How to switch to a local account from a Microsoft account on Windows 10
Don't want to use a Microsoft account on Windows 11 (or 10)? Here's how you can switch to a traditional local account.
Although Windows 11 (and 10) forces you to use a Microsoft account to set up your computer during the initial setup, you can switch to a local account quite easily. You just need to know where to find the settings.
This approach is based on the company's desire to encourage you to use its online accounts to access the different benefits, such as the ability to sync settings and files across devices and recover their accounts. Microsoft also uses this strategy to lure users into signing up for its services, such as OneDrive and the Microsoft 365 apps.
You can always set up your computer with a local account using this other guide I wrote. However, if you're already using a Microsoft account, you can switch to a local account regardless of the version of the operating system.
In this how-to guide, I will explain the steps to switch to a local account from a Microsoft account using the Settings app.
How to switch to a local account on Windows 11
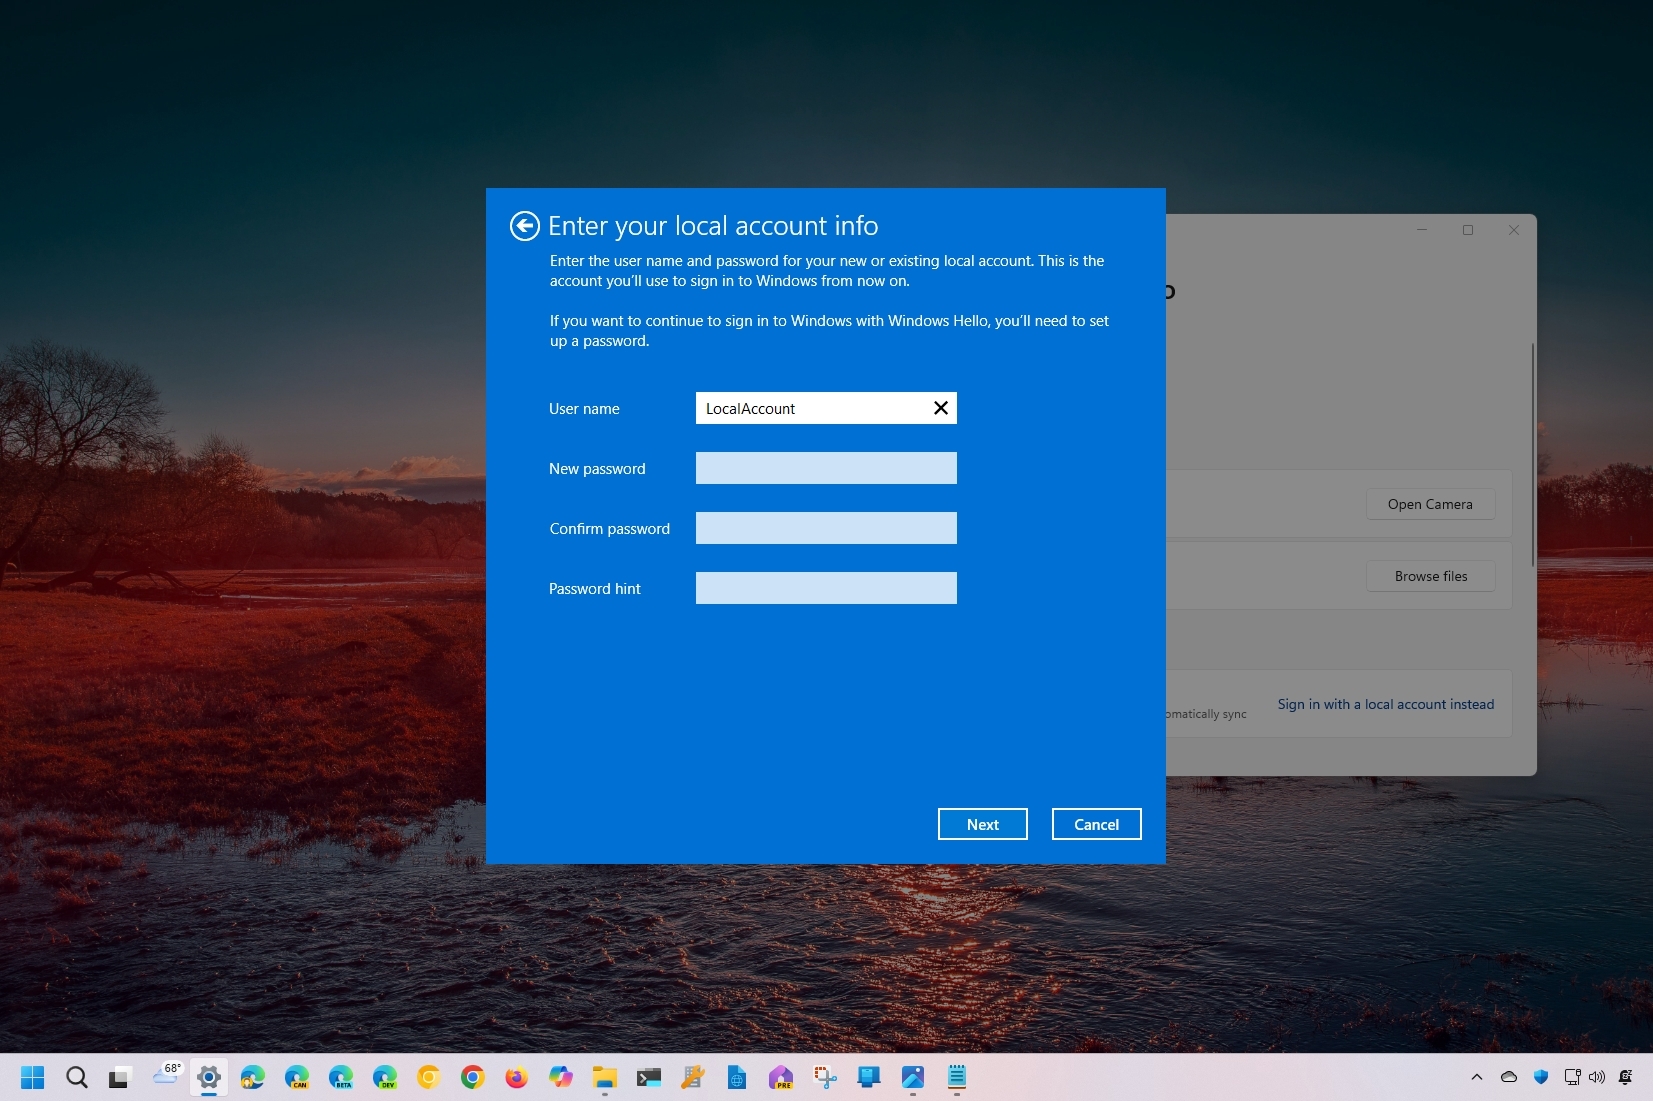
To switch from a Microsoft to a local account on Windows 11, use these steps:
- Open Settings.
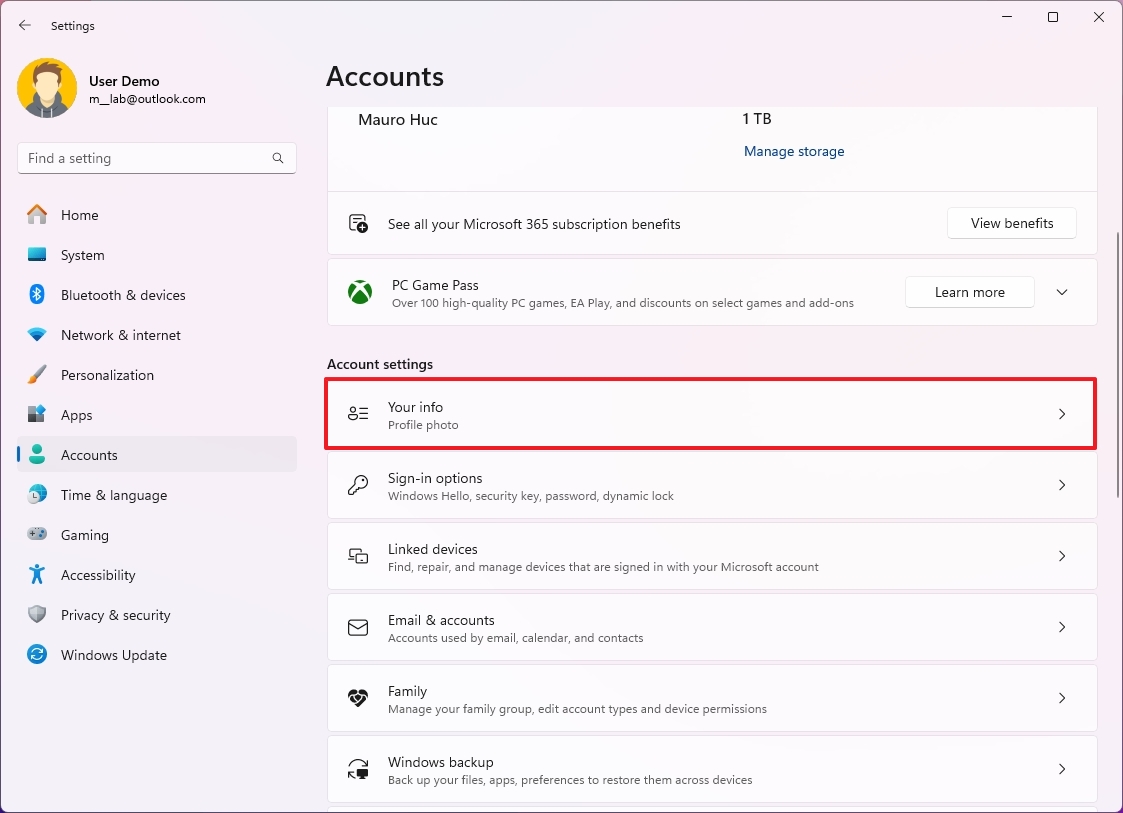
- Click on Accounts.
- Click the Your info page on the right side.
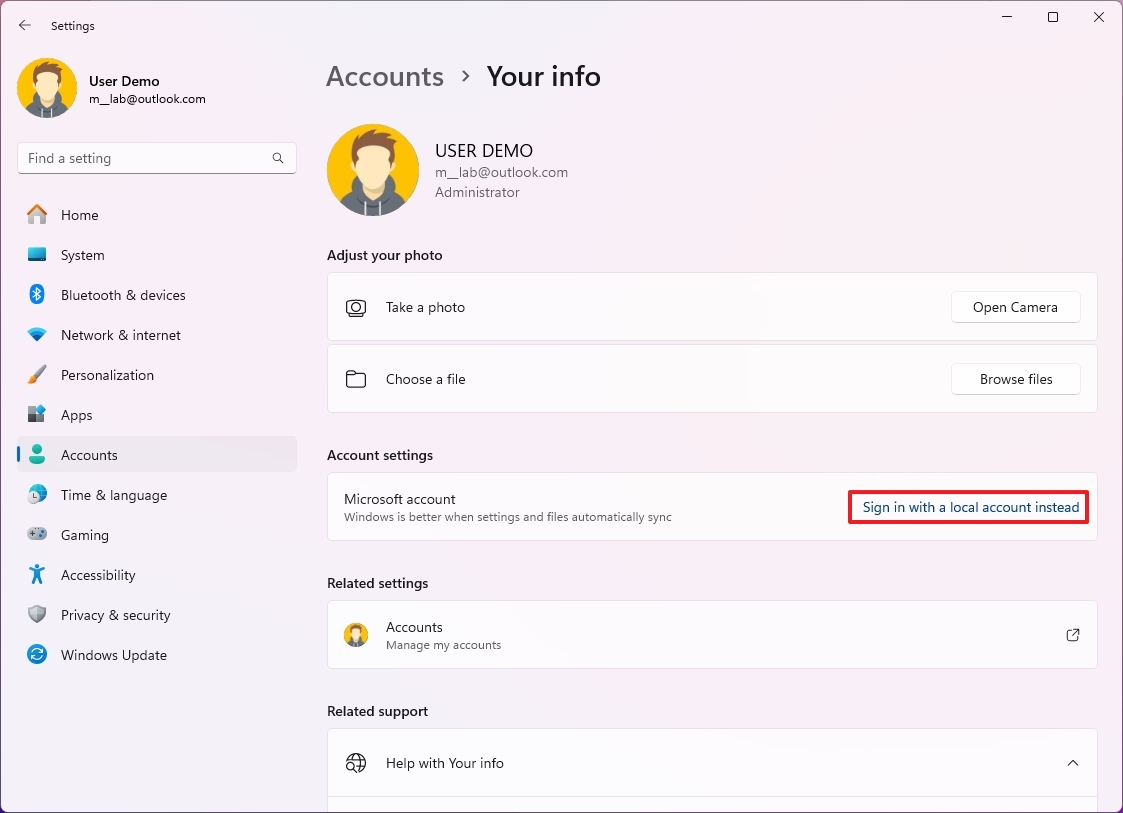
- Click the "Sign in with a local account instead" option in the "Microsoft account" setting.
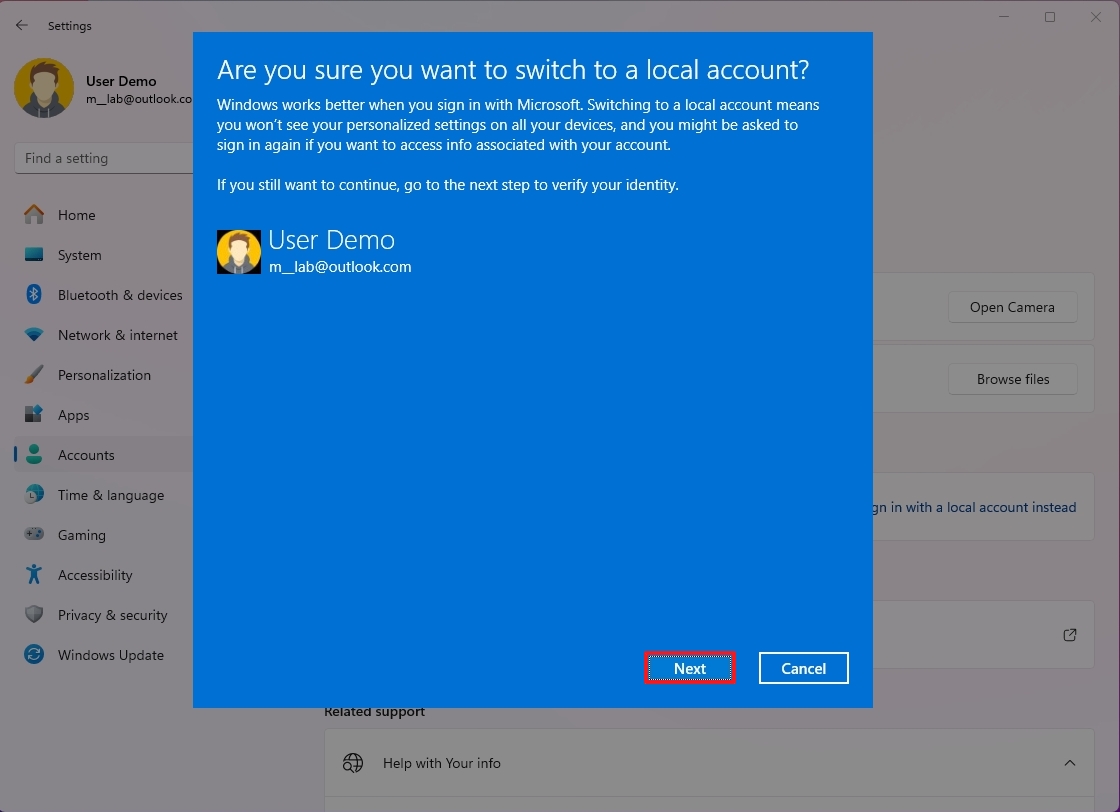
- Click the Next button.
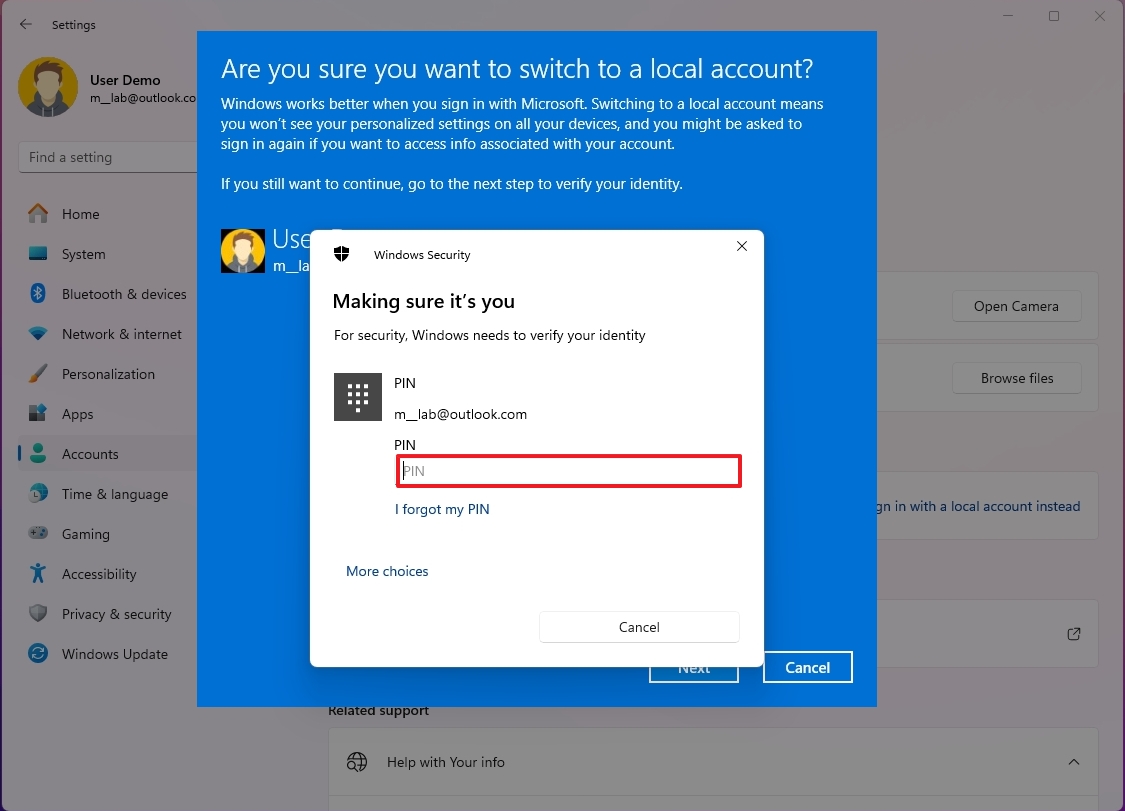
- Confirm your account credentials.
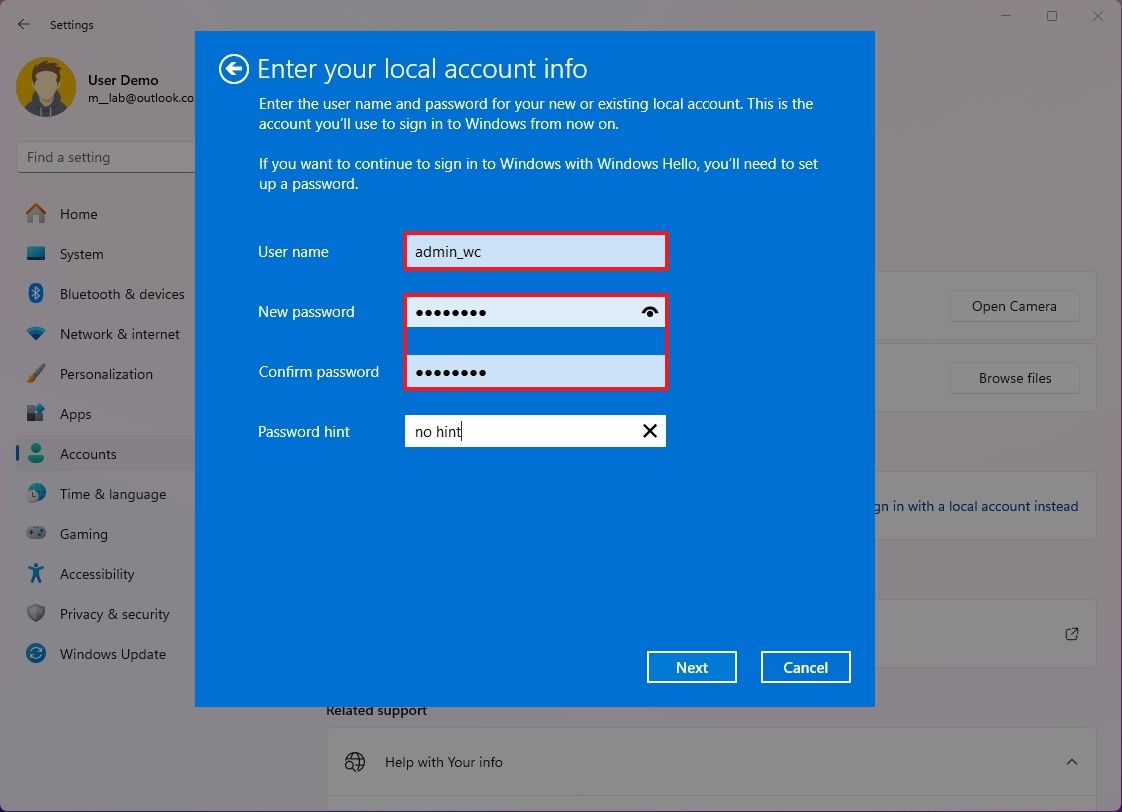
- Confirm a username for the local account.
- Create a password for the account.
- (Optional) Set up a password hint that can make you remember the password.
- Click the Next button.
- Click the "Sign out and finish" button.
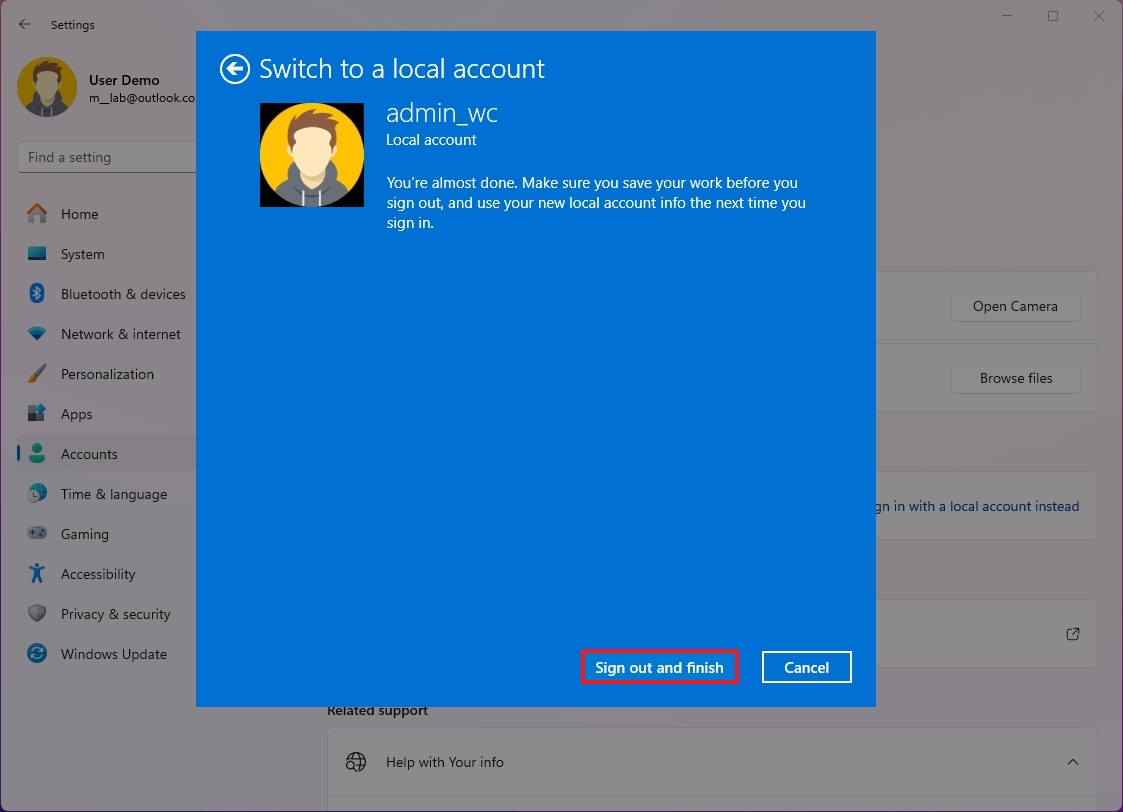
After completing the steps, you can sign in to the same account without a connection to Microsoft services.
How to switch to a local account on Windows 10
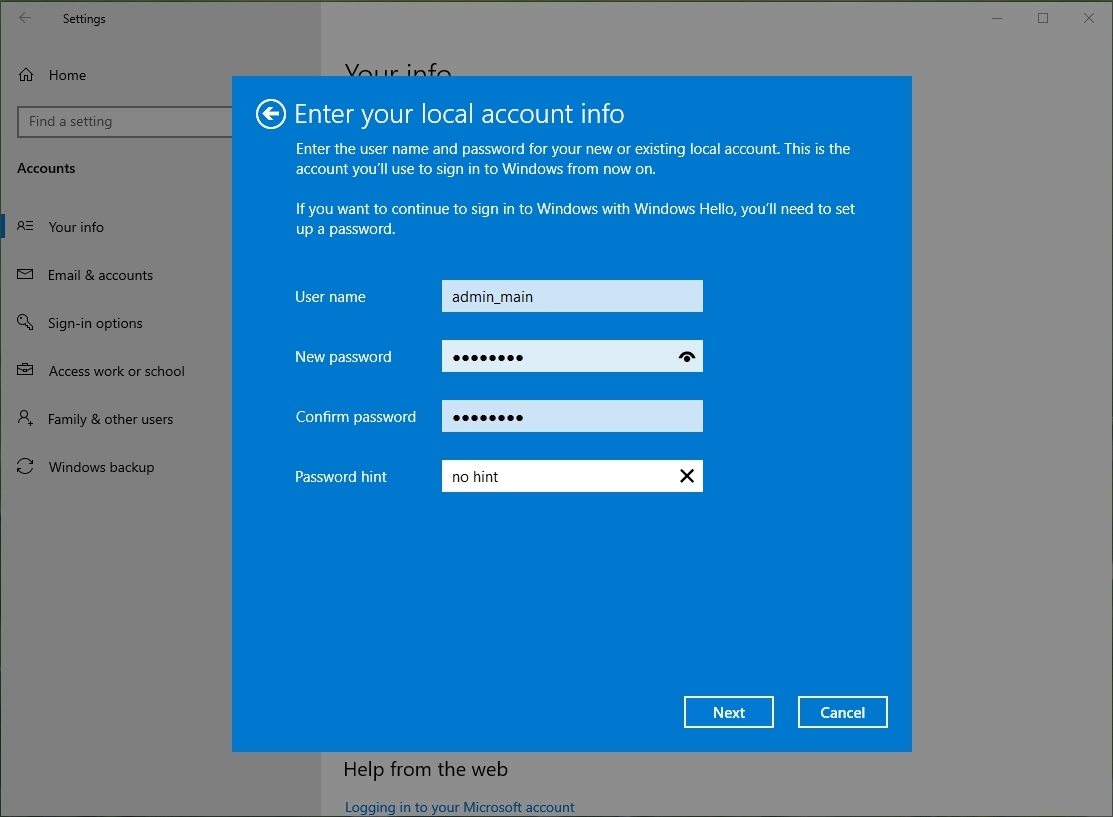
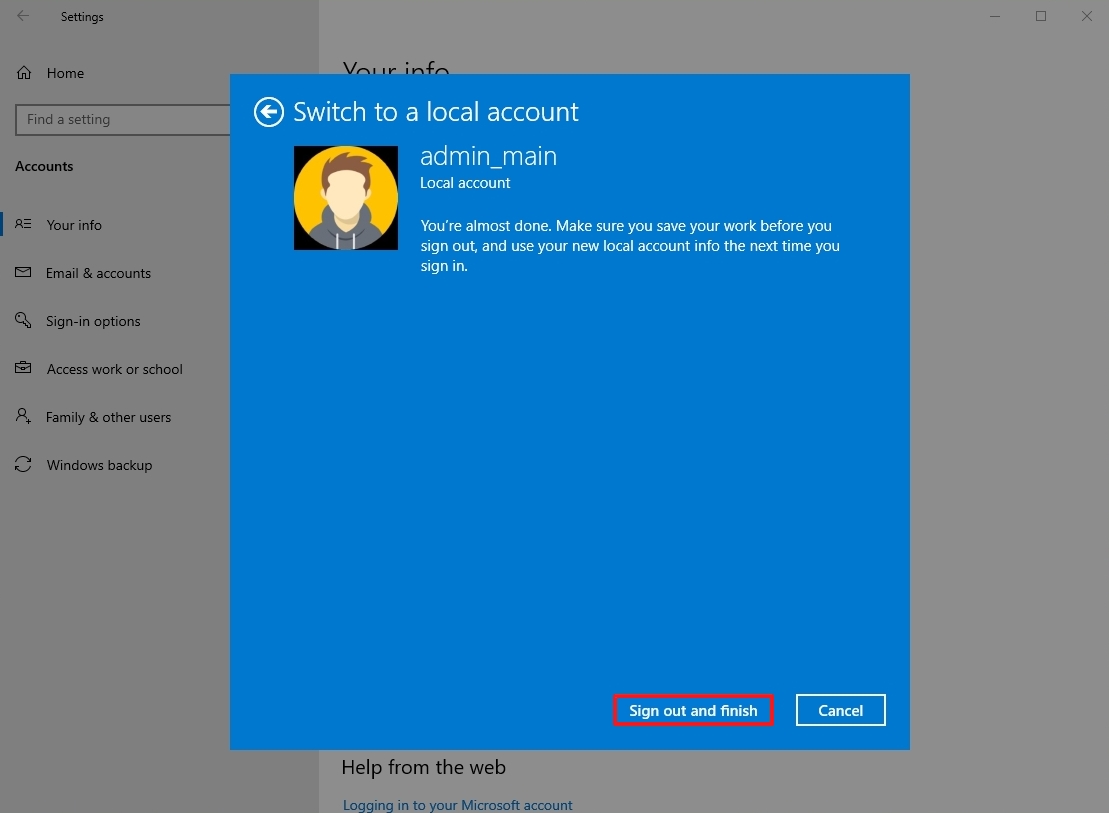
To switch to a local account from a Microsoft account on Windows 10, use these steps:
All the latest news, reviews, and guides for Windows and Xbox diehards.
- Open Settings.
- Click on Accounts.
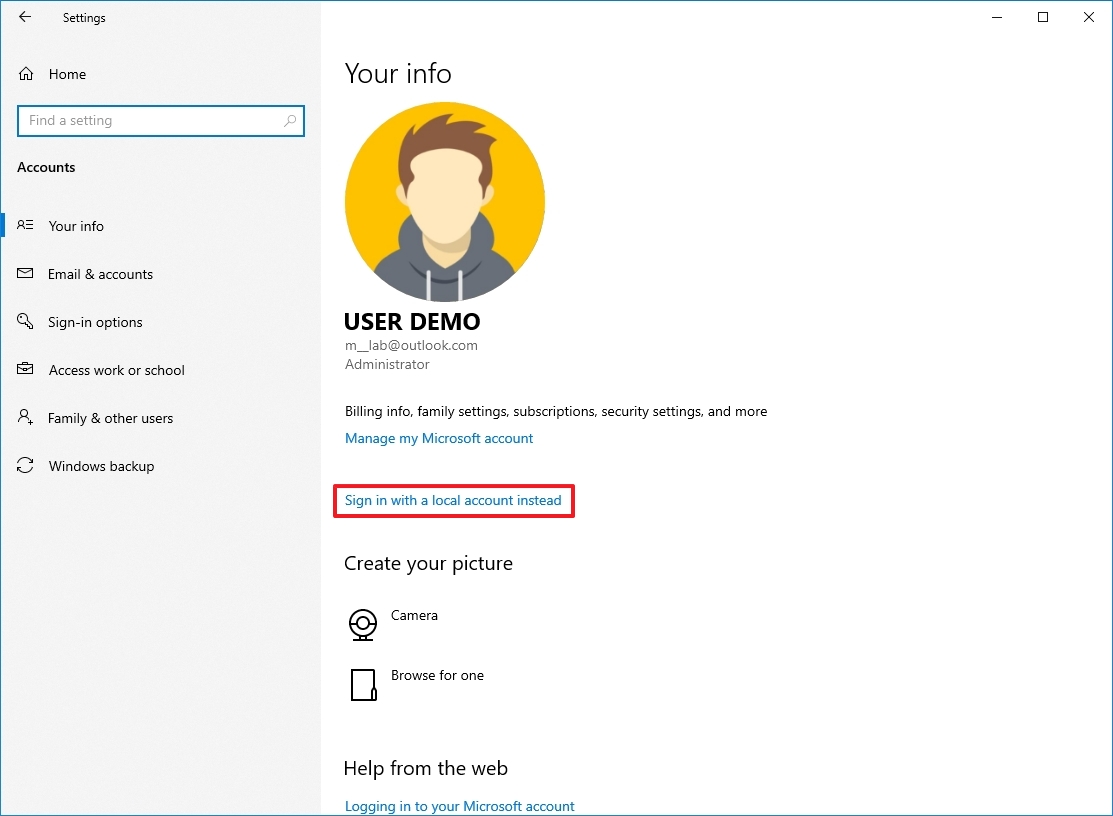
- Click on Your info.
- Click the "Sign in with a local account instead" option.
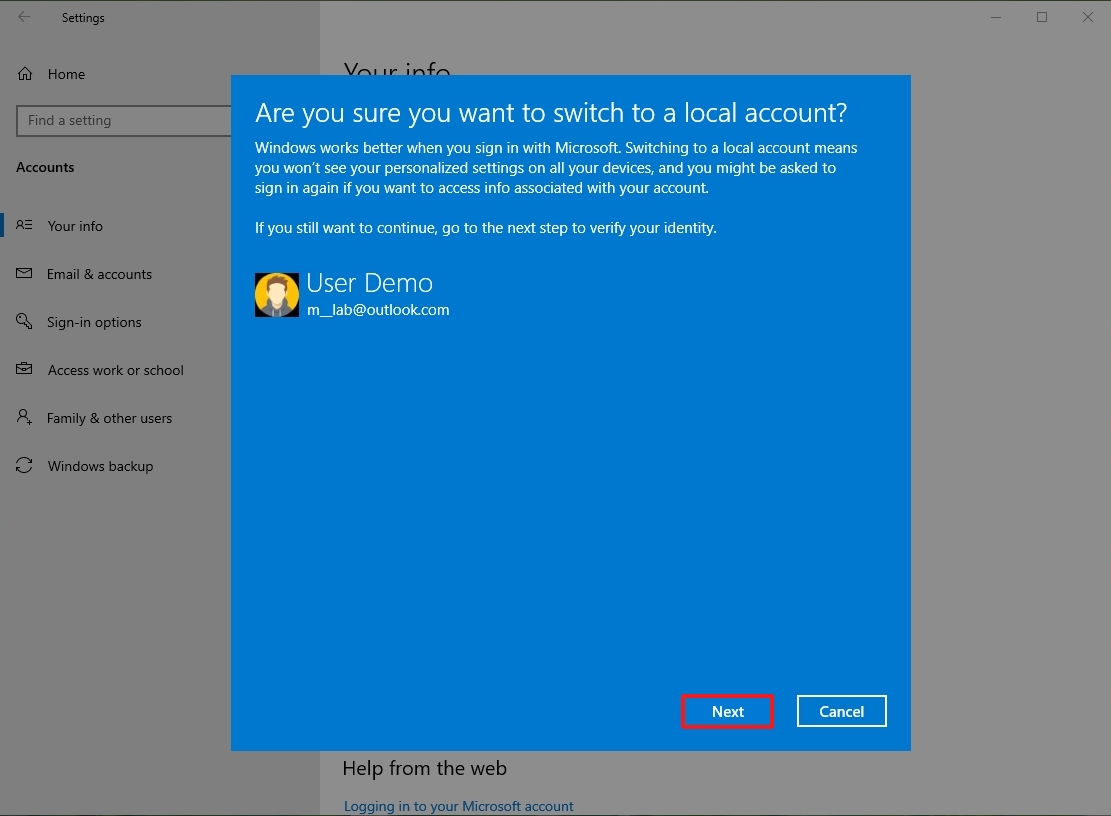
- Click the Next button.
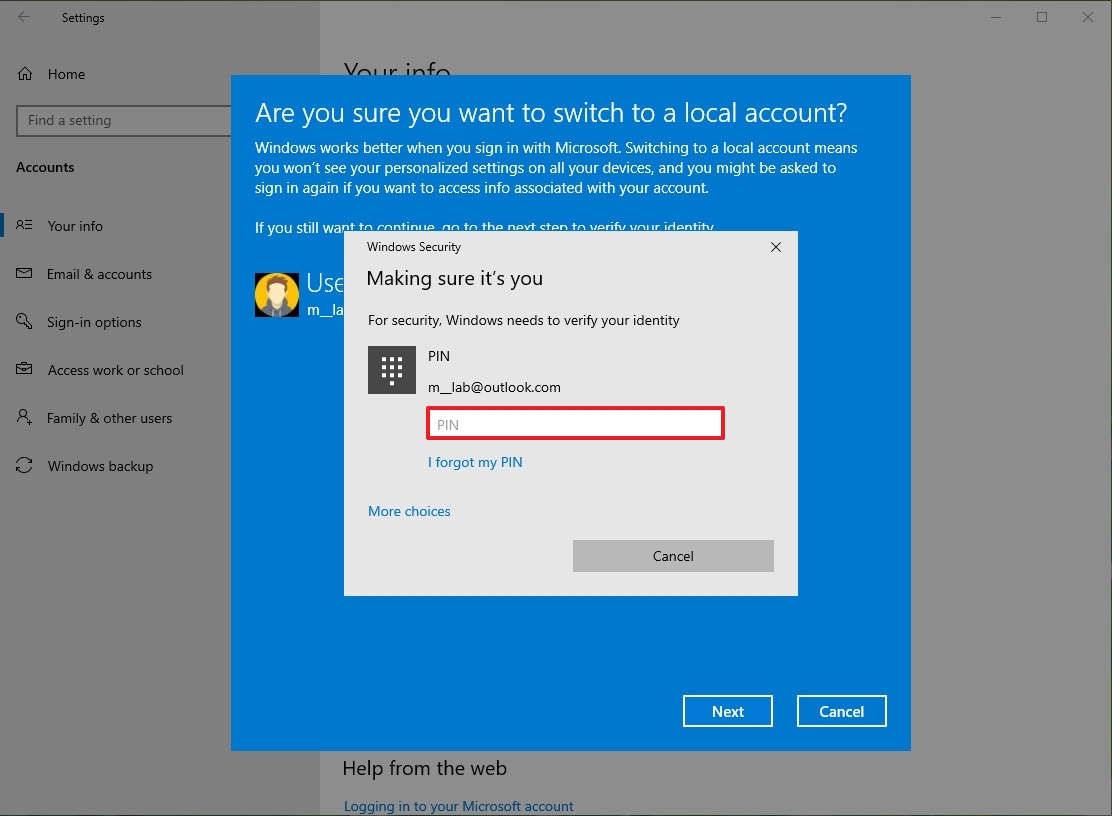
- Confirm your account credentials.
- Confirm the new username for the local account.
- Create a password for the account.
- (Optional) Set up a password hint that can make you remember the password.
- Click the Next button.
- Click the "Sign out and finish" button.
Once you complete these steps, your Windows 10 account will be disconnected from your Microsoft account, and it will switch to the traditional local account style. Using this method, your Microsoft account credentials will continue to be available on the device to sign you into various services as required automatically.
More resources
For more helpful articles, coverage, and answers to common questions about Windows 10 and Windows 11, visit the following resources:
- Windows 11 on Windows Central — All you need to know
- Windows 10 on Windows Central — All you need to know

Mauro Huculak has been a Windows How-To Expert contributor for WindowsCentral.com for nearly a decade and has over 22 years of combined experience in IT and technical writing. He holds various professional certifications from Microsoft, Cisco, VMware, and CompTIA and has been recognized as a Microsoft MVP for many years.
