How to get the best visuals from your Xbox One
Push the most out of your Xbox One with these tips for display settings and calibration.
The Xbox One cuts out the complexities of gaming, with a seamless setup and gaming experience. Unbox it, plug it in, walk through a few steps of set up, and then you're good to go, with games, movies, and more just a few button presses away.
But to truly get the most from your Xbox One, you'll need to take a deeper dive into the console. Jumping into its settings and tweaking just a few options, you may be able to squeeze the most from your console's power.
- Choosing the best resolution
- Enabling HDR
- Choosing the best color depth
- Choosing the best color space
- Enabling VRR via FreeSync)
- Calibrating your TV or monitor
Understanding your console
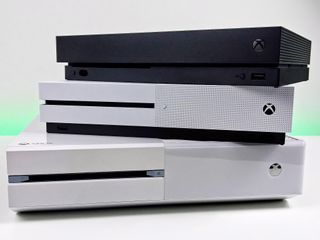
Microsoft has sold three revisions of the Xbox One over its four years on the market. Each major revision of the console has delivered various visual enhancements, with its current flagship, the Xbox One X, leading the family. The Xbox One X supports 4K resolutions for both games and videos, while also supporting High Dynamic Range (HDR).
Xbox One S is the current entry-level console, delivering a middle ground between Xbox One X and the base unit. This console supports HDR across all supported content but only delivers 4K for video.
The original Xbox One is no longer sold by Microsoft, yet still makes up a sizeable portion of the install base. This console is limited to 1080p resolution and doesn't offer support for HDR.
The ultimate Xbox One buyer's guide
Choose the right resolution
While the Xbox One packs cutting-edge visuals for games and video, it's important to choose the right resolution settings for you. Making sure the output resolution of your console matches the maximum supported by your console ensures you're leveraging its full potential.
Get the Windows Central Newsletter
All the latest news, reviews, and guides for Windows and Xbox diehards.
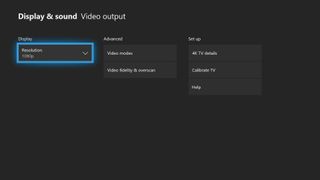
To get the most of your Xbox One X and Xbox One S, 4K resolution can be enabled on compatible displays. Following the Xbox Spring Update, support for 1440p monitors is available too, alongside existing 1080p and 720p compatibility. By selecting the maximum supported resolution, you'll be getting the sharpest, most defined image possible.
- Connect your Xbox One directly to your TV or monitor over HDMI. Avoid using any HDMI switches and splitters to prevent throttling your maximum resolution.
- Open the Settings app on your Xbox One.
- Navigate to the Display & sound tab.
- Select the Video output tile.
- Choose the maximum supported resolution for your display.
Check HDR is enabled
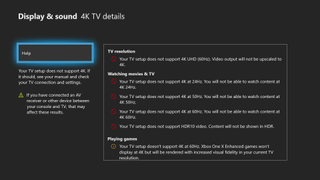
Both the Xbox One X and Xbox One S offer support for High Dynamic Range (HDR), serving up a wider color gamut and increased contrast ratio. Offered across a growing range of gaming and video content, colors truly pop with the feature enabled.
The Xbox One's HDR support is limited to HDR10 – an open standard supported by a majority of modern high-end displays. However, even with the right display, many unknowingly lose out on HDR content due to the default manufacturer settings. We previously compiled a guide on setting up 4K HDR displays with Xbox One consoles, with specific breakdowns for popular brands.
How to enable HDR for Xbox One X on popular 4K TVs
Choose the best color depth
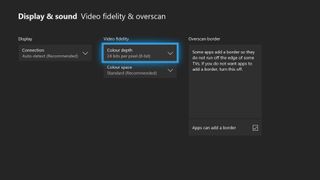
The color depth setting indicates the number of bits used per pixel to represent on-screen colors. Essentially, when set to a higher value, your Xbox One will output a wider range of colors, with more incremental steps between color values.
Xbox One consoles can output signals at 24 bits per pixel (8-bit), 30 bits per pixel (10-bit) and 36 bits per pixel (12-bit), and while higher is often better, don't mindlessly crank up the value to the maximum. Both your TV and game content set limitations on how significantly increased color depth is reflected on screen, with most consumer displays not supporting 12-bit video. While HDR10, the standard used by Xbox One X, requires a 10-bit panel, many without HDR support only offer 8-bit.
- Open the Settings app on your Xbox One.
- Navigate to the Display & sound tab.
- Select the Video output tile.
- Select the Video fidelity & overscan tile.
- Choose your Color depth from the available options.
Push the best with a PC monitor
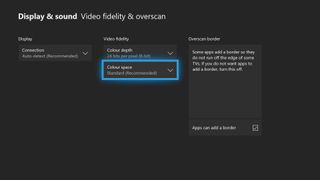
Xbox One also allows players to customize the color space of the console, with "Standard (recommended)" and "PC RGB" settings available. Relating to different color spaces, this determines the which colors are displayed, according to your display's supported space.
While PC monitors are built to output "RGB Full," TVs are often built to output a narrower space, known as "RGB Limited." By changing this option, you'll be changing how the video signal is sent from your console and colors are represented by your TV.
Even though it might make sense to display the full RGB range regardless, using this on many TVs results in an unwanted side effect known as "black crush." When attempting to output full RGB, darker parts of images can lose detail, making certain scenes much harder to view. In short, PC RGB can be recommended for some PC monitors, though for many, especially those on TVs, the recommended standard setting should be used.
- Open the Settings app on your Xbox One.
- Navigate to the Display & sound tab.
- Select the Video output tile.
- Select the Video fidelity & overscan tile.
- Choose your Color space from the available options.
Get smoother gameplay
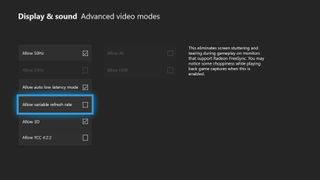
Variable refresh rates (VRR) are seeing increased adoption among PC gamers, reducing screen tearing, making for overall smoother gameplay. Unlike software solutions for screen tearing such as "V-Sync," VRR allows for a direct communication with your monitor, adapting its refresh rate on the fly.
Following the Xbox Spring Update, VRR is available for Xbox One in the form of AMD's in-house FreeSync technology. When connected to a display compatible with FreeSync over HDMI, you'll see noticeably smoother gameplay across certain titles. FreeSync is available on all three Xbox One models, while FreeSync 2 with HDR is limited to Xbox One X and Xbox One S.
Xbox One FreeSync and Variable Refresh Rates: Everything you need to know
Fixing the finer details
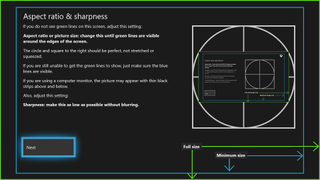
After configuring the video settings for your Xbox One, you'll want to find a reliable way to test if they're for you. A calibration tool hidden away within the console's settings is the best way to do so, allowing you to check that both your console and TV settings are displaying images correctly. This can be found within the Settings app, under Display and Sound > Video output > Calibrate HDTV.
It's important that this calibration tool is run after completing all aforementioned steps and used to fine-tune your TV's settings for improved compatibility. By doing so you'll be getting the best out of your TV, while also accounting for external factors, such as lighting conditions. This provides a more accurate representation of on-screen images, closer to those intended by developers.
Through the process, you'll be given prompts to change your display's color settings, brightness, sharpness and other display traits. If correctly configured, you should be getting some of the best results out of your Xbox One. And while discreet at times, this makes for the most consistent experience you can get.
Over to you
If you have any further tips for pushing the most from your Xbox One, drop into the comments with your thoughts.
Matt Brown was formerly a Windows Central's Senior Editor, Xbox & PC, at Future. Following over seven years of professional consumer technology and gaming coverage, he’s focused on the world of Microsoft's gaming efforts. You can follow him on Twitter @mattjbrown.
