Windows Phone App Review: Fantasia Painter
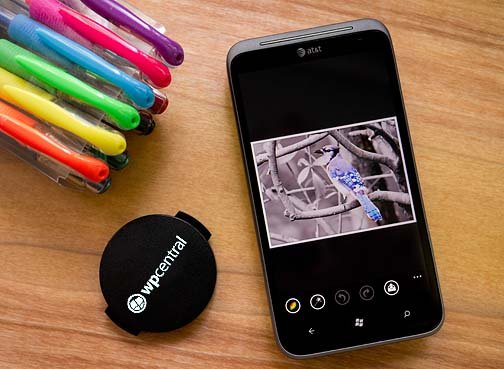
The other day we shared a list of the best photography apps for your Windows Phone. We knew that there were other worthy photo apps out there and one such app that was mentioned prominently in the comments was Fantasia Painter.
On the one hand the Fantasia Painter is a photo editing app. On the other hand Fantasia Painter is a creative suite to give your photos a serious splash of color. On top of all that, if painting is more your cup of tea Fantasia Painter can handle that as well.
It's really hard to tell how many editing tools Fantasia Painter has (the Marketplace description says 45+ but that feels a little low) but it ranks amongst the top photography Windows Phone apps on the amount of control you have over editing your pictures. Fantasia Painter is an impressive photography app for your Windows Phone and it can be a little intimidating. Once you get the hang of the controls and all the editing possibilities, Fantasia Painter can really make your photos shine.
When you first launch Fantasia Painter, a tutorial screen will pop up showing you a broad how-to on painting. To get started editing, just tap the "Start Painting" button bar. With Fantasia Painter you have two options, create a new painting from scratch or edit a photograph...and editing may be an understatement.
App Layout
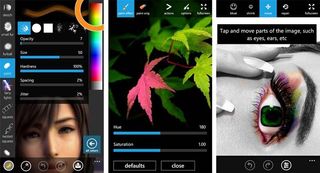
Fantasia Painter will open up to your last photo/painting that you were working on. Along the bottom of the screen are five button controls.
Brush: This button pulls up all your thirteen brush tools. You have the basic sketch brushes, the more elaborate fairy lights brush, and tint makeup. Each brush has different styles, opacity levels and sizes. Once you select your brush, tap the Brush Button again to hide the settings and start your creativity. When you mess up, remember you have the Undo Button at the bottom of the screen to help fix things.
Get the Windows Central Newsletter
All the latest news, reviews, and guides for Windows and Xbox diehards.
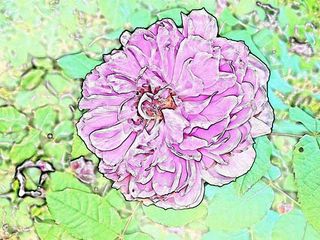
Effects: Where the Brush Menu is the heart of your painting controls, the Effects Menu is the heart of Fantasia Painter's editing and effects tools. Fantasia Painter has over forty five effects that can be applied to your photographs and paintings. The Effects Menu includes mold (distortion tool), your editing actions, photo adjustments (color, brightness, contrast, white balance, etc), and artistic tools (tilt shift, old photo, comic, oil portrait, etc.). You also have an HDR filter, pencil sketch, and a lot more. My count is fifty one effects and many, many, many of those effects have settings/adjustments to apply those effects in just as many ways.
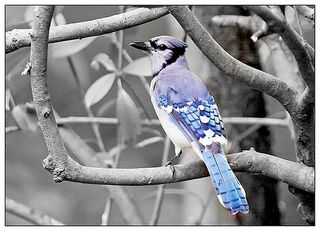
Each effects screen will have three button controls at the bottom and a few tile buttons up top. Below you will find the undo/redo buttons and a tweaks button. The tweaks button will pull up various settings/adjustments for that particular effect. Up top, you will find tiles to apply a paint effect, paint the original image, view actions, view options and go full screen with the image.
- The Paint Effect tool will let you brush apply that particular effect.
- The Paint the Original tool will let you brush remove the particular effect.
- Actions cover how the effect will be applied and include reverse effect, horizontal fade, vertical fade, and toggle controls to show the original image and effect.
- Options deal with brush opacity, size, hardness, etc.
Once you're done applying an effect, just hit the Windows Phone Back Button to return to the Effects Menu. When you do, you will be presented with three options; keep changes, discard changes or cancel.
Undo and Redo Buttons: These are two very important buttons. One helps you correct an error in editing judgment, the other helps you restore edits you should have kept in place to begin with. As you learn your way around Fantasia Painter these two buttons will be your best friends.
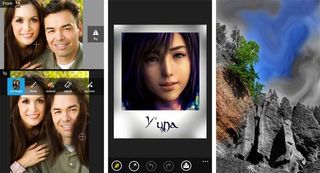
Open/Save: The open/save button presents you with options to:
- Open or take a photo: Whichever option you choose, your new photo will open up in the basic crop, scale, rotate editing screen. Once you've got the size, position and crop to your liking tap "ok" to move into the main editing screens.
- New Painting: If painting is your cup of tea, here's where you open up a blank canvass. You'll be able to choose your background color from preset options or create your own.
- Save to phone: Here is where you save your finished creation to your phone. Before saving your image you will have options to name your photo/painting, choose one of sixteen borders and frames, and flip/rotate your photo.
- Share on Facebook: If you want to share your finished project on Facebook directly from Fantasia Painter.
- Tips and Help: If you missed any of the directions on the opening screen, here's where you can refresh your memory.
From the Open/Save screen you can also access Fantasia Painter's settings. The settings cover image quality levels when you save the final product or share it on Facebook, covering the app's notifications, whether you want it to run under lock screen and a picture-in-picture setting. The picture-in-picture setting will pull up a small windows to help you with the more precision paintings.
You also have links to send the developer feedback and rate/review Fantasia Painter from the Open/Save button.
Using Fantasia Painter

Using Fantasia Painter can be a little intimidating. It's an application you simply have to dive into and tinker with. If you screw up an edit (and you will), there's always a the undo button.
The only limitation Fantasia Painter seems to have will be from your imagination. You can stack effects, add text, distort colors and shapes, add colors, or start from a blank canvass to create your own masterpiece. If you apply an effect that you just don't like there's the friendly undo button or you can always hit the back button and choose to discard the changes option as you return to the Effects Menu.

The best approach to Fantasia Painter is, as we've already said, is to dive in and experiment.
There's no doubt that Fantasia Painter has a lot of editing tools for your photos plus the ability to create your own paintings. The only reservation I have with Fantasia is it may be too much for the smaller screen on your Windows Phone. Even with the picture-in-picture setting, the precision adjustments can be tough to get just right.
Don't get me wrong, Fantasia Painter is a very respectable photo editor for your Windows Phone but it can be challenging applying a color effect to a small portion of your photo when working on a 4.7" screen. As feature rich, it may be best suited for a larger screen. Speaking of which, if you want to tinker with Fantasia Painter on the big screen, Nokola offers an online version at their website.
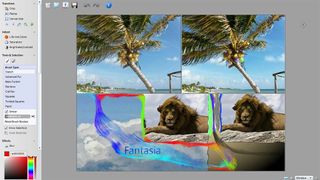
All in all, I liked Fantasia Painter and I'm glad it was recommended by so many readers. While I still have some hesitation on doing serious editing on my Windows Phone, the more I used Fantasia Painter, the more the hesitation faded. Fantasia Painter will it will definitely be on our next "Best of" list. Fantasia Painter is one of the more comprehensive creative photographic apps for your Windows Phone. You can keep it simple and use Fantasia Painter to apply the core edits to your photos or go all in and apply one of the many artistic filters and effects.
There are two versions of Fantasia Painter available on the Windows Phone Marketplace. You have Fantasia Painter Free which has the same functionality of the paid version but is ad supported. If you just want to try Fantasia Painter first, this is the way to go but I found the ad banners got in the way too much (your experiences may differ). The paid version of Fantasia Painter is running $1.99 and is well worth the price of admission.
You can find Fantasia Painter Free here and Fantasia Painter here at the Windows Phone Marketplace.


George is the Reviews Editor at Windows Central, concentrating on Windows 10 PC and Mobile apps. He's been a supporter of the platform since the days of Windows CE and uses his current Windows 10 Mobile phone daily to keep up with life and enjoy a game during down time.
