How to upgrade the SSD in a Dell XPS 15 (9570)
Dell's XPS 15 features several upgradeable components, and but swapping in a new SSD could add a few years to your laptop.
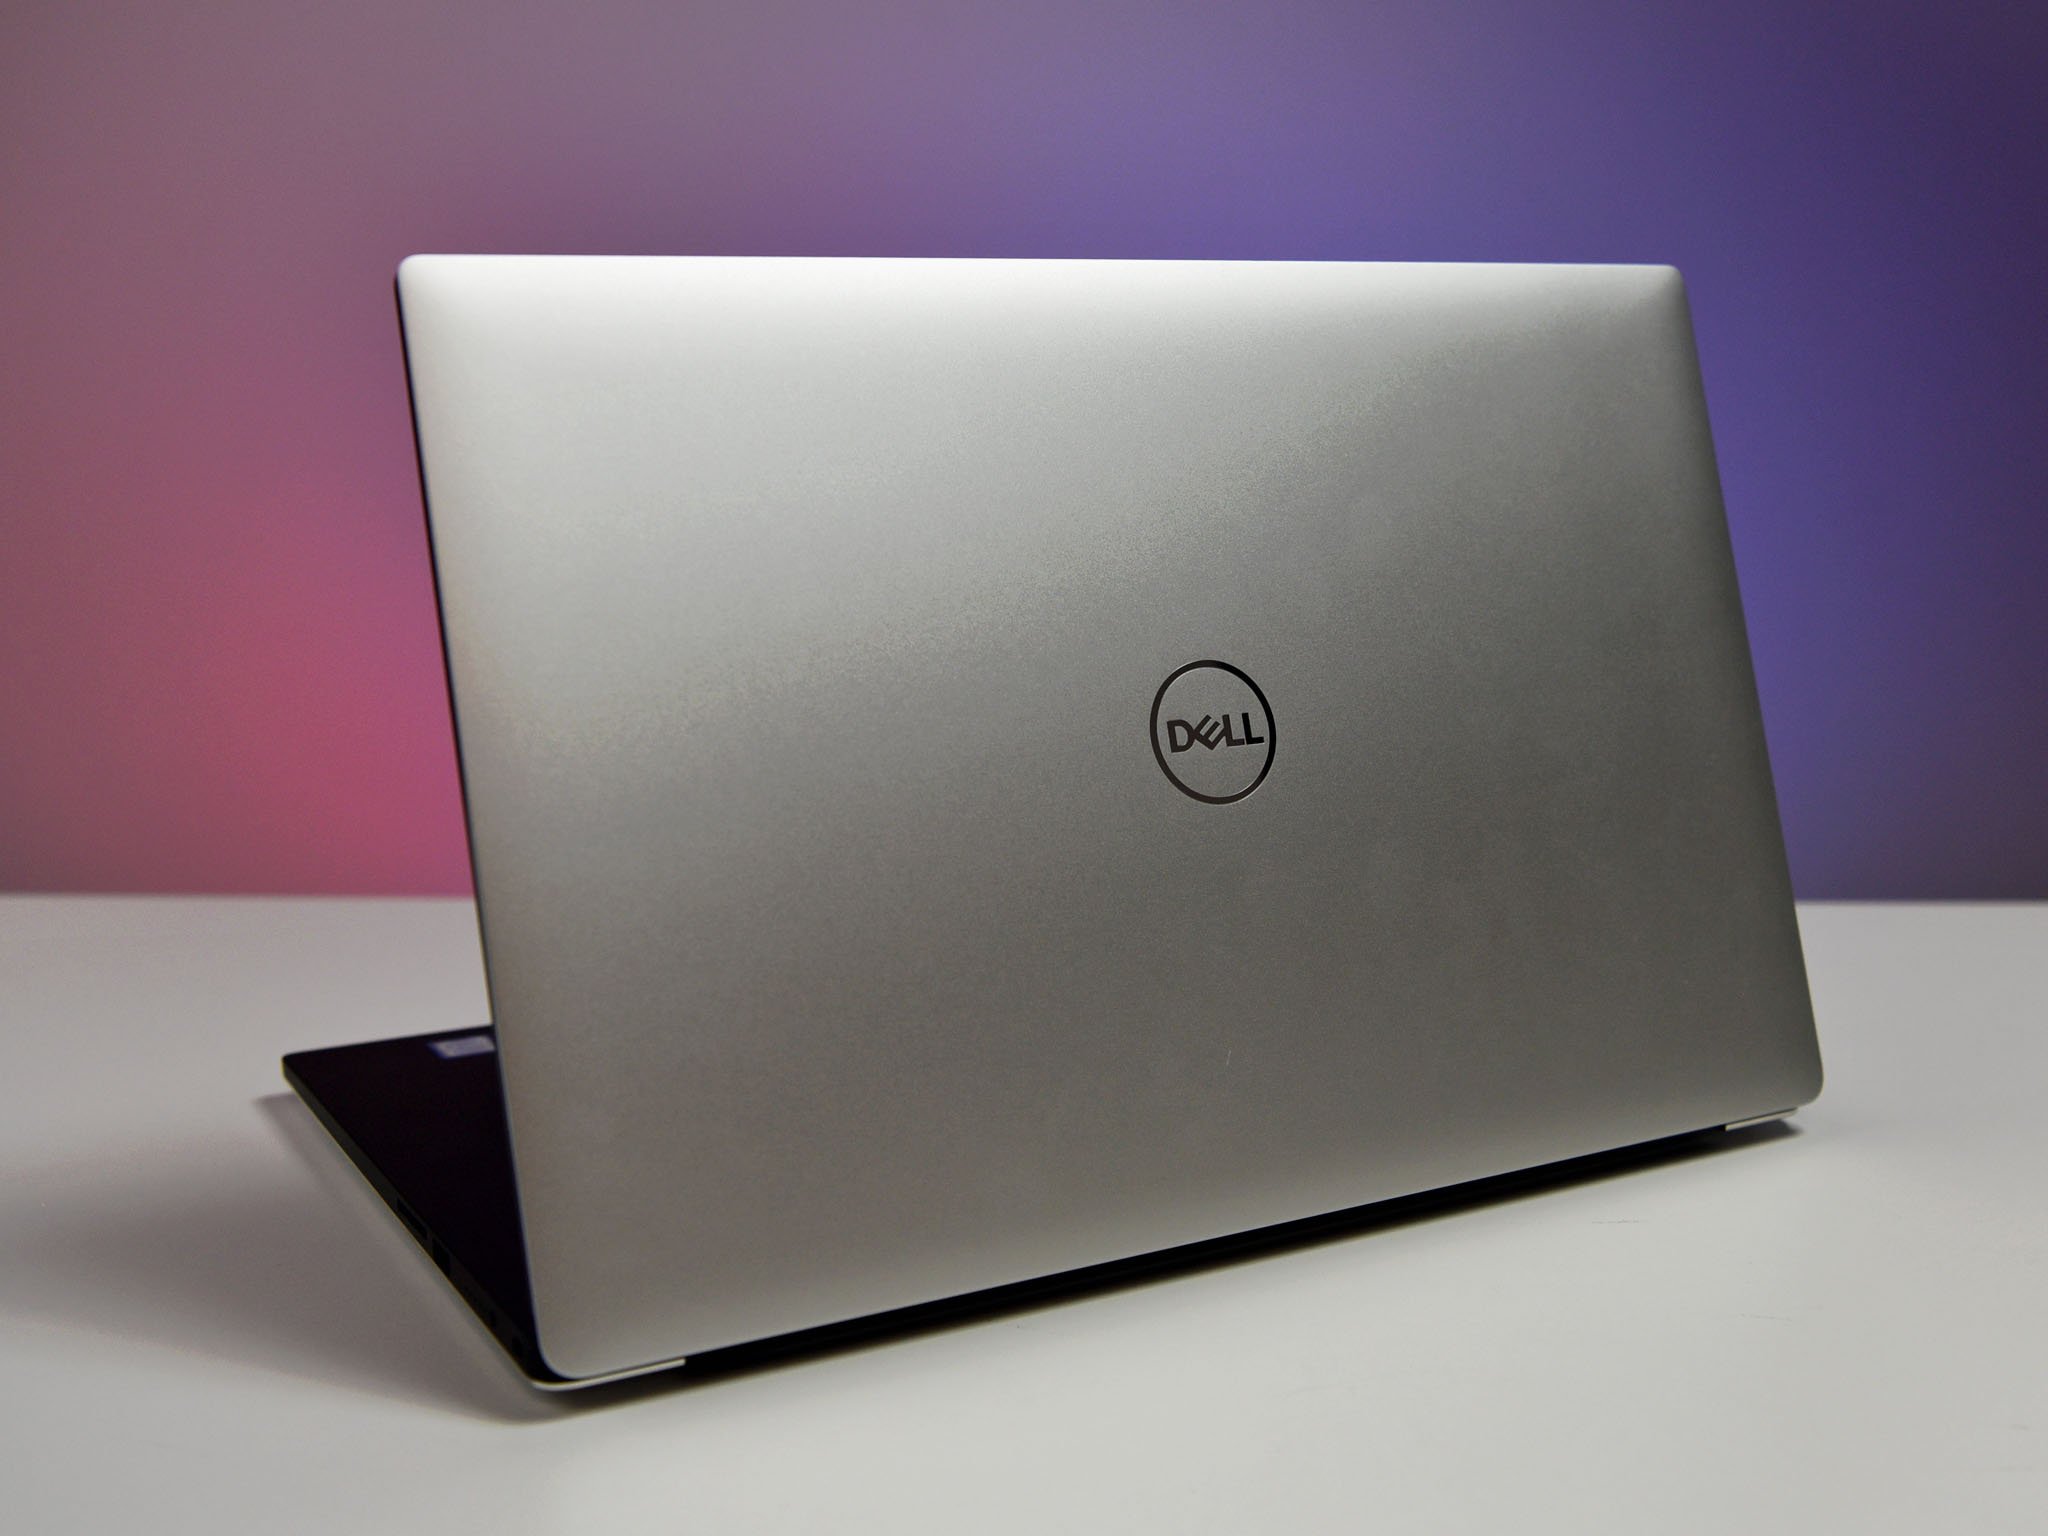
Many high-end laptops come with very few upgradable features. But there is one component you usually can improve: storage. While even the most basic solid-state drive (SSD) outperforms any hard-disk drive (HDD), you can get even more speed and more storage by upgrading.
The Dell XPS 15 (9570) is one of my favorite ultra-powerful, non-gaming laptops. Here is how to make it even better by tossing in a new SSD.
Why upgrade the SSD in your XPS 15?
There are two reasons to upgrade your SSD in the XPS 15: more storage and more speed.
Maybe you thought the 256GB in your XPS 15 would be enough, but now with lower prices for flash storage, a 1TB SSD would be nice and roomy. And even though your current drive is faster than an old spinning-disk hard drive, it can load apps and save large files even quicker.
You can pick up a new 500GB Samsung 970 EVO on Amazon for around $150. Dell charges $200 for an SSD upgrade when you buy the device, and you don't know which SSD brand you get.
Dell XPS 15 SSD upgrade options
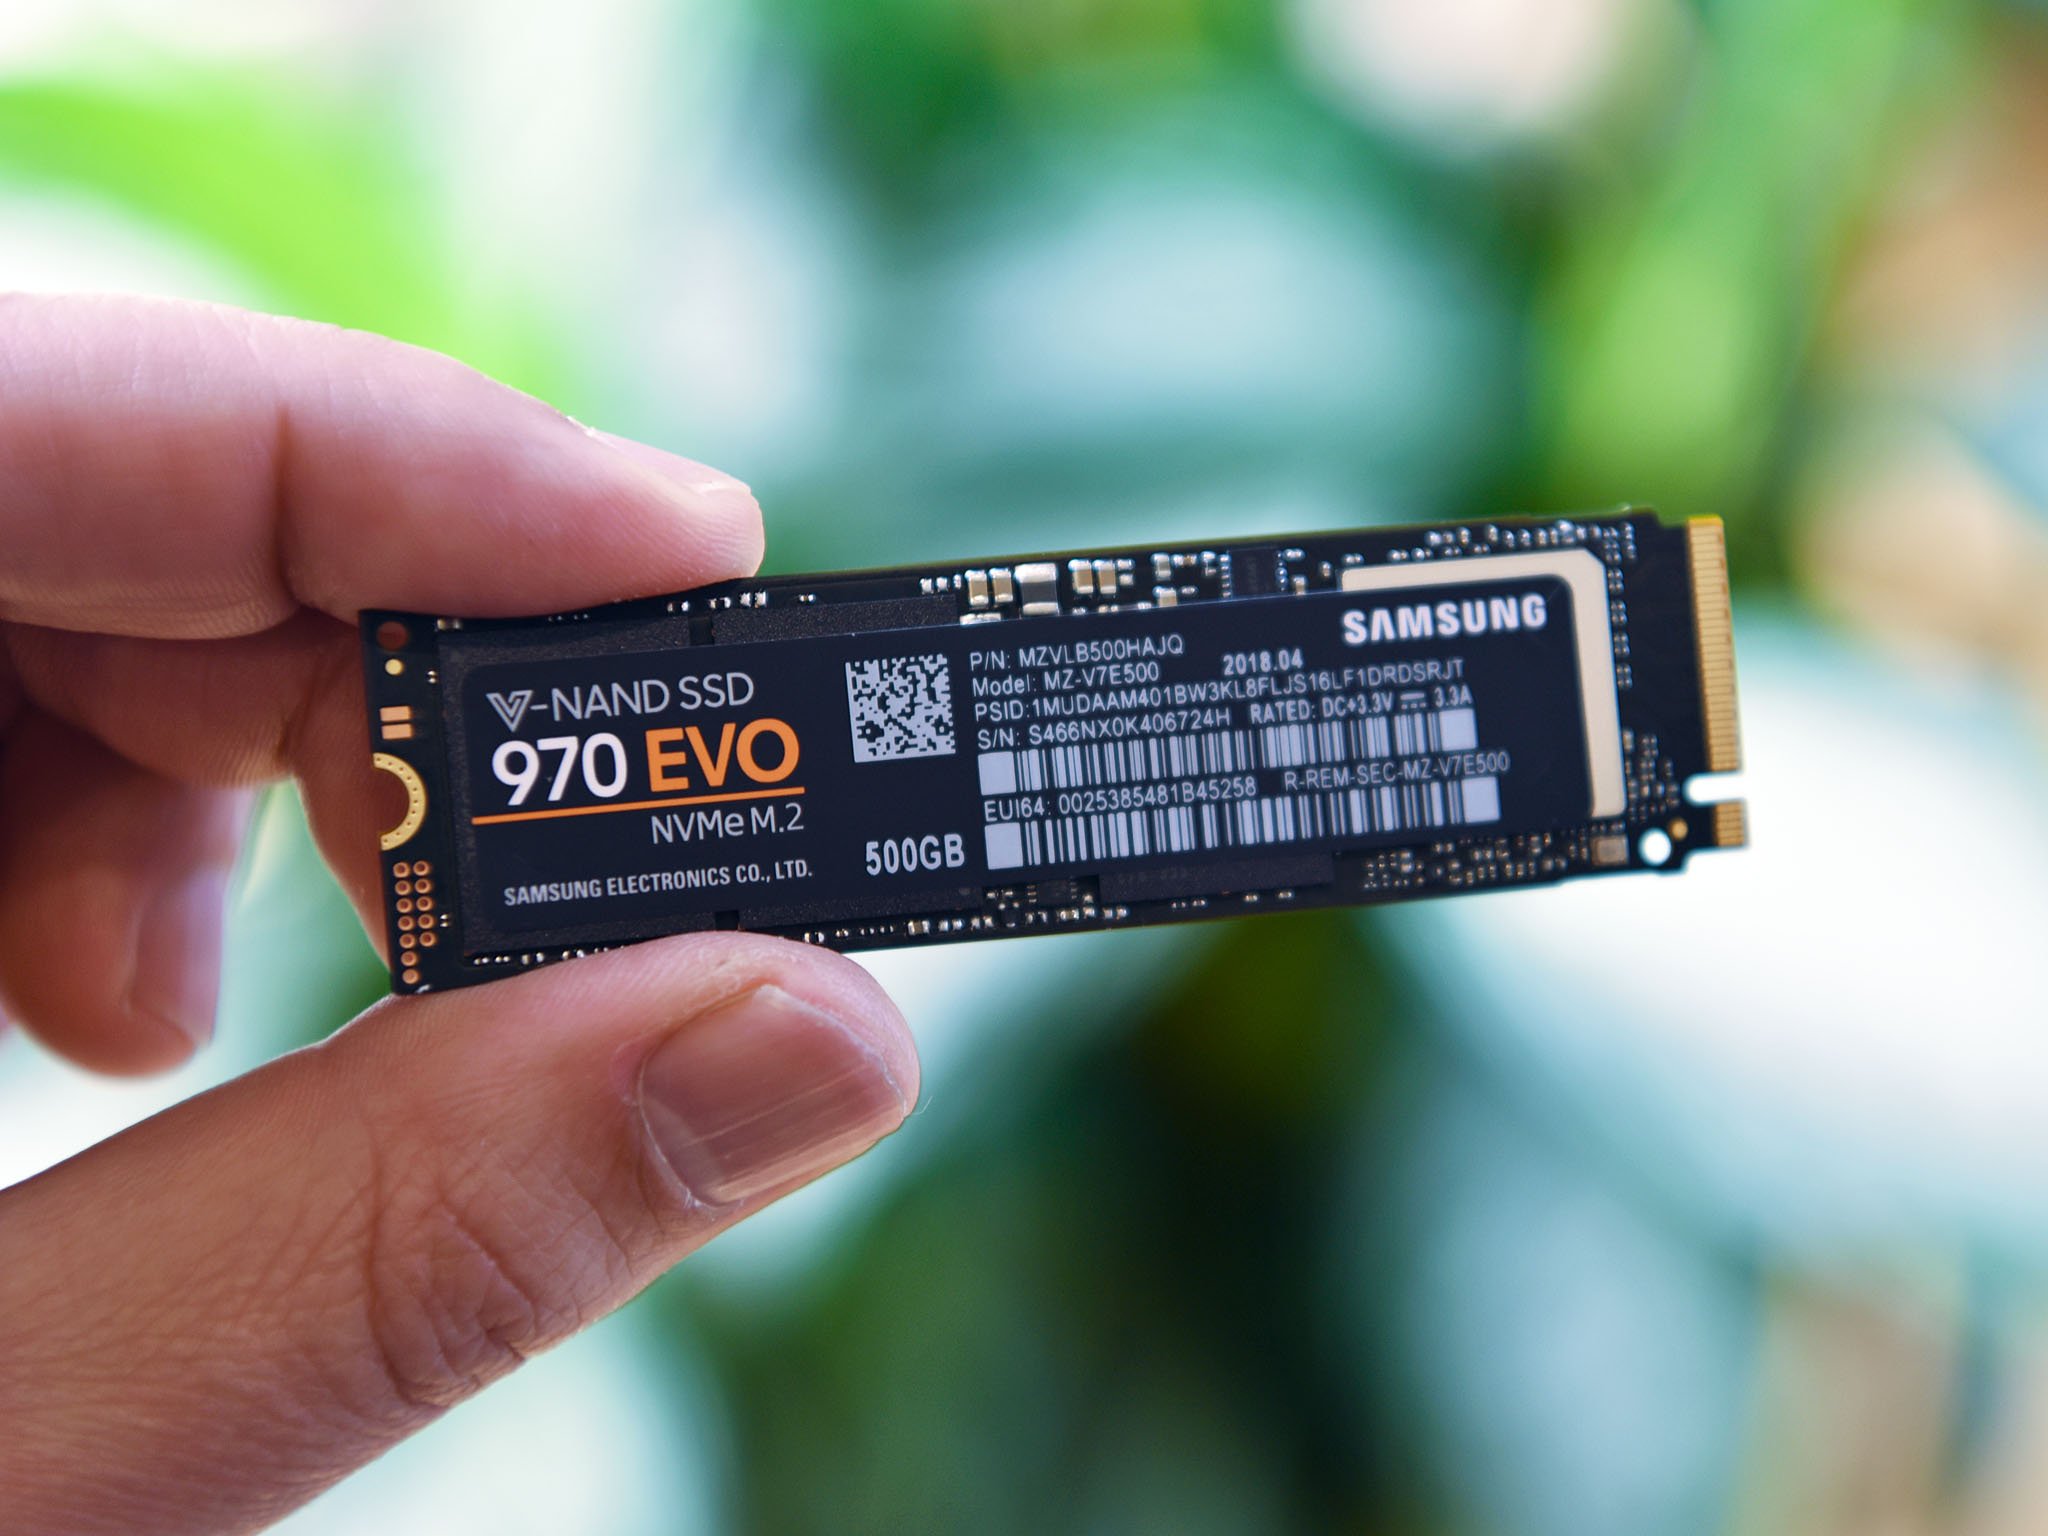
There are quite a few SSD drives on the market these days, but I'm a fan of Samsung's, for both performance and storage.
Samsung 970 EVO SSD
A significant step up in performance would be going with the brand-new Samsung 970 EVO with a theoretical 3,500 MB/s and 2,500 MB/s sequential read and write performance. Sizes range from 250GB ($97, 500GB ($150, 1TB ($300 or a huge 2TB ($530.
Get the Windows Central Newsletter
All the latest news, reviews, and guides for Windows and Xbox diehards.
For the XPS 15 (9570), the 970 EVO is going to be the best balance of size options, performance, reliability, and warranty for the average power user.
Samsung 970 PRO SSD
Pushing the limits to the extreme is the current king of laptop SSDs: the Samsung 970 PRO.
The 970 PRO is similar to the EVO, including the same read speeds (3,500 MB/s), but it's the write performance that sees a jump from a theoretical 2,500 MB/s to 2,700 MB/s.
Samsung's Pro line is also meant for frequent reading and writing to the memory with exceptional reliability. It's certainly a fast SSD, but it's an extra $50 for the 512GB model ($230 and $100 more for the 1TB option ($450.
How to upgrade your Dell XPS 15 SSD
This is everything you need to know to remove and replace the SSD in your XPS 15, to boost storage and drive speed.
SSD upgrade difficulty rating
We previously rated the XPS 15 SSD upgrades process as simple, but that's changed a bit with the 9570. The actual swapping of the SSD is easy, but removing the bottom cover on the XPS 15 (9570) is harder than it should be for two reasons:
- Dell used very soft Torx T5 screws that strip easily.
- Dell used a light thread-locker, which makes them harder to remove.
Doing this upgrade on our XPS 15 (9570), we ended up just stripping out all the screws and using a Torx T6 driver, but it was tough to remove them. It was arduous, intensive, and if you slip, you could scratch the body of the XPS 15.
Having a Torx screwdriver is a good start. You'll also want to be patient. Even if you strip out the head of the screw by using a larger format you can still force the screw off. But it can be laborious and stressful.
Difficulty rating: Moderate to hard.
Backing up your XPS 15 SSD
There are multiple ways to upgrade to a new SSD with Windows 10 depending on preference and tools available:
- Clean install Windows 10 on the new SSD with the Windows 10 Media Creation Tool.
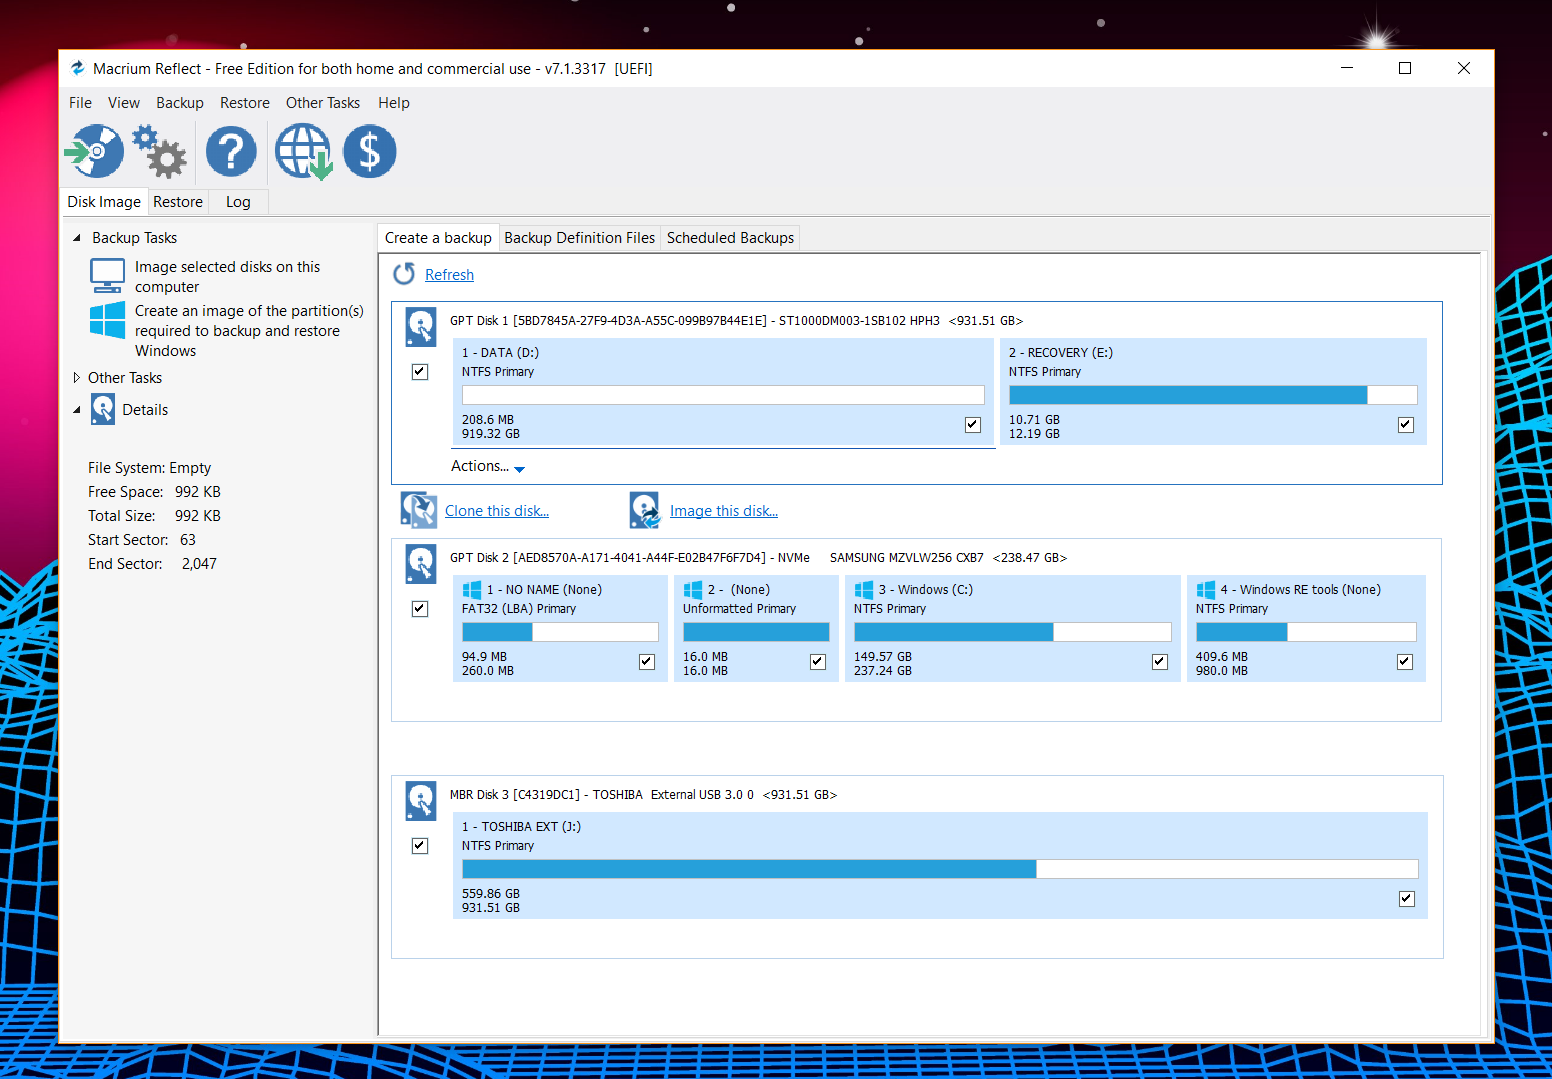
- Copy your current SSD to a backup drive (250GB or larger to match the backup) and then copy back to new SSD using third-party software.
- Copy your current SSD directly to new SSD using an external enclosure before swapping.
Option number one, the clean install, can be tricky if you do not have all the hardware drivers for your device handy, so contact your manufacturer before you begin. Another good tip is have quick access to another PC in case you need to get a file or look up information during this process.
For option number two, I use the third-party solution Macrium Reflect Free Edition. There is a pay version of Reflect if you plan to use it for regular backups, but for a one-time SSD swap, you can use the free one.
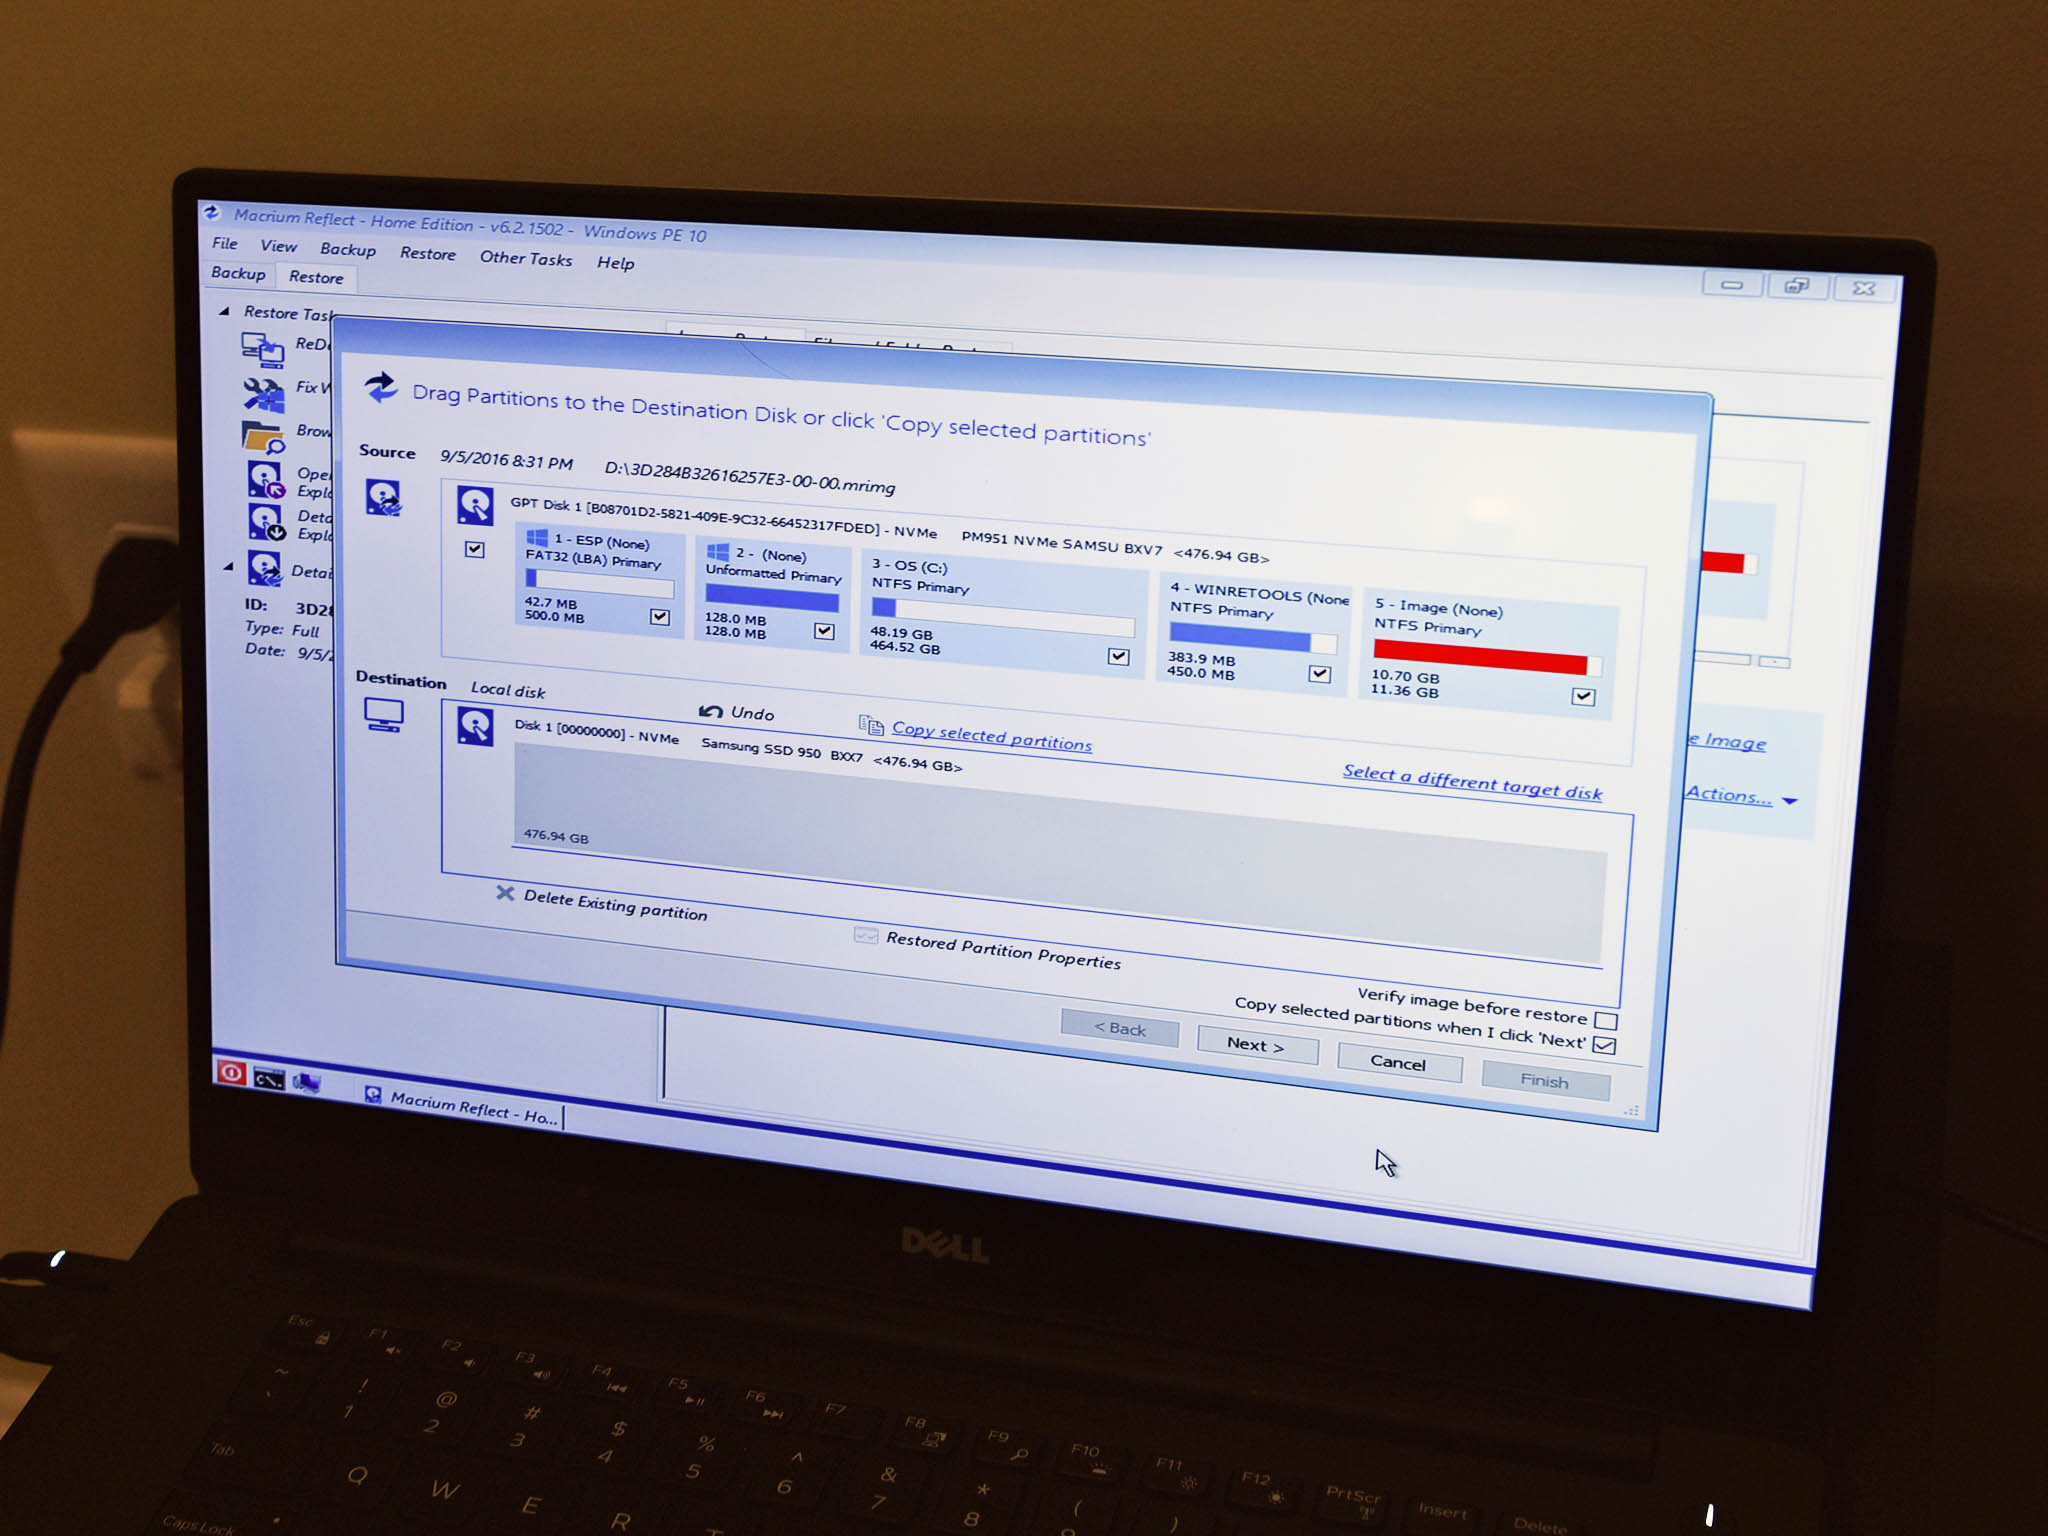
You just run the software on your current SSD and back up your PC to an external USB drive. After swapping out the SSD, boot the XPS 15 to the USB drive and restore the image.
For the third option, Samsung makes free Data Migration software for use with its SSD drives. While Samsung's option is free, you need a way to connect the new SSD to the laptop to directly copy its contents. For a laptop SSD, this means you need to buy an enclosure with a USB connection (you can then repurpose your old SSD as a new external drive).
Tools you need to upgrade Dell XPS 15 (9570) SSD
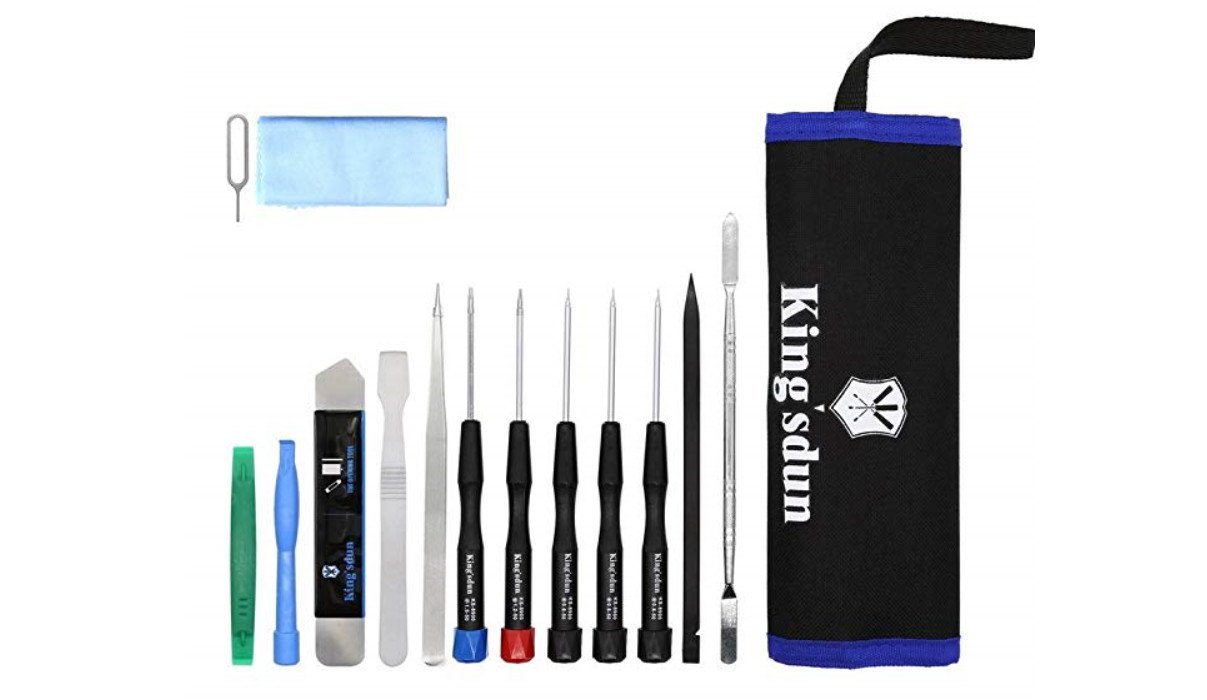
You need Torx and Philips screwdrivers and a small pry tool to help remove the bottom cover on the XPS 15.
You may have your own tools, but I picked up the Kingsdun 14 in 1 Precision Screwdriver Repair Tool Kit on Amazon. Ignore the "for Apple" marketing, as this kit has all bits you'll need for this job, including a Torx T5 screwdriver. It was a mere $14 and includes every tool you will need to work on electronics like a laptop, and it will also likely come in handy in the future.
You will also want a clean and well-lit workspace, and somewhere safe to put the screws from the bottom of the XPS 15. An anti-static wrist strap is not necessary, but it's beneficial. And it costs just $6.
If you want to purchase some screws in anticipating of having to replace them (not a bad idea at all) this $10 kit has the right M2*3 screws (black) that will fit. They're also regular Philips screws, which will be more convenient later if you need to remove the cover again.
Finally, if you are backing up your old SSD using option three via an SSD enclosure with a USB connection make sure to get one of those too.
Opening the Dell XPS 15 (9570)
Before you begin, power down (not sleep or hibernate) your laptop and unplug it from the power adapter.
To open the XPS 15 (9570), you should follow these steps.
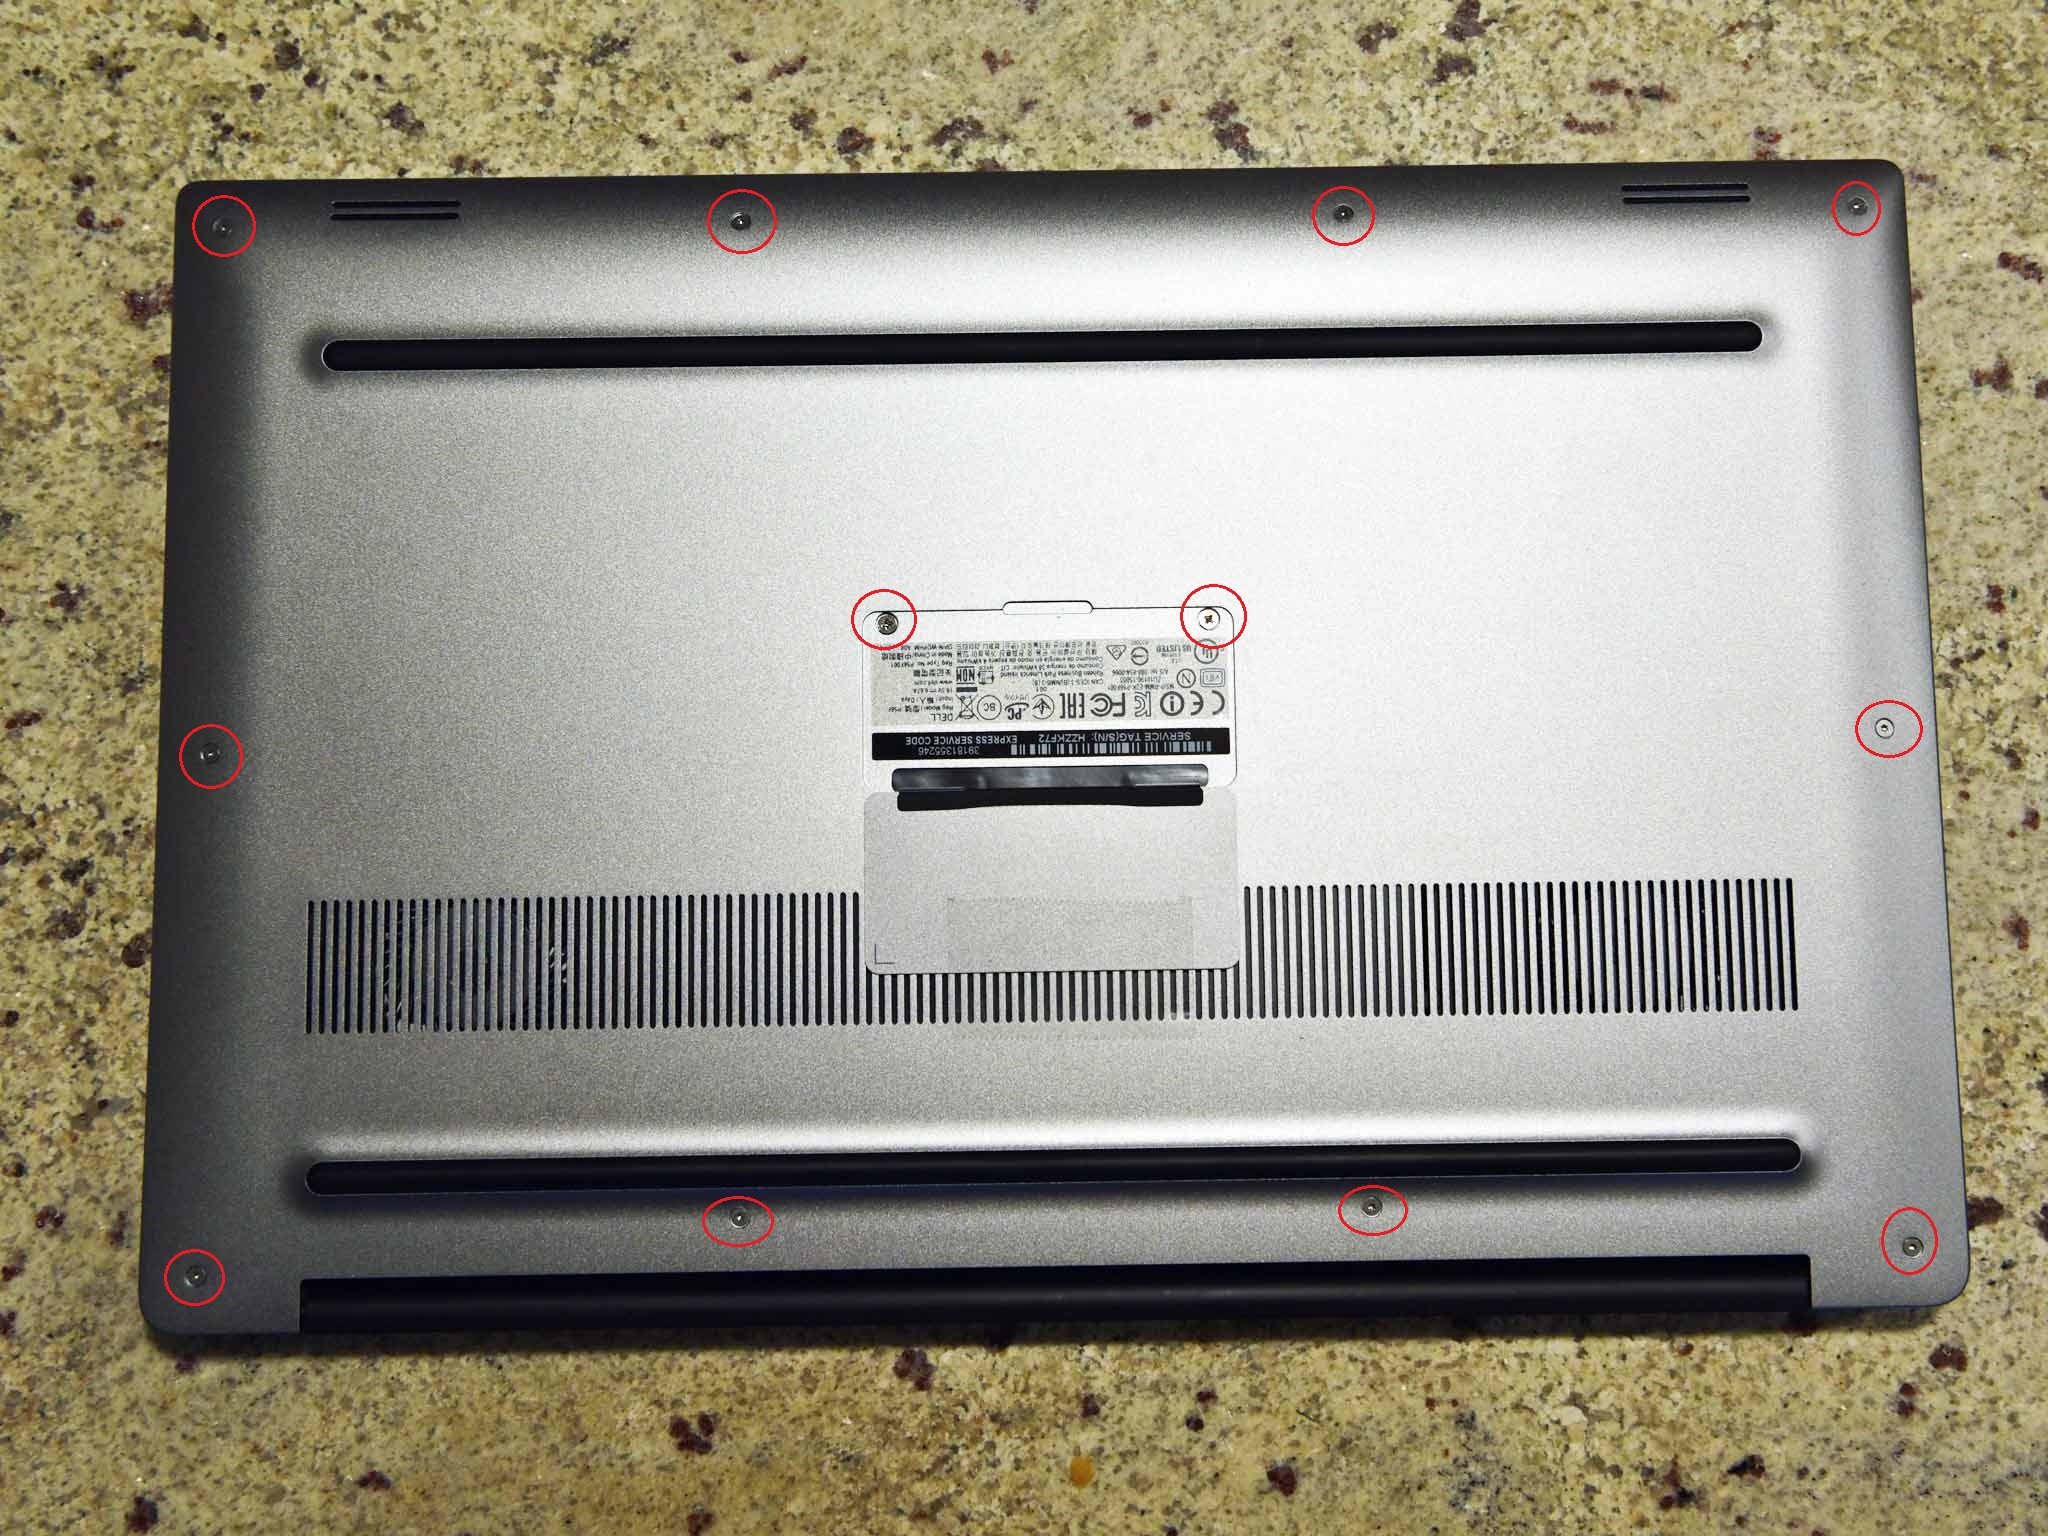
- Place the XPS 15 face down. (I recommend using a cloth to prevent any scratches.)
- Remove the 10 Torx head screws from the bottom edges.
- Remove the 2 Philips head screws from beneath the XPS label in the center (lift the cover).
- Pry the cover off gently using a pry tool.
The cover should click and come off without much force after all 12 of the screws are removed.
Changing the SSD on the XPS 15
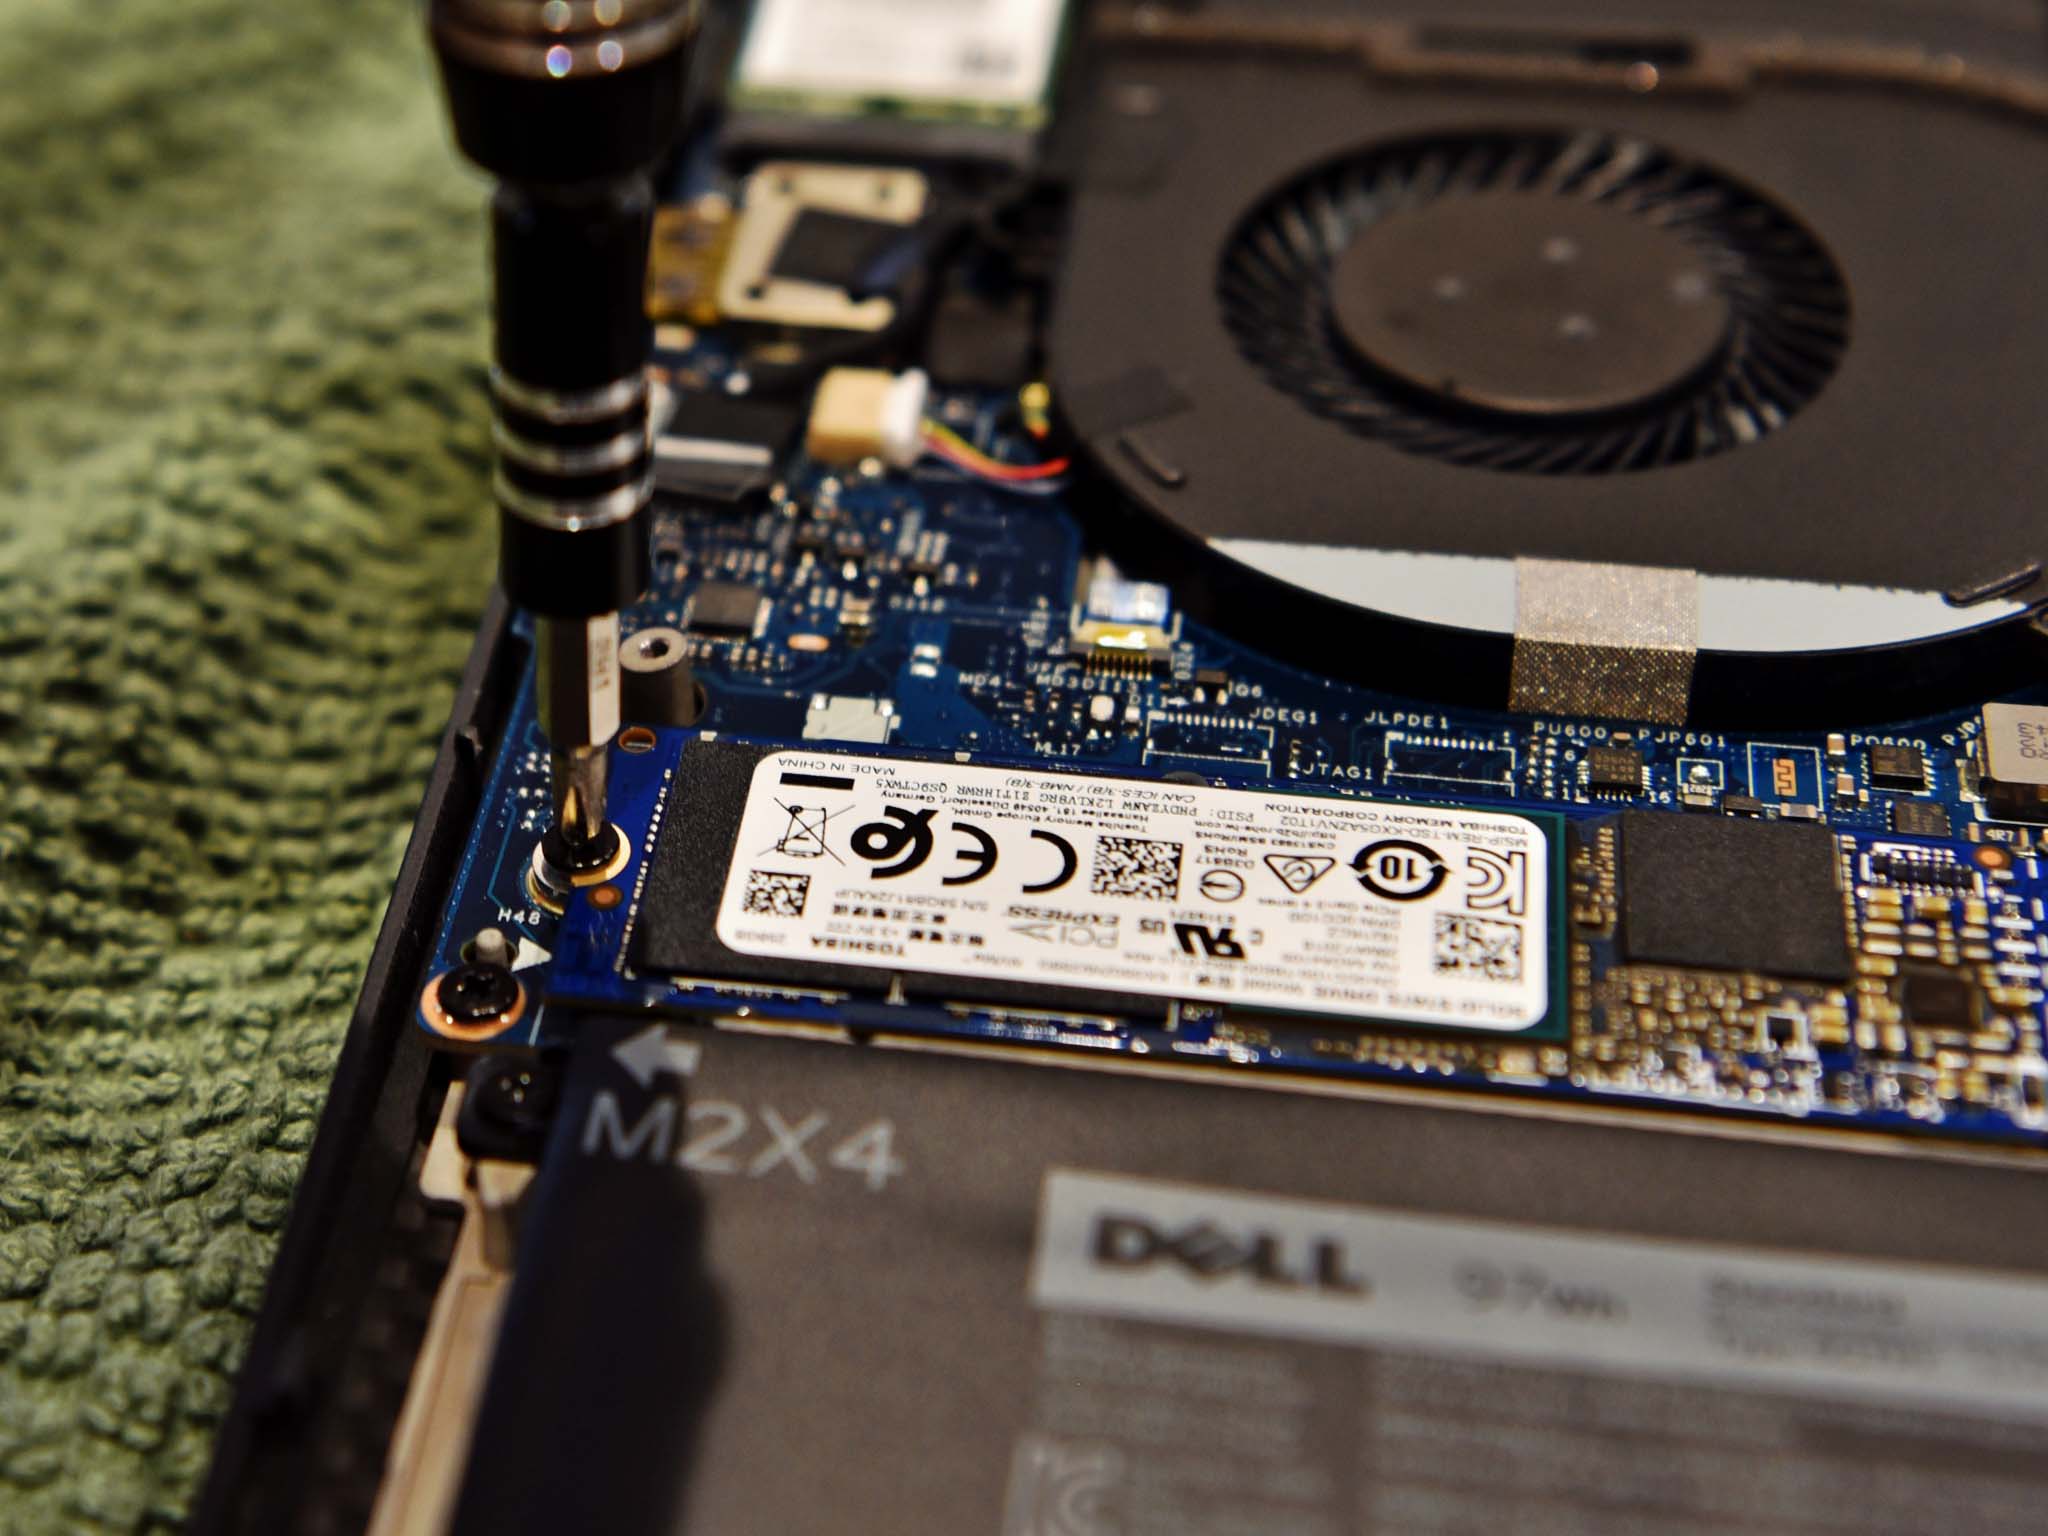
With the display hinge oriented away from you, you'll find the SSD below the exhaust fans and to the left on the XPS 15.
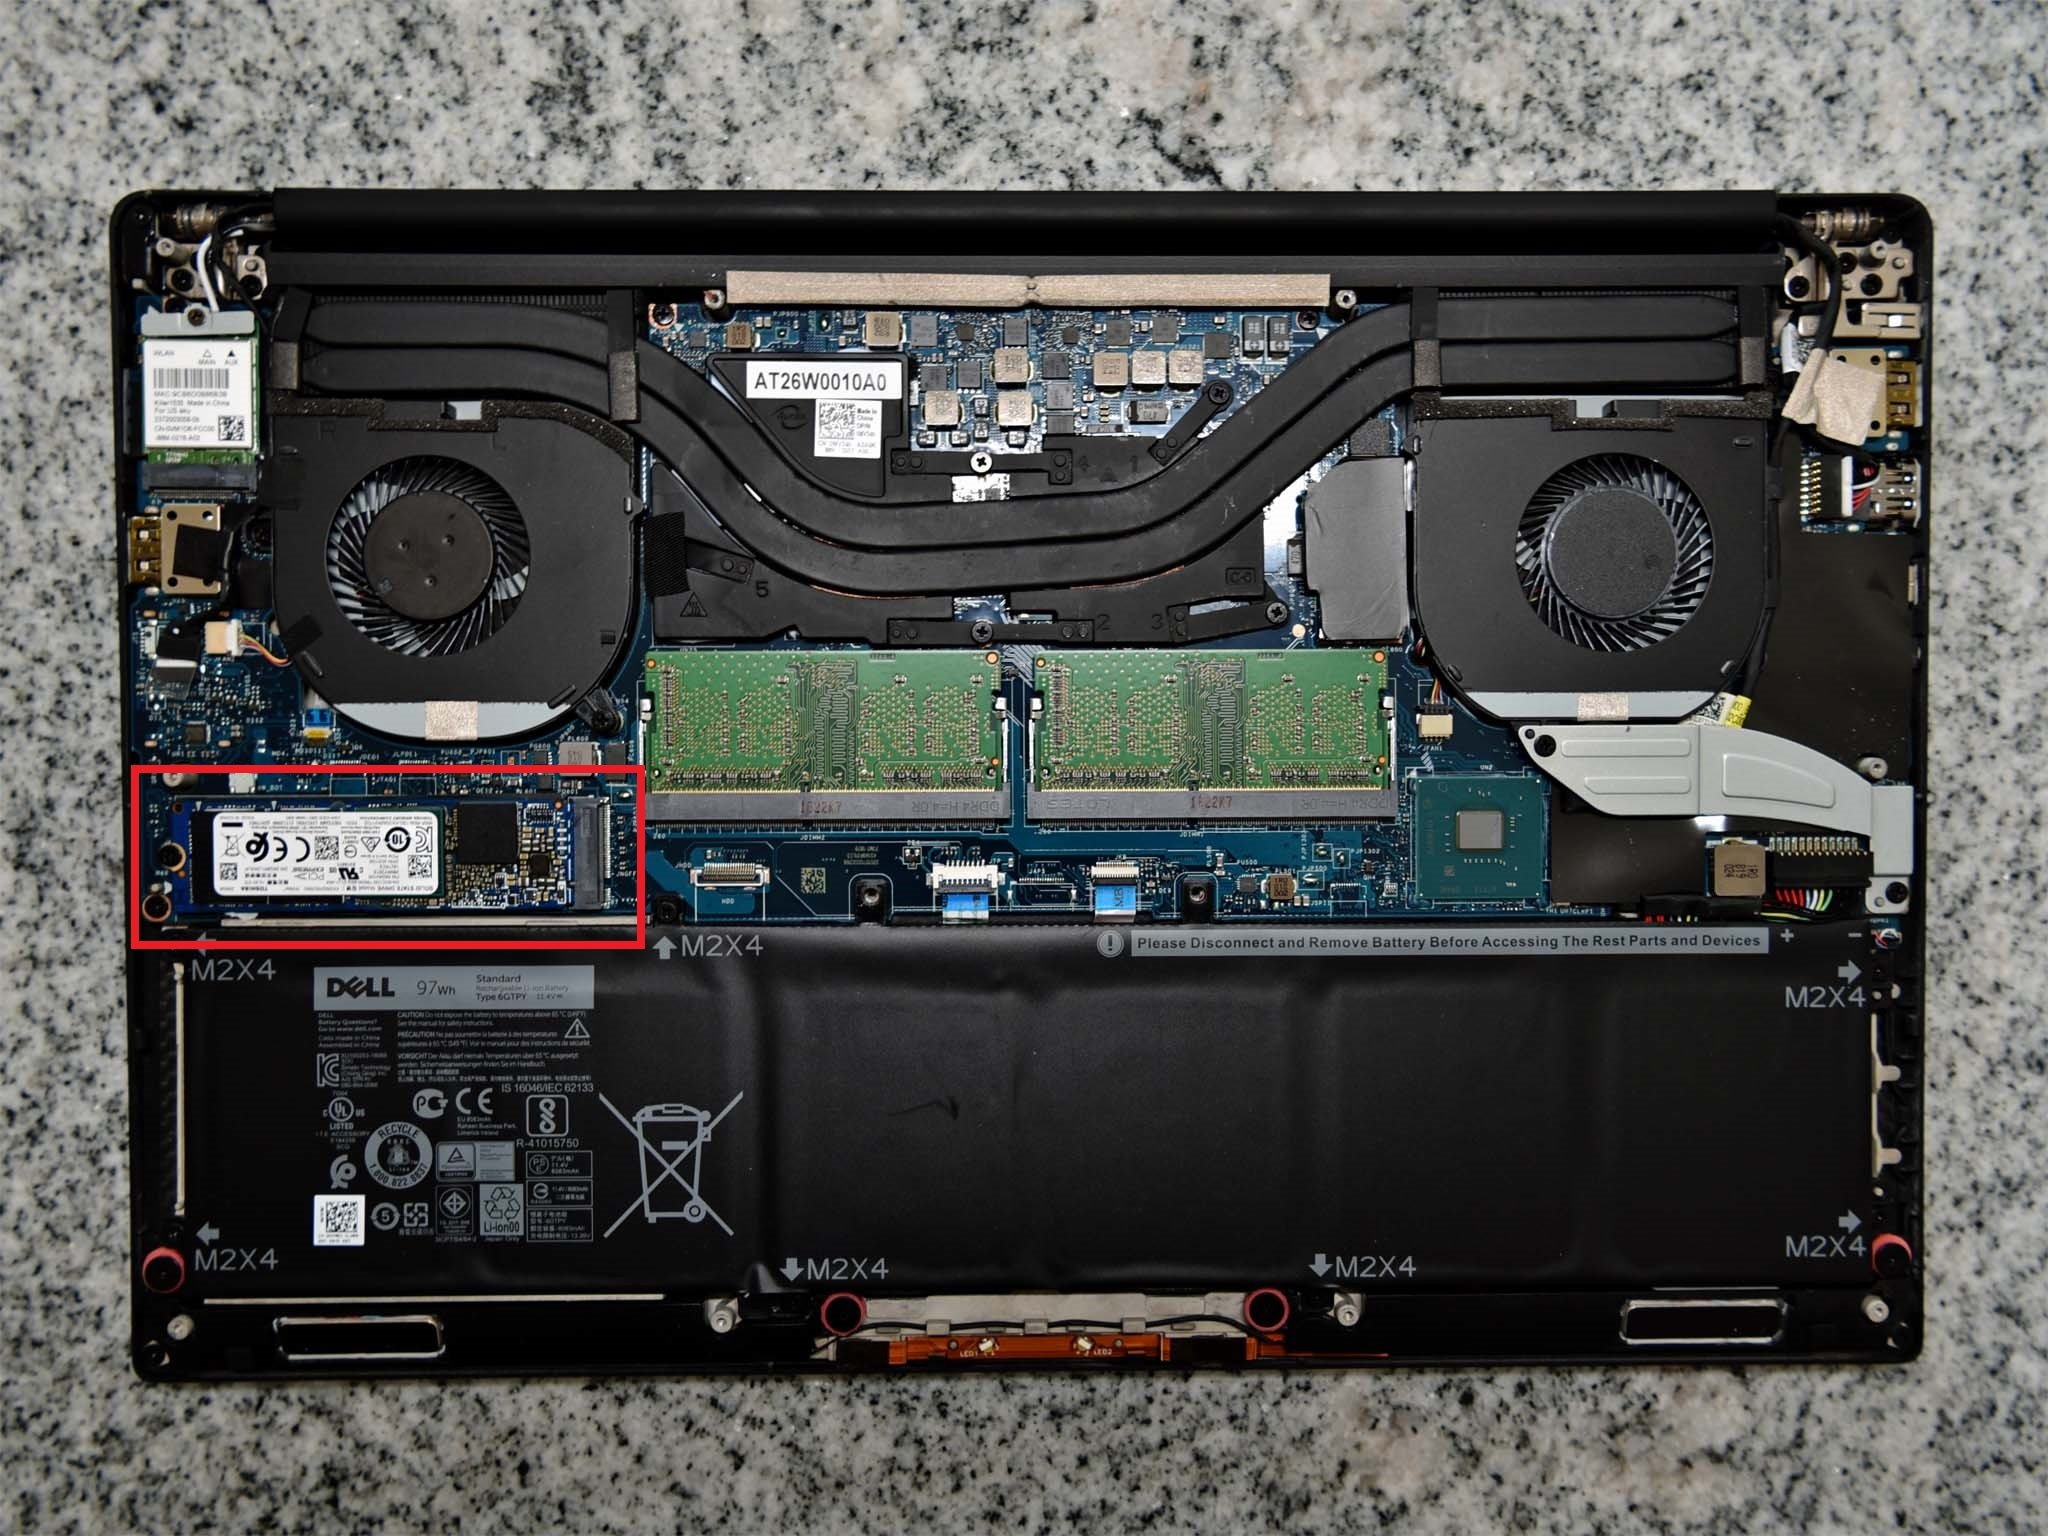
- Remove the placement screw at the base of the SSD.
- Gently peel off the gum-like insulation material. (Don't throw it away, as we'll be reusing it.)
- Gently lift the old SSD at a 20-degree angle and slide it out.
- Insert the new SSD firmly into the slot at the same 20-degree angle.
- Lay down the new SSD and replace the placement screw.
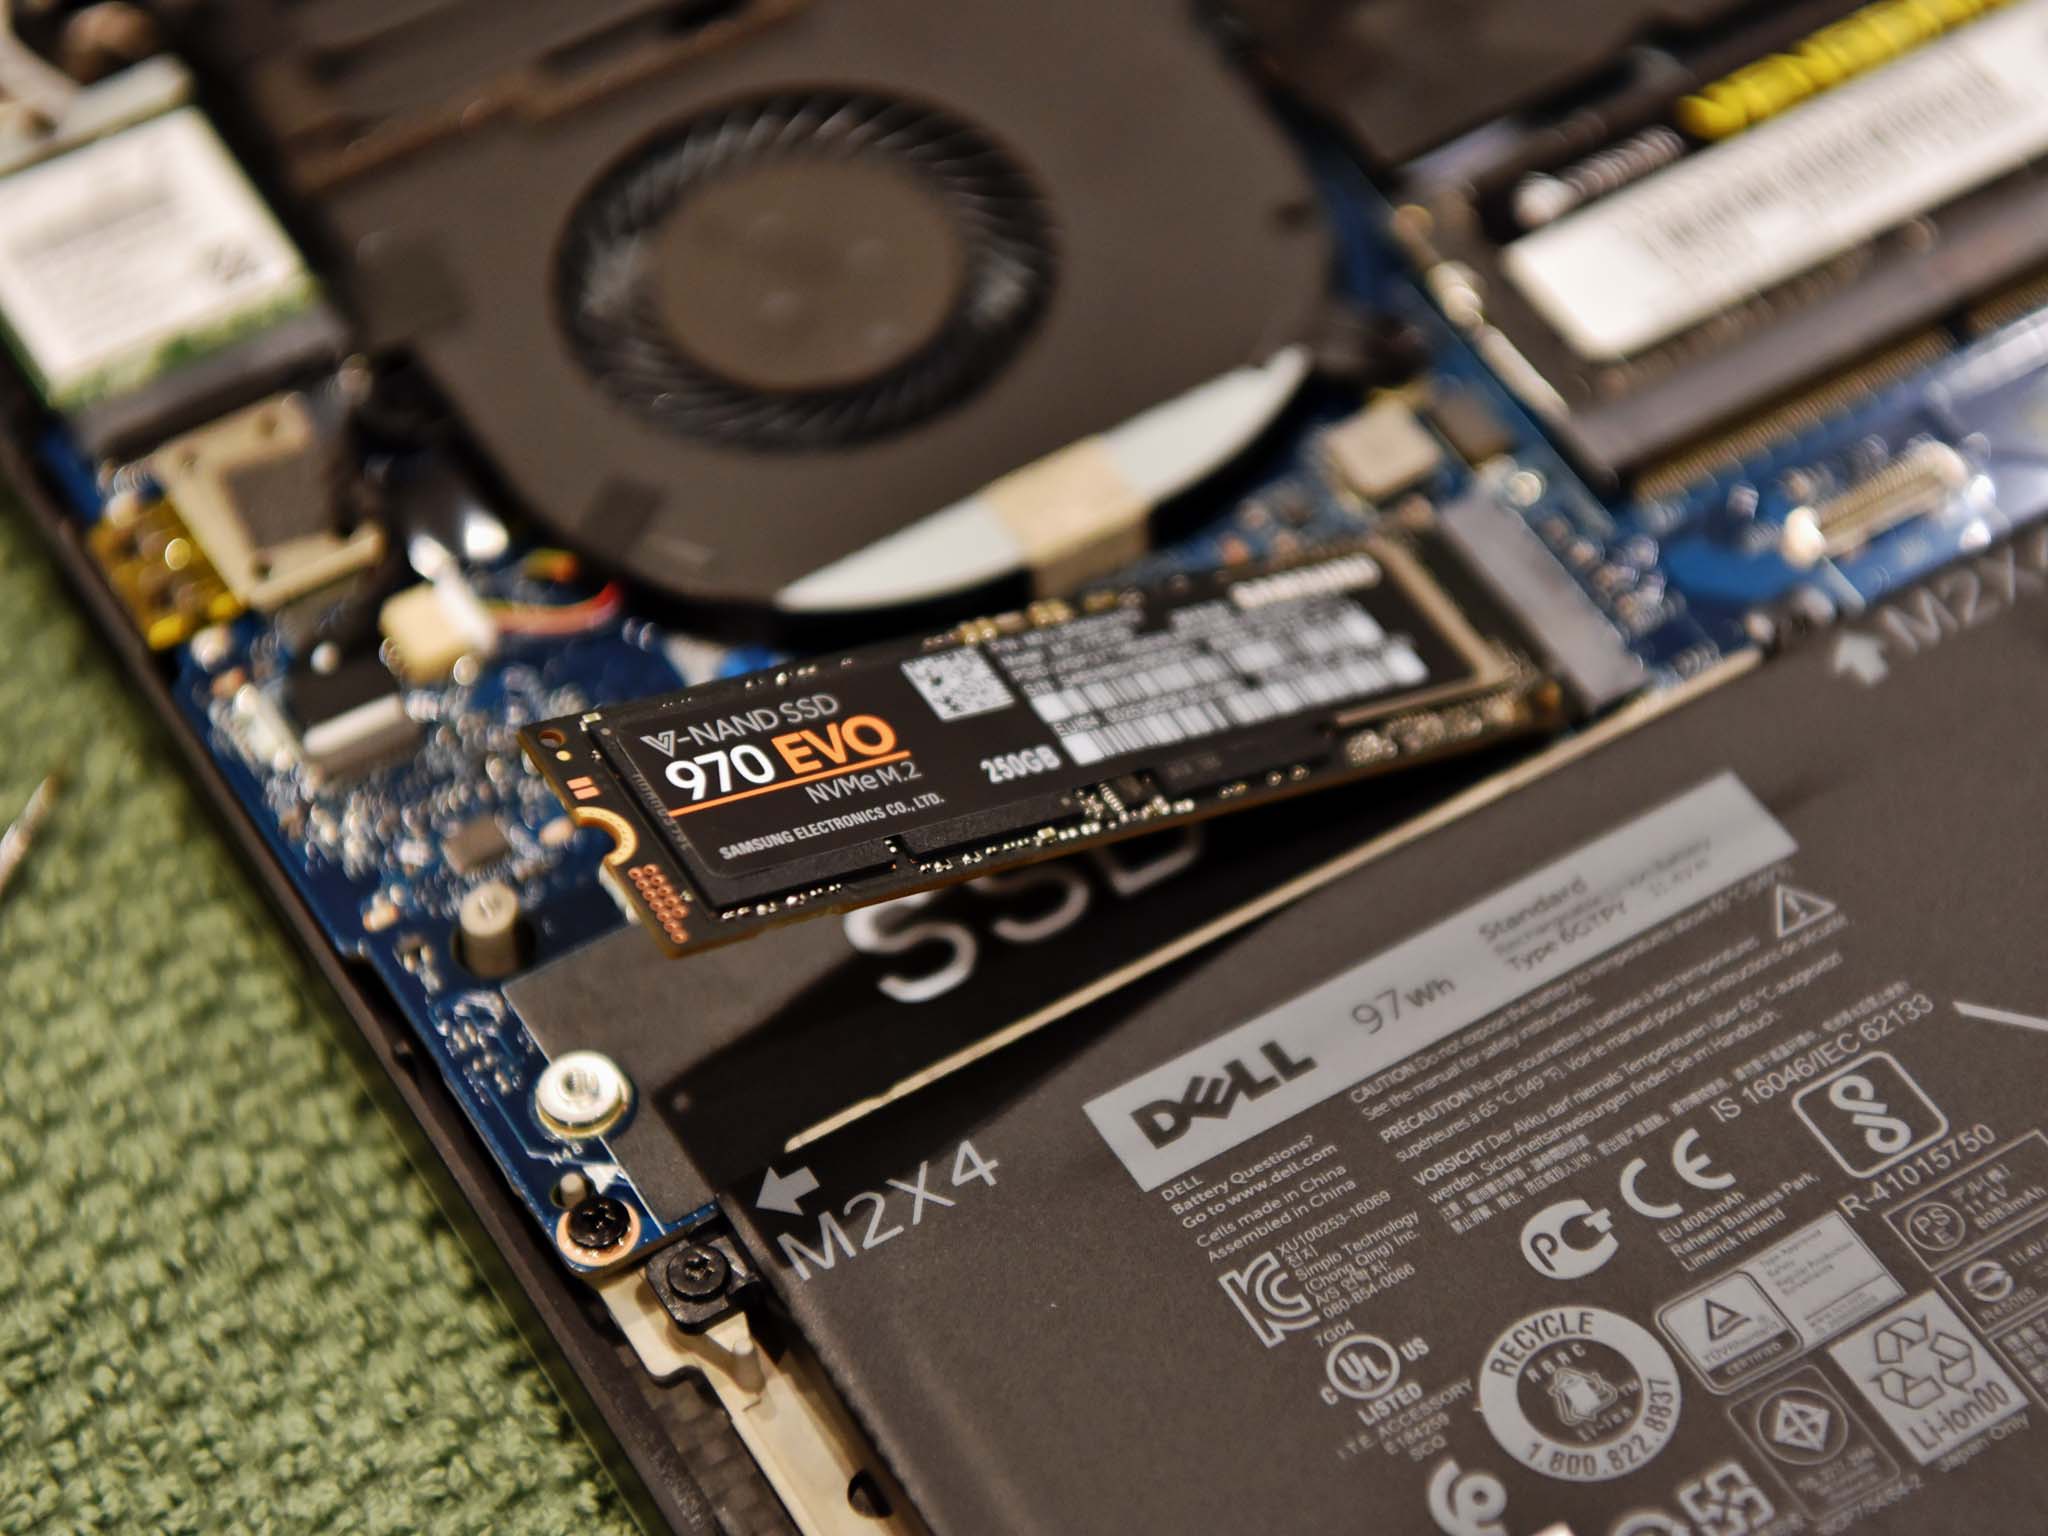
- Reapply the insulation. (This will help dissipate any heat the SSD generates.)
Reassemble and boot your XPS 15
- Position the laptop's base panel in place.
- Replace the 12 screws around the edge of the base and under the XPS label plate.
- Turn over and open the laptop.
- Install the old SSD in your external drive enclosure.
- Plug the old SSD into any USB port on the XPS 15.
- Press the power button in the top right corner to boot the laptop.
- Immediately press and hold F12 until the Boot Menu appears.
- Use the arrow keys to select the USB drive and boot from the old Windows 10 install.
- Use your choice of software to copy the contents of the USB SSD to the newly installed SSD.
Remember, if all else fails, you can just put back your old SSD.
How to switch to AHCI (and why)
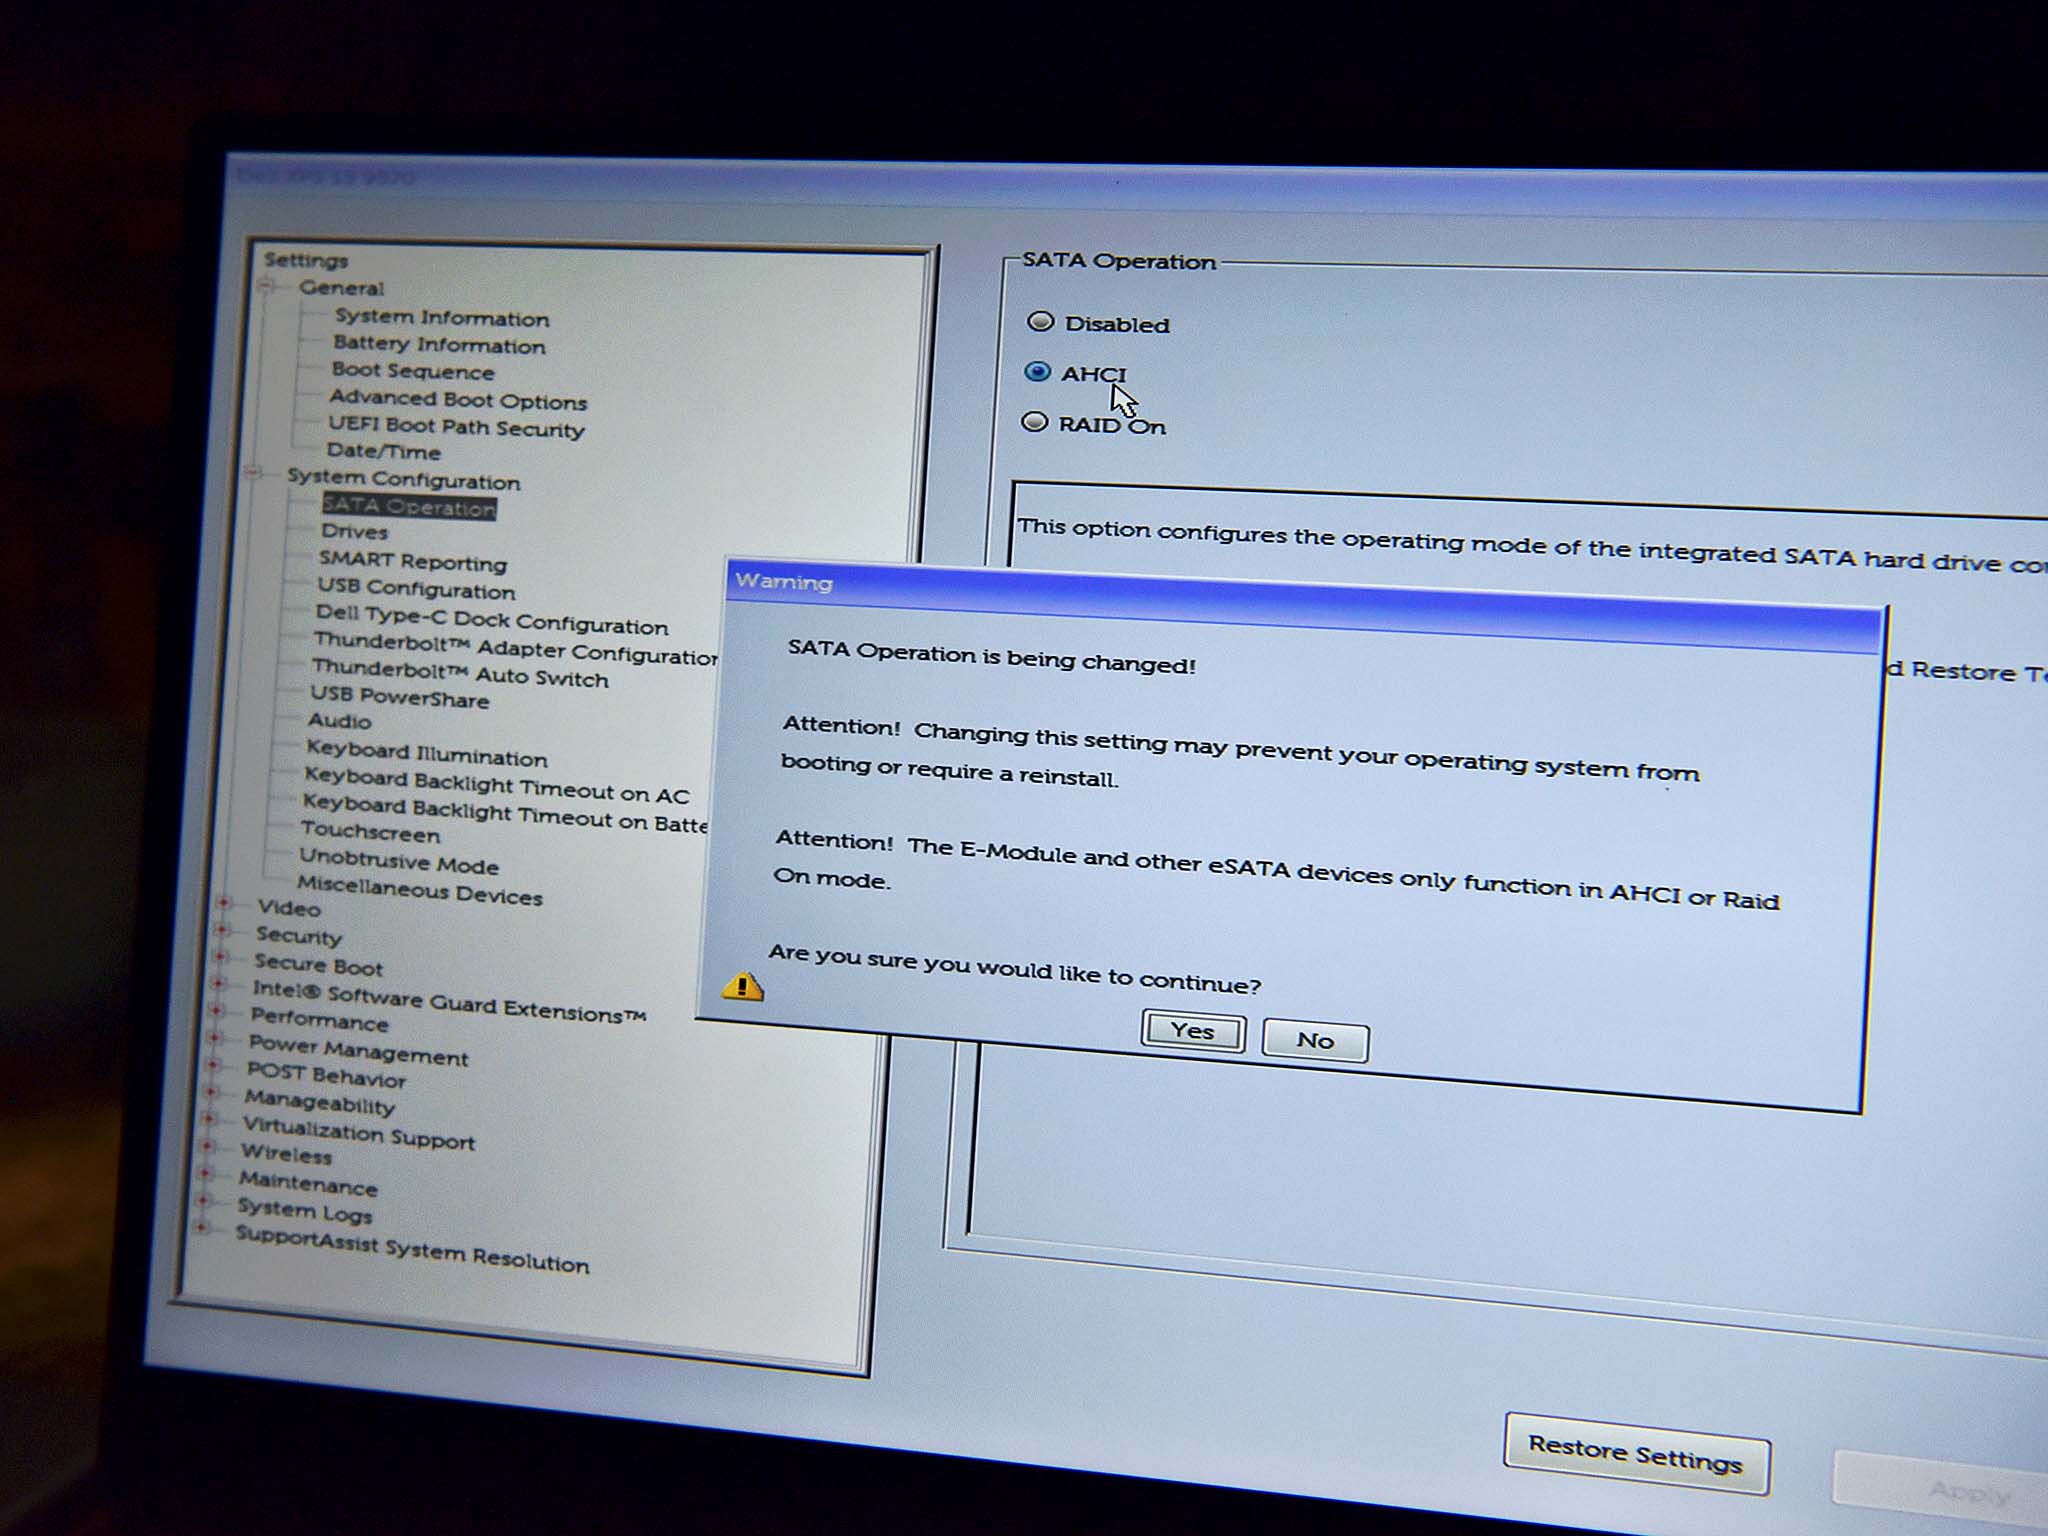
Dell ships the XPS 15 (9570) SSD in a RAID configuration for the controller. But Samsung SSDs work better under Advanced Host Controller Interface (AHCI). More accurately, if you would like to install Samsung's SSD NVMe driver and Magician software you need to be in AHCI mode set through the XPS 15's BIOS. AHCI delivers a few more options to the SSD when using Samsung's software like TRIM (improved data maintenence), firmware updates, healt tests, and more. So it's a good idea to install it.
The problem, though, is you cannot just switch to AHCI in the BIOS and then boot straight to Windows 10 – the OS will not load the driver because it's already in use.
To get around this, you need to follow these steps:
- Enable Windows 10 Safe Mode for next reboot.
- Reboot the PC and enter the BIOS before Windows 10 Safe Mode loads.
- Turn RAID off and enable AHCI in the BIOS.
- Boot into Windows 10 in Safe Mode and let it load the right driver.
- Disable boot into Safe Mode and reboot into regular Windows 10.
Once those steps are completed, you can install the Samsung SSD driver and Magician software.
To set the PC to go into Safe Mode, follow these steps:
- Type cmd into the Start search bar to get to Command Prompt.
- Right-click on cmd to run as Administrator.
- Type into the Command Prompt bcdedit /set {current} safeboot minimal and hit Enter.
Restart the computer, but before Windows 10 loads, hit F12 when you see the Dell logo and choose BIOS Setup from the menu.
Navigate to System Configuration > SATA Operation and enable AHCI.
Save and exit the BIOS settings and let Windows 10 boot into Safe Mode. Just doing this lets Windows 10 switch over its drivers from SATA to AHCI, but we've set Windows 10 to only boot into Safe Mode, so we need to un-do that. Here's how:
- Type cmd into the Start search bar to get to Command Prompt.
- Right-click on cmd to run as Administrator.
- Type into the Command Prompt bcdedit /deletevalue {current} safeboot and hit Enter.
Restart Windows 10 and the regular, non-Safe Mode Windows 10 should boot.
Your SSD is now running in AHCI mode, and you can go ahead and install Samsung's drivers and software
Dell XPS 15 SSD upgrade results
The benefit of updating to a faster (and larger) SSD is apparent when you run some benchmarks. You can also "feel" the difference in everyday usage, whether loading a giant video game, transferring large files, rendering a video for output, or even just booting Windows.
Here is a direct before and after comparison of the SSD the XPS 15 ships with and the Samsung SSDs, using benchmarks from CrystalDiskMark (higher numbers are better).
| Device | Size | Read | Write |
|---|---|---|---|
| Toshiba XG5 (old) | 256GB | 2,771 MB/s | 383 MB/s |
| Samsung 970 EVO | 256GB | 3,525 MB/s | 1,508 MB/s |
| Samsung 970 PRO | 512GB | 3,533 MB/s | 2,327 MB/s |
For those curious about 4K (Q32) random speeds in CrystalDiskmark, we also ran some related benchmarks.
| Device | Size | Read | Write |
|---|---|---|---|
| Toshiba XG5 (Old) | 256GB | 260 MB/s | 333 MB/s |
| Samsung 970 EVO | 256GB | 342 MB/s | 314 MB/s |
| Samsung 970 PRO | 512GB | 250 MB/s | 212 MB/s |
The most significant improvement is the sequential write speed. That's important for many "pro" users out there who need to render video or do heavy lifting. If you are just consuming media or playing games, you still get a noticeable bump but it's not as impressive.
Overall, swapping an SSD on a new laptop can be a complicated experience, but the rewards may be worth it. If, however, you are a computer hardare novice and do not feel comfortable with this process, try to just buy the appropiate configuration at your time of purchase.

Daniel Rubino is the Editor-in-chief of Windows Central. He is also the head reviewer, podcast co-host, and analyst. He has been covering Microsoft since 2007 when this site was called WMExperts (and later Windows Phone Central). His interests include Windows, laptops, next-gen computing, and wearable tech. He has reviewed laptops for over 10 years and is particularly fond of 2-in-1 convertibles, Arm64 processors, new form factors, and thin-and-light PCs. Before all this tech stuff, he worked on a Ph.D. in linguistics, performed polysomnographs in NYC, and was a motion-picture operator for 17 years.
