How to run any Linux distro alongside Windows 11
Do you need to use Linux? Here are two solutions for Windows 11 users.
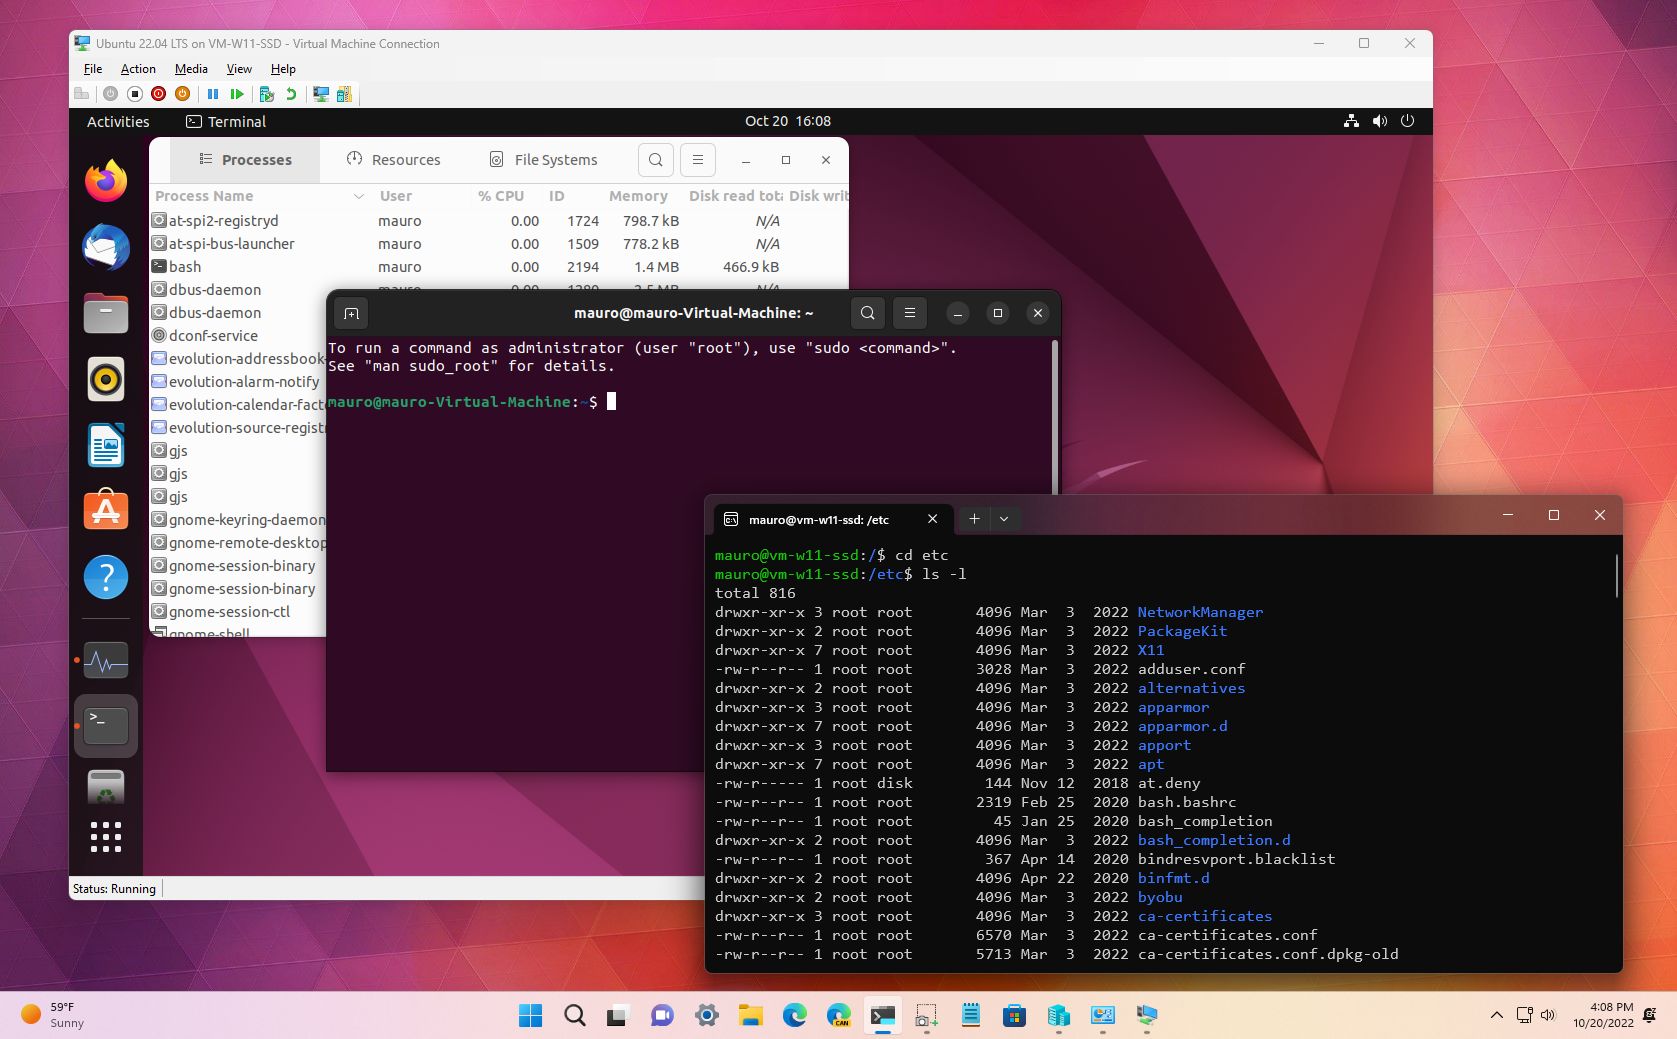
On Windows 11 version 22H2 or 21H2, if you are a developer, network administrator, or advanced user who needs to use Linux tools, you don't need a second computer since the system offers different solutions to run Linux alongside Windows, including the Windows Subsystem for Linux and Hyper-V.
The Windows Subsystem for Linux is a collection of components and integrations that allows you to install various distributions of Linux (such as Ubuntu, Kali, Debian, etc.) without the desktop experience and the overhead of a virtual machine. Using this platform, you can run command-line and GUI tools as well as interact with Windows components from the Linux shell.
If you prefer to have access to the desktop experience that Linux has to offer or want a more traditional experience, you can create and install any distribution on a virtual machine using the Microsoft Hyper-V technology. This solution provides the ability to create a virtual machine with custom settings to install and run Linux alongside Windows 11.
This guide will walk you through two approaches to setting up and running Linux distributions alongside Windows 11.
How to run Linux with WSL on Windows 11
To install a Linux distro (such as Ubuntu) on Windows 11, use these steps:
- Open Start.
- Search for Command Prompt, right-click the top result, and select the Run as administrator option.
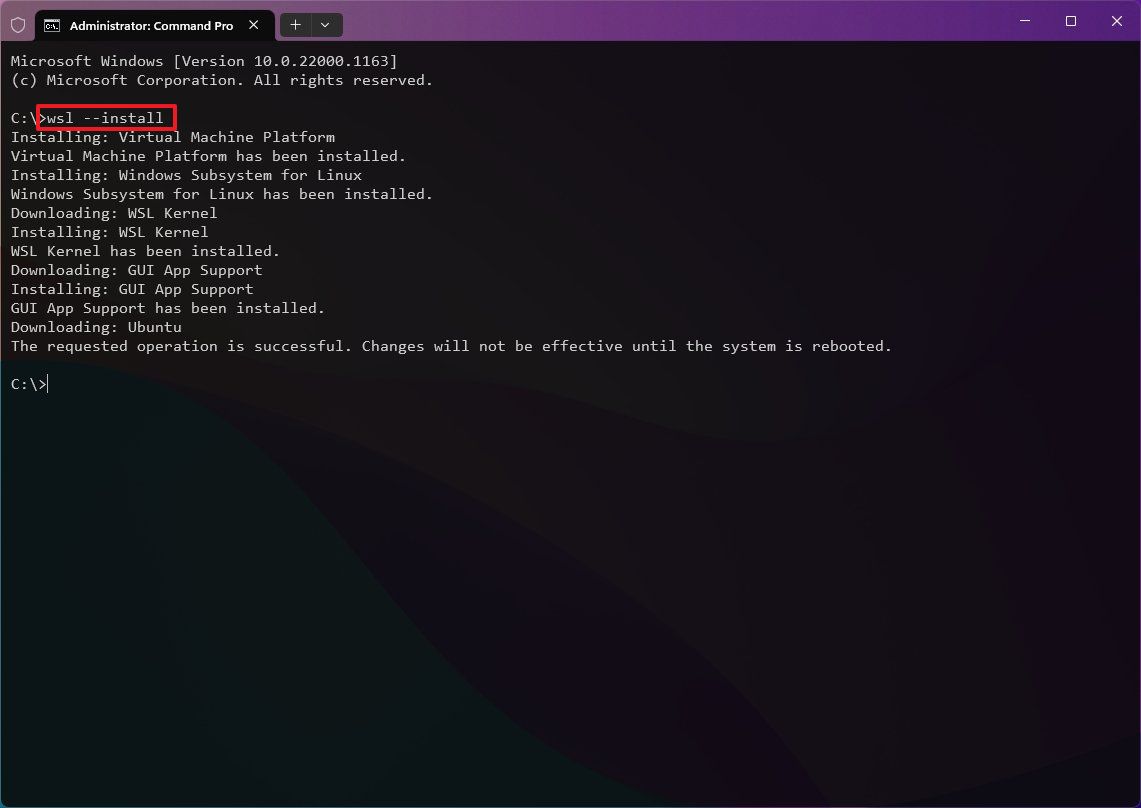
- Type the following command to install WSL and Ubuntu Linux on Windows 11 and press Enter: wsl --install
- (Optional) Type the following command to install WSL with a specific distro and press Enter: wsl --install -d DISTRO-NAME
- Quick tip: You can use the wsl --list --online command to view the available distros.
- Restart the computer.
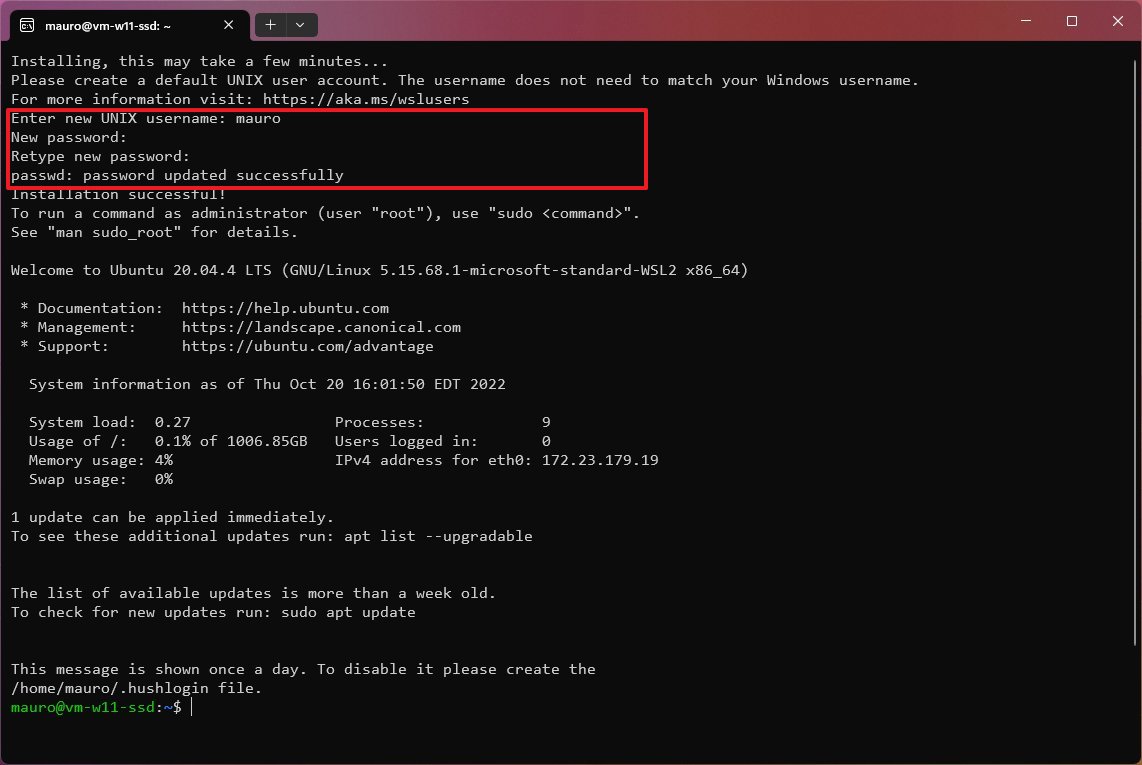
- Create an account and password for the Linux installation prompt after the computer reboots.
Once you complete the steps, you can start the Linux terminal to run commands, scripts, and different tools.
Install GUI apps
All the latest news, reviews, and guides for Windows and Xbox diehards.
The Windows Subsystem for Linux install command also adds the components to run graphical apps, which means you can install your favorite GUI apps.
To install graphical apps in the WSL version of Linux, use these steps:
- Open Start.
- Search for Ubuntu (or the distro you installed) and click the top result to spin the distro.
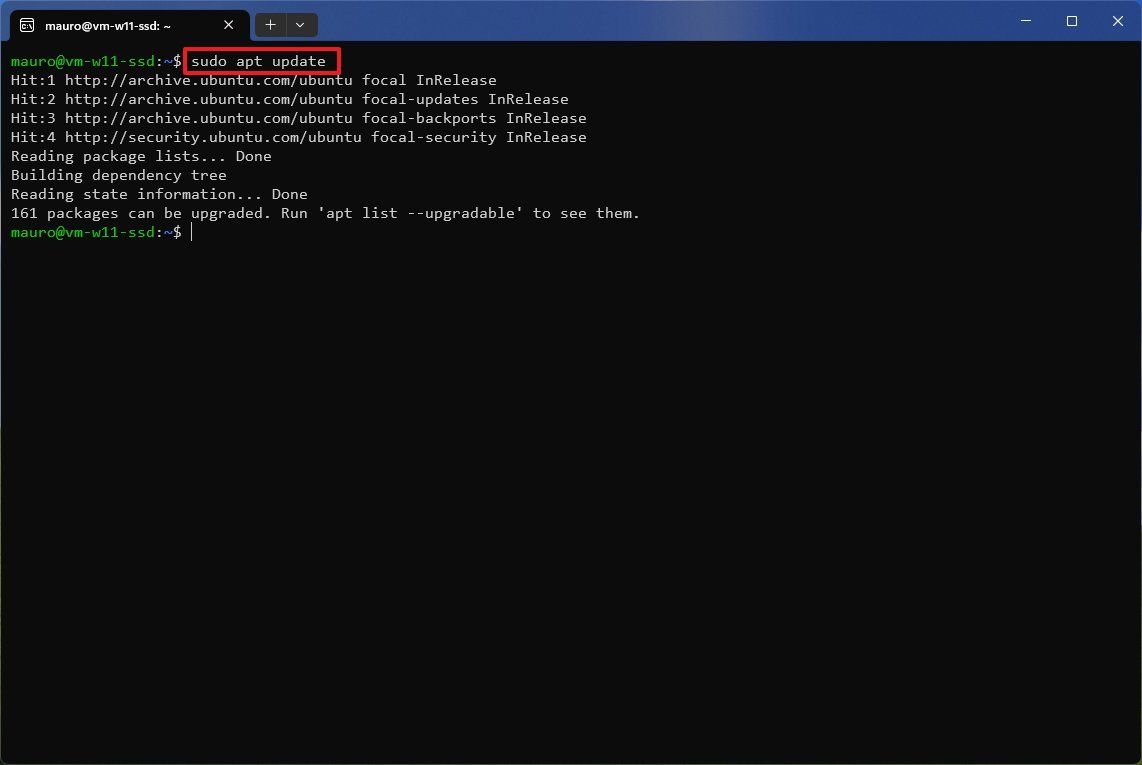
- Type the following command to download the package information and press Enter: sudo apt update
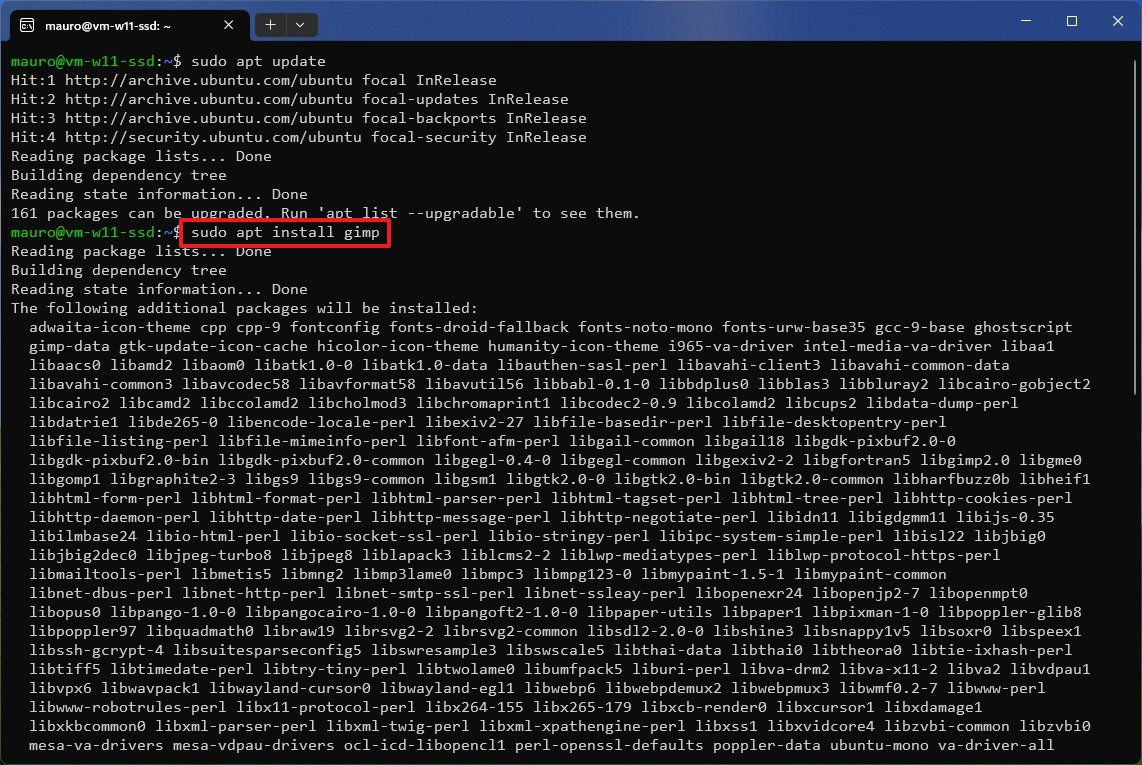
- Type the following command to install an app and press Enter: sudo apt install APP-NAME
In the command, change the APP-NAME for the name of the app you want to install. For example, this command installs the GIMP app: sudo apt install gimp
After you complete the steps, the application will register in the system, making it available through the Start menu and the "Installed apps" page to uninstall.
How to run Linux with VM on Windows 11
If you prefer to use a more traditional virtual machine experience with access to the Linux desktop interface, you will need to enable the Hyper-V Manager app, create a virtual machine, and install the distro you want.
Enable Hyper-V on Windows 11
To enable Hyper-V on Windows 11, use these steps:
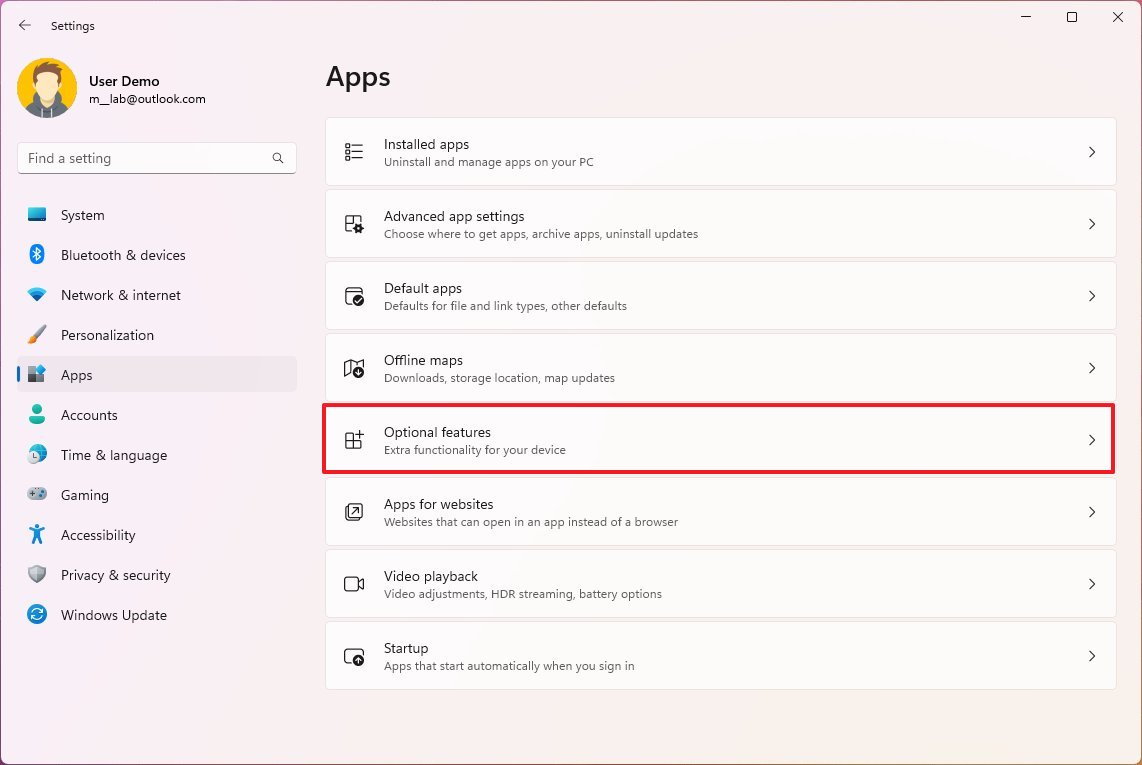
- Open Settings.
- Click on Apps.
- Click the Optional features page on the right side.
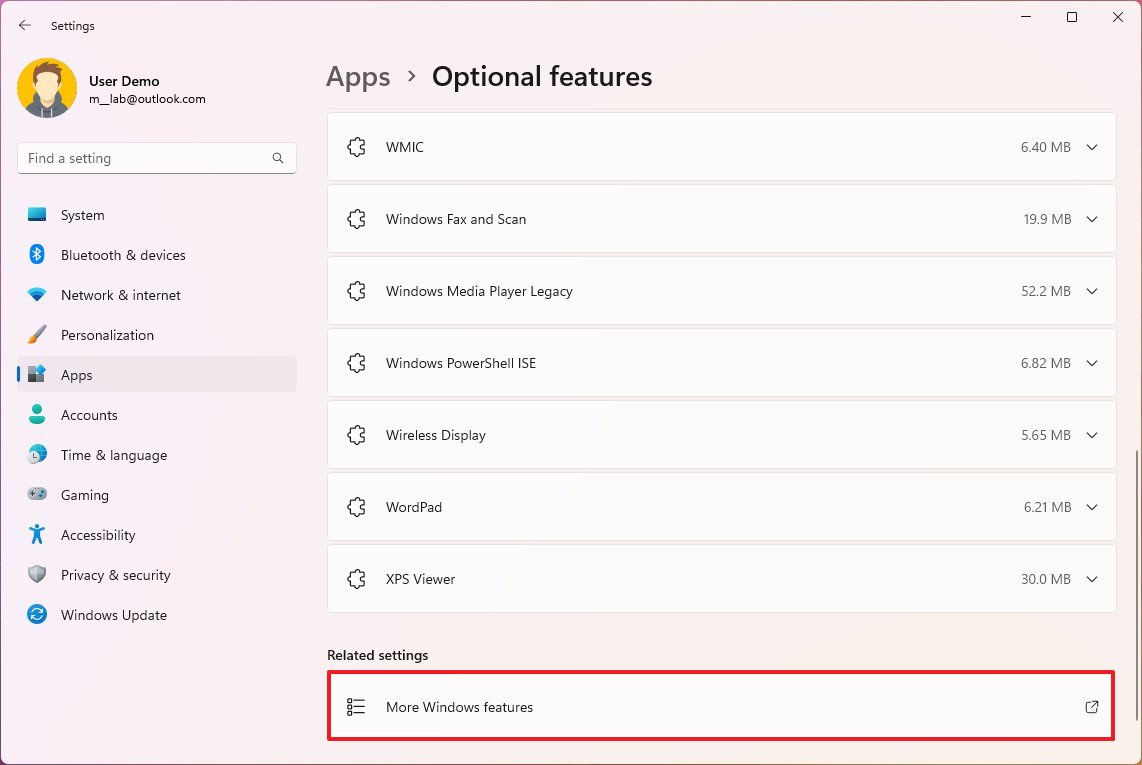
- Under the "Related settings" section, click the "More Windows features" setting.
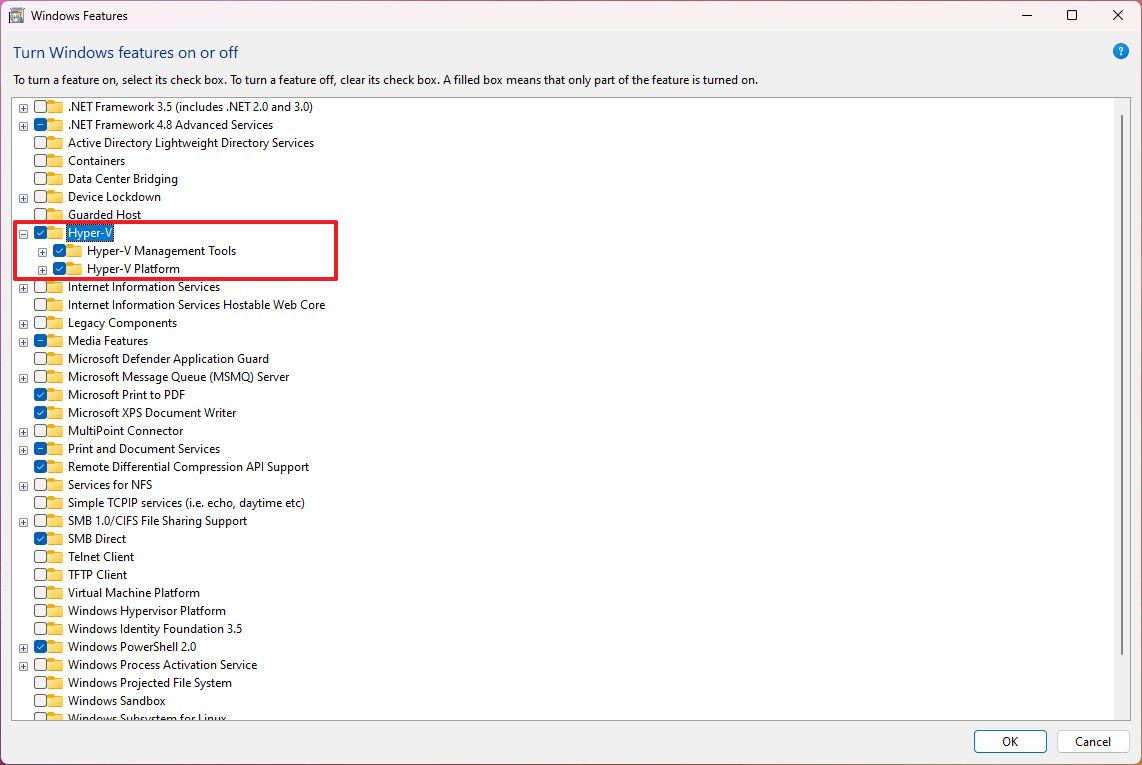
- Check the Hyper-V option.
- Click the OK button.
- Click the Restart now button.
Once you complete the steps, you can proceed to create a virtual machine.
Create Linux virtual machine (quickly)
On Windows 11, you have two ways to create a virtual machine. You can use the quick method that downloads one of the available versions of Ubuntu and sets up the virtual machine automatically. Or you can create a VM manually that allows you to install any Linux distribution.
To use the "Quick Create" feature on Hyper-V to set up a Linux virtual machine, use these steps:
- Open Start.
- Search for Hyper-V and select the top result to open the app.
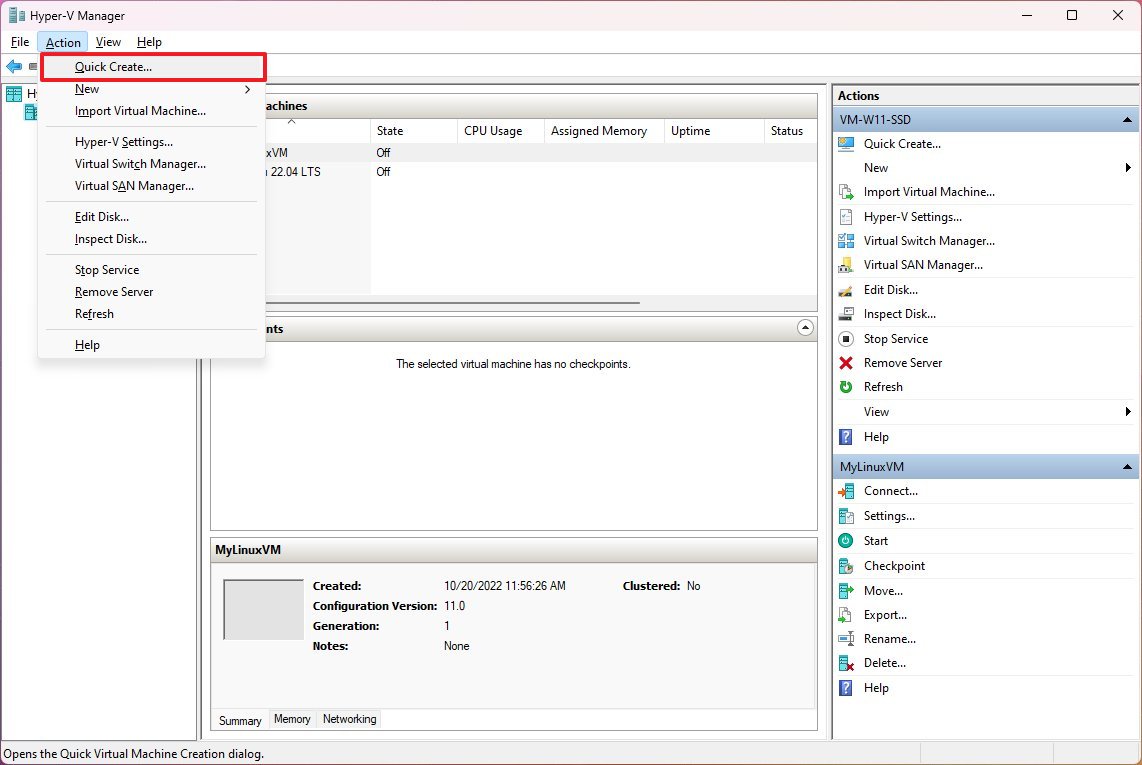
- Click on Actions from the top navigation and select the Quick Create option.
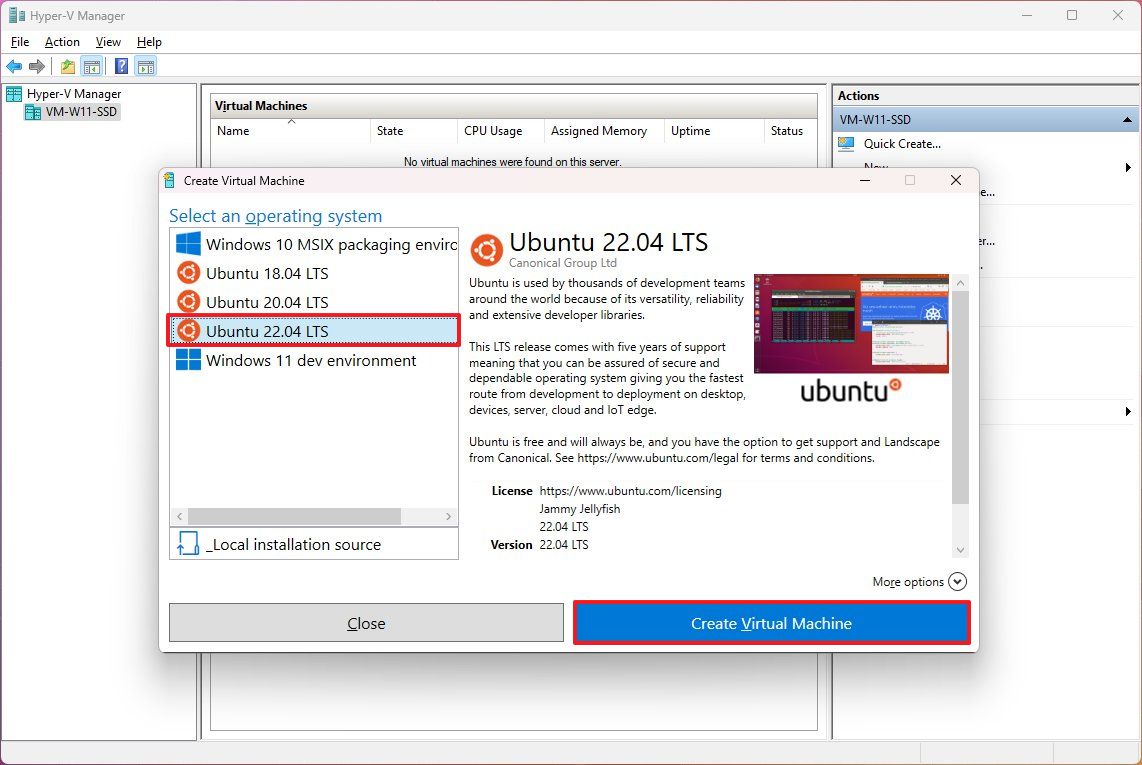
- Select the version of Ubuntu to install on Windows 11.
- Click the "Create Virtual Machine" button.
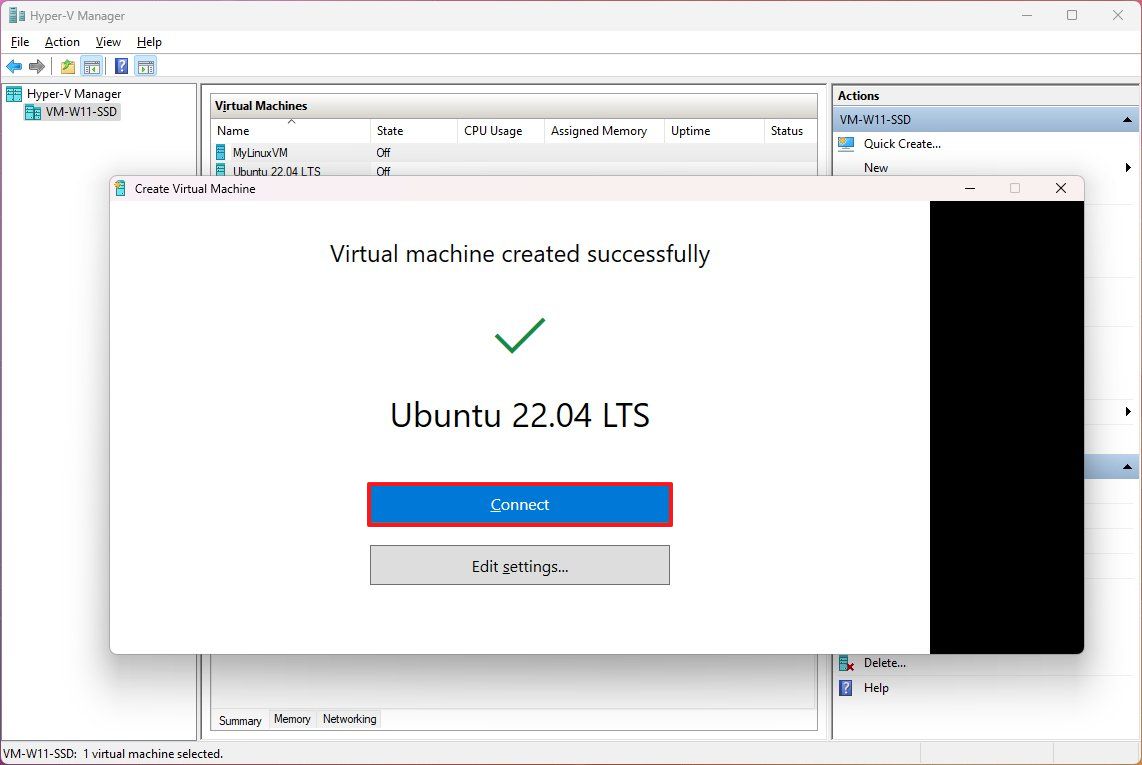
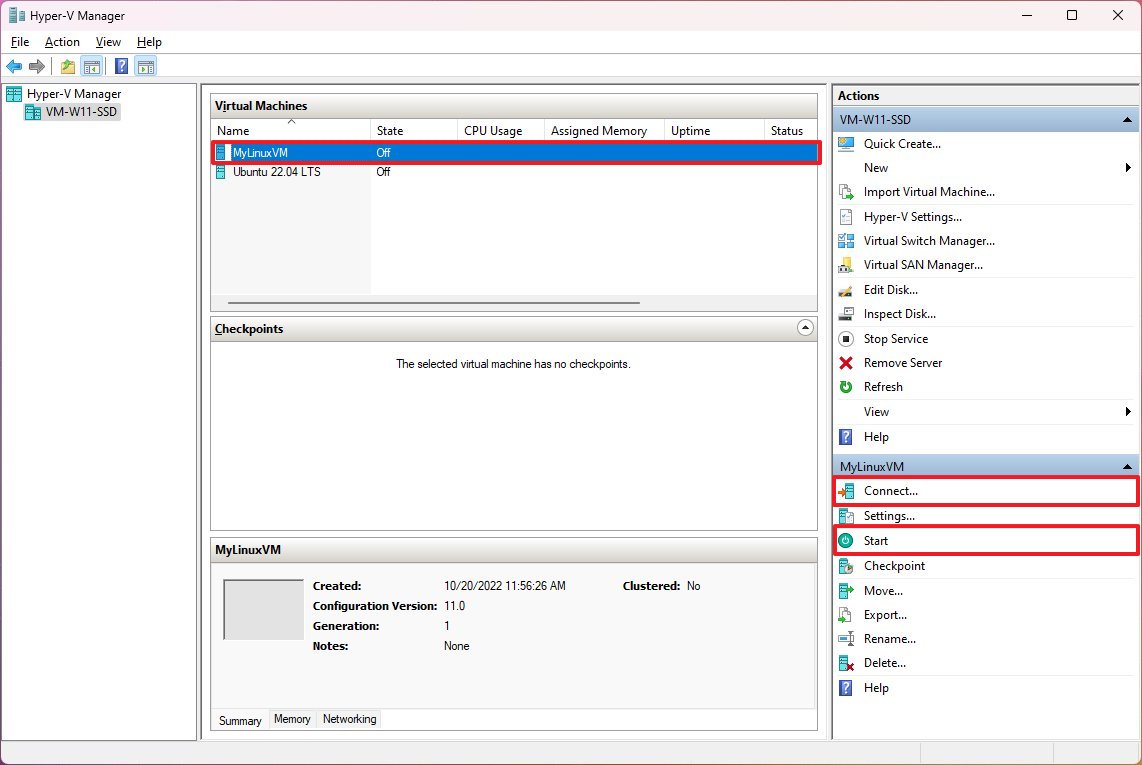
- Click the Connect button.
- Click the Start button.
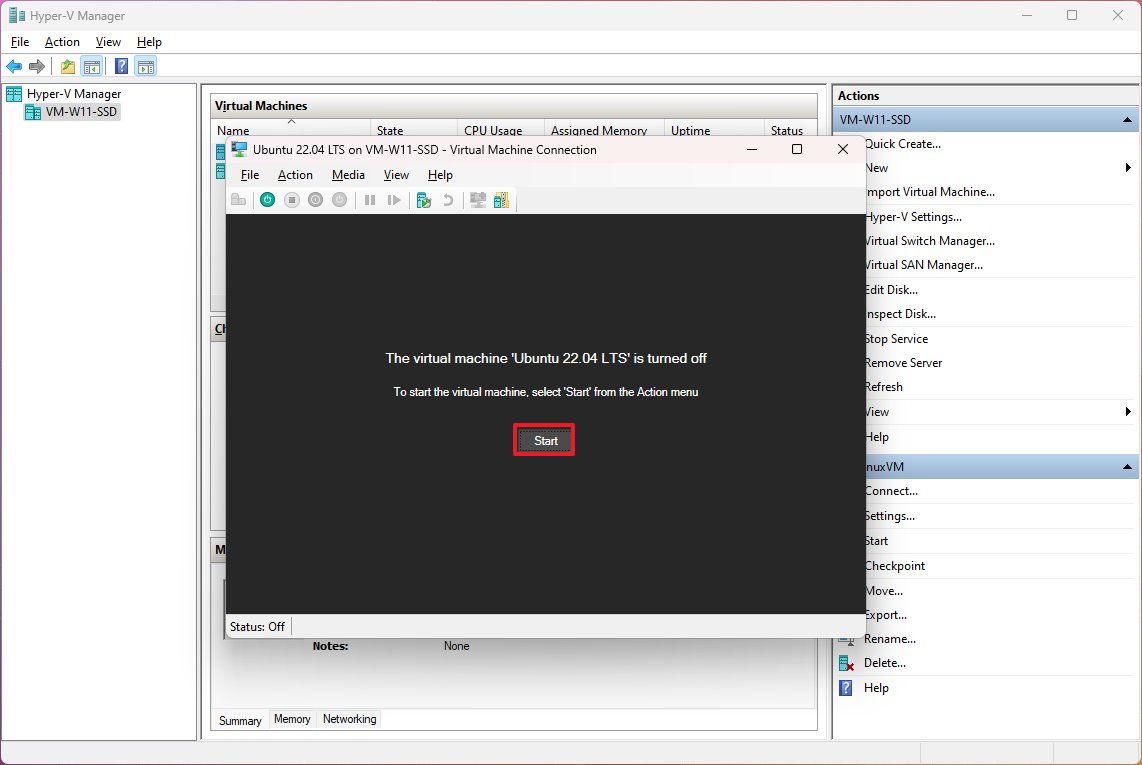
- Select your language.
- Click the Continue button.
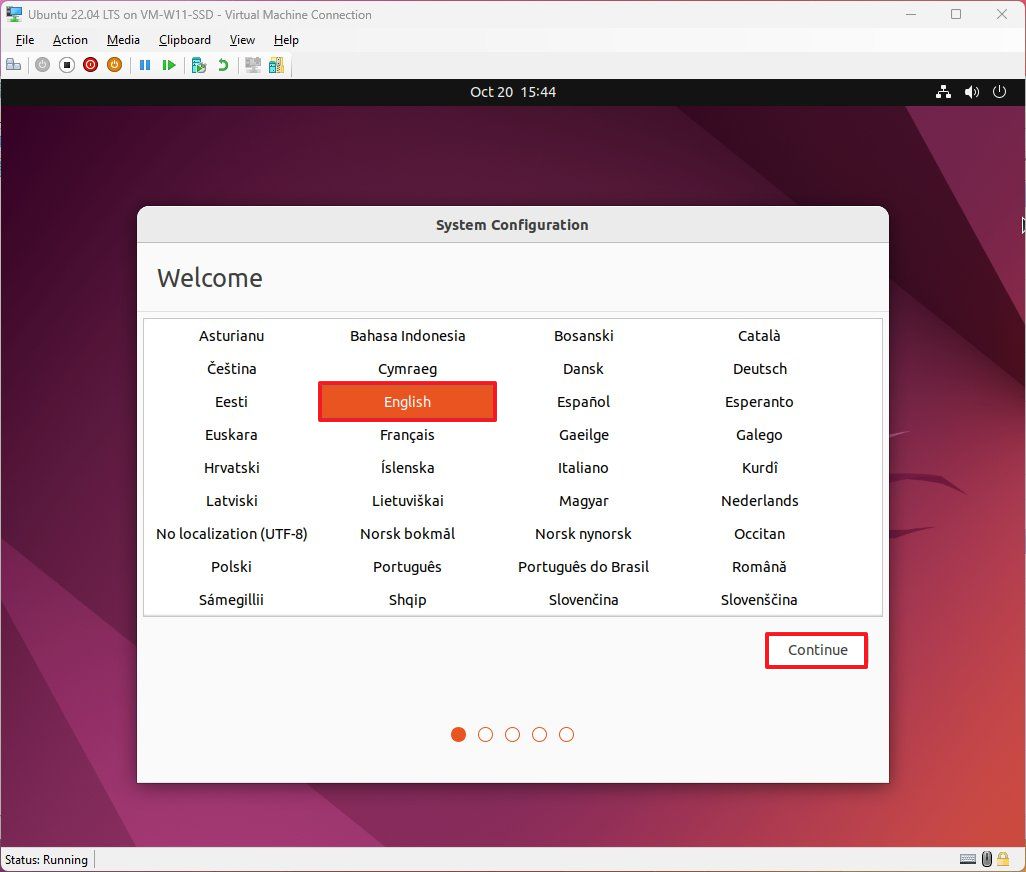
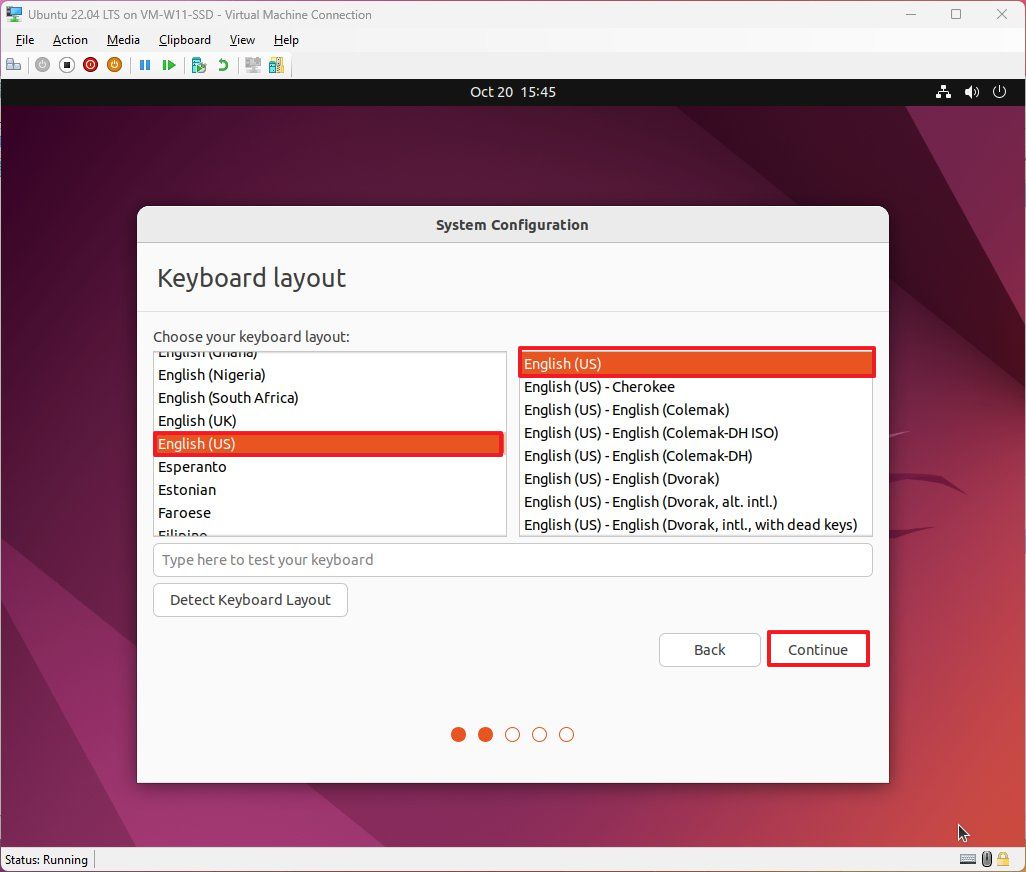
- Select the keyboard layout.
- Click the Continue button.
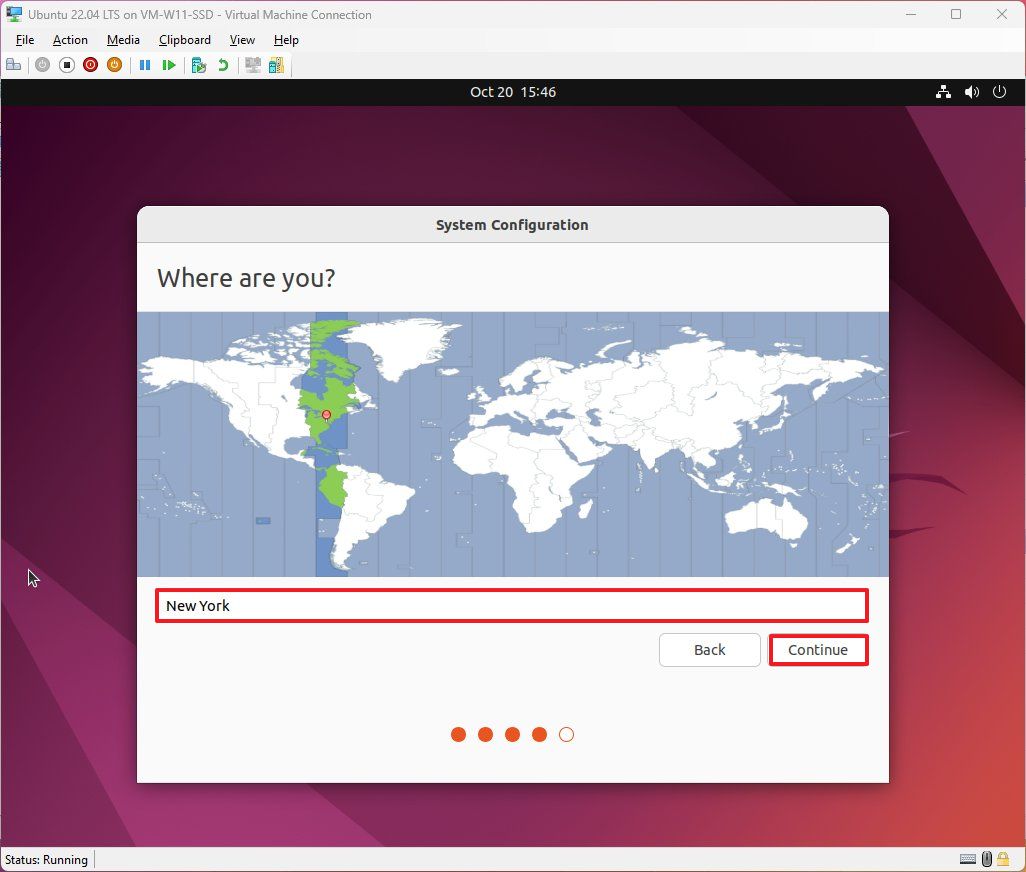
- Select your location.
- Click the Continue button.
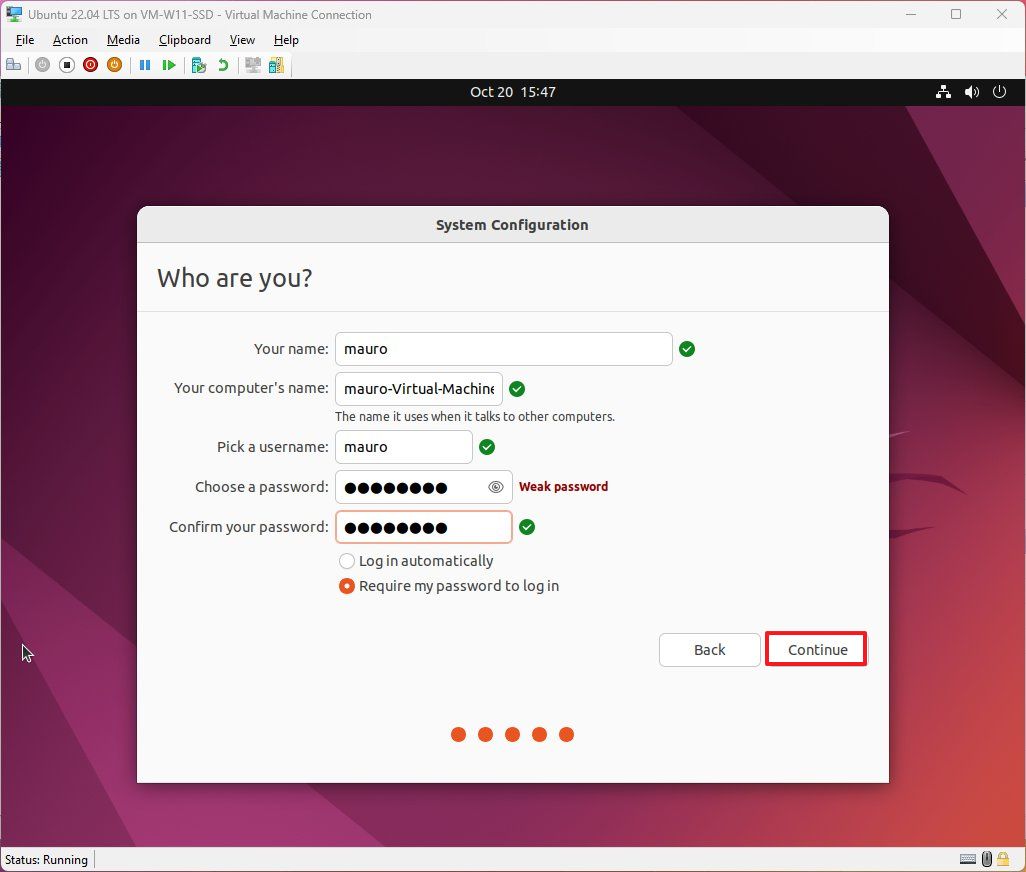
- Create a user account and password.
- Click the Continue button.
After you complete the steps, you can start using Ubuntu Linux alongside Windows 11 with a graphical desktop experience.
Create Linux virtual machine (manually)
Alternatively, you can create a virtual machine manually using the ISO file of your favorite Linux distribution.
To create a Linux Hyper-V VM on Windows 11, use these steps:
- Open Start.
- Search for Hyper-V and select the top result to open the app.
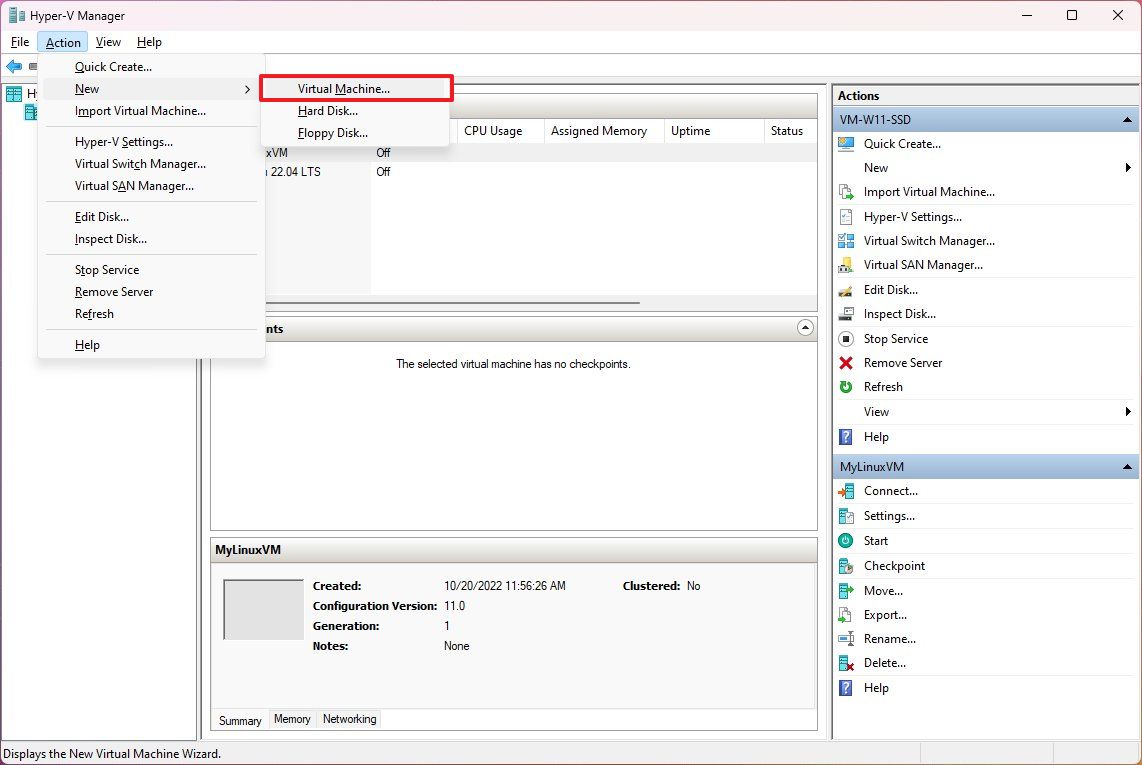
- Click on Actions from the top navigation, select New and choose the Virtual Machine option.
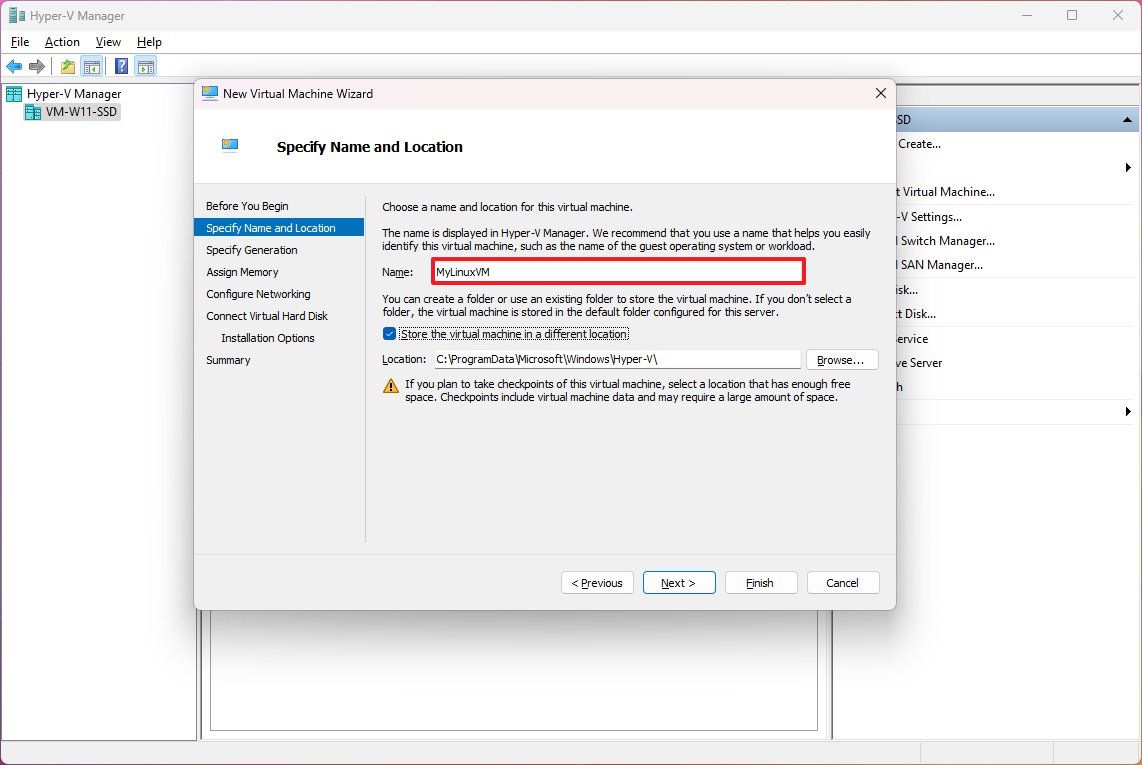
- Confirm a name for the machine.
- (Optional) Check the "Store the virtual machine in a different location" option and specify the location to store the Linux machine.
- Click the Next button.
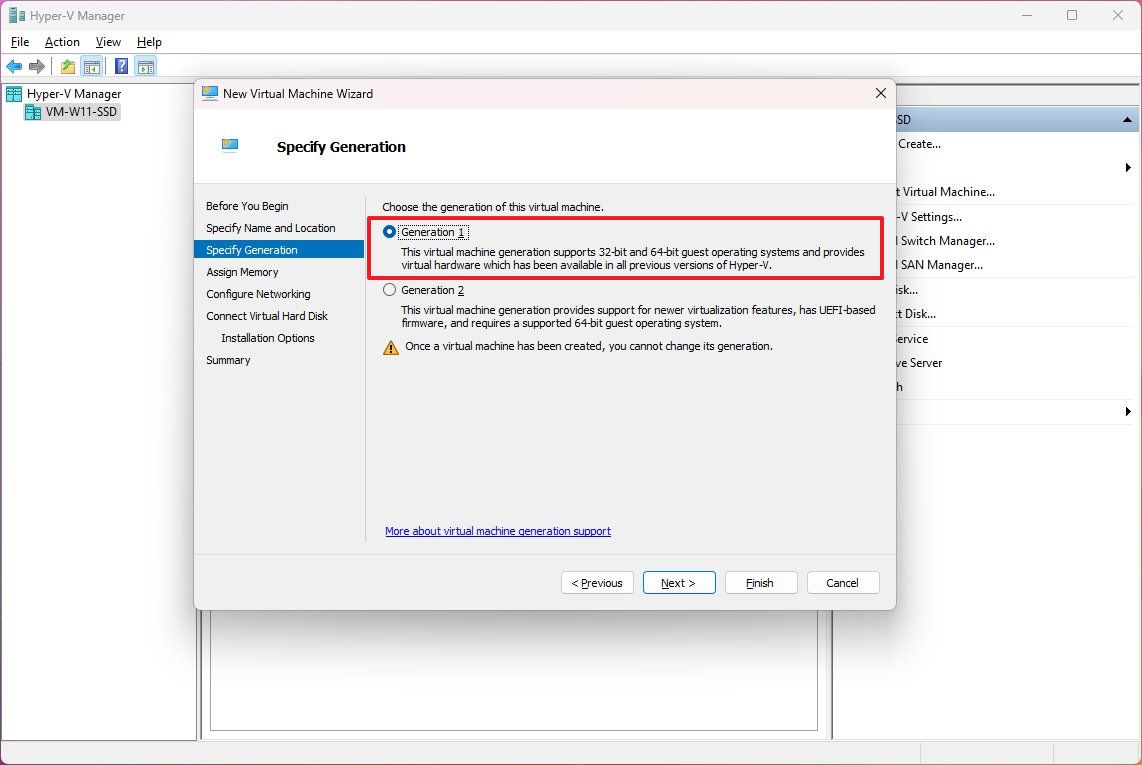
- Select the Generation 1 option.
- Quick note: This option will depend on the operating system you want to install. You can check this Microsoft documentation website to help you make a choice. Usually, the "Generation 1" option would be your best option when using Linux.
- Click the Next button.
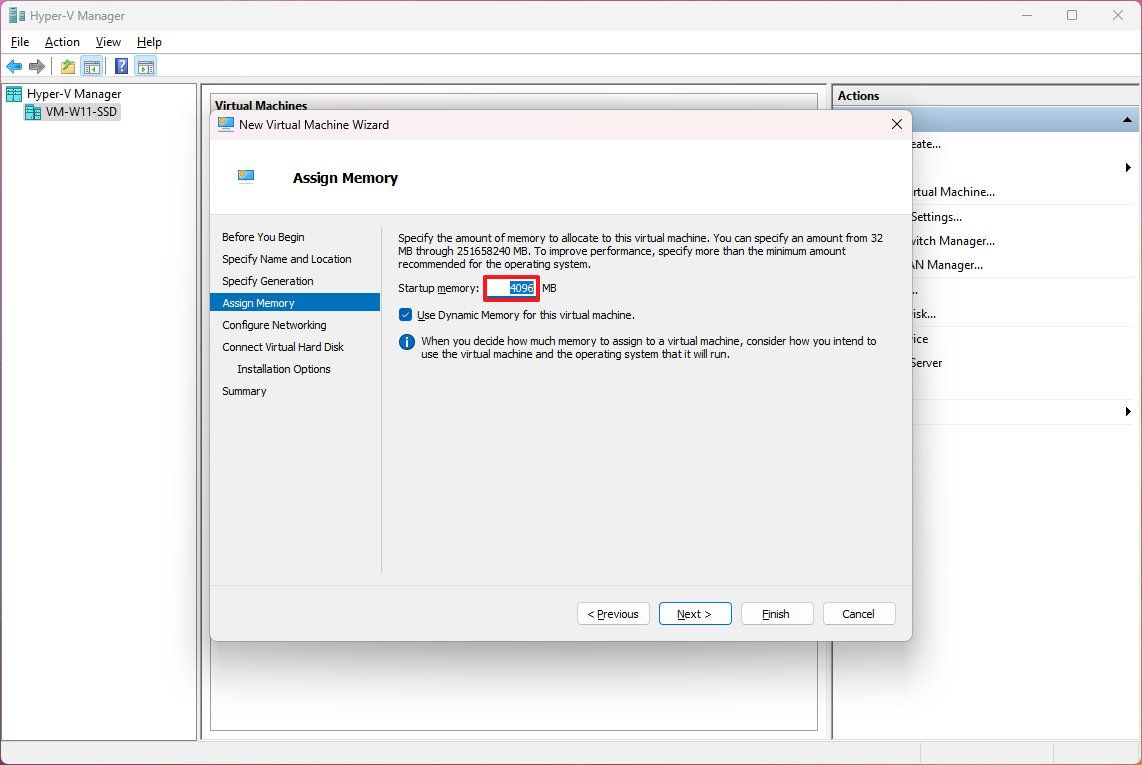
- Specify the amount of memory to reserve for the virtual machine.
- Check the "Use Dynamic Memory for this virtual machine" option.
- Click the Next button.
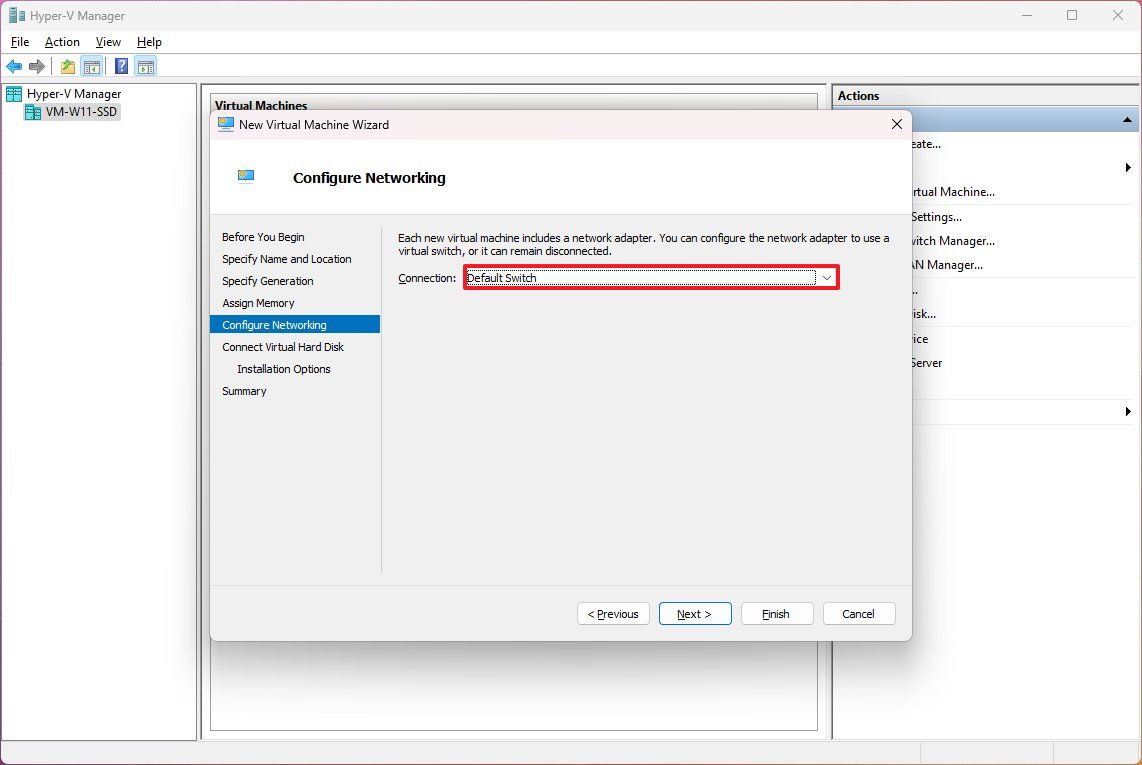
- Select the Default Switch for the "Connection" setting.
- Click the Next button.
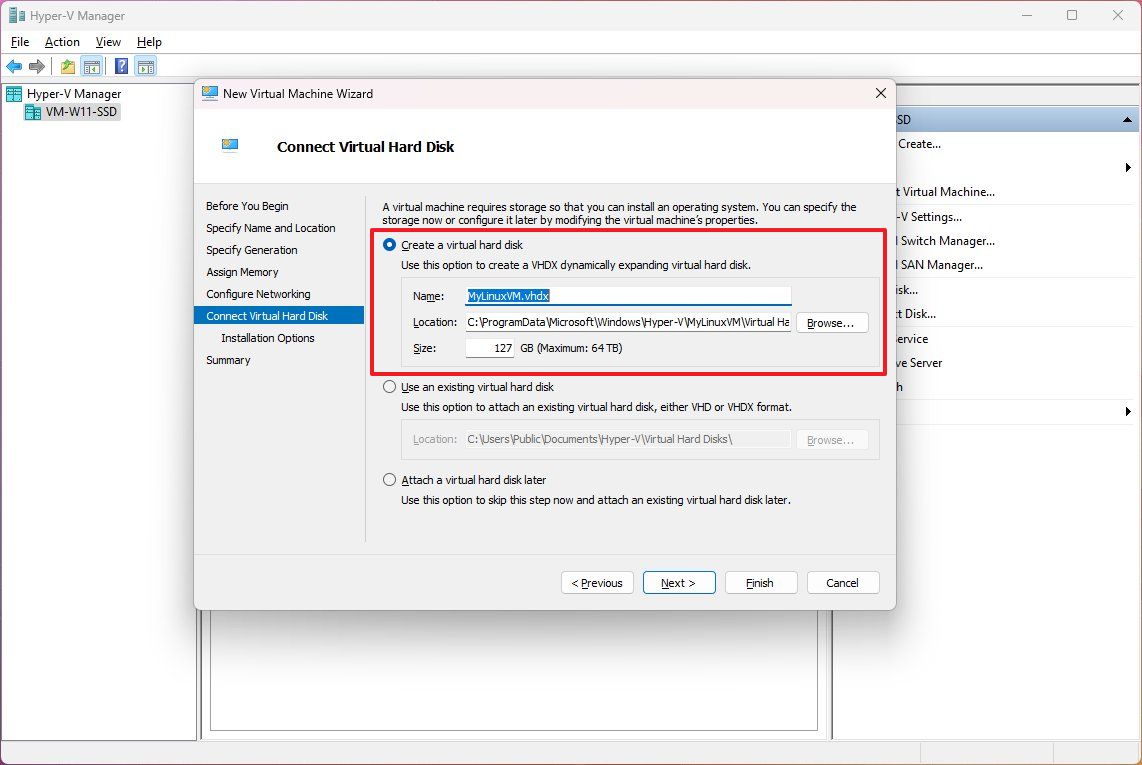
- Select the "Create a virtual hard disk" option.
- Specify a name for the virtual drive.
- Specify the size of the virtual drive to install the Linux distro.
- Click the Next button.
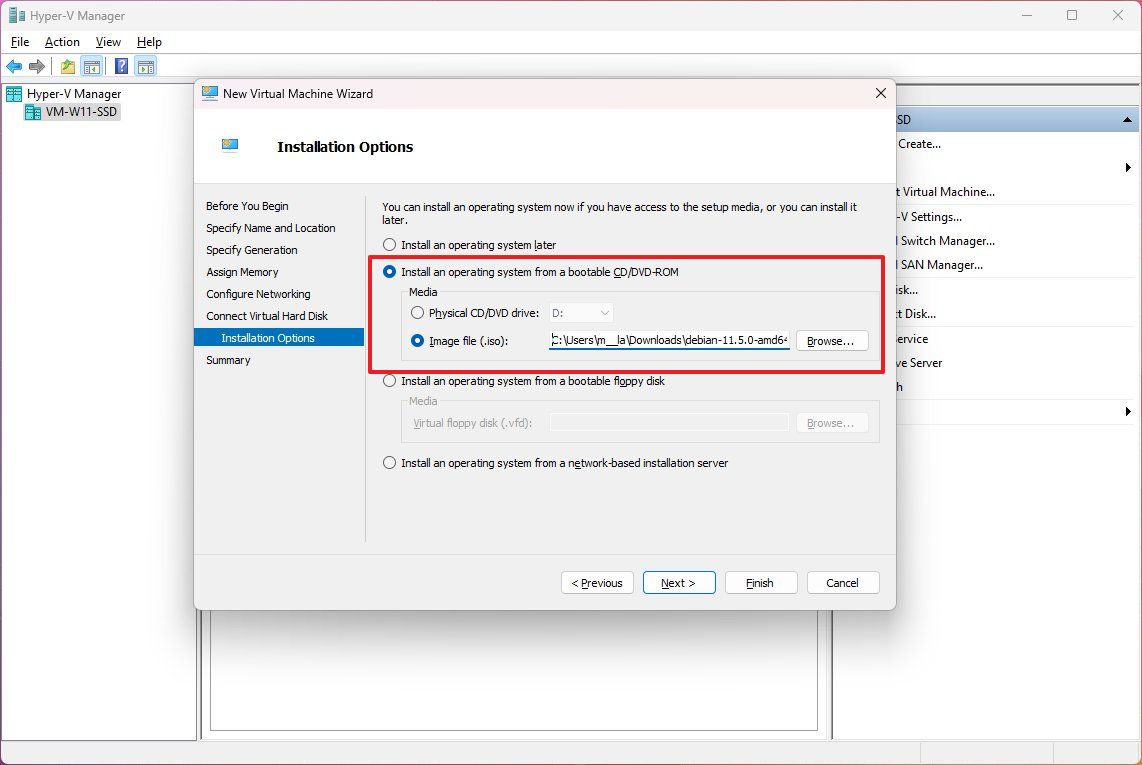
- Select the "Install an operating system from a bootable image file" option.
- Click the Browse button.
- Select the Linux distro ISO file.
- Click the Open button.
- Click the Next button.
- Click the Finish button.
- Select the virtual machine from Hyper-V Manager and click the Start button.
- Click the Connect button.
- Continue with the on-screen directions to install the Linux distro.
Once you complete the steps, the distribution of Linux will install on the virtual machine with a graphical or command experience, depending on the distro you installed.
Whether you choose to use the Windows Subsystem for Linux or Microsoft Hyper-V virtual machine, you can install and run as many distros as the hardware on your computer allows.
More resources
For more helpful articles, coverage, and answers to common questions about Windows 10 and Windows 11, visit the following resources:

Mauro Huculak has been a Windows How-To Expert contributor for WindowsCentral.com for nearly a decade and has over 22 years of combined experience in IT and technical writing. He holds various professional certifications from Microsoft, Cisco, VMware, and CompTIA and has been recognized as a Microsoft MVP for many years.
