How to restrict bandwidth for updates on Windows 11
Yes, you can control how much bandwidth Windows 11 uses for updates, and here's how.
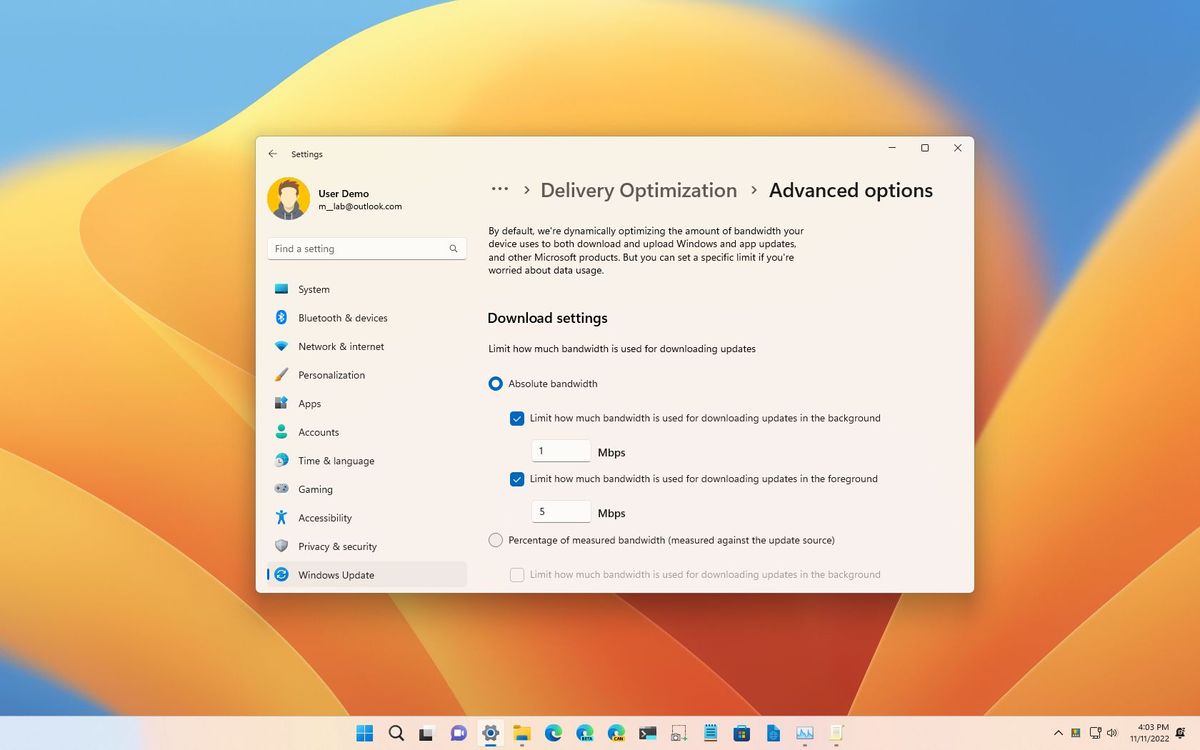
On Windows 11, the system can automatically control and optimize the bandwidth for downloads and uploads of updates, Microsoft Store apps, and other products to ensure they don't affect your online experience.
The caveat with the approach is that Windows 11 is unaware of any network activity outside the computer. As a result, other devices in the local network can notice networking speed degradation during update activities.
If you have multiple devices in the local network and an internet connection without adequate bandwidth, you can restrict how Windows 11 downloads updates and uploads part of updates to other devices locally and over the internet through the Settings app and the Group Policy Editor.
This guide will walk you through how to control the bandwidth that Windows 11 uses for downloads and uploads of updates.
How to limit bandwidth for updates from Settings
To limit the amount of bandwidth Windows 11 dedicates to downloading and uploading updates, use these steps:
- Open Settings.
- Click on Windows Update.
- Click the Advanced options page on the right side.
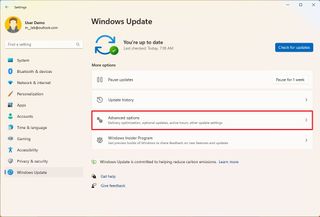
- Under the "Additional options" section, click the Deliver Optimization setting.
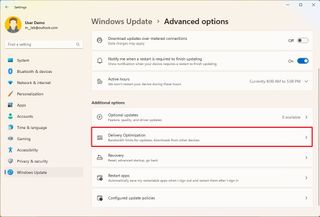
- (Optional) Turn on the "Allow downloads from other PCs" toggle switch.
- Select the "Devices on the internet and my local network" option.
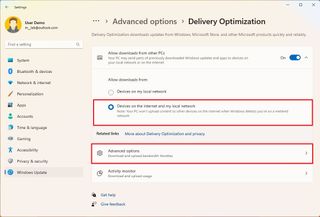
- Quick note: You must enable the options on steps 5 and 6 for the upload settings to work.
- Click the Advanced options setting.
- Under the "Download settings" section, select the Absolute bandwidth option.
- Quick tip: You can also select the "Percentage of measured bandwidth" to change the settings in percentage instead of megabits.
- Check the "Limit how much bandwidth is used for downloading updates" option.
- Use the slider to restrict the bandwidth in megabits per second (Mbps).
- Check the "Limit how much bandwidth is used for downloading updates in the foreground" option.
- Use the slider to restrict the bandwidth in megabits per second (Mbps).
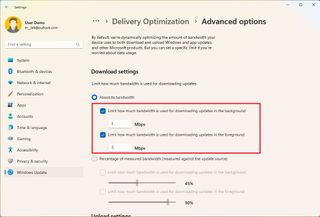
- Under the "Upload settings" section, check the "Limit how much bandwidth is used for uploading updates to other PCs on the Internet" option.
- Use the slider to restrict the bandwidth (in percentage) for uploads.
- Check the "Monthly upload limit" option.
- Use the slider to restrict the upload bandwidth allowance per month.
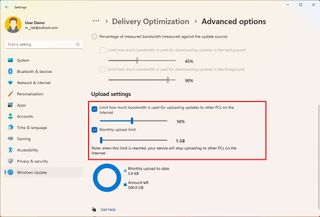
Once you complete the steps, the system will restrict the maximum amount of data transmitted over the internet in a given amount of time to download and upload updates.
How to limit bandwidth for updates from Group Policy
If you have Windows 11 Pro, Enterprise, or Education, you can also use the Group Policy Editor to limit the bandwidth for updates.
Get the Windows Central Newsletter
All the latest news, reviews, and guides for Windows and Xbox diehards.
To limit the bandwidth for system updates through Group Policy, use these steps:
- Open Start.
- Search for gpedit and click the top result to open the Local Group Policy Editor.
- Browse the following path: Computer Configuration > Administrative Templates > Windows Components > Delivery Optimization
- Double-click the "Maximum Background Download Bandwidth (in KB/s)" policy.
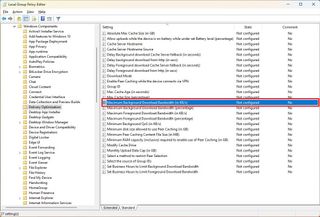
- Quick tip: You can always use the "percentage" policy variant.
- Check the Enabled option.
- Under the "Options" section, specify the bandwidth in kilobytes per second (KB/s) to allocate for update downloads.
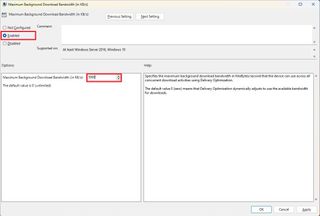
- Click the Apply button.
- Click the OK button.
- Double-click the "Maximum Foreground Download Bandwidth (in KB/s)" policy.
- Check the Enabled option.
- Under the "Options" section, specify the bandwidth in kilobytes per second (KB/s) to allocate for update foreground downloads.
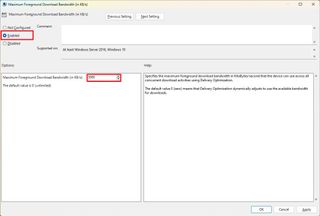
- Click the Apply button.
- Click the OK button.
- Double-click the "Monthly Upload Data Cap (in GB)" policy.
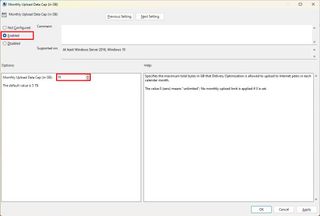
- Quick note: It appears that the system no longer includes the option to limit the upload bandwidth.
- Select the Enabled option.
- Under the "Options" section, specify the number of gigabytes to allow per month.
- Click the Apply button.
- Click the OK button.
After completing the steps, Windows 11 will download and upload updates at the bandwidth specified in the policies.
You can always revert the changes following the same instructions, but on steps 6, 9, and 15, select the "Not configured" option.
How to view download and upload statistics on Windows 11
To see the download and upload statistics for updates on Windows 11, use these steps:
- Open Settings.
- Click on Windows Update.
- Click the Advanced options page on the right side.

- Under the "Additional options" section, click the Deliver Optimization setting.

- Click the Activity monitor setting.
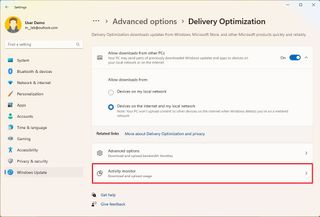
- Review the statistics.
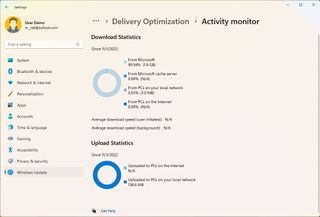
Once you complete the steps, the system will give you an overview of the uploads and downloads for updates, including the percentage coming from Microsoft, Microsoft cache servers, computers in the local network and the internet, and upload to the internet and local network for other devices.
More resources
For more helpful articles, coverage, and answers to common questions about Windows 10 and Windows 11, visit the following resources:
Mauro Huculak has been a Windows How-To Expert contributor for WindowsCentral.com for nearly a decade and has over 15 years of experience writing comprehensive guides. He also has an IT background and has achieved different professional certifications from Microsoft, Cisco, VMware, and CompTIA. He has been recognized as a Microsoft MVP for many years.
