How to restrict access to Registry on Windows 11
Yes, you can block access to the Registry, and in this guide, you'll learn how on Windows 11.
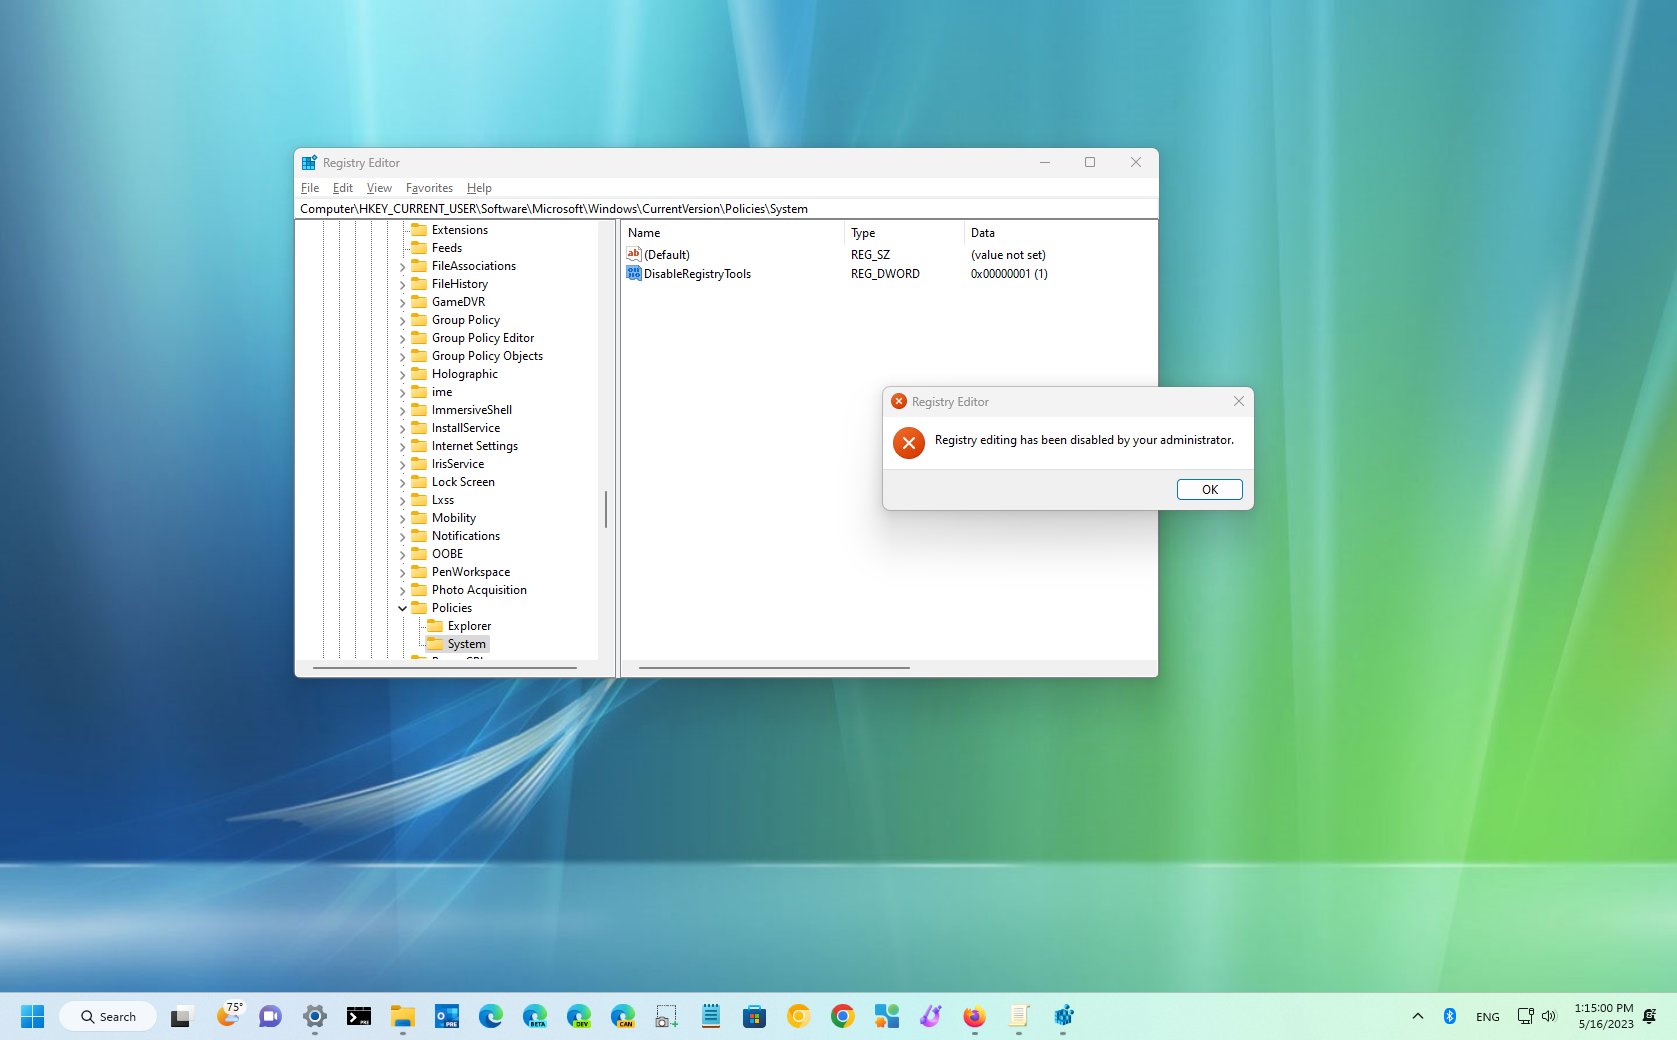
On Windows 11, it's possible to disable access to the Registry, and in this guide, you will learn two ways to complete this task. The Registry is a hierarchical database that stores configuration settings for the operating system, hardware, and installed applications, and since the slightest mistake can cause irreversible damage, it's never a good idea to make changes.
Although this is a known fact for most technical users, it's not something everyone knows. As a result, on Windows 11, if you want to prevent users from making unwanted system changes, you can restrict access to the Registry in at least two ways using the Local Group Policy Editor and the Registry.
In this how-to guide, you will learn the steps to block access to the Registry on Windows 11.
Warning: This is a friendly reminder that editing the Registry is risky and can cause irreversible damage to your installation if you don't do it correctly. Before proceeding, it's recommended to make a full backup of your PC.
How to disable Registry access from Group Policy
On Windows 11, the best way to stop users from launching and modifying the Registry is through the Local Group Policy Editor. However, this tool is only available for Pro, Enterprise, and Education.
To block access to the Registry on Windows 11, use these steps:
- Open Start.
- Search for gpedit and click the top result to open the app.
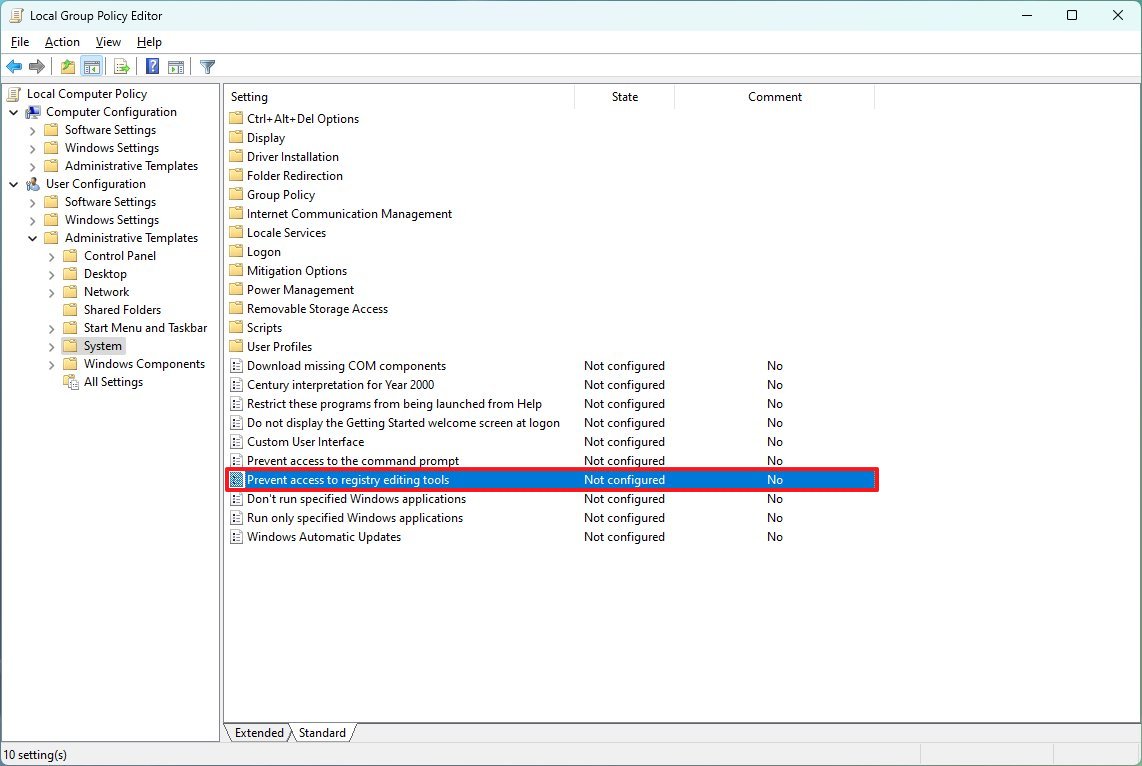
- Open the following path: User Configuration > Administrative Templates > System
- Double-click the "Prevent access to registry editing tools" policy from the right side.
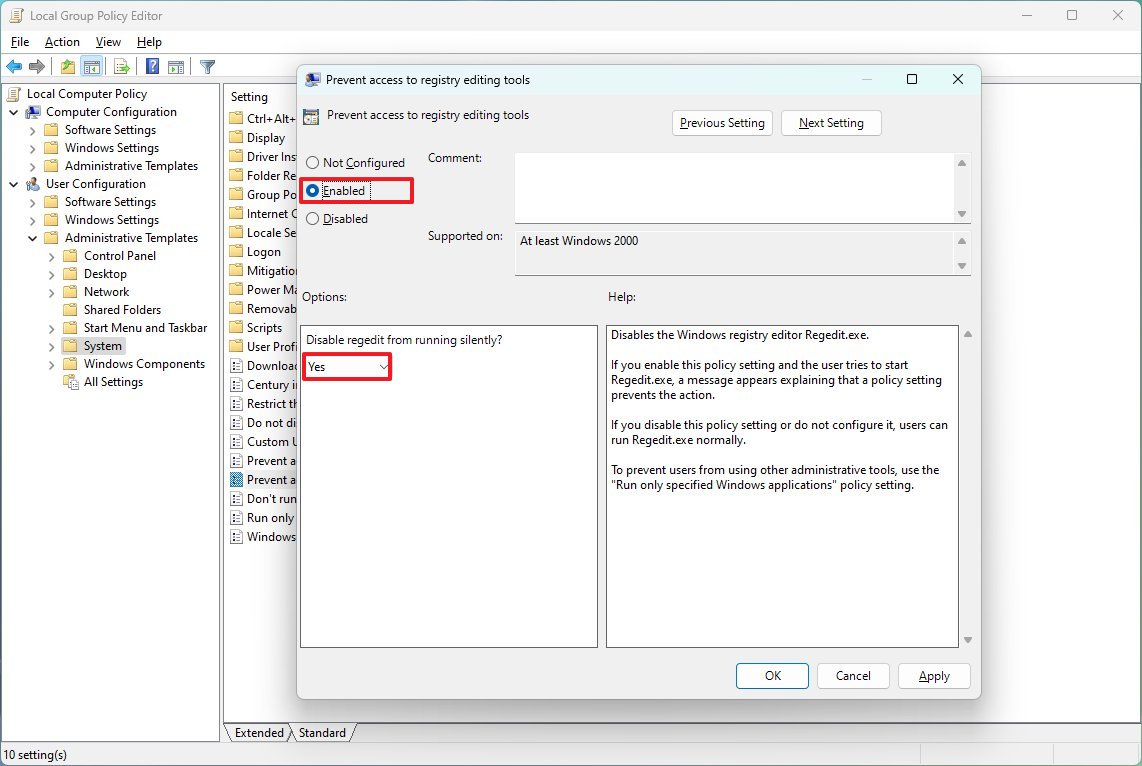
- Choose the Enabled option.
- (Optional) Under the "Options" section, select the "Yes" option to also prevent users from editing the database with the "regedit /s" command. If you choose, the "No" option won't have any access to the Registry.
- Click the Apply button.
- Click the OK button.
Once you complete the steps, the configuration will apply to every user with an account on Windows 11.
All the latest news, reviews, and guides for Windows and Xbox diehards.
Re-enable the Registry
If you change your mind or no longer need the configuration, you can easily allow access to the Registry with these steps:
- Open Start.
- Search for gpedit and click the top result to open the app.
- Open the following path: User Configuration > Administrative Templates > System
- Double-click the "Prevent access to registry editing tools" policy from the right side.
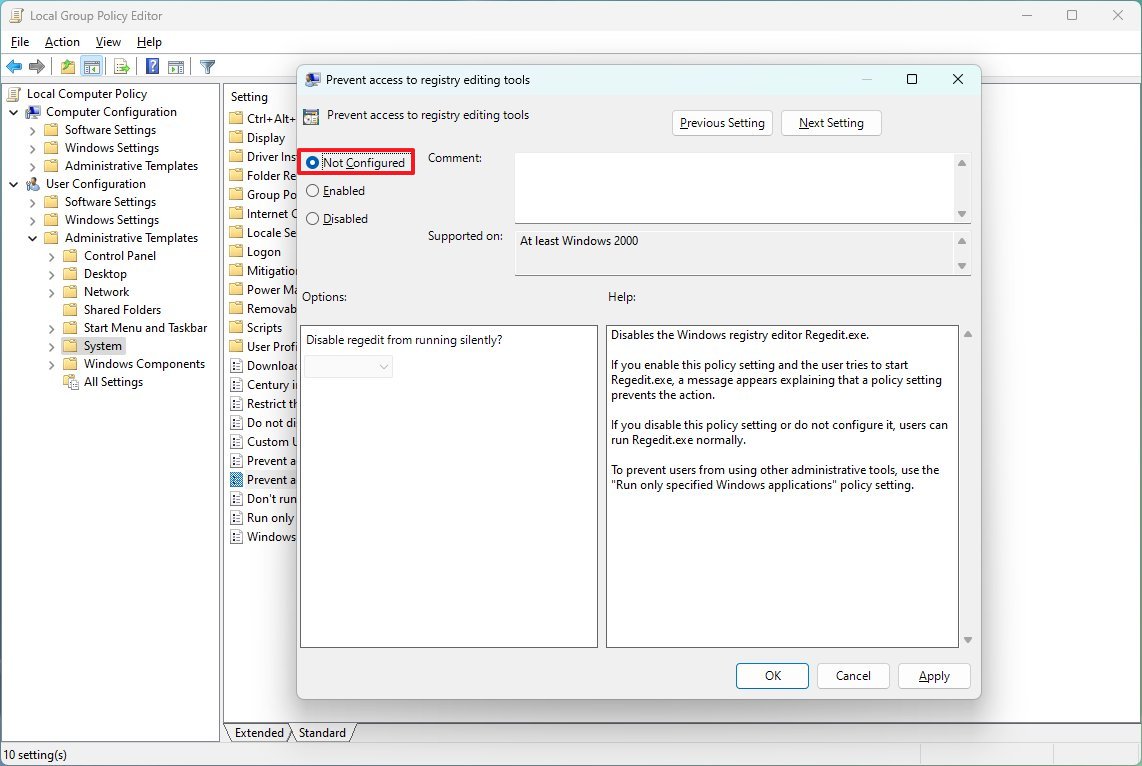
- Choose the Not configured option.
- Click the Apply button.
- Click the OK button.
After you complete the steps, users will once again be able to open and change settings in the Registry.
How to disable Registry access from Registry Editor
On Windows 11 Home, it's still possible to restrict access to the Registry. However, ironically enough, you must use the Registry Editor because you won't have access to the Local Group Policy.
If you have to use this method, consider that you must change the settings on every account if you want to restrict access.
To disable Registry access through the Editor app, use these steps:
- Open Start.
- Search for regedit, right-click the top result, and select the Run as administrator option.
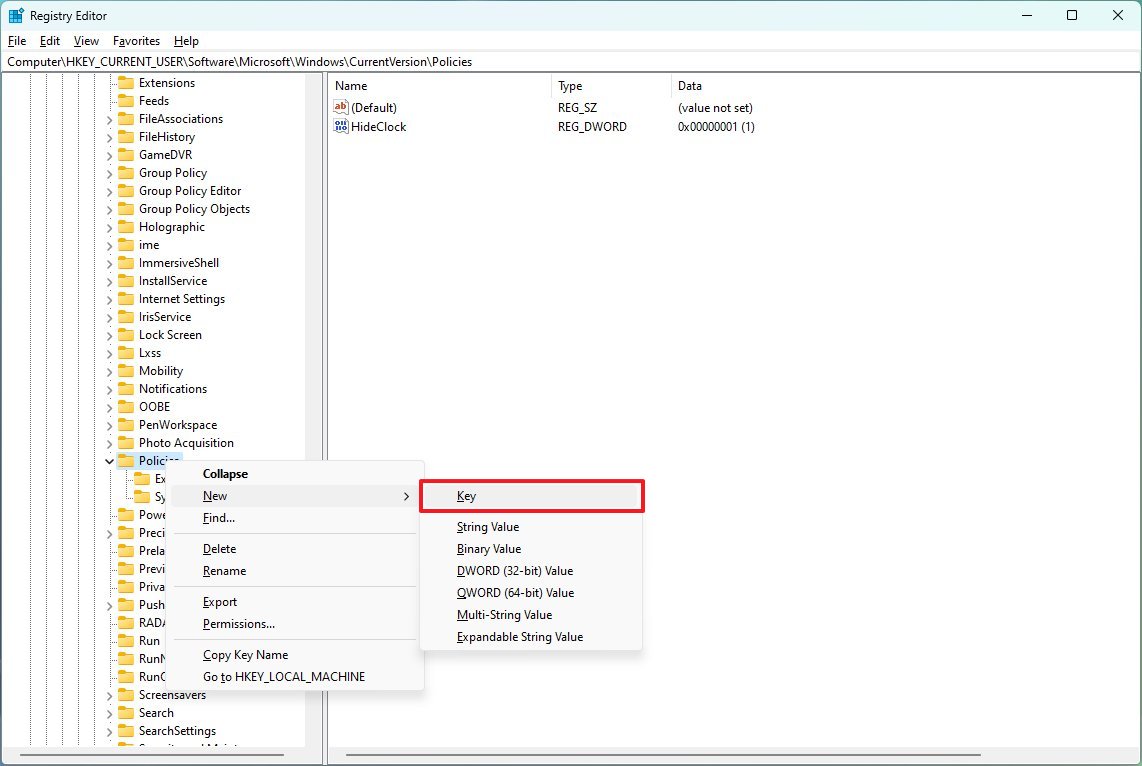
- Open the following path: HKEY_CURRENT_USER\SOFTWARE\Microsoft\Windows\CurrentVersion\Policies
- Right-click the Policies (folder) key, select the New submenu, and click on Key.
- Name the key System and press Enter.
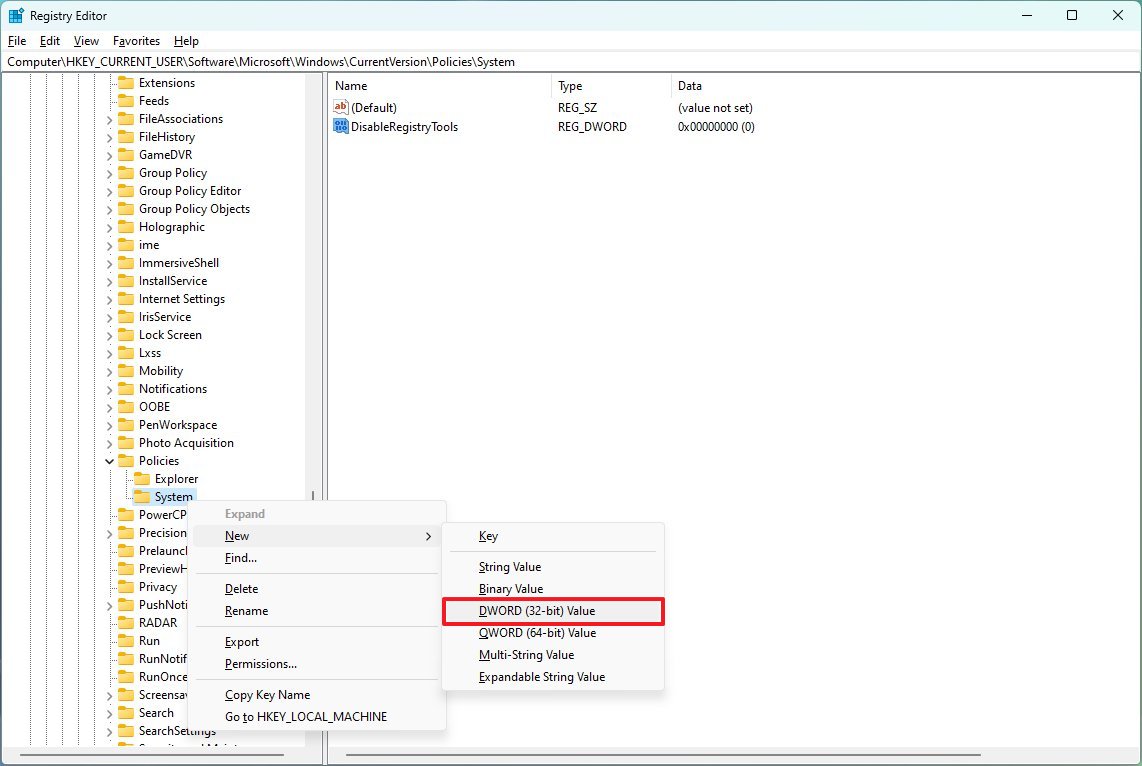
- Right-click the newly created key, select the New menu, and click on DWORD (32-bit) Value.
- Name the key DisableRegistryTools and press Enter.
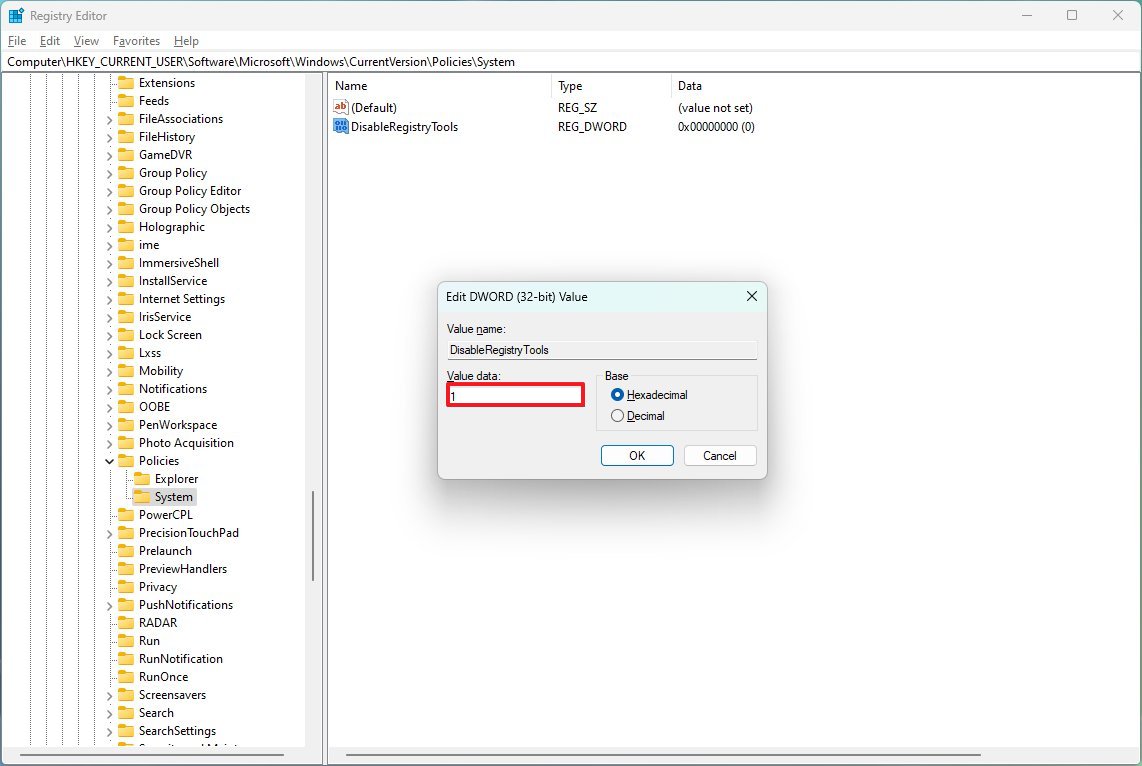
- Double-click the newly created DWORD and change its value from "0" to "1" to block access to the Registry.
- Quick note: Similar to the Group Policy option, you could use the "2" option to prevent users from accessing the Registry and block running commands silently. However, it's not a good approach since it makes it very challenging to undo the changes.
Once you complete the steps, the new setting will apply immediately, and when trying to re-launch the Registry, you will longer have access to it.
Re-enable the Registry
If you have to allow access to the Registry again, you will have to create and import a ".reg" file since you won't be able to launch the database editor.
To remove the Registry block on Windows 11, use these steps:
- Open Start.
- Search for Notepad and click the top result to open the app.
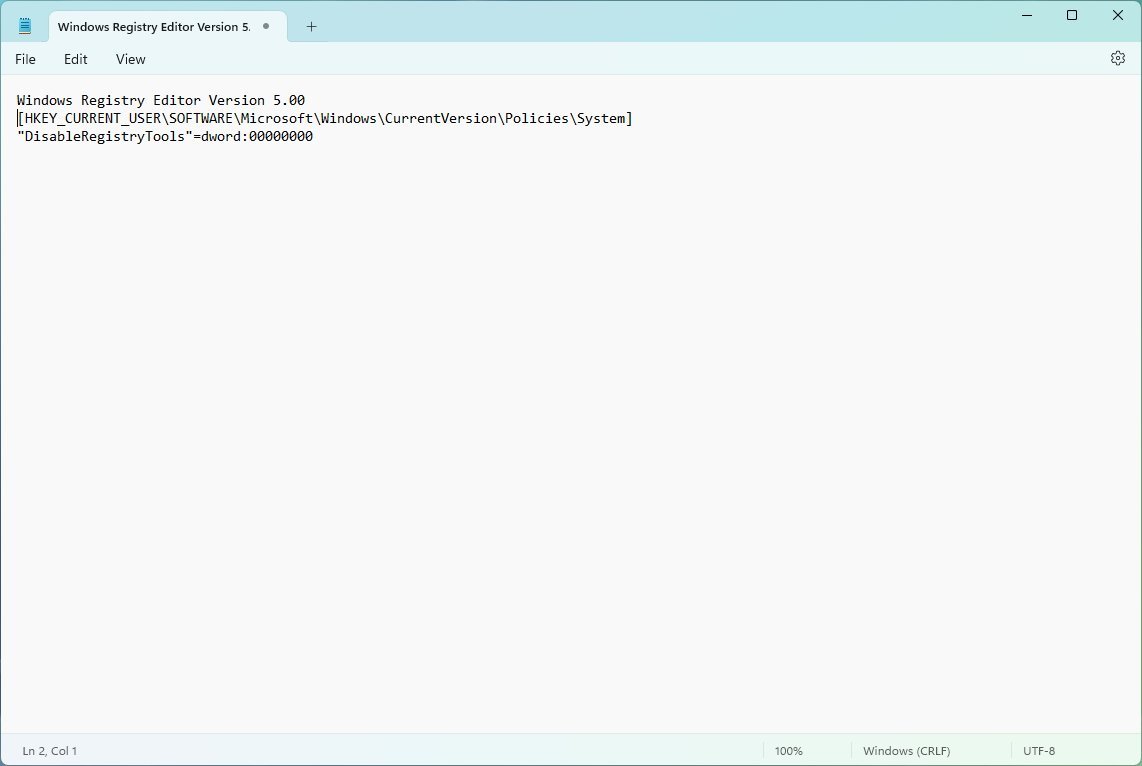
- Copy and paste the following content:
Windows Registry Editor Version 5.00 [HKEY_CURRENT_USER\SOFTWARE\Microsoft\Windows\CurrentVersion\Policies\System] "DisableRegistryTools"=dword:00000000
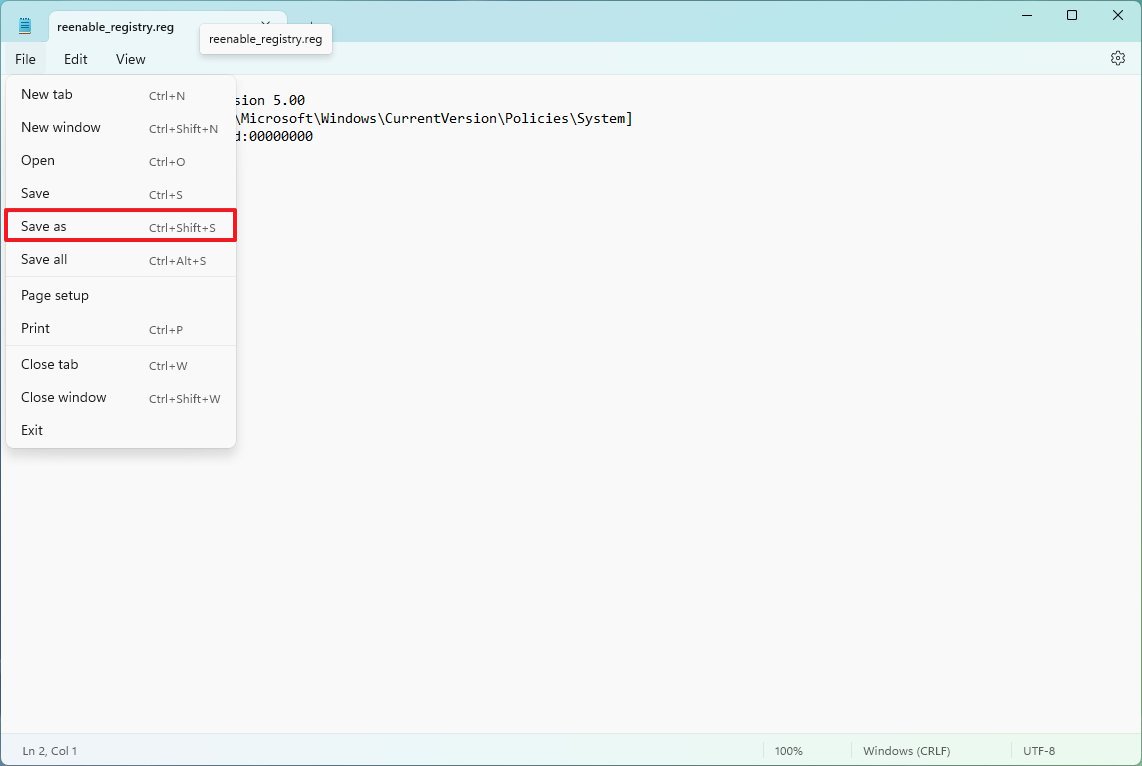
- Open the File menu and choose the Save as option.
- Choose the destination folder.
- Confirm a descriptive name for the file – for example, reenable_registry.reg.
- Click the Save button.
- Open Start.
- Search for Command Prompt, right-click the result, and select Run as administrator.
- Type the following command to switch to the ".reg" location and press Enter: cd C:\PATH\TO\REG-FILE\
In the command, update the path and file with your configuration.
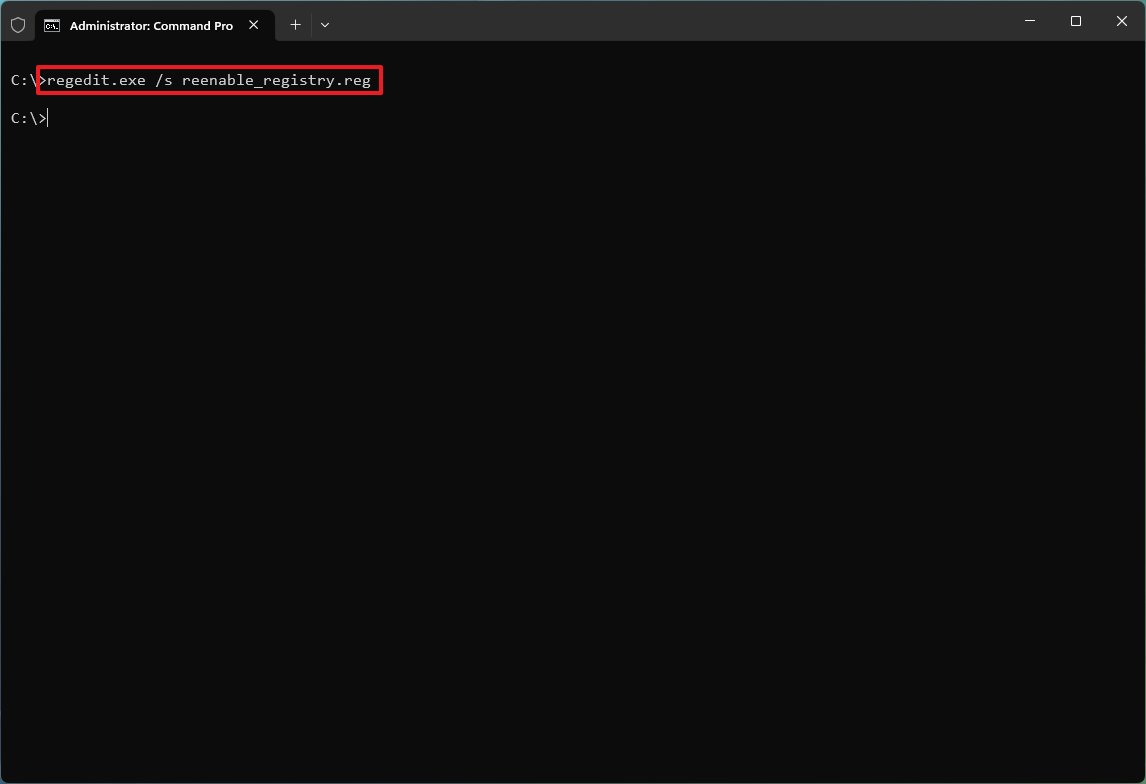
- Type the following command to re-enable the Registry and press Enter: regedit.exe /s reenable_registry.reg
After you complete the steps, the file will merge the settings into the database to remove the access restrictions to the Registry on Windows 11.
More resources
For more helpful articles, coverage, and answers to common questions about Windows 10 and Windows 11, visit the following resources:
- Windows 11 on Windows Central — All you need to know
- Windows 10 on Windows Central — All you need to know

Mauro Huculak has been a Windows How-To Expert contributor for WindowsCentral.com for nearly a decade and has over 22 years of combined experience in IT and technical writing. He holds various professional certifications from Microsoft, Cisco, VMware, and CompTIA and has been recognized as a Microsoft MVP for many years.
