How to fix CrowdStrike Blue Screen error on Windows 11
If your PC is getting BSoD error, you're not the only one, but here's a workaround to mitigate the problem.
If you have a computer running Windows 11 (or 10) connected to an organization using the Falcon Sensor app from CrowdStrike and it's experiencing a Blue Screen of Death (BSoD) error, you're not the only one. In this guide, I will explain the easy workaround to resolve this issue.
On July 19, 2024, Windows users worldwide experienced perhaps the most historic network outage ever seen. Computers suddenly started to crash with a Blue Screen of Death (BSoD) error, affecting airlines, banks, emergency systems, and TV news channels. However, this time around, it wasn't Microsoft's fault. Instead, it was a bug in a driver update that the cybersecurity company CrowdStrike pushed out to Windows.
The cybersecurity company quickly acknowledged the problem, solved the issue, and quickly started to work with customers to implement a solution. However, it's still unclear how long it will take for every affected device to receive the fix. Still, if your computer is showing a BSoD due to the CrowdStrike update, there's an official workaround that you can apply to a computer that only involves deleting a few driver files from the system.
In this how-to guide, I will explain how to quickly fix the CrowdStrike bug problem on Windows 11 (and 10). It's important to note that devices still running Windows 7 or 2008 R2 and computers running macOS or Linux were unaffected.
Important: If the computer uses BitLocker encryption, you may need to enter the recovery key to proceed with the startup process.
Fix Blue Screen of Death due to CrowdStrike update bug
To resolve the Blue Screen of Death error, restart the computer to allow the system to download the fix, but if the error persists, use these steps:
- Power on the PC.
- As soon as the Windows logo appears, press and hold the power button to interrupt the boot sequence.
- Repeat steps 1 and 2 two more times.
- Click the Advanced Startup option
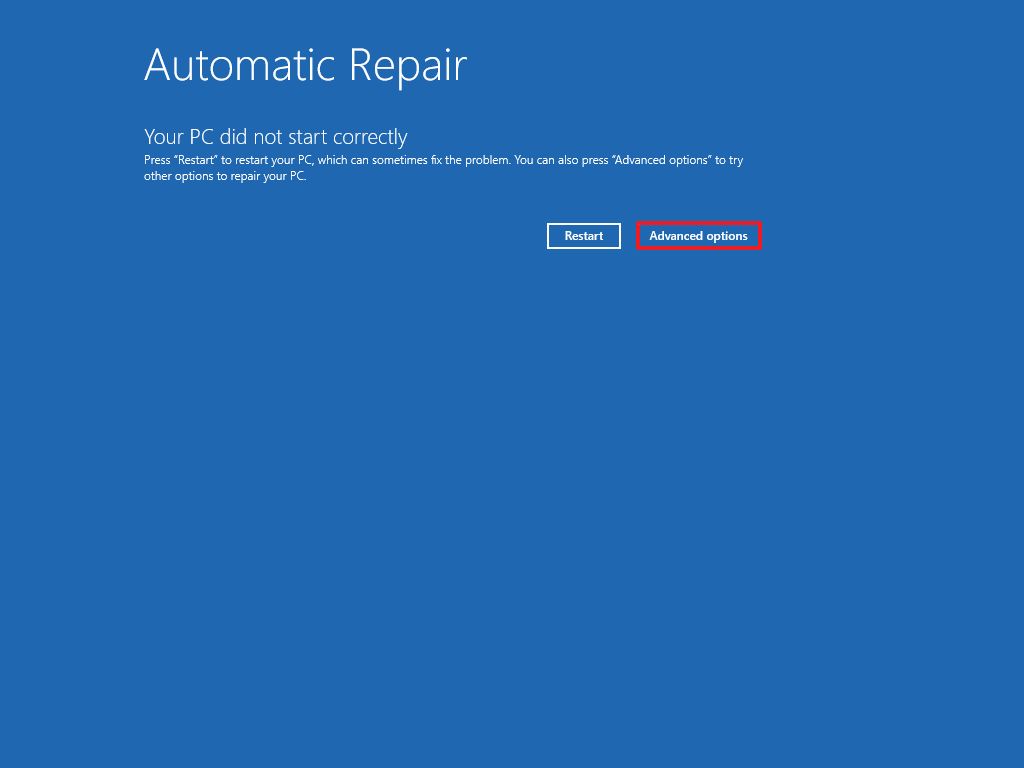
- Click the Troubleshoot option.
- Click on Advanced options.
- Click the Startup Settings option.
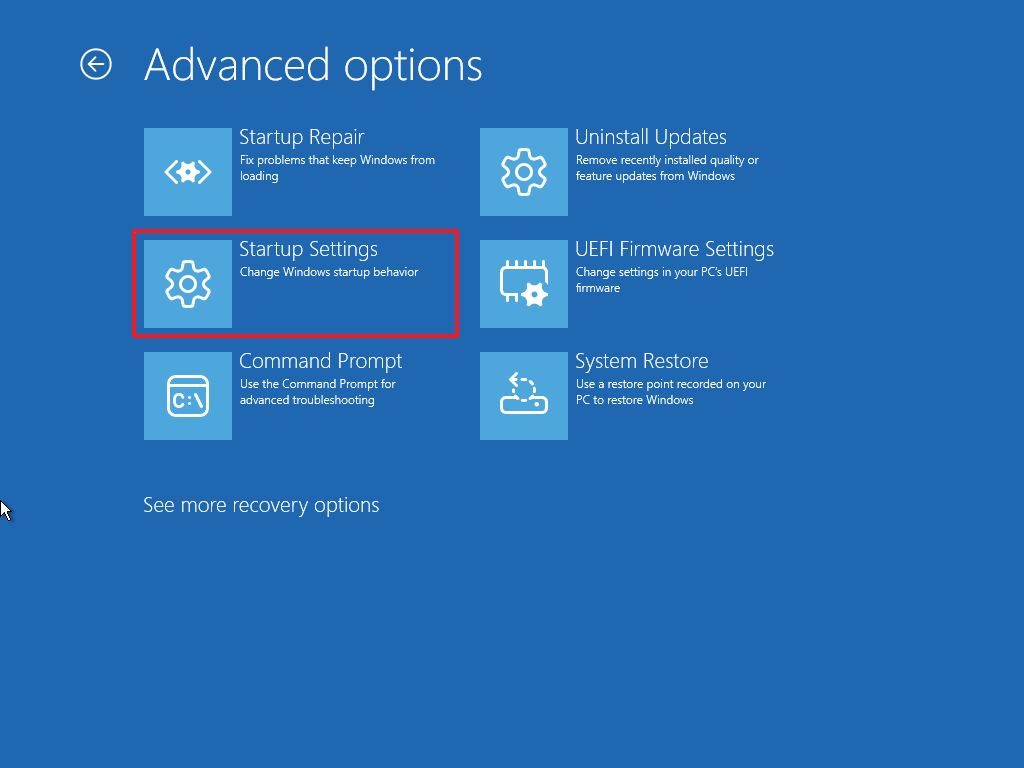
- Quick tip: If you still have access to the desktop, you can access the Windows Recovery Environment (WinRE) through Settings > System > Recovery and click the "Restart Now" button from the "Advanced startup" setting, and then continue with step 5.
- Click the Restart button.
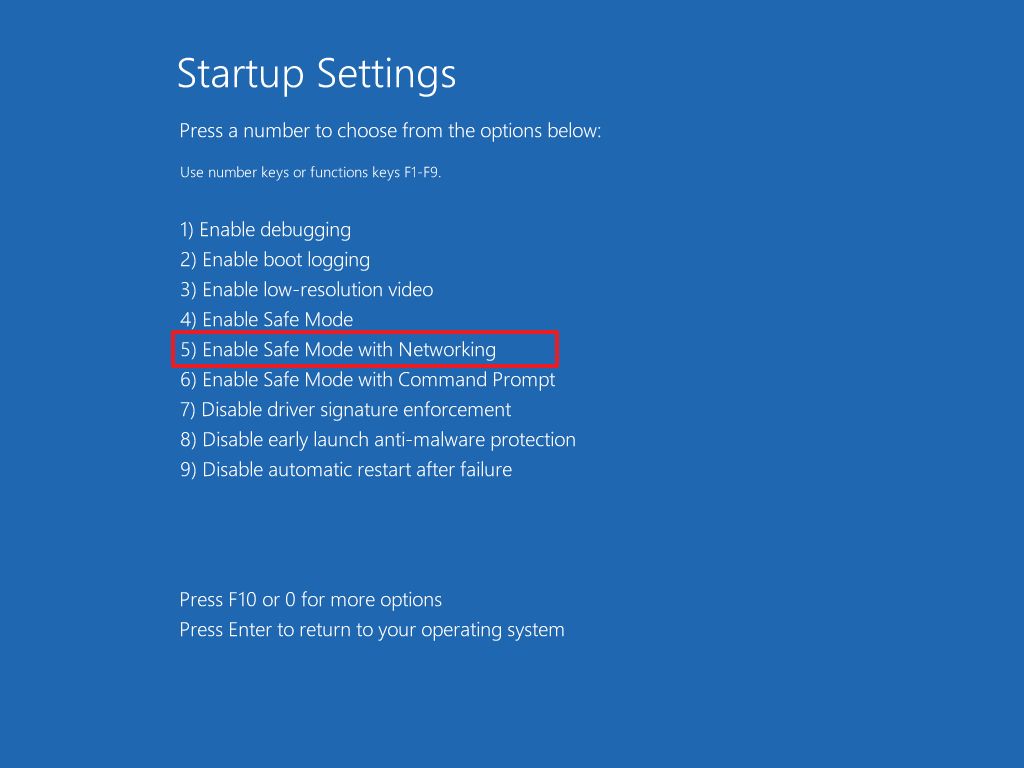
- After your computer reboots, press the F5 (or 5) key to select the "Enable Safe Mode with networking" option.
- Sign in to your Windows 11 account.
- Open Start.
- Search for File Explorer and click the top result to open the app.
- Click on This PC.
- Double-click to open the "C" drive from the right side.
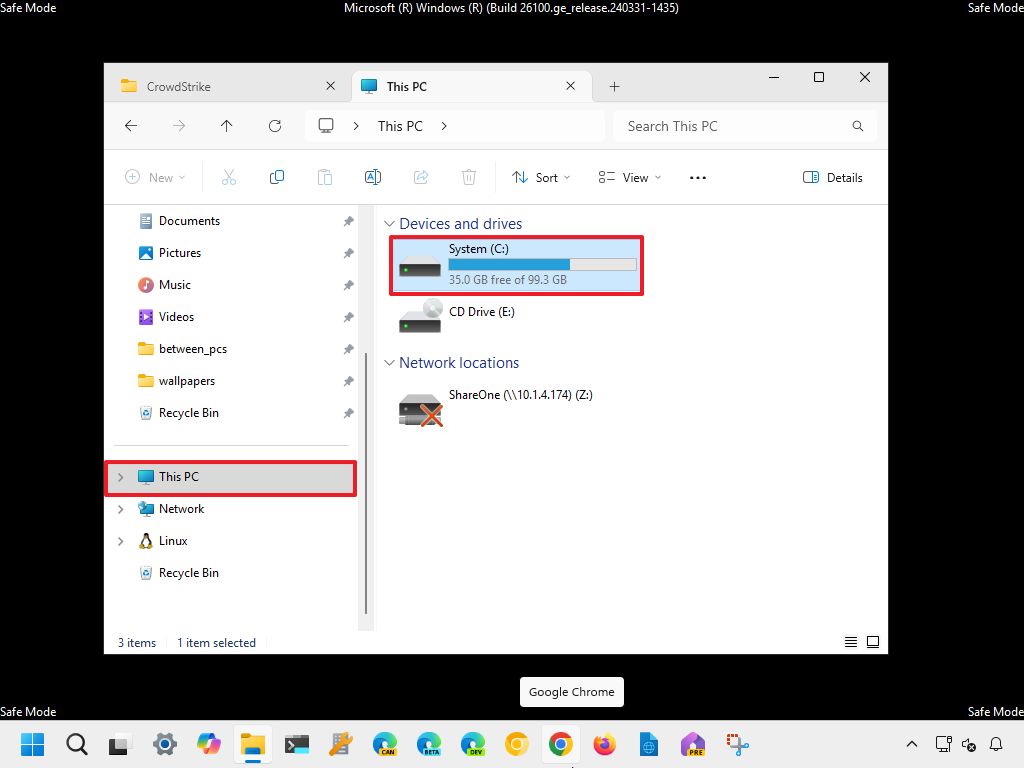
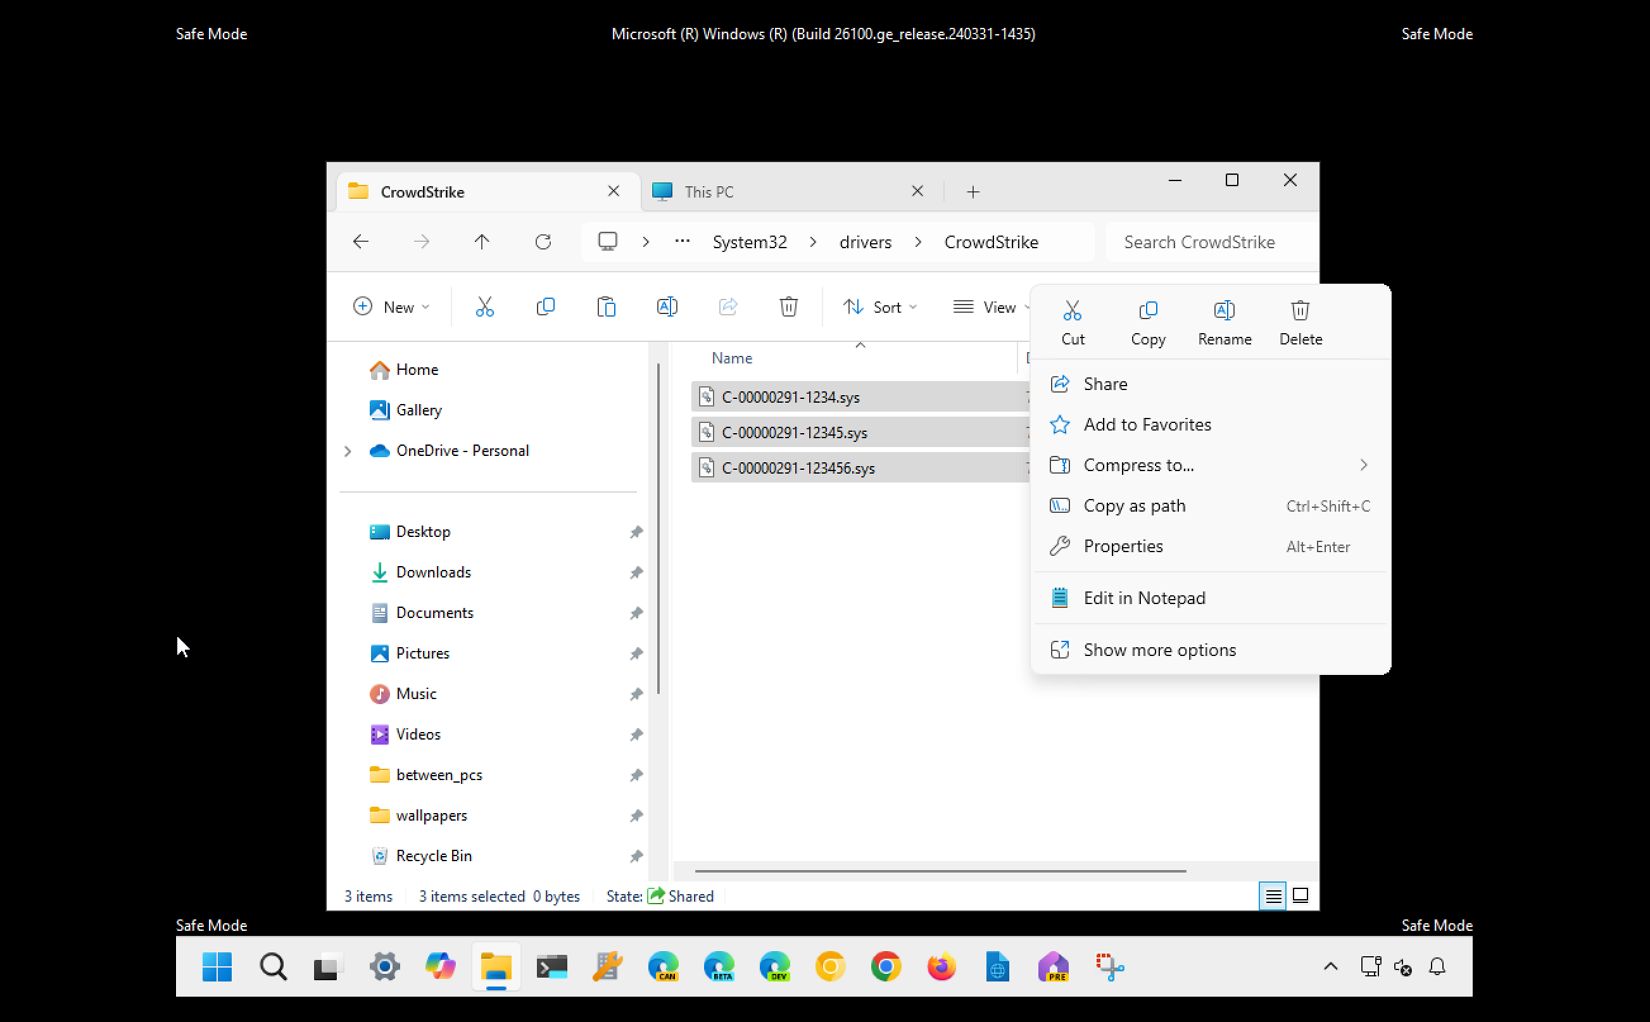
- Open the "System32" folder, go to the "drivers" folder, and access the "CrowdStricke" folder.
- Right-click and choose the Delete option for each of the files.
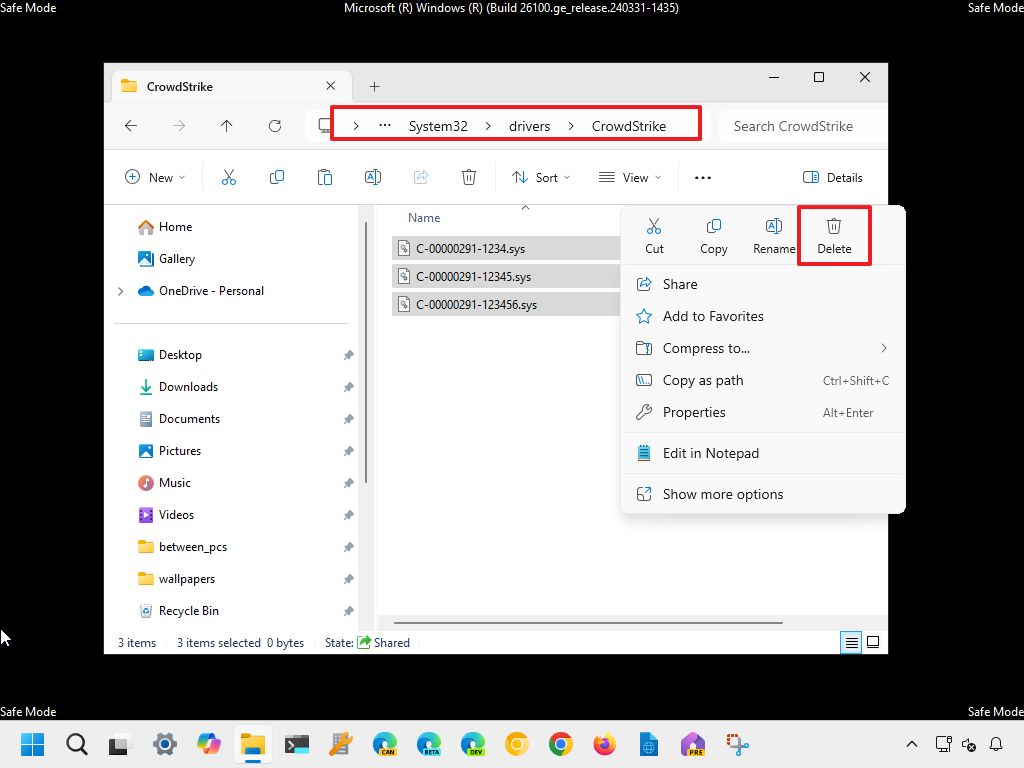
- Quick note: The above screenshot is a mockup to help you delete the files. The file structure in your computer's "CrowdStrike" folder may look slightly different.
- Restart the computer.
Once you complete the steps, the operating system should boot properly, and now, the Blue Screen of Death should be resolved.
Get the Windows Central Newsletter
All the latest news, reviews, and guides for Windows and Xbox diehards.
More resources
For more helpful articles, coverage, and answers to common questions about Windows 10 and Windows 11, visit the following resources:
Mauro Huculak has been a Windows How-To Expert contributor for WindowsCentral.com for nearly a decade and has over 15 years of experience writing comprehensive guides. He also has an IT background and has achieved different professional certifications from Microsoft, Cisco, VMware, and CompTIA. He has been recognized as a Microsoft MVP for many years.

