How to protect folder with password on Windows 11
Do you want to protect folders and files with a password? Here's how on Windows 11.
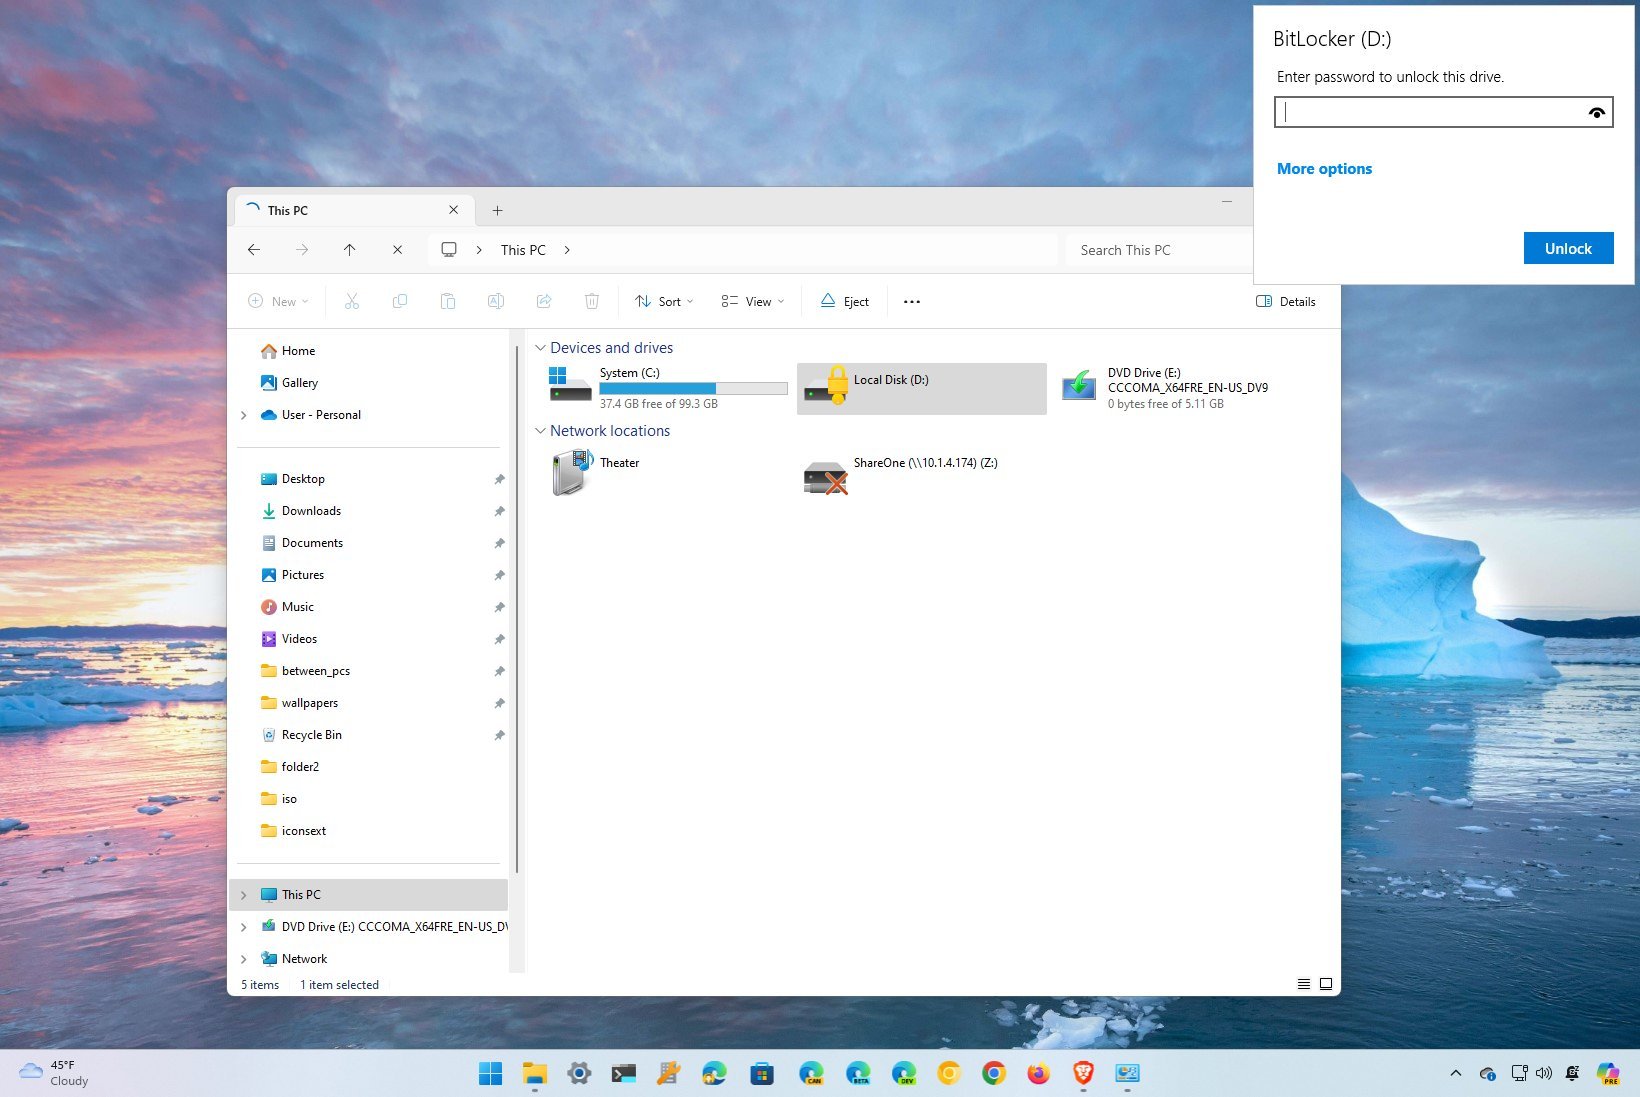
On Windows 11, you won't find a feature to add a password to a folder to protect your files because your account already uses a password and encryption, and you should be the only one accessing your profile.
However, if you share the computer with others, are concerned about unauthorized access, or want to add another layer of security, you can use Windows 11's virtual hard disk feature along with BitLocker to protect files and folders with a password.
In this how-to guide, I will explain how to protect a folder with a password using drive virtualization and encryption features available on Windows 11.
How to add password to folder on Windows 11
Windows 11 doesn't have a feature to protect a folder with a password because the account is already protected with your profile credentials (and encryption if you use BitLocker). However, you can use the virtual drive and BitLocker features to create a secure drive with a password, which works similarly to a password-protected folder.
Create virtual drive to act as a folder
To create a virtual drive that will act as a password-protected folder, use these steps:
- Open Settings.
- Click on System.
- Click the Storage page on the right side.
- Click on "Advanced storage settings" under the "Storage management" section.
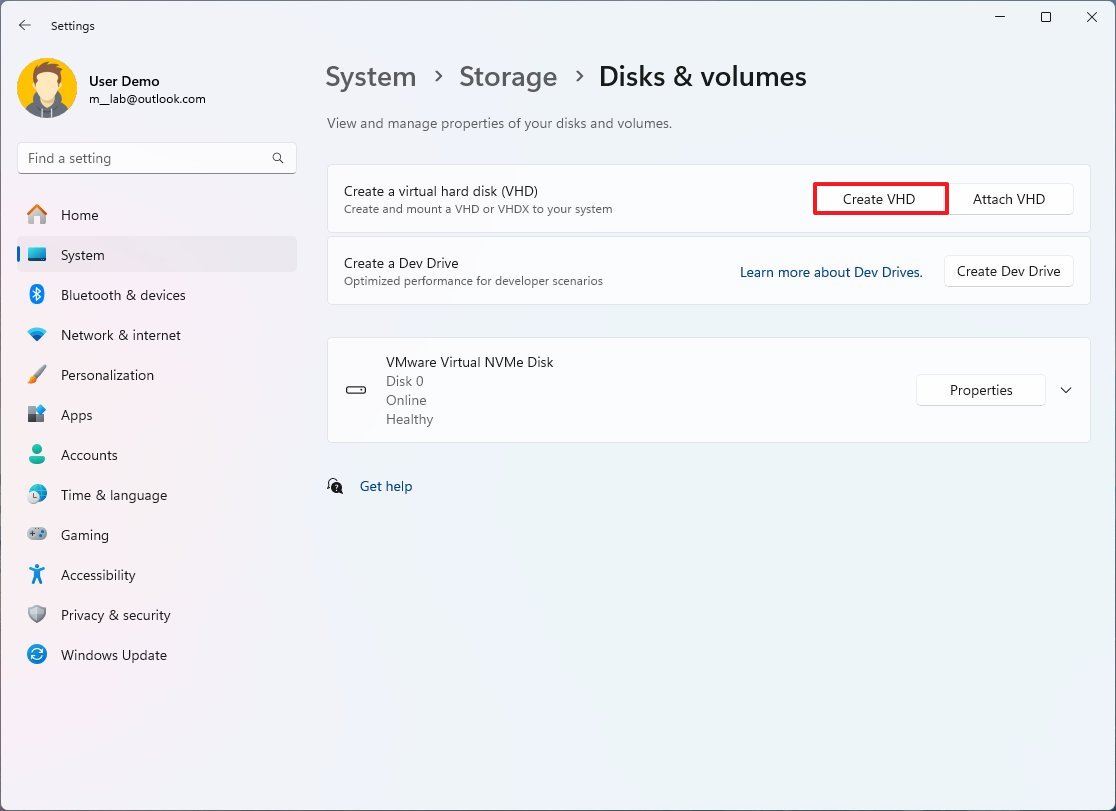
- Click the Disks & volumes setting.
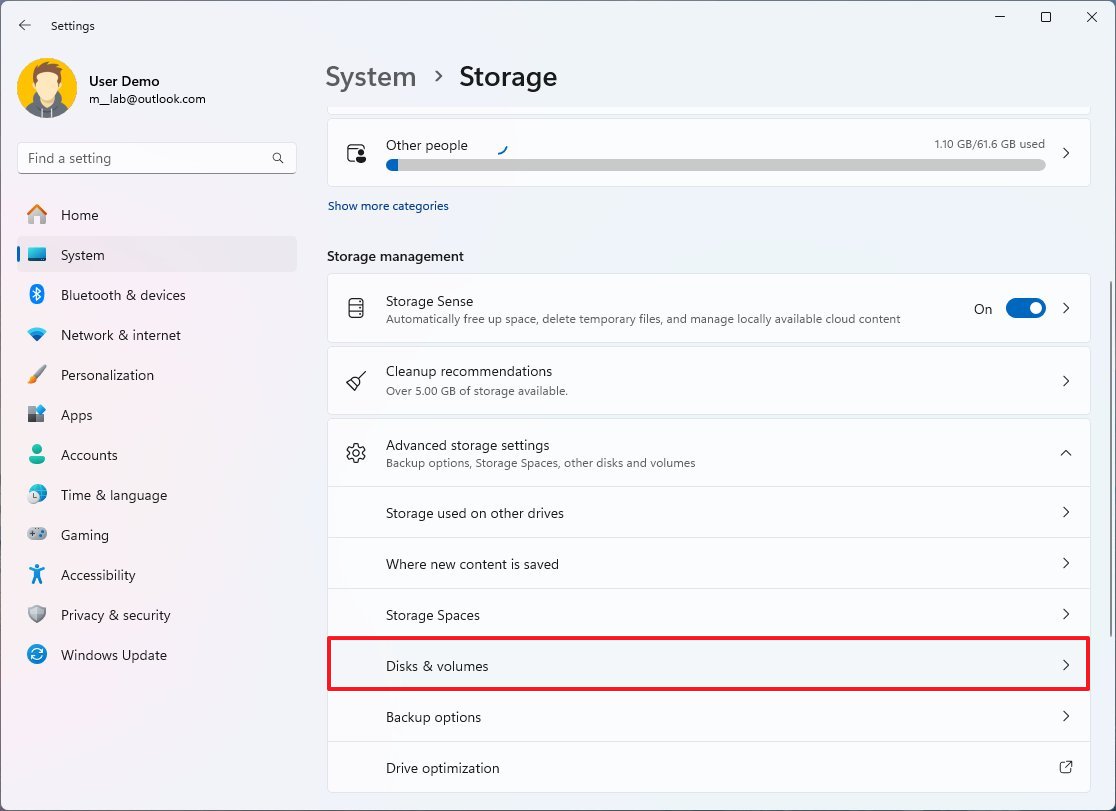
- Click the Create VHD button.
- Choose a descriptive name for the virtual drive.
- Click the Browse button.
- Specify a location to store the virtual drive.
- Confirm the drive size (in gigabytes). For example, 10GB.
- Select the VHDX option.
- Select the Dynamically expanding option.
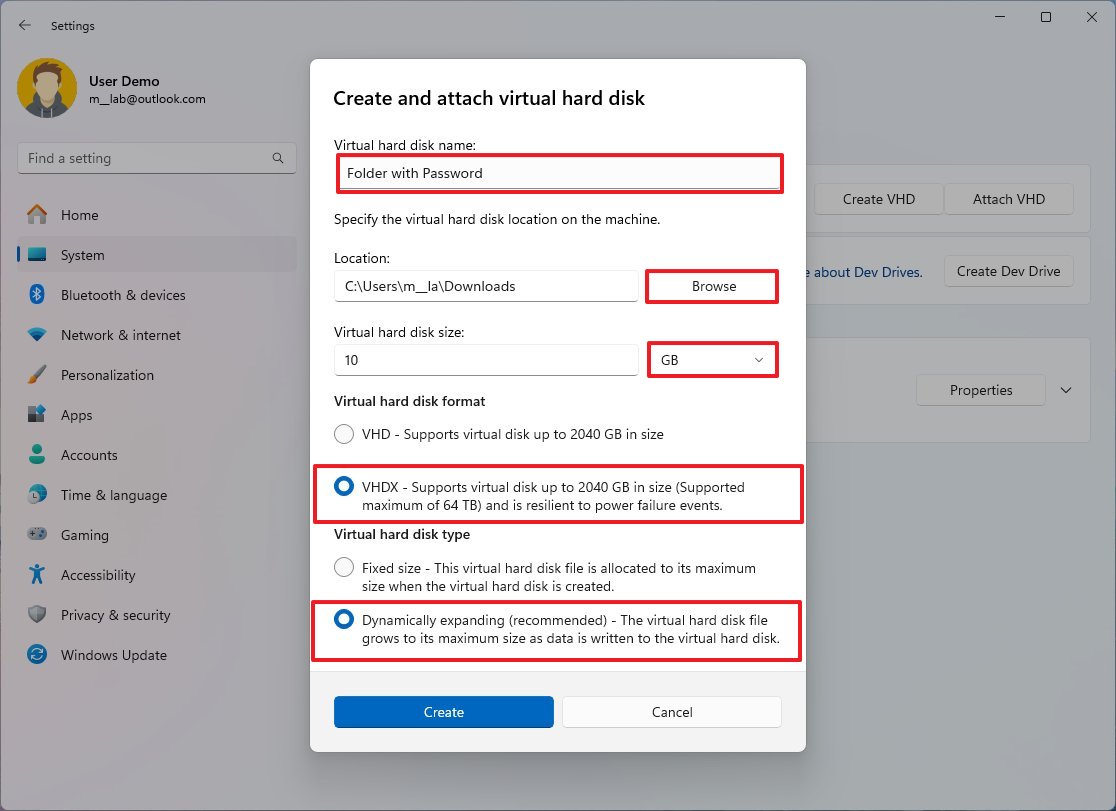
- Click the Create button.
- Select the "GPT (GUID Partition Table)" option.
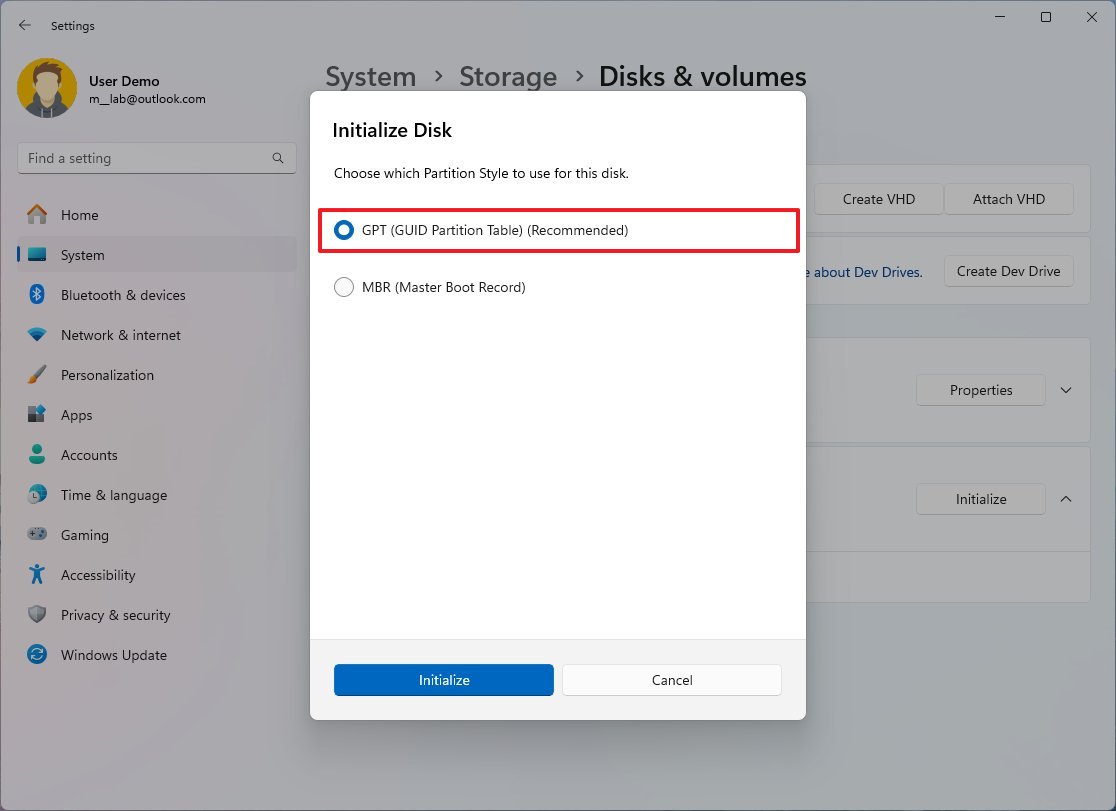
- Click the Initialize button.
- Confirm a label for the virtual drive as you want it to appear on File Explorer.
- Choose the drive letter you want to appear in the system.
- Select the "NTFS" option for the "File System" setting.
- Click the Format button.
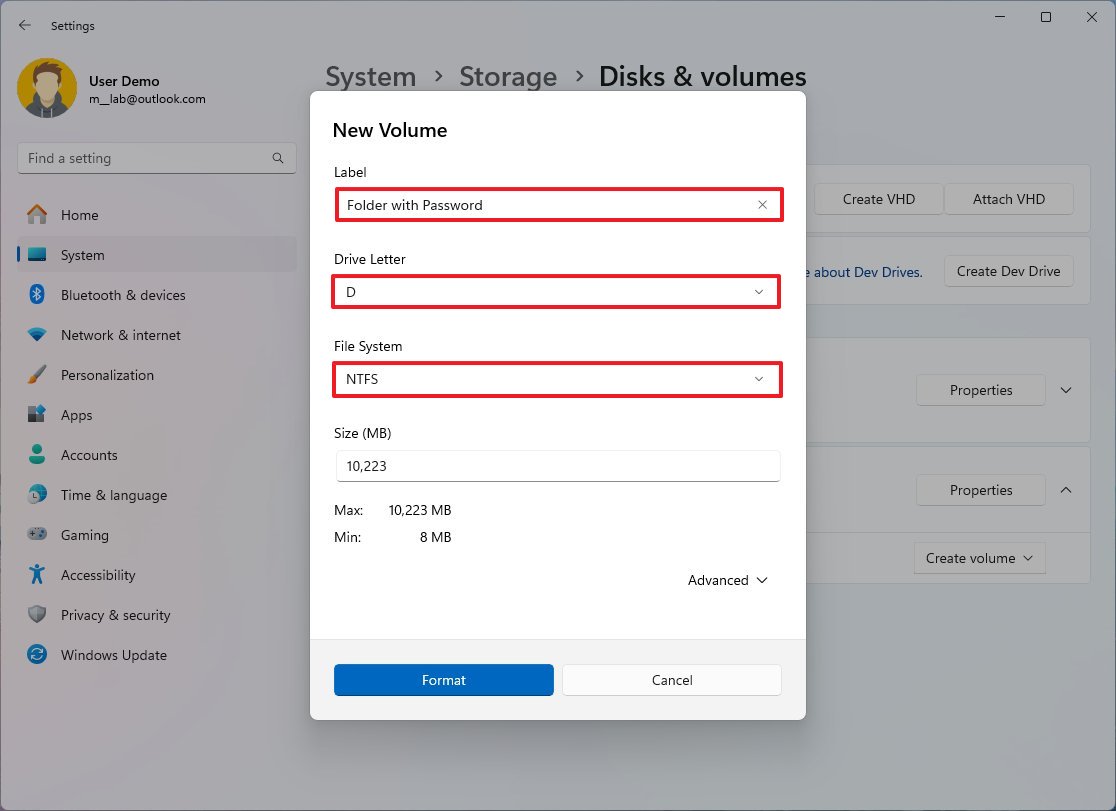
Once you complete the steps, the virtual drive will be created, and you can now use it as a folder to securely store files by encrypting it using BitLocker.
Protect folder with BitLocker password
To set up BitLocker to protect the drive with a password on Windows 11, use these steps:
Get the Windows Central Newsletter
All the latest news, reviews, and guides for Windows and Xbox diehards.
- Open Settings.
- Click on System.
- Click the Storage page on the right side.
- Click "Advanced storage settings" under the "Storage management" section.
- Click the "Disks & volumes" setting.

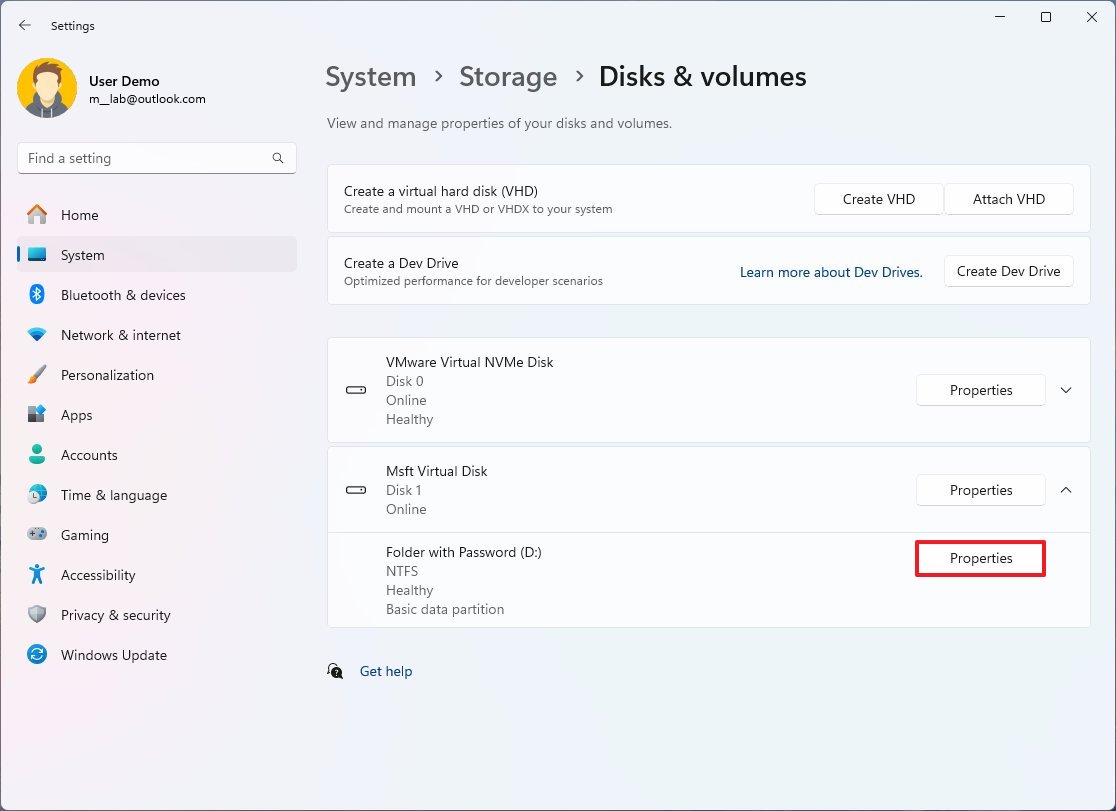
- Select the volume of the virtual drive and click the Properties button.
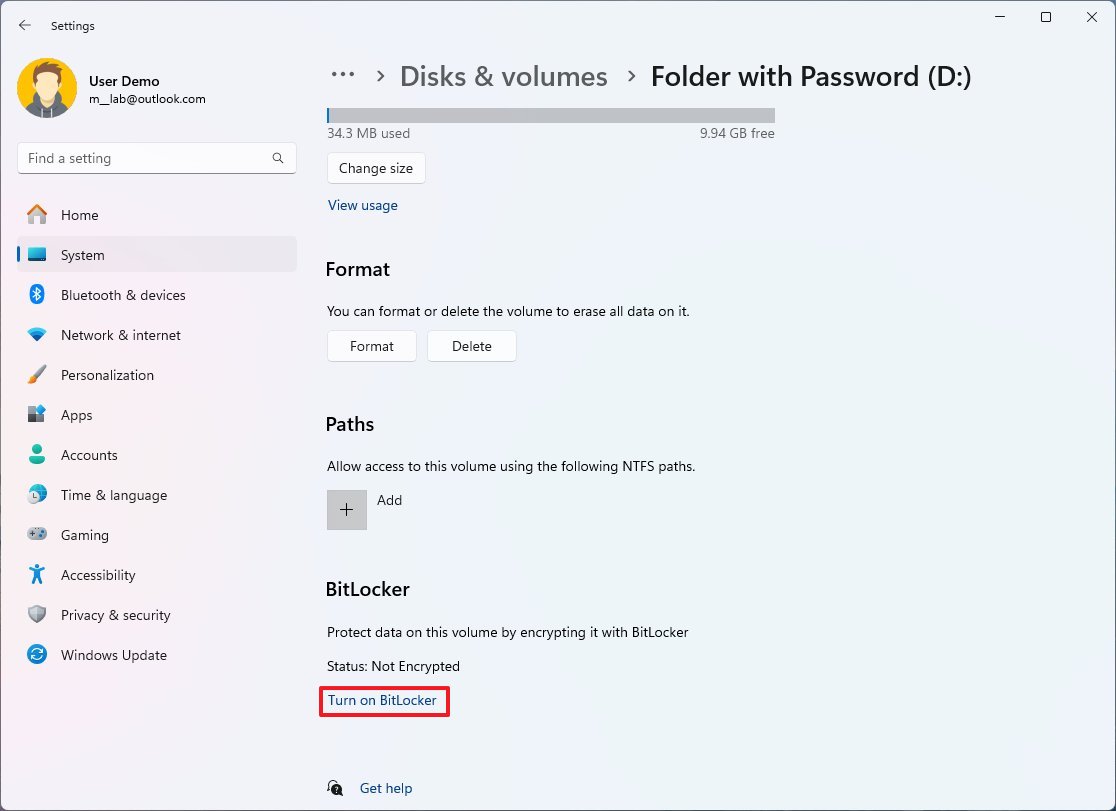
- Click the "Turn on BitLocker" option at the bottom of the page.
- Select the vault drive under the "Fixed data drives" section
- Click the "Turn on BitLocker" option.
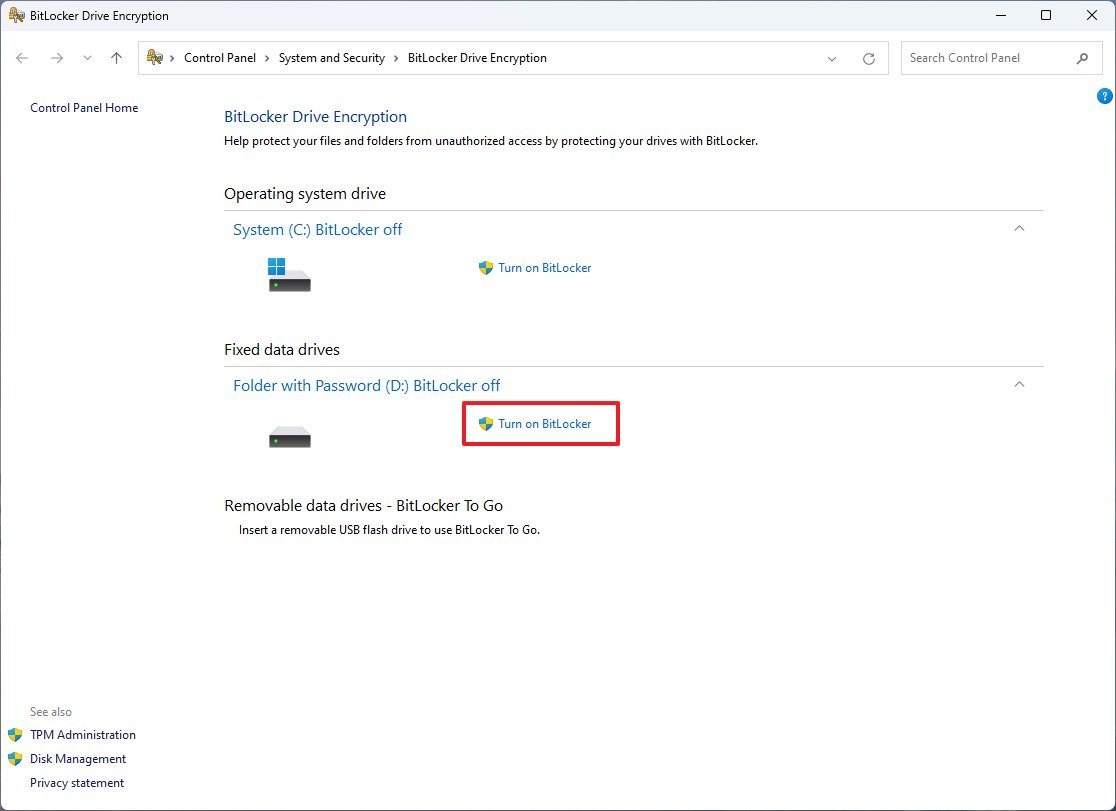
- Check the "Use a password to unlock the drive" option.
- Create a password to protect your folders inside the drive.
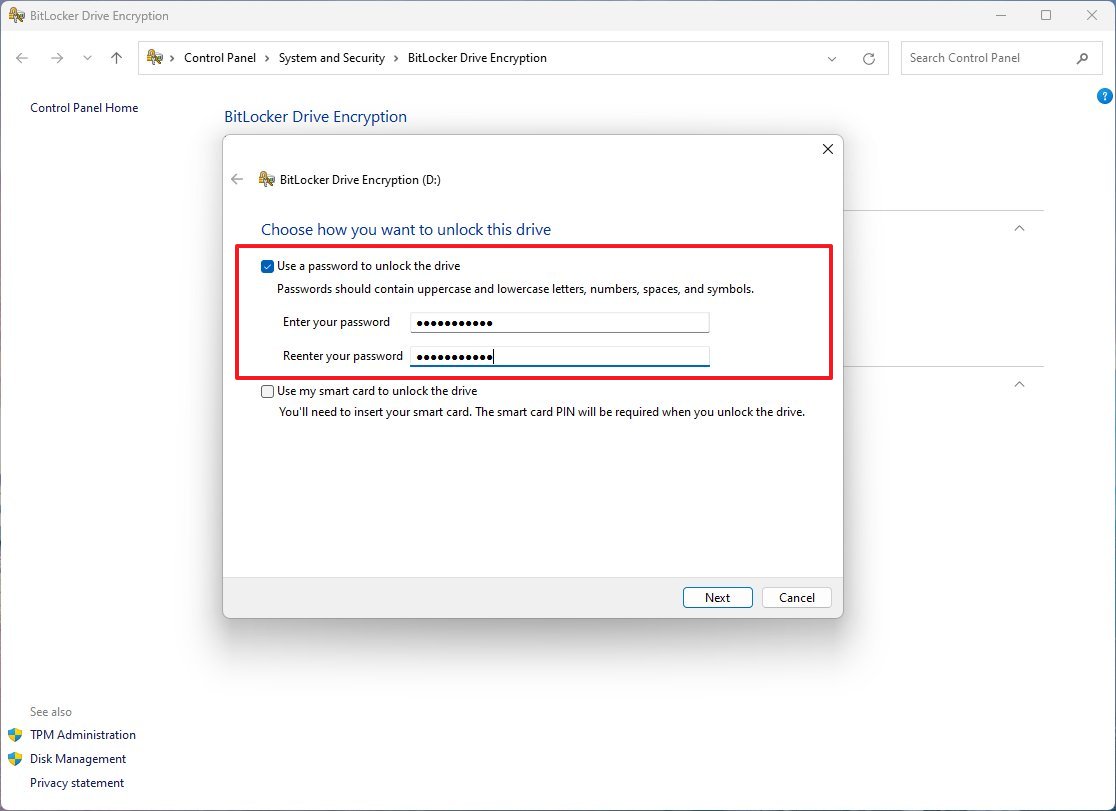
- Click the Next button.
- Select the "Save to your Microsoft account" option.
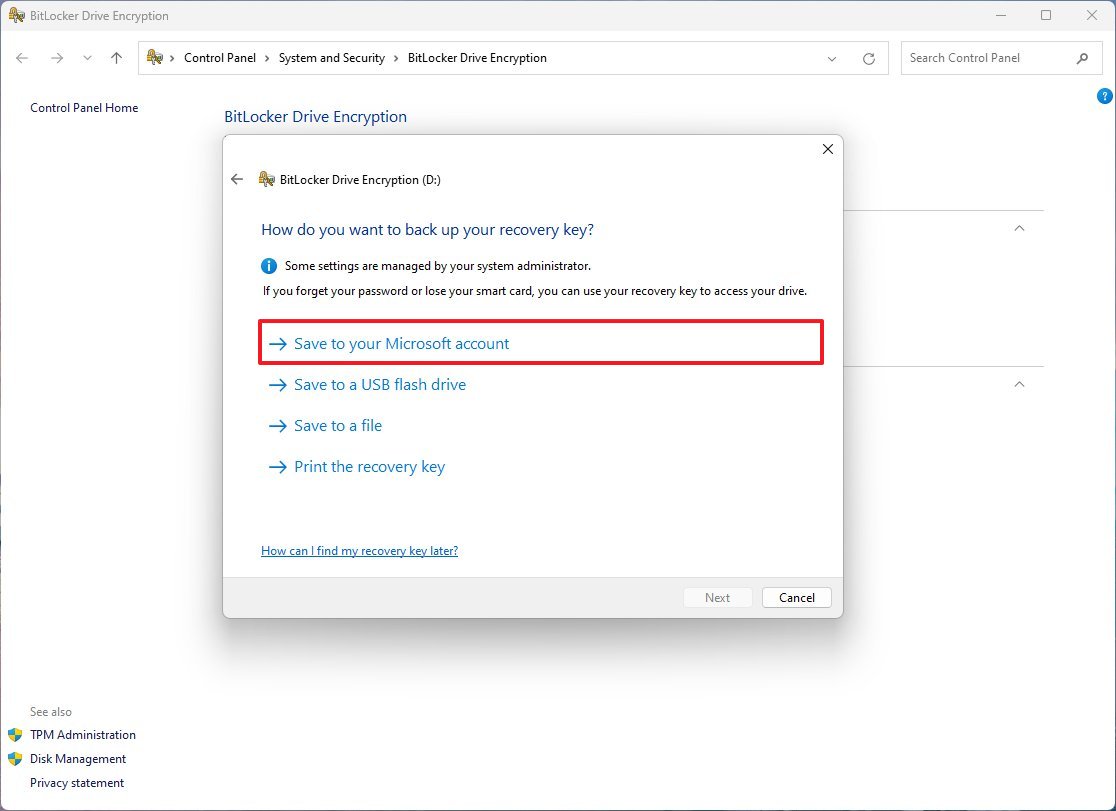
- Quick note: Using the Microsoft account is the most convenient option. However, you can choose any of the other available options.
- Click the Next button.
- Select the "Encrypt used disk space only" option.
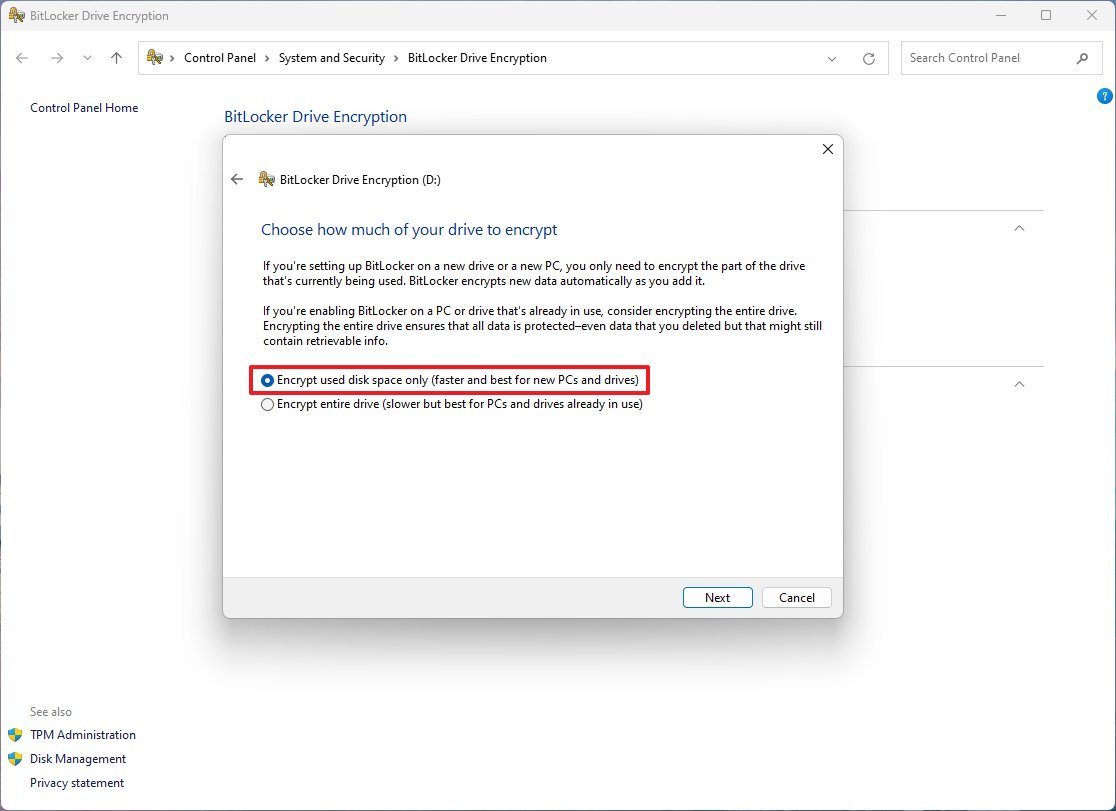
- Click the Next button.
- Select the Compatible mode option.
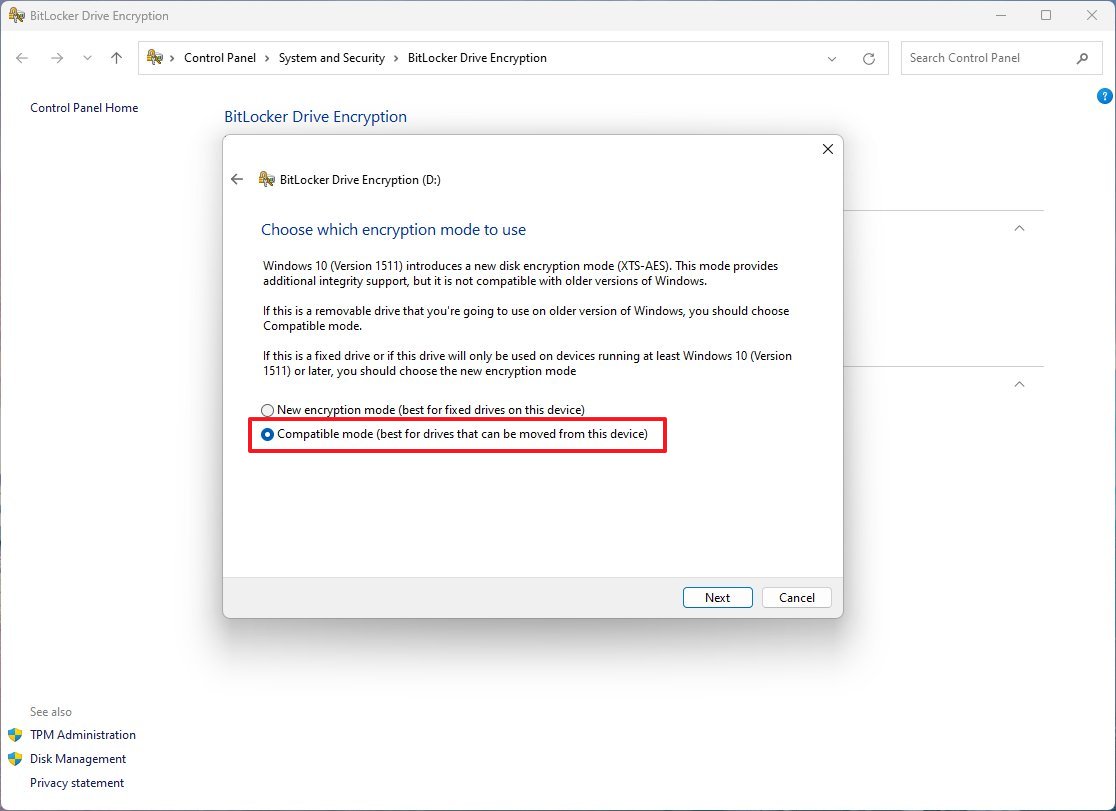
- Click the Next button.
- Click the Start encryption button.
- Click the Close button.
After you complete the steps, the virtual drive will be secured with a password.
Unlock password-protected folder
To open a folder with a password on Windows 11, use these steps:
- Open File Explorer.
- Open the folder with the vault.vhdx file.
- Double-click the VHD (VHDX) file to mount it to File Explorer.
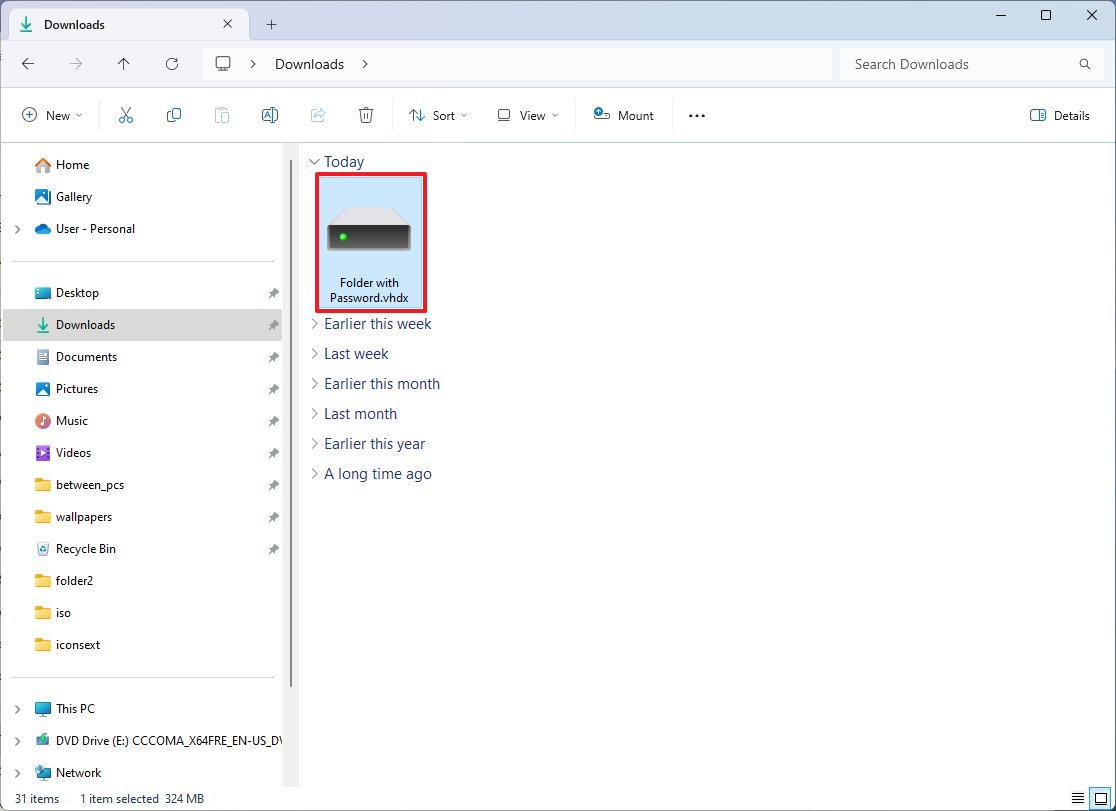
- Quick note: If you receive a "is not accessible" and "Access is denied" message, this is normal behavior because you mounted the drive but haven't unlocked it with the password yet.
- Click on This PC from the left navigation pane.
- Double-click the drive to open the sign-in page under the "Devices and drives" section.
- Type the password to unlock the drive.
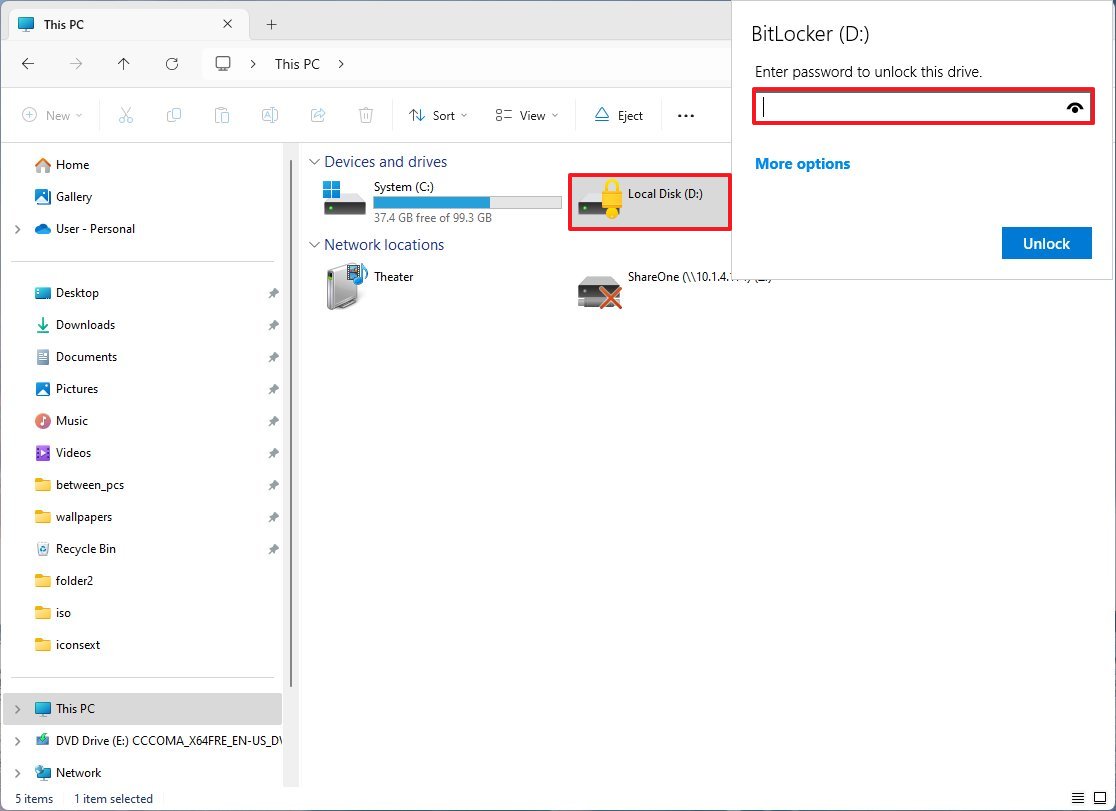
- Quick tip: If you can't remember the password, click on "More options," select the Enter recovery key option, and type the 48-digit recovery key available on your Microsoft account.
- Click the Unlock button.
Once you complete the steps, the drive will open, allowing you to add, modify, and remove your sensitive files.
Lock password-protected folder
To close and lock a folder with a password on Windows 11, use these steps:
- Open File Explorer.
- Click on This PC from the left navigation pane.
- Under the "Devices and drives" section, right-click the BitLocker drive, and select the Eject option.
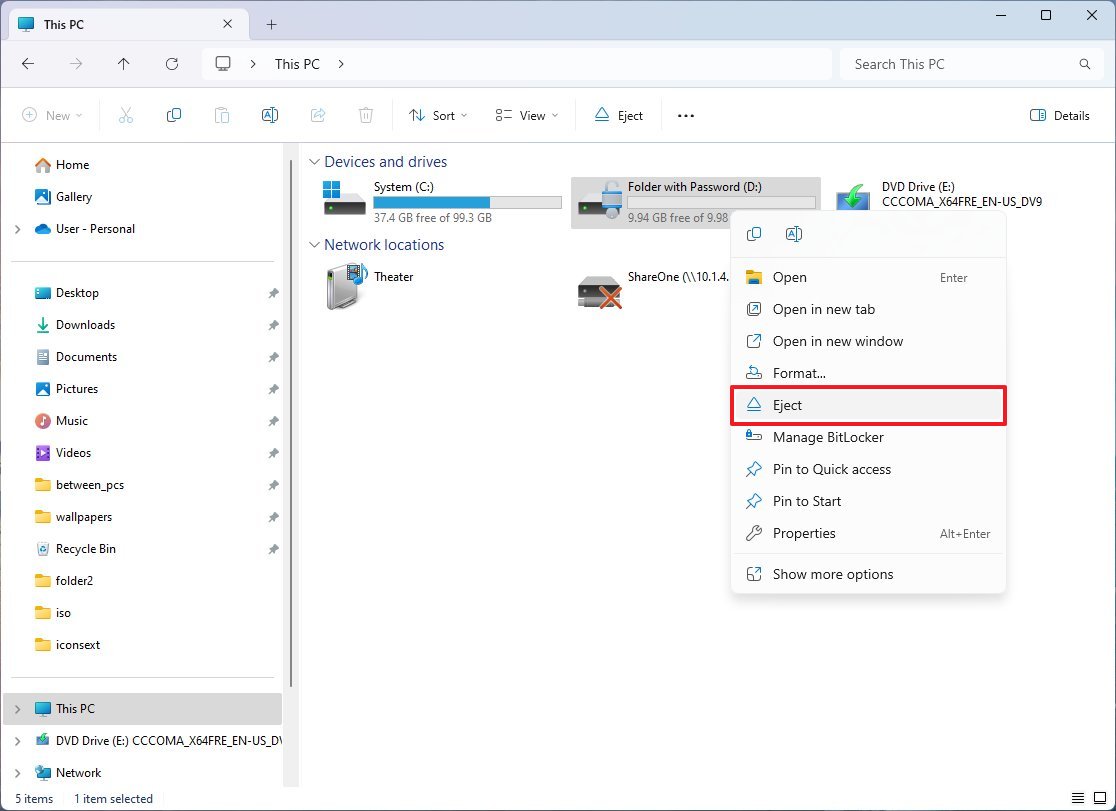
After you complete the steps, the folder (drive) will lock, and the password will be required to unlock the contents again.
More resources
For more helpful articles, coverage, and answers to common questions about Windows 10 and Windows 11, visit the following resources:
Mauro Huculak has been a Windows How-To Expert contributor for WindowsCentral.com for nearly a decade and has over 15 years of experience writing comprehensive guides. He also has an IT background and has achieved different professional certifications from Microsoft, Cisco, VMware, and CompTIA. He has been recognized as a Microsoft MVP for many years.

