On Windows 11 (and 10), you can limit the amount of storage each person configured on the computer can use with the Disk Quotas, and in this guide, I'll outline the steps to complete this configuration.
Disk Quotas is a feature that has been available for a long time, and it allows you to limit the drive space a user can use. You will typically find this feature useful to prevent other users from filling up the hard drive with their files or to ensure that a specific user has only the space they need for their work.
It's important to note that this feature has been primarily designed for network administrators to control the storage on devices configured for multiple users, but anyone can use it. Also, this feature is only available for drives formatted using the NTFS file system.
In this how-to guide, I'll outline the steps to configure the Disk Quotas feature on your computer. Although I'm focusing on Windows 11 users, these instructions apply to those still running Windows 10.
How to set up Disk Quotas for all users on Windows 11
To configure Disk Quotas to limit storage usage for all users, use these steps:
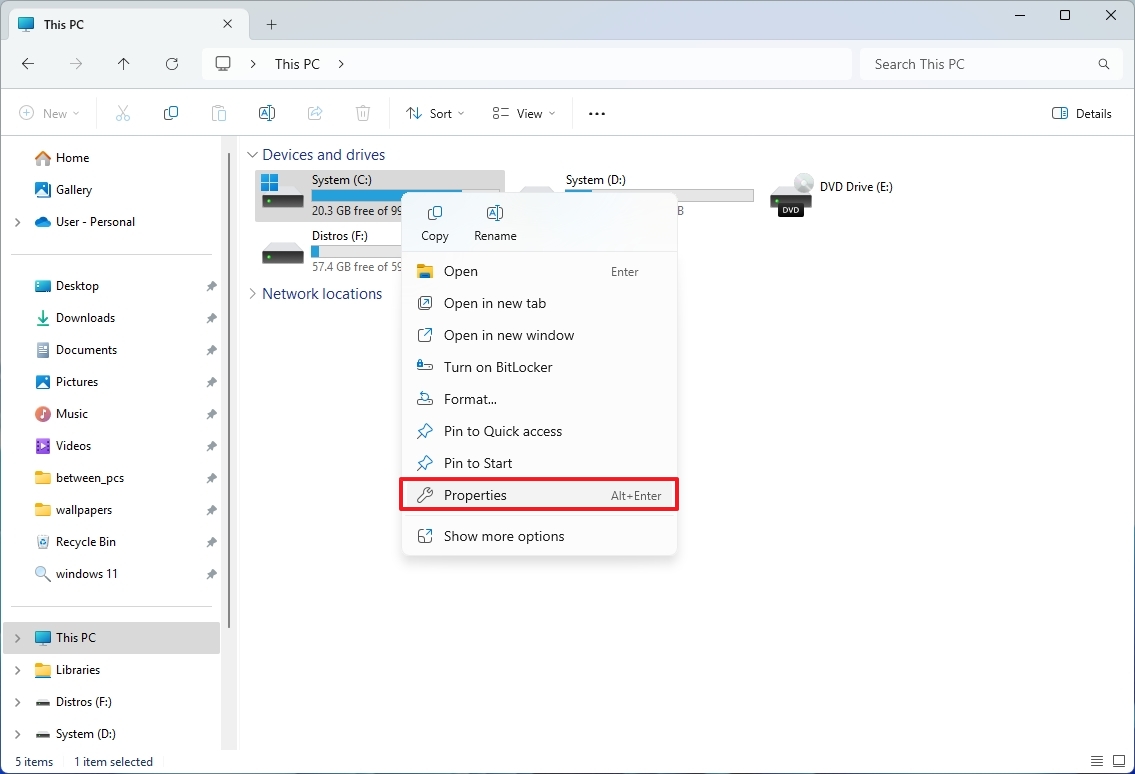
- Open File Explorer.
- Click on This PC from the left side.
- Right-click the main drive and choose the Properties option.
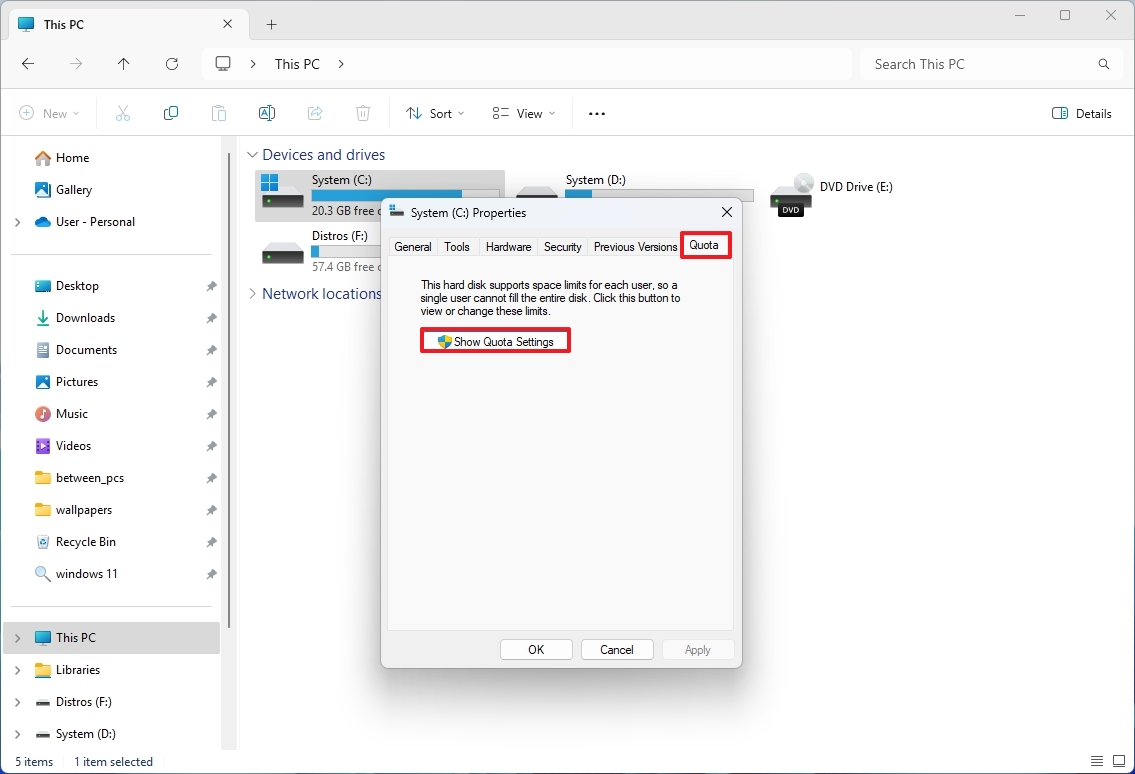
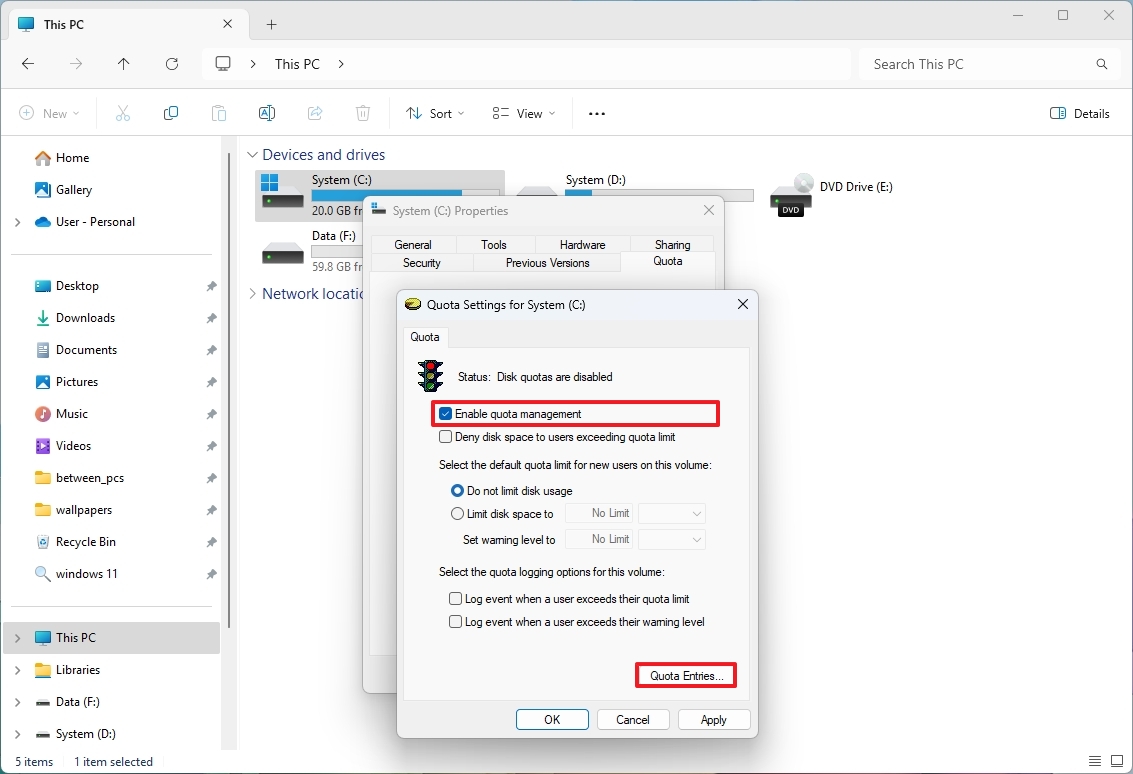
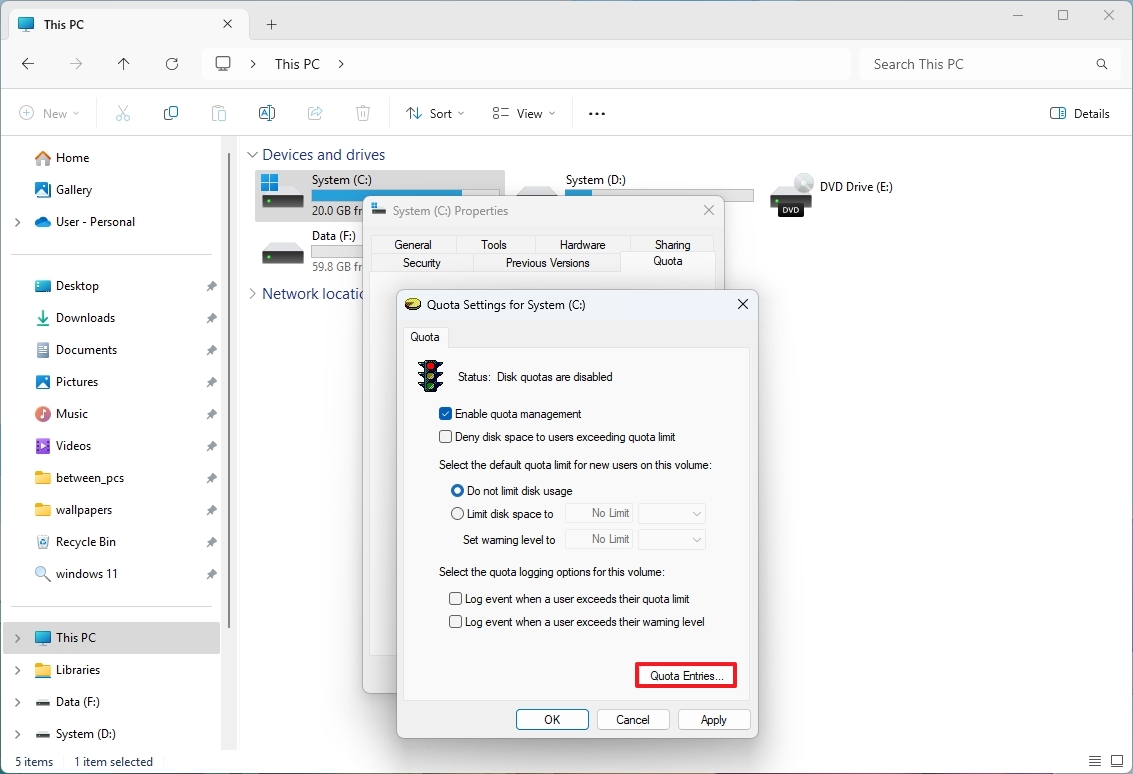
- Click the Quota tab.
- Click the "Show Quota Settings" button.
- Check the "Enable quota management" option.
- (Optional) Check the "Deny disk space to users exceeding quota" limit option.
- Select the "Limit disk space to" option, confirm the storage allowance for all users, and specify the storage unit.
- (Optional) Confirm the storage amount in the "Set warning level to" setting to trigger a warning when users are getting closer to their limit.
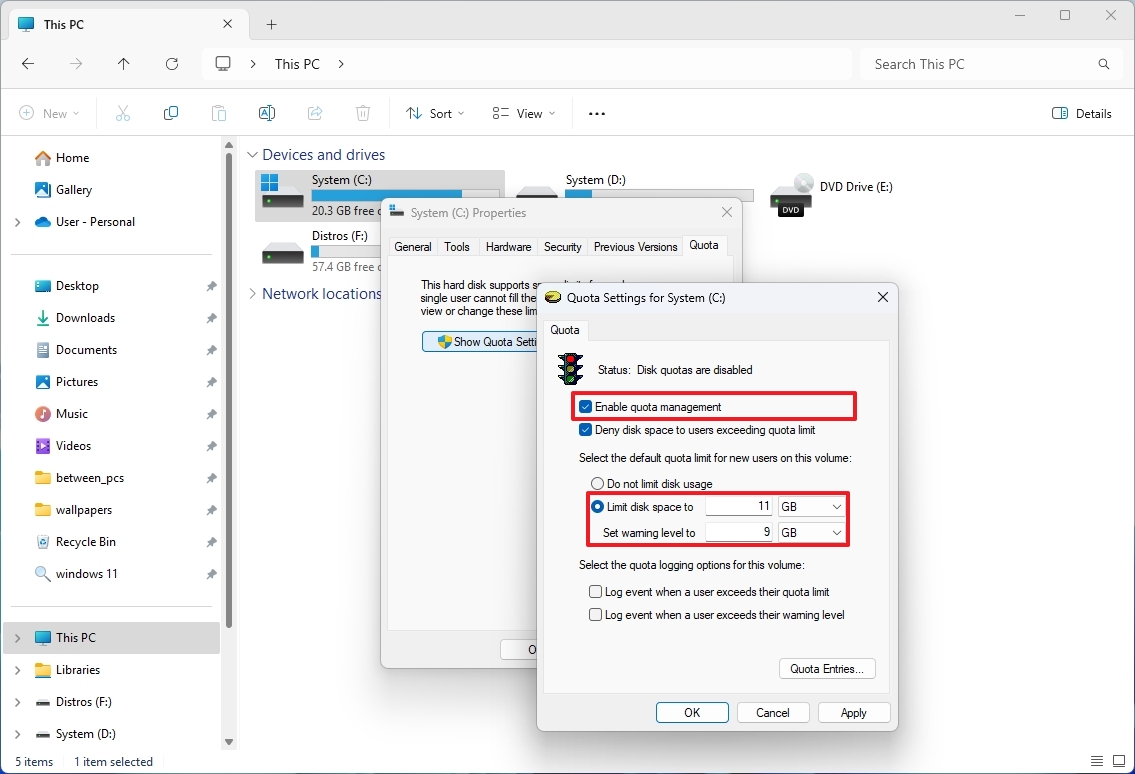
- Quick note: You want to put this setting lower than the total amount.
- Click the Apply button.
- Click the OK button.
Once you complete the steps, the settings will be applied, and everyone configured on the computer will have the same limited storage capacity.
Disable Disk Quotas for all users
To undo the changes to disable Disk Quotas, use these steps:
- Open File Explorer.
- Click on This PC from the left side.
- Right-click the main drive and choose the Properties option.
- Click the Quota tab.
- Click the "Show Quota Settings" button.
- Clear the "Enable quota management" option.
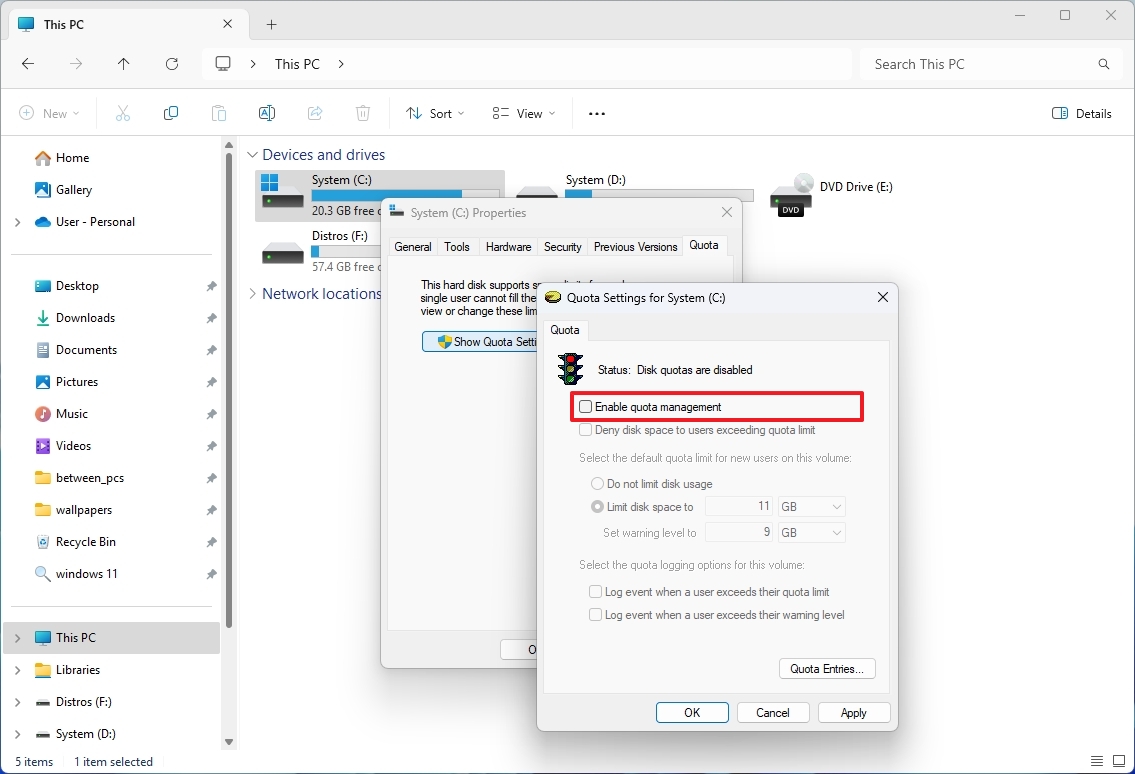
- Click the Apply button.
- Click the OK button.
After you complete the steps, the feature will be disabled, and everyone will have full access to the total amount of storage.
How to set up Disk Quotas for a specific user on Windows 11
To configure Disk Quotas for a specific user, use these steps:
- Open File Explorer.
- Click on This PC from the left side.
- Right-click the main drive and choose the Properties option.
- Click the Quota tab.
- Click the "Show Quota Settings" button.
- Check the "Enable quota management" option.
- (Optional) Check the "Deny disk space to users exceeding quota" limit option.
- Click the Quota Entries button.
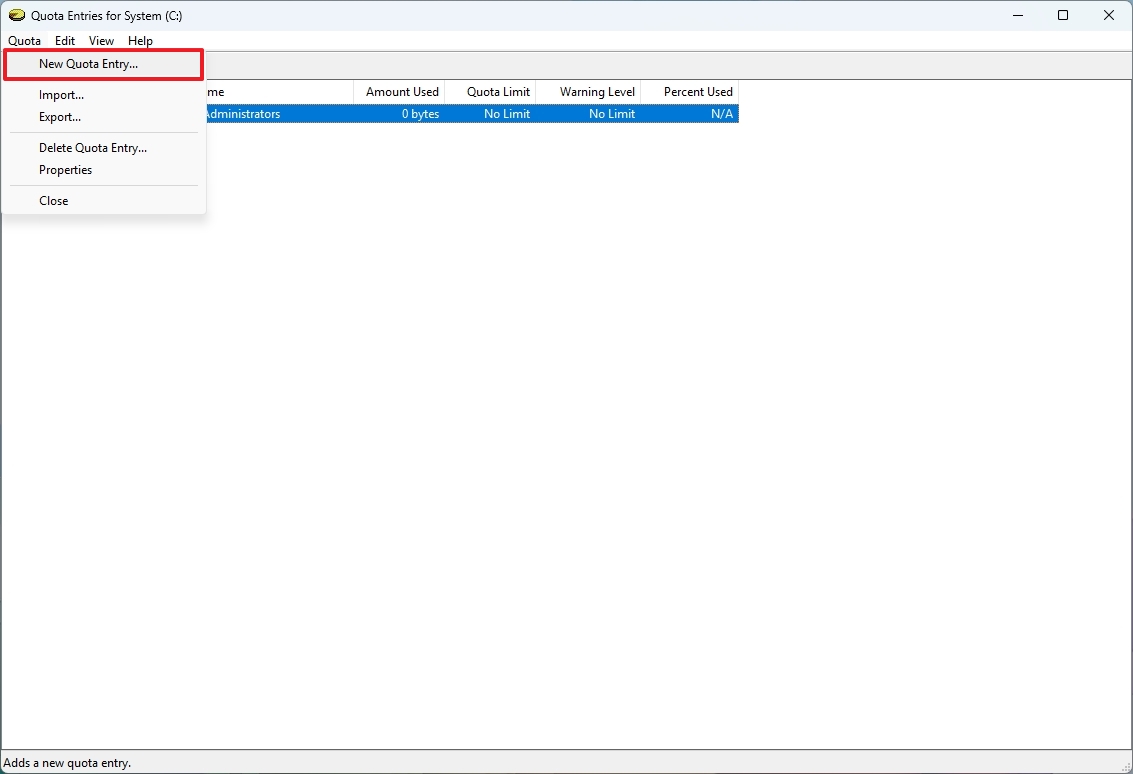
- Open the Quota menu and choose the "New Quota Entry" option.
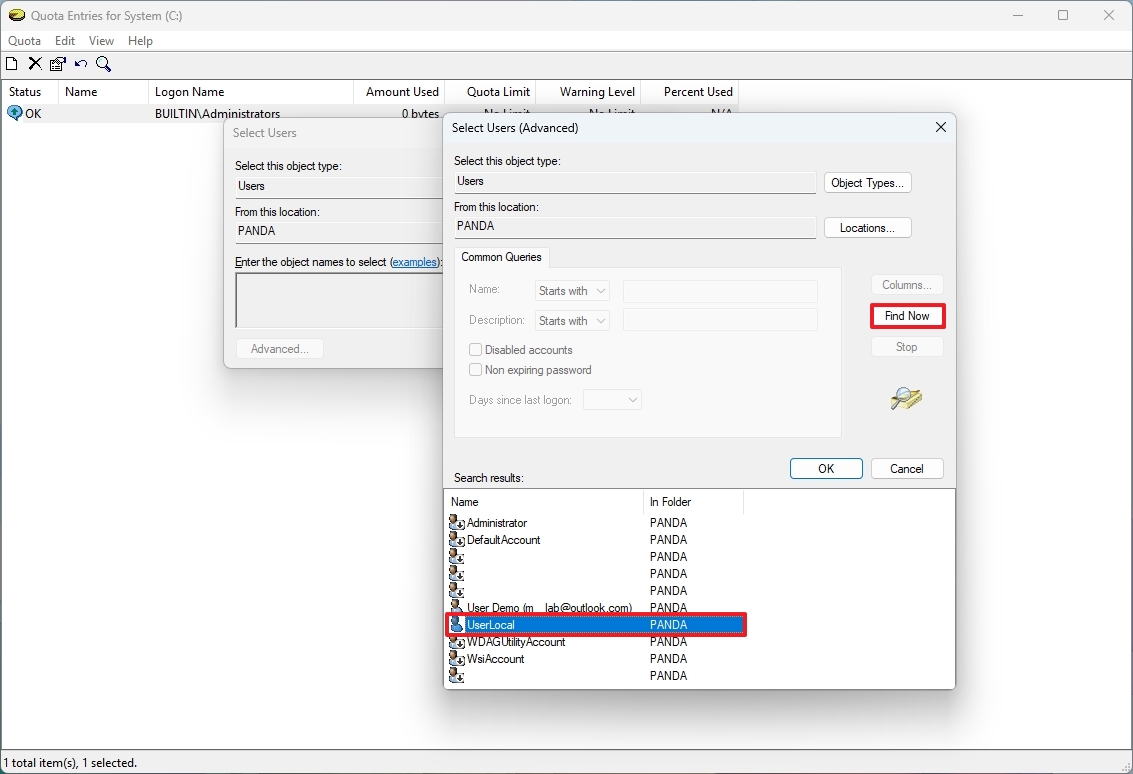
- Click the OK button.
- Click the OK button again.
- Select the "Limit disk space to" option, confirm the storage allowance for all users, and specify the storage unit.
- (Optional) Confirm the storage amount in the "Set warning level to" setting to trigger a warning when users are getting closer to their limit.
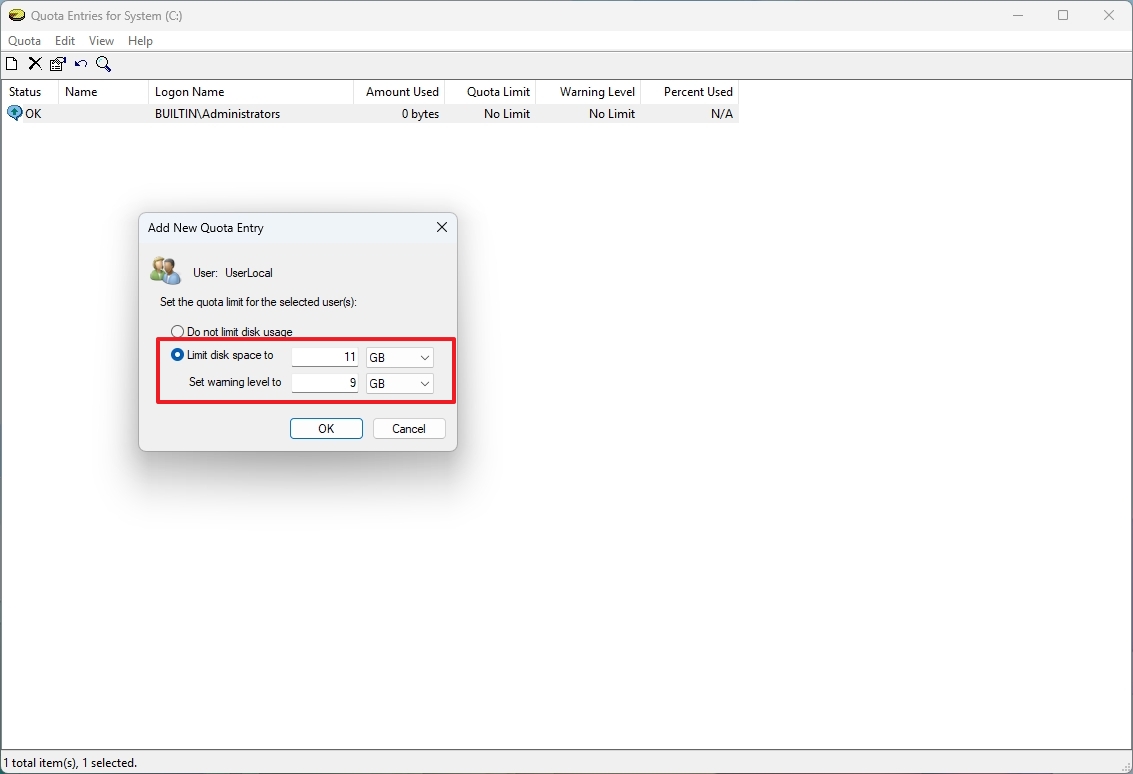
- Click the OK button.
Once you complete the steps, the storage limit will be applied to the specified user. You may have to repeat the steps to limit the storage usage for other users configured on the device.
Disable Disk Quotas for a specific user
To disable Disk Quotas for one user, use these steps:
- Open File Explorer.
- Click on This PC from the left side.
- Right-click the main drive and choose the Properties option.
- Click the Quota tab.
- Click the Quota Entries button.
- Right-click the user and select the Properties option.
- Choose the "Do not limit disk usage" option.
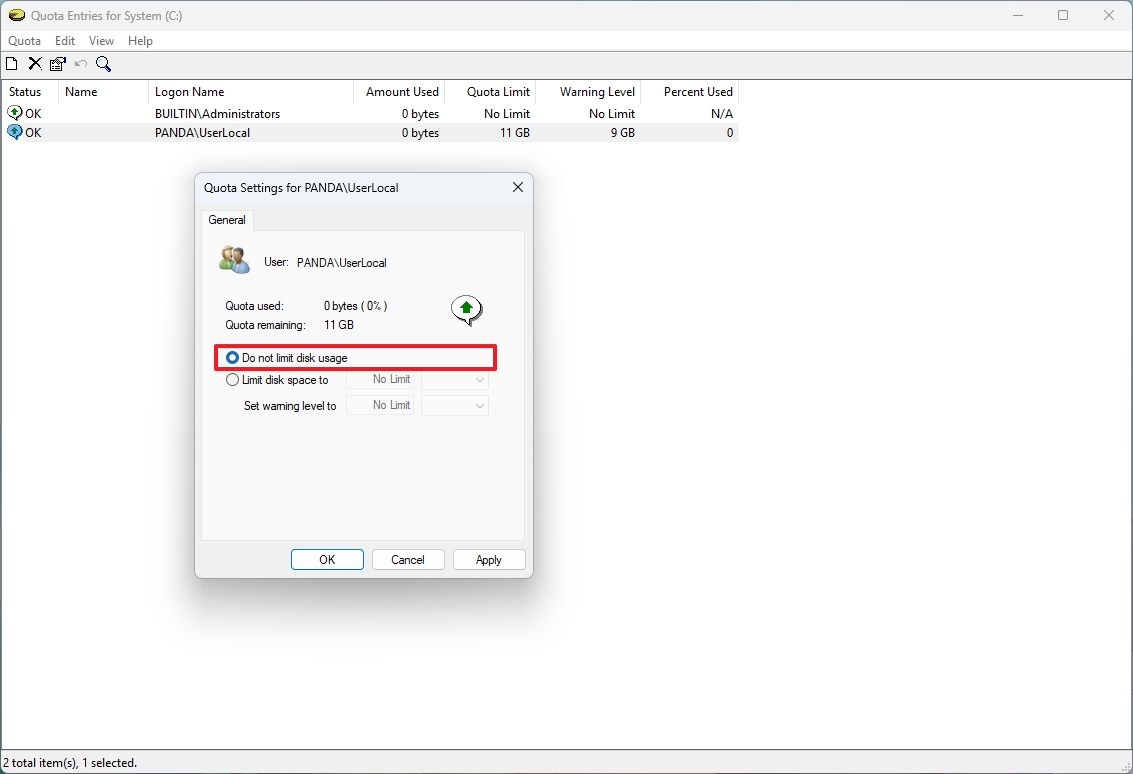
- Click the Apply button.
- Click the OK button.
- (Optional) Repeat steps 4 through 7 to disable the feature for other users.
- Close the Quota Entries app.
- (Optional) Clear the "Enable quota management" option to disable the feature as necessary.
- Click the Apply button.
- Click the OK button.
After you complete the steps, the user will no longer have limitations when storing files on your computer.
How to check storage usage for users using Disk Quotas
To check the storage usage for everyone configured on the computer, use these steps:
- Open File Explorer.
- Click on This PC from the left side.
- Right-click the main drive and choose the Properties option.
- Confirm the storage usage next to the user name.
- Confirm the storage usage next to the user name.
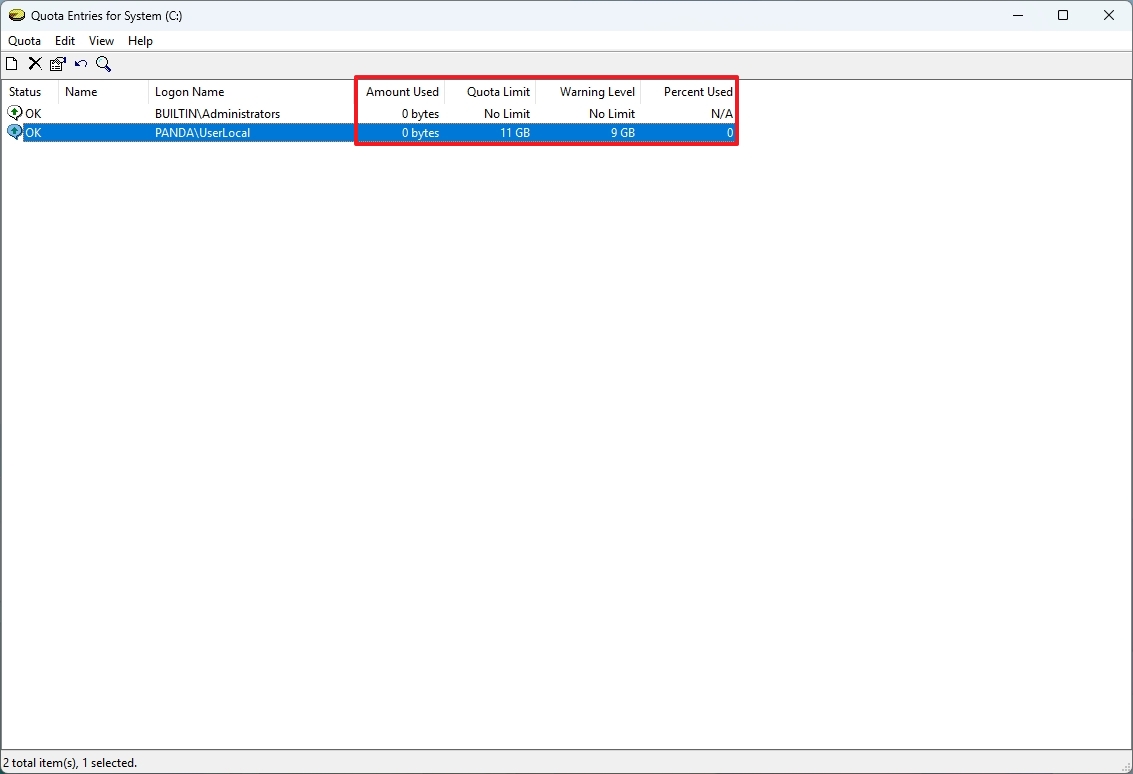
On the application, you can determine the amount of storage being used and the current limits.
The process of using Disk Quotas is straightforward, but if the feature is missing, check the drive is formatted with the NTFS file system. If you use FAT32 or exFAT option, the feature won't be available.
You can check this from File Explorer > This PC, right-click the drive, choose the "Properties" option, and confirm the file system.
Also, this feature can only be configured per drive, meaning you must configure Disk Quotas on each drive.
If you're having trouble using this feature, you can always open Event Viewer > Windows Logs > Application, check the errors related to disk quotas and research online to find a solution. Restarting the computer usually fixes most issues.
Finally, only administrator users can manage this feature.
More resources
Find in-depth guides, troubleshooting tips, and the latest updates on Windows 11 and 10 here: