How to install apps using commands on Windows 11
Here are the steps to download and install apps with commands on Windows 11.
On Windows 11, in addition to using a standalone (.exe or .msi) installer or the Microsoft Store, you can also use the Windows Package Manager (winget) to download and install apps on your laptop or desktop computer.
The Windows Package Manager is a command-line tool that makes it easier to discover, download, install, update, and even remove apps on Windows 11 or 10 installations with Command Prompt, reducing the number of steps it would take using a different method.
This guide will walk you through the steps to search, download, and install one or multiple apps on Windows 11.
How to install apps with Command Prompt
On Windows 11, you can use quick and easy commands to find, download, and install virtually any app that has been registered in the Windows Package Manager repository, even those from the Microsoft Store.
Search app with winget
To search for an app to install with commands on Windows 11, use these steps:
- Open Start.
- Search for Command Prompt, right-click the top result, and select the Run as administrator option.
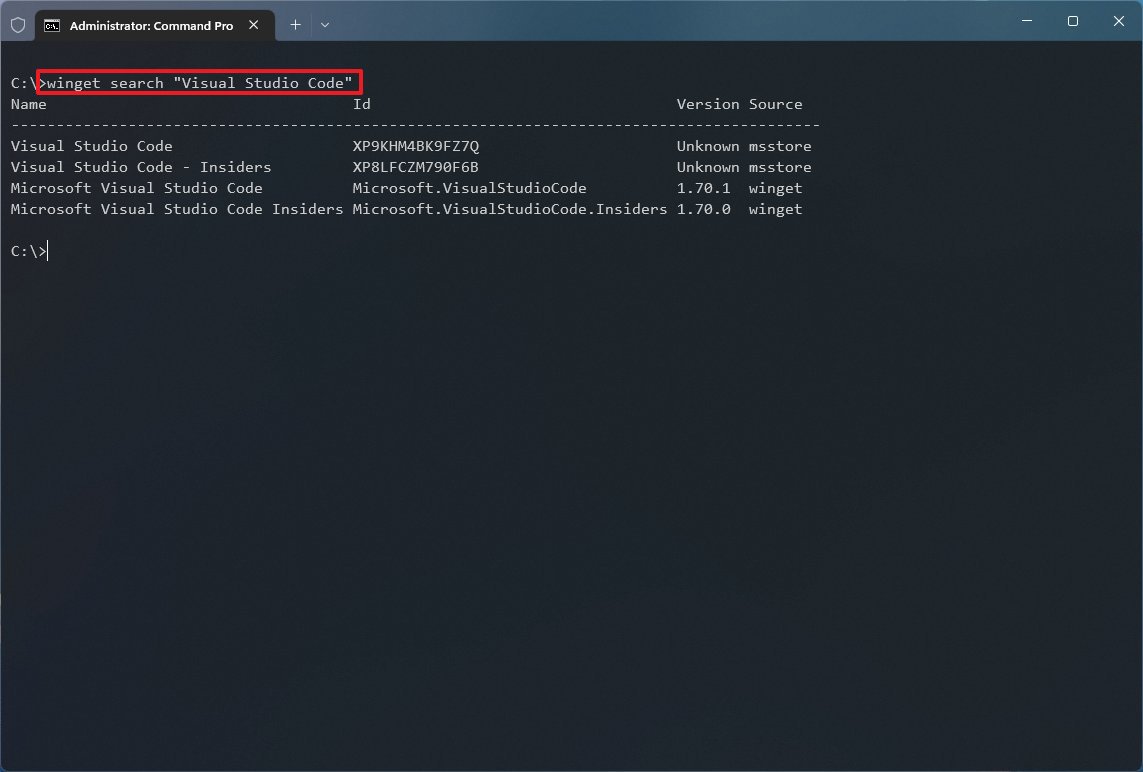
- Type the following command to search an app and press Enter: winget search APP-NAME
In the command, change APP-NAME for the actual name of the app. If the name has spaces, use quotation marks. For example, "Visual Studio Code."
All the latest news, reviews, and guides for Windows and Xbox diehards.
- Confirm the app name and ID value.
Once you complete the steps, you can use the app name or its ID to install it with the Windows Package Manager tool.
When using the search command, the "Source" column will tell you whether the app is available from the Windows Package Manager (winget) or Microsoft Store (msstore) repository.
You will also notice that the app ID will have a different structure depending on the source. For example, the VLC media player has the ID of "VideoLAN.VLC" in the winget repository and the "XPDM1ZW6815MQM" in the msstore repository. These are the same apps, but depending on the ID you use, the app will install from different sources.
Install an app with winget
To install an app with the winget command, use these steps:
- Open Start.
- Search for Command Prompt, right-click the top result, and select the Run as administrator option.
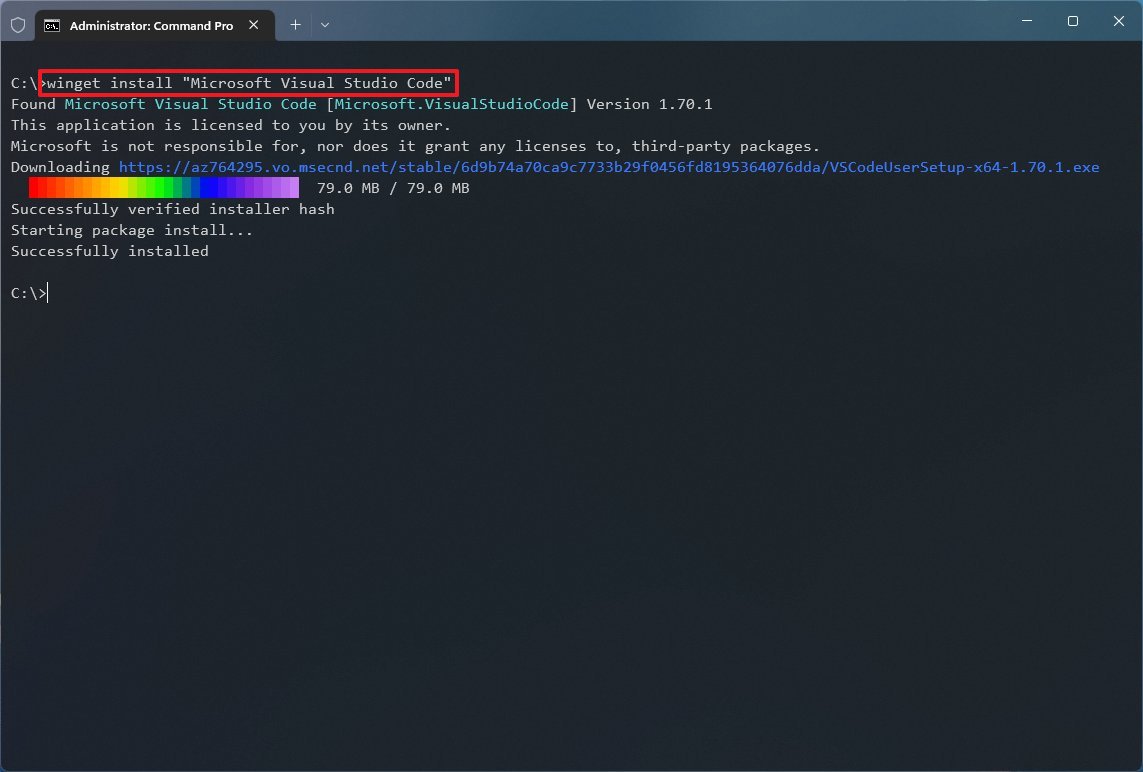
- Type the following command to install an app with the winget command and press Enter: winget install "APP-NAME"
In the command, change "APP-NAME" for the app's name. The quotation marks are only required when the name has multiple words with space. This example installs the VSCode app: winget install "Microsoft Visual Studio Code"
- (Optional) Type the following command to install an app by ID and press Enter: winget install APP-ID
After you complete the steps, the app will install on Windows 11. Although you can use the app name, the ID option is the better option because it's more specific, lets you choose the source repository, and you will find fewer conflicts running the command.
Install multiple apps with winget
To install multiple apps with the winget command, use these steps:
- Open Start.
- Search for Command Prompt, right-click the top result, and select the Run as administrator option.
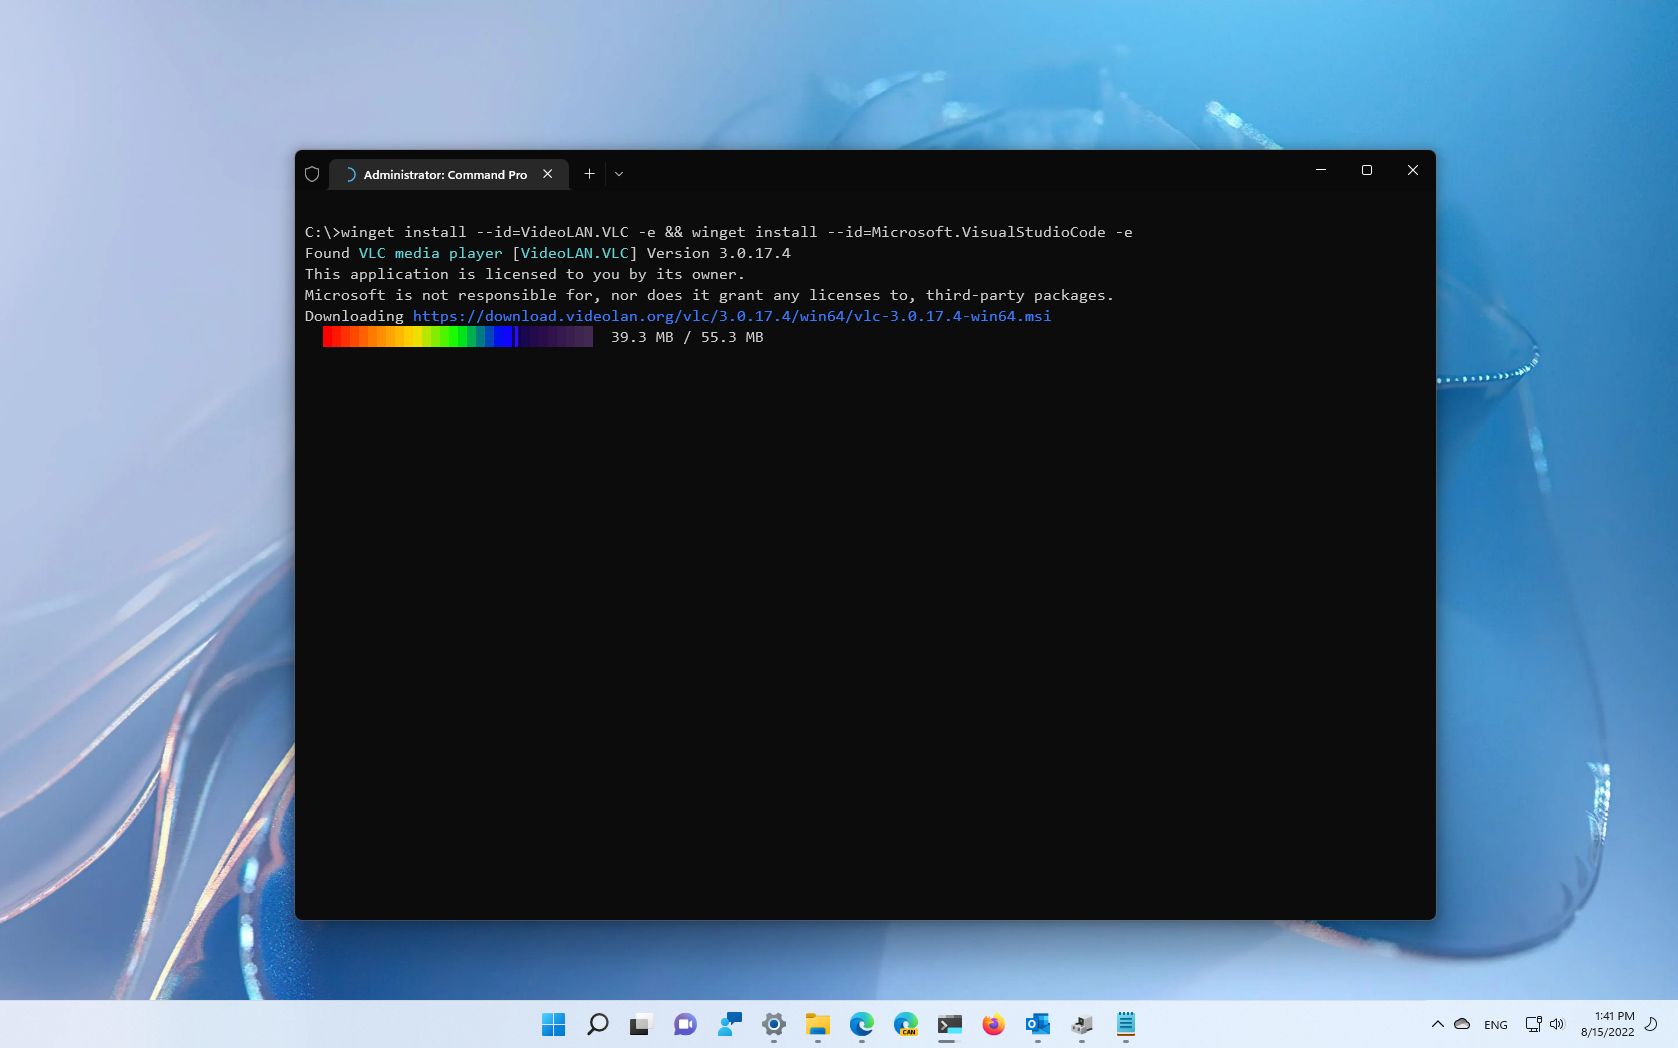
- Type the following command to install multiple apps with the winget command and press Enter: winget install "APP-NAME-1" -e && winget install "APP-NAME-2" -e
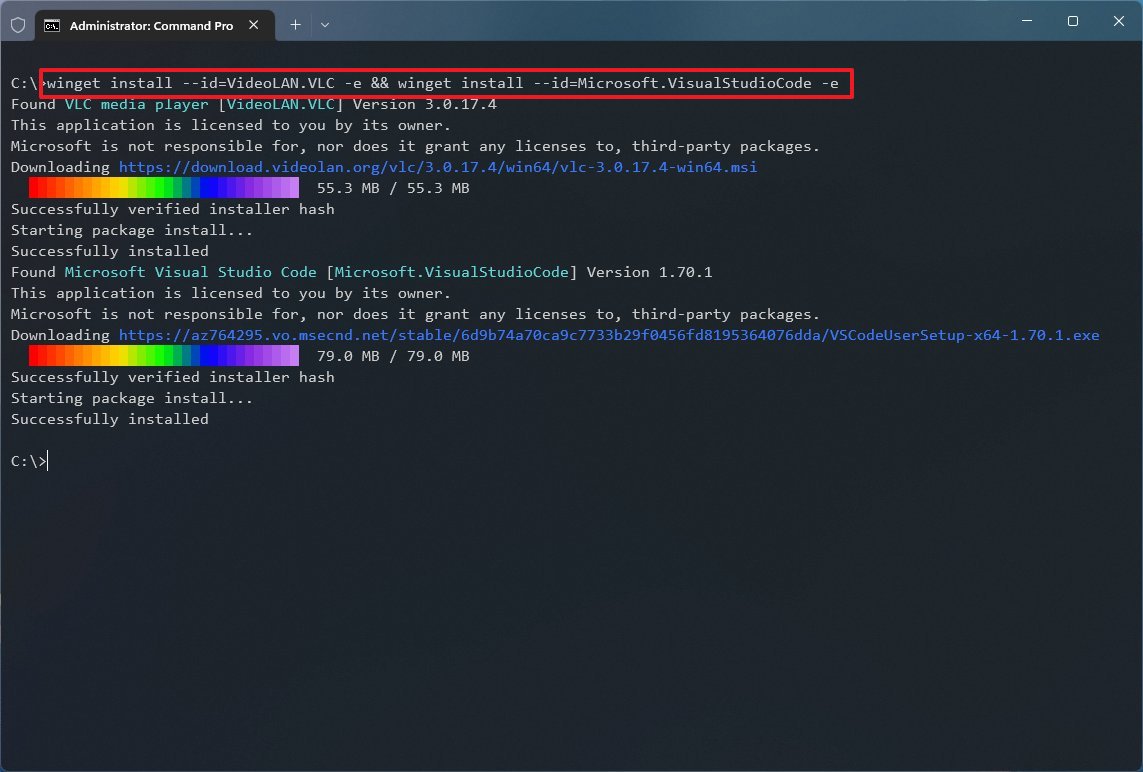
- (Optional) Type the following command to install multiple apps by ID and press Enter: winget install --id=APP-NAME-1 -e && winget install --id=APP-NAME-2 -e
In the commands, change "APP-NAME-1" and "APP-NAME-2" for the actual names of the apps. If you want to queue even more app installations, add a space and && along with the app installation command. This example installs the VLC and Visual Studio Code apps: winget install --id=VideoLAN.VLC -e && winget install --id=Microsoft.VisualStudioCode -e
Once you complete the steps, the command will begin installing the apps one at a time.
Check installed apps with winget
To check whether the application has been installed, use these steps:
- Open Start.
- Search for Command Prompt, right-click the top result, and select the Run as administrator option.
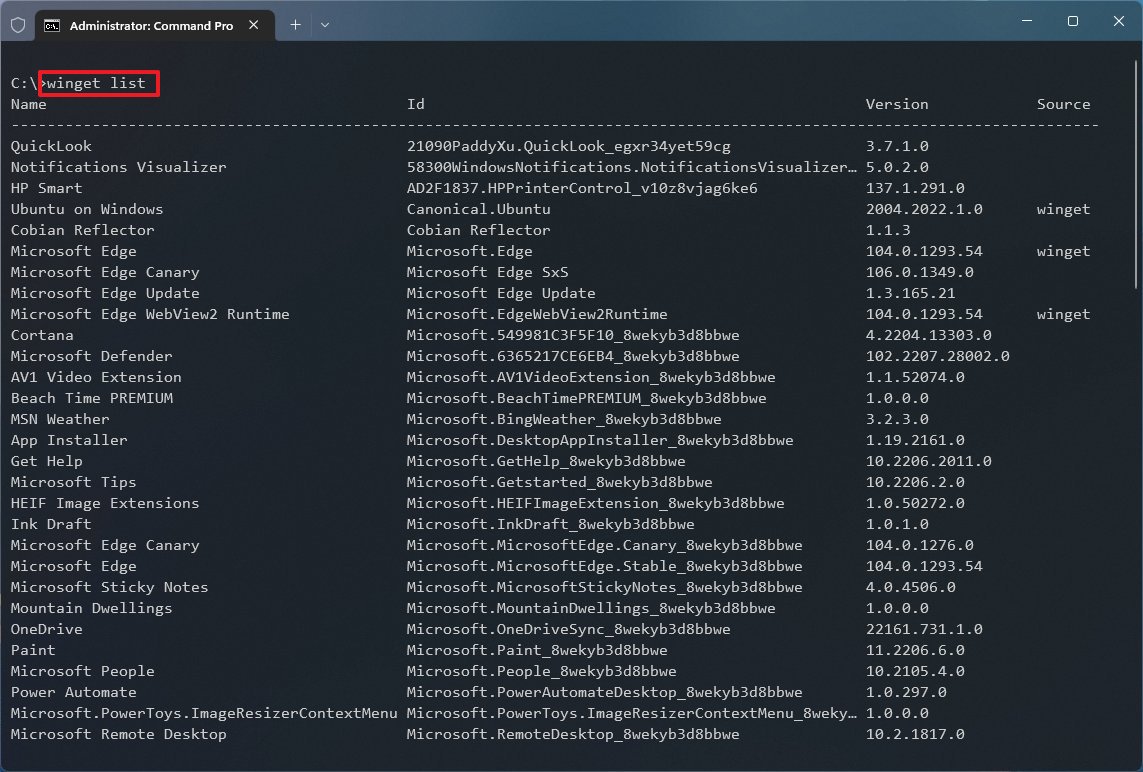
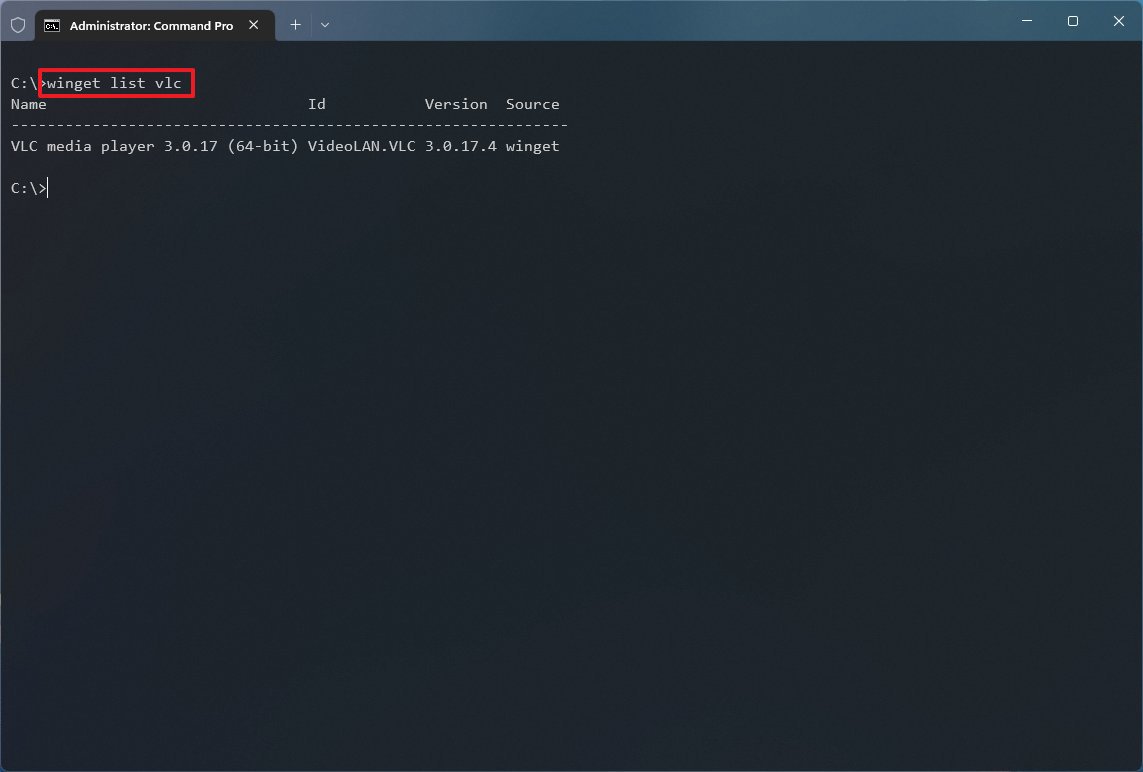
- Type the following command to list the app installed on Windows 11 and press Enter: winget list
- (Optional) Type the following command to confirm an app installation and press Enter: winget list APP-NAME
After you complete the steps, you can confirm whether the app has been successfully installed on Windows 11.
More resources
For more helpful articles, coverage, and answers to common questions about Windows 10 and Windows 11, visit the following resources:

Mauro Huculak has been a Windows How-To Expert contributor for WindowsCentral.com for nearly a decade and has over 22 years of combined experience in IT and technical writing. He holds various professional certifications from Microsoft, Cisco, VMware, and CompTIA and has been recognized as a Microsoft MVP for many years.
