How to fix File Explorer thumbnails not showing correctly on Windows 11
If you're dealing with thumbnail preview issues, these instructions will resolve the problem on Windows 11.
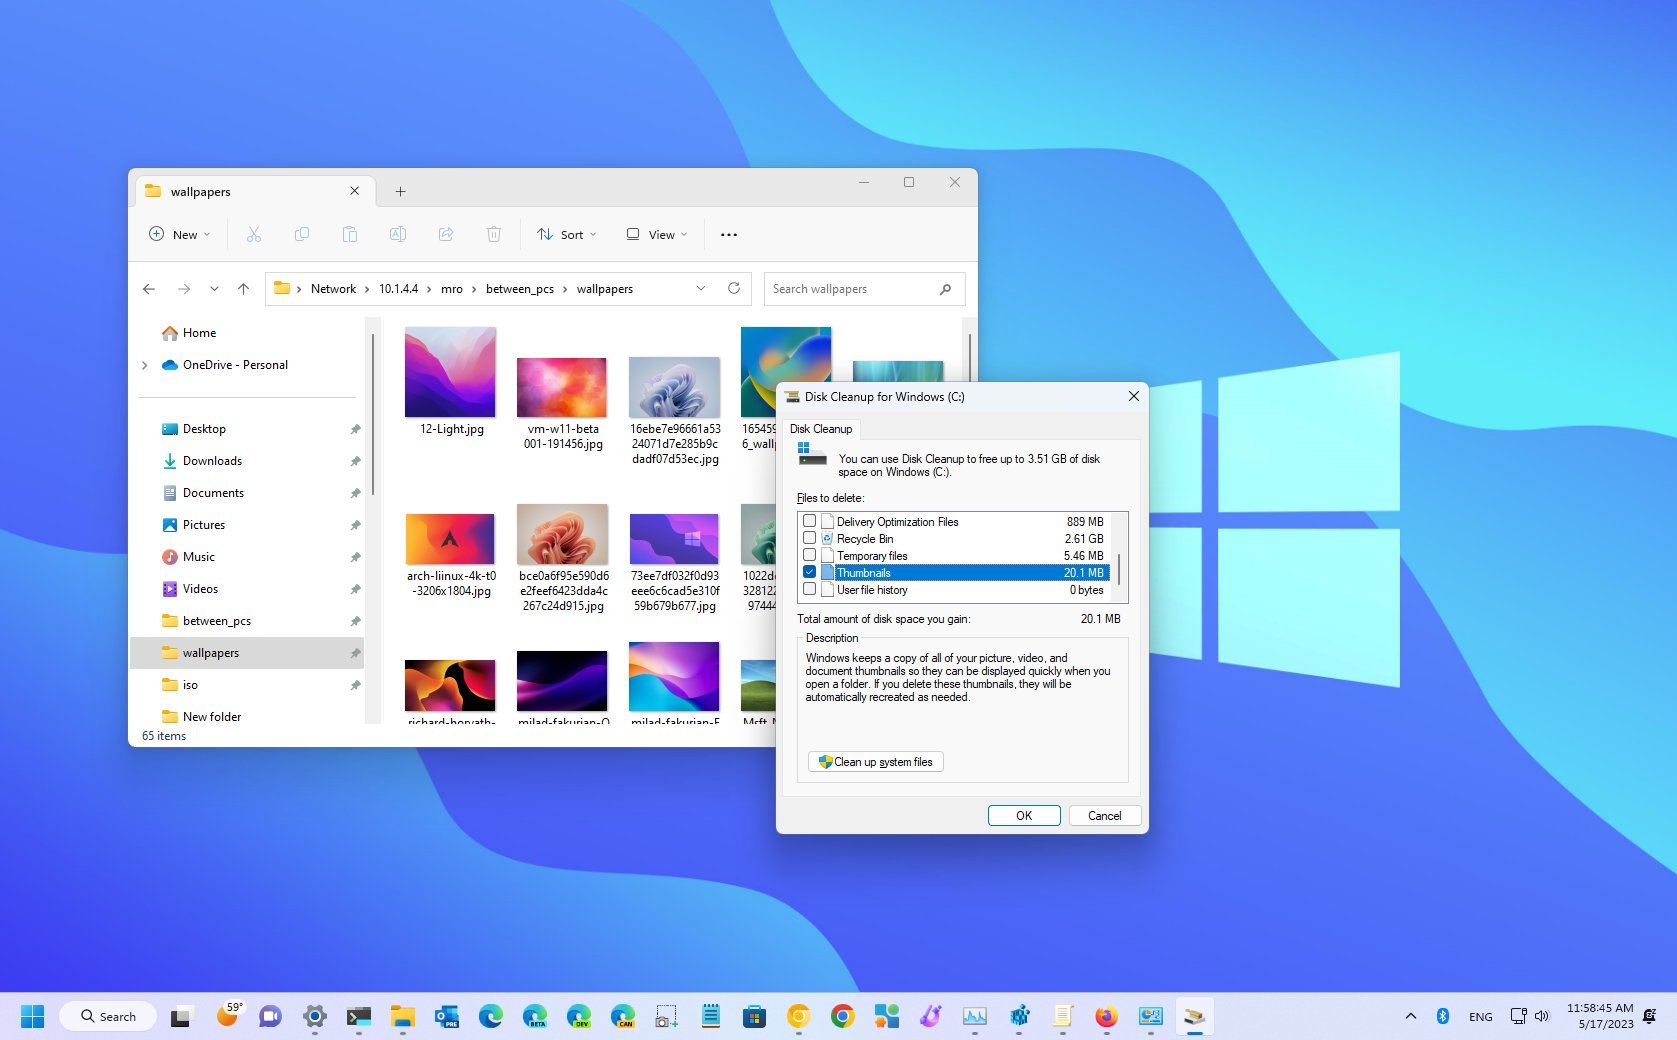
On Windows 11, thumbnails are those image previews for files and folders that give you a snapshot of the contents before accessing the location, document, image, or video.
Although it's a convenient feature available on File Explorer, sometimes the database that stores these images can become corrupted, causing the system not to show thumbnail previews correctly.
Whatever the reason might be, on Windows 11, if the system isn't showing thumbnails correctly, you can clear the thumbnail database to recreate the information in at least three ways using the Disk Cleanup legacy tool and Command Prompt.
This how-to guide will walk you through the steps to fix thumbnail problems on Windows 11.
How to repair thumbnail cache by enabling feature on Windows 11
The feature is probably turned off if you do not see thumbnails on File Explorer. As such, the first thing you want to do is to check the file manager settings.
To enable thumbnails for File Explorer, use these steps:
- Open File Explorer.
- Click the See more (three-dots) button in the command bar and click on Options.
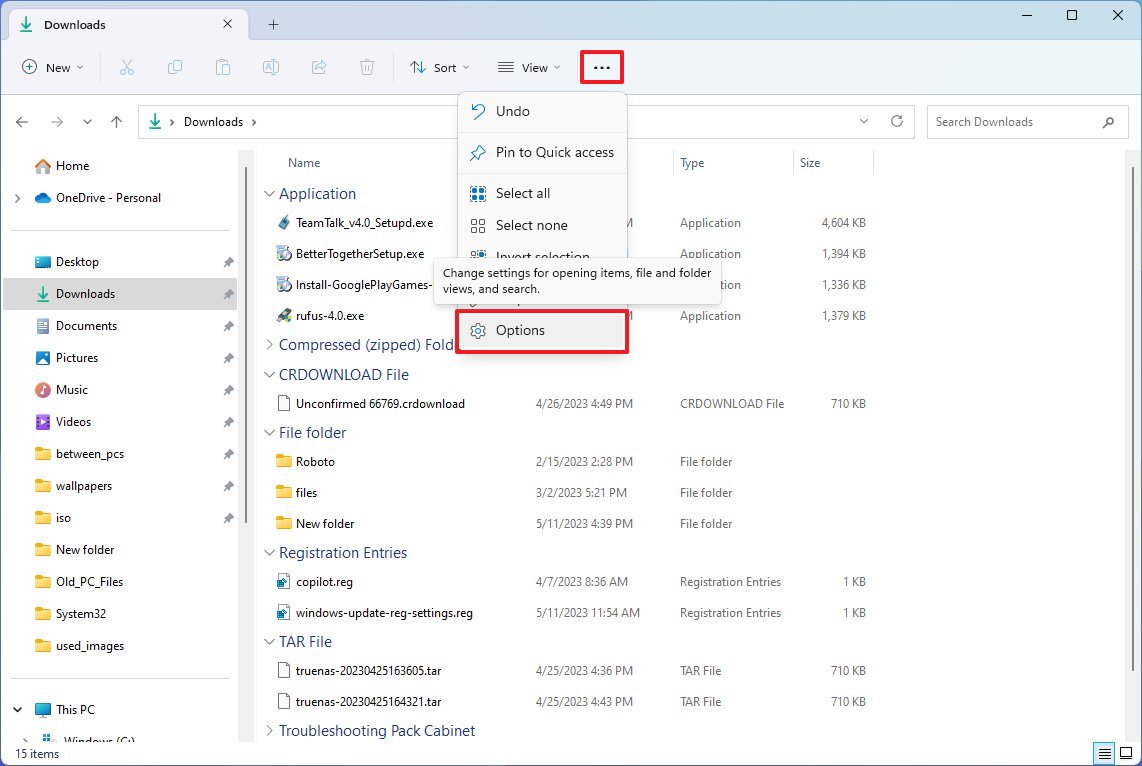
- Click the View tab.
- Clear the "Always show icons, never thumbnails" option.
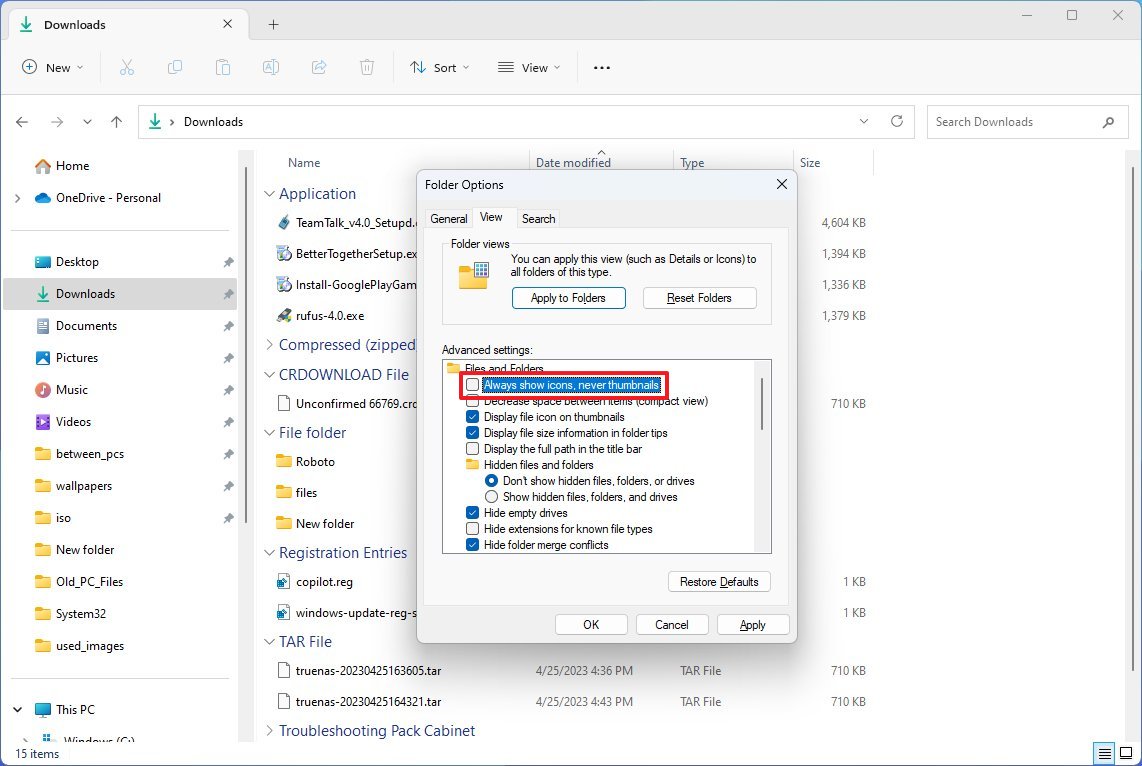
- Click the Apply button.
- Click the OK button.
Once you complete the steps, File Explorer should now be able to show thumbnails for folders and supported files.
Get the Windows Central Newsletter
All the latest news, reviews, and guides for Windows and Xbox diehards.
It's important to note that File Explorer can only thumbnails for specific file formats. For example, some files, such as those created with Photoshop, won't thumbnails unless you have the Adobe application installed on your computer.
How to repair thumbnail cache from Settings
To clear the thumbnail database cache to fix image preview problems on Windows 11, use these steps:
- Open Settings.
- Click on Storage.
- Click the Temporary files option.
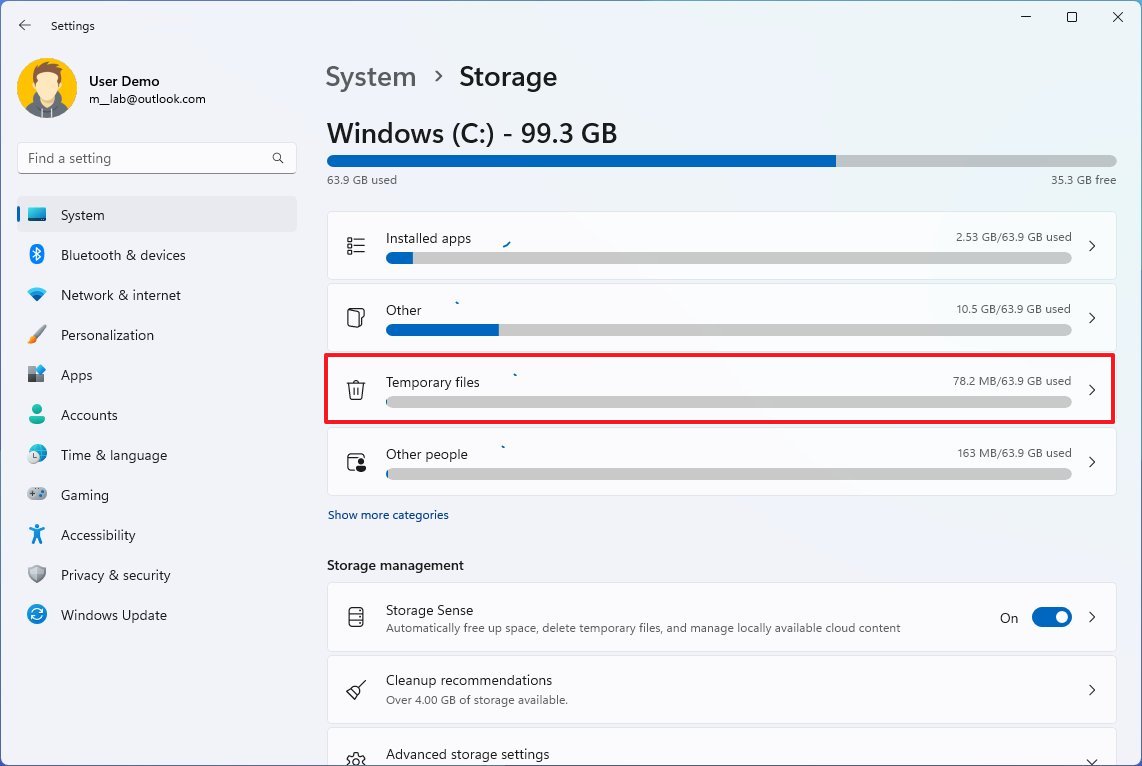
- Clear the current selection.
- Check the Thumbnails item.
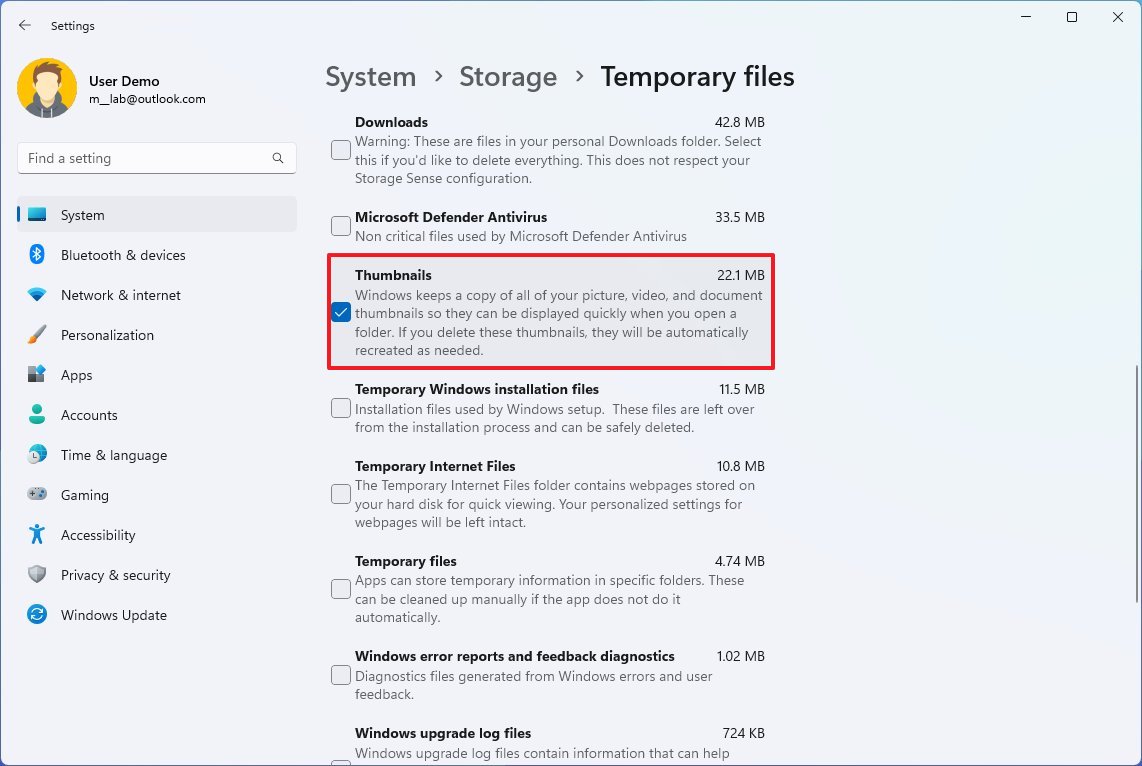
- Click the Remove files button.
After you complete the steps, the next time you open File Explorer again, files and folders should display thumbnails again.
How to repair thumbnail cache from Disk Cleanup
To fix thumbnail problems on Windows 11, use these steps:
- Close File Explorer (if applicable).
- Open Control Panel.
- Click on System and Security.
- Click on Windows Tool.
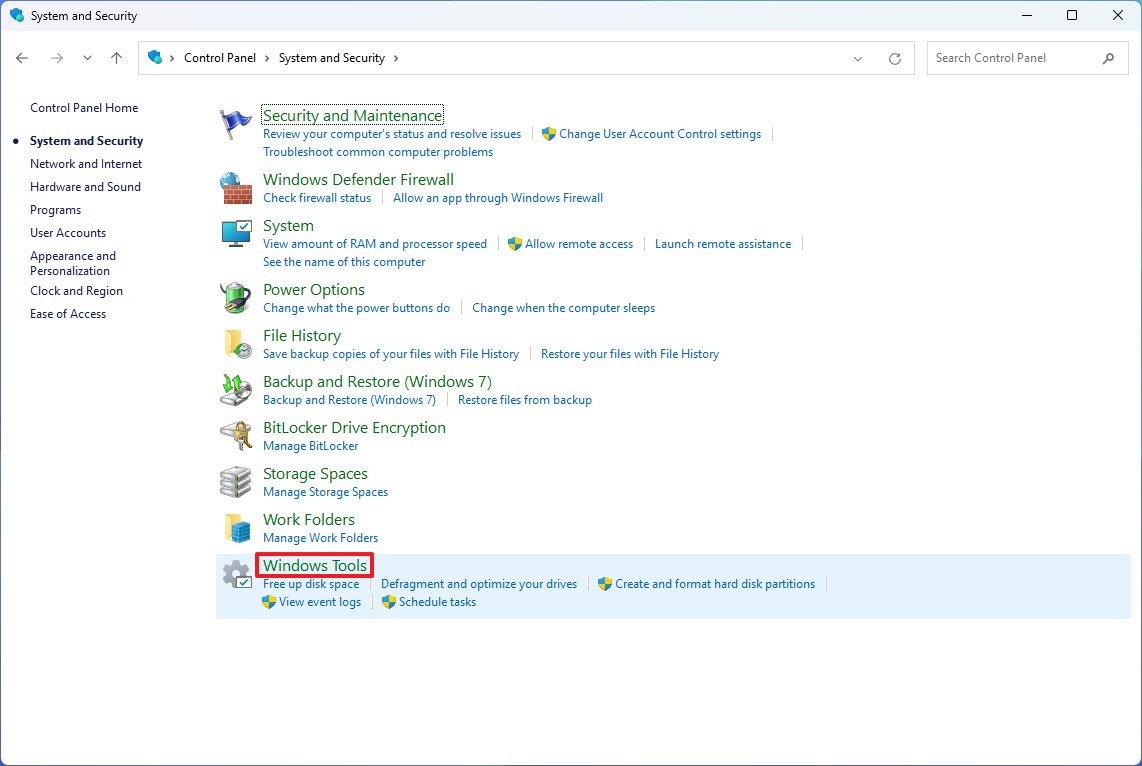
- Start the Disk Cleanup tool.
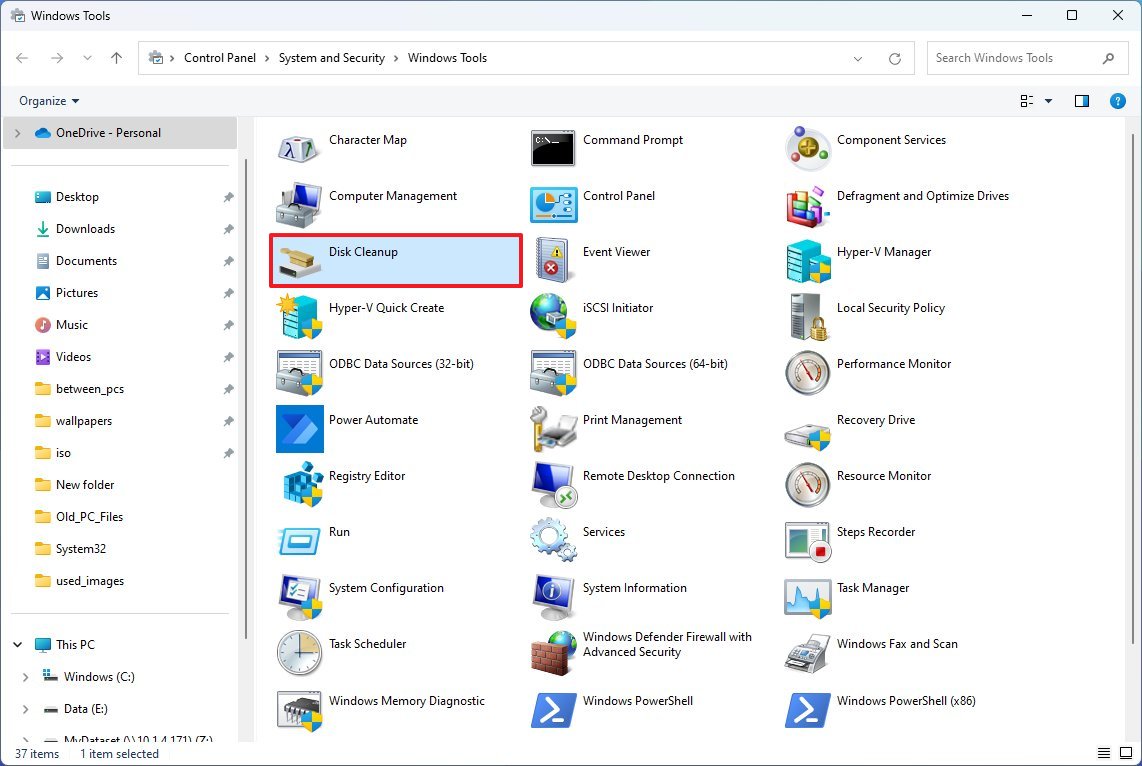
- Clear the current item selections.
- Check the Thumbnails option.
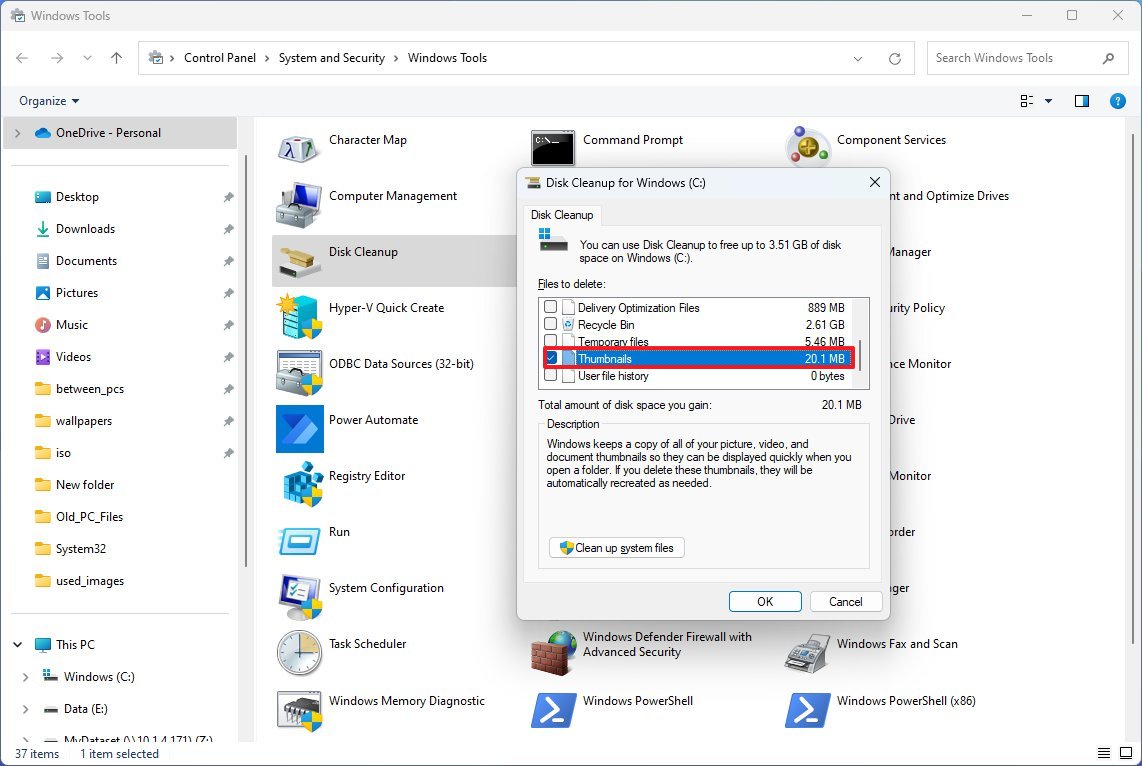
- Click the OK button.
- Click the Delete Files button.
After you complete the steps, the default file manager for Windows 11 should display thumbnails.
How to repair thumbnail cache from Command Prompt
To resolve issues with thumbnails not working correctly from Command Prompt, use these steps:
- Open Start.
- Search for Command Prompt, right-click the top result, and select the Run as administrator option.
- Type the following command to terminate the File Explorer services and press Enter: taskkill /f /im explorer.exe
- Type the following command to clear the thumbnail cache files on Windows 11 and press Enter: del /f /s /q /a %LocalAppData%\Microsoft\Windows\Explorer\thumbcache_*.db
- Type the following command to restart the File Explorer services and press Enter: start explorer.exe
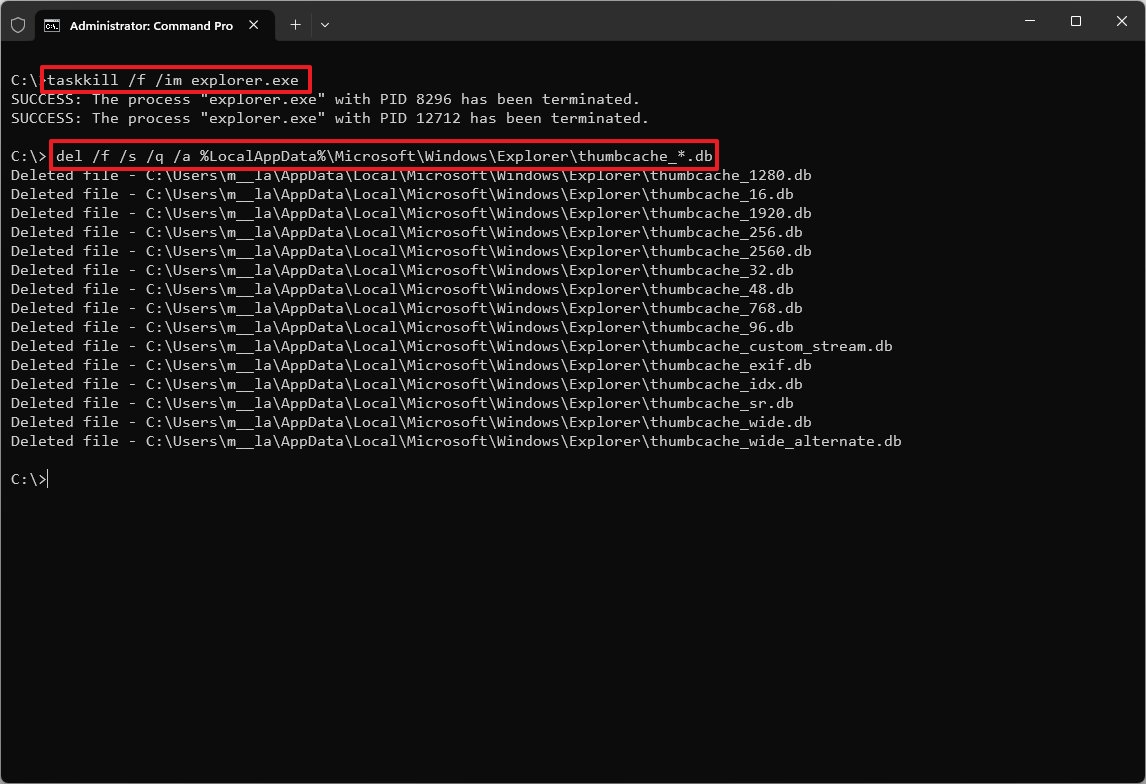
Once you complete the steps, the thumbnail cache will be recreated to fix problems on File Explorer.
More resources
For more helpful articles, coverage, and answers to common questions about Windows 10 and Windows 11, visit the following resources:
Mauro Huculak has been a Windows How-To Expert contributor for WindowsCentral.com for nearly a decade and has over 15 years of experience writing comprehensive guides. He also has an IT background and has achieved different professional certifications from Microsoft, Cisco, VMware, and CompTIA. He has been recognized as a Microsoft MVP for many years.

