How to find available memory slots on Windows 11
Here are three easy ways to check the number of RAM slots available without opening your computer on Windows 11.
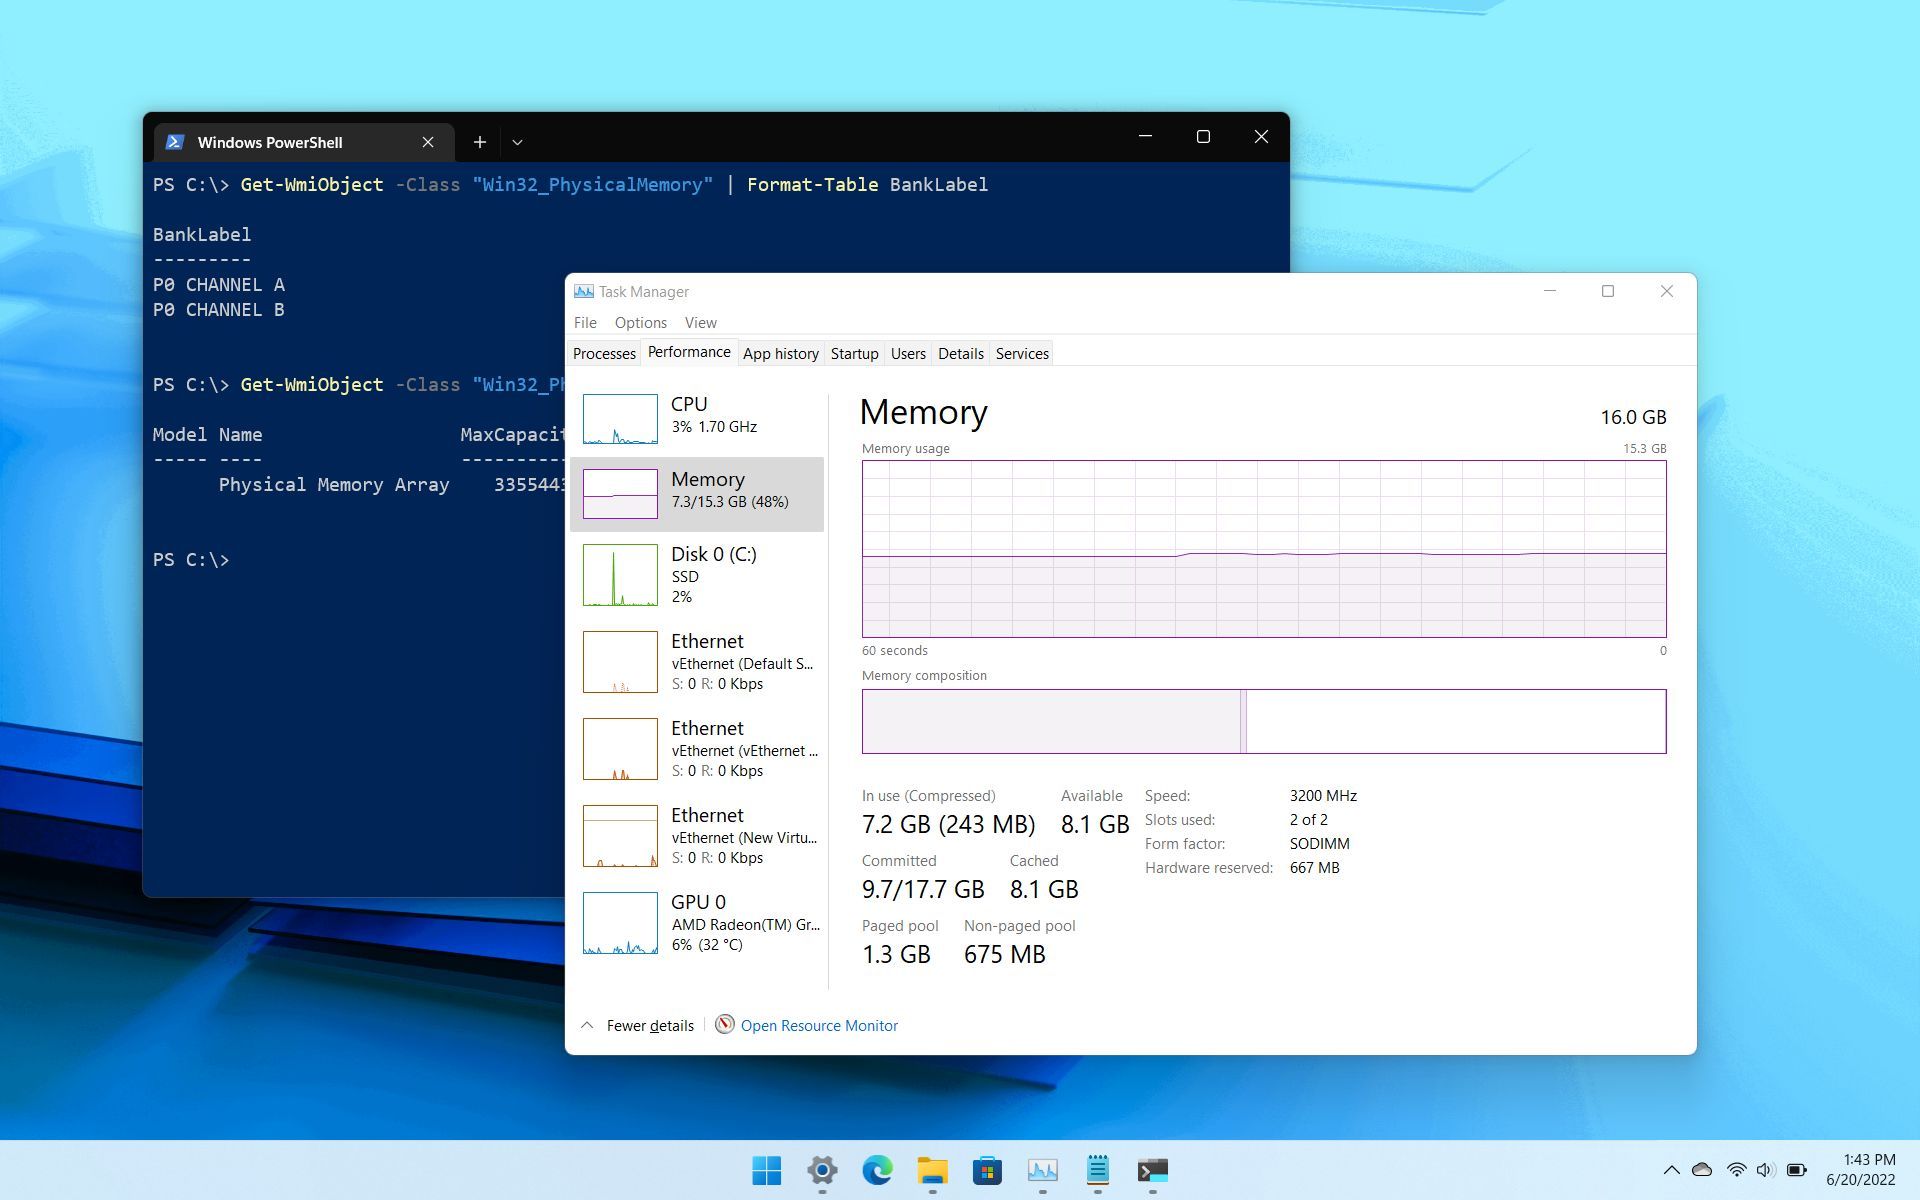
On Windows 11, determining the number of memory slots on the motherboard can come in handy if you need to upgrade the system's RAM (Random Access Memory) on your computer. For example, it can help determine whether there are any extra slots to add more sticks or whether you need to get a new kit with higher capacity modules.
Although it's possible to check the device documentation online or open the computer case, you can use different tools (such as Task Manager, Command Prompt, or PowerShell) to check the slots and determine whether the motherboard still has some of them available.
In this guide, we will walk you through the steps to confirm whether the system has any available slots to add more memory to the computer.
How to check available memory slots on Windows 11
To determine whether your laptop or desktop computer has available memory slots, use these steps:
- Open Start.
- Search for Task Manager and click the top result to open the app.
- Quick tip: You can access the app with the Ctrl + Alt + Del keyboard shortcut, Quick Links menu (Windows key + X keyboard shortcut ), and Ctrl + Shift + Esc keyboard shortcut.
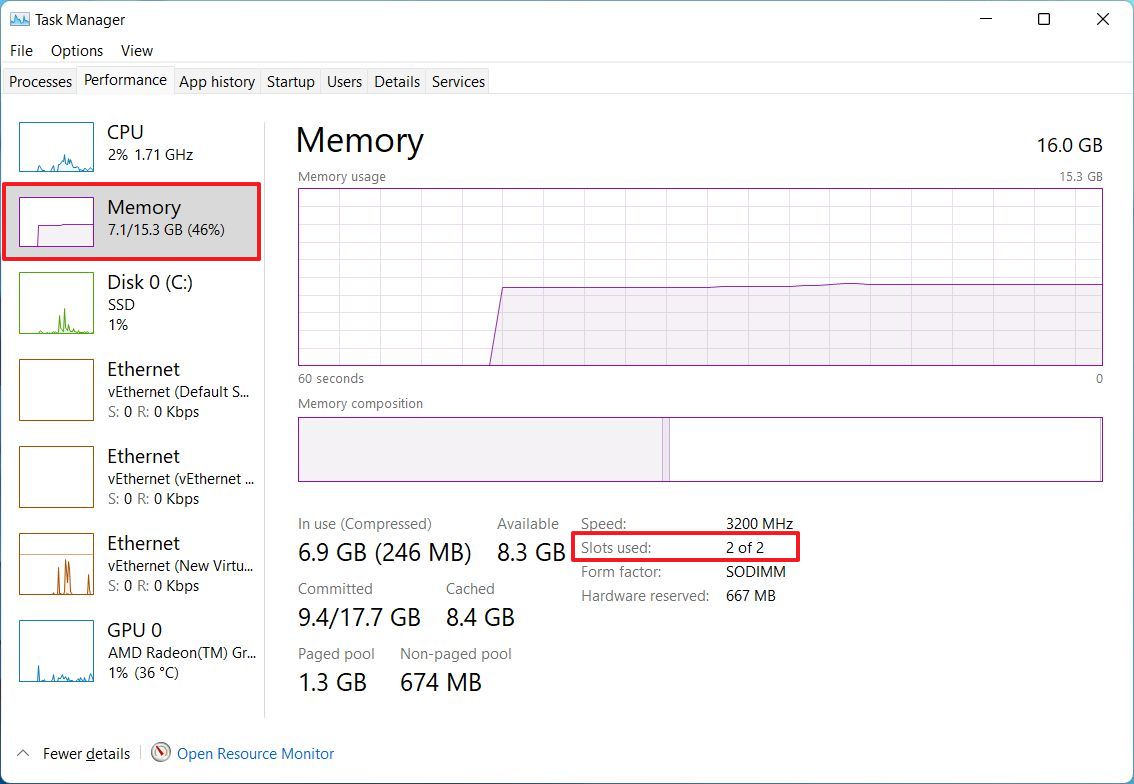
- Click the Performance tab.
- Click on Memory.
- Confirm the number of memory slots available under the "Slot used" information on the bottom-right side of the page.
Once you complete the steps, the Task Manager will confirm the total number of slots and which ones are being used.
How to check available memory slots using Command Prompt
To check the number of memory slots and the ones that may not still be populated on Command Prompt, use these steps:
- Open Start.
- Search for Command Prompt, right-click the top result, and select the Run as administrator option.
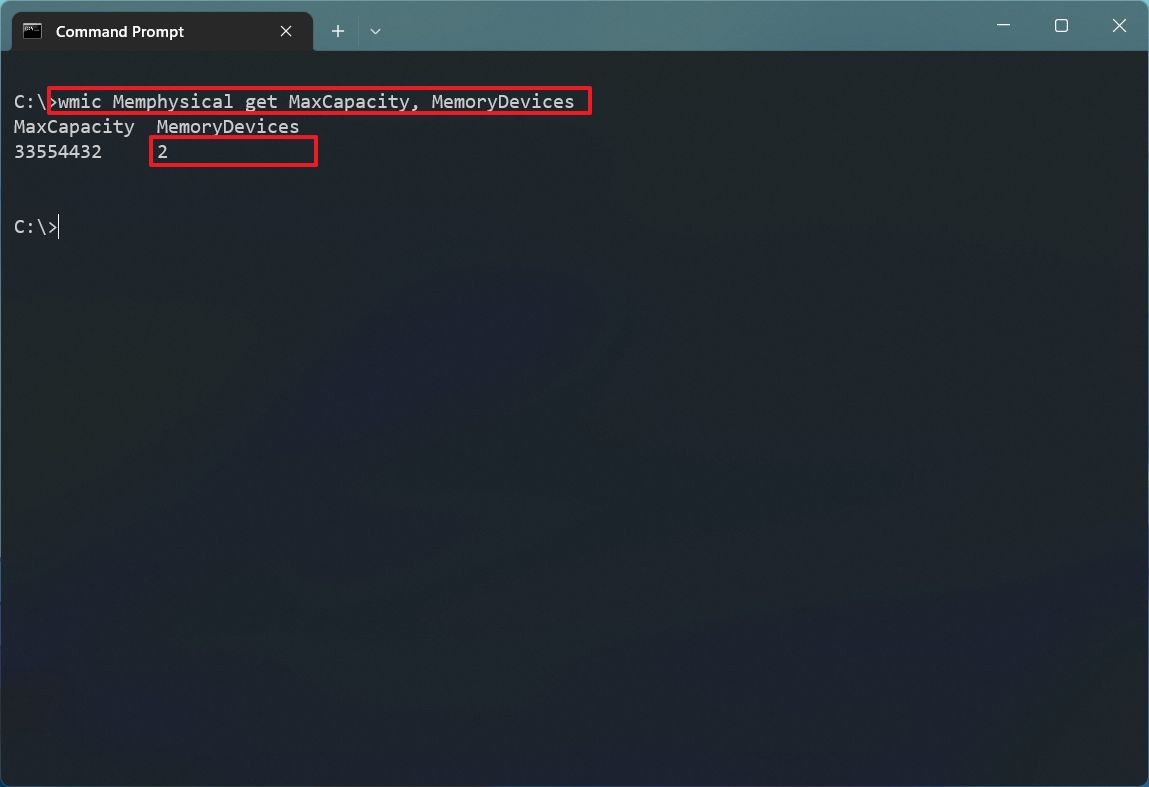
- Type the following command to determine the slots available in the motherboard and press Enter: wmic Memphysical get MaxCapacity, MemoryDevices
- Confirm the MemoryDevices to find the total amount of slots on the system.
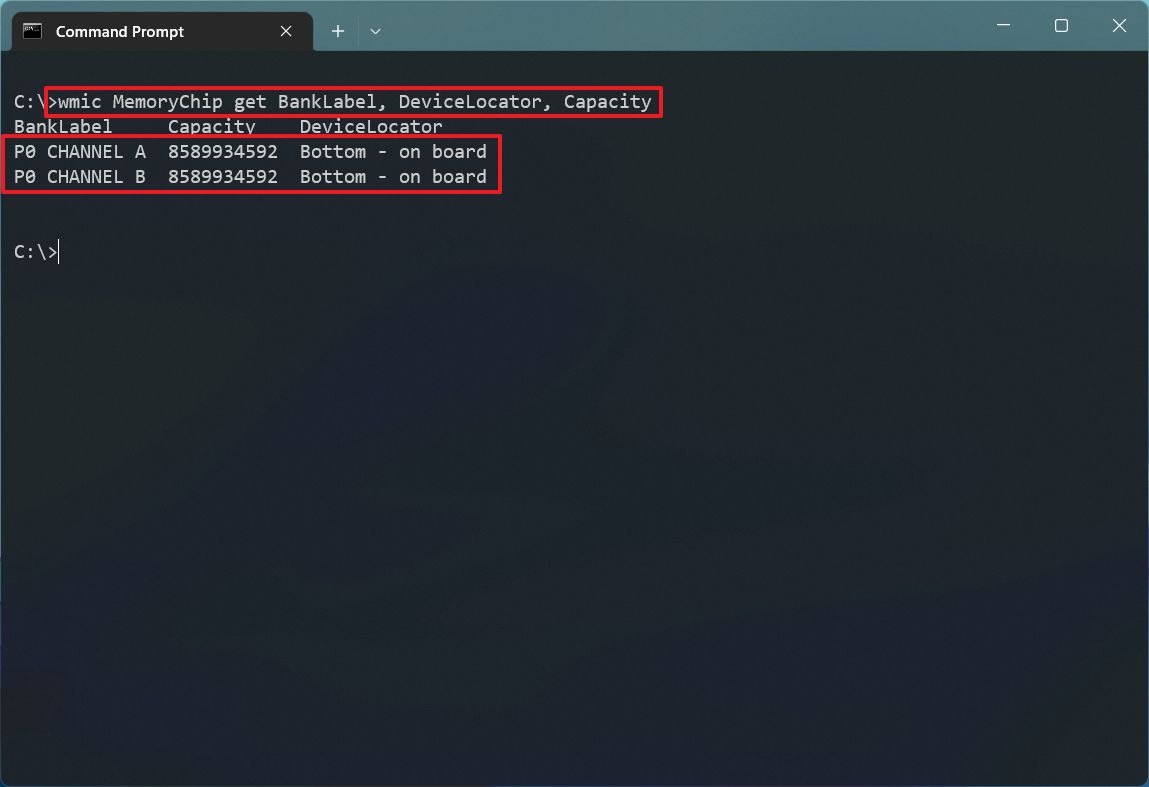
- Type the following command to find the used slots and press Enter: wmic MemoryChip get BankLabel, DeviceLocator, Capacity
- Confirm the number of memory sticks installed on the system.
After you complete the steps, the Command Prompt output will list the memory slots on the motherboard and which ones are still not populated.
All the latest news, reviews, and guides for Windows and Xbox diehards.
How to check available memory slots using PowerShell
To find out the memory slots available on the motherboard with PowerShell, use these steps:
- Open Start.
- Search for PowerShell, right-click the top result, and select the Run as administrator option.
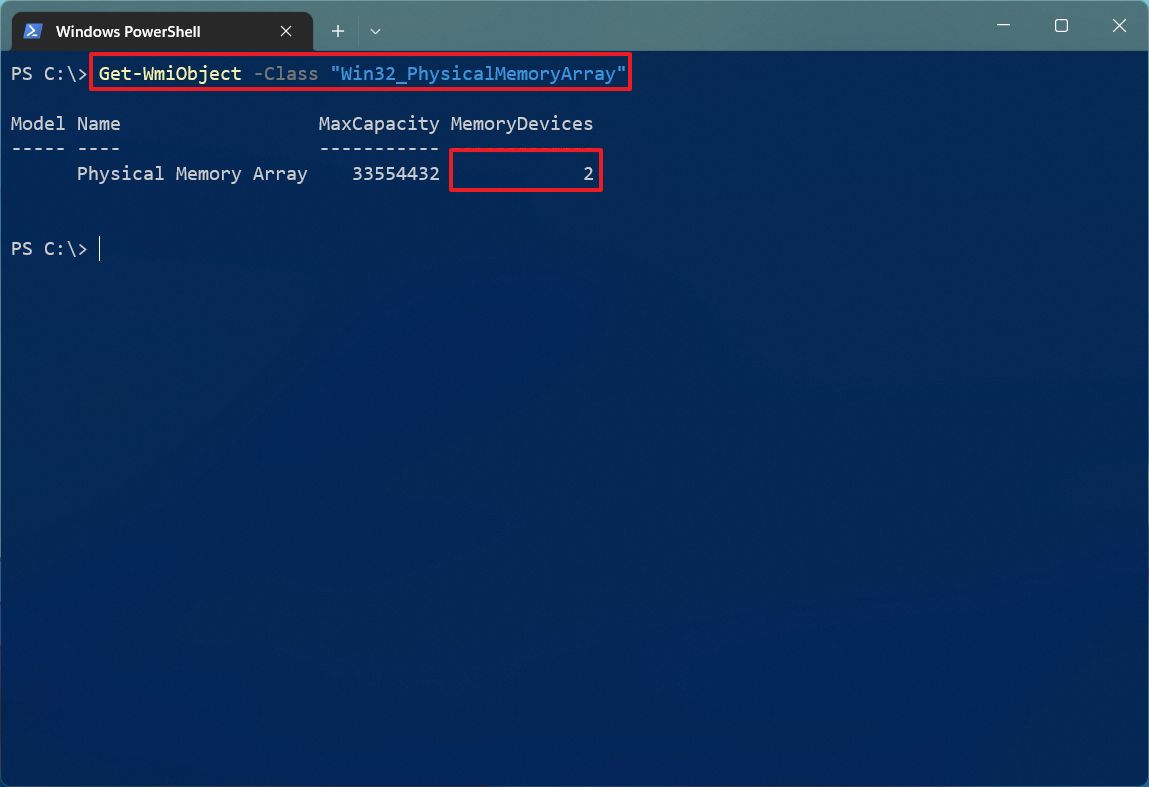
- Type the following command to determine the slots available in the motherboard and press Enter: Get-WmiObject -Class "Win32_PhysicalMemoryArray"
- Confirm the MemoryDevices to find the total amount of slots on the system.
- Type the following command to find the used slots and press Enter: Get-WmiObject -Class "Win32_PhysicalMemory" | Format-Table BankLabel
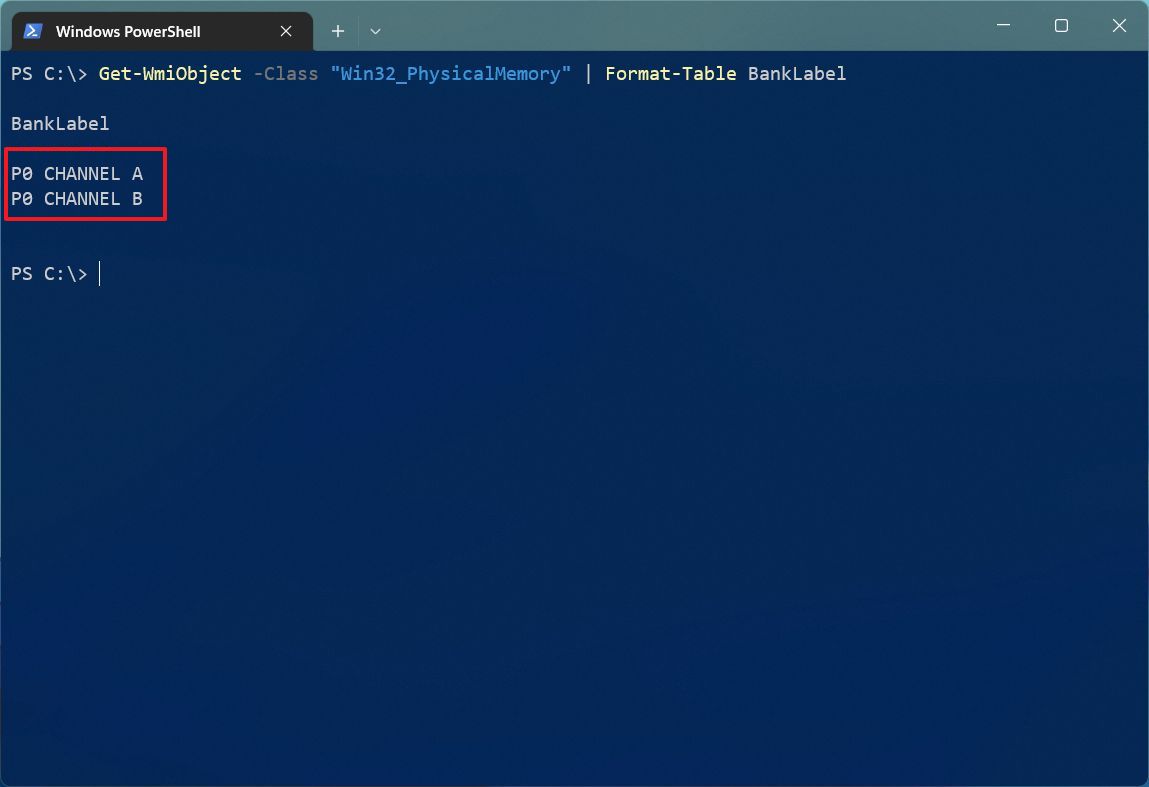
- Confirm the number of memory sticks installed on the system.
Once you complete the steps, PowerShell will return the slots available and the slots that you can use to add more memory.
More Windows resources
For more helpful articles, coverage, and answers to common questions about Windows 10 and Windows 11, visit the following resources:

Mauro Huculak has been a Windows How-To Expert contributor for WindowsCentral.com for nearly a decade and has over 22 years of combined experience in IT and technical writing. He holds various professional certifications from Microsoft, Cisco, VMware, and CompTIA and has been recognized as a Microsoft MVP for many years.
