How to disable data tracking features on Windows 11
Windows 11, apps, and services are always tracking you. Here's how to slow down the data collection.
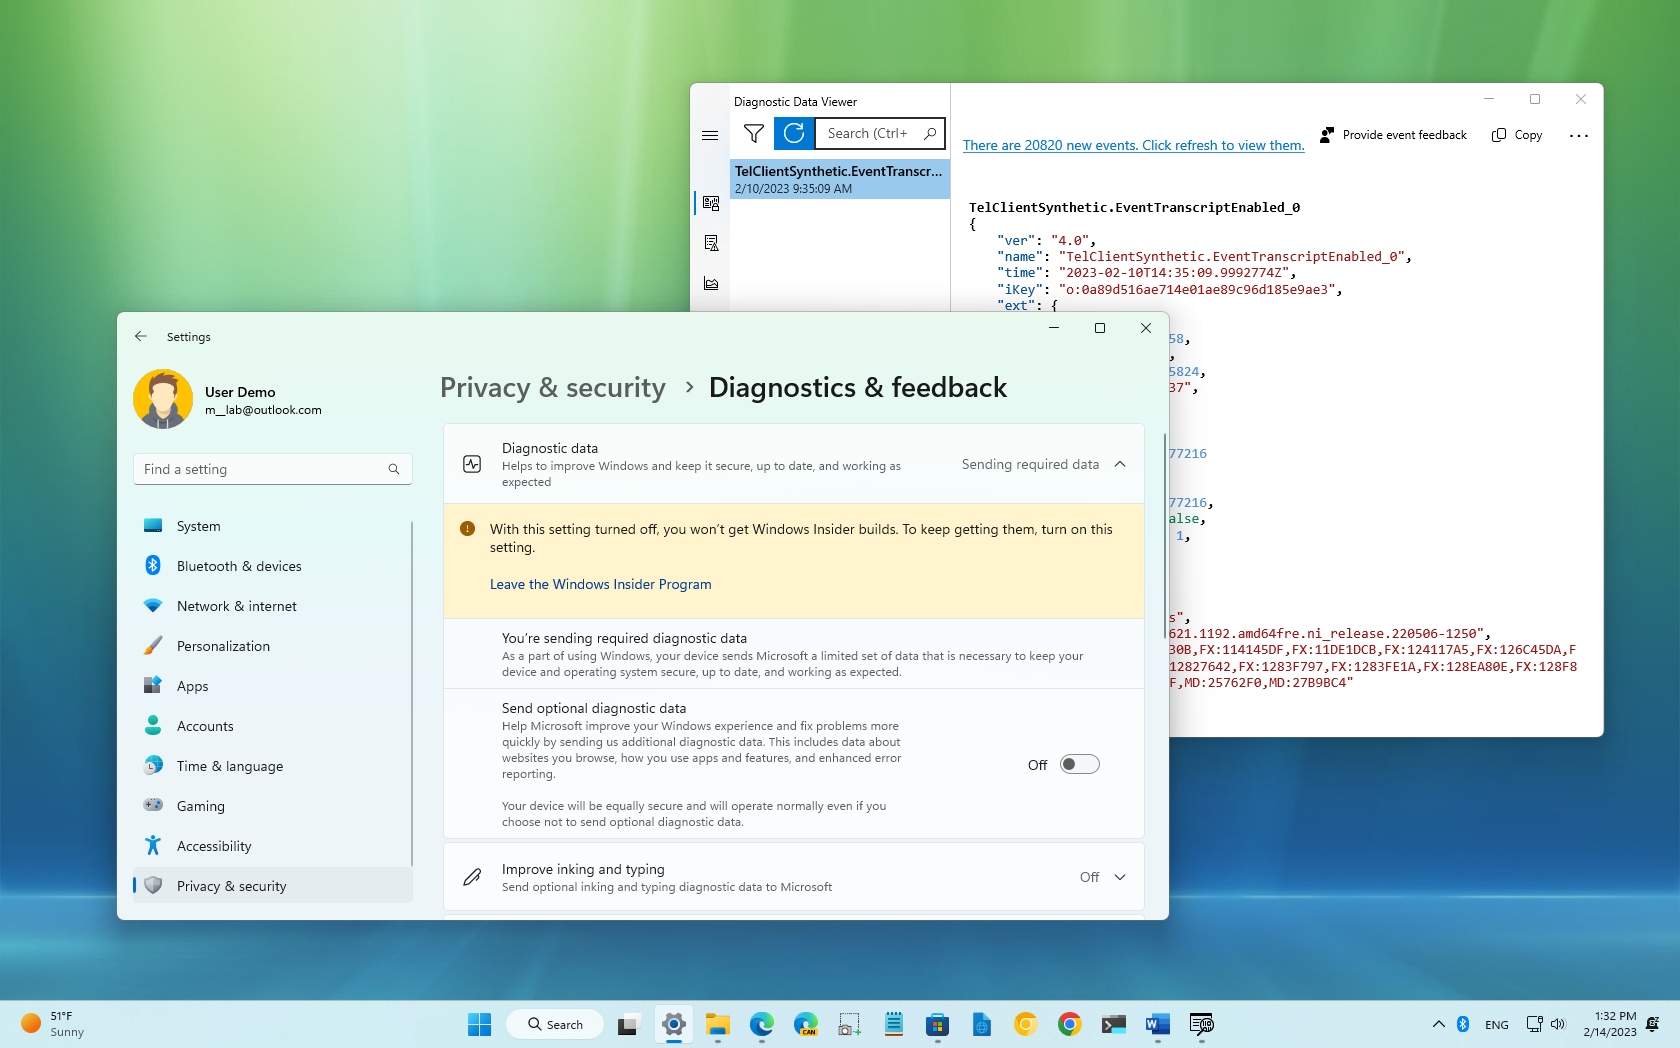
On Windows 11, you can minimize the information that Microsoft, advertisers, and other services track about you and your computer, and in this guide, you will learn how.
It has always been known that Microsoft collects various types of data about your computer and your activities to improve the experience. However, the company seems to be growing the amount of data collection on each new operating system version, and this continues to be a concern for many people.
Case and point, a recent video published in "The PC Security Channel" on YouTube compares the privacy of Windows 11 to the one of Windows XP, and the result shows that the latest version of the operating system appears to be collecting (or at least sending) many folds more of data than the two-decade-old version.
If you are concerned about your privacy, Windows 11 provides settings to disable many of the tracking features to minimize the amount of data the company collects. In addition, the operating system even includes a tool to review some of the data sent to the company.
In this how-to guide, I'll walk you through the steps to understand the diagnostic data that Microsoft collects from your computer and the instructions to disable many of the tracking features available on Windows 11.
How to review tracking data on Windows 11
Although you can't view every piece of information that Microsoft and other services track about you and your computer, it's possible to review the diagnostic data that the company uses to improve the experience on Windows 11.
Install diagnostic data viewer
All the latest news, reviews, and guides for Windows and Xbox diehards.
To install the "Diagnostic Data Viewer" on Windows 11, use these steps:
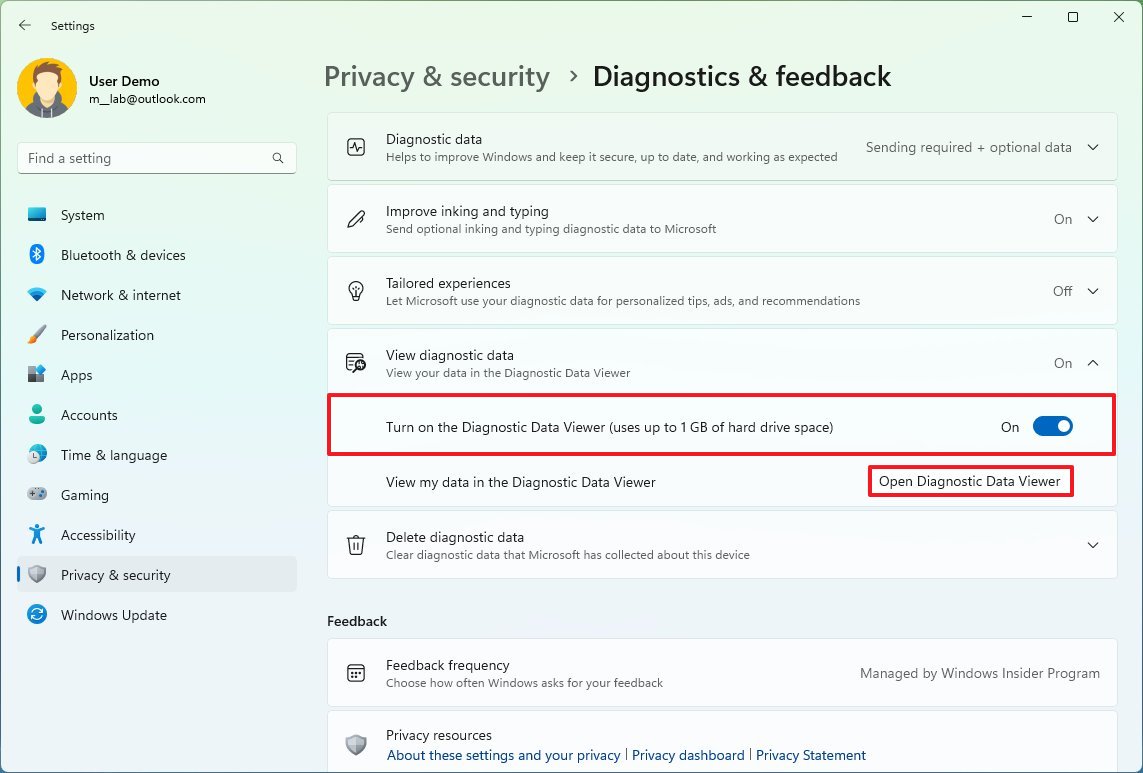
- Open Settings.
- Click on Privacy & security.
- Click the Diagnostic & feedback page from the right side.
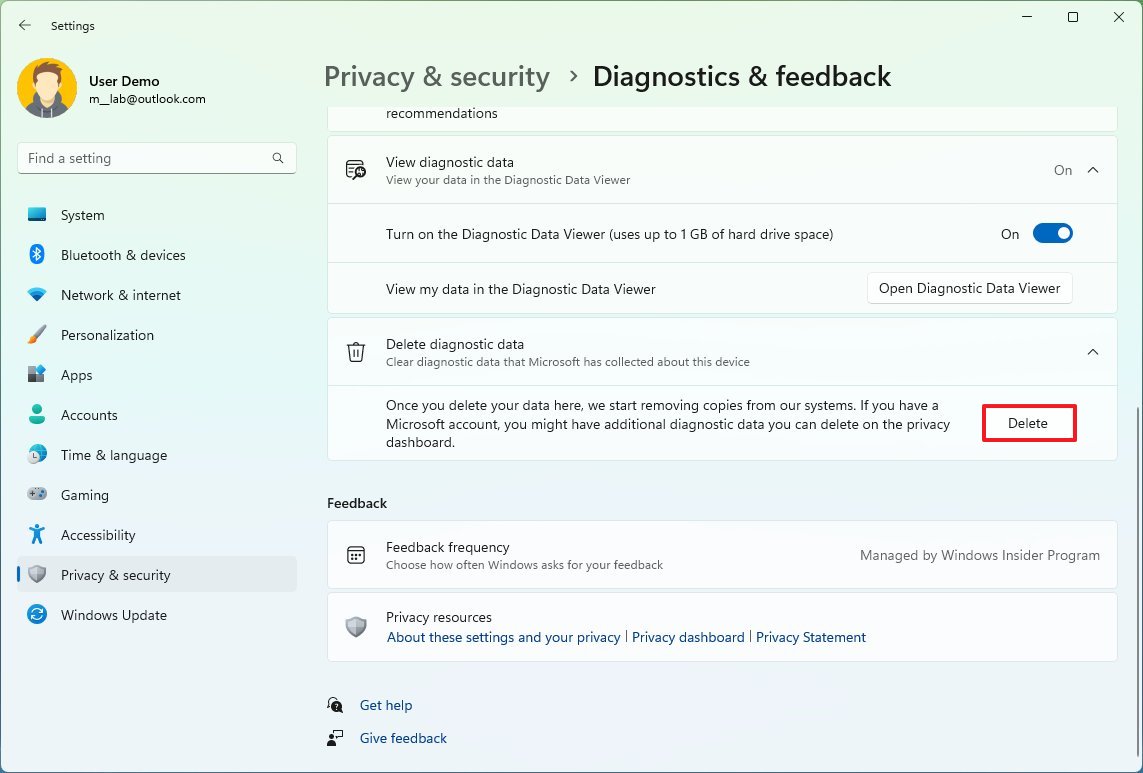
- Click the "View diagnostic data" setting and turn on the toggle switch.
- Click the "Open Diagnostic Data Viewer" button.
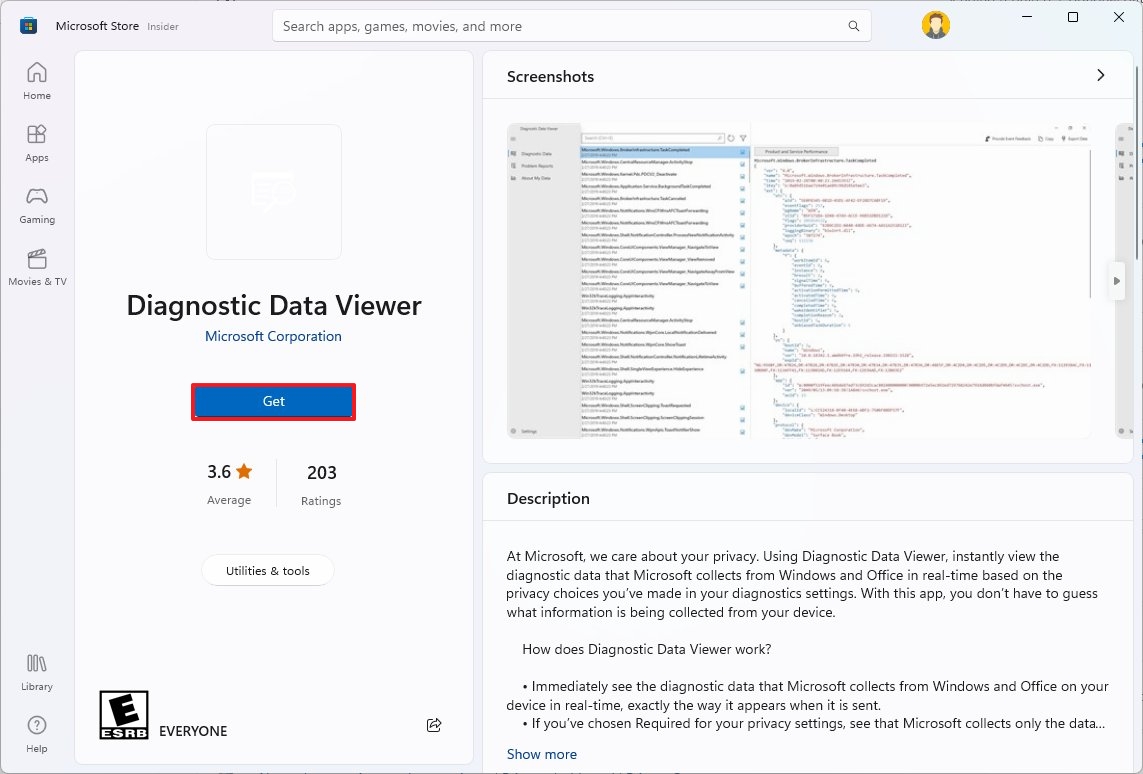
- Click the Install (or Get) button from the Microsoft Store.
Once you complete the steps, you can proceed to open the app and review the data that Microsoft collects from you and your computer.
Review diagnostic data
To review the diagnostic data, use these steps:
- Open Settings.
- Click on Privacy & security.
- Click the Diagnostic & feedback page from the right side.
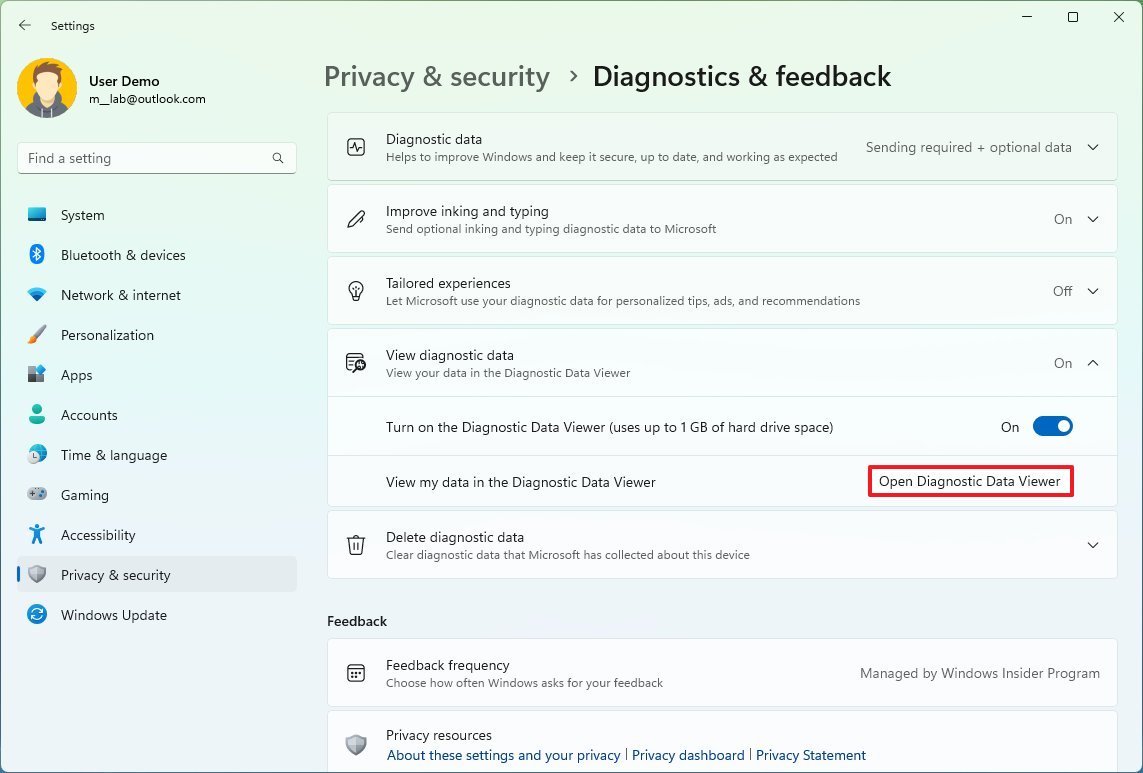
- Click the "View diagnostic data" setting and turn on the toggle switch.
- Click the "Open Diagnostic Data Viewer" button.
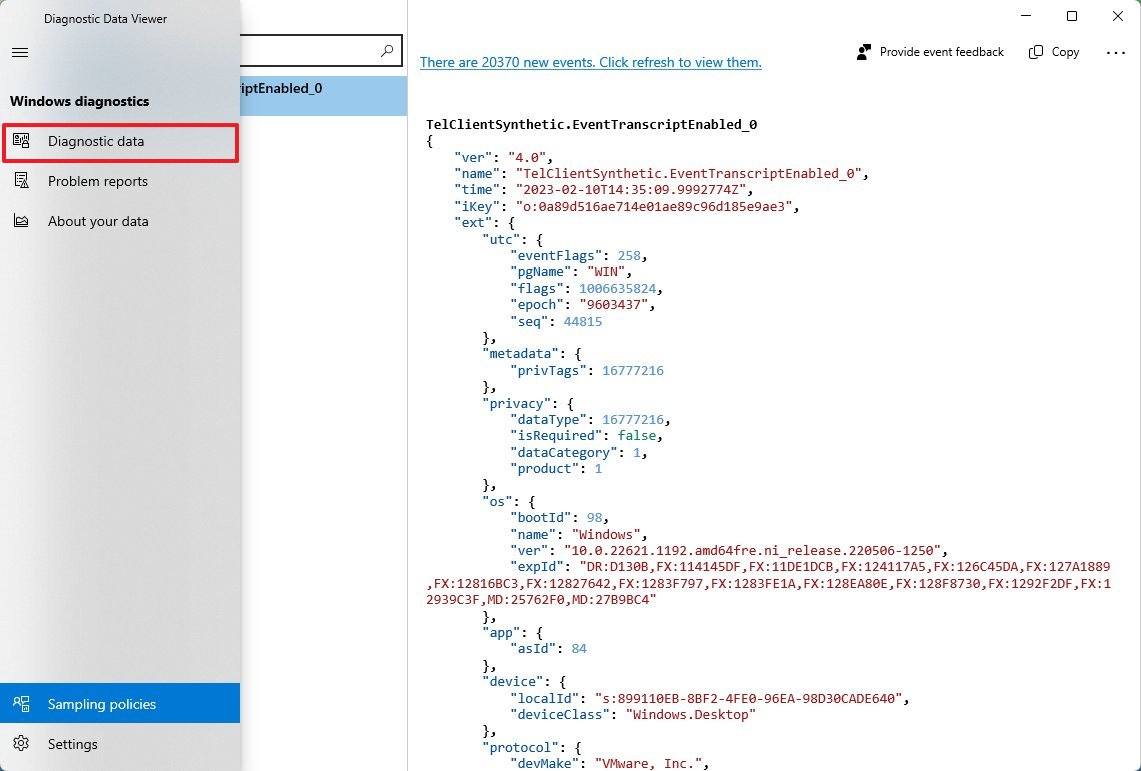
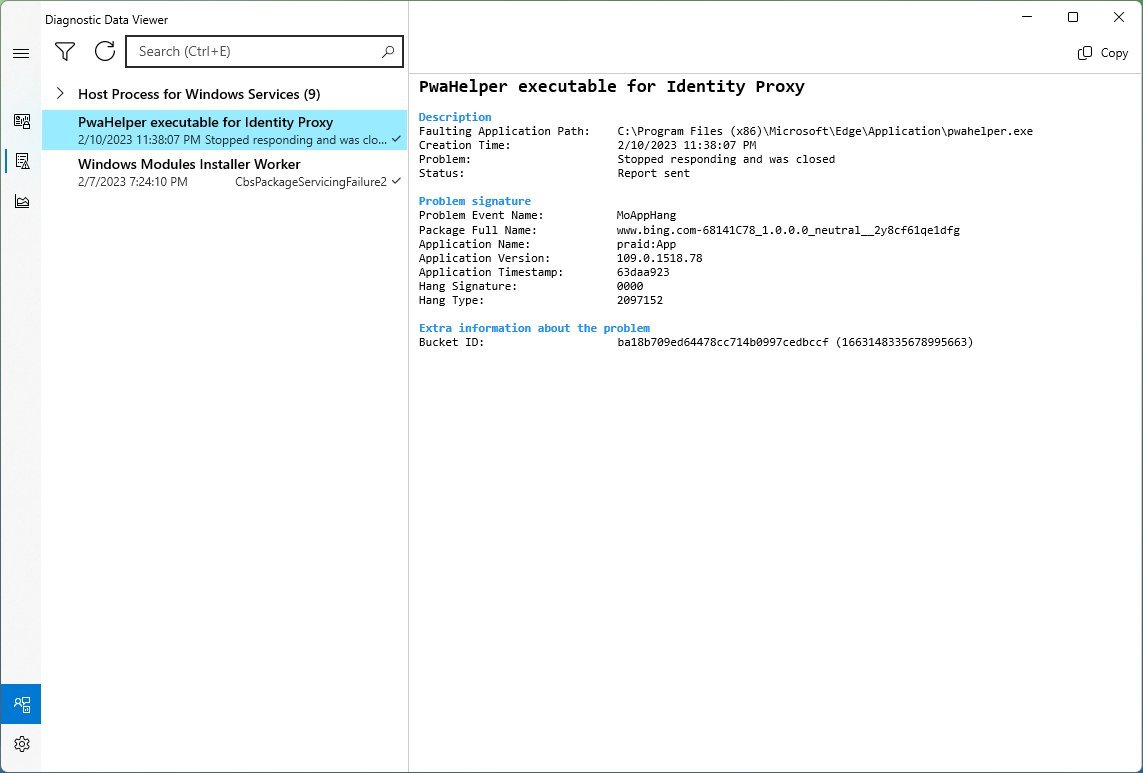
- Click on Diagnostic data to review the data that Microsoft has been collecting.
- Click on Problem reports to check the system issues that were reported to Microsoft.
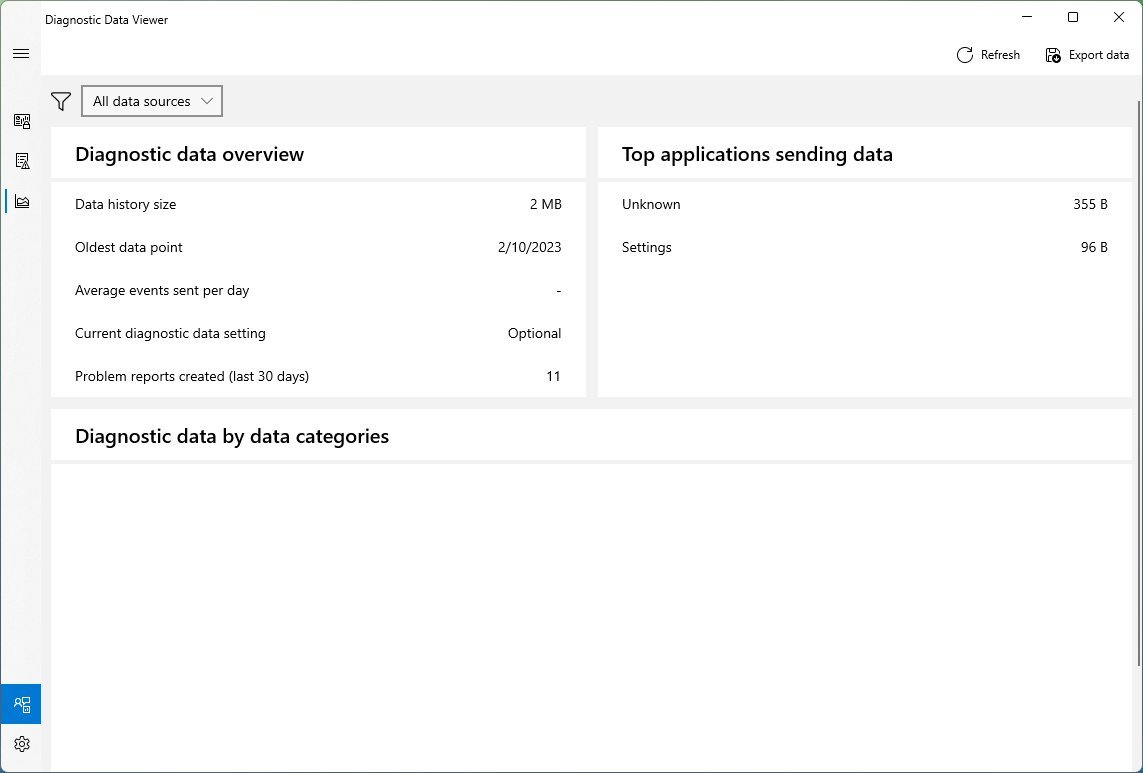
- Click on About your data to see an overview of data captured on your computer.
After you complete the steps, you will have a basic understanding of the information sent to the software giant, which can include computer configuration, hardware details, peripherals, performance data, installed apps, visited websites, speech, location, and more.
How to disable tracking on Windows 11
Windows 11 includes different features to track information about you and your device, and even though you can disable most of these features, some information may still be sent to the cloud.
Disable diagnostic data collection
To disable diagnostic data collection on Windows 11, use these steps:
- Open Settings.
- Click on Privacy & security.
- Click the Diagnostic & feedback page from the right side.
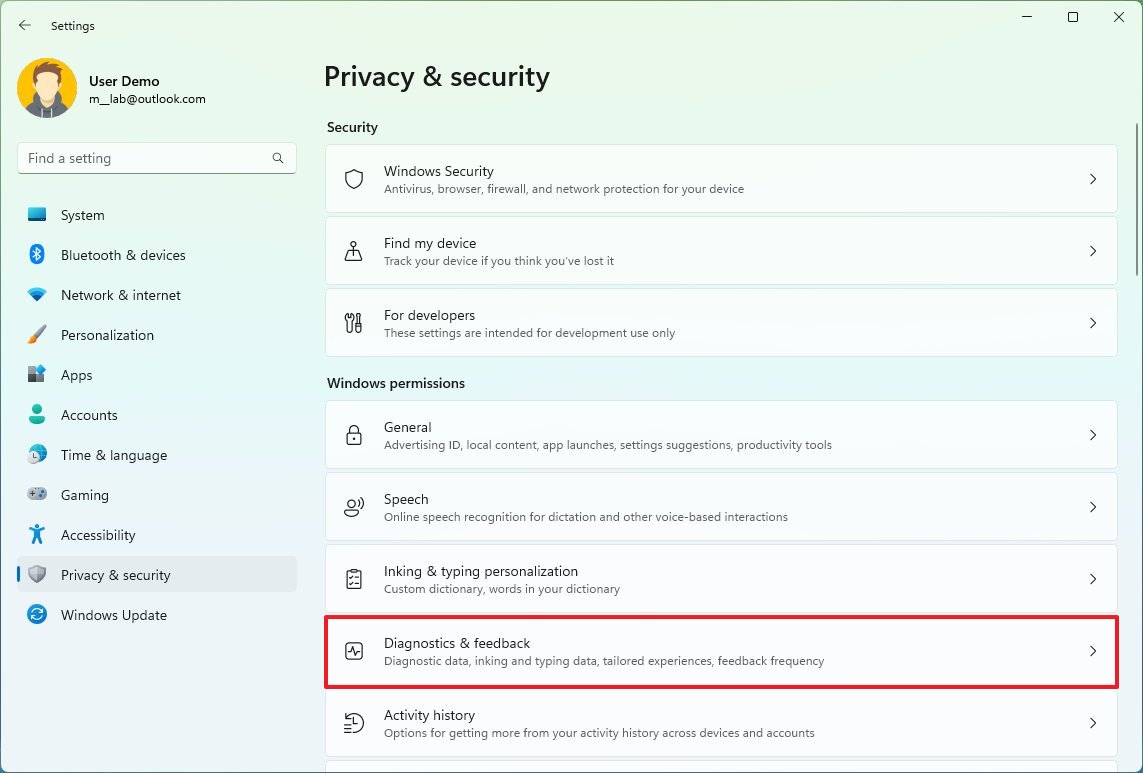
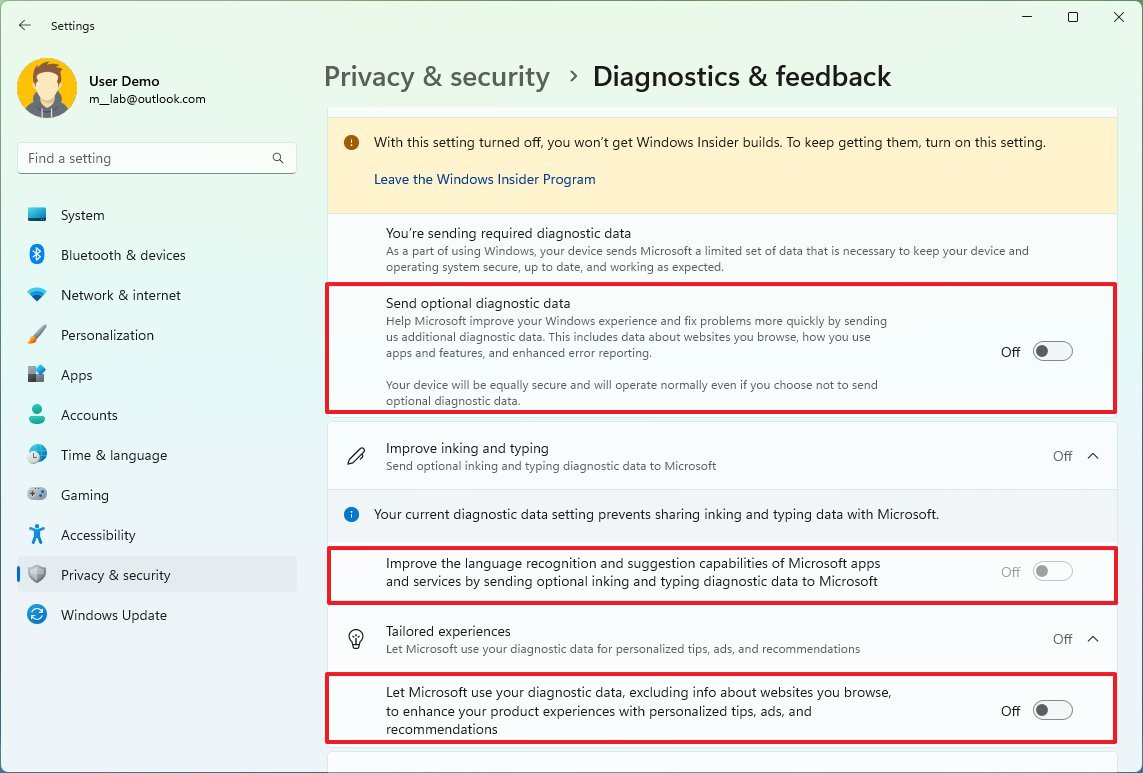
- Under the "Diagnostic data" section, turn off the "Send optional diagnostic data" toggle switch.
- Click the "Improve inking and typing" setting and turn off the toggle switch (if applicable).
- Click the "Tailored experiences" setting to turn off the toggle switch.
- Click the "Delete diagnostic data" setting and click the Delete button to remove the collected diagnostic data from the computer.
Once you complete the steps, the system will continue sending diagnostic data to the software giant. However, the company won't collect some data, such as browsing history, app and feature usage, and enhanced error reporting.
Disable advertising tracking
To disable advertising tracking on Windows 11, use these steps:
- Open Settings.
- Click on Privacy & security.
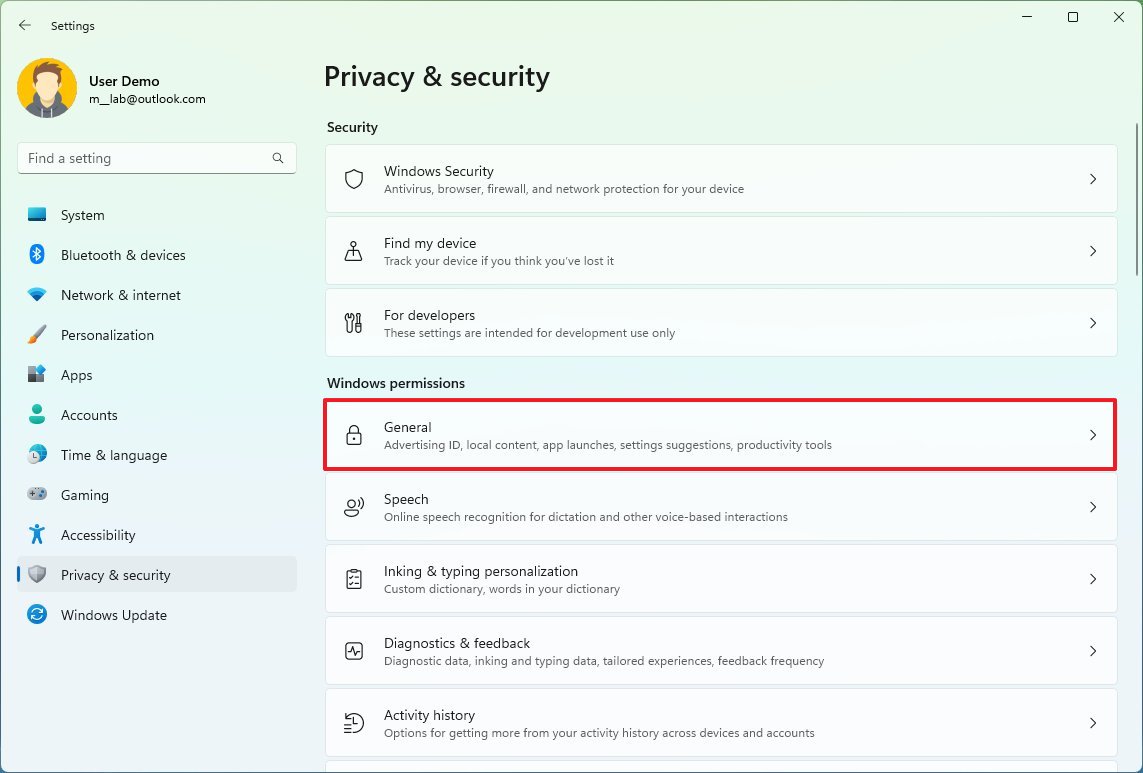
- Click the General page from the right side.
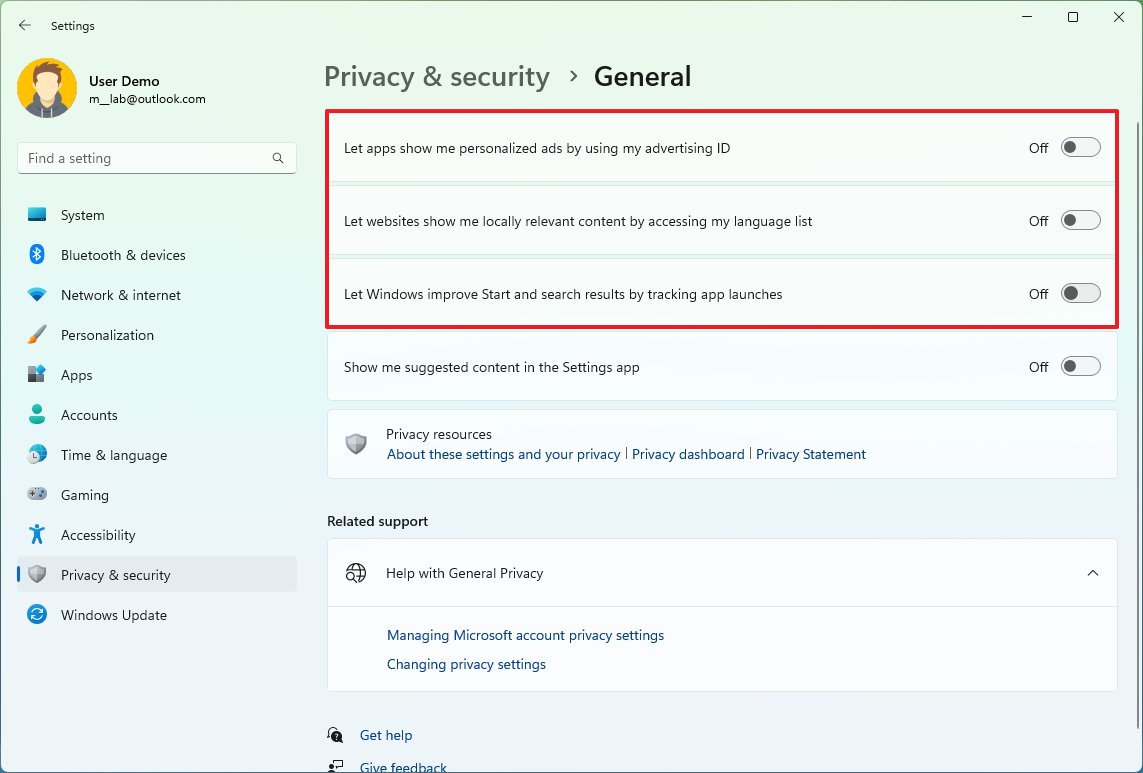
- Turn off the "Let apps show me personalized ads by using my advertising ID" toggle switch.
- Turn off the "Let websites show me locally relevant content by accessing my language list" toggle switch.
- Turn off the "Let Windows improve Start and search results by tracking apps launches" toggle switch.
- (Optional) Turn off the "Show me suggested content in the Settings app" toggle switch.
After you complete the steps, you may continue to see advertisements on Windows 11, but they won't be based on your behavior.
Disable Windows 11 activity tracking
To disable activity tracking on your computer, use these steps:
- Open Settings.
- Click on Privacy & security.
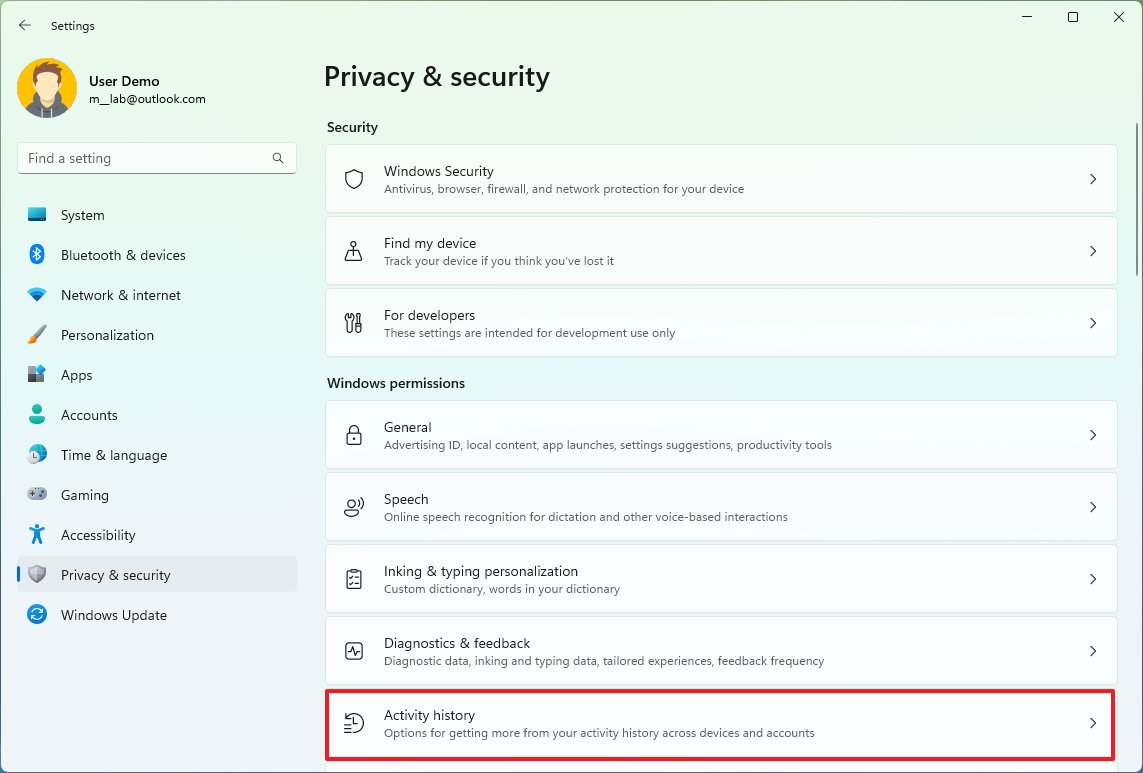
- Click the Activity history page from the right side.
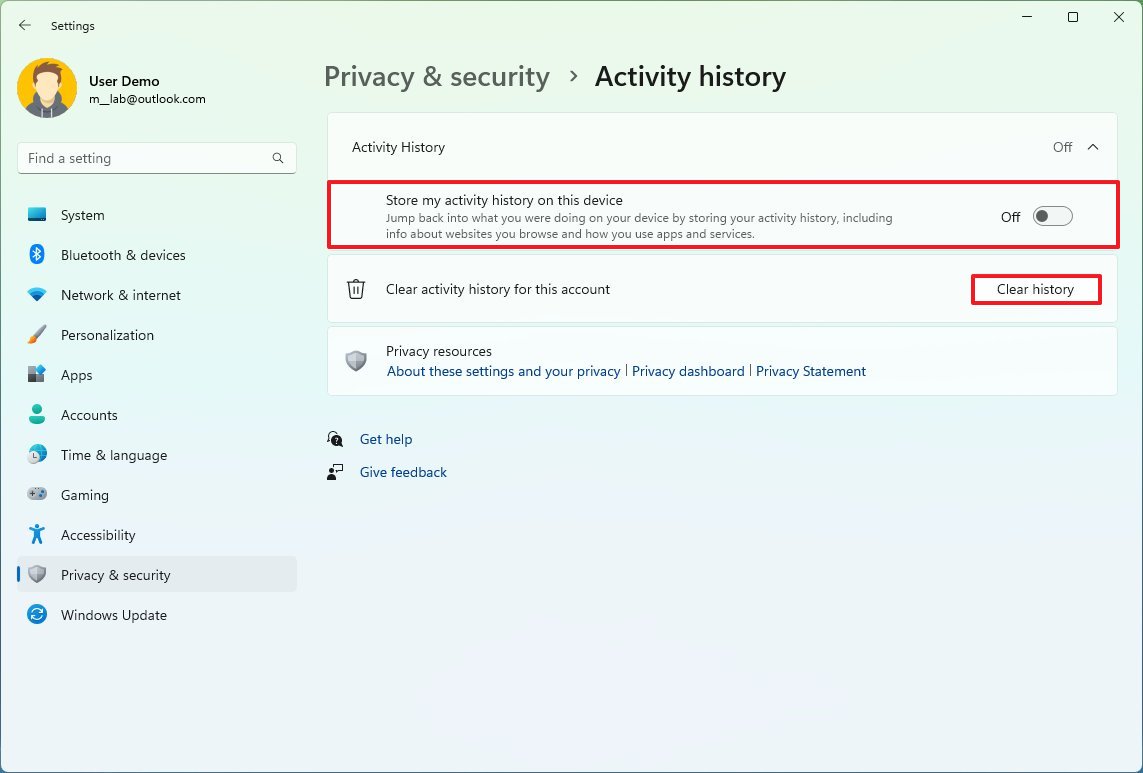
- Clear the "Store my activity history on this device" toggle switch.
- Click the Clear button for the "Clear activity history" setting.
Once you complete the steps, the system will no longer collect information about the websites you browse and the apps and services you use to suggest the content and apps you can pick up where you left off across devices when using the same Microsoft account.
Disable Find my device feature
To prevent Microsoft from tracking your computer location turn off Find my device with these steps:
- Open Settings.
- Click on Privacy & security.
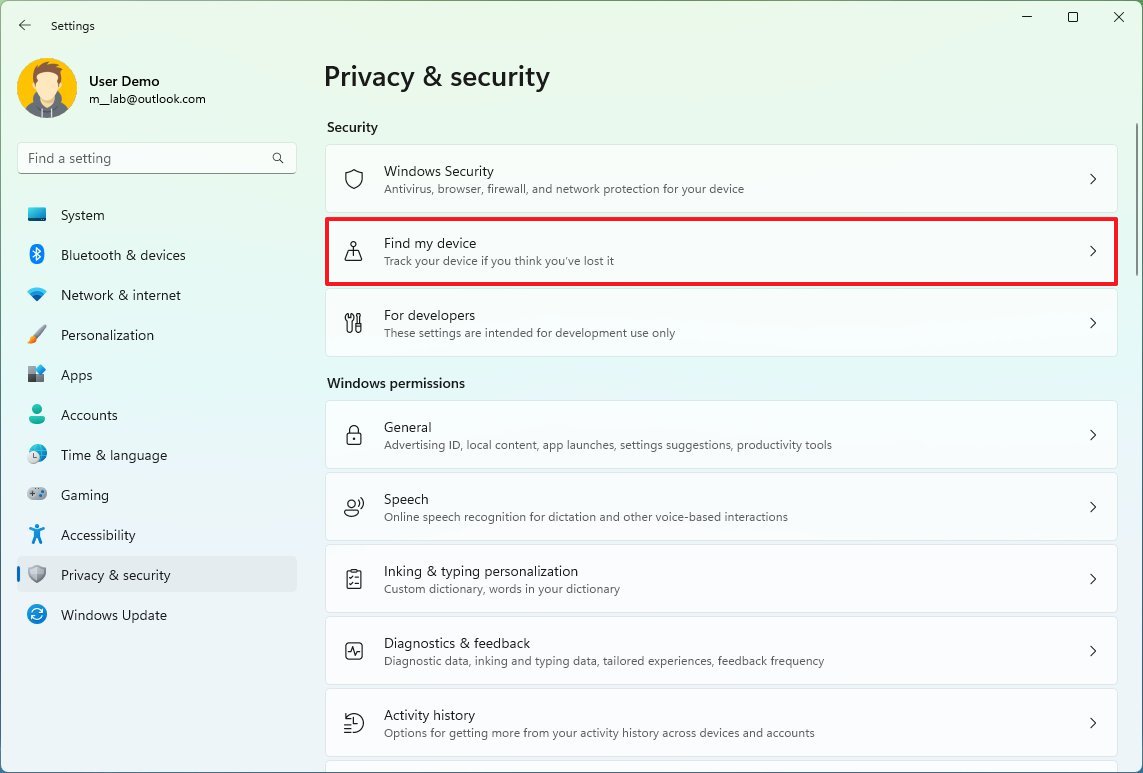
- Click the Find my device page on the right side.
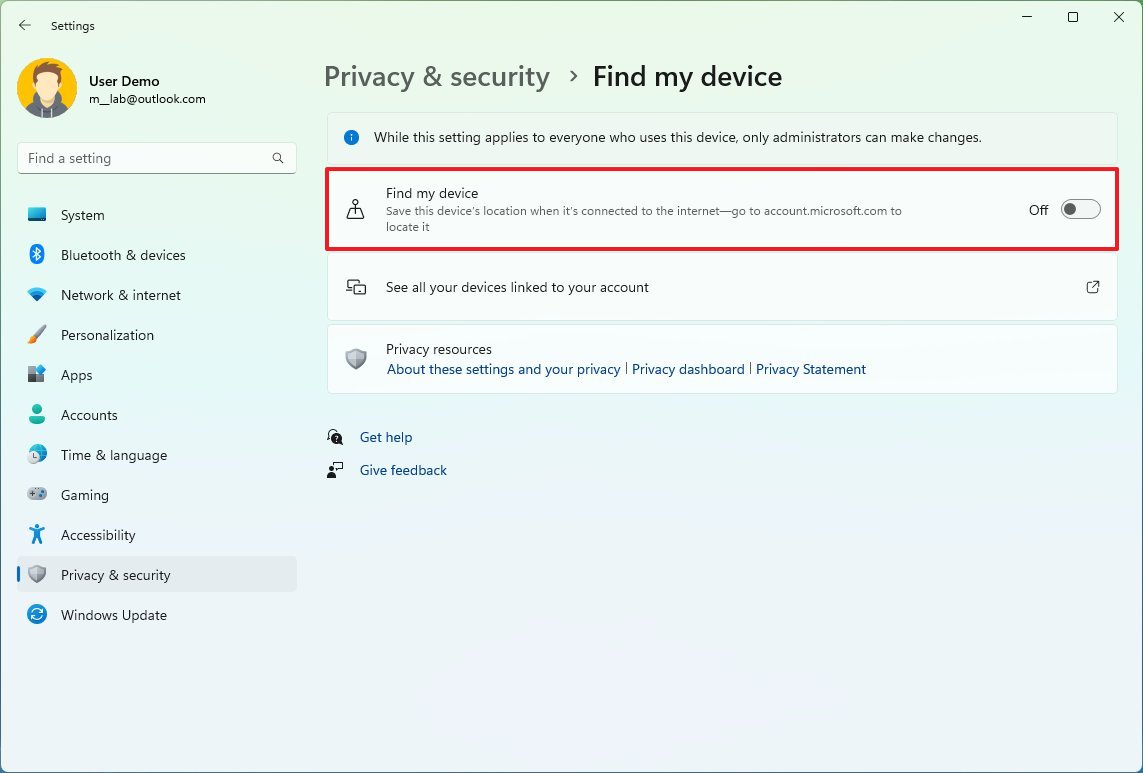
- Turn off the "Find my device" toggle switch.
After you complete the steps, the computer will no longer upload location data to your online account. However, you will also no longer be able to use the feature to find your laptop if it turns out missing or stolen.
Clear Microsoft account activity tracking
To delete the tracking information from your Microsoft account, use these steps:
- Open Settings.
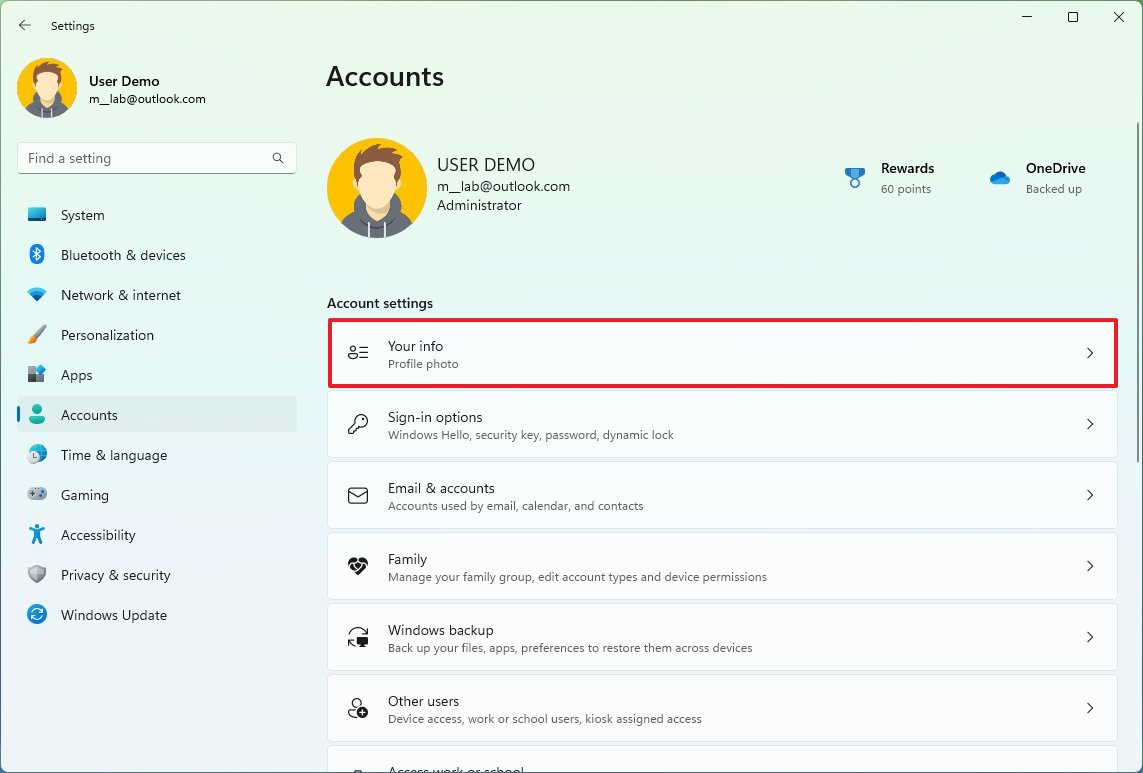
- Click on Accounts.
- Click the Your info page on the right side.
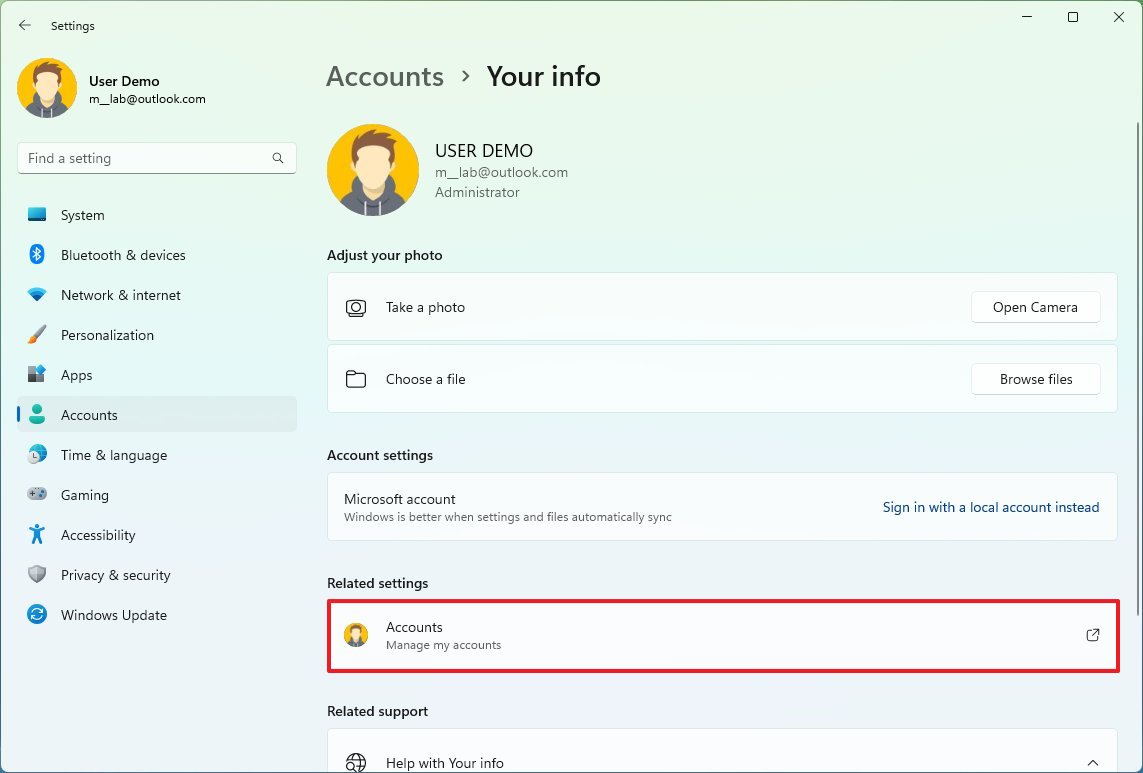
- Under the "Related settings" section, click the Accounts option.
- Sign in with your Microsoft account (as needed).
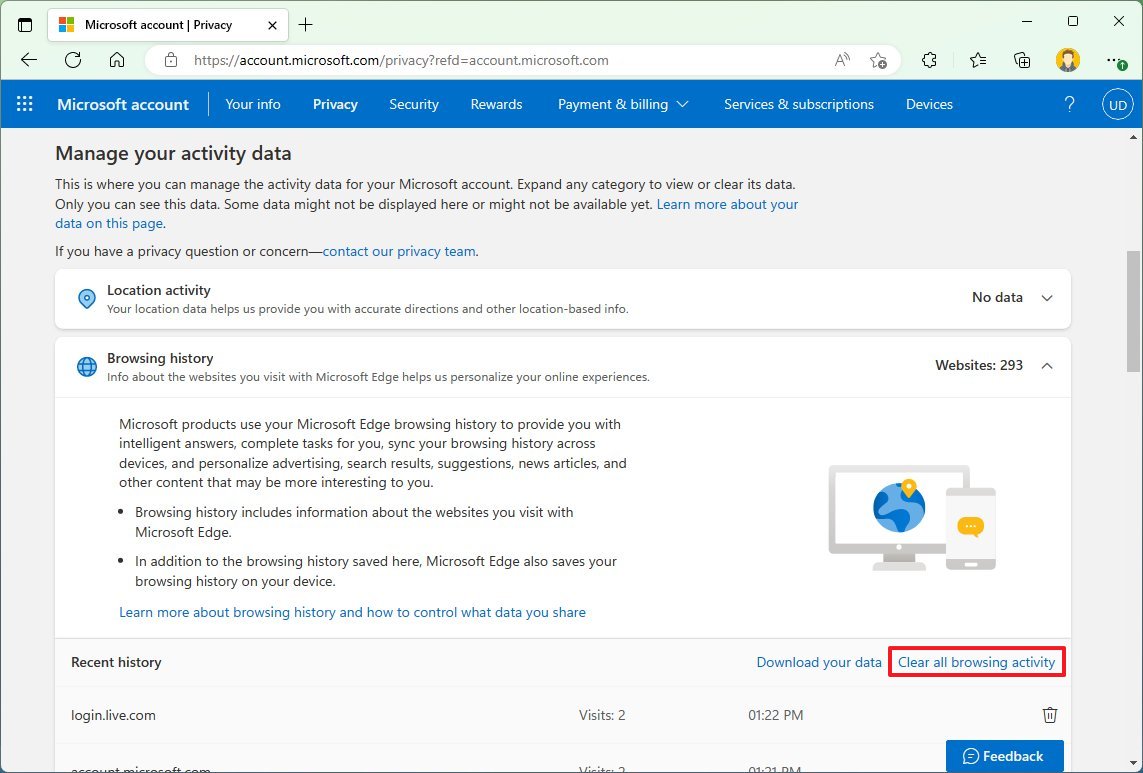
- Click the Privacy tab.
- Under the "Manage your activity data" section, click the "Location activity" setting and clear the data.
- Click the "Browsing history" setting and clear the data.
- Click the "Search history" setting and clear the data.
- Click the "App and service activity" setting and clear the data.
- Click the "Media activity" setting and clear the data.
- Click the "App and services performance data" setting and clear the data.
Once you complete the steps, the information stored in your online account will be deleted.
Disable Microsoft Edge data collection
To disable data collection on Microsoft Edge, use these steps:
- Open Microsoft Edge.
- Click the main menu (three-dotted) button and select the Settings option.
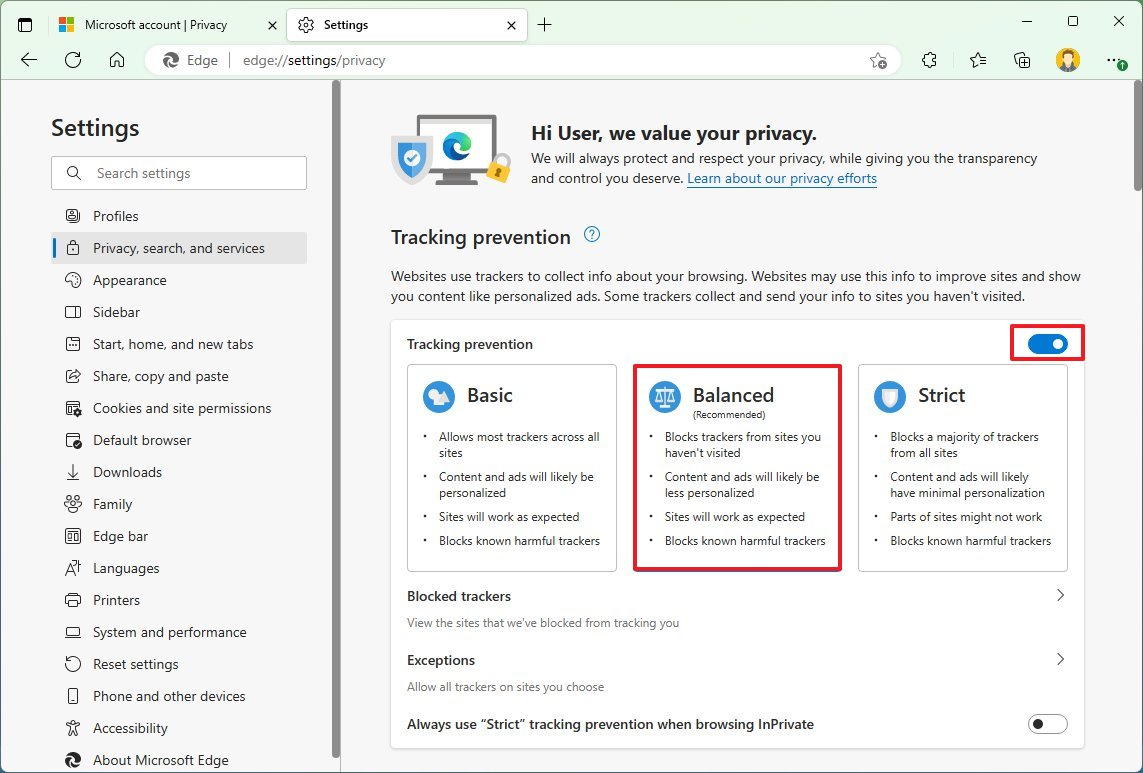
- Click on Privacy, search and services.
- Under the "Tracking prevention" section, turn on the Tracking prevention feature and select the best option. For example, "Balanced."
After completing the steps, the browser will block trackers from websites you didn't visit before, and ads won't be significantly personalized.
The "Balanced" option is usually the best option, but you can choose the "Strict" option. The only caveat is that the last option may sometimes break the web experience.
It's worth noting that the video claims that the computer is using a fresh installation but not the original image of Windows 11. Instead, the device seems to be using the manufacturer's default image, which is known to include far more bloatware than the original image (such as third-party antivirus and other trial software), which could be the reason for many of the network calls to different services.
I have installed WireShark on one of my machines, and even though I've seen the operating system making many online calls, I didn't see much of the information detailed in the video.
You also have to consider that Windows 11 is a cloud-connected system, meaning that it relies on online services to run as expected. For example, the Start menu needs to know your activities to show recommendations. Windows Search requires a connection to Microsoft services to show web search results and other content. The Widgets feature connects to the MSN network to render your personalized feed and weather information. And Windows Update needs an internet connection to download and install updates (to name a few).
More resources
For more helpful articles, coverage, and answers to common questions about Windows 10 and Windows 11, visit the following resources:
- Windows 11 on Windows Central — All you need to know
- Windows 10 on Windows Central — All you need to know

Mauro Huculak has been a Windows How-To Expert contributor for WindowsCentral.com for nearly a decade and has over 22 years of combined experience in IT and technical writing. He holds various professional certifications from Microsoft, Cisco, VMware, and CompTIA and has been recognized as a Microsoft MVP for many years.
