How to configure Windows Hello authentication on Windows 11
Stop using traditional passwords when you can sign in with a PIN, fingerprint, or facial recognition on Windows 11. Here's how.
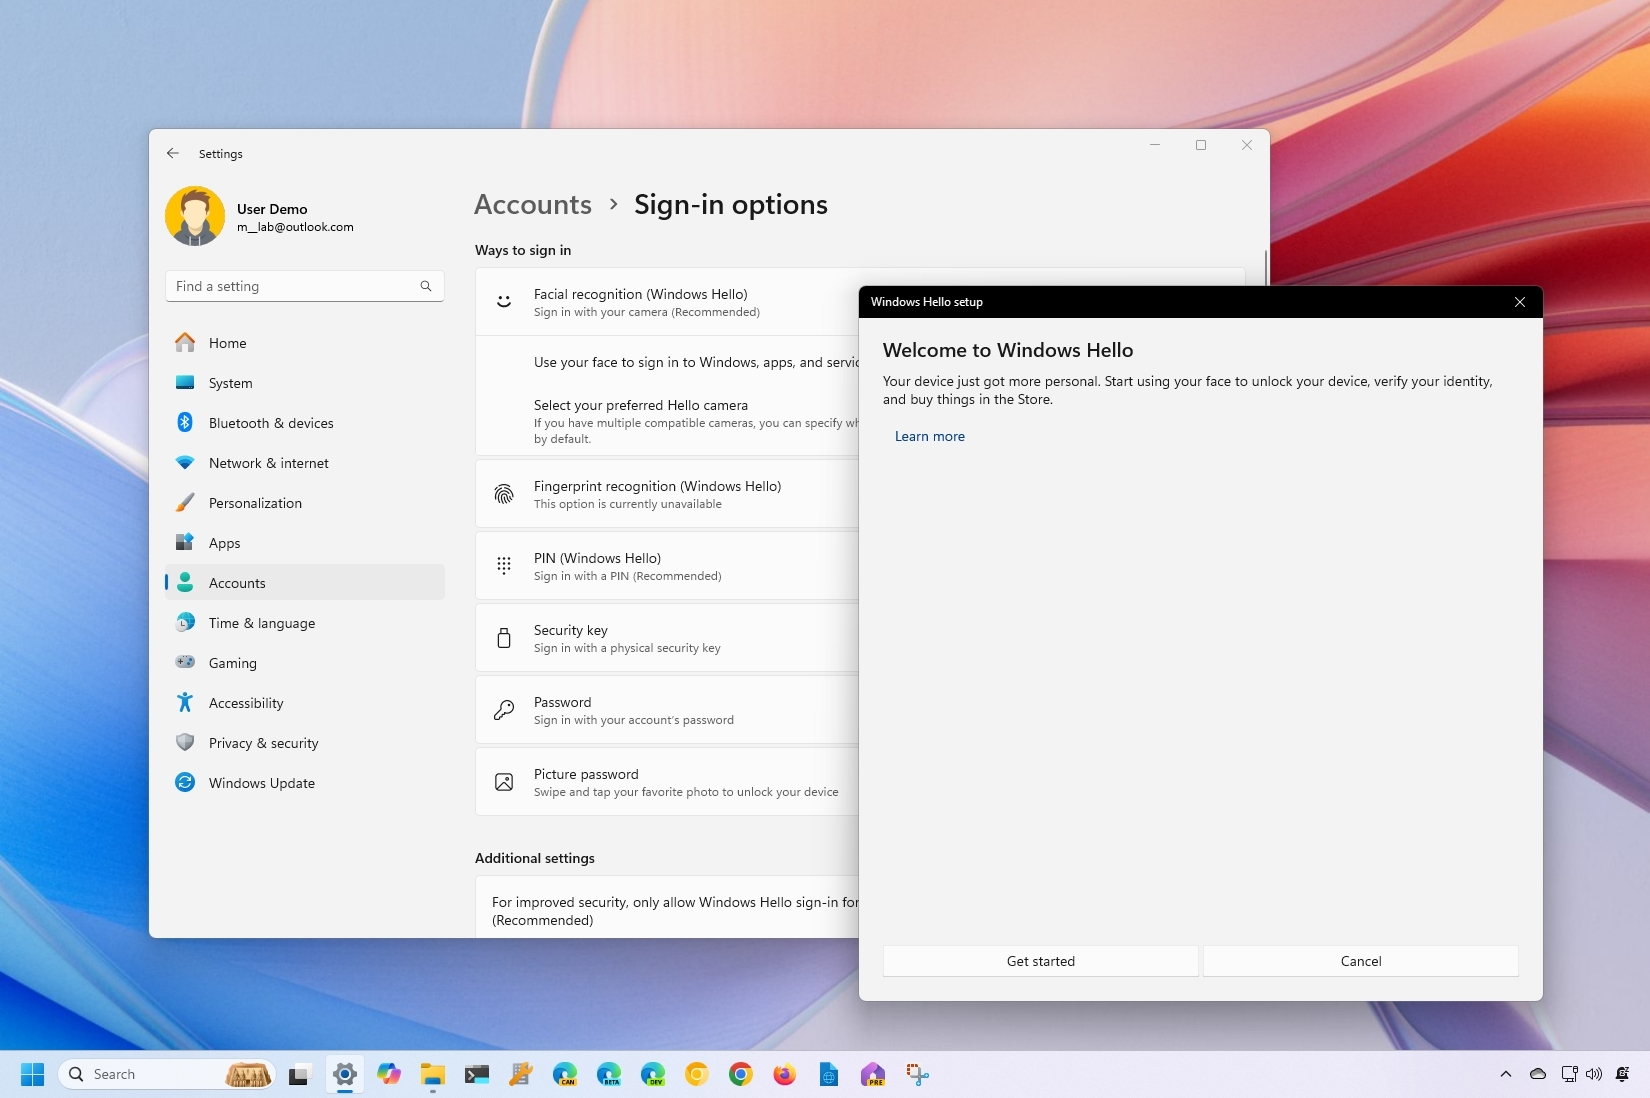
On Windows 11, in addition to signing in with your Microsoft or local account password, you can also configure one of the Windows Hello authentication methods for a more secure experience.
Windows Hello is a feature that allows you to use biometric authentication (such as fingerprint or face recognition) or a PIN instead of a traditional password.
Perhaps the most important aspect of this feature is security since biometric authentication is generally more secure because it's based on your unique physical characteristics. Also, since the information is stored securely on your computer rather than a server, it's less vulnerable to attacks. Furthermore, signing in with your face, fingerprint, or PIN is faster and easier than typing in a password.
On Windows 11, you can configure one or more Windows Hello authentication methods and choose which method to use on the sign-in screen.
In this how-to guide, I will outline the different ways you can configure Windows Hello on Windows 11, depending on the biometric hardware supported by your device.
How to set up PIN authentication on Windows 11
On Windows 11, the system will prompt you to set up at least one of the Windows Hello authentication methods available, depending on the device's capabilities. The most common method is the PIN method since it doesn't require special biometric hardware.
If your computer doesn't have a PIN, you can create one using the steps below. You can always change or remove it completely.
All the latest news, reviews, and guides for Windows and Xbox diehards.
Create PIN
To create a PIN for a Windows 11 account, use these steps:
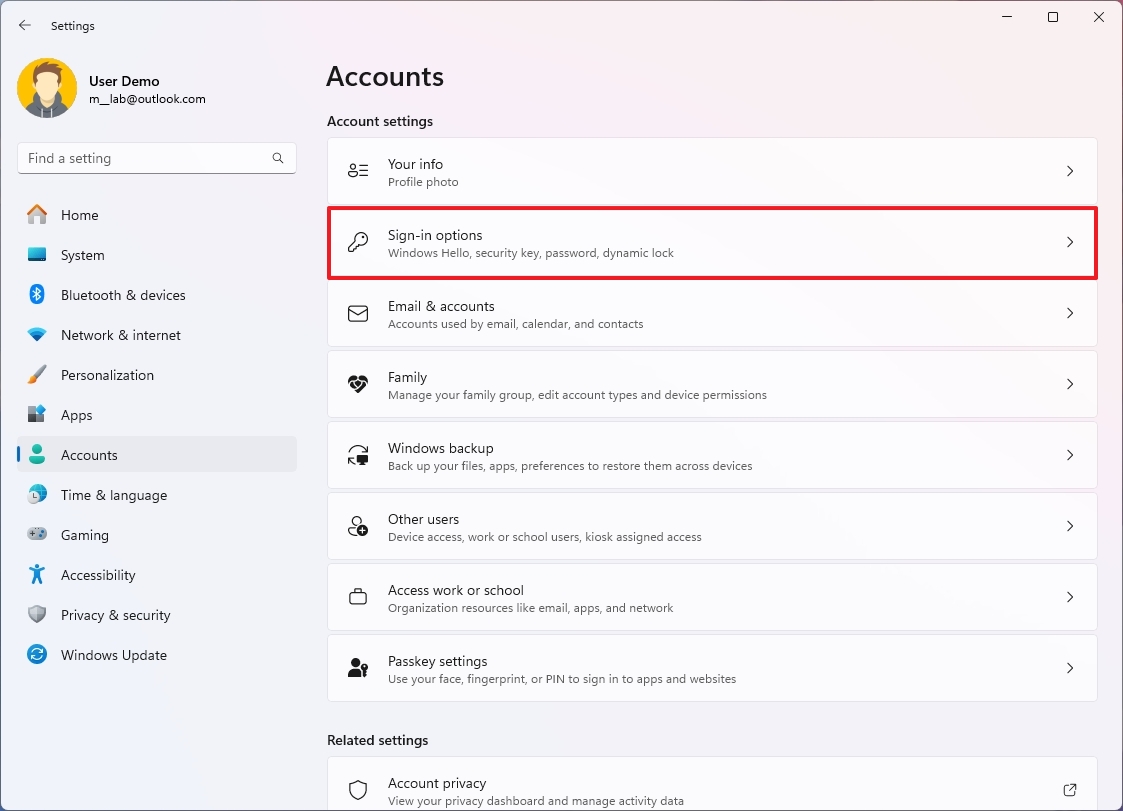
- Open Settings.
- Click on Accounts.
- Click the Sign-in options page from the right side.
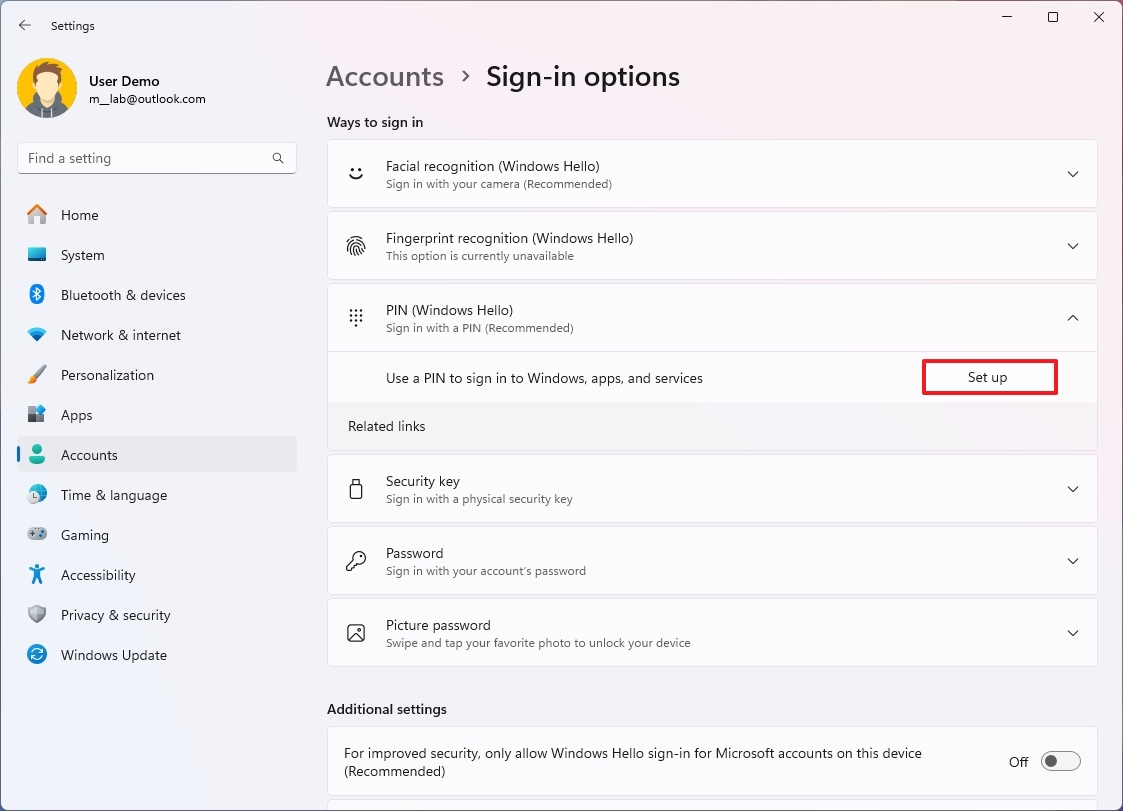
- Click the "PIN (Windows Hello)" setting under the "Ways to sign in" section.
- Click the Set up button.
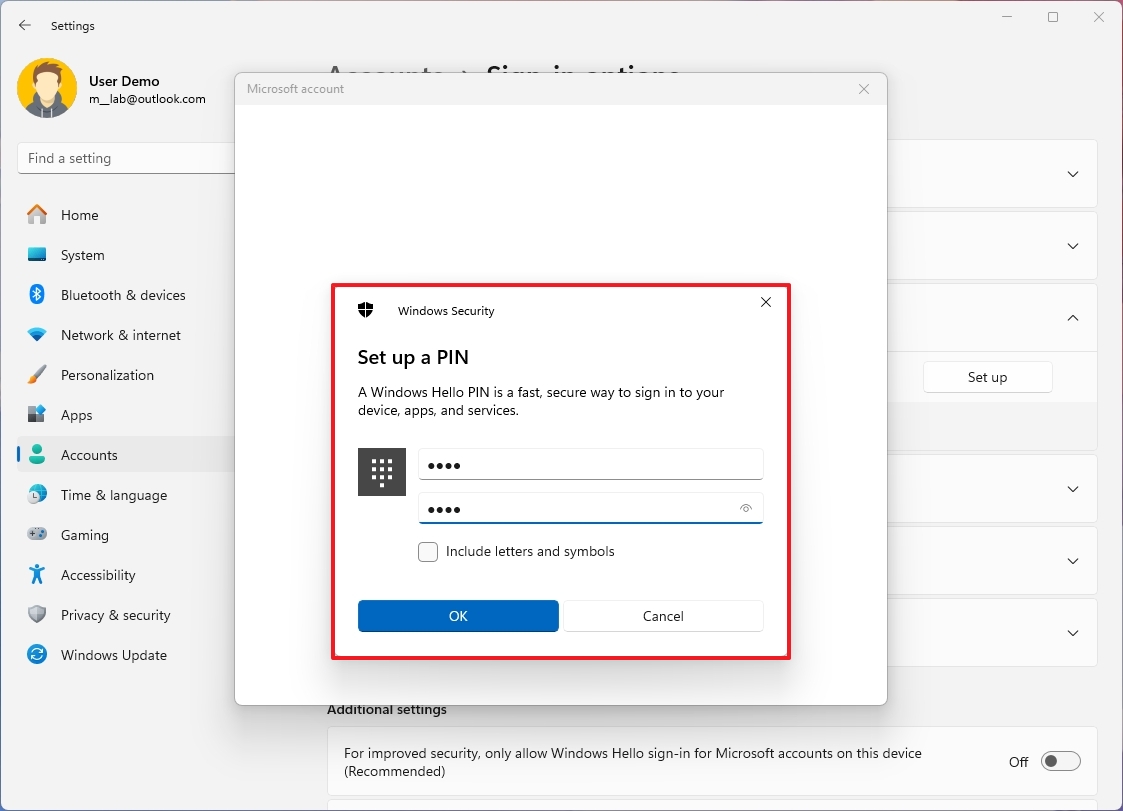
- Click the Next button.
- Confirm the new PIN.
- Click the OK button.
Once you complete the steps, the next time you log in, the system will default to the PIN authentication method instead of a password.
Change PIN
To change the PIN on your account, use these steps:
- Open Settings.
- Click on Accounts.
- Click the Sign-in options page from the right side.
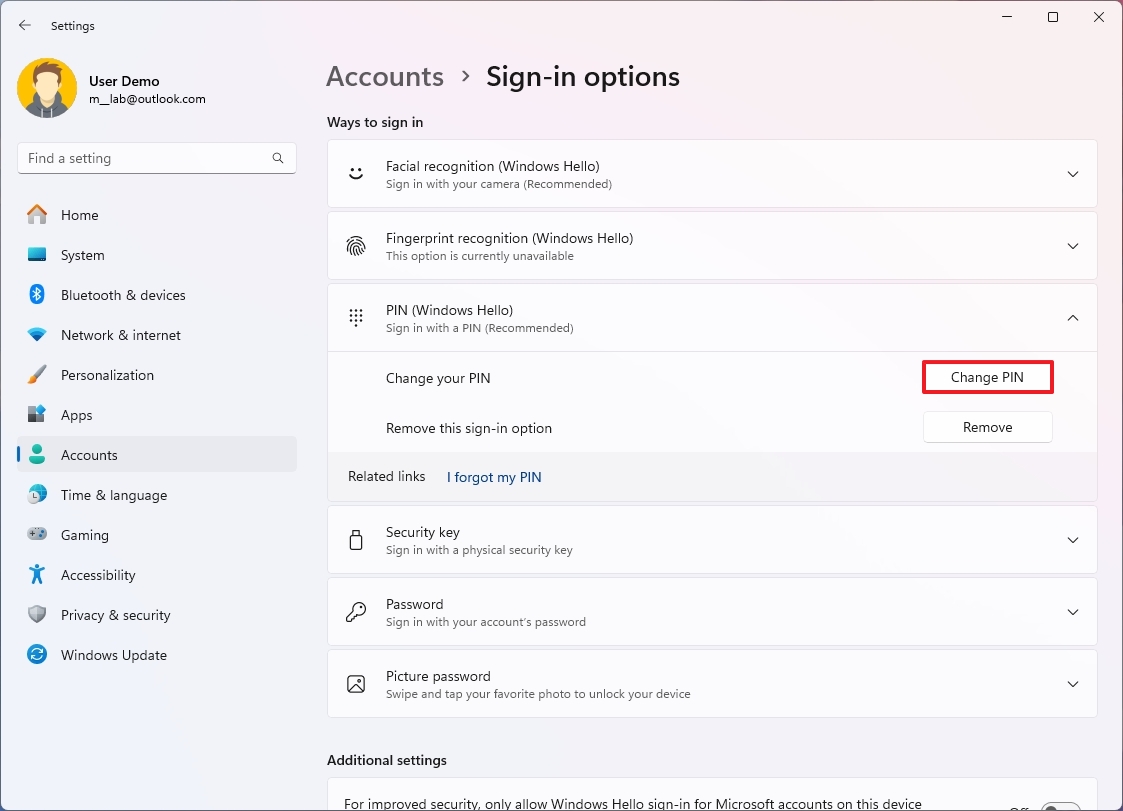
- Click the "PIN (Windows Hello)" setting under the "Ways to sign in" section.
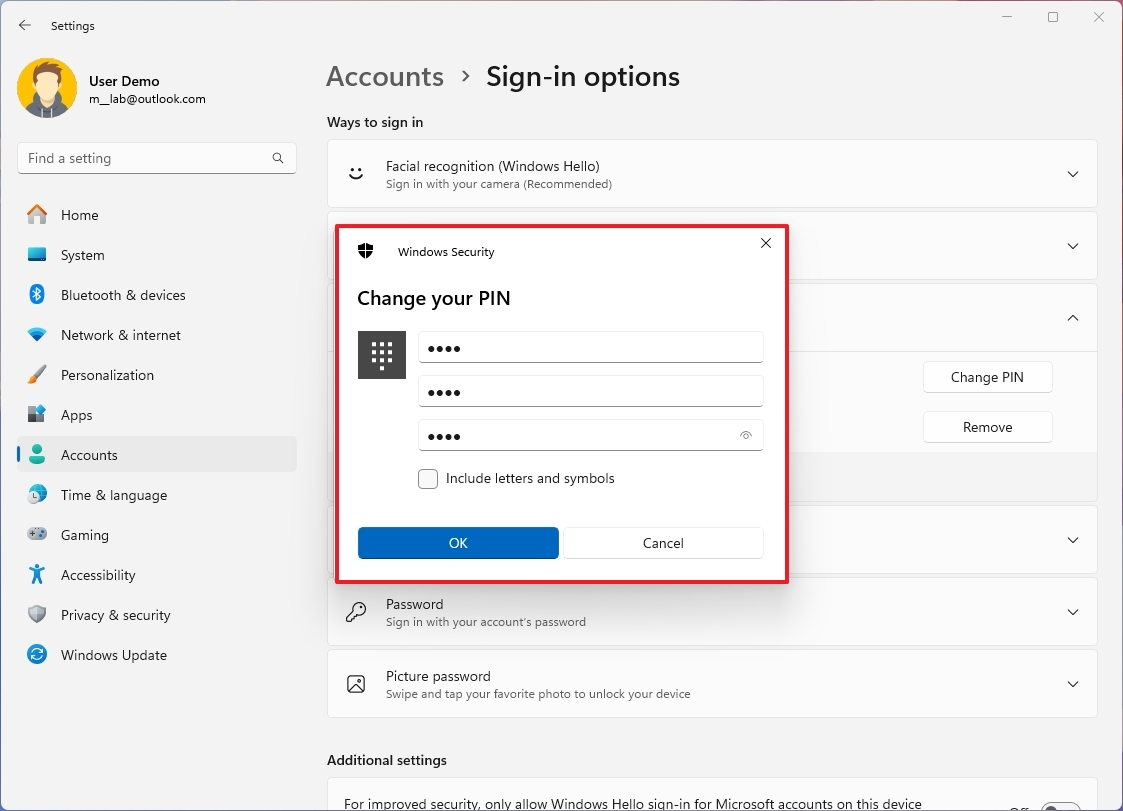
- Click the Change PIN button.
- Confirm your current PIN.
- Create your new PIN.
- Quick tip: If you click the "Include letters and symbols" option, you can create a PIN similar to a password that is only locally relevant to the computer.
- Click the OK button.
After you complete the steps, you can start using the new PIN in the login.
Remove PIN
To remove the PIN authentication, use these steps:
- Open Settings.
- Click on Accounts.
- Click the Sign-in options page from the right side.
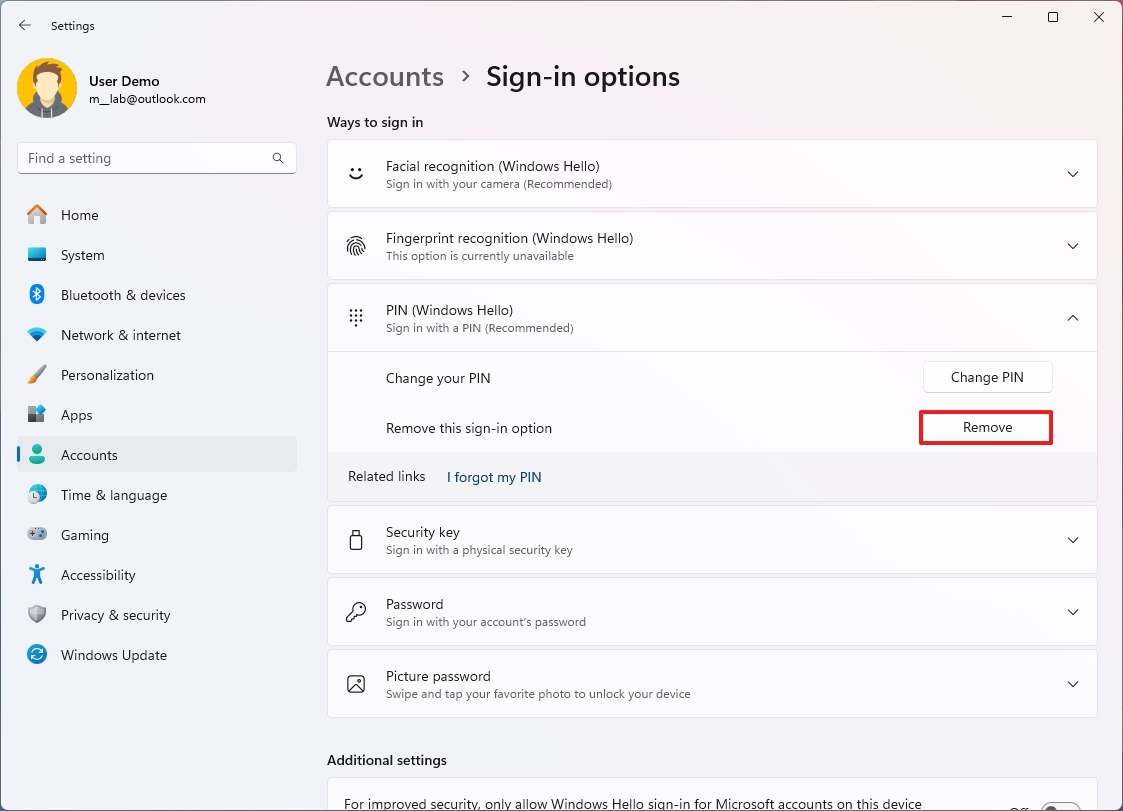
- Click the "PIN (Windows Hello)" setting under the "Ways to sign in" section.
- Click the Remove button for the "Remove this sign-in option" setting.
- Click the Remove button again to confirm.
- Confirm your Microsoft account password.
- Click the OK button.
Once you complete the steps, the system will default to the next available authentication method, the password, if you don't have another Windows Hello feature enabled.
How to set up Fingerprint authentication on Windows 11
You can configure the Fingerprint authentication method if you have a device such as a keyboard or a fingerprint reader.
This authentication method requires a fingerprint reader. Usually, this hardware comes built on certain laptops and keyboards, and you can also purchase a USB fingerprint reader.
Create Fingerprint
To configure Windows 11 to sign in with a fingerprint, use these steps:
- Open Settings.
- Click on Accounts.
- Click the Sign-in options page from the right side.
- Click the "Fingerprint recognition (Windows Hello)" setting under the "Ways to sign in" section.
- Click the Set up button.
- Click the Get started button.
- Confirm your account password (if applicable).
- Register your fingerprint with the on-screen directions.
After you complete the steps, you can proceed to use your fingerprint to sign in to Windows 11.
Add Fingerprint
To register additional fingerprints, use these steps.
- Open Settings.
- Click on Accounts.
- Click the Sign-in options page from the right side.
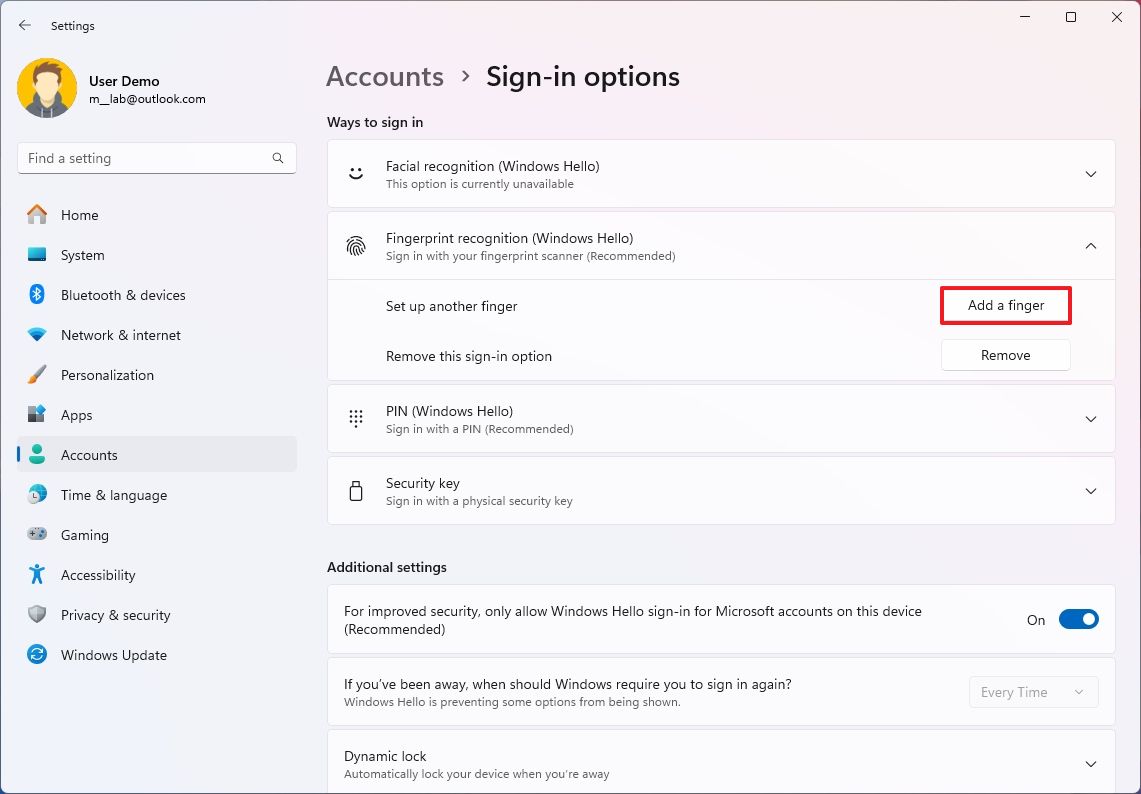
- Click the "Fingerprint recognition (Windows Hello)" setting under the "Ways to sign in" section.
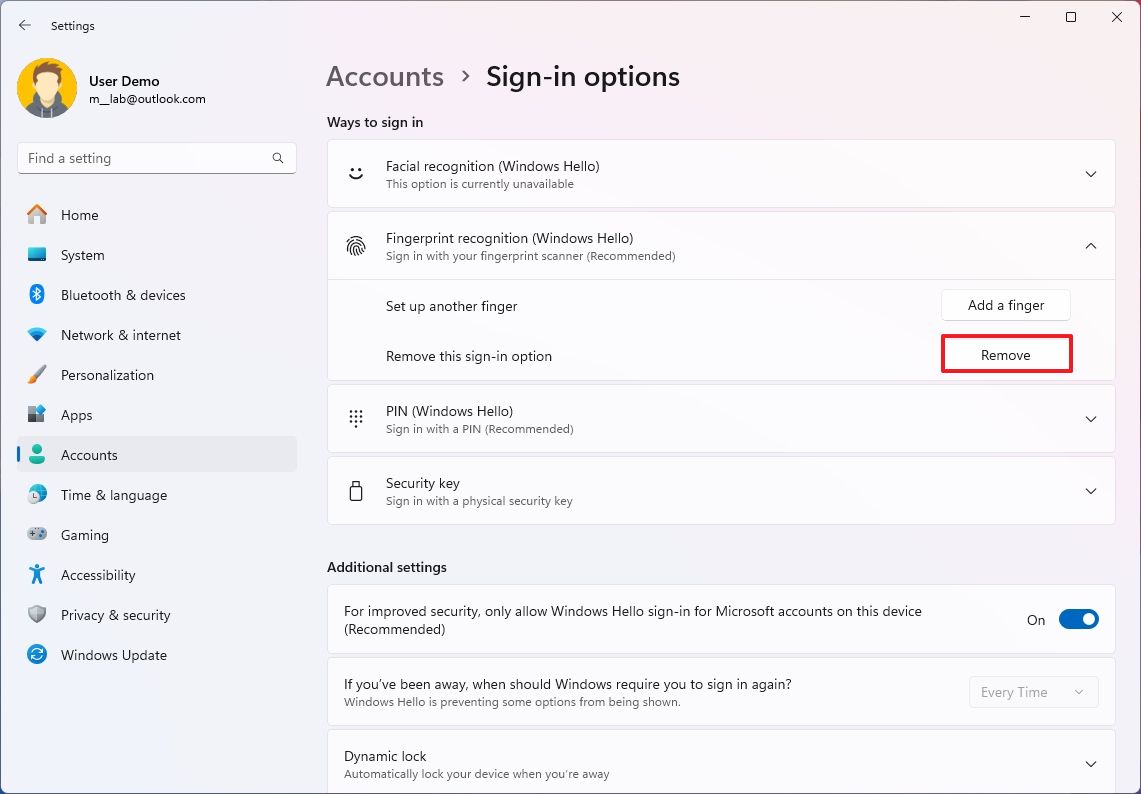
- Click the Add a finger button.
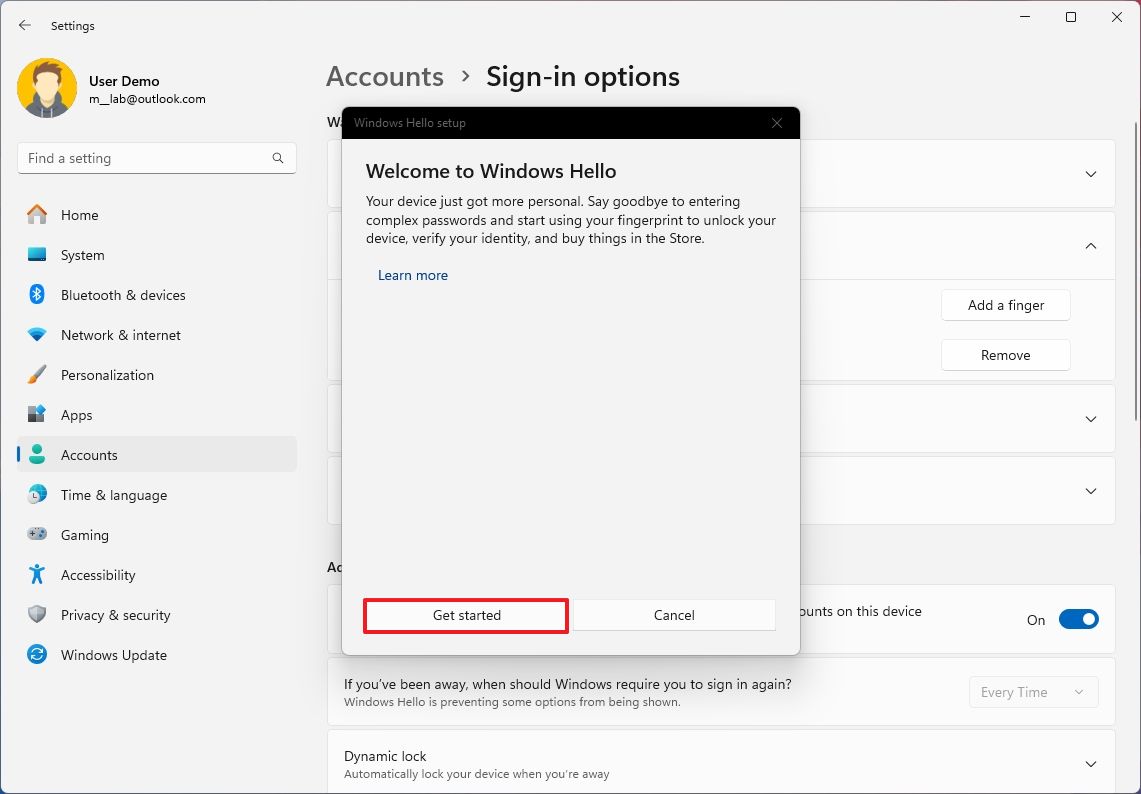
- Click the Get started button.
- Confirm your account credentials.
- Continue with the on-screen directions.
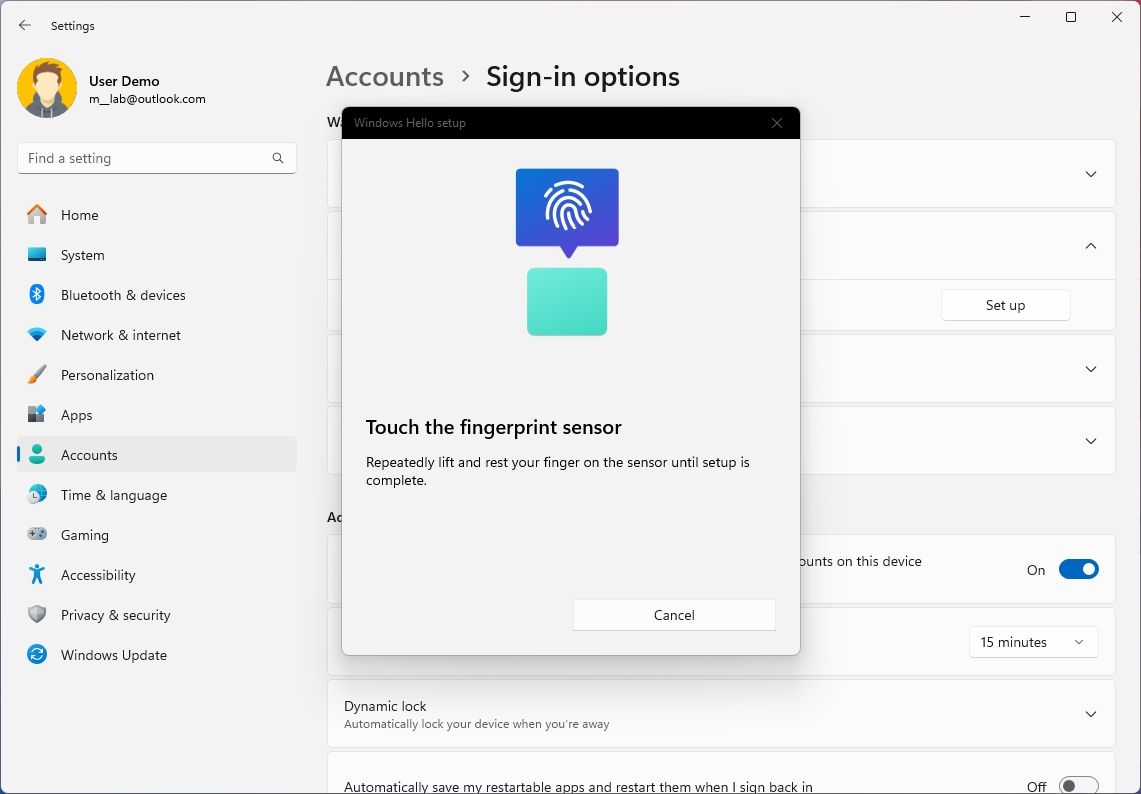
Once you complete the steps, you can sign in using another finger.
Remove Fingerprint
To remove the Fingerprint feature on Windows 11, use these steps:
- Open Settings.
- Click on Accounts.
- Click the Sign-in options page from the right side.
- Click the "Fingerprint recognition (Windows Hello)" setting under the "Ways to sign in" section.
- Click the Remove button.
- Click the Remove button again.
After you complete the steps, you can continue to sign in to your account using another Windows Hello method or password.
How to set up Face authentication on Windows 11
Windows 11 also includes support for signing in with your face if the computer has a camera that supports Windows Hello.
This authentication method requires a camera supporting Windows Hello. Usually, devices like a Surface Pro and Surface Laptop come with this capability built-in, but you can find external cameras like the Logitech BRIO webcam that comes with facial recognition support.
Create Face
To set up a Face authentication method, use these steps:
- Open Settings.
- Click on Accounts.
- Click the Sign-in options page from the right side.
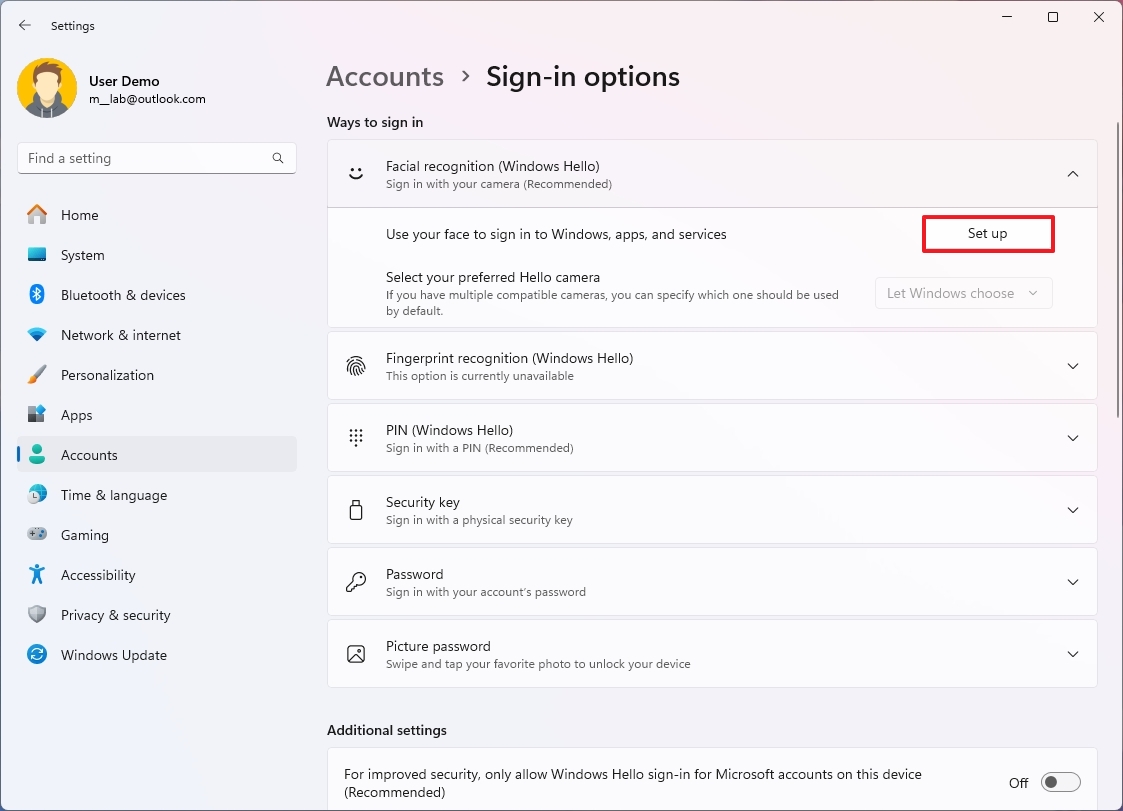
- Click the "Facial recognition (Windows Hello)" setting under the "Ways to sign in" section.
- Click the Set up button.
- Click the Get started button.
- Confirm your account credentials.
- Create your facial authentication as indicated on the screen.
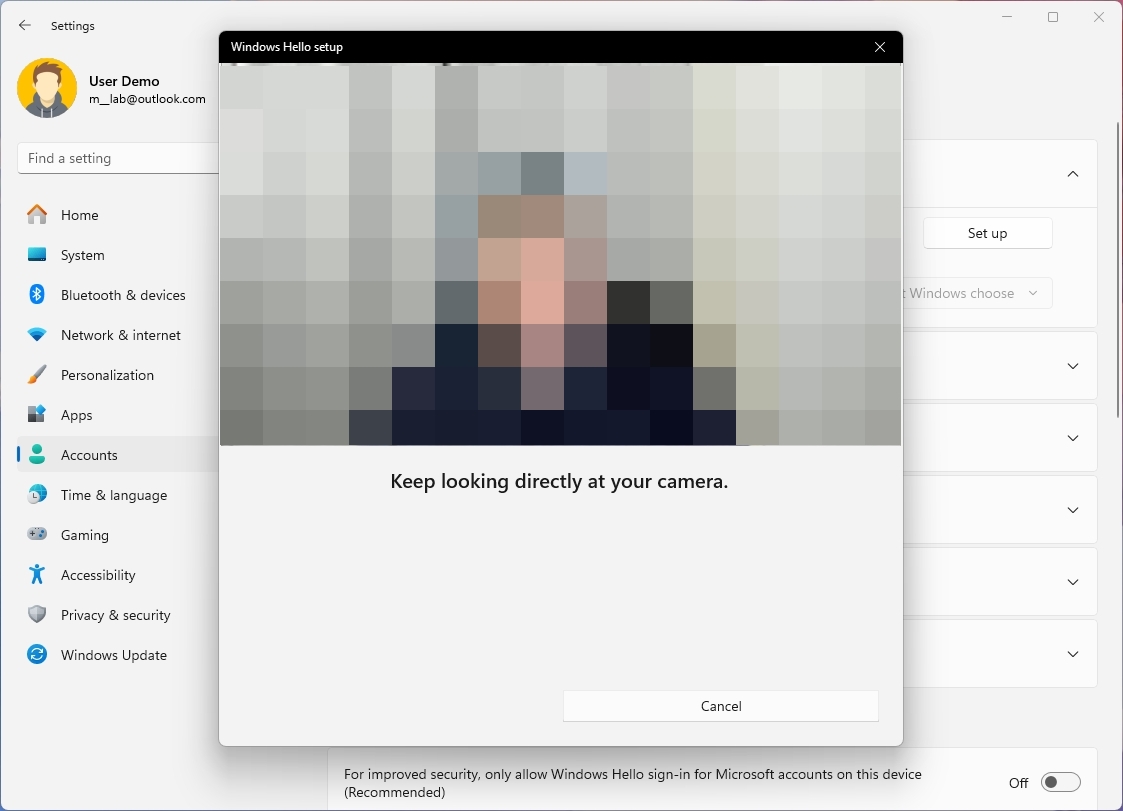
- Click the Close button.
Once you complete the steps, you can sign in to Windows 11 by just looking at the camera on your computer.
Improve recognition
To improve the accuracy of the face recognition, use these steps:
- Open Settings.
- Click on Accounts.
- Click the Sign-in options page from the right side.
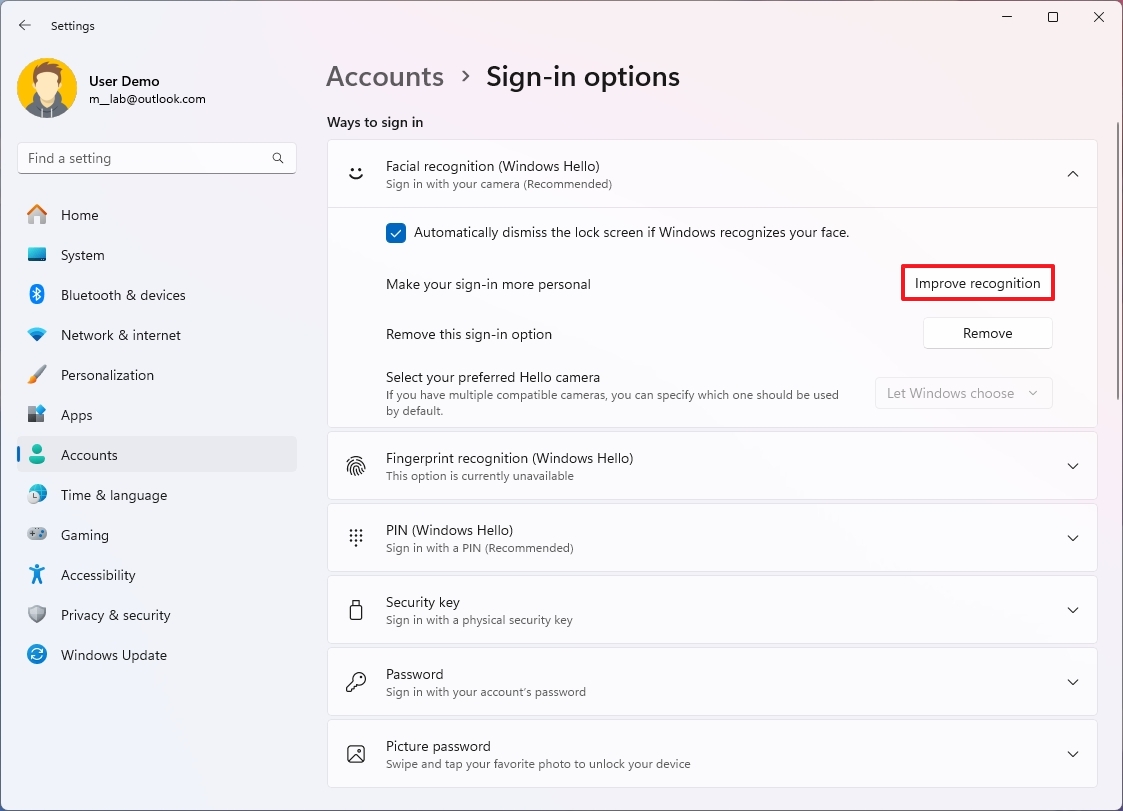
- Click the "Facial recognition (Windows Hello)" setting under the "Ways to sign in" section.
- Click the Improve recognition button.
- Click the Get started button.
- Confirm your account credentials.
- Continue with the on-screen directions.
- Click the Close button.
After you complete the steps, the Windows Hello Face method should sign you in more accurately.
Remove Face
To remove the Windows Hello Face authentication from your computer, use these steps:
- Open Settings.
- Click on Accounts.
- Click the Sign-in options page from the right side.
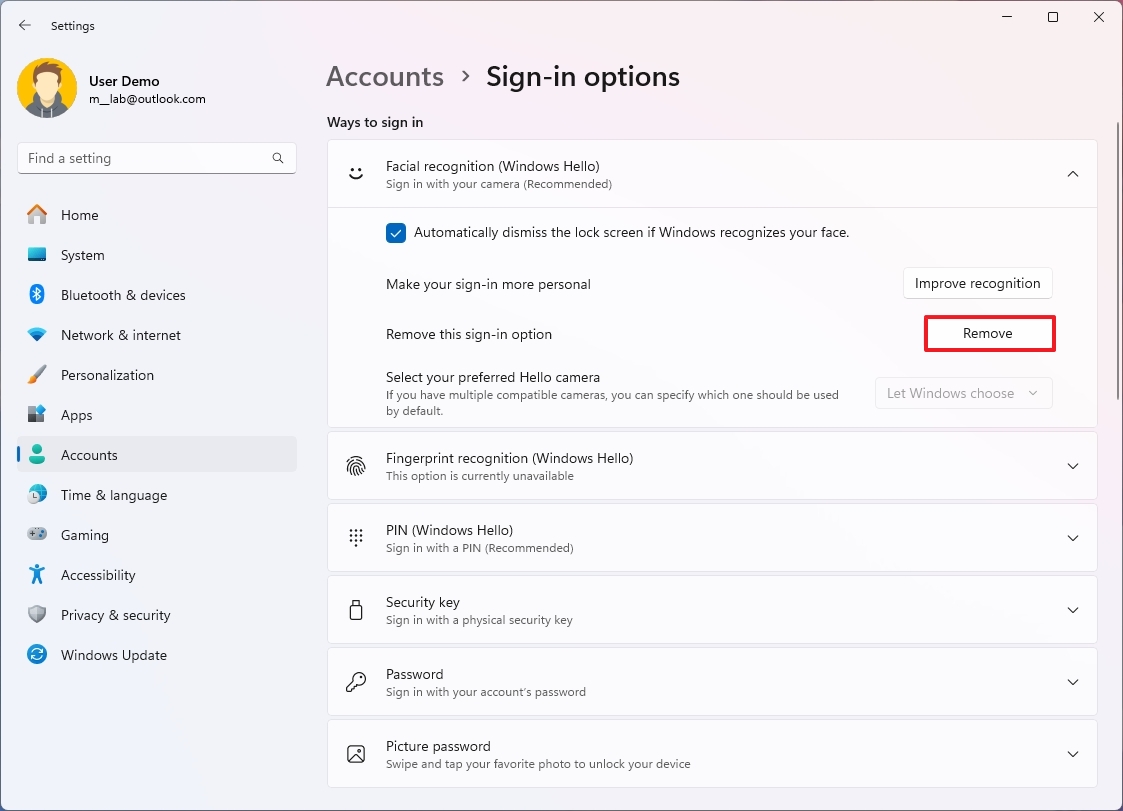
- Click the "Facial recognition (Windows Hello)" setting under the "Ways to sign in" section.
- Click the Remove button.
Once you complete the steps, you can continue to access your Windows 11 account using a password or another Windows Hello authentication.
More resources
For more helpful articles, coverage, and answers to common questions about Windows 10 and Windows 11, visit the following resources:
- Windows 11 on Windows Central — All you need to know
- Windows 10 on Windows Central — All you need to know

Mauro Huculak has been a Windows How-To Expert contributor for WindowsCentral.com for nearly a decade and has over 22 years of combined experience in IT and technical writing. He holds various professional certifications from Microsoft, Cisco, VMware, and CompTIA and has been recognized as a Microsoft MVP for many years.
