How to change account type on Windows 11
Here are four ways to change the account type for Windows 11 users.
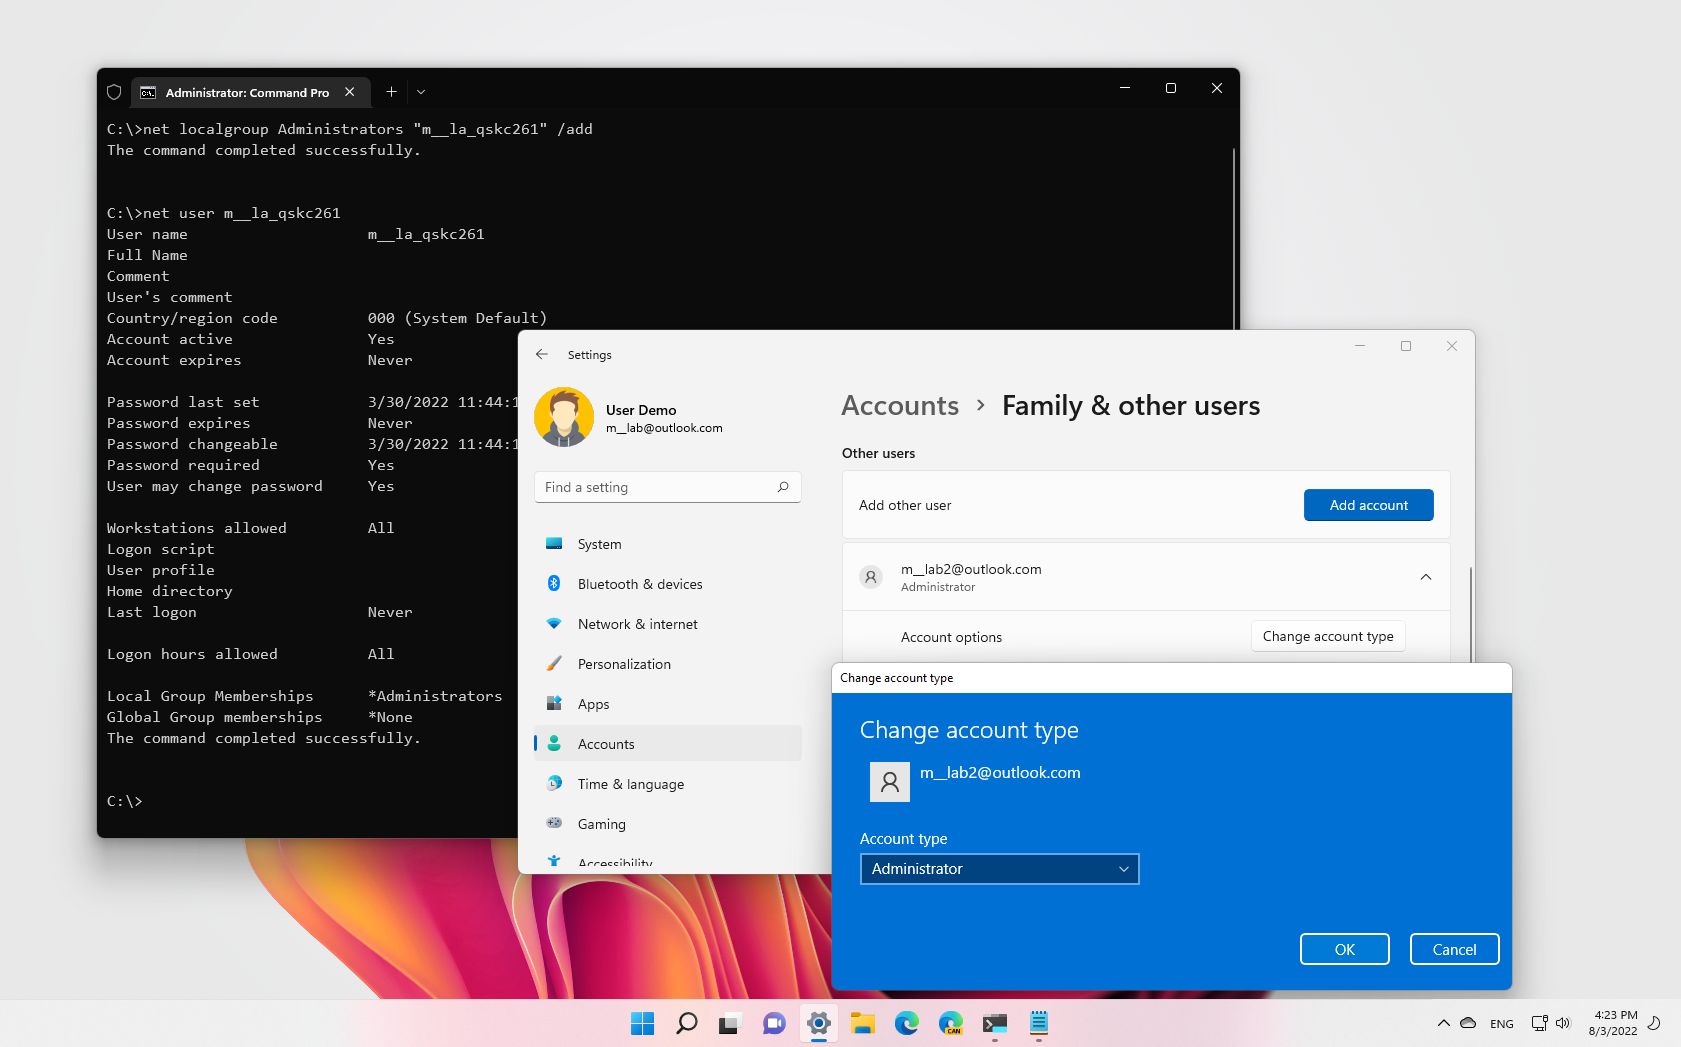
On Windows 11, like in previous versions, users usually belong to one of the two main account types (including "Administrator" and "Standard User") that will determine the access level to the device and applications.
For example, the "Administrator" account gives complete control over the device. This means that a user with this account type can install apps, run elevated commands, changes global system settings, and everything else.
On the other hand, an account with the "Standard User" type restricts the user to only a small scope of privileges, but it offers the most secure environment. A user with a standard account can launch applications, but they're not allowed to install new apps. If an app requires elevation, the user will be prompted to authenticate the action with administrator credentials. Also, they can change settings, but only settings that will affect their account.
Typically, it's recommended that all users (including admins) use a standard account type. However, Windows 11 provides different ways to change an account type from Standard User to Administrator or vice versa, depending on your requirements, using Settings, Control Panel, PowerShell, and Command Prompt.
This guide will walk you through the different ways you can use to switch the account type on Windows 11.
How to change user account type on Windows 11
To change a user account type on Windows 11, use these steps:
- Open Settings.
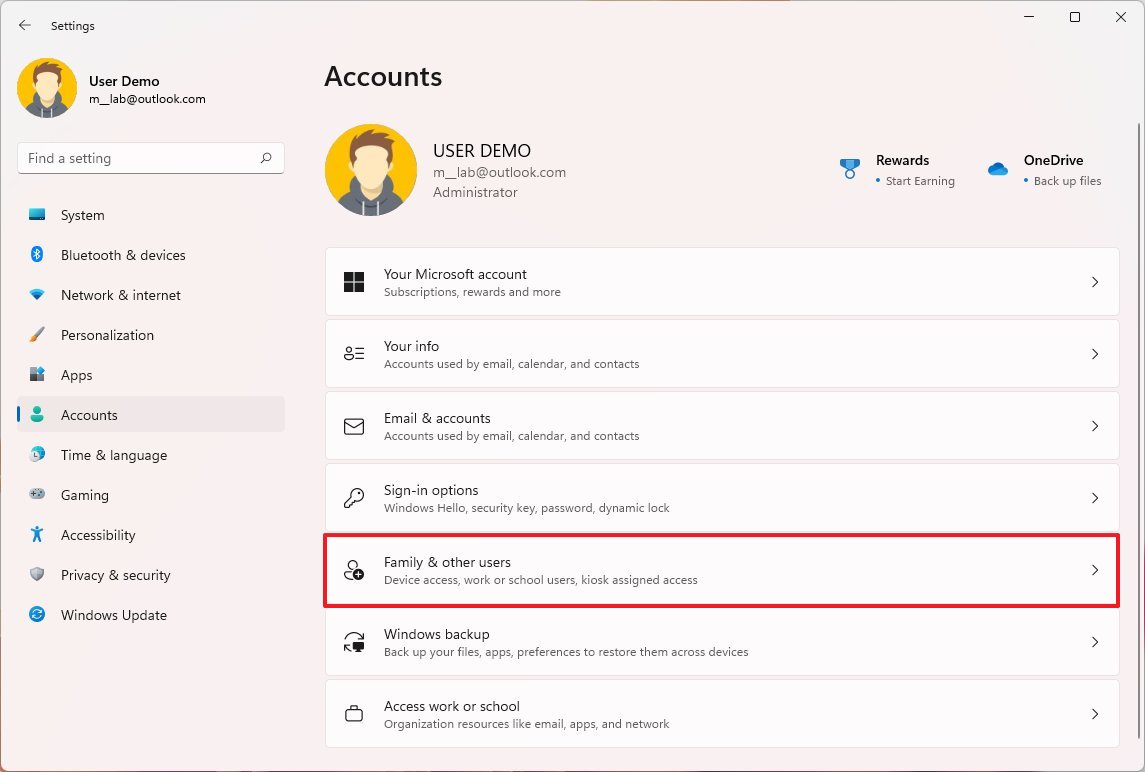
- Click on Accounts.
- Click the Family & other users page on the right side.
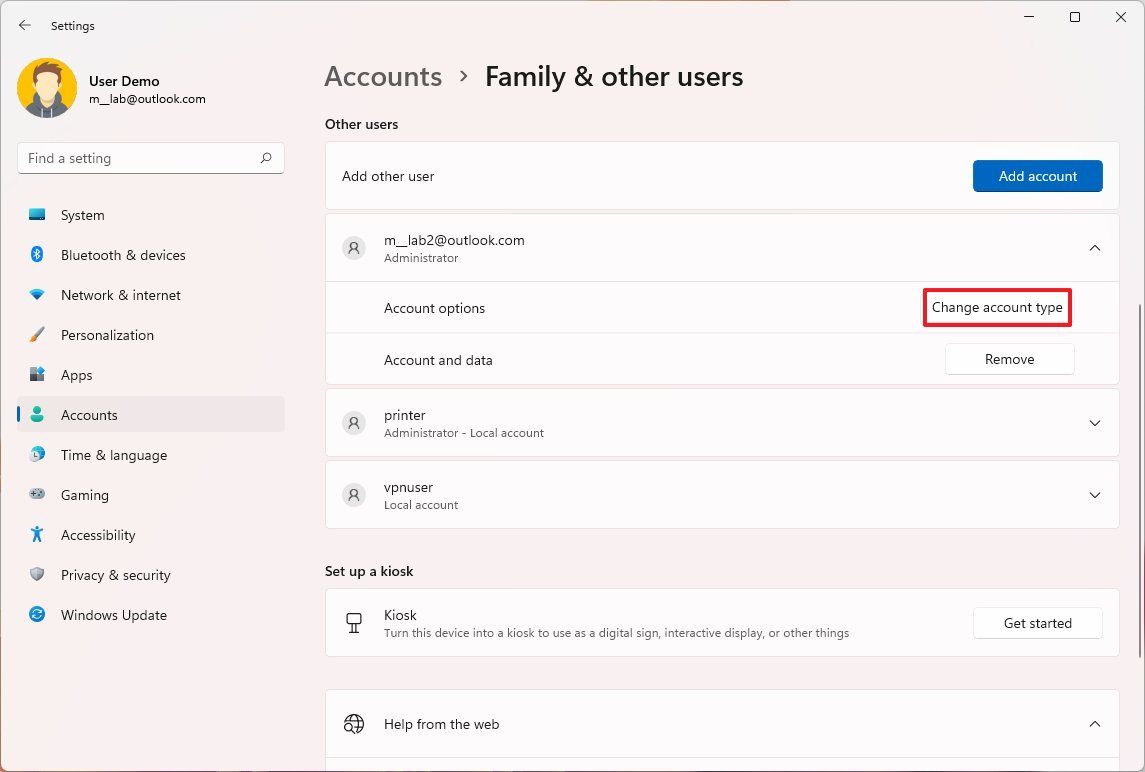
- Under the "Other users" section, select the account to update.
- Click the Change account button.
- Select the Administrator or Standard User account type.
- Click the OK button.
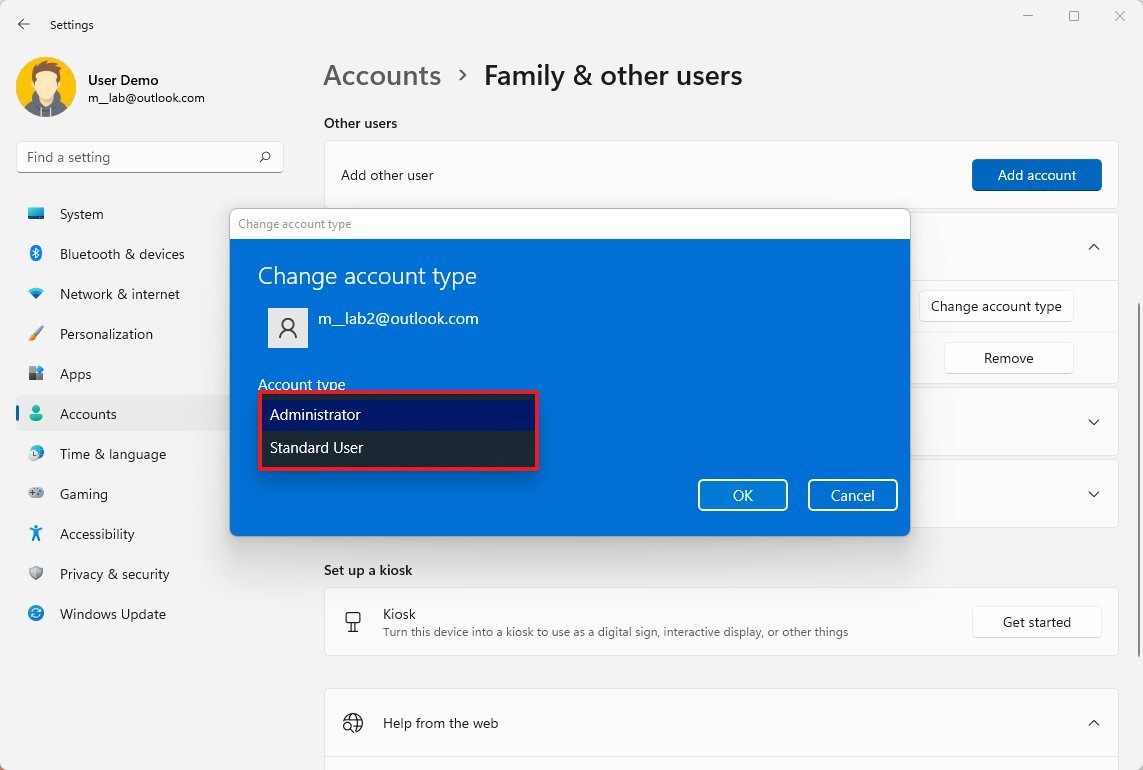
Once you complete the steps, the new account type will dictate the user's access privileges.
All the latest news, reviews, and guides for Windows and Xbox diehards.
If you want to change your account type, you'll need to log out of your account, sign in with another Administrator account, and use the above steps to adjust the settings.
How to change account type with Control Panel
In Control Panel, you can adjust the account settings in two ways. You can use the "User Accounts" page or the legacy "User Accounts" (netplwiz) interface.
Control Panel first method
To switch the account type through Control Panel, use these steps:
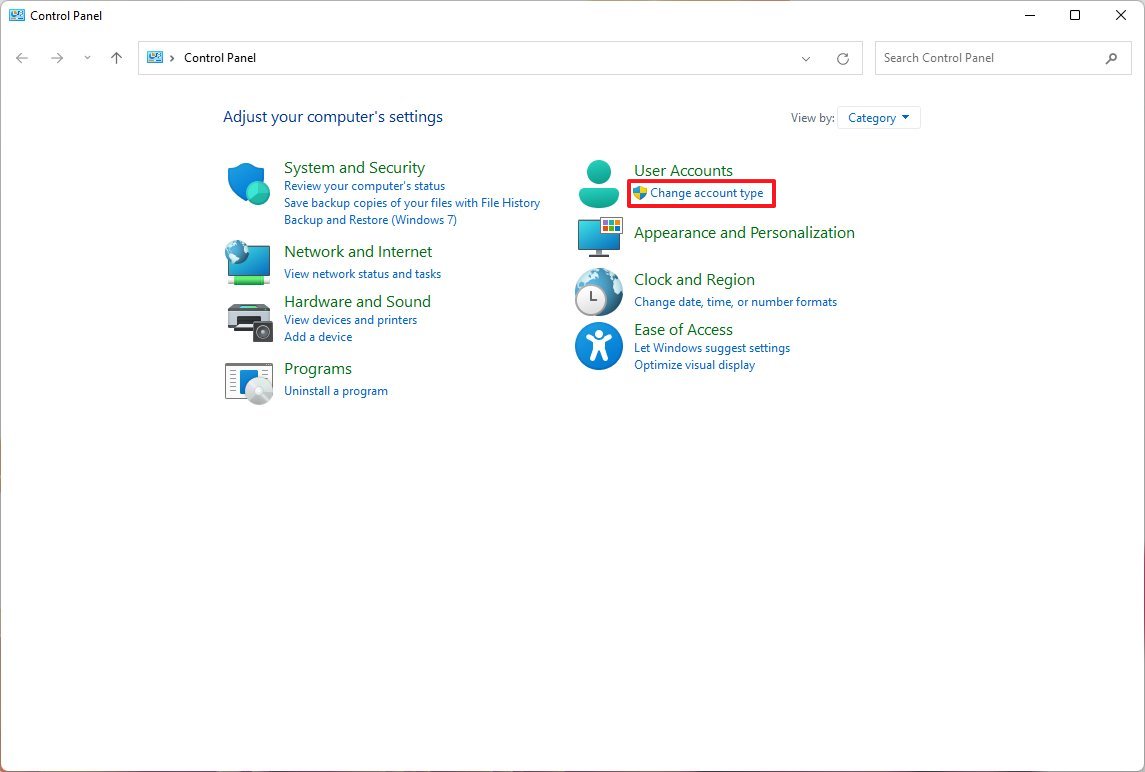
- Open Control Panel.
- Under the "User Accounts" section, click the Change account type option.
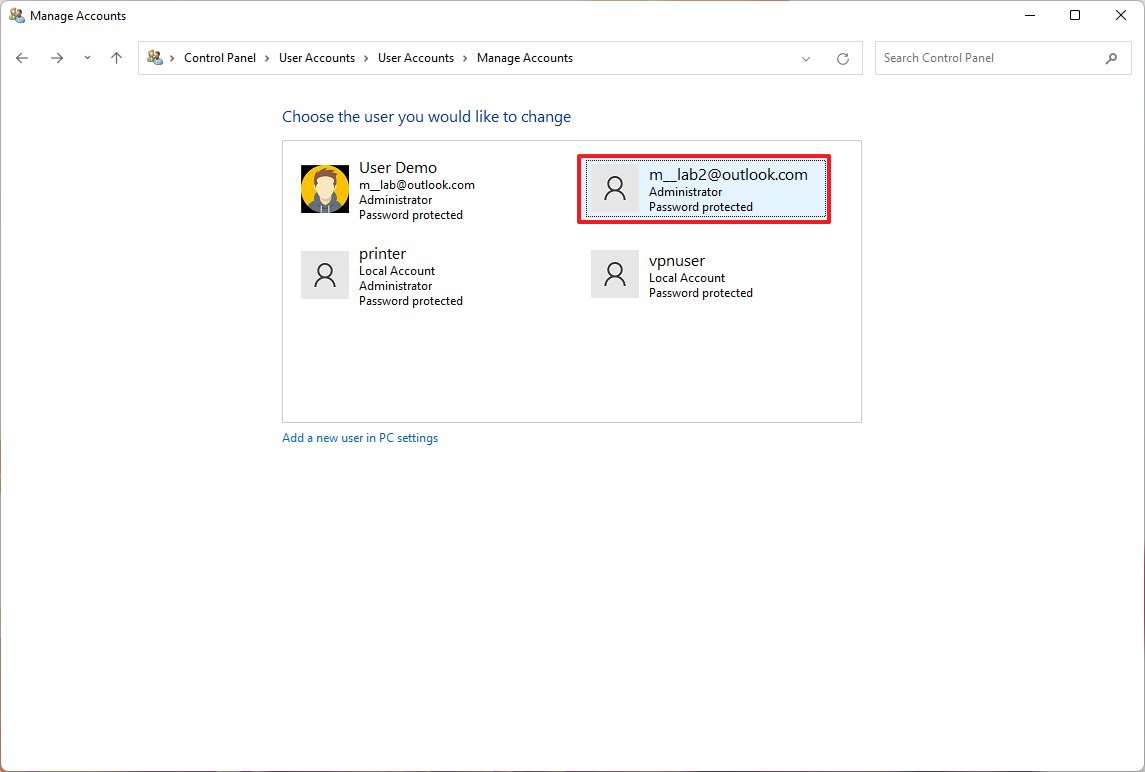
- Select the account that you want to change.
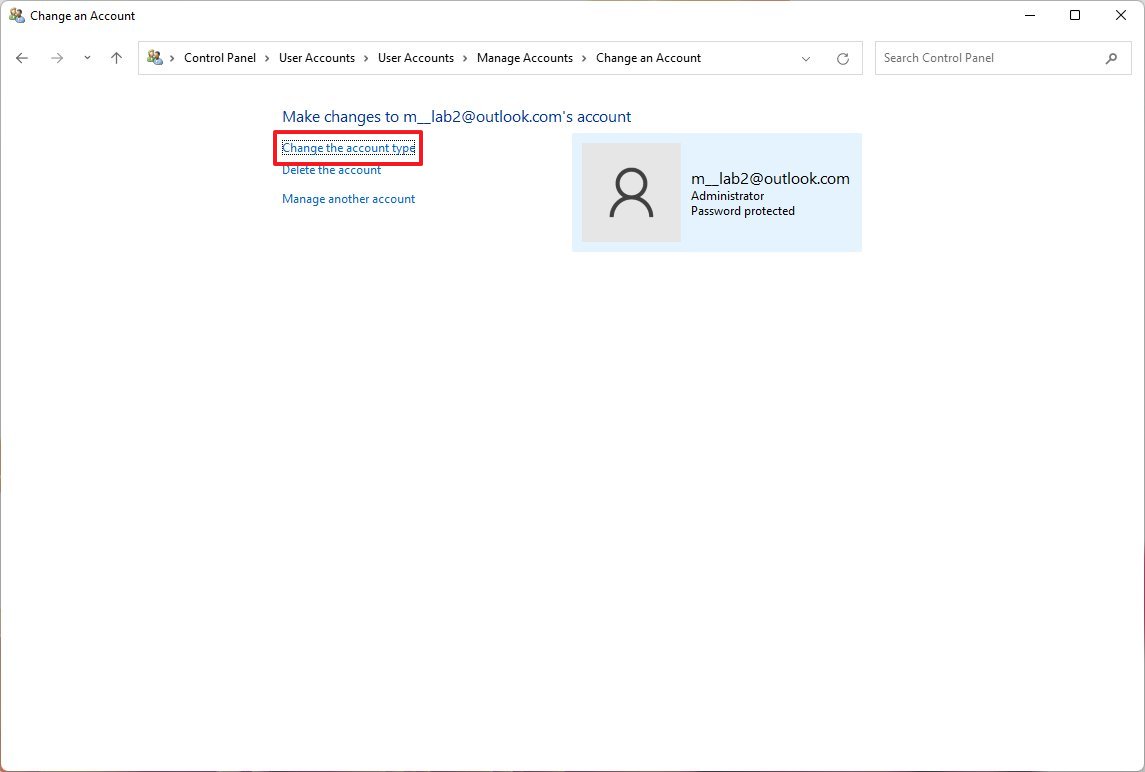
- Click the Change the account type option.
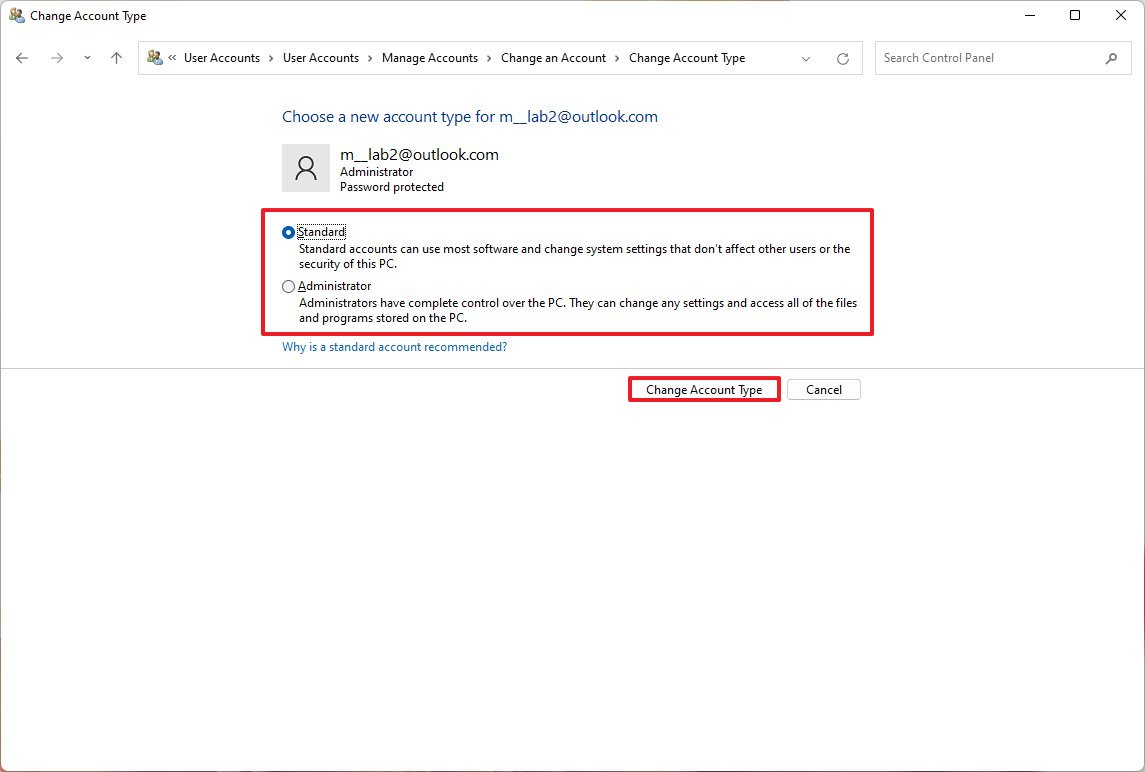
- Select either Standard or Administrator as needed.
- Click the Change Account Type button.
Control Panel second method
To use the netplwiz interface to change the account type on Windows 11, use these steps:
- Open Start.
- Search for netplwiz and click the top result to open the "User Accounts" experience.
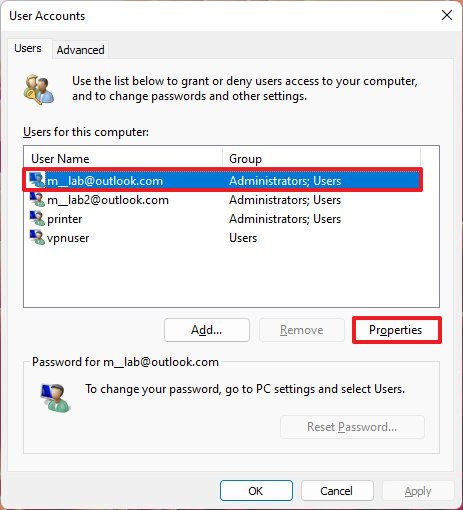
- Select the account that you wish to change.
- Click the Properties button.
- Click the Group Membership tab.
- Select the Standard user or Administrator account type depending on the requirements.
- Quick tip: You can also select the Other membership option, which allows you to choose different user groups, such as Power Users, Backup Operators, Remote Desktop Users, etc.
- Click the Apply button.
- Click the OK button.
- Click the Apply button again.
- Click the OK button again.
Whatever method you use, after completing the steps, the account type will change according to your setting.
How to change account type with PowerShell
To change the Windows 11 account type, use these steps:
- Open Start.
- Search for PowerShell, right-click the top result, and select the Run as administrator option.
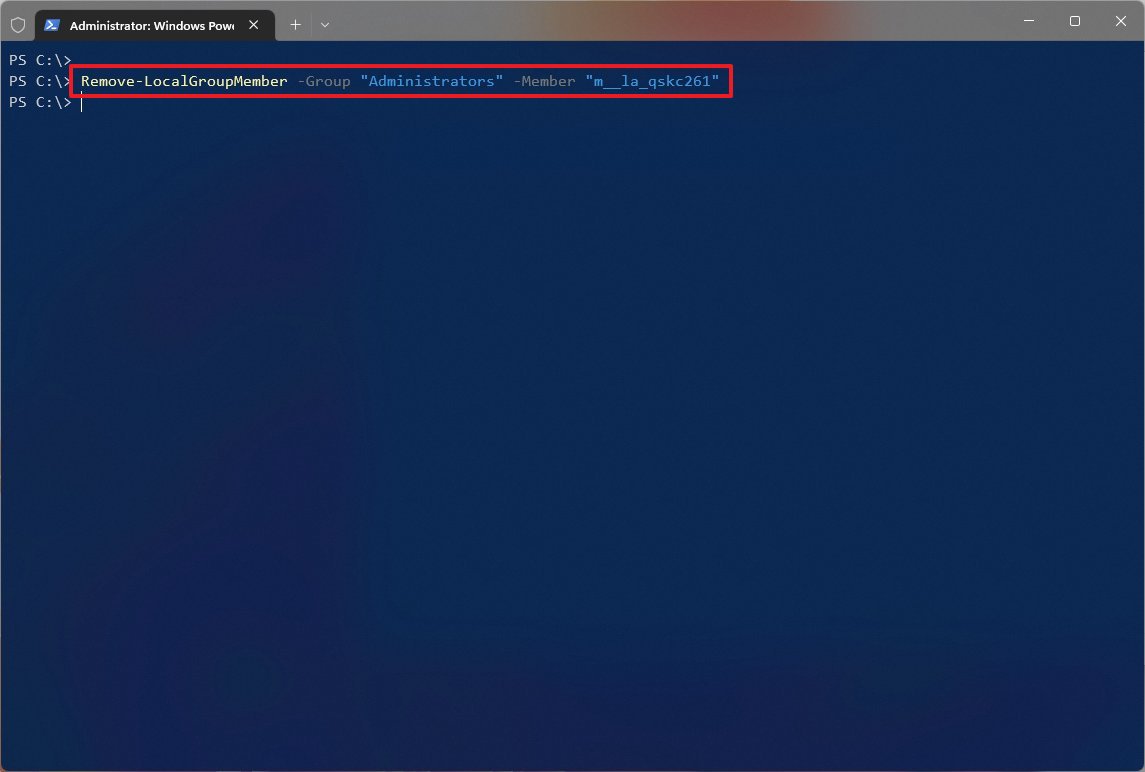
- Type the following command to change the account type to "Standard User" and press Enter: Remove-LocalGroupMember -Group "Administrators" -Member "ACCOUNT-NAME"
In the command, make sure to change the ACCOUNT-NAME for the actual name of the account that you want to change. If you don't know the account name, you can run the "Get-LocalUser" command to view a list of all available users.
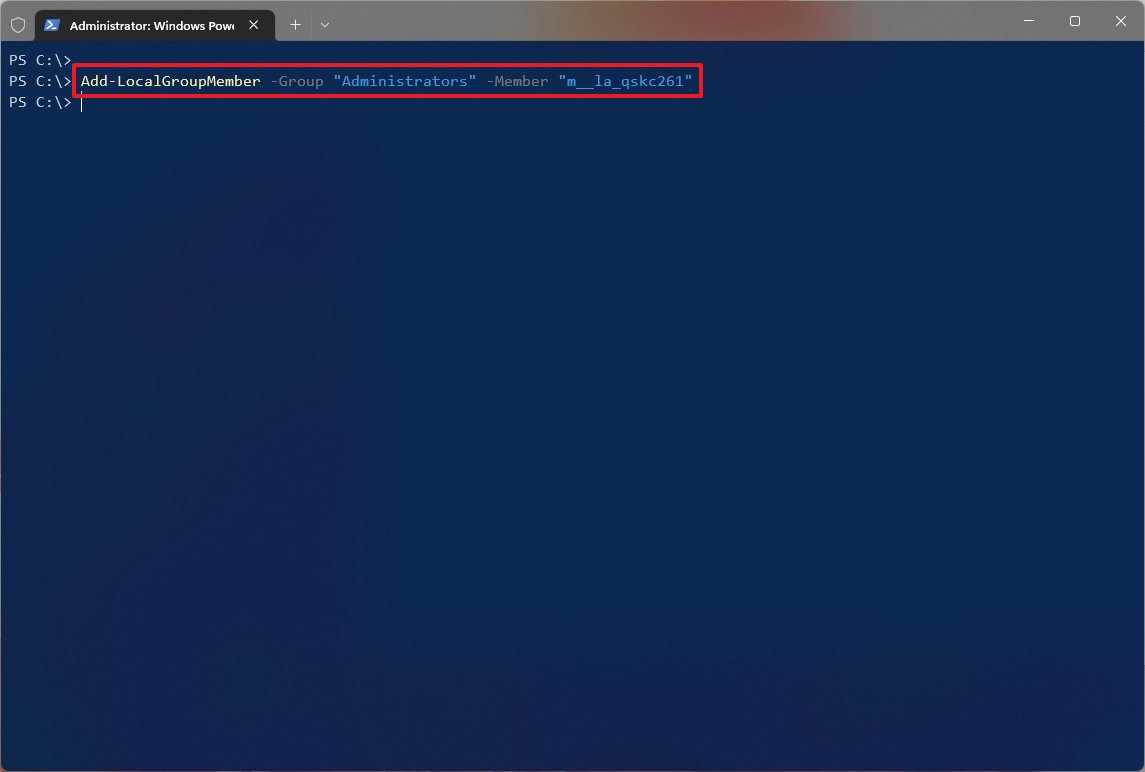
- Type the following command to change the account type to "Administrator" and press Enter: Add-LocalGroupMember -Group "Administrators" -Member "ACCOUNT-NAME"
In the command, make sure to change the ACCOUNT-NAME for the actual name of the account that you want to change.
- Quick note: Users with administrator accounts are part of both, the "Administrators" and "Users" groups. As a result, to make a user standard, you only need to remove the user from the "Administrators" group.
Once you complete the steps, the account type will switch to the Administrator or Standard group, depending on your selection.
How to change account type with Command Prompt
To change the account type which Command Prompt, use these steps:
- Open Start.
- Search for Command Prompt, right-click the top result, and select the Run as administrator option.
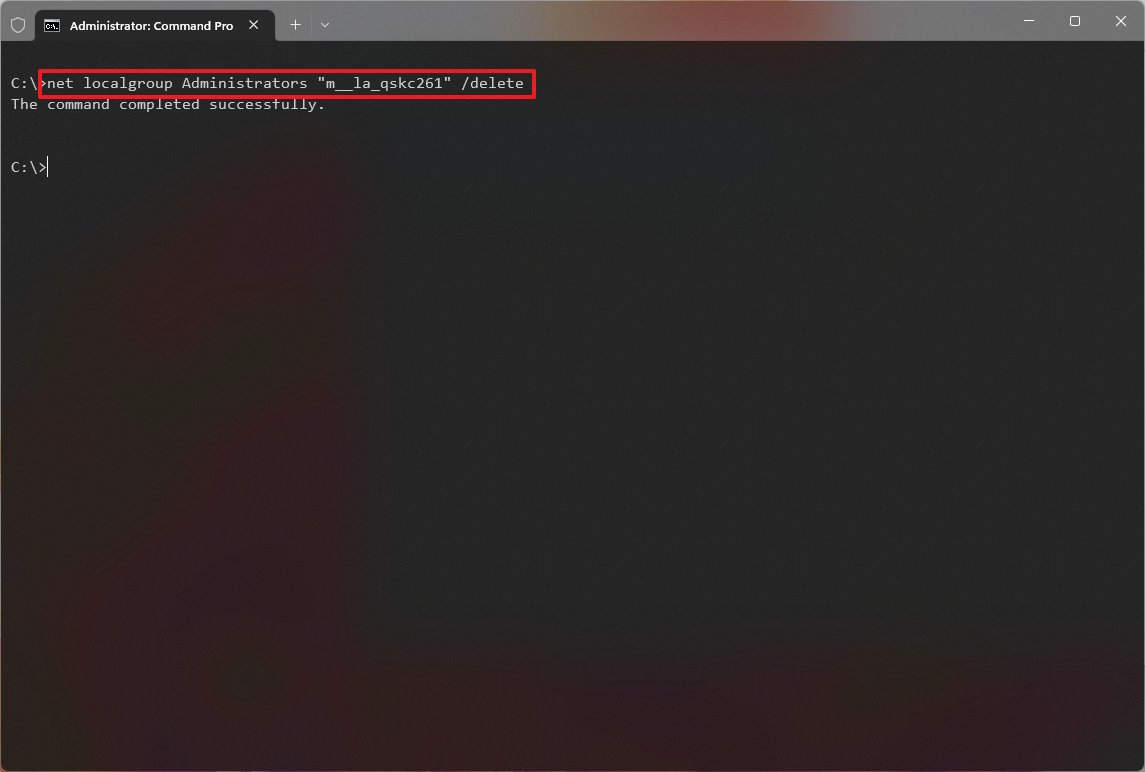
- Type the following command to change the account type to "Standard User" and press Enter: net localgroup Administrators "ACCOUNT-NAME" /delete
In the command, make sure to change the ACCOUNT-NAME for the actual name of the account that you want to change. If you don't know the account name, you can run the "net user" command to view a list of all available users.
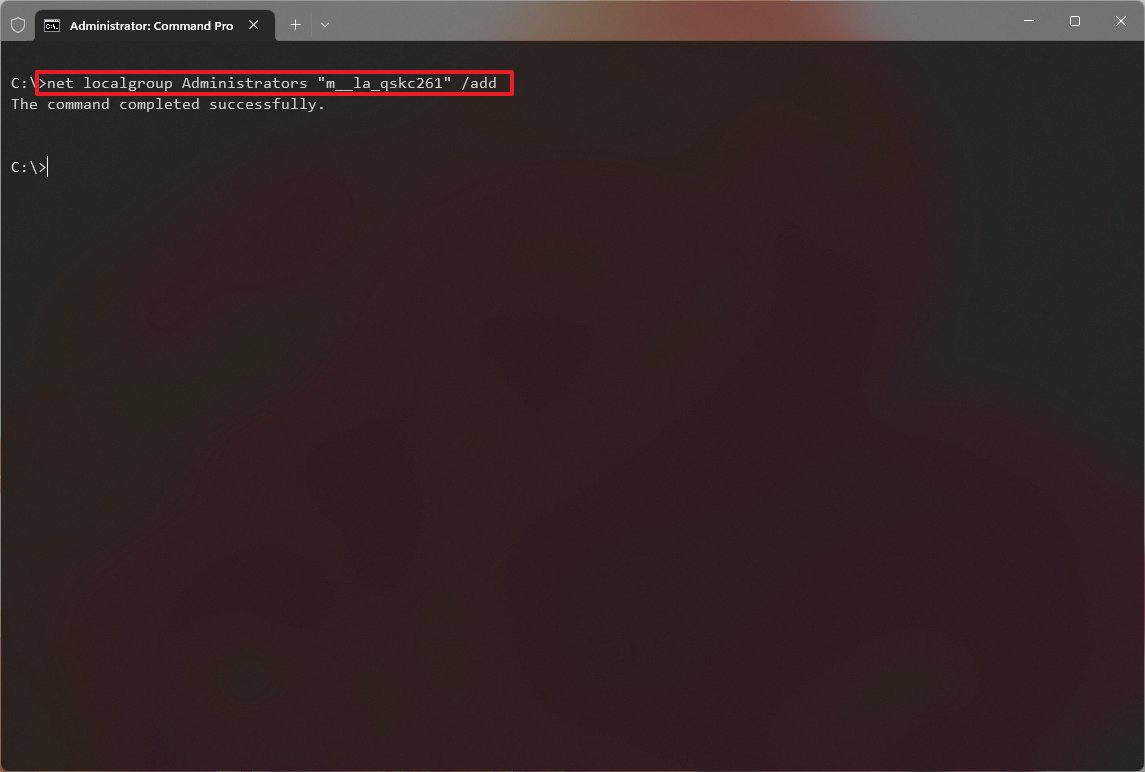
- Type the following command to change the account type to "Administrator" and press Enter: net localgroup Administrators "ACCOUNT-NAME" /add
In the command, make sure to change the ACCOUNT-NAME for the actual name of the account that you want to change.
- Type the following command to view the account type and press Enter: net user ACCOUNT-NAME
After completing the steps, the next time the user signs into the computer, the account will start with the privileges allowed by the group you specified in the command.
More resources
For more helpful articles, coverage, and answers to common questions about Windows 10 and Windows 11, visit the following resources:

Mauro Huculak has been a Windows How-To Expert contributor for WindowsCentral.com for nearly a decade and has over 22 years of combined experience in IT and technical writing. He holds various professional certifications from Microsoft, Cisco, VMware, and CompTIA and has been recognized as a Microsoft MVP for many years.
