Essential settings to configure on Windows Subsystem for Android on Windows 11
You should change these settings when setting up the Windows Subsystem for Android on Windows 11.
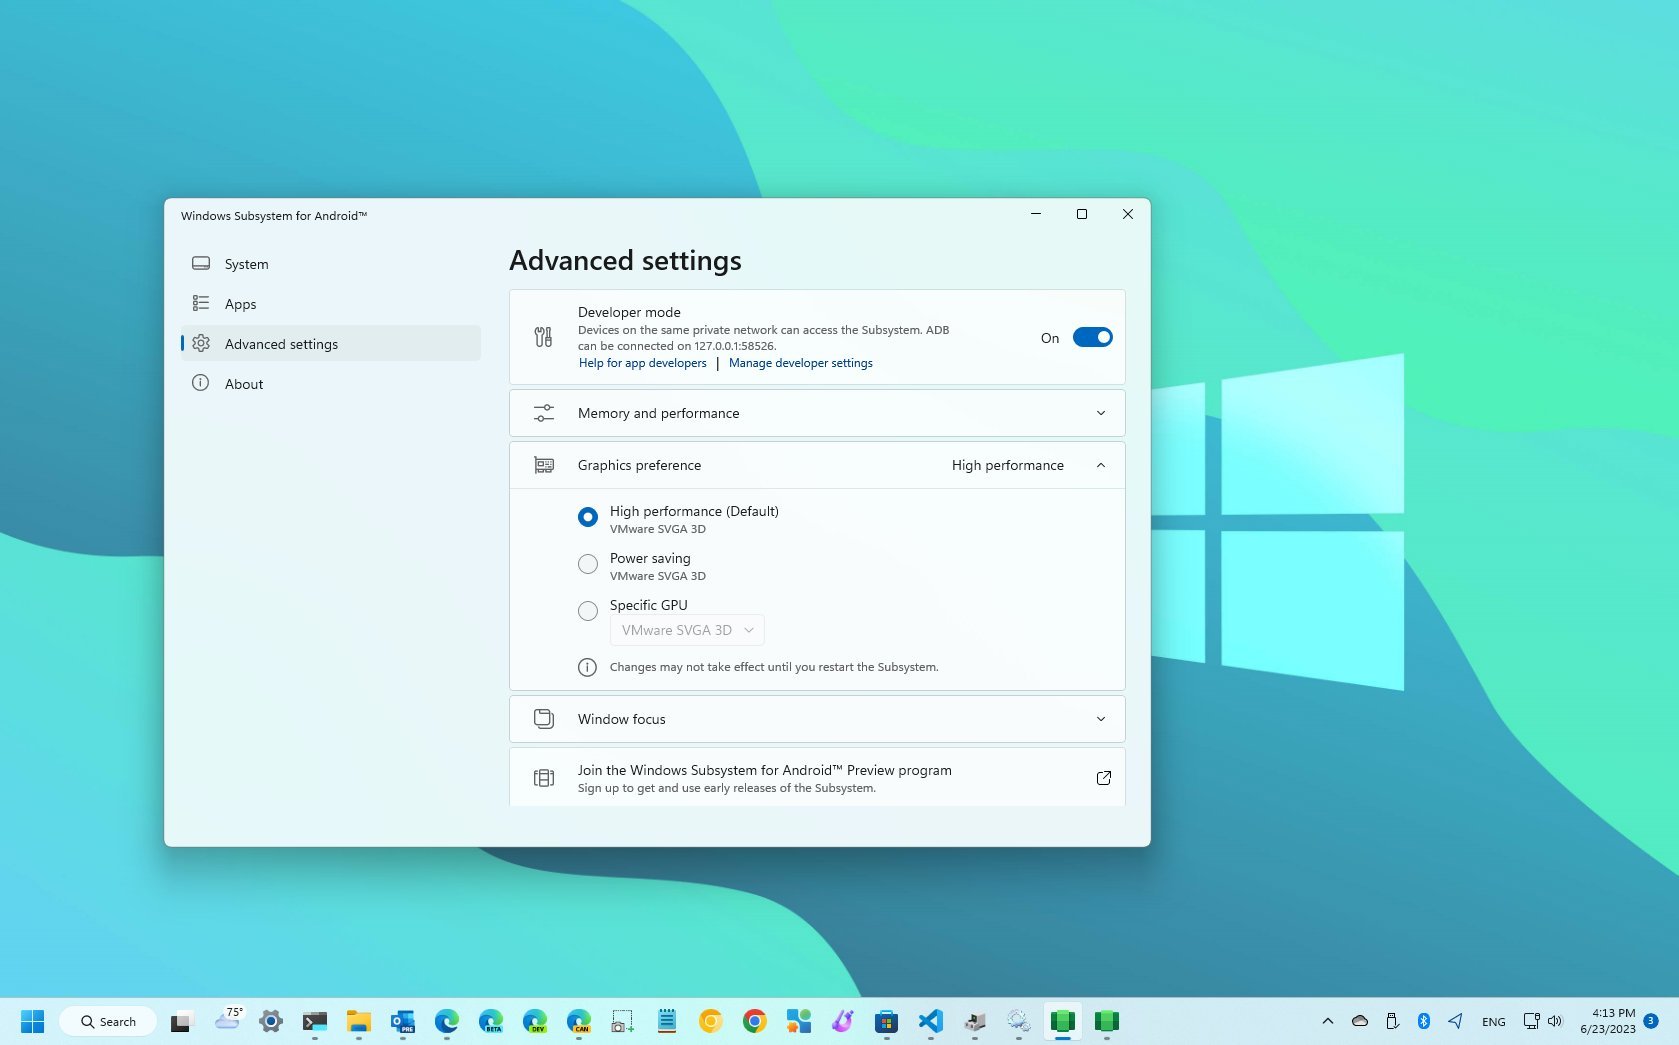
The Windows Subsystem for Android (WSA) is a virtualization solution that, in combination with the Amazon Appstore, allows you to run Android apps on Windows 11.
Although the default configuration of the WSA environment should be enough for most users, it's possible to change some of the settings to get the most out of the experience. For instance, you can enable file-sharing to access your files from Android apps. It's also possible to control how much memory the subsystem uses, choose the graphics card, enable anti-malware scanning, and you can even change the behavior to make the subsystem always available for quick access to your apps.
This how-to guide will walk you through some essential settings you must consider changing when using WSA on Windows 11.
How to enable File Sharing on WSA
File Sharing is a feature that adds the ability to make available files from the Documents, Downloads, Pictures, Music, and Videos folders to Android apps.
To enable WSA File Sharing, use these steps:
- Open Start.
- Search for Windows Subsystem for Android and click the top result to open the app.
- Click on Advanced settings.
- Click the Experimental features setting.
- Turn on the "Share user folders" toggle switch to enable the feature.
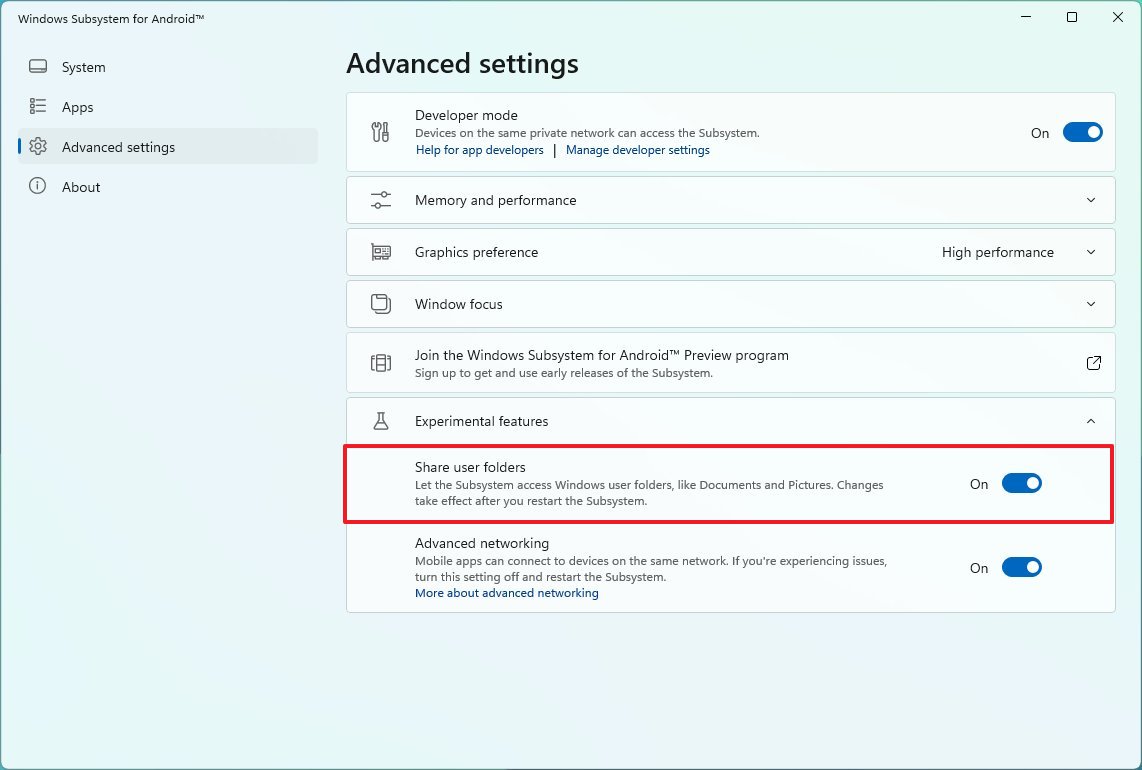
- (Optional) Turn off the "Share use folders" toggle switch to disable the feature.
Once you complete the steps, your Windows 11 profile folders will appear inside the "Windows" folder in the "sdcard" location.
How to change memory usage on WSA
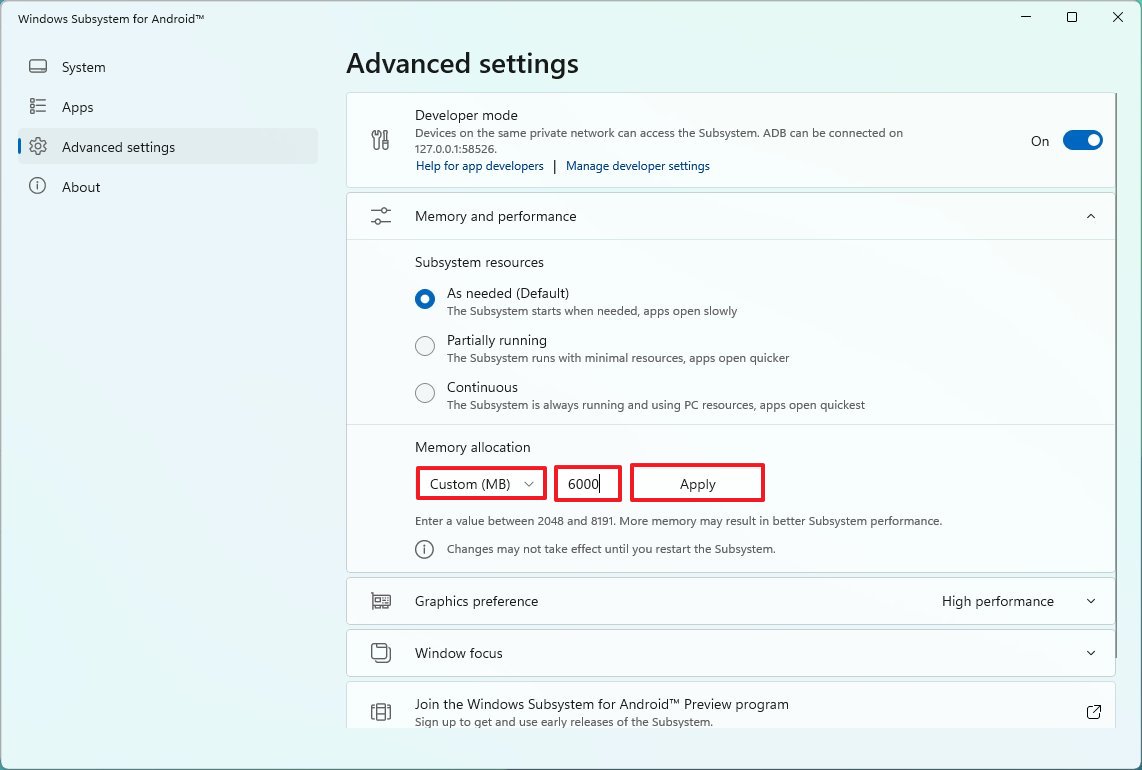
If you have a system with more than enough memory, you can change the Windows Subsystem for Android settings to increase memory usage to improve app performance. You can also consider changing the settings to limit memory usage on less powerful systems.
All the latest news, reviews, and guides for Windows and Xbox diehards.
To specify the amount of memory that WSA can use for the platform and apps, use these steps:
- Open Start.
- Search for Windows Subsystem for Android and click the top result to open the app.
- Click on Advanced settings.
- Click the "Memory and performance" setting.
- Under the "Memory allocation" setting, choose one of the available options, including "Low (2GB)," "Default (4GB)," "High (8GB)," or "Custom (MB)."
- Quick note: The "Custom" option allows you to assign virtually any amount of memory, and you must specify the amount in megabytes.
- Click the Apply button.
After you complete the steps, the system will dedicate the amount of memory you specified and nothing more.
How to keep platform running continuously on WSA
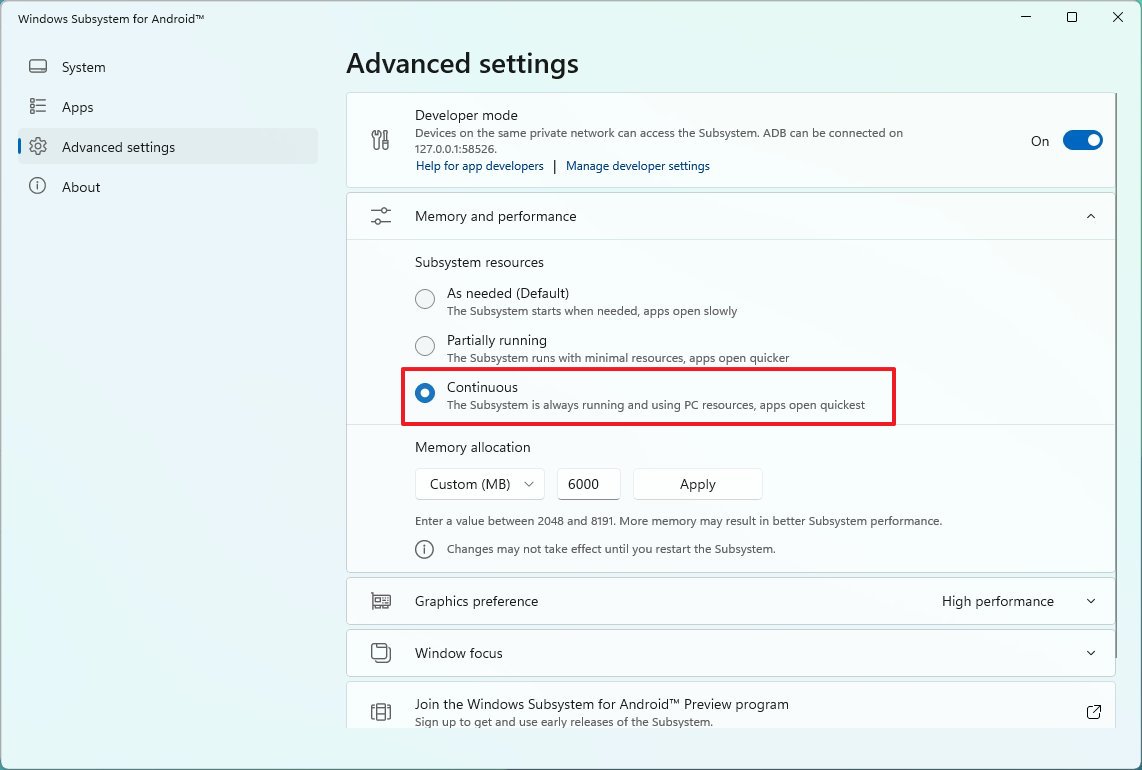
When you are not actively using Android apps, the subsystem will go into sleep mode to save system resources and battery. The only caveat with this approach is that launching an app can take a long time since it must wait until the subsystem spins up before it can run. If you want to start apps faster, you can use the system resources settings to keep the subsystem running all the time.
To maintain WSA running continuously, use these steps:
- Open Start.
- Search for Windows Subsystem for Android and click the top result to open the app.
- Click on Advanced settings.
- Click the "Memory and performance" setting.
- Select the "Continuous" option to keep the subsystem running all the time, allowing you to open apps quickly.
- Quick note: The "As needed" option starts the subsystem on demand when trying to launch an application. And the "Partially running" keeps the subsystem running using minimal resources.
Once you complete the steps, the Windows Subsystem for Android will run continuously, making launching apps quicker. (This option is not recommended for devices running on battery.)
How to assign specific graphics card on WSA
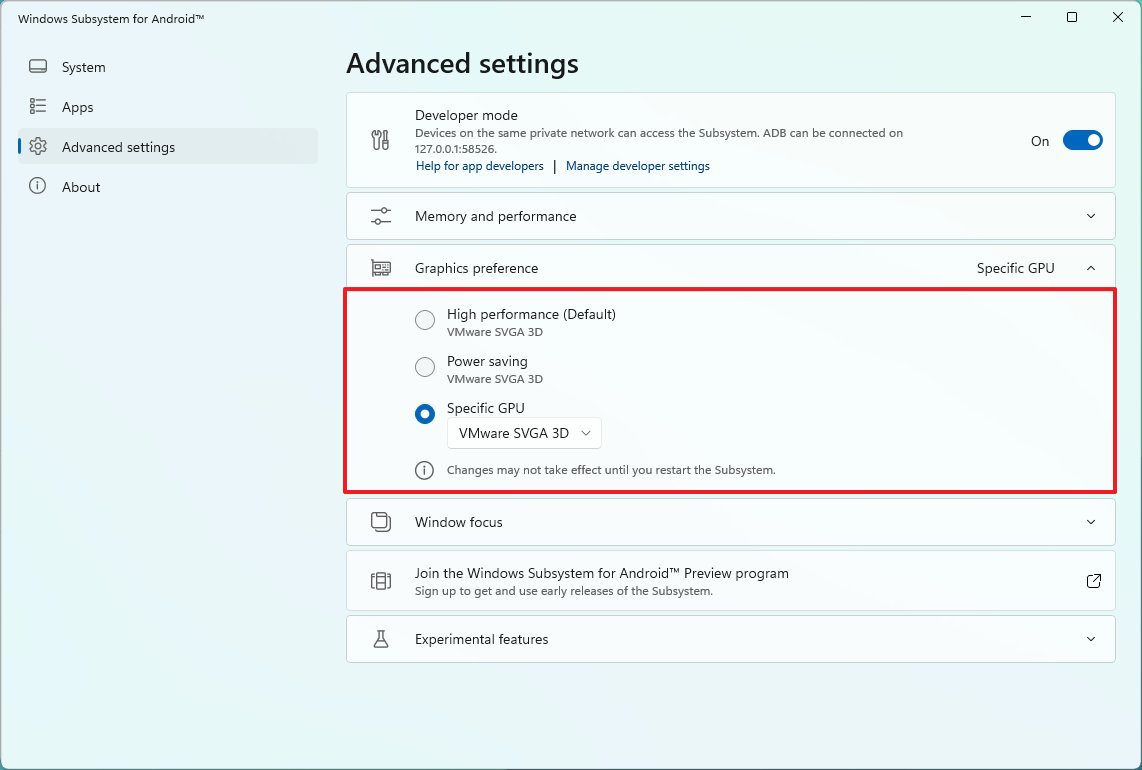
WSA, by default, uses the graphics card with the highest performance installed on the computer, but you can always choose the card you want the subsystem to use.
To assign a specific video card to WSA, use these steps:
- Open Start.
- Search for Windows Subsystem for Android and click the top result to open the app.
- Click on Advanced settings.
- Click the Graphics preference setting.
- Choose the graphics card to assign to the Windows Subsystem for Linux, including "High performance," "Power saving," and the "Specific GPU" allows you to select from any of the available cards.
After you complete the steps, the subsystem will use the graphics card you specified to render Android apps.
How to enable malware scan on WSA
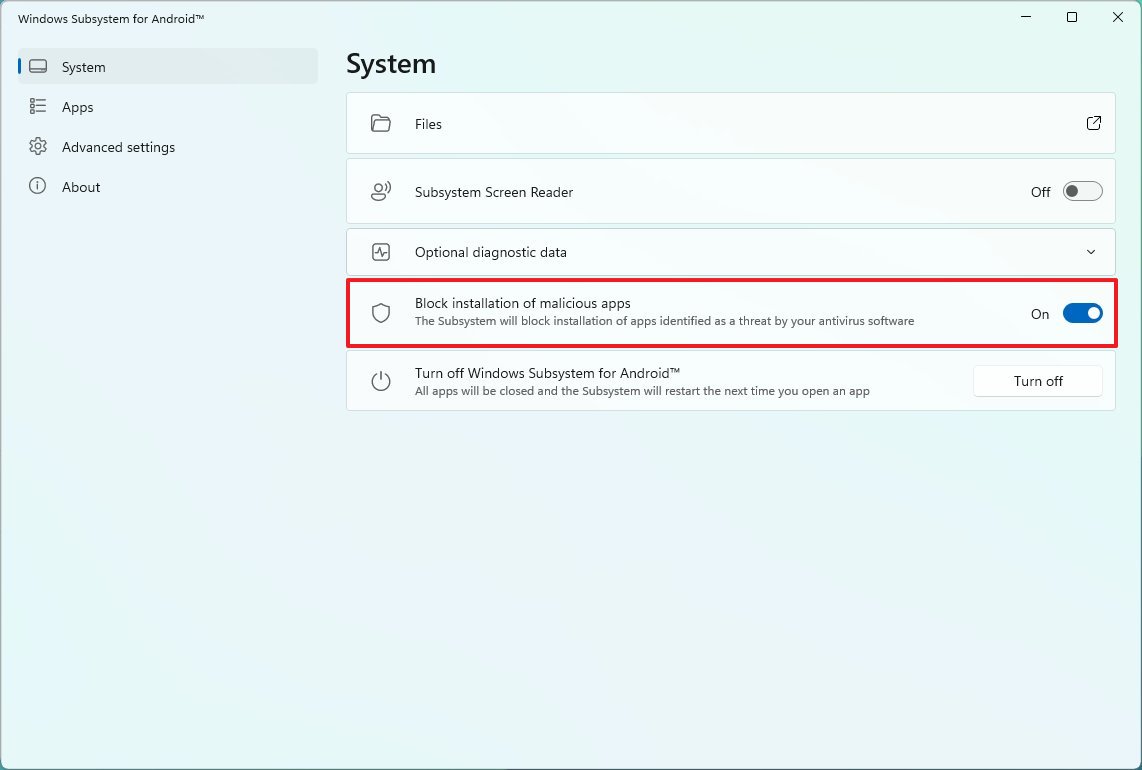
The Windows Subsystem for Android can use the Microsoft Defender Antivirus available on Windows 11 to scan apps prior to installation to make sure that no malicious code hijacks the system. If the feature is already enabled, you can also turn it off to prevent the antivirus from blocking an app you know is trusted.
To turn on or off the Microsoft Defender Antivirus for WSA apps, use these steps.
- Open Start.
- Search for Windows Subsystem for Android and click the top result to open the app.
- Click on System.
- Turn on the "Block installation of malicious apps" toggle switch to enable the feature.
- (Optional) Turn off the "Block installation of malicious apps" toggle switch to disable the feature.
Once you complete the steps, the antivirus will scan Android apps before installation to ensure they won't compromise the system.
After changing the settings, it's recommended to restart the Windows Subsystem for Android. You can do this by restarting the computer or from the "System" settings page, clicking the "Turn off" button, and then clicking the "Turn on" button from the "Turn off Windows Subsystem for Android" setting.
More resources
For more helpful articles, coverage, and answers to common questions about Windows 10 and Windows 11, visit the following resources:
- Windows 10 on Windows Central — All you need to know
- Windows 11 on Windows Central — All you need to know

Mauro Huculak has been a Windows How-To Expert contributor for WindowsCentral.com for nearly a decade and has over 22 years of combined experience in IT and technical writing. He holds various professional certifications from Microsoft, Cisco, VMware, and CompTIA and has been recognized as a Microsoft MVP for many years.
