10 features you probably didn't know about Notepad for Windows 11
If you use Notepad on Windows 11, you should know about these features (and how to use them.)
On Windows 11, you can use an updated version of the popular Notepad app. Although it has been designed to be a simple text editor, it includes a range of features you probably aren't using because you don't know or forgot about them.
For example, in recent updates, Microsoft added the spelling capabilities to check spelling as well as an option to correct mistakes automatically. The text edition also includes a more capable find-and-replace feature. Furthermore, you can customize the default font size and style, change the startup behavior, switch to dark color mode, and use various other settings to make the most of Notepad.
In this how-to guide, I will share with you ten features you're probably not using with Notepad on Windows 11.
Notepad features you should try out on Windows 11
Check out this collection of features to boost your productivity while using the popular note-taking app.
1. Spell check and autocorrect
Notepad can check and highlight spelling mistakes as written and correct typos them automatically. The part is that these features only apply to text files, and they exclude files with code, such as HTML and CSS.
To turn the spelling feature on or off in Notepad, use these steps:
- Open Notepad.
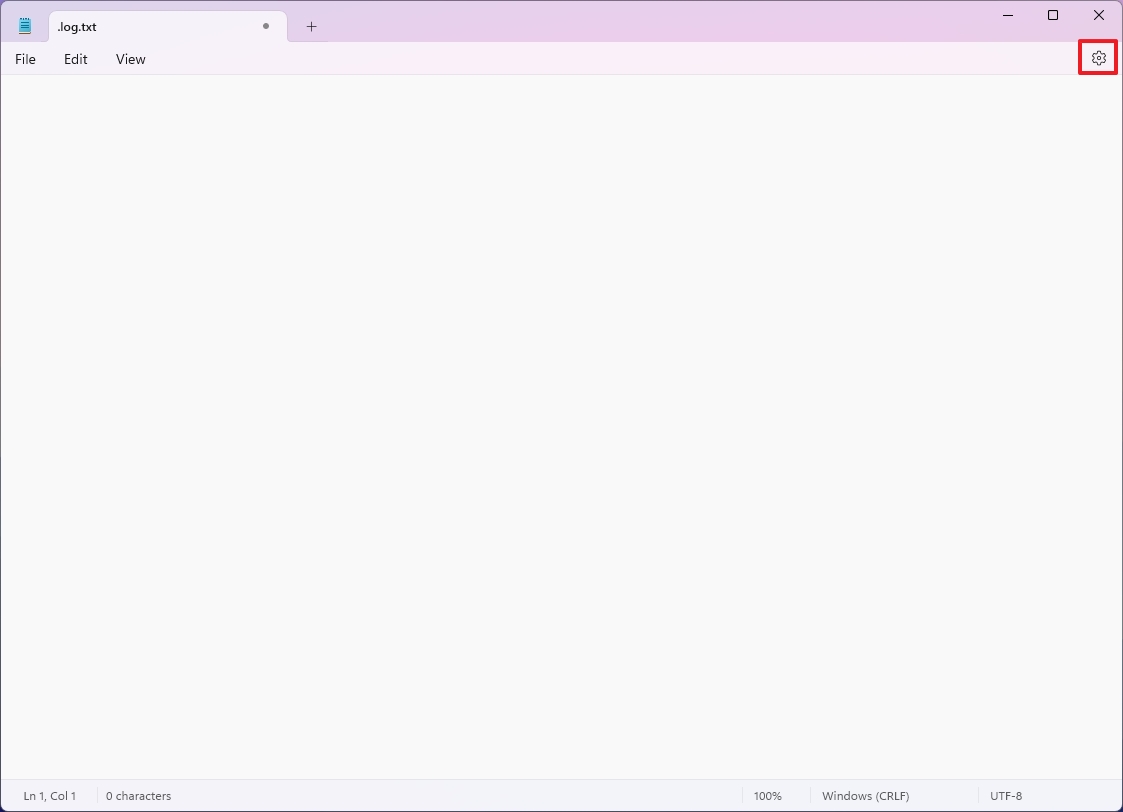
- Click the Settings button on the top-right corner.
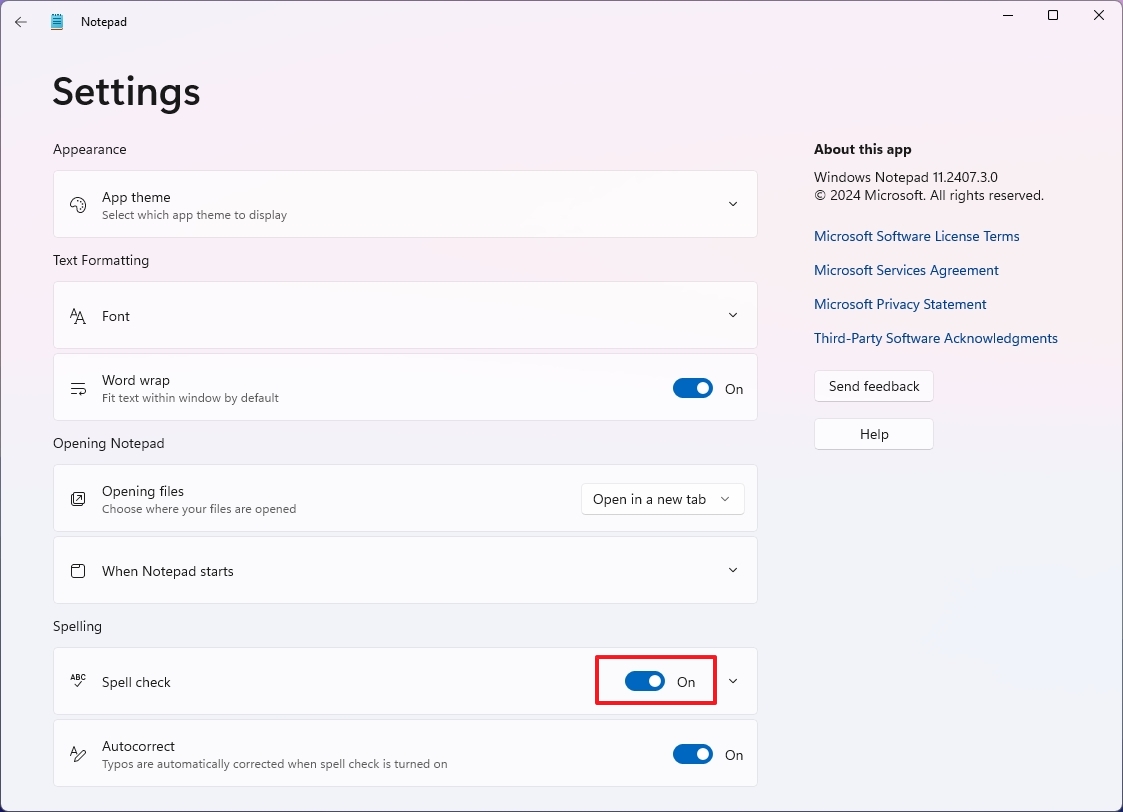
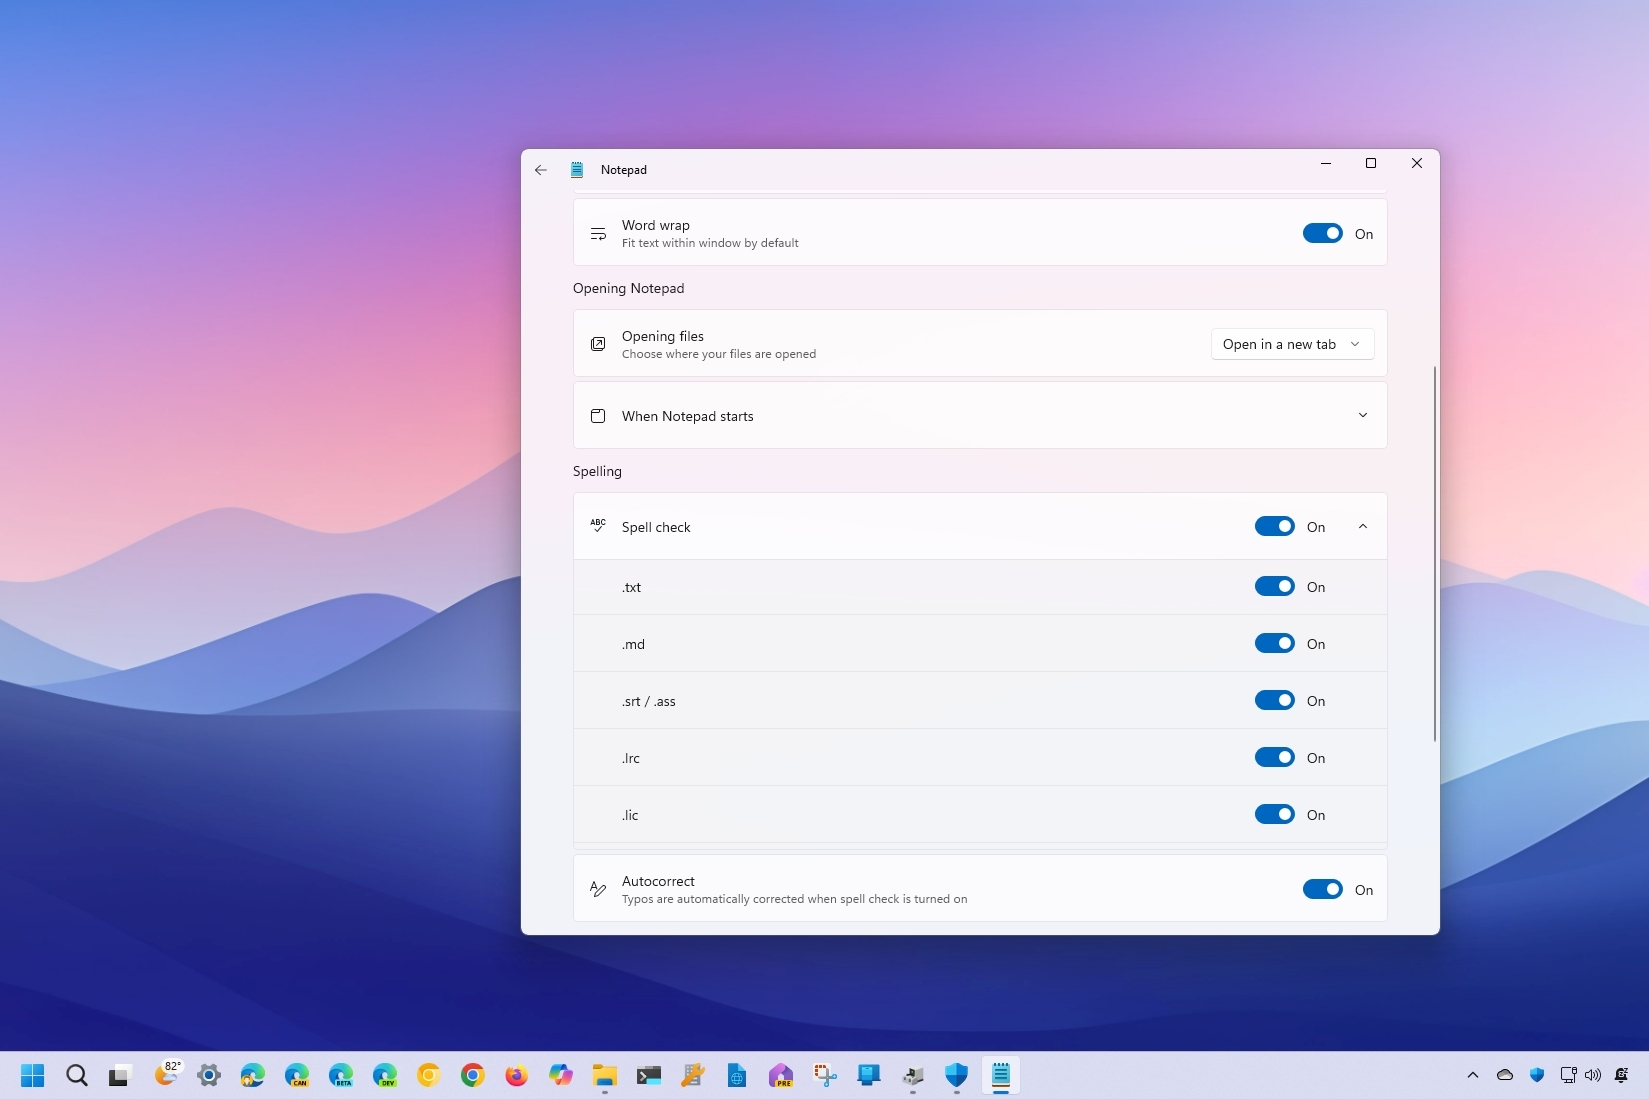
- (Option 1) Turn on the Spell check toggle switch to enable the feature.
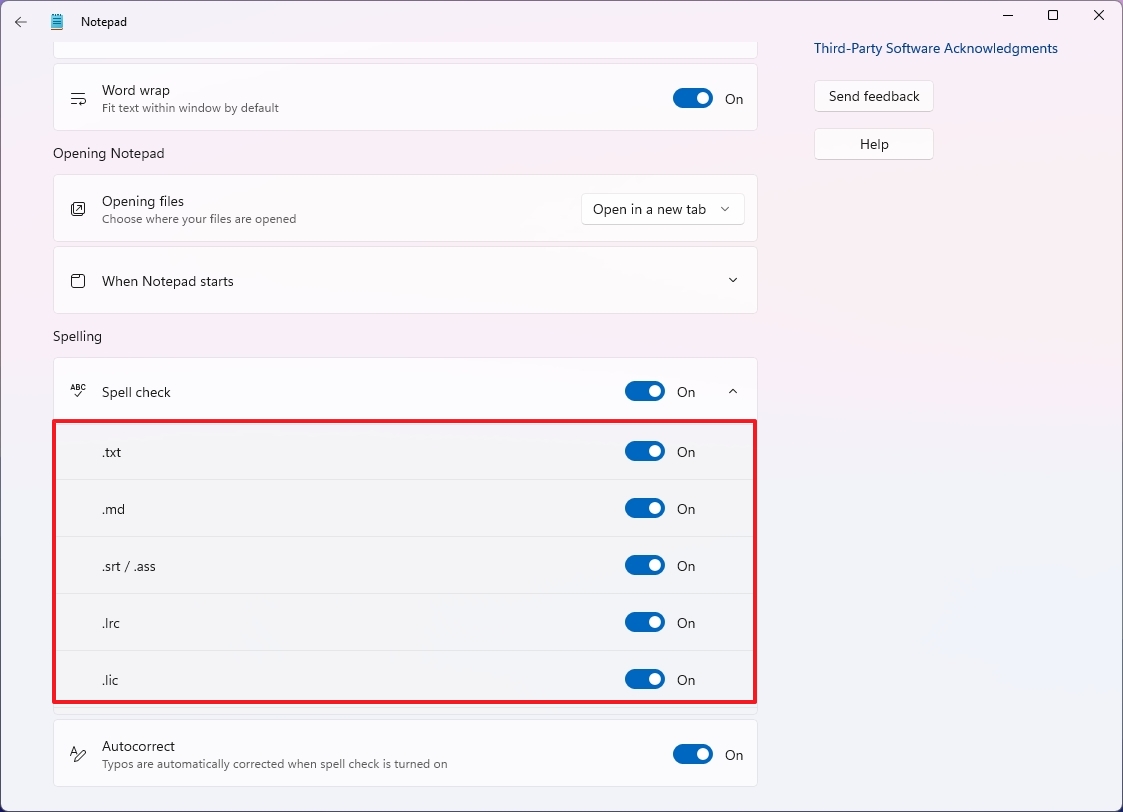
- Click the Spell check setting.
- Turn on the file types that Notepad should be able to check for spelling.
- (Option 2) Turn off the Spell check toggle switch to disable the feature.
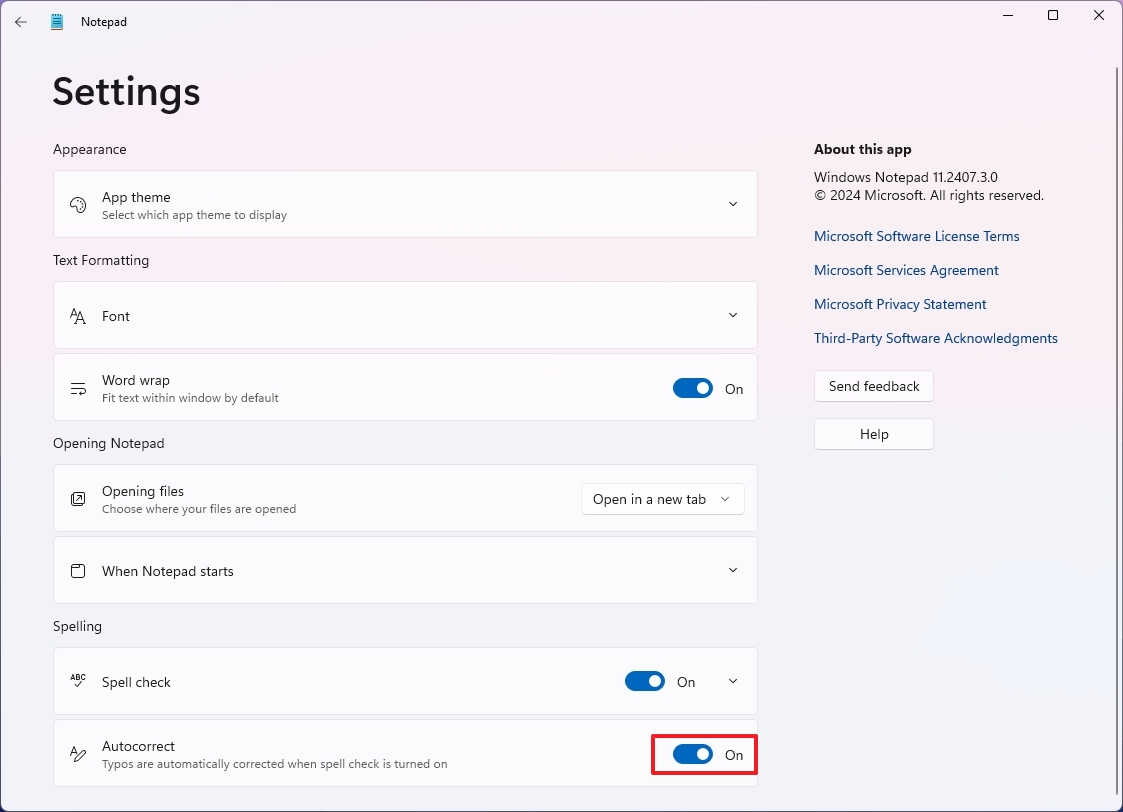
- (Option 1) Turn on the Autocorrect toggle switch to allow the app to correct typos automatically.
- (Option 2) Turn off the Autocorrect toggle switch to disable the feature.
Once you complete the steps, Notepad will highlight spelling mistakes and autocorrect typos.
All the latest news, reviews, and guides for Windows and Xbox diehards.
When the app highlights a word, you can right-click it and select the correct spelling for the word from the "Spelling" menu.
2. Change font size and style
As part of the customization settings, you can set the default font size and style. Here's how:
- Open Notepad.
- Click the Settings button on the top-right corner.
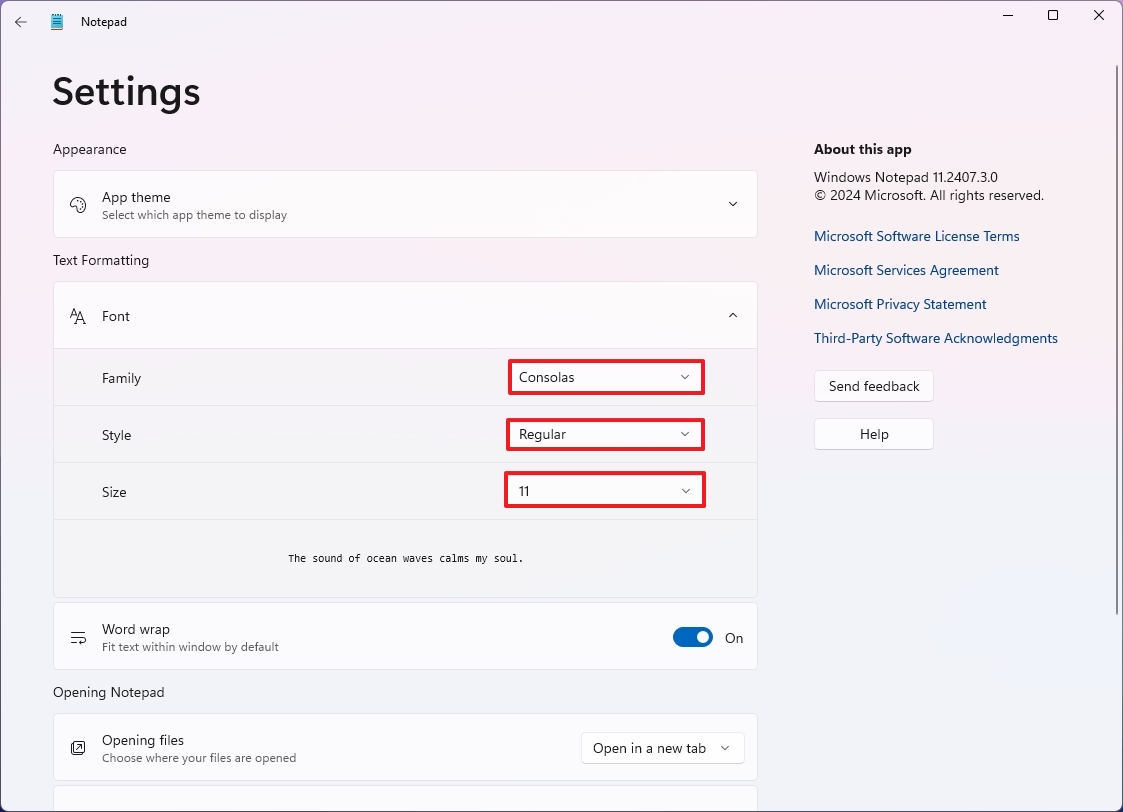
- Click the Font setting.
- Choose the default font family, such as Arial, Bahnschrift, etc., in the "Family" setting.
- Select the font style, depending on the font family you're using, in the "Style" setting.
- Choose the default font size using the "Size" setting.
After you complete the steps, the new settings will apply automatically.
You can also use the "Ctrl + scroll mouse wheel up or down" to zoom in and out quickly while typing on Notepad.
3. Find and replace
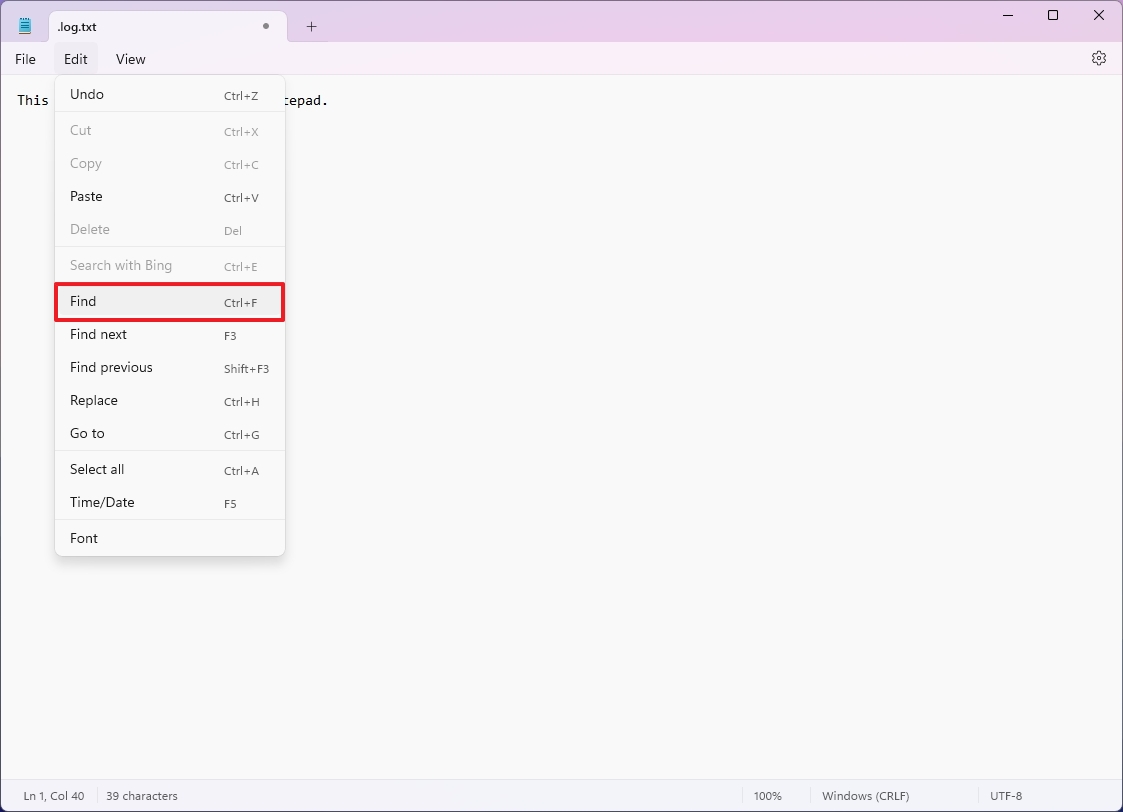
One of the most underrated features of Notepad is find and replace since it allows you to find a specific string or replace text quickly.
To find and replace text on Notepad, use these steps:
- Open Notepad.
- Open the Edit menu and choose the Find option.
- Quick note: You can also use the "Ctrl + F" keyboard shortcut. You can also use the "Ctrl + H" shortcut to open the "Replace" interface, but the "Find" interface also includes the Replace feature, so this is not necessary.
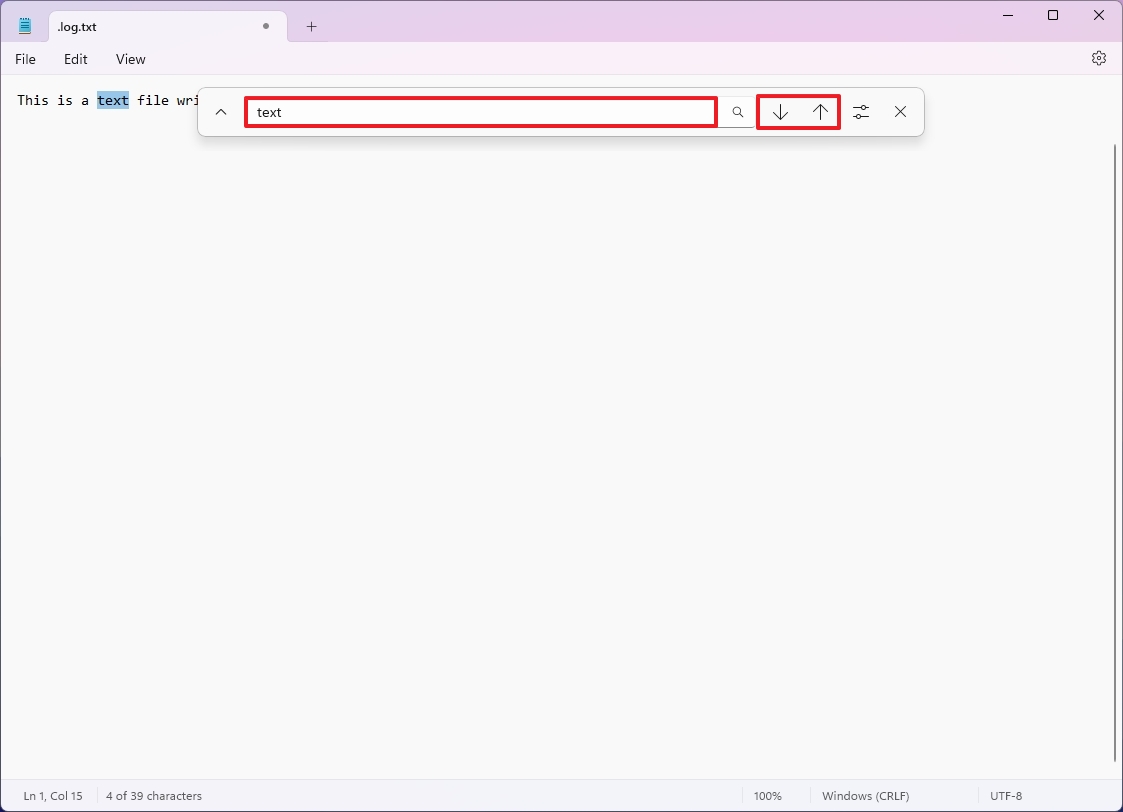
- (Option 1) Confirm the text in the box.
- Click the arrow up or down button to search up or down.
- Quick tip: You can also click the magnifier button or press Enter to search.
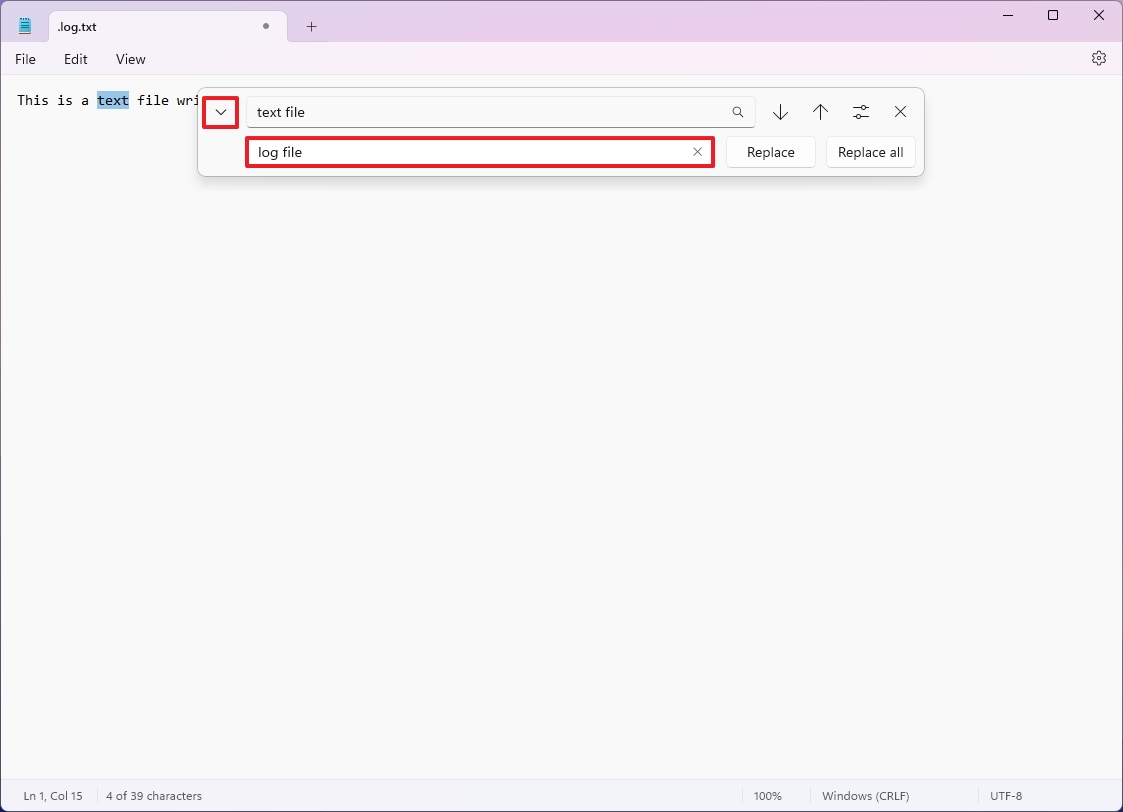
- (Option 2) Click the up arrow button to open the Replace experience.
- Confirm the text to replace in the first box on the top.
- Confirm the new text in the second box, on the bottom.
- Click the Replace button to change one match at a time.
- Click the "Replace all" button to change all matches simultaneously.
While Notepad doesn't support full regular expressions, you can use some basic wildcards like "*" (matches any number of characters) and "?" (matches any single character).
4. Enable word wrap
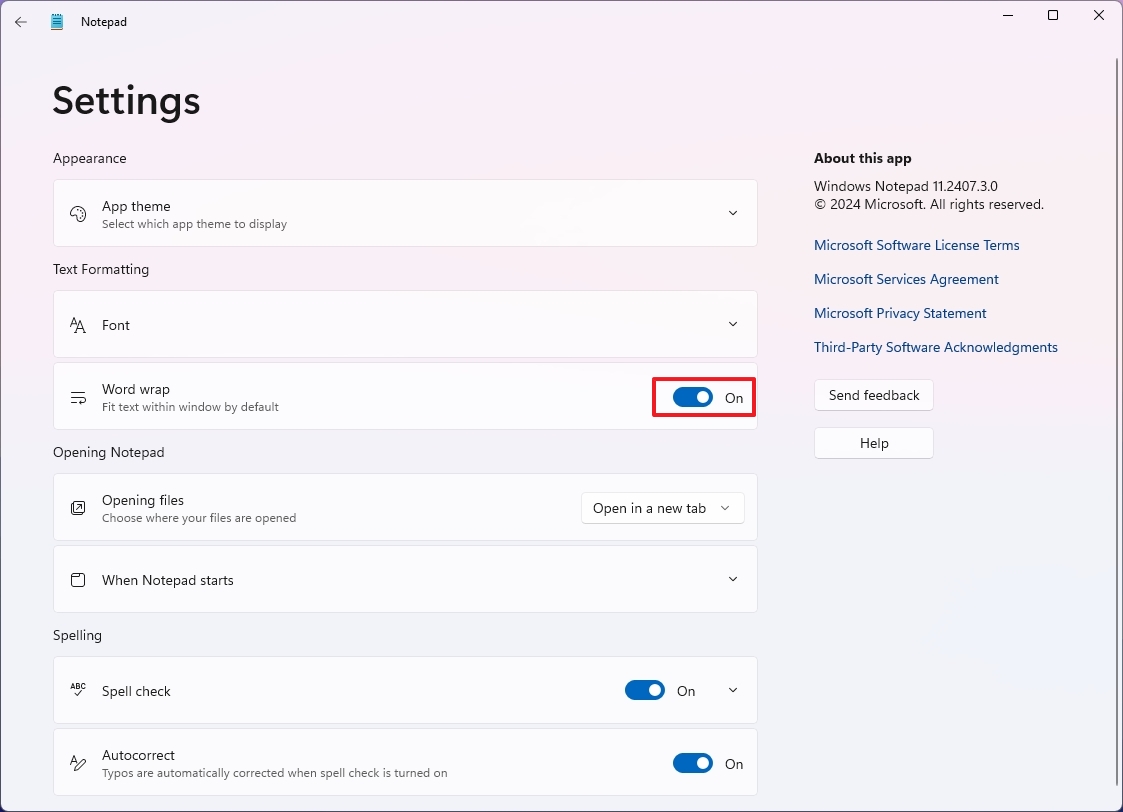
Word wrap is a feature in Notepad that automatically moves the cursor to the next line when the current line reaches the end of the window. This allows lines to be shorter and easier to read.
To enable word wrap in Notepad, use these steps:
- Open Notepad.
- Click the Settings button on the top-right corner.
- Turn on the Word wrap toggle switch.
Once you complete the steps, the feature will enable the lines to break when they reach the end of the window.
It's important to note that you can also find the option from the "View" menu.
5. Change startup behavior
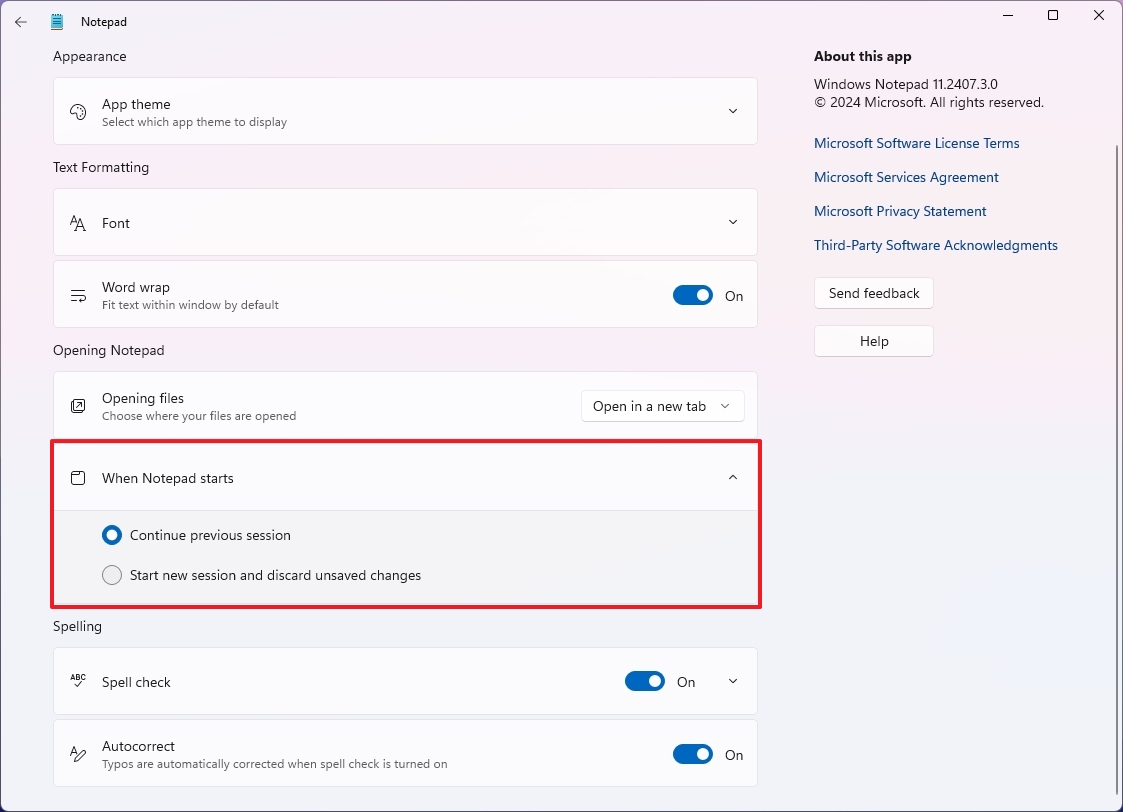
On Windows 11, you can set the startup behavior of Notepad to open a new session or resume your previous sessions with tabs.
To change the start settings of Notepad, use these steps:
- Open Notepad.
- Click the Settings button on the top-right corner.
- Click the "When Notepad starts" setting.
- (Option 1) Check the "Continue previous session" option to pick up where you left off.
- (Option 2) Select the "Start new session and discard unsaved changes" option to launch an empty session on startup.
After you complete the steps, the text editor will launch with the specified startup configuration.
6. Change text alignment
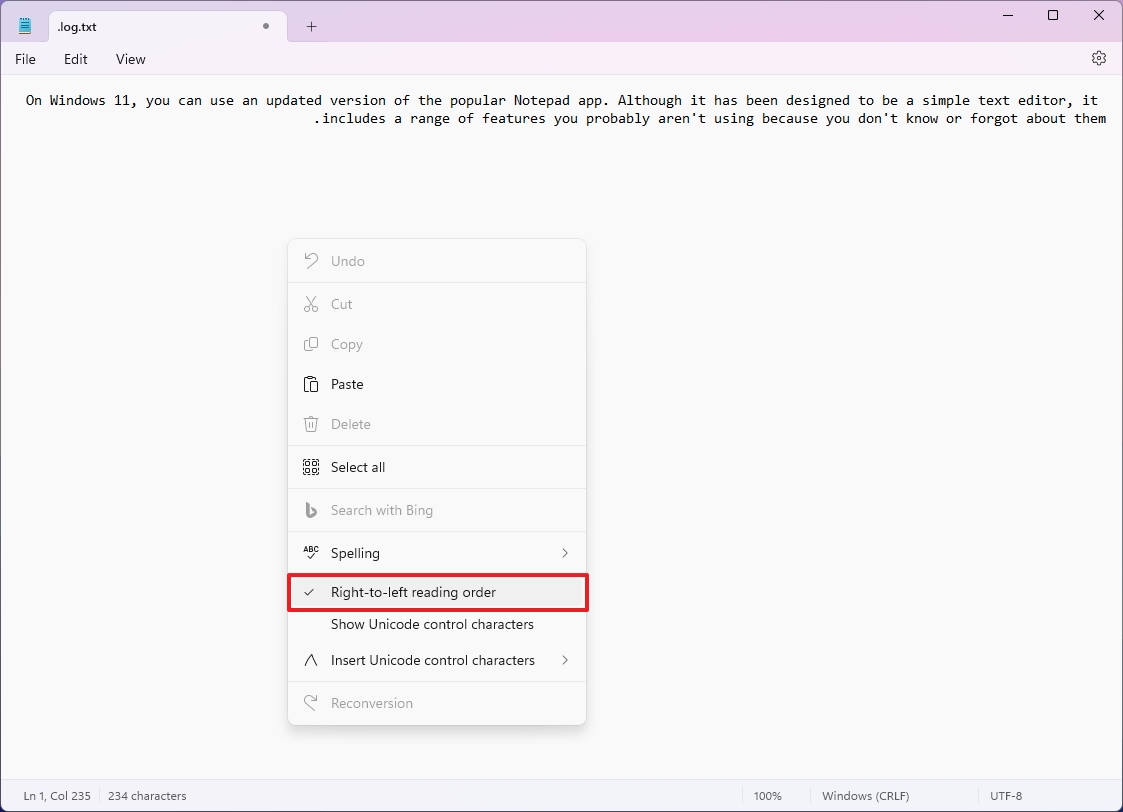
If you use Notepad in a different language, the app includes a right-to-left (RTL) text direction feature to support languages written in a right-to-left script, such as Arabic, Hebrew, and Persian.
To change the text alignment in Notepad, use these steps:
- Open Notepad.
- Right-click on the text and choose the "Right-to-left reading order" option.
Once you complete the steps, the text will align to the right. If the text is aligning automatically to the right, but you want the left-to-right experience, make sure to clear the "Right-to-left reading order" option.
7. Switch color mode
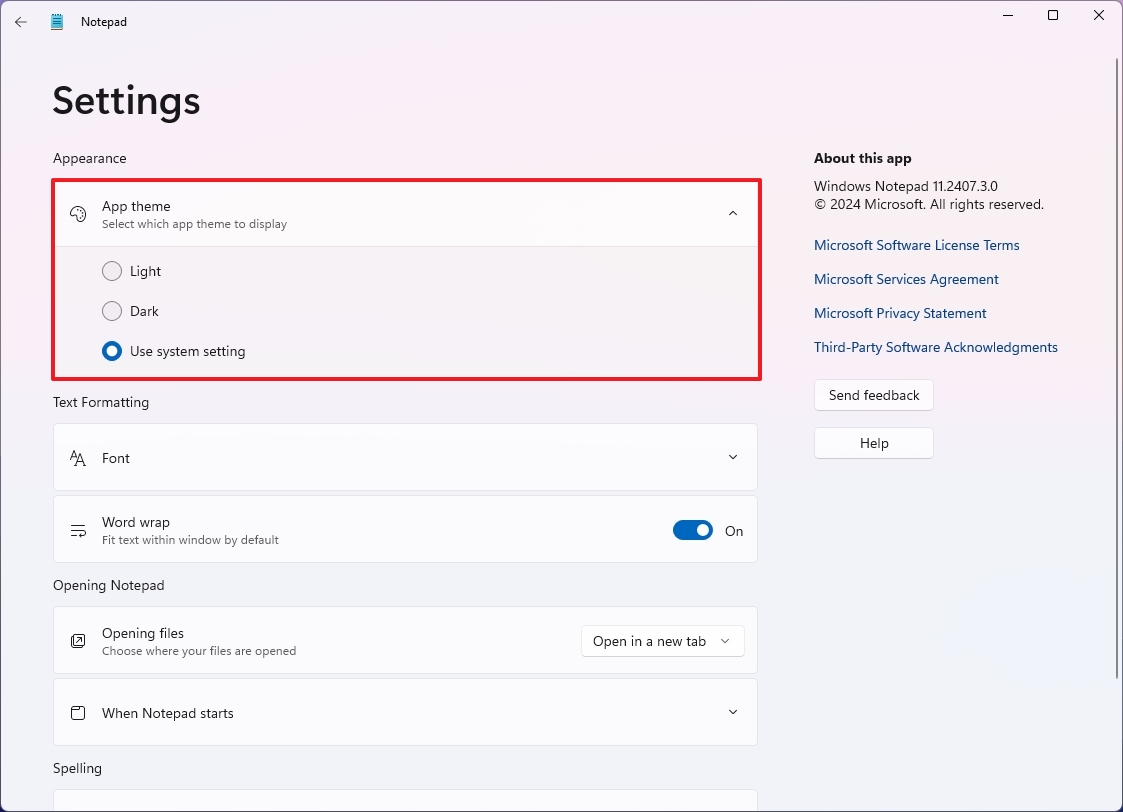
If you prefer using Notepad in dark mode, you can set the app to the dark color scheme manually, or you can use the option to allow the app to follow the system color.
To enable the dark mode for Notepad, use these steps:
- Open Notepad.
- Click the Settings button on the top-right corner.
- Click the "App theme" setting.
- (Option 1) Select the Dark option to force the dark color mode.
- (Option 2) Select the "Use system settings" option to change the color mode when you change the system color.
After you complete the steps, the Notepad will switch to a dark color theme according to your setting selection.
8. Insert time shortcut
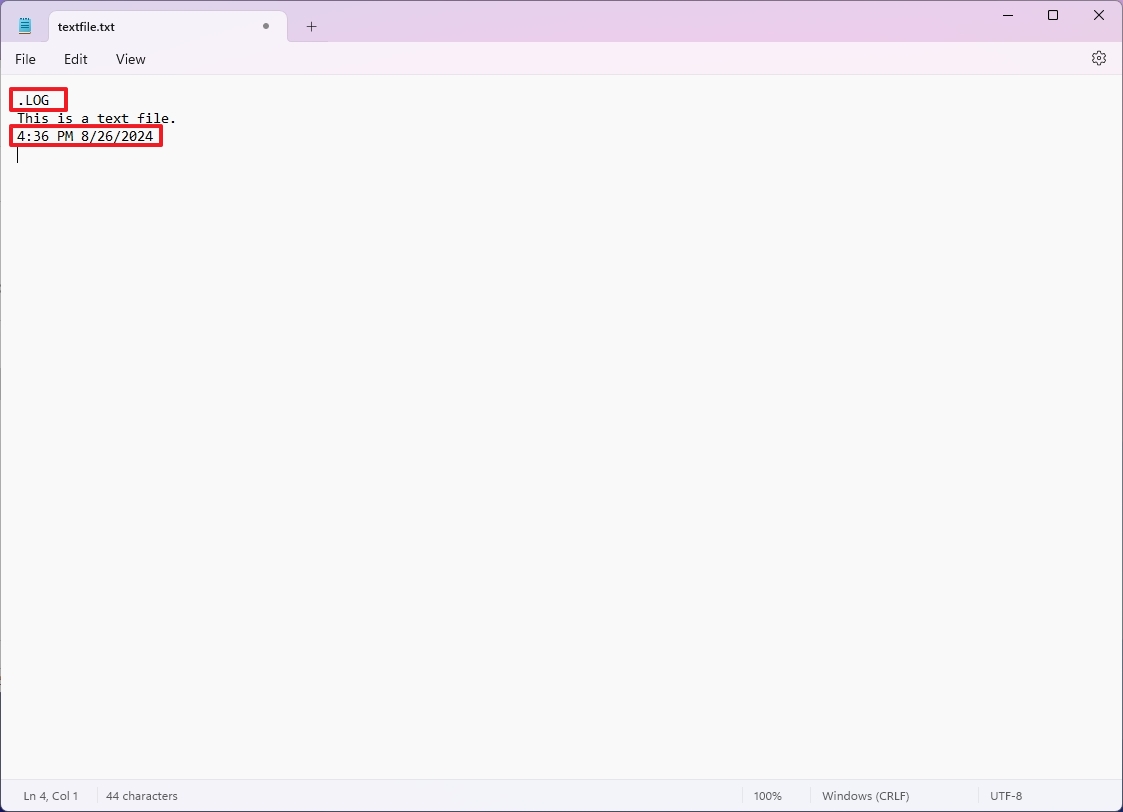
If you use Notepad to log changes for an application, script, etc., you can configure the app to print a timestamp in a new line every time you open the file.
To insert a timestamp in Notepad, use these steps:
- Open Notepad.
- Type the following in the first line: .LOG
- Continue with the contents of the text file in the second line.
- Save the the text file.
Once you complete the steps, the next time you open the file, Notepad will write the timestamp (for example, 2:14 PM 8/26/2024) in a new line.
When I tested this option, it only worked when having the "Start new session and discard unsaved changes" option selected in the "When Notepad starts" setting.
9. Custom header and footer
You can choose the custom header and footer when printing a page from Notepad. For example, you can include the filename, page number, current date, and alignment.
To change the header and footer for a text file in Notepad, use these steps:
- Open Notepad.
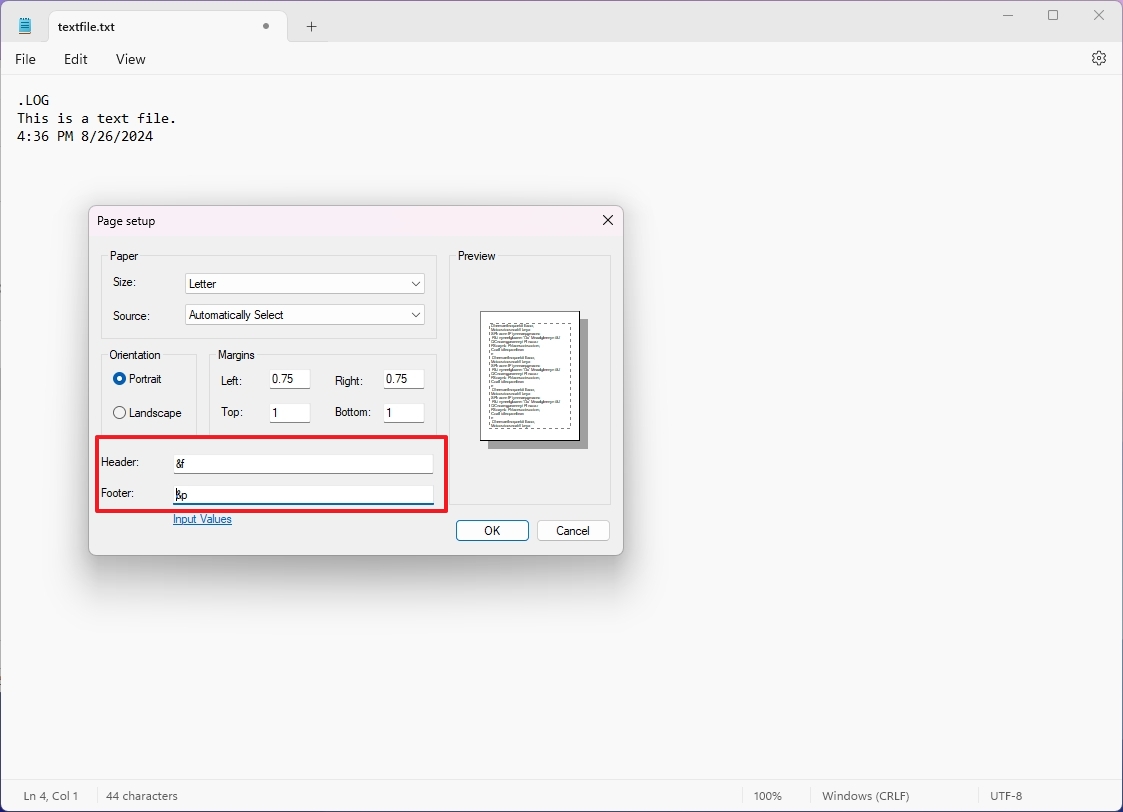
- Open the File menu and choose the Page setup option.
- In the "Header" setting, you can use the &f to print the filename at the top.
- In the "Footer" setting, you can use the &p to print the page name.
You can also use these other variables:
- &l: Left-align the characters that follow.
- &c: Center the characters that follow.
- &r: Right-align the characters that follow.
- &d: Print the current date.
- &t: Print the current time.
- &f: Print the name of the document.
- &p: Print the page number.
After you complete the steps, the printer will include the actions you specified for the header and footer.
It's important to note that Notepad doesn't save these settings, meaning that you must specify them on every print.
10. Disable status bar
The status bar in Notepad is a horizontal bar at the bottom of the application window. It provides valuable information about your current document, such as line number, column number, and insert mode. If you don't find it useful, you can disable it.
To turn off the status bar, use these steps:
- Open Notepad.
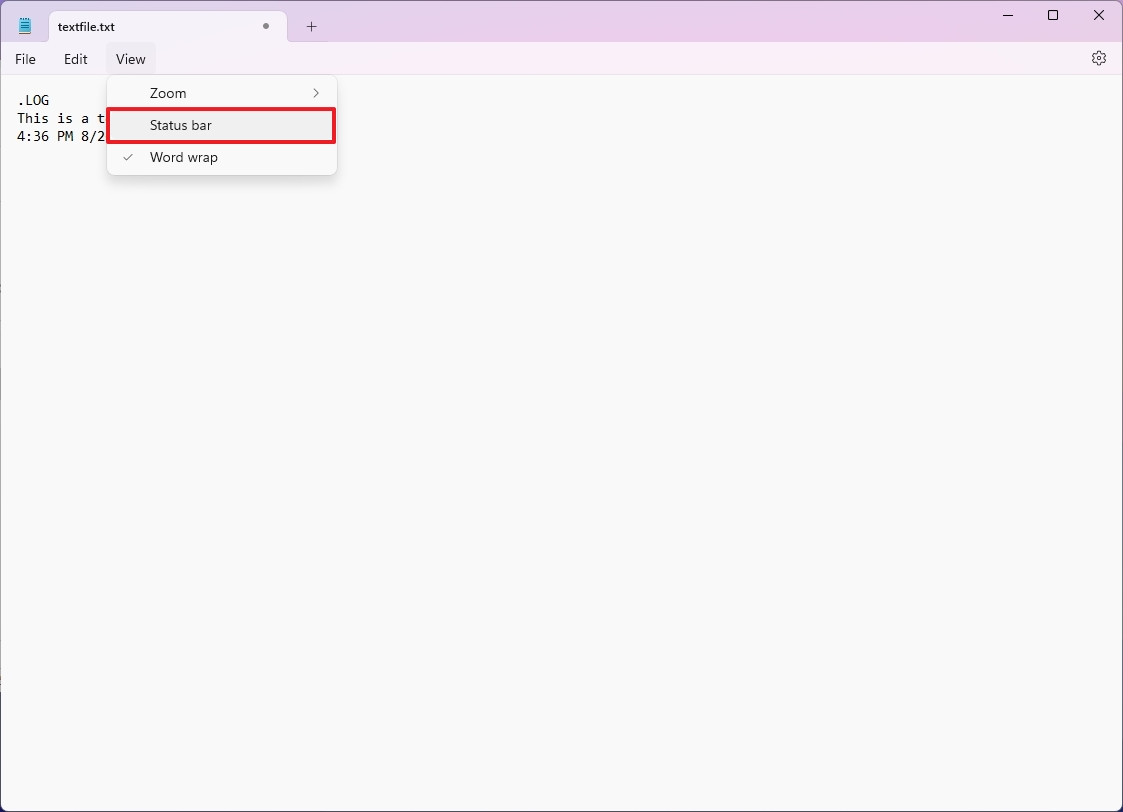
- Open the View menu and click the Status bar to clear the option.
Once you complete the steps, the status bar will no longer appear at the bottom of the page.
You can always select the option from the "View" menu to re-enable the feature.
More resources
For more helpful articles, coverage, and answers to common questions about Windows 10 and Windows 11, visit the following resources:
- Windows 11 on Windows Central — All you need to know
- Windows 10 on Windows Central — All you need to know

Mauro Huculak has been a Windows How-To Expert contributor for WindowsCentral.com for nearly a decade and has over 22 years of combined experience in IT and technical writing. He holds various professional certifications from Microsoft, Cisco, VMware, and CompTIA and has been recognized as a Microsoft MVP for many years.
