Use Bing Image Creator in the terminal because why wouldn't you want to do that?
A clever developer has built a Python tool to build your AI image creations.

You can already use Bing Chat and Bing Image Creator from a multitude of places, but how about the terminal? The same developer that built a Bing Chat client that runs inside a terminal has also done the same thing for Bing Image Creator and it's pretty awesome.
Obviously, it's not for everyone, nor is it the most user-friendly way to build AI artwork, but as a proof of concept it's still impressive. It's built in Python and allows you to create an image from your regular prompts and have them downloaded to a local directory.
Everything will also be synced to your recents list that you can access from mobile or in the browser and it doesn't bypass using your boosts or anything. But if you're comfortable with a terminal and installing Python it's neat to play around with.
Python, a bit of mild setup and all the terminal image creating you can handle

To try this out for yourself you'll need to have Python installed on your PC. On Windows you can easily do this by grabbing it from the Microsoft Store. From here you'll be able to access it through PowerShell. Alternatively, if you use WSL, you can also install and use in there, again just making sure you have a current version of Python installed.
With this out of the way you can install the client with this command:
pip3 install --upgrade BingImageCreatorYou may also need an additional module installed, so before attempting to run enter this command, also:
pip3 install aiohttpBefore you begin you'll need to grab your authentication from Bing Image Creator on the web which you grab from your browsers Dev Tools. The instructions on how to do this are on the GitHub repo but in essence you'll be grabbing a cookie that you can feed into the Python client to authenticate your access. There are no requirements for account login information being passed into it directly.
Get the Windows Central Newsletter
All the latest news, reviews, and guides for Windows and Xbox diehards.
Once you have that you have everything you need to create images. The command you need to enter follows this template:
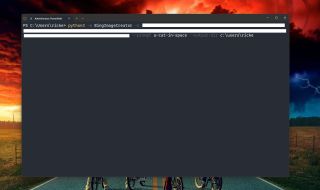
python3 -m BingImageCreator -U [cookie] --prompt [prompt] --output-dir [directory location] After -U is where you paste your cookie. It's important to pass a directory to save your images to as well otherwise the images will download but won't have a place to be saved locally. They'll still be saved to your account to access elsewhere, but the killer part of using this is that they'll automatically be saved to your machine.
It's a little long-winded and you'll want to make sure you have a copy of your cookie handy because you'll have to enter it each time. But as a concept, it's very cool, and if you live in the terminal, it's another fun way to interact with Microsoft's AI image generator. Find everything you need to know about it on GitHub.

Richard Devine is a Managing Editor at Windows Central with over a decade of experience. A former Project Manager and long-term tech addict, he joined Mobile Nations in 2011 and has been found on Android Central and iMore as well as Windows Central. Currently, you'll find him steering the site's coverage of all manner of PC hardware and reviews. Find him on Mastodon at mstdn.social/@richdevine