How to integrate OneDrive with your Chromebook's Files app
Microsoft and Google are integrating OneDrive and Microsoft 365 better in Chrome OS and you can try it out right now.
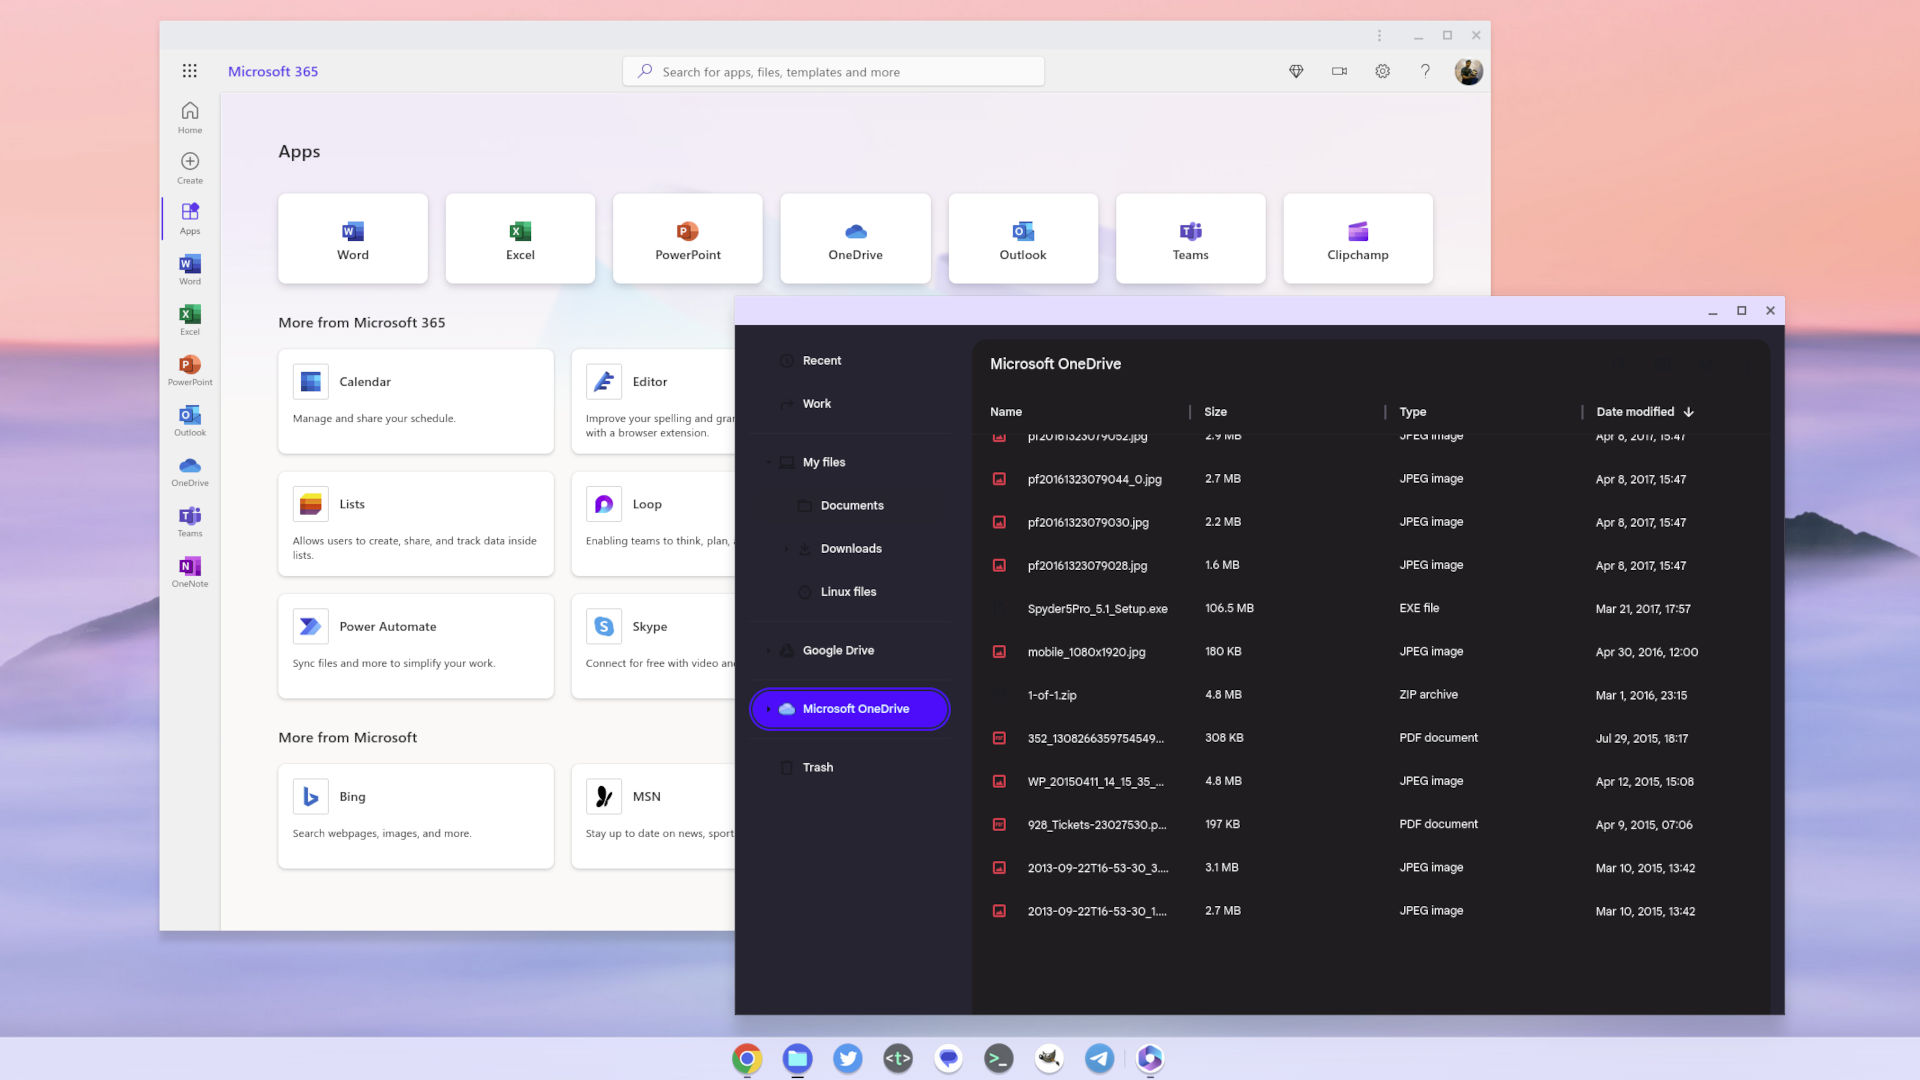
Among all the best laptops out there today, if you're heavily entrenched in the Microsoft ecosystem you probably aren't looking at a Chromebook as your first choice. And that's fair. But they're also popular in education, and growing in popularity in enterprise, so maybe you just got given a Chromebook and you have to use it.
Google's Office suite just isn't as good as Microsoft's, and it doesn't have nearly the market share. Many personal users, as well as education and enterprise still rely on Microsoft Office, or Microsoft 365.
Microsoft 365 has web apps for all its key products, but in the case of OneDrive, you can go one better and integrate it natively into the Chrome OS Files app. It's not yet a public, stable feature, but anyone can try it out on the more recent versions of Chrome OS. Here's what you need to do.
How to enable OneDrive in the Chrome OS Files app
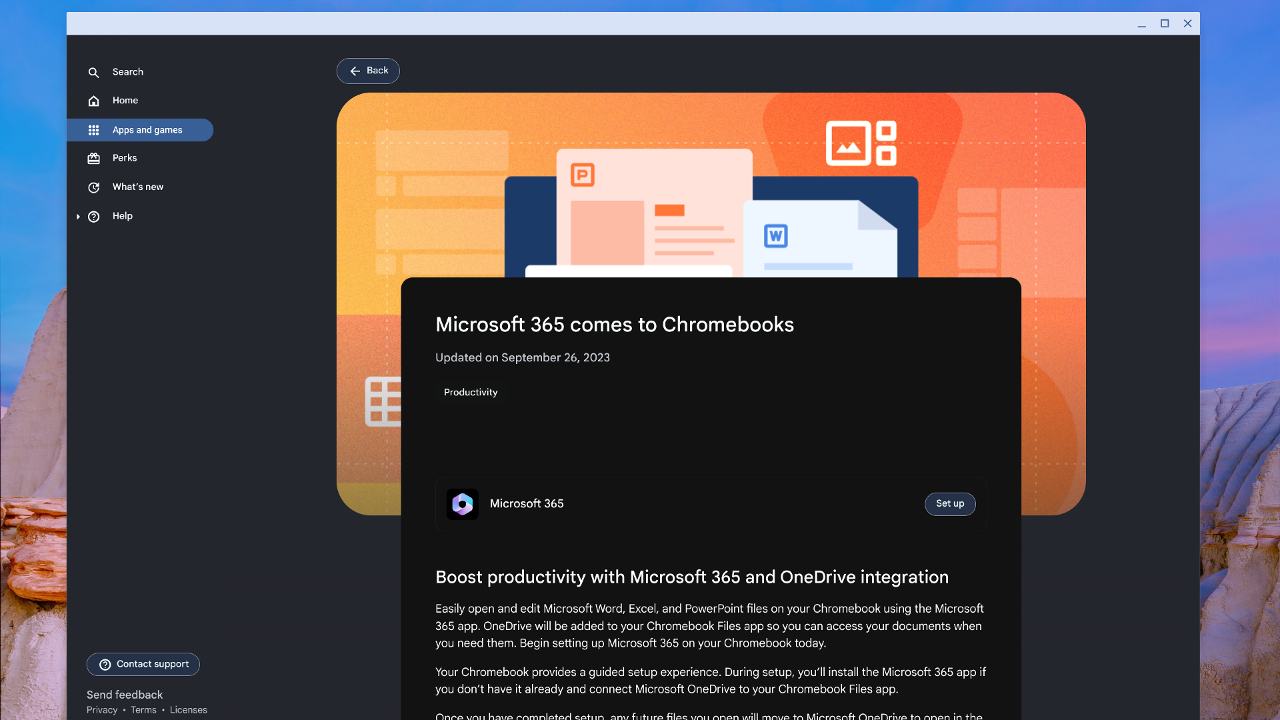
There are a couple of ways to achieve the end goal here, both are fairly easy, but one is certainly a little quicker. This first method involves the Explore app on your Chromebook. If you open it up, you should see in the Apps & Games section there's a tile that says "Microsoft 365 comes to Chromebooks."
Click on this, and you'll get some blurb, but also a magic Set up button. Click on this, and you'll be taken through the process, which essentially involves logging in to your Microsoft Account and letting your Chromebook do the rest. OneDrive will be added to the Files app and the Microsoft 365 web app will be installed for you. This is certainly the easiest of the two methods.
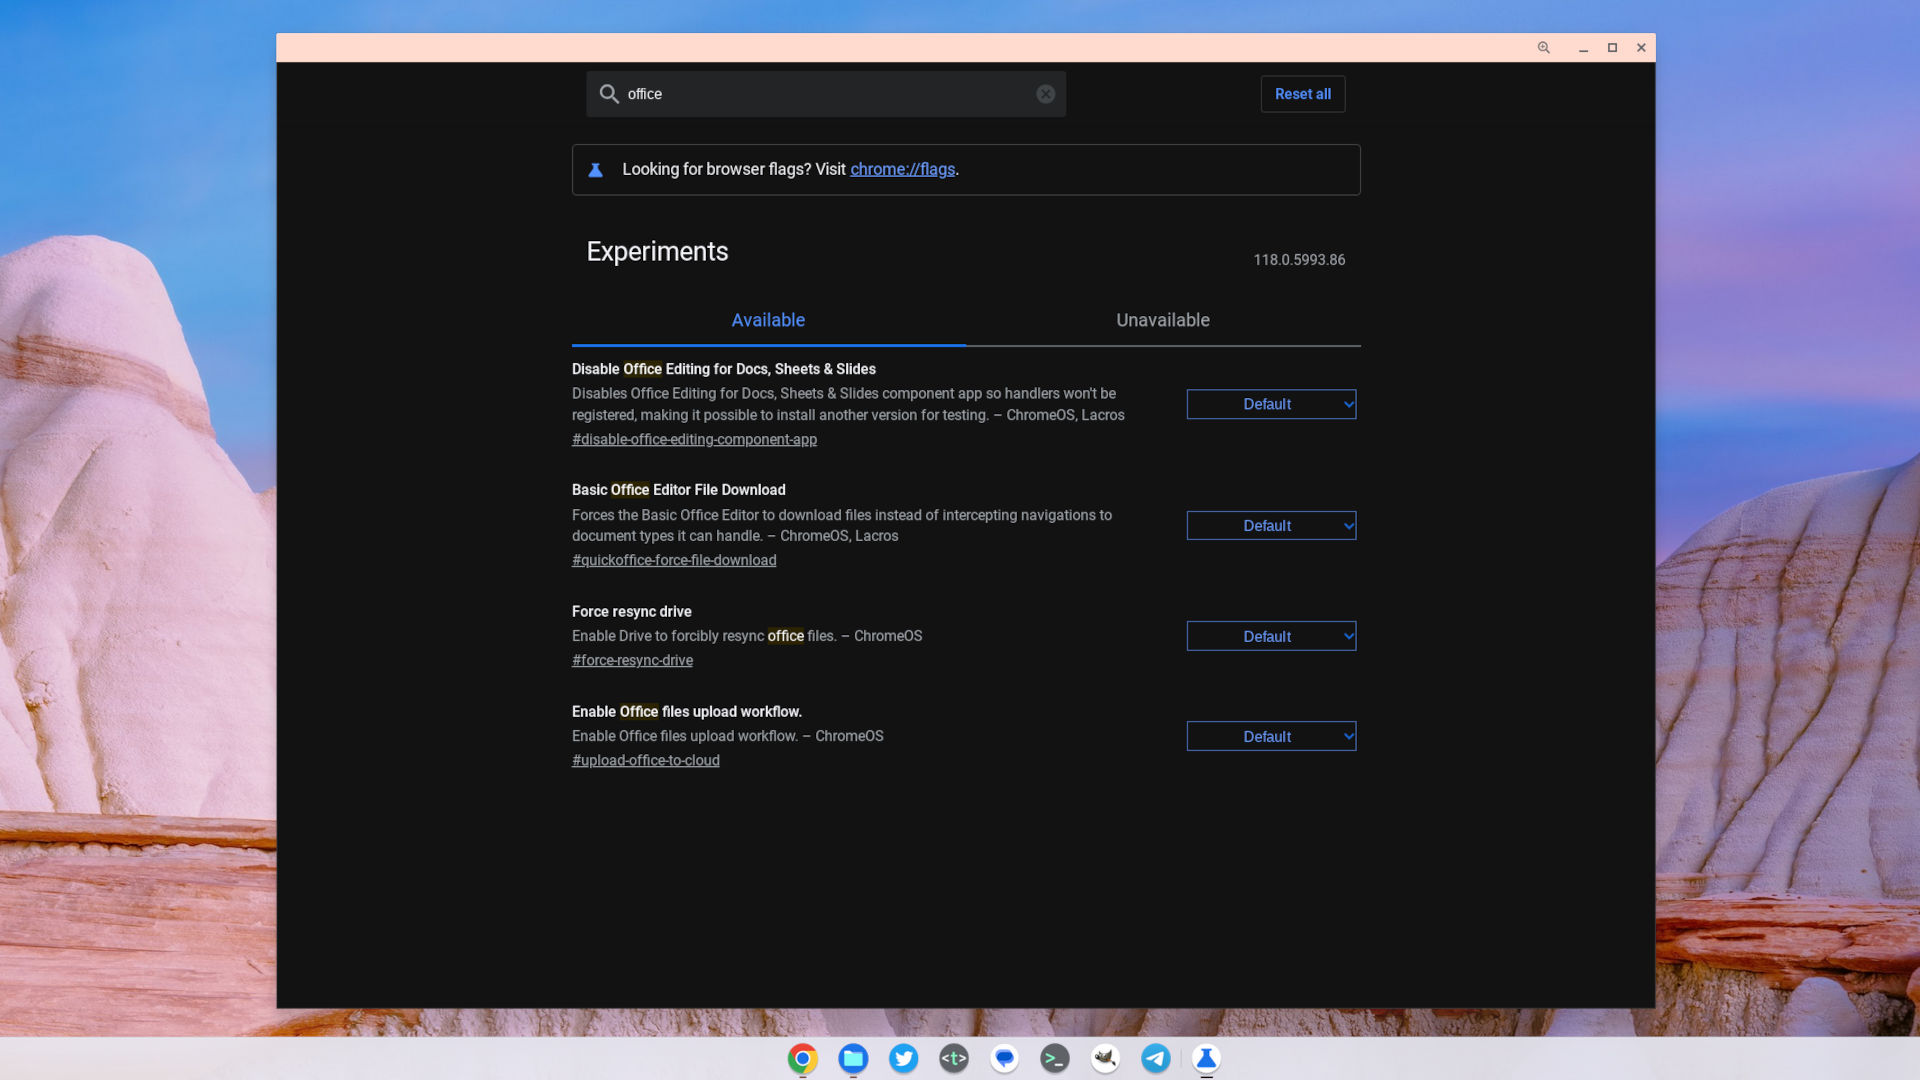
The alternative method involves enabling a flag in Chrome OS to turn on the magic. It's not immediately obvious what it does, but once enabled, you'll be able to link up your Microsoft Account and access OneDrive right there in the Files app.
Follow these steps to enable the right flag:
Get the Windows Central Newsletter
All the latest news, reviews, and guides for Windows and Xbox diehards.
1. In Chrome, type chrome://flag into the address bar. If you're using the Lacros browser, that is, Chrome detached from Chrome OS, you'll need to type os://flags instead.
2. In the search box type #upload-office-to-cloud to locate the flag.
3. Select Enabled from the dropdown box.
4. Restart your Chromebook to apply.
That's just the first part, there's a little more you need to do right now to trigger the OneDrive integration. If you open Files then you'll see nothing has changed. What you need for the next part is a Microsoft Office document, be that Word or Excel, just something you would open in Microsoft Office.
With this file on your Chromebook, you're going to right-click and now you will see a new option under Open with for Microsoft 365. Select this and the process of installing and linking up your Microsoft Account will begin, as well as OneDrive in the Files app.
The process is really straightforward and just involves following the on-screen prompts. Each step is shown in the gallery below.
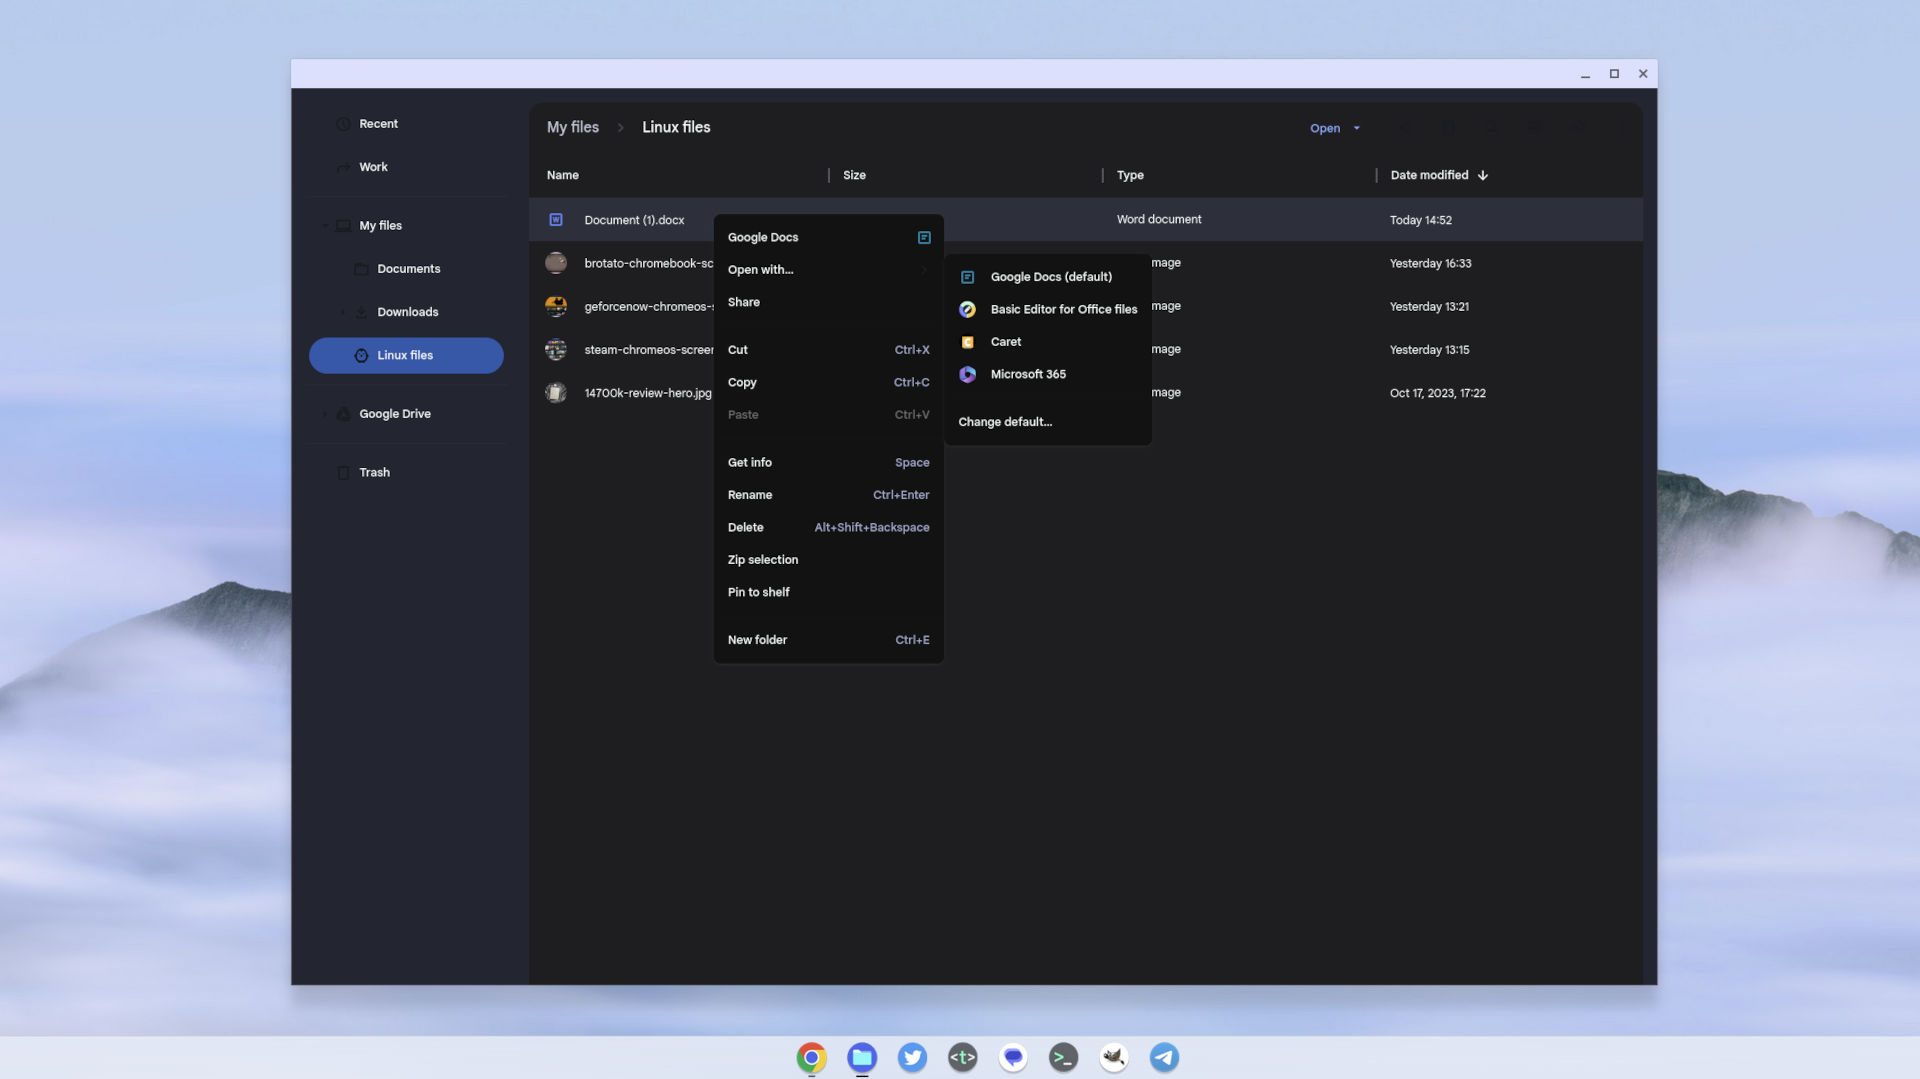
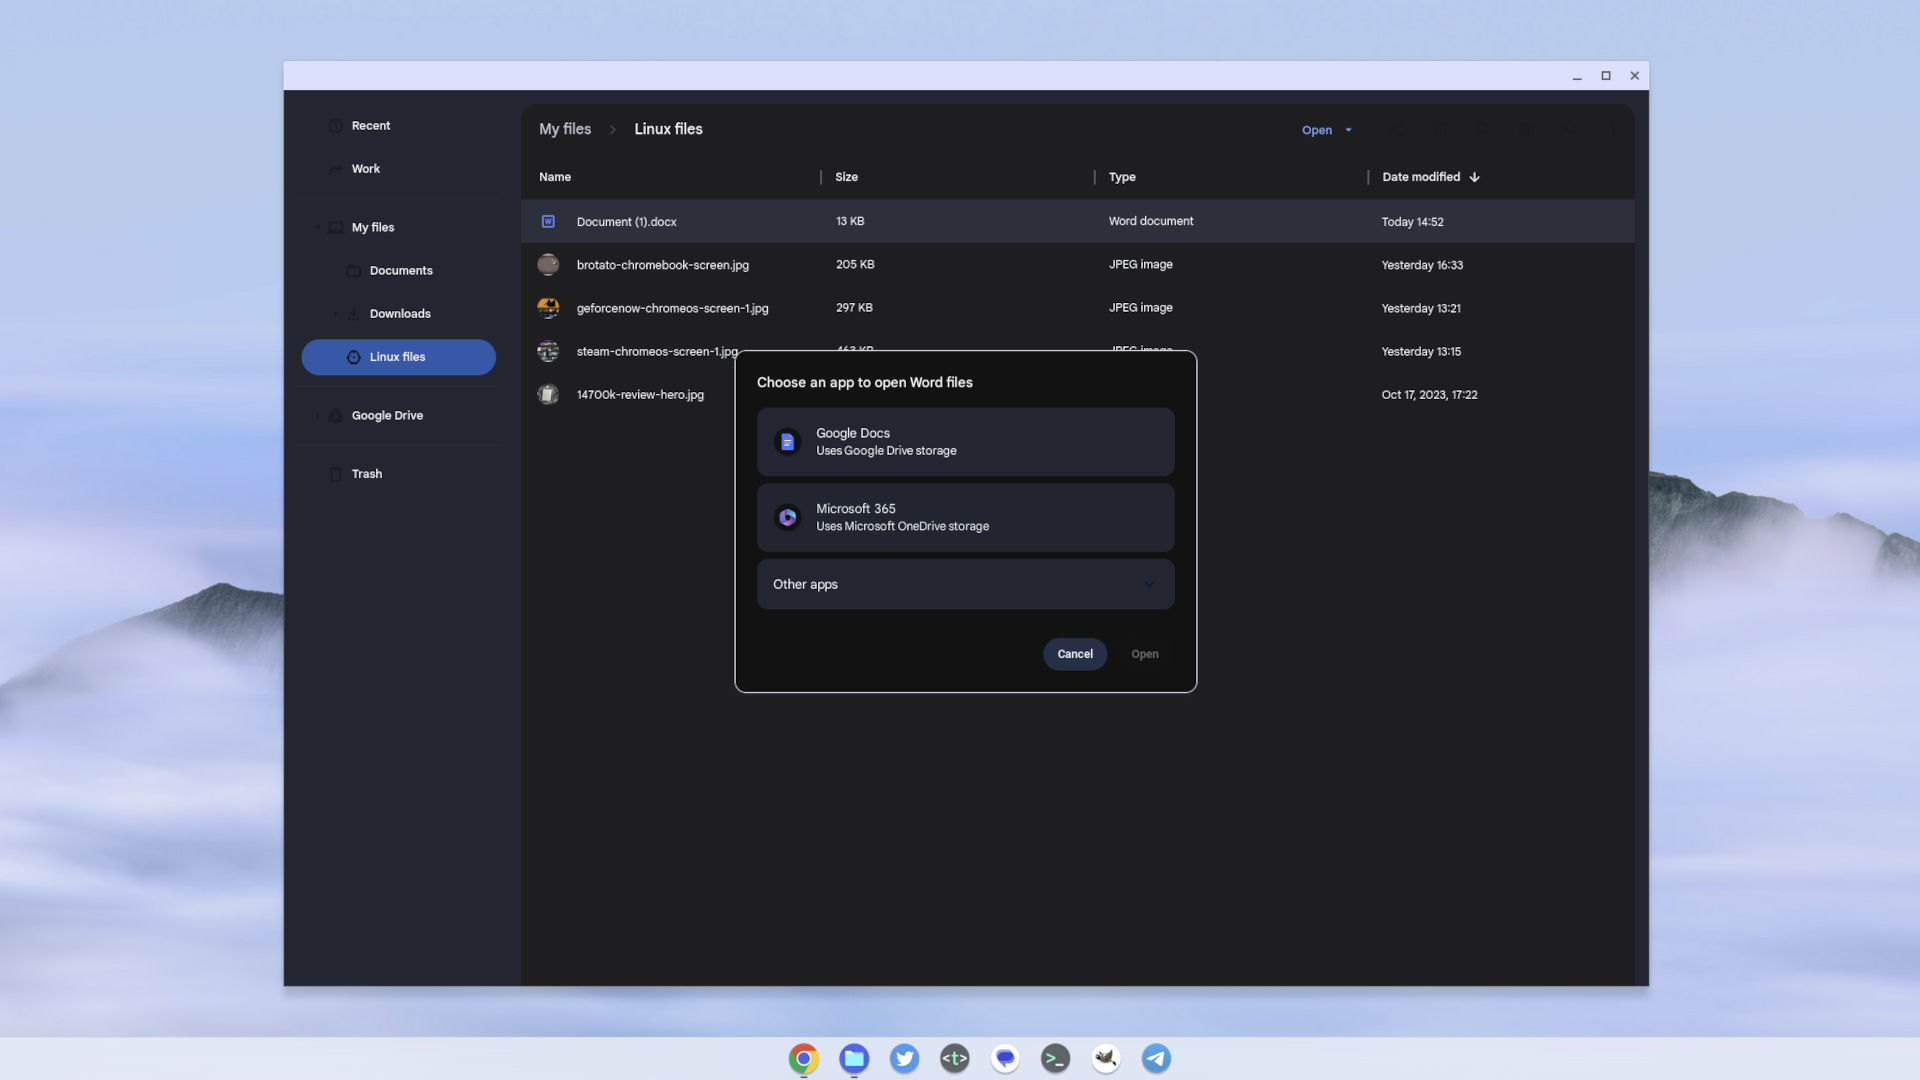
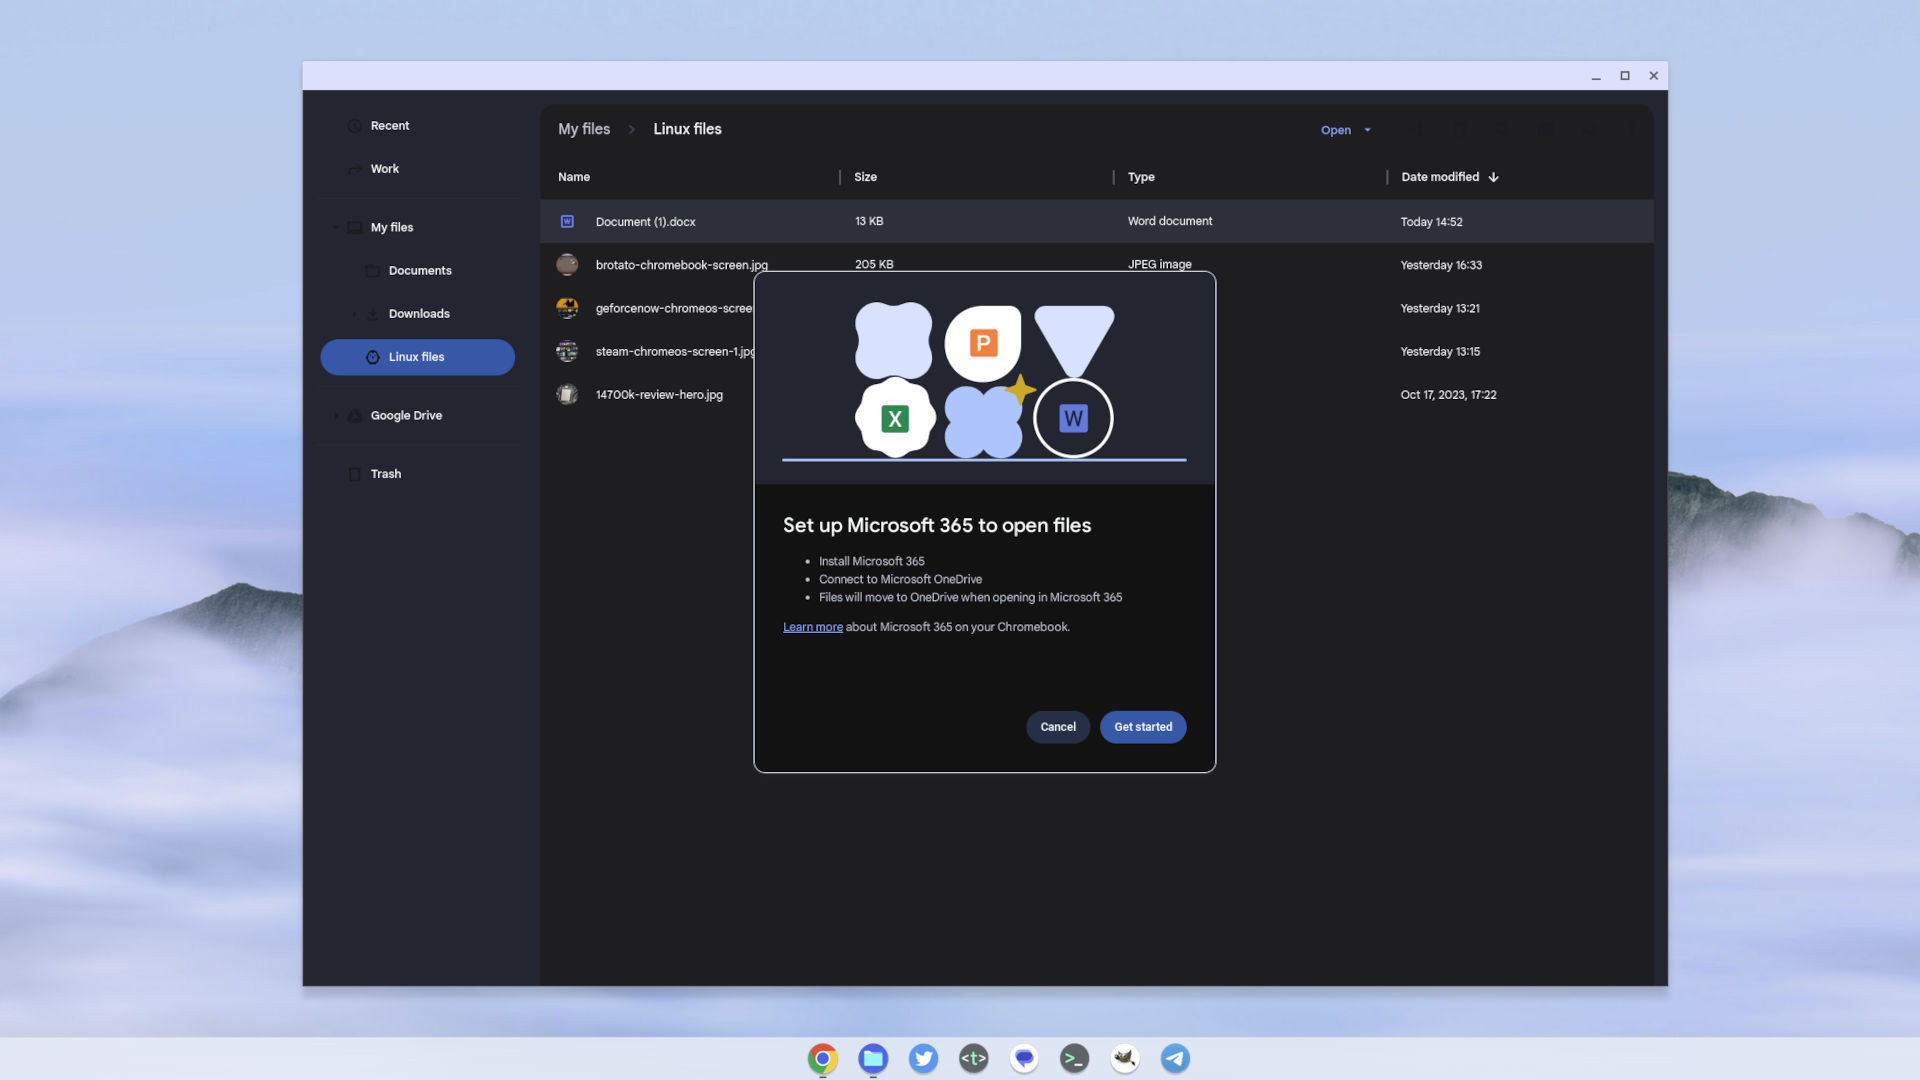
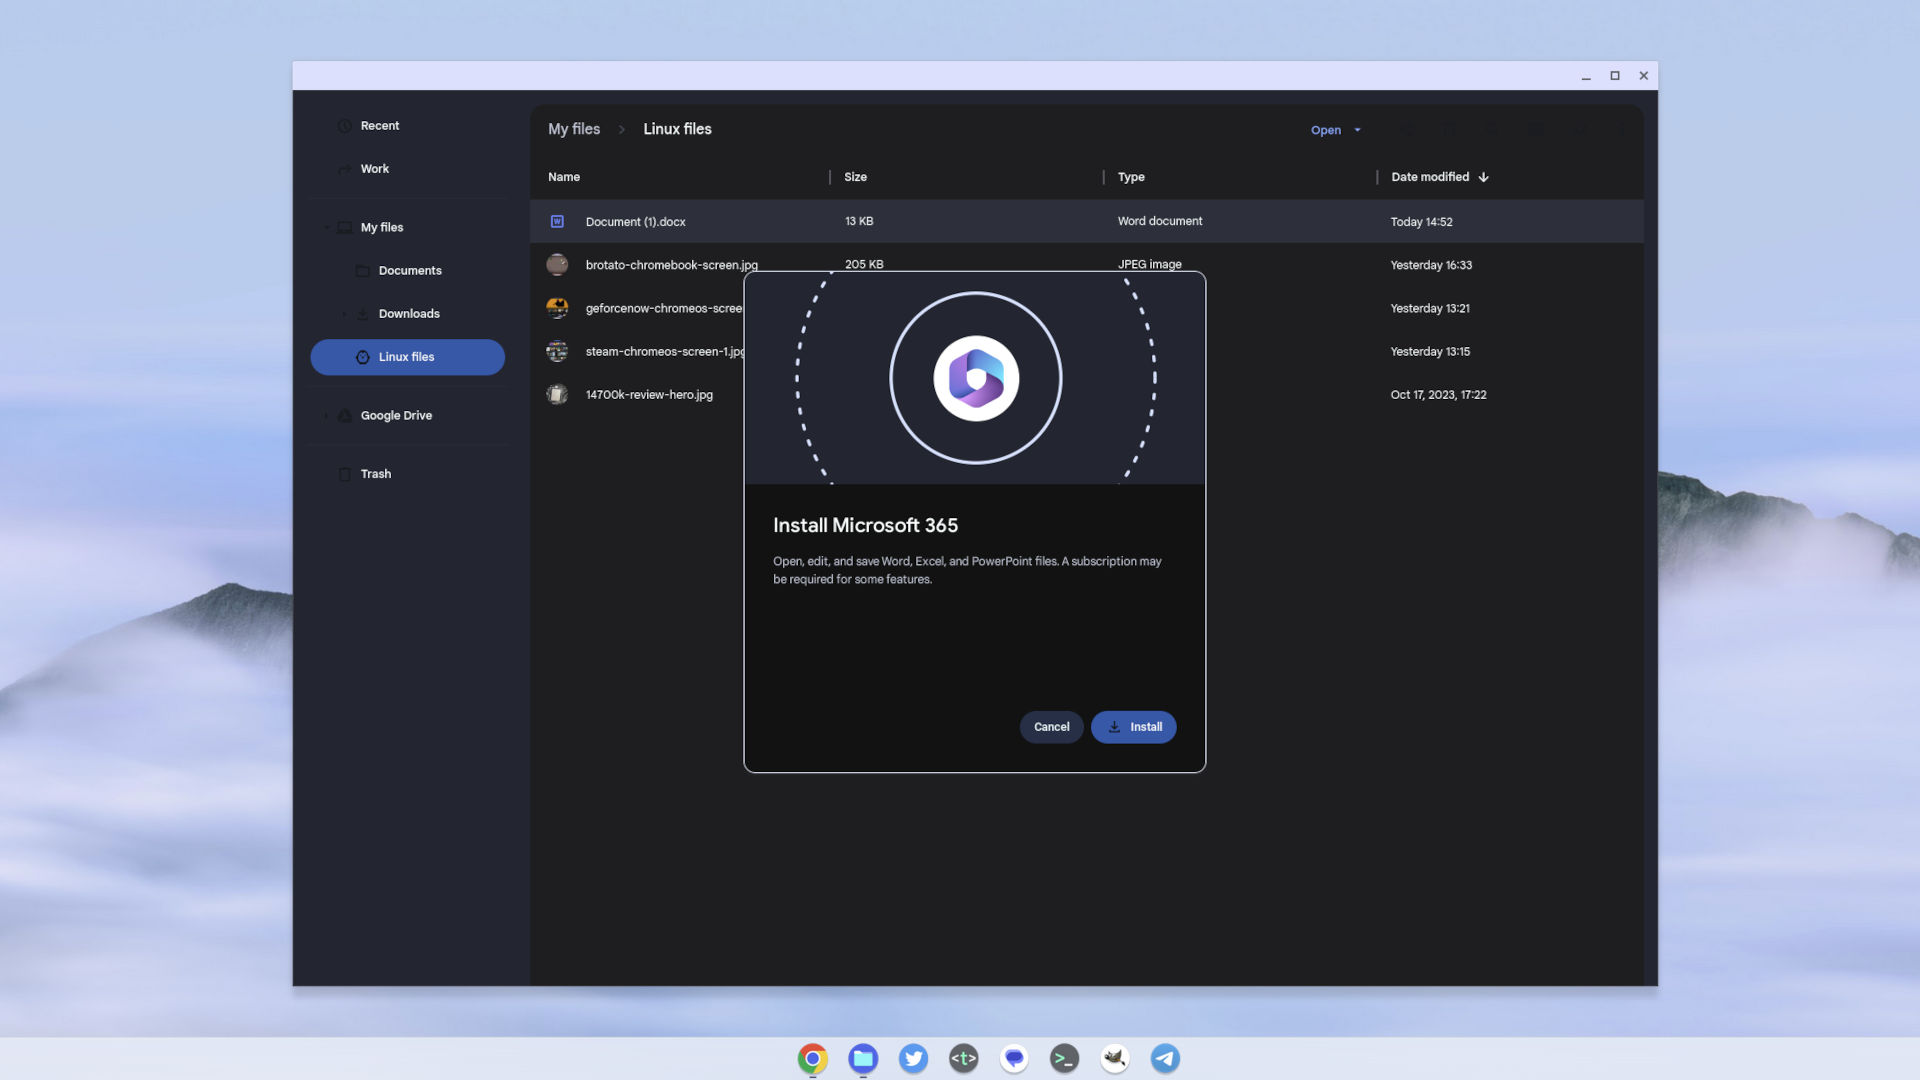
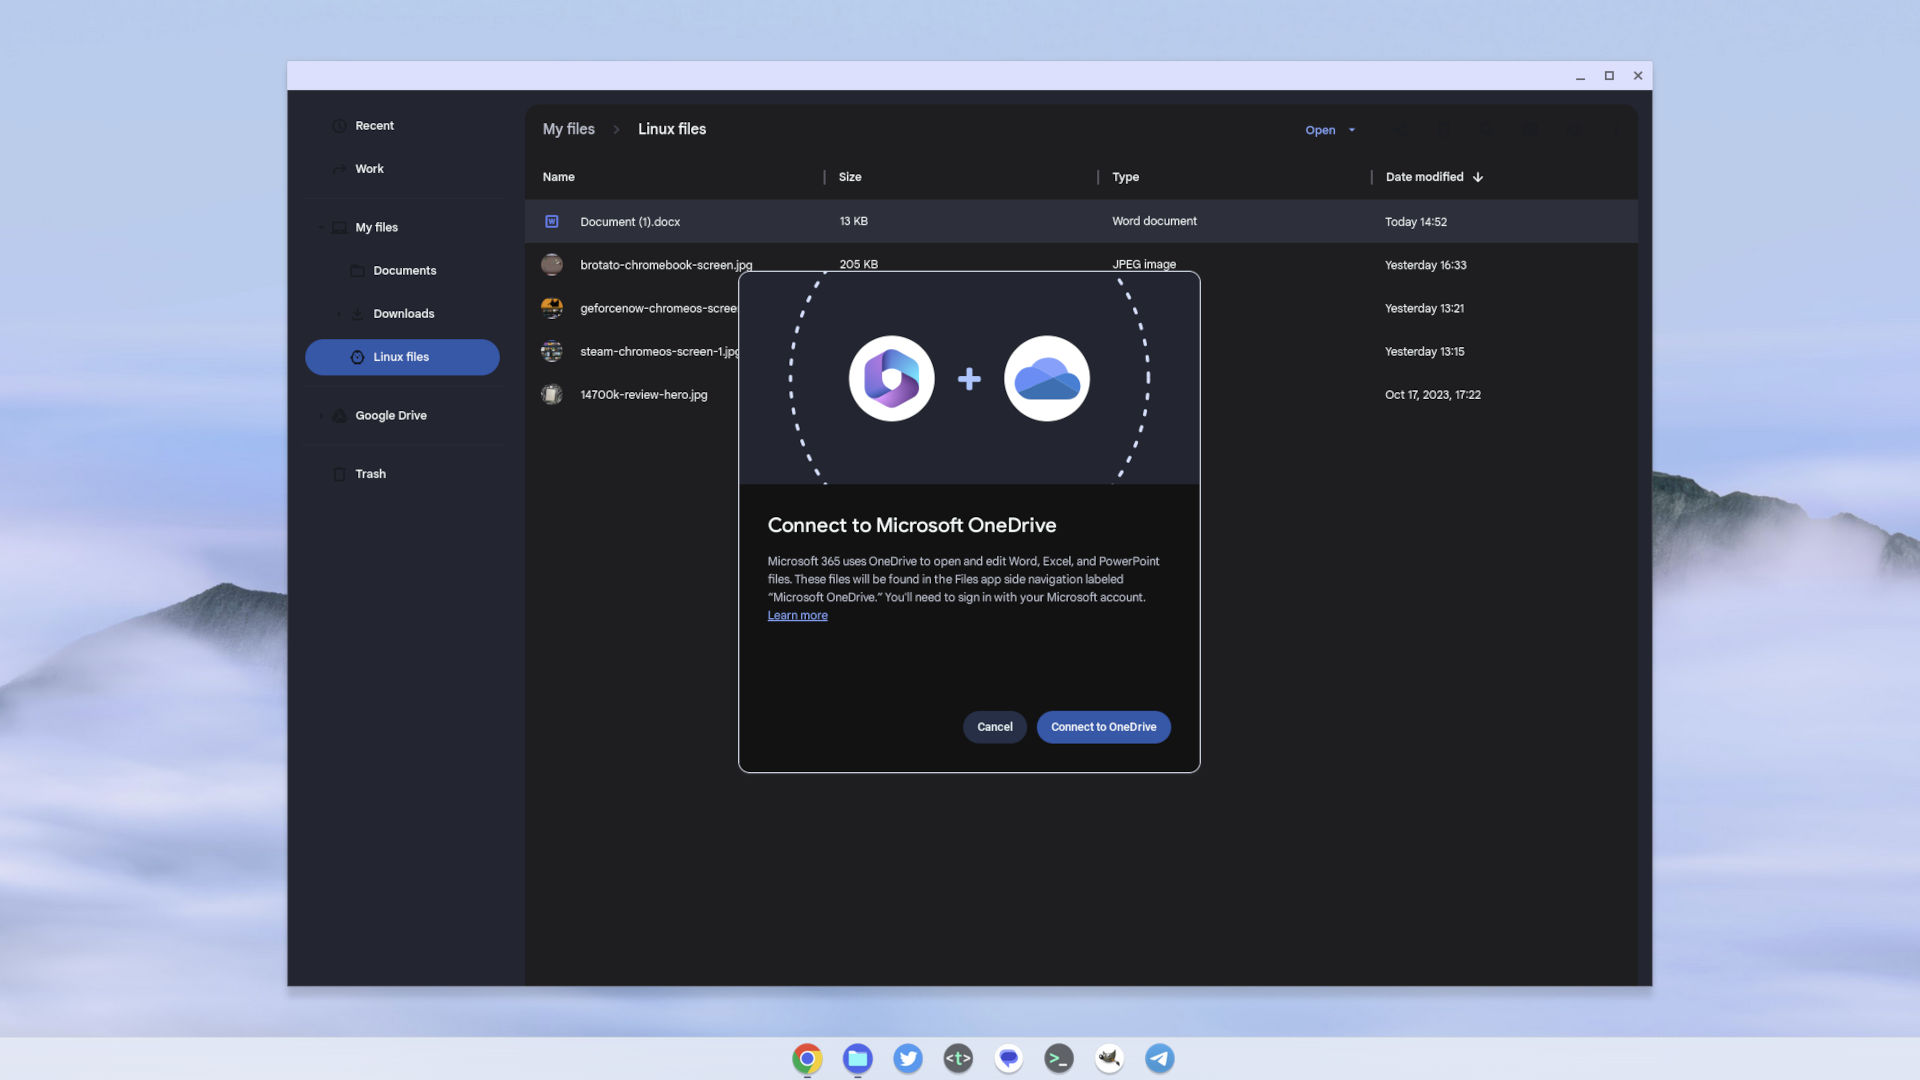
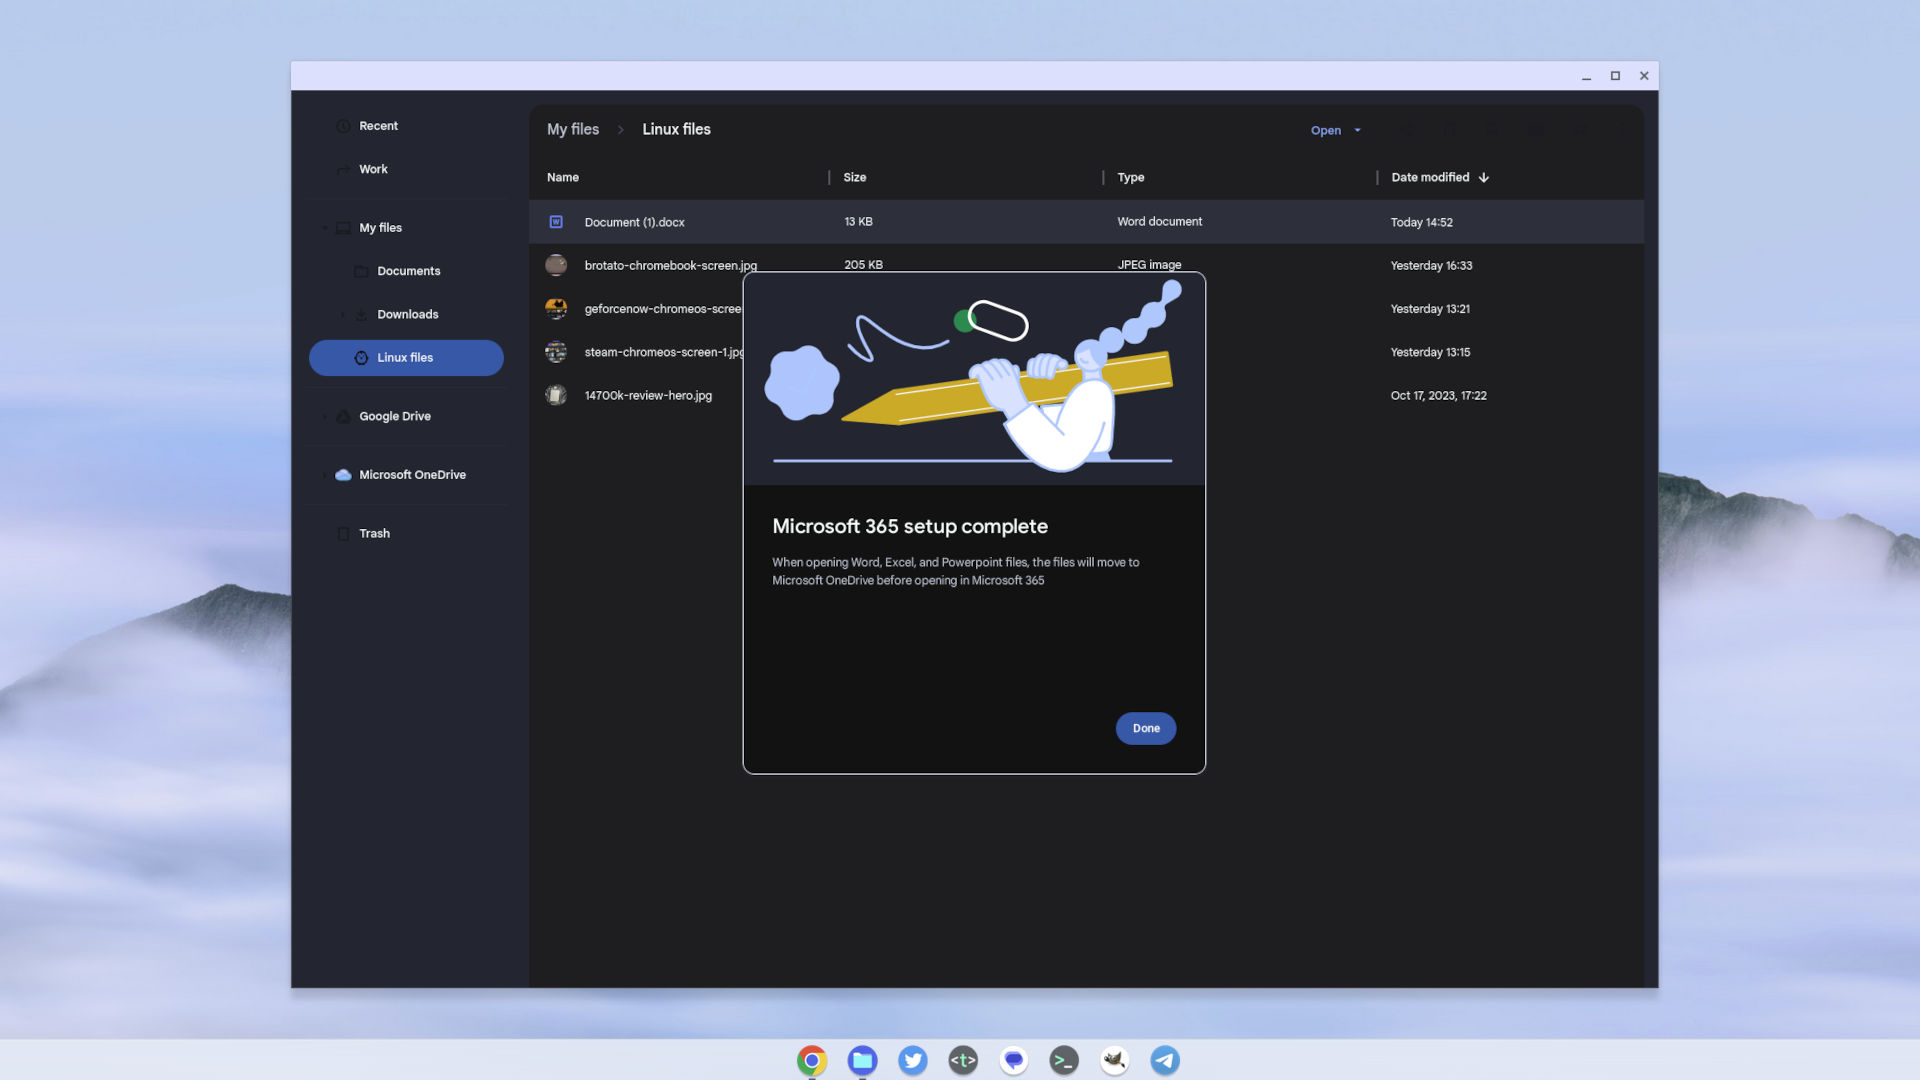
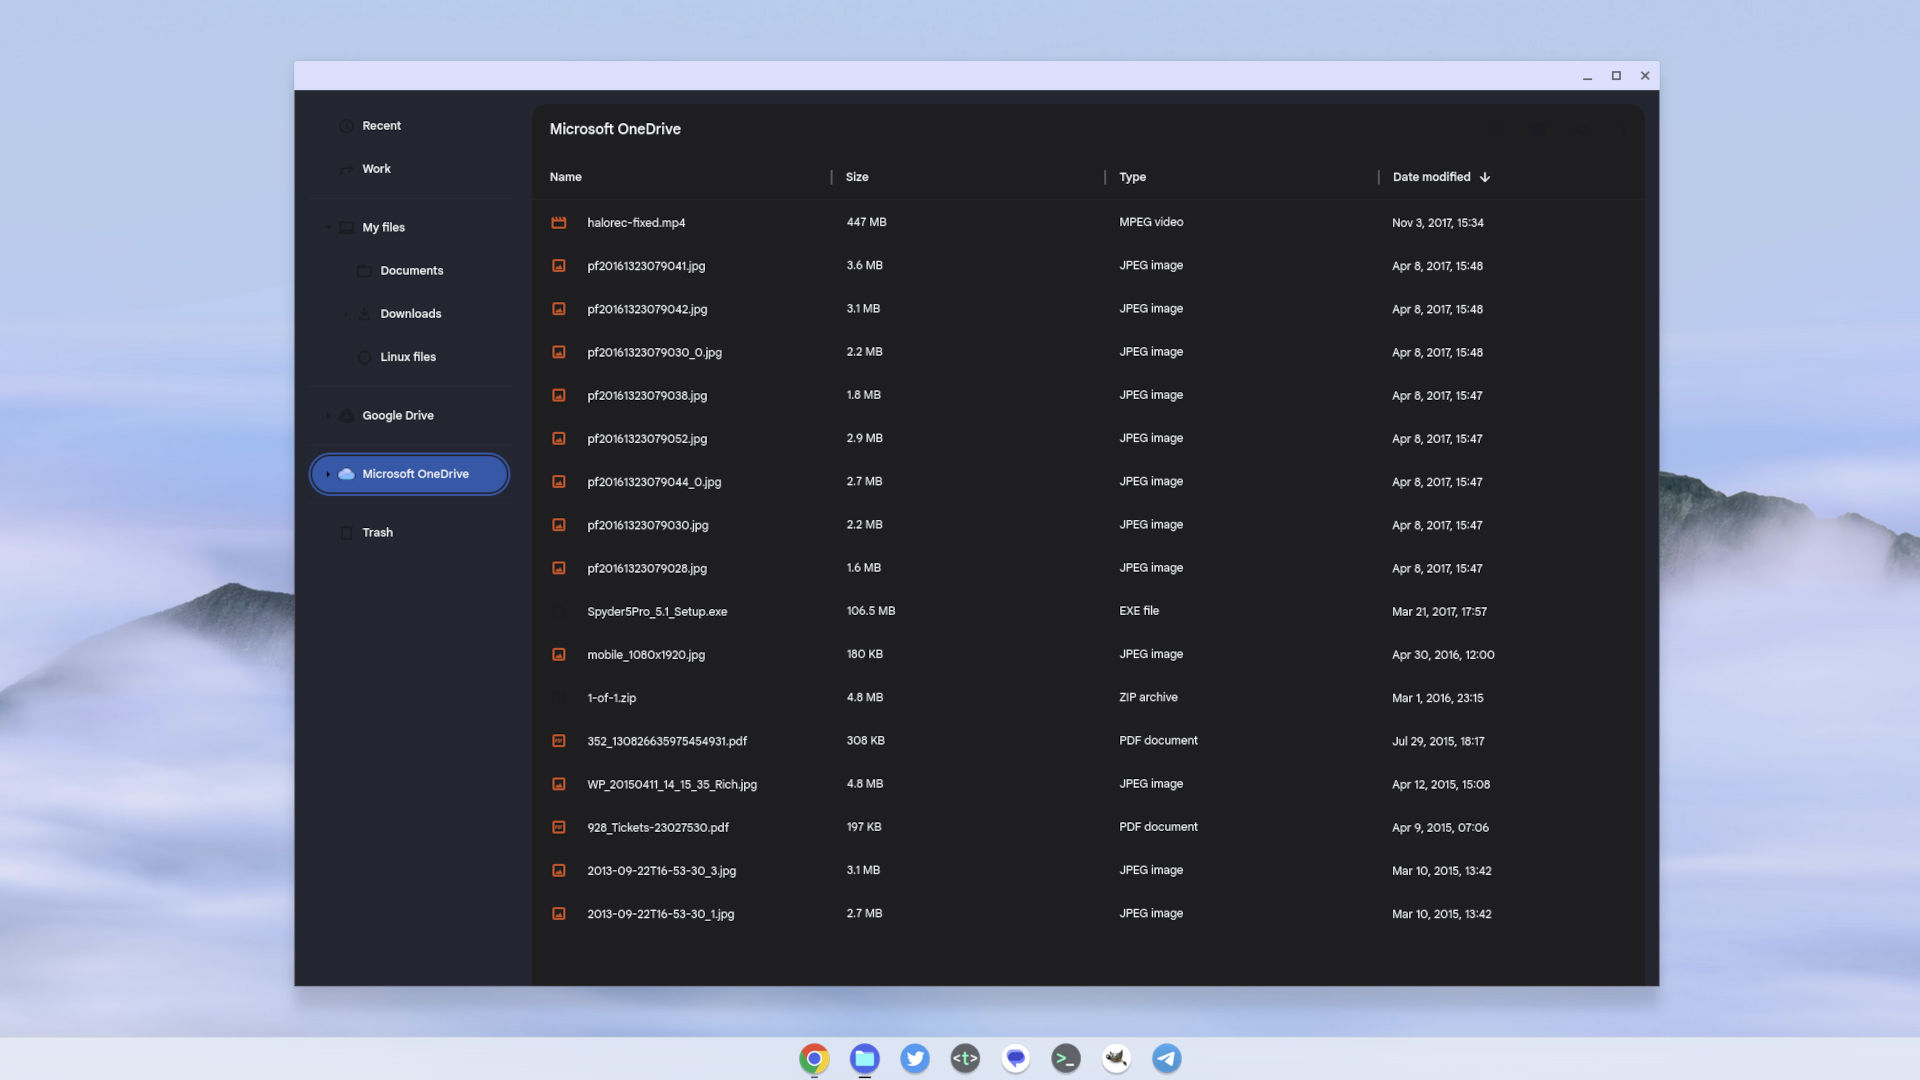
It does seem a little janky to set up right now, as it took me two attempts for it to link up my Microsoft Account. Once it's complete you'll be asked if you want to move your Office files into OneDrive. Microsoft 365 on Chrome OS will use OneDrive to handle files, which is understandable. For the sake of this guide, you probably have no issues with this since you'll already be a OneDrive user.
What you'll now have on your Chromebook is the Microsoft 365 web app installed and ready to use, as well as access to all your OneDrive files from within the Chrome OS Files app. If at any time you wish to remove your OneDrive account, you can do so by opening the Chromebook's Settings app, selecting the Files option in the left-hand column, and then clicking on your OneDrive account. Hit the remove button to make it go away.
It's nice to see Microsoft and Google working together on little things like this that ultimately make the end-user experience better for everyone. Eventually, it'll be easier to set up than this, but for now, this is what we have to work with.

Richard Devine is a Managing Editor at Windows Central with over a decade of experience. A former Project Manager and long-term tech addict, he joined Mobile Nations in 2011 and has been found on Android Central and iMore as well as Windows Central. Currently, you'll find him steering the site's coverage of all manner of PC hardware and reviews. Find him on Mastodon at mstdn.social/@richdevine
