Shooting in RAW with your Nokia Lumia PureView Camera
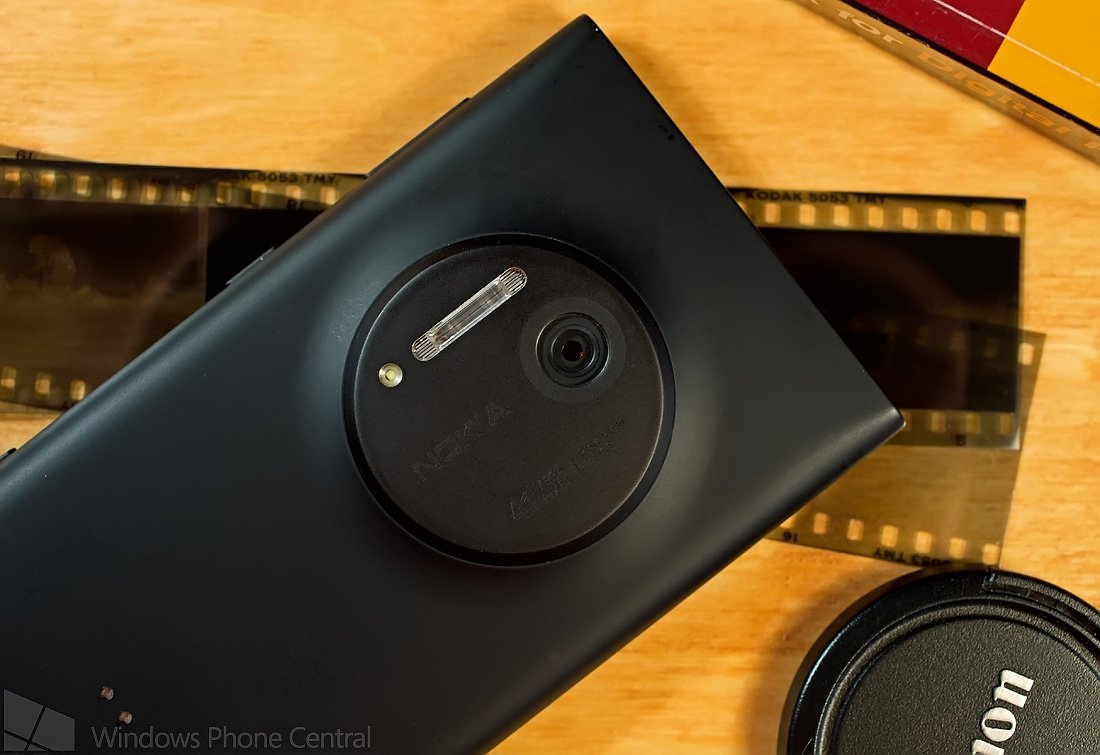
One of the more interesting features of the Nokia Black update is the ability to capture photographs in RAW or DNG format. DSLR and high-end compact cameras have been using the RAW/DNG format for years and this is the first time a smartphone has had this ability.
The DNG format allows Lumia 1020 and 1520 camera users more control over their images. It is a feature that matches up well with the optical stabilization, low-light performance and larger imaging sensors already in place.
However, DNG may not be for everyone. If you detest post-processing (photo editing) and prefer a “straight from the camera” photography experience, you may want to stick with JPEG.
What is DNG?
DNG is a universal RAW image format and is short for Digital Negative Image File. In many respects, a RAW image file is comparable to film negatives. Where JPEG image files are processed in-camera (exposure, white balance, contrast, etc.) and compressed, DNG files are not. They leave the camera as a raw, un-adjusted image file. This allows you to adjust the image as you see fit and minimizes any image degradation that such adjustments may cause.
You can fine-tune JPEG images with post-processing but the more you adjust and tweak exposure, color adjustments, sharpness, contrast, etc. your image quality begins to suffer.
Think of it this way. If you draw a picture on a piece of paper and have to erase portions of the drawing to improve the appearance the paper will begin to show wear from being erased. The more you post-edit a JPEG image, the stronger the chance the image will begin to show wear through noise, artifacts or other abnormalities.
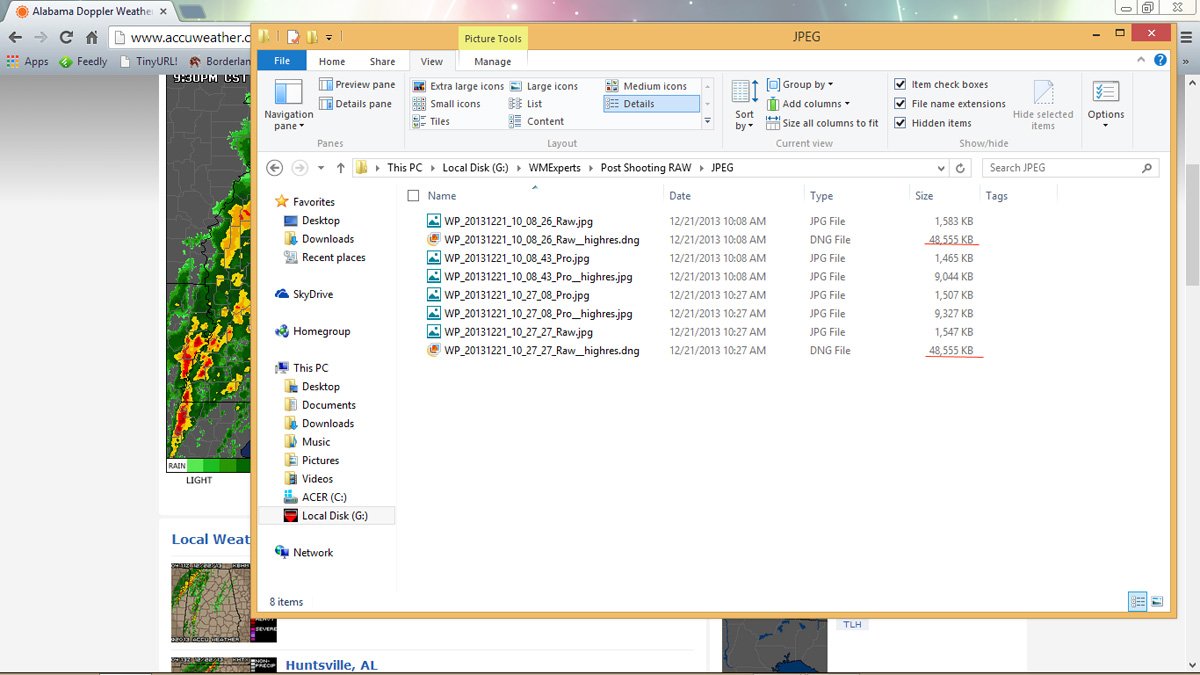
One of the downsides to DNG files is that without any adjustments or compression, the file itself is huge. A compressed 38MP JPEG file runs in the neighborhood of 9MB while an uncompressed 38MP DNG file runs in the neighborhood of 48MB.
All the latest news, reviews, and guides for Windows and Xbox diehards.
Image sizes of the two file formats breaks down as follows. The 38MP JPEG image is 7136 x 5360 pixels at 72dpi. The 38MP DNG image is 7152 x 5360 pixels at 240dpi. I am not exactly sure where the extra pixel width comes from but I have found the higher, native dpi lends for better print quality.
Accessing your DNG files
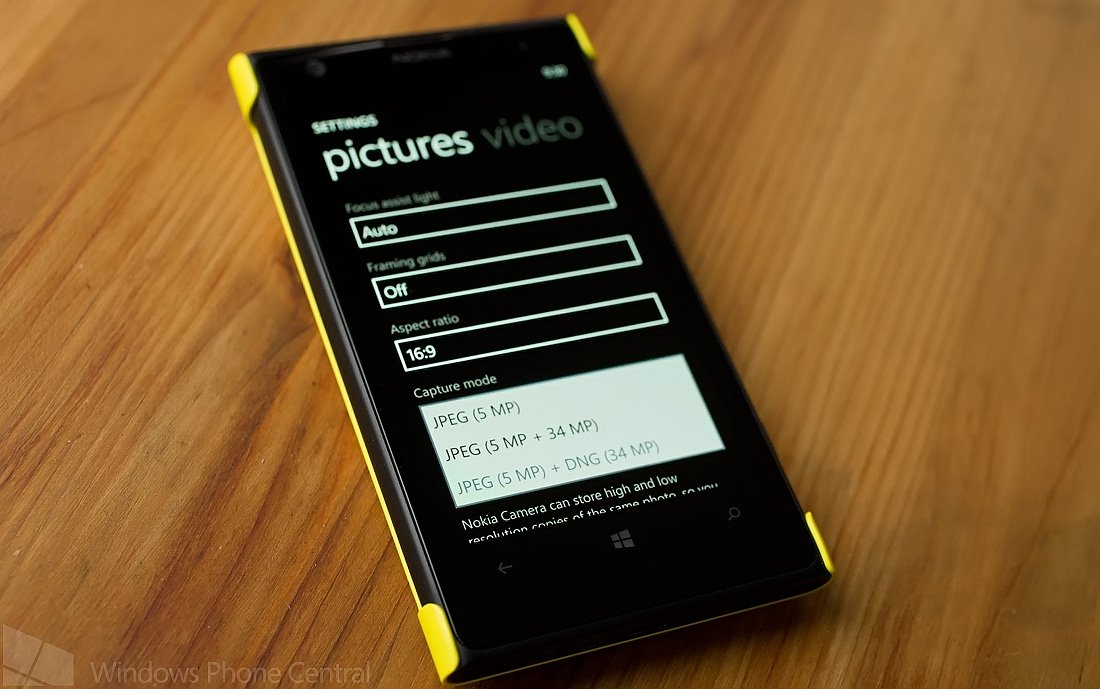
To set your Lumia 1020 or 1520 to shoot DNG format, go to your camera settings. You will have capture mode options that will include JPEG (5MP), JPEG (5MP +38MP) and JPEG (5MP + DNG (38MP). Keep in mind the high end of the image resolution is dependent on your aspect ratio. An aspect ratio of 4:3 will give you the 38MP resolution and an aspect ratio of 16:9 will yield you a 34MP resolution on the high end.
The 5MP image is built off the larger JPEG or DNG image file and is easier to share from your Windows Phone. The larger image file can be used with the “zoom later” feature of Nokia Camera to modify the appearance of the 5MP image. Shooting in DNG format will act just like shooting with the 5MP+34/38MP option.
If your photography never strays from your Windows Phone screen, you will not see the difference between shooting DNG and JPEG formats (save the storage needed for the larger DNG file). The advantages of the DNG format come into play if you take the images offsite to a photo-editing app on computer.
DNG Conversion
Asides from being a much larger file, another downside to DNG or RAW image files is that it takes more time to edit your photos. With JPEG images, you get a finished product straight from the camera that often requires no post-editing. With DNG files, you are guaranteed time with photo editing software.
Windows File Explorer Listing DNG Files
To edit the un-compressed, un-adjusted, raw DNG file you will first need to remove it from your Windows Phone to a computer. You can do this by connecting your Windows Phone up to your computer and using the file explorer look for the file with the “Raw_highres.dng” extension or the DNG File Type in the Camera Roll sub-folder of the Pictures folder.
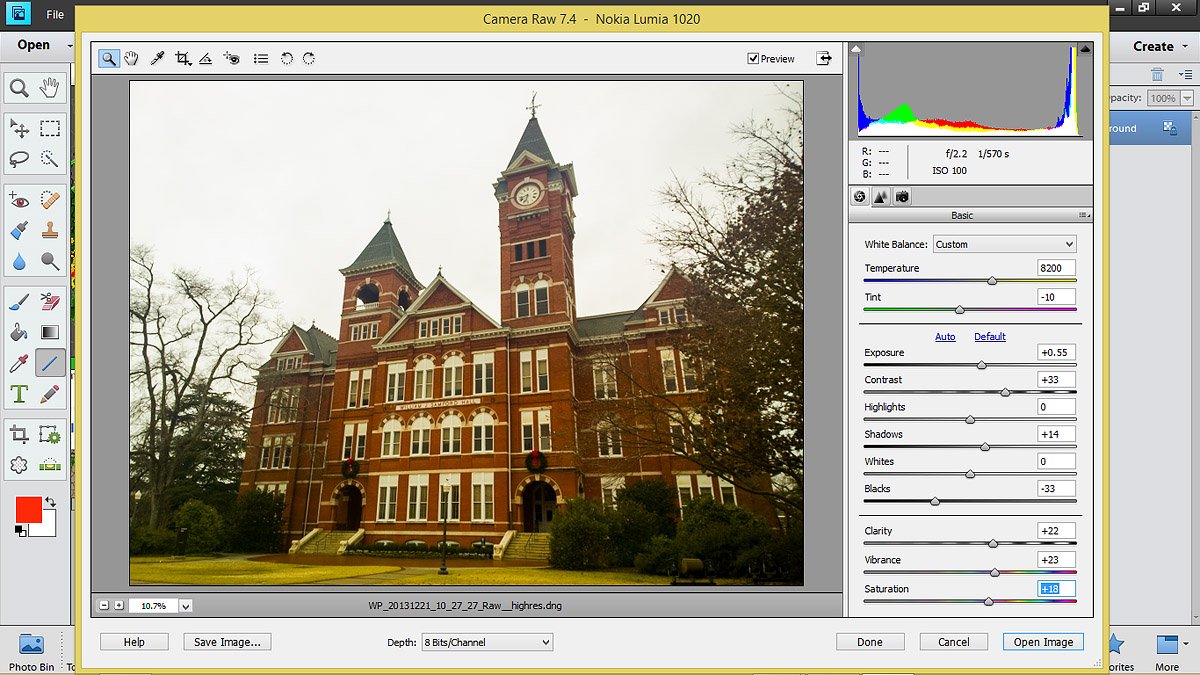
Once on your computer, you will need to open it from Photoshop Elements, Lightroom or other photo editor. When you do so, you will need to run the DNG file through a conversion application. Most photo editors have this built in and the conversion process pulls up automatically.
Adobe Photoshop Elements RAW Conversion
The conversion app lets you apply your editing adjustment to the DNG files appearance. Adjustments include exposure, color temperature, color tint, shadows, contrast, brightness, black levels, saturation and more. The number of adjustments varies depending on the photo editing software manufacturer.
Once you get your adjustments just right, the DNG file will be converted to JPEG format and the adjustments will be applied. From there you can crop, re-size and/or make additional edits to your image before saving.
As the development of our Windows Phone cameras continue, hopefully we will see a Windows Phone photo-editing app that will allow us to convert and edit DNG files straight from the Windows Phone. The Lumia 1520’s six-inch screen is just screaming for such an editor.
End Results
I have been shooting RAW format from a DSLR for years and find the format gives me more control in editing photos, helps me save marginal images from being tossed, and provides overall better image quality. The JPEG image format is equally capable of producing quality images but can be more sensitive to post-processing.
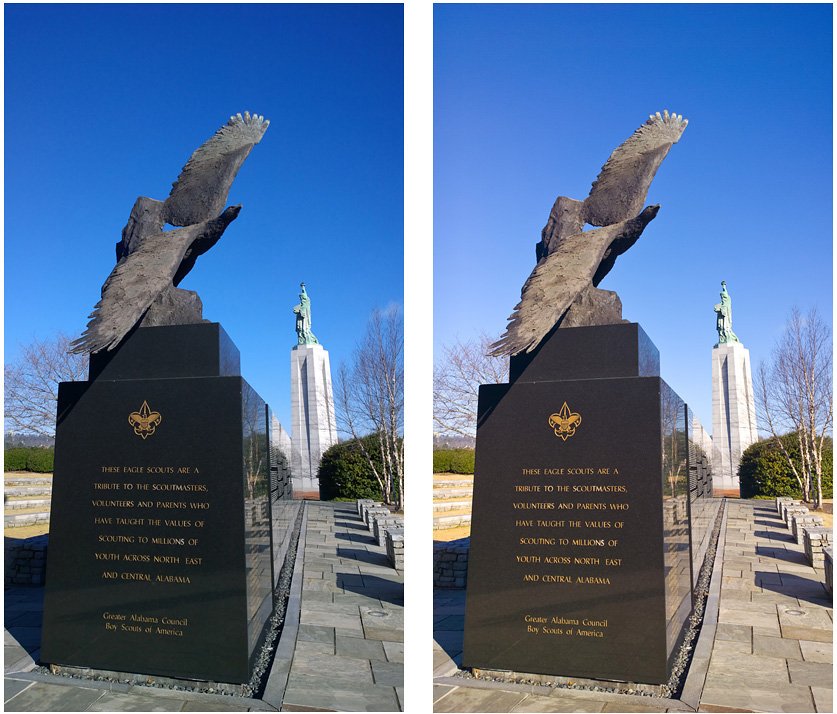
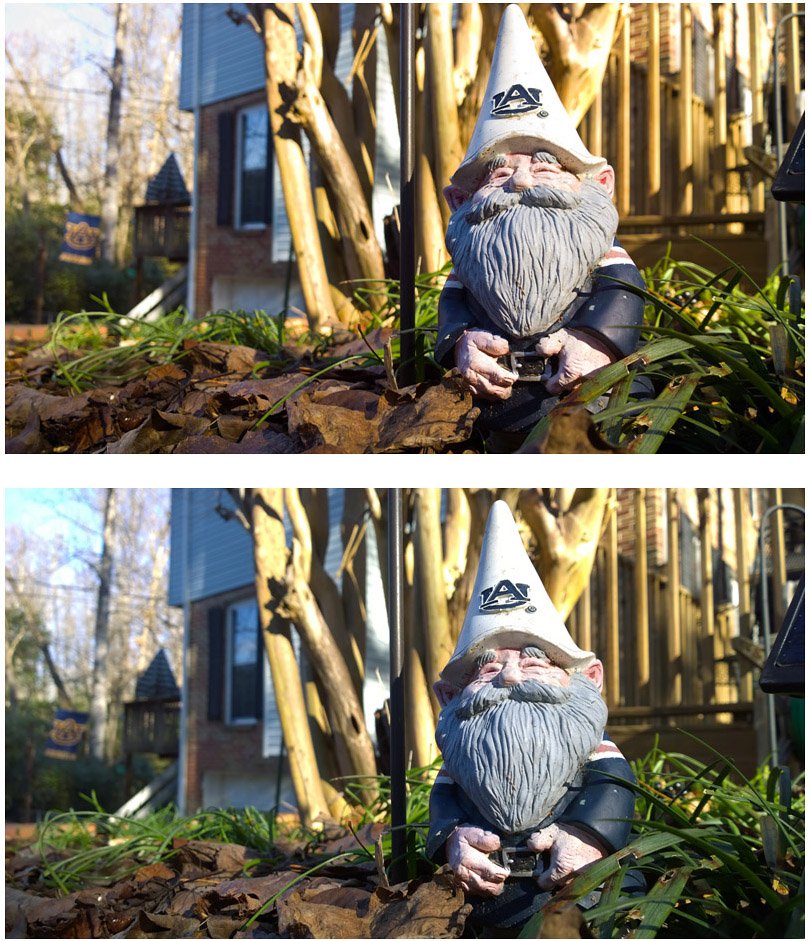
Note: Sample images were shot with the Nokia Lumia 1020. JPEG images were taken straight from the camera and resized for publication. DNG images were converted, then resized for publication.
JPEG (left) and DNG (right) Samples
The adjustment controls with processing DNG files makes it easier to pull details out of the shadows, accurately adjust an image’s white balance (tint and temperature), and overall gives you more creative control over your images. When lighting conditions aren't that great, I have found that shooting RAW gives you a little more forgiveness than JPEG.
Straight from the Camera JPEG Sample Image
In shooting images with both formats, I am very impressed with how well the Lumia 1020 handles in-camera processing. Image quality was very close with the two image formats but I found getting the image to look as desired was easier in shooting with the DNG format. Granted this could be based on being more accustomed to processing RAW image files.
DNG File Sample Image
In defense of the JPEG image, you can fine-tune the image file with Fhotoroom, Nokia's Creative Studio, or other Windows Phone/computer photo editors to improve the "straight from the camera" image. Just keep in mind, the more you adjust a JPEG image the chance of image degradation increases.
Hopefully we will see a Windows Phone photo editor that will be capable of opening and converting the DNG files and reduce the dependency on a computer to make the most of these files. The 'zoom later' feature of Nokia Camera will work on DNG files but the image is automatically converted and re-sampled to the 5MP version. It would be nice to have an internal conversion app to let you adjust the DNG file manually then edit the image accordingly.
DNG or JPEG?
If the majority of your photos will reside on your Windows Phone, the JPEG file format will serve you well. Even if you venture beyond your Windows Phone, shooting JPEG images can produce fantastic images.
If you like to dabble with photo editing and are looking for more control with your images, then shoot DNG. It will require a little more time with photo editing software but in the end you may find it time well spent.
For me, the introduction of the RAW/DNG file format to our Windows Phones makes the camera a more serious contender. It gives you the ability to shoot a photo, share the 5MP JPEG immediately and later edit/fine-tune the DNG for print or digital publication. This ability has been in place with many professional DSLRs for years and it is nice to see it landing with our Windows Phones.
JPEG (Bottom) and DNG (Top) Sample Images
If you have shot RAW before with your DSLR or advanced Point and Shoot camera, you will feel right at home with the Lumia’s DNG format. If you are curious about photo editing, the DNG will give you the opportunity to dive into more intense post-processing. If you could care less about RAW image files and like the convenience of the JPEG format, the Lumia 1020 and 1520 has you covered as well.
There really is no right or wrong whichever way you choose.
If you have given the new DNG format a spin, let us know what you think of it in the comments below.

George is a former Reviews Editor at Windows Central, concentrating on Windows 10 PC and Mobile apps. He's been a supporter of the platform since the days of Windows CE and uses his current Windows 10 Mobile phone daily to keep up with life and enjoy a game during downtime.
