How to add more and faster RAM to the Dell XPS 15 (9550 and 9560)
As is, the Dell XPS 15 (9550 or 9560) is an outstanding 15-inch laptop.
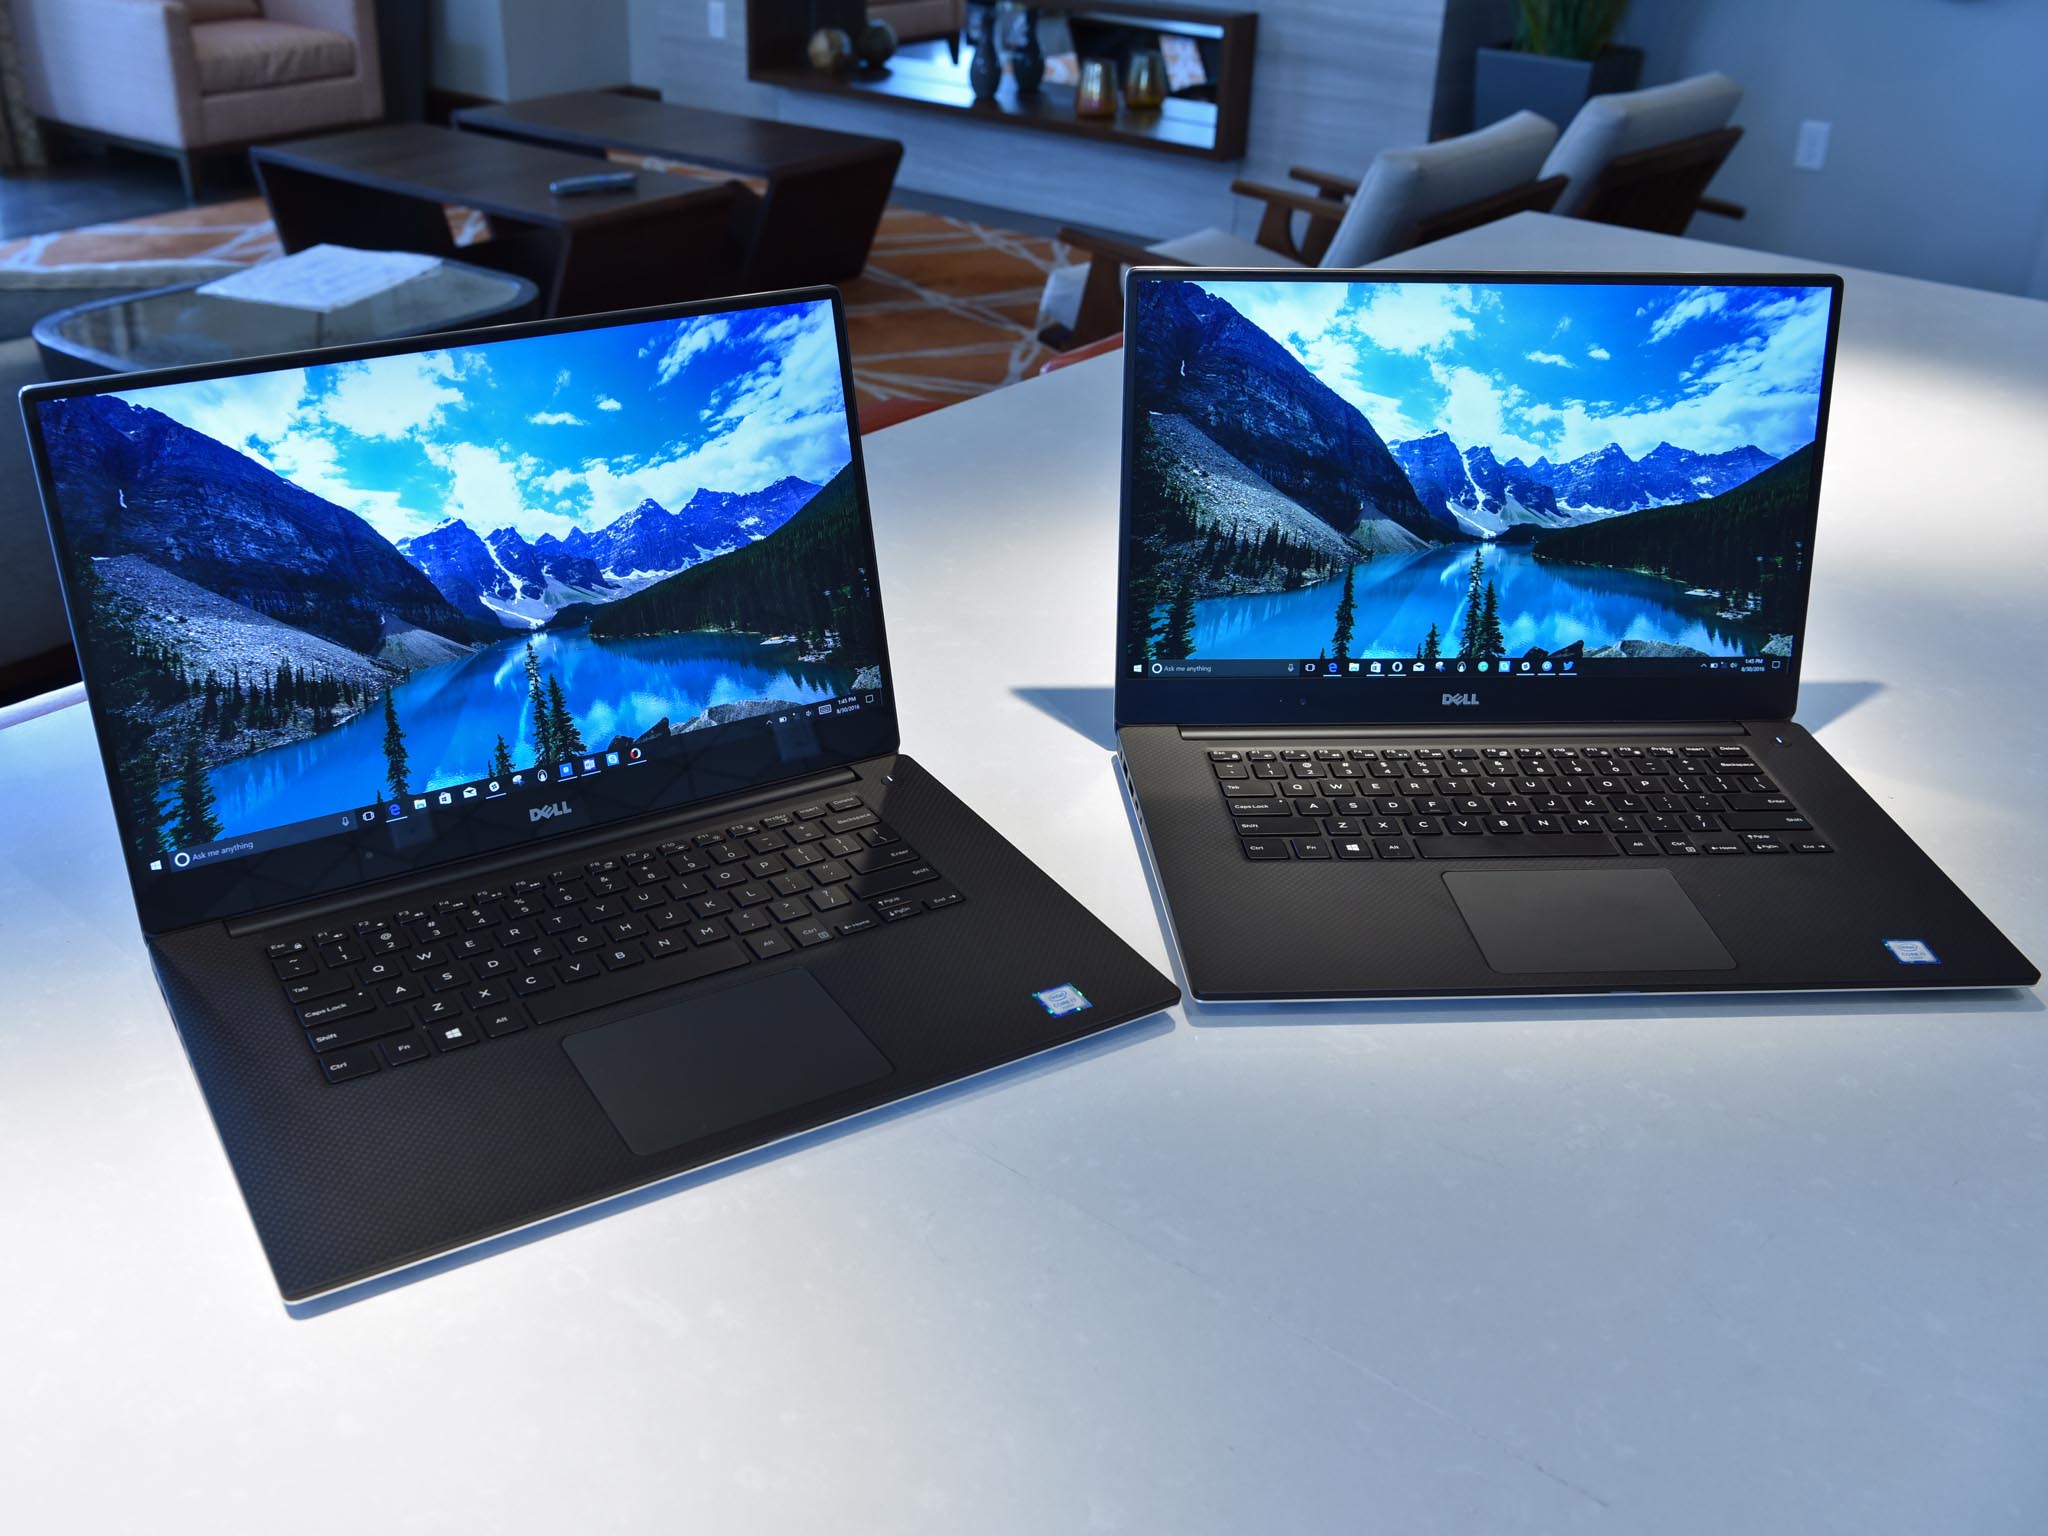
Nonetheless, there are ways to make it even more of a beastly machine thanks to easy upgradeability of some of its hardware.
I recently showed you how to swap the internal Wi-Fi card and today I'll show you how to upgrade the RAM.
RAM – Faster or More?
Before going to the actual how-to let's talk about why you want to upgrade your RAM. There are a few ways to consider this depending on your needs, wants, and wallet:
- More RAM.
- Faster RAM.
More RAM is easy. If your XPS 15 has 8GB of RAM and you want 16GB, then we can easily drop in more memory. Personally, I feel 8GB of RAM is fine for most users, but some do need 16GB or even 32GB for heavy lifting like 4K video editing, 3D modeling, virtual machines, and the like. If you're just running a web browser and a few apps and the occasional game, 8GB or 16GB will be more than enough for you.
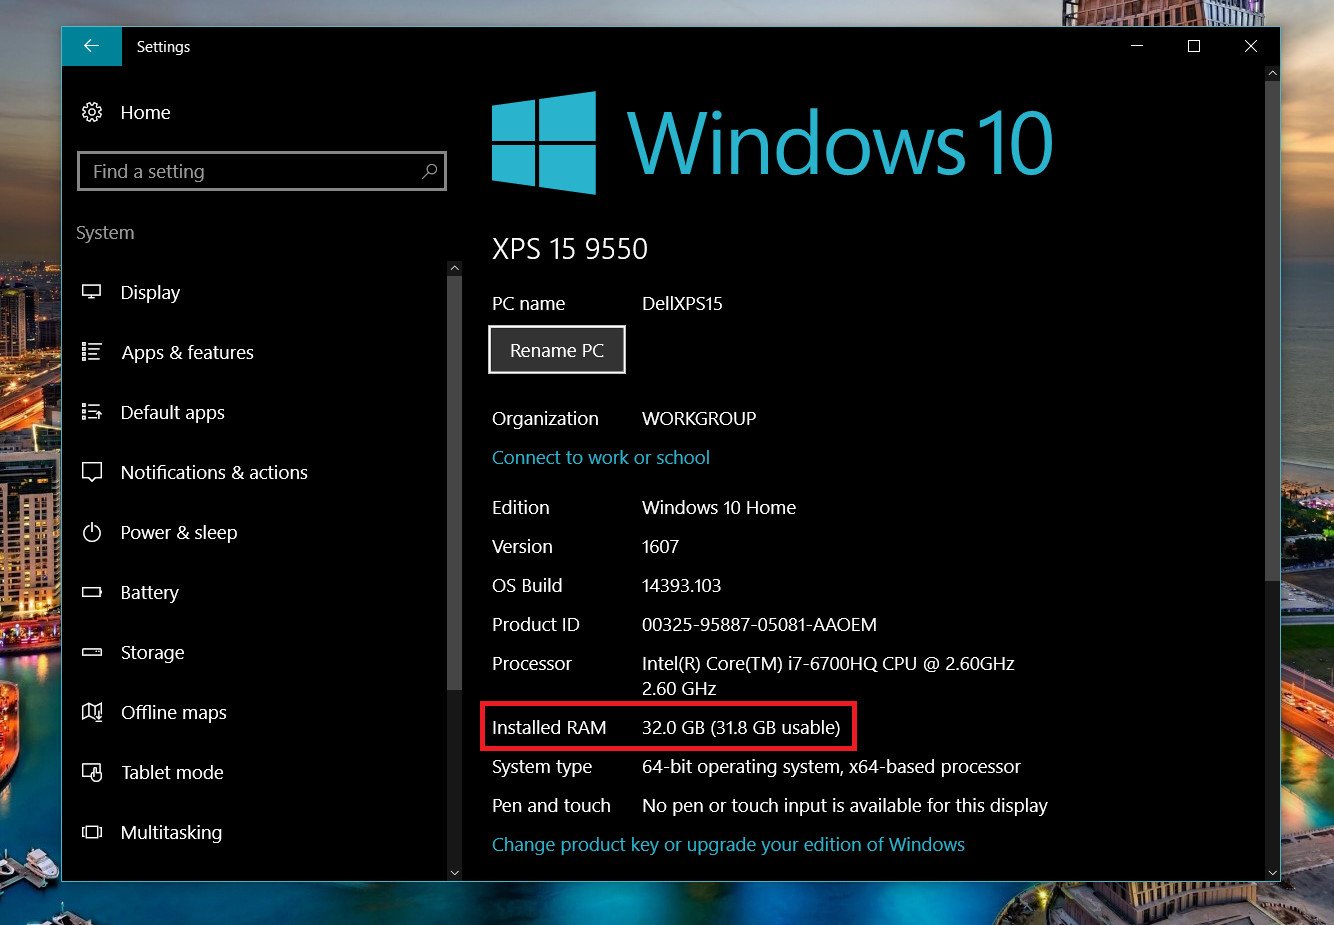
Faster RAM is trickier. The XPS 15 (9550 and 9560) ships with 8GB or 16GB of DDR4-2133MHz. But you can run 2400MHz RAM on the XPS 15 without any issue. (You can install 2800MHz RAM, but the BIOS limits it to 2400MHz, so don't waste your money).
Are there any downsides to having too much RAM? Technically, more RAM uses more energy from the system, but it's such a negligible amount that you'll barely notice it. In fact, if you're maxing out your current RAM, you're using more power by putting the power-hungry SSD to work as overflow memory. Really, though, the only downside is cost versus actual value you get from the upgrade.
Finally, the Dell XPS 15 (9550 and 9560) maxes out at 32GB of DDR4 RAM (a pair of 16GB sticks).
Get the Windows Central Newsletter
All the latest news, reviews, and guides for Windows and Xbox diehards.
What to buy
When it comes to buying RAM, it will depend on those two factors mentioned above as well as your wallet.
For this article (and for science) I used G.SKILL 32GB (2 x 16GB) Ripjaws Series DDR4-2800MHz (which is how I discovered the 2400MHz limit).
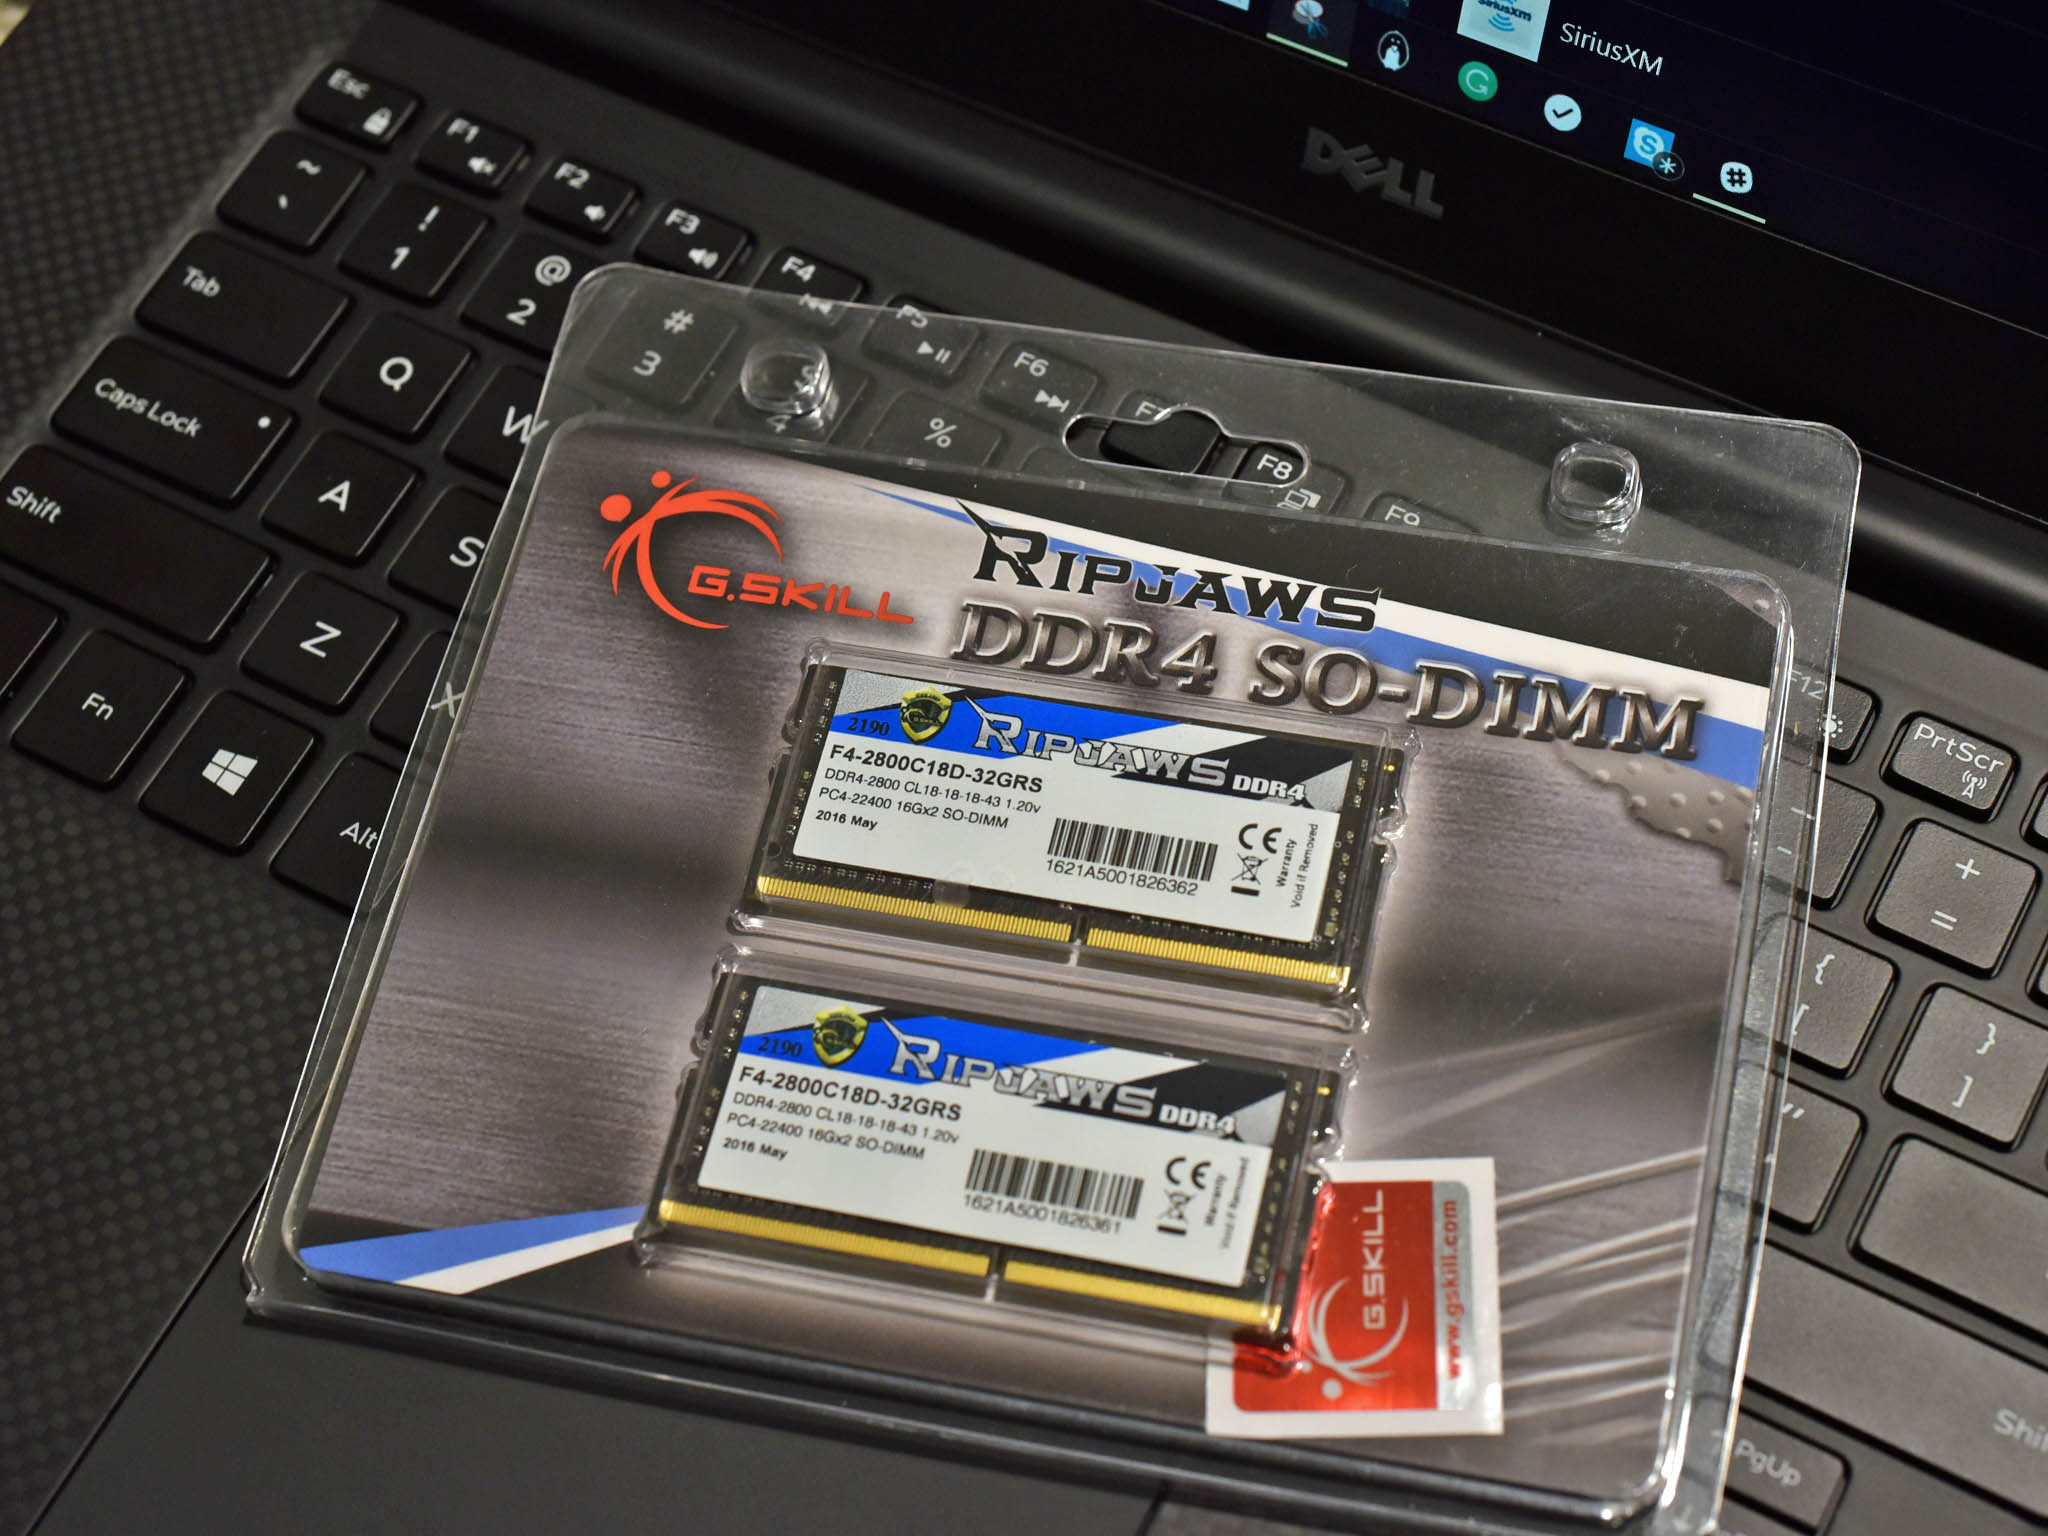
Assuming Dell does not enable 2800MHz speeds for RAM here is what you should buy for the high-end:
See G.SKILL 32GB (2 x 16GB) Ripjaws
This RAM is the same as my extreme version just clocked at 2400MHz and cheaper by around $25. Kingston's HyperX Impact RAM is also impressive and may cost even less.
If you are upgrading from an 8GB XPS 15 to 16GB, you can find the same G.SKILL RAM with less memory at half the cost:
See G.SKILL 16GB (2 x 8GB) Ripjaws
Either one of those will give you more memory at a slightly higher speed. You could, of course, find even cheaper RAM clocked at 2133MHz, but if you're opening your machine and replacing the RAM why not spend the few extra bucks to get a slight bump in performance?
Speaking of, let's be clear: any "speed" difference with RAM will likely make little impact on an actual day to day basis. We're talking maybe in the realm of 2-5% difference in throughput for things like the GPU under heavy load. Something like CAS Latency is also relevant. Yes, your XPS 15 will feel peppier after this upgrade, but it won't be a massive difference.
If you want to see a dramatic improvement in performance for everyday tasks, stay tuned for my SSD upgrade guide for the XPS 15.
Finally, remember it is always preferable to increase RAM amount over RAM speed. If you have to pick one, go for more RAM. I do not advise buying less RAM that is clocked faster. Another way of putting that is the XPS 15 (9550 and 9560) already ships with fast RAM, so it is the amount we are looking to improve upon.
Difficulty Rating
This upgrade is very simple and even easier than changing the Wi-Fi card.
The process is just taking off the bottom cover of the laptop, pushing the latch pins for the RAM to the side and swapping it with the new RAM. You are looking at about a 20-minute job if you take your time.
What you need
You will need a few tools like hex and Philips screwdrivers and a small pry to help remove the bottom cover on the XPS 15.
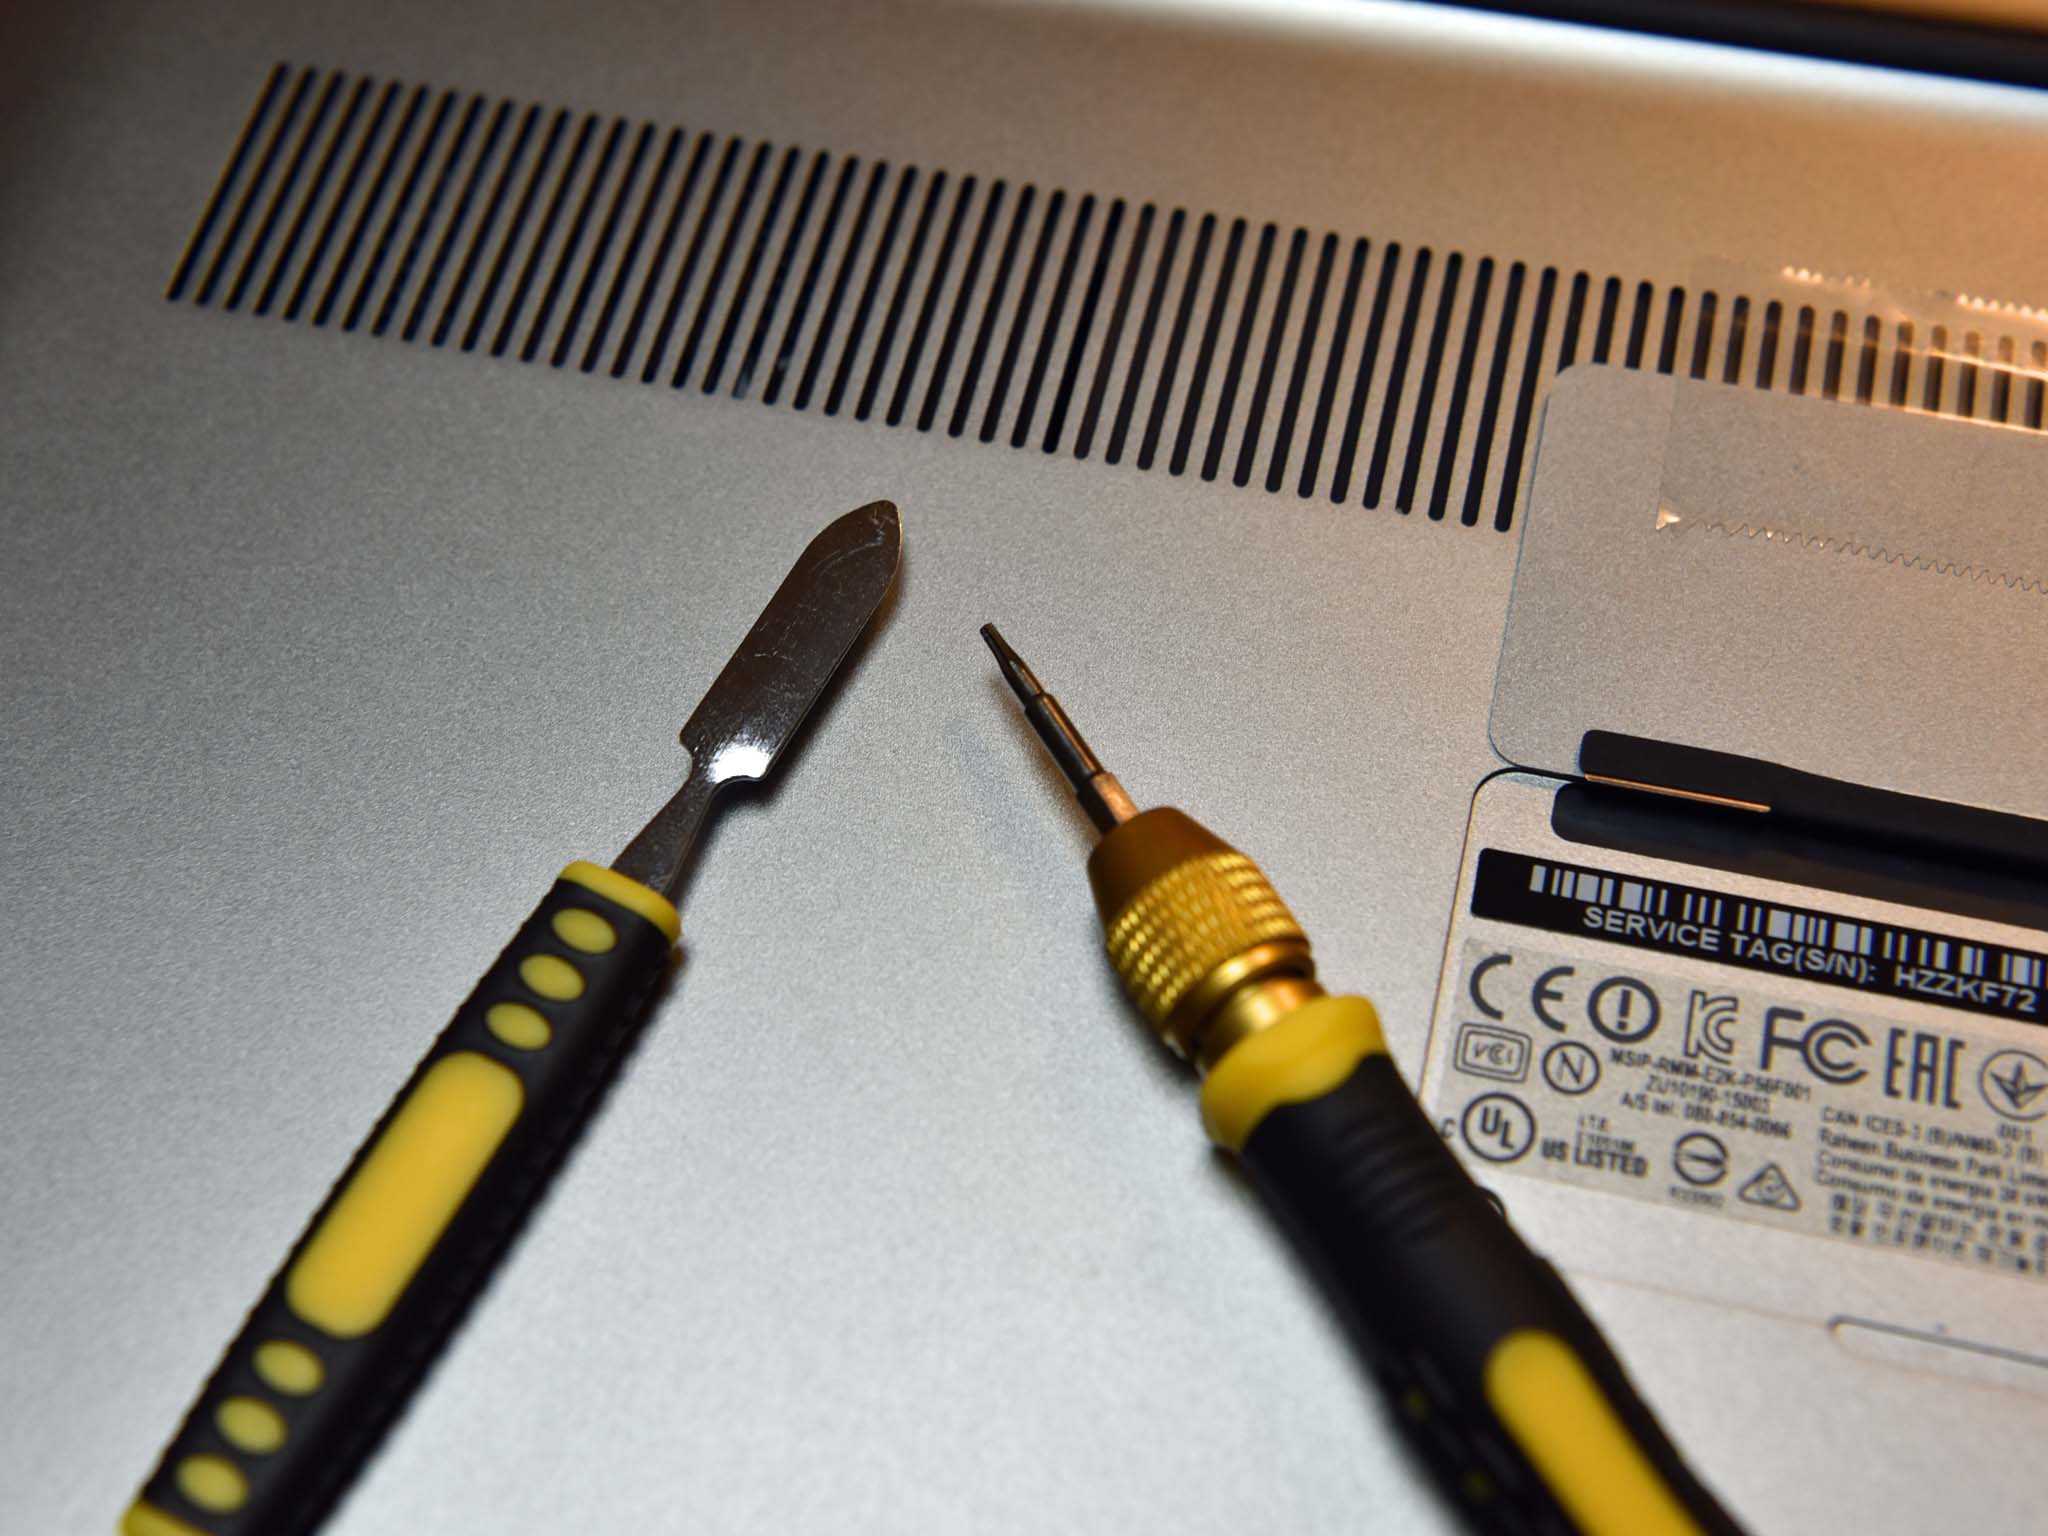
You may have your own tools, but since I plan on doing this more often, I picked up the E-Durable Pro Bit Driver Kit on Amazon. It was a mere $12 and includes every tool you will need to work on electronics like a laptop, and I recommend it if you don't have anything at the moment.
See E-Durable Pro Kit on Amazon
You will also want a clean and well-lit workspace and somewhere safe to put the screws from the bottom of the XPS 15.
Opening the XPS 15
To begin, shut down (not sleep or hibernate) your laptop and unplug it from the power adapter.
You should also use an Anti-Static Wrist Strap when touching the inner components.
See Anti-Static Strap at Amazon
To open the XPS 15 (9550 and 9560), you will want to do the following.
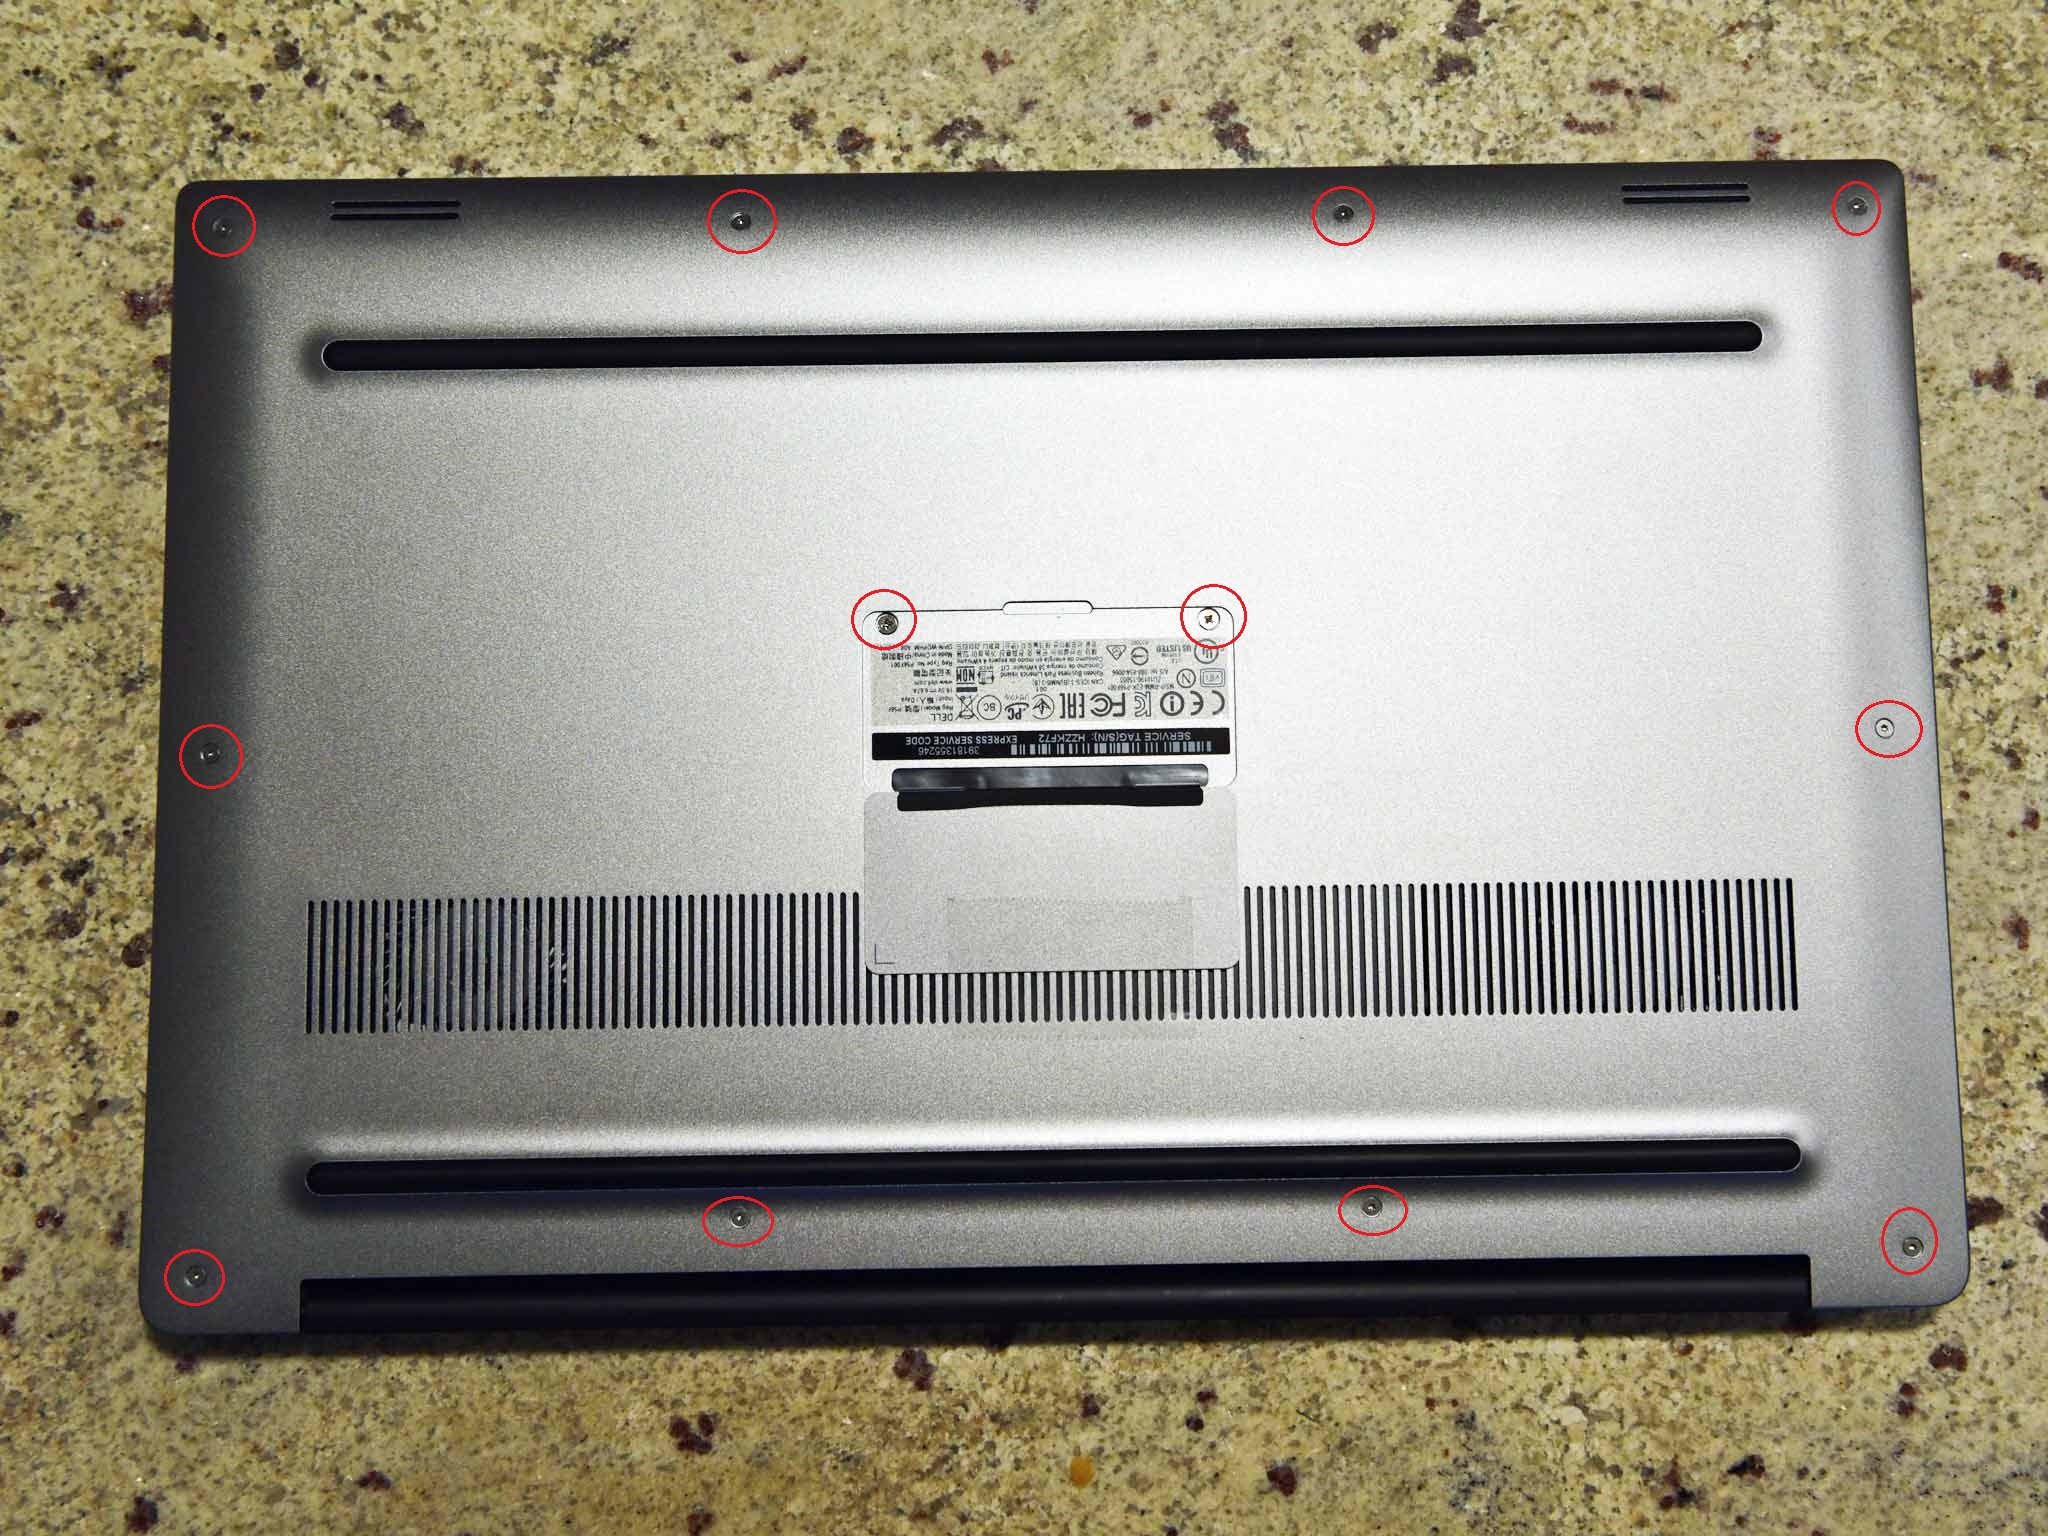
- Place the XPS 15 bottom-up. I recommend using a cloth to prevent any scratches.
- Remove the 10 Torx head screws from the bottom.
- Remove the 2 Philips head screws from beneath the XPS label (lift the cover).
- Pry the cover off gently using a pry tool.
The cover should just click and come off without much force once all 12 of the screws are removed.
Changing the RAM
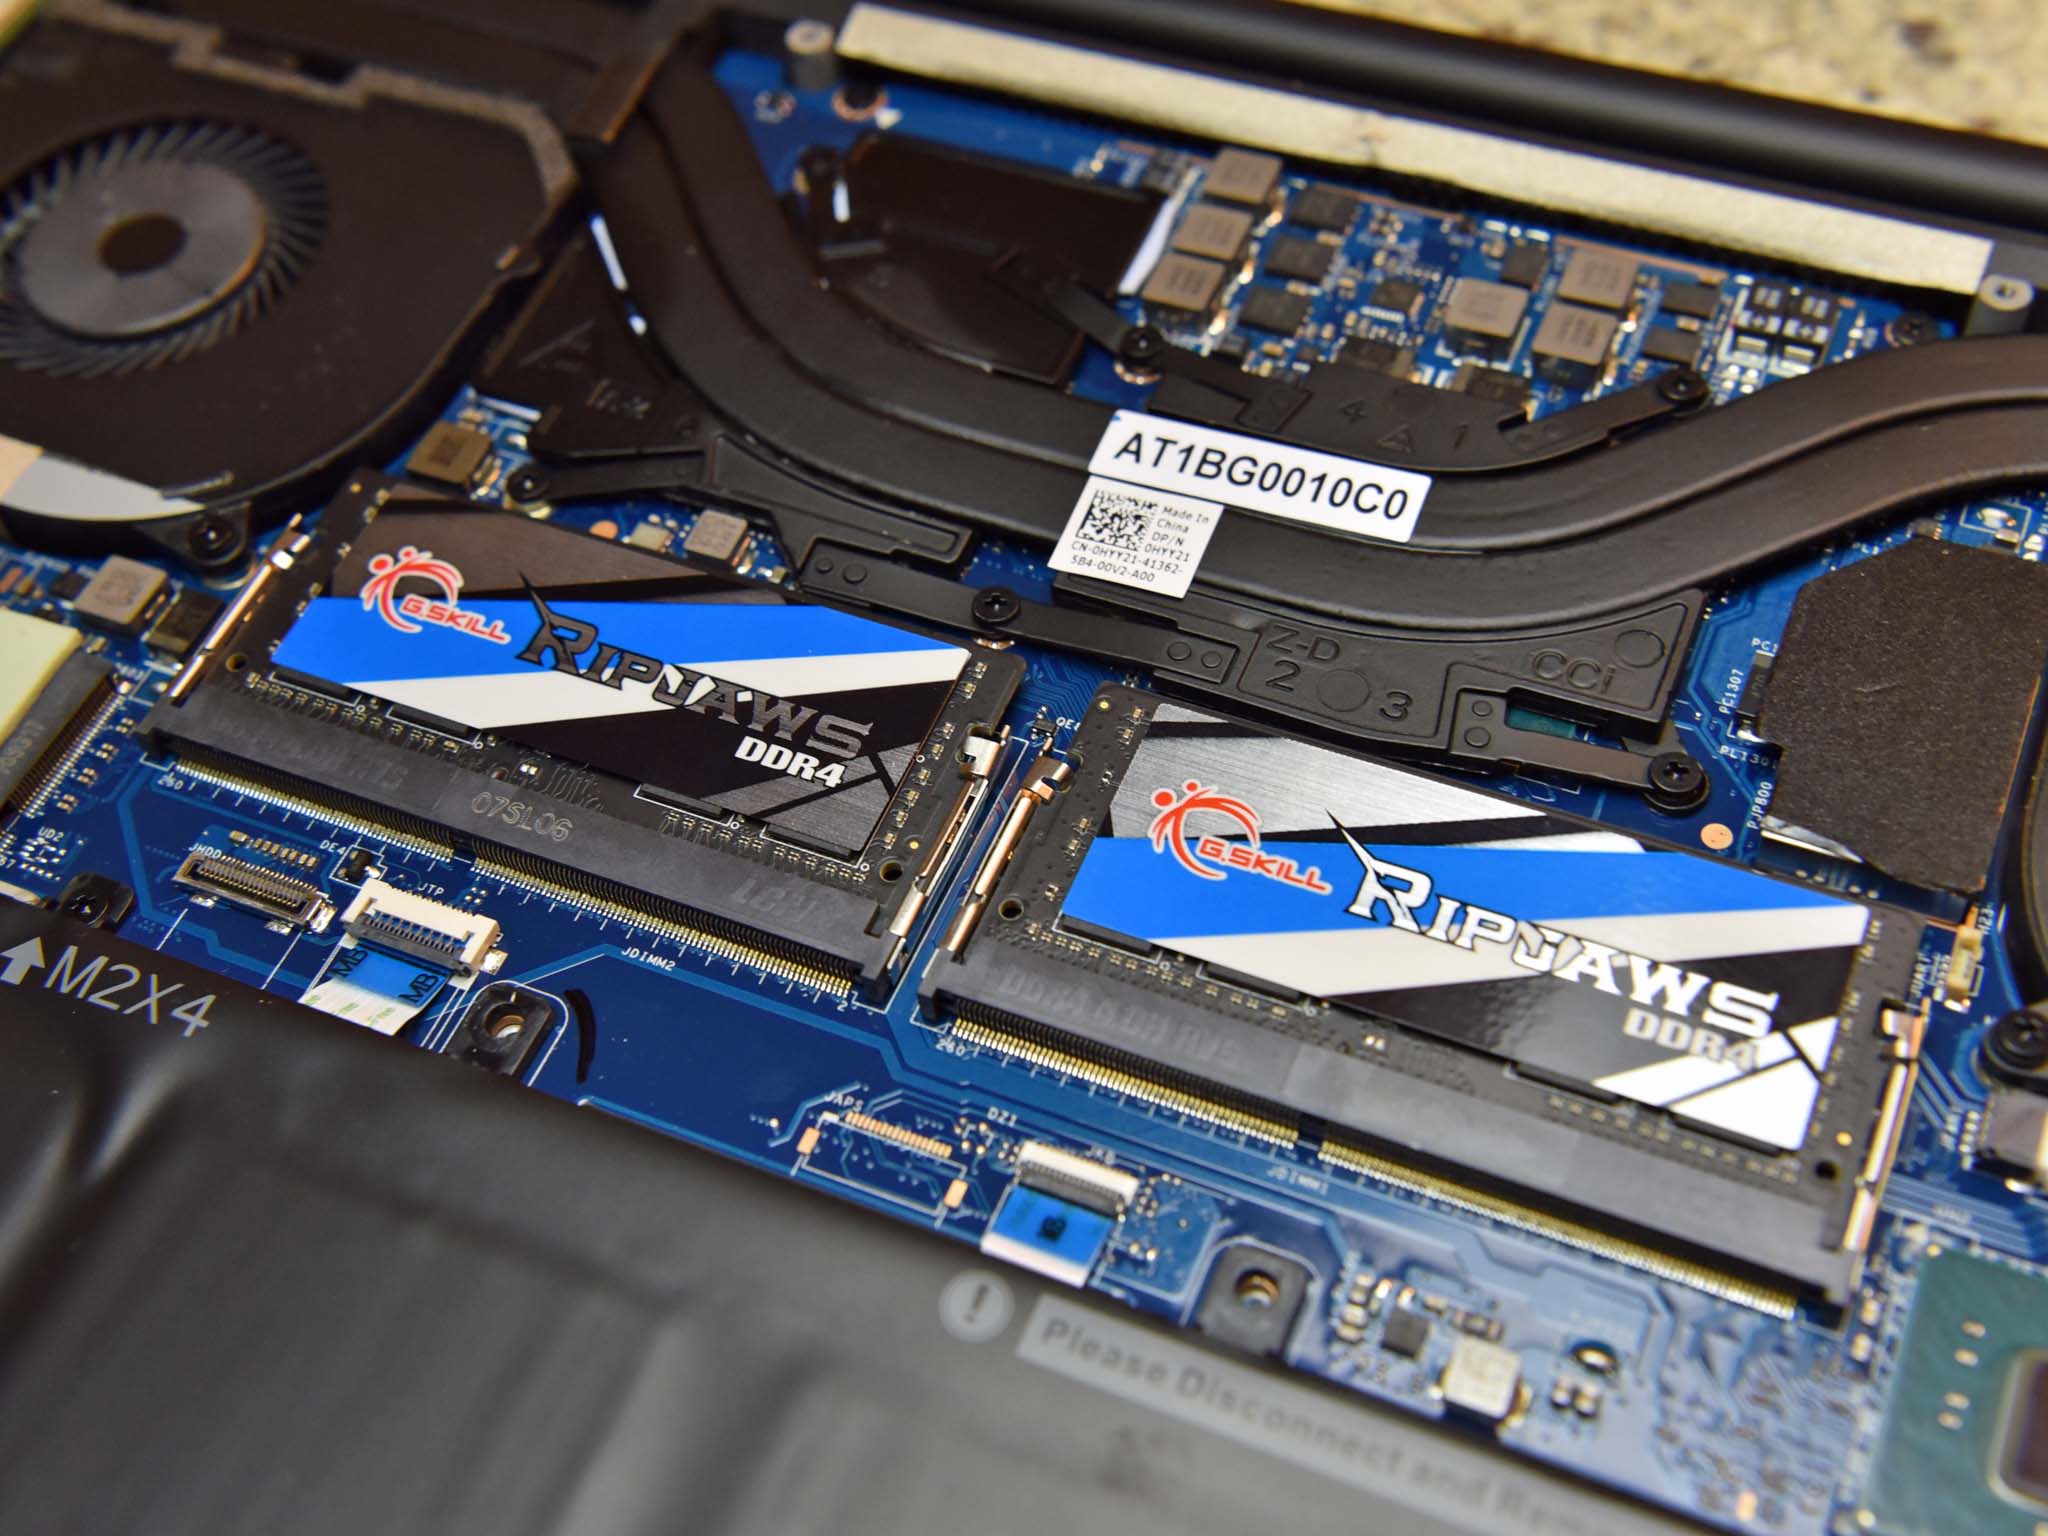
The RAM is easily found on the opened XPS 15 (9550 and 9560) as it is right in the middle of the machine and unobstructed. You can see the placement in the below image.
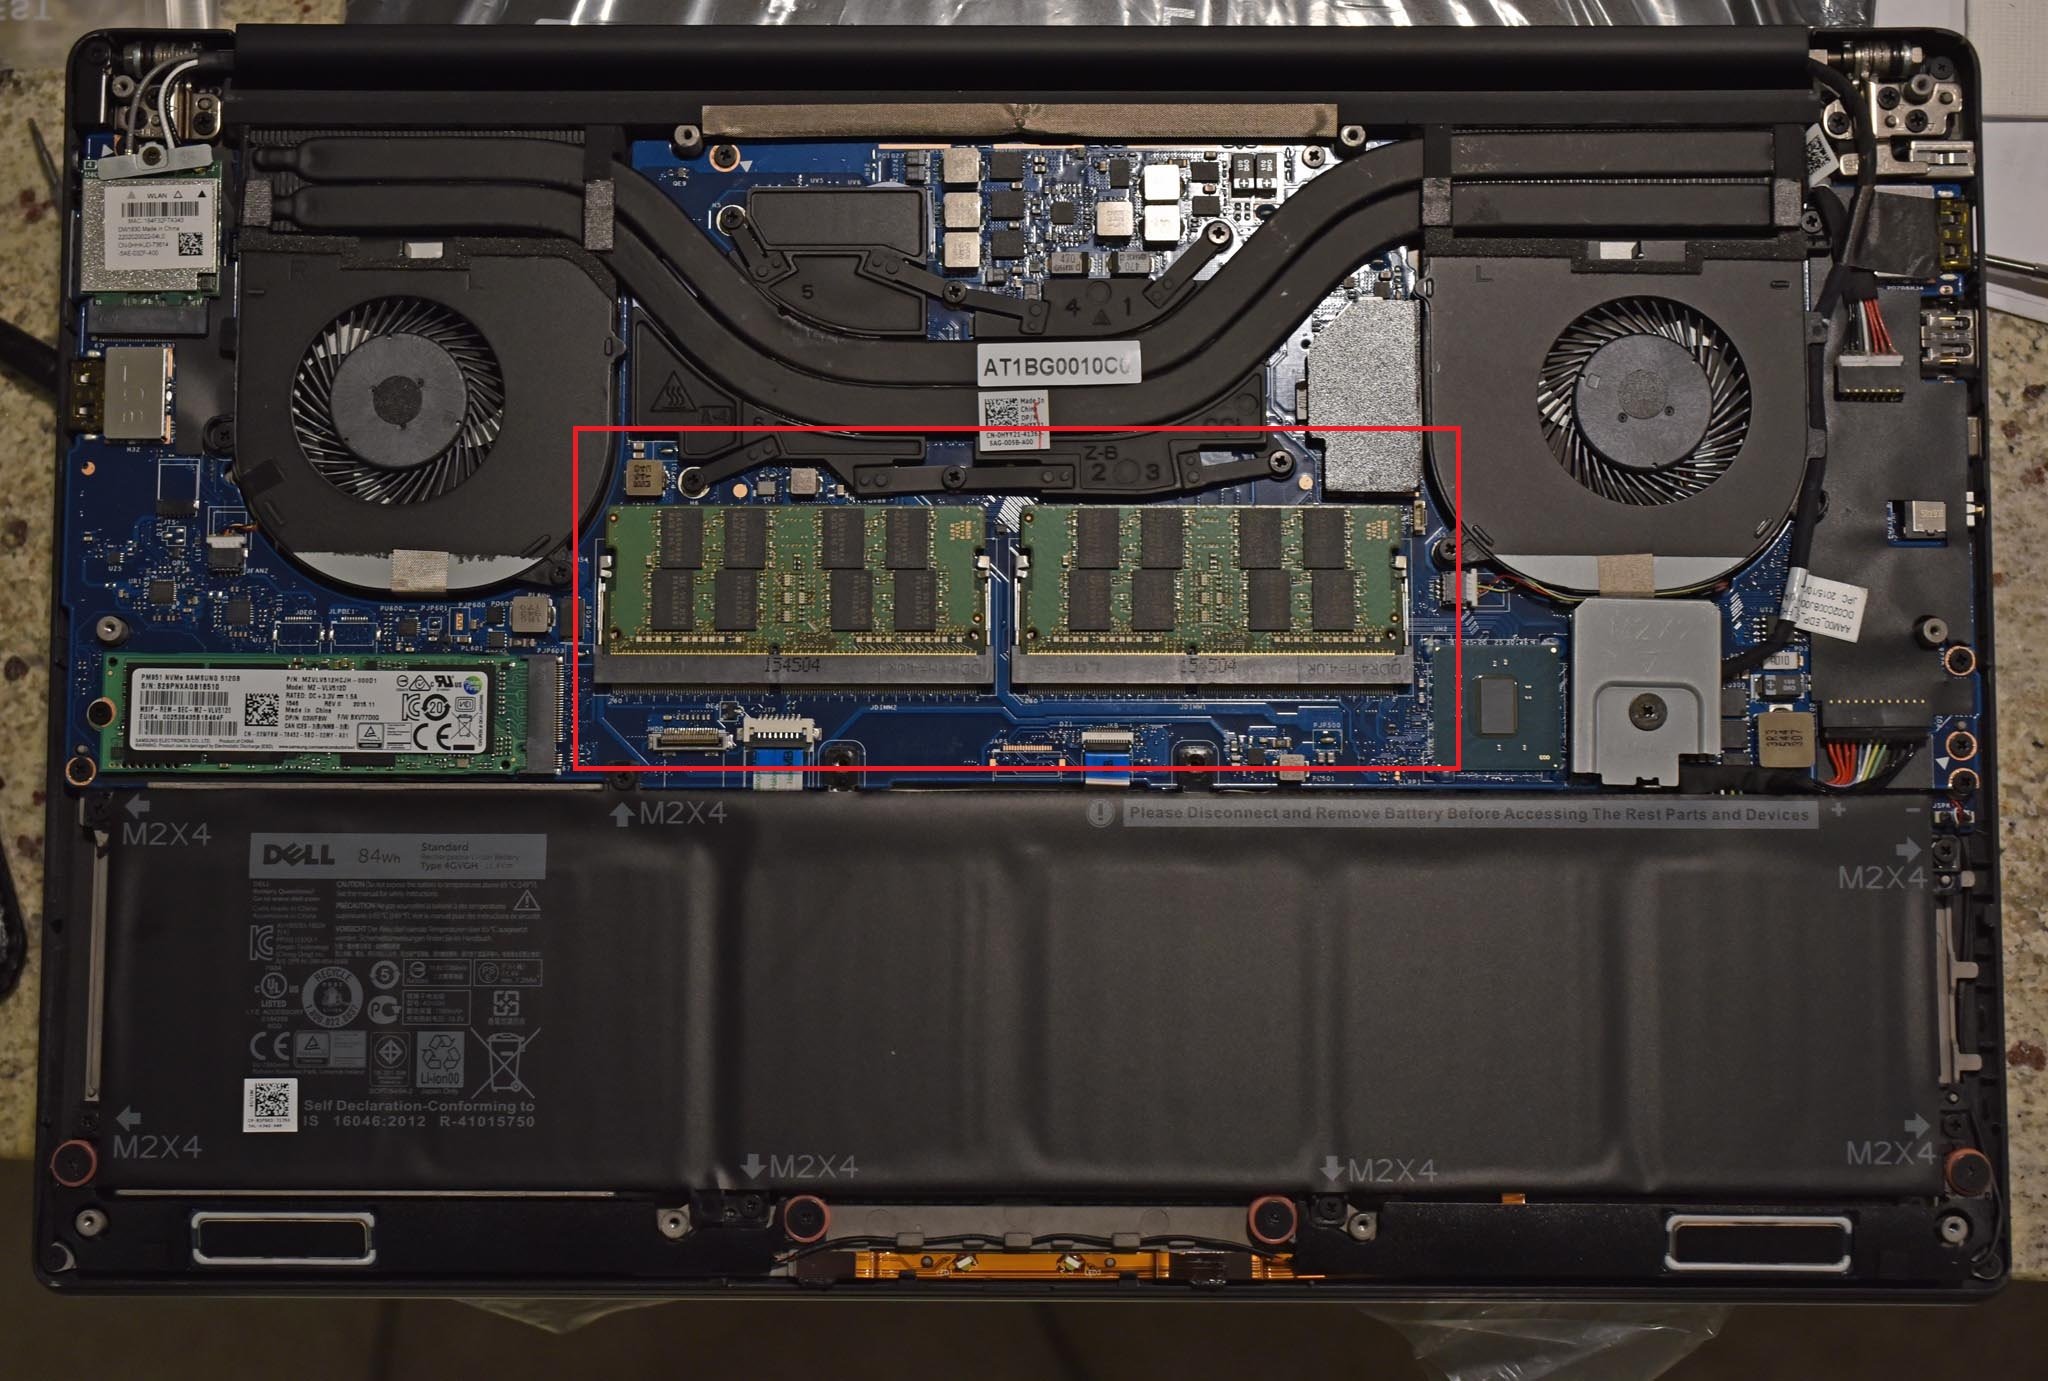
The RAM is held down by clamps on each side of the chip. Using a small pry tool (or your fingers if you're nimble) just push the clamp to the side away from the RAM. Once you do this for each side, the chip should pop up at a 45-degree angle.
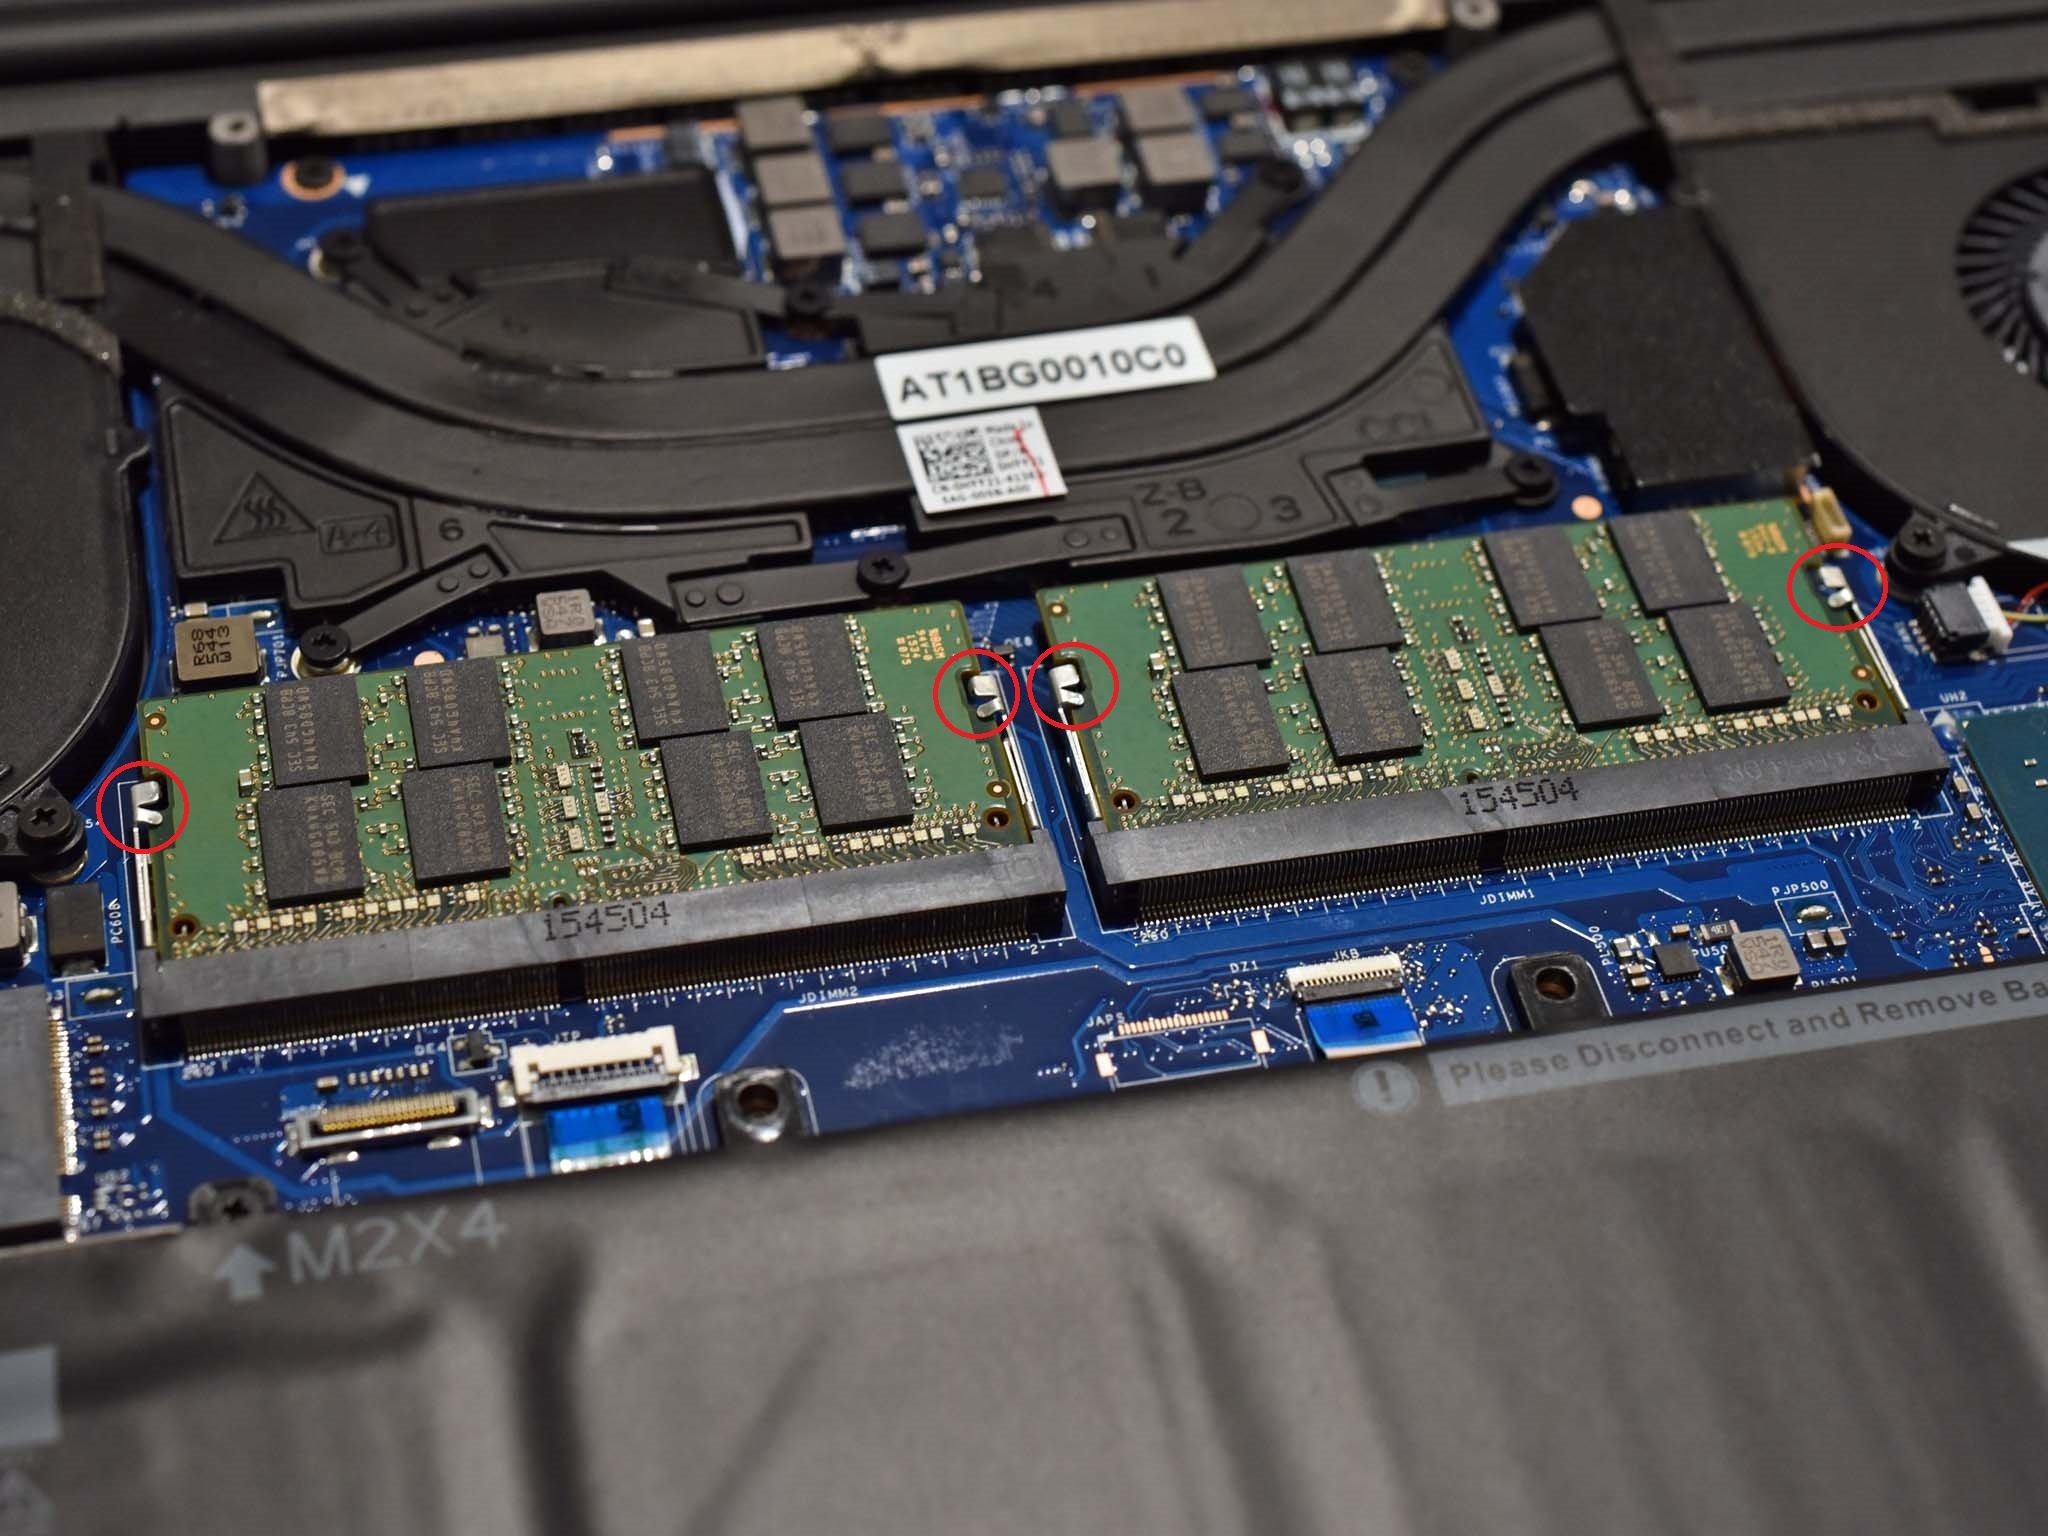
- Push clamps to the side for each RAM chip
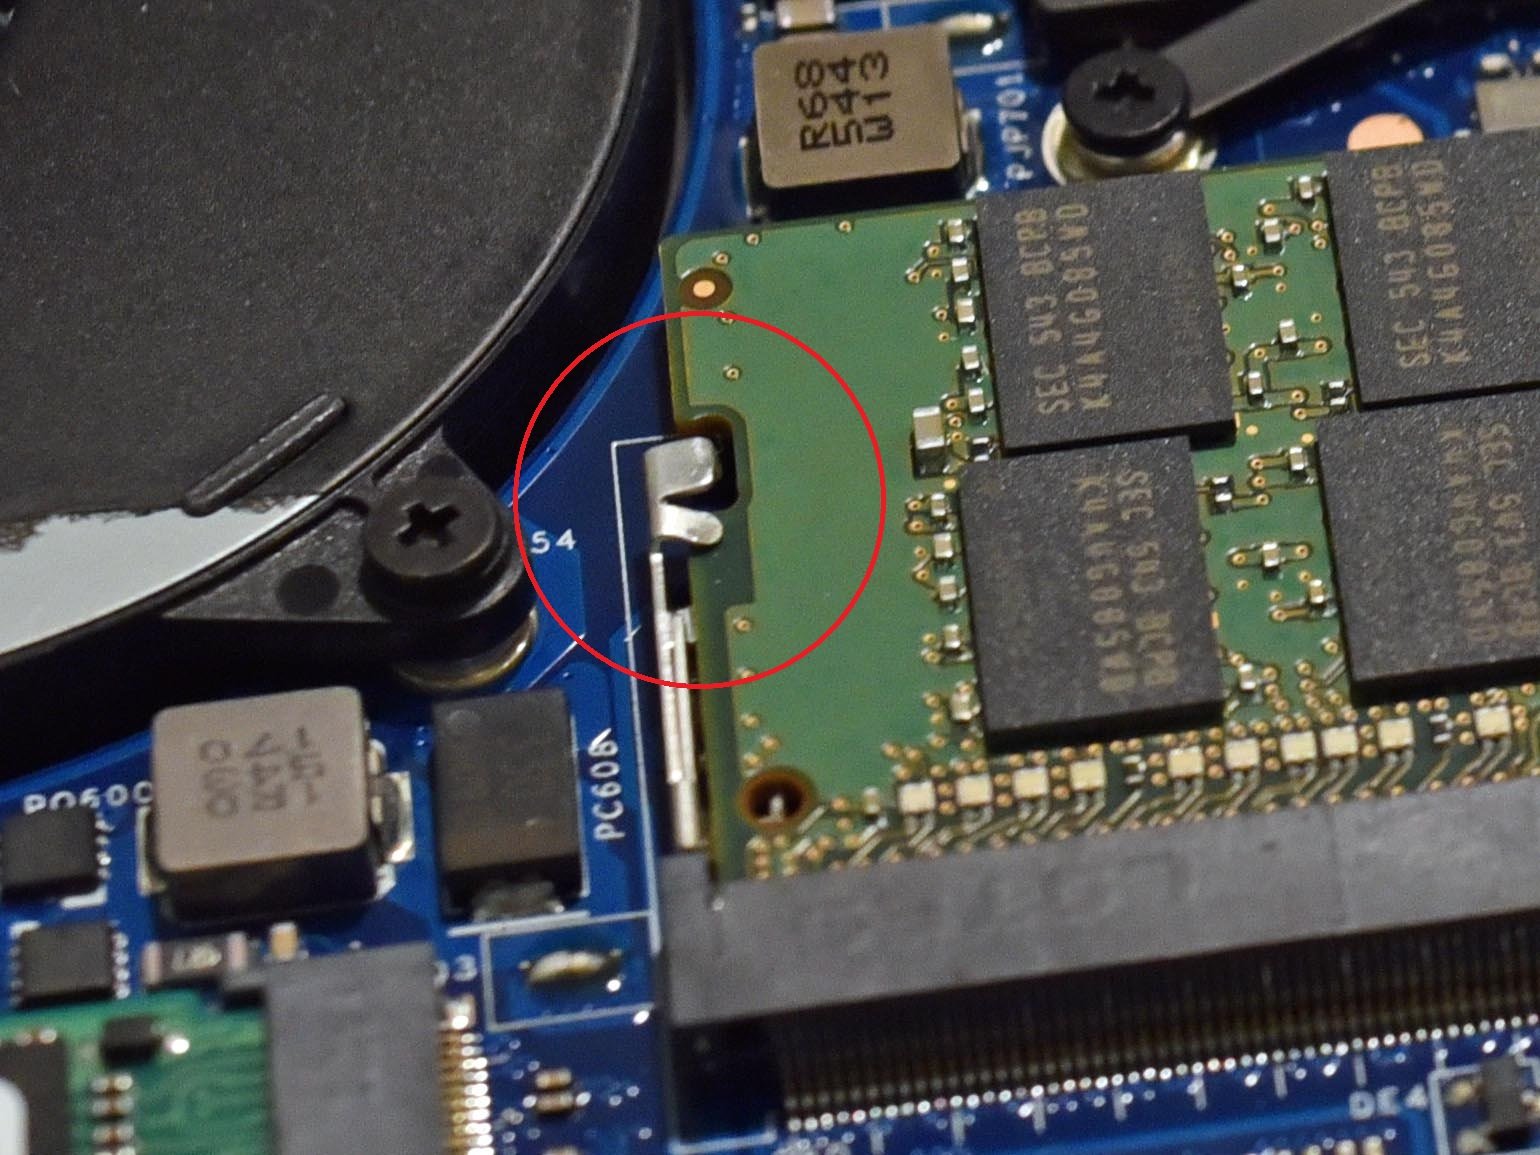
- When RAM is free from the clamps they should pop up slightly
- Gently pull the chip away from the motherboard
- Slide in the new RAM (label will likely be facing out)
- Gently press downwards on the RAM until you hear the clamps click
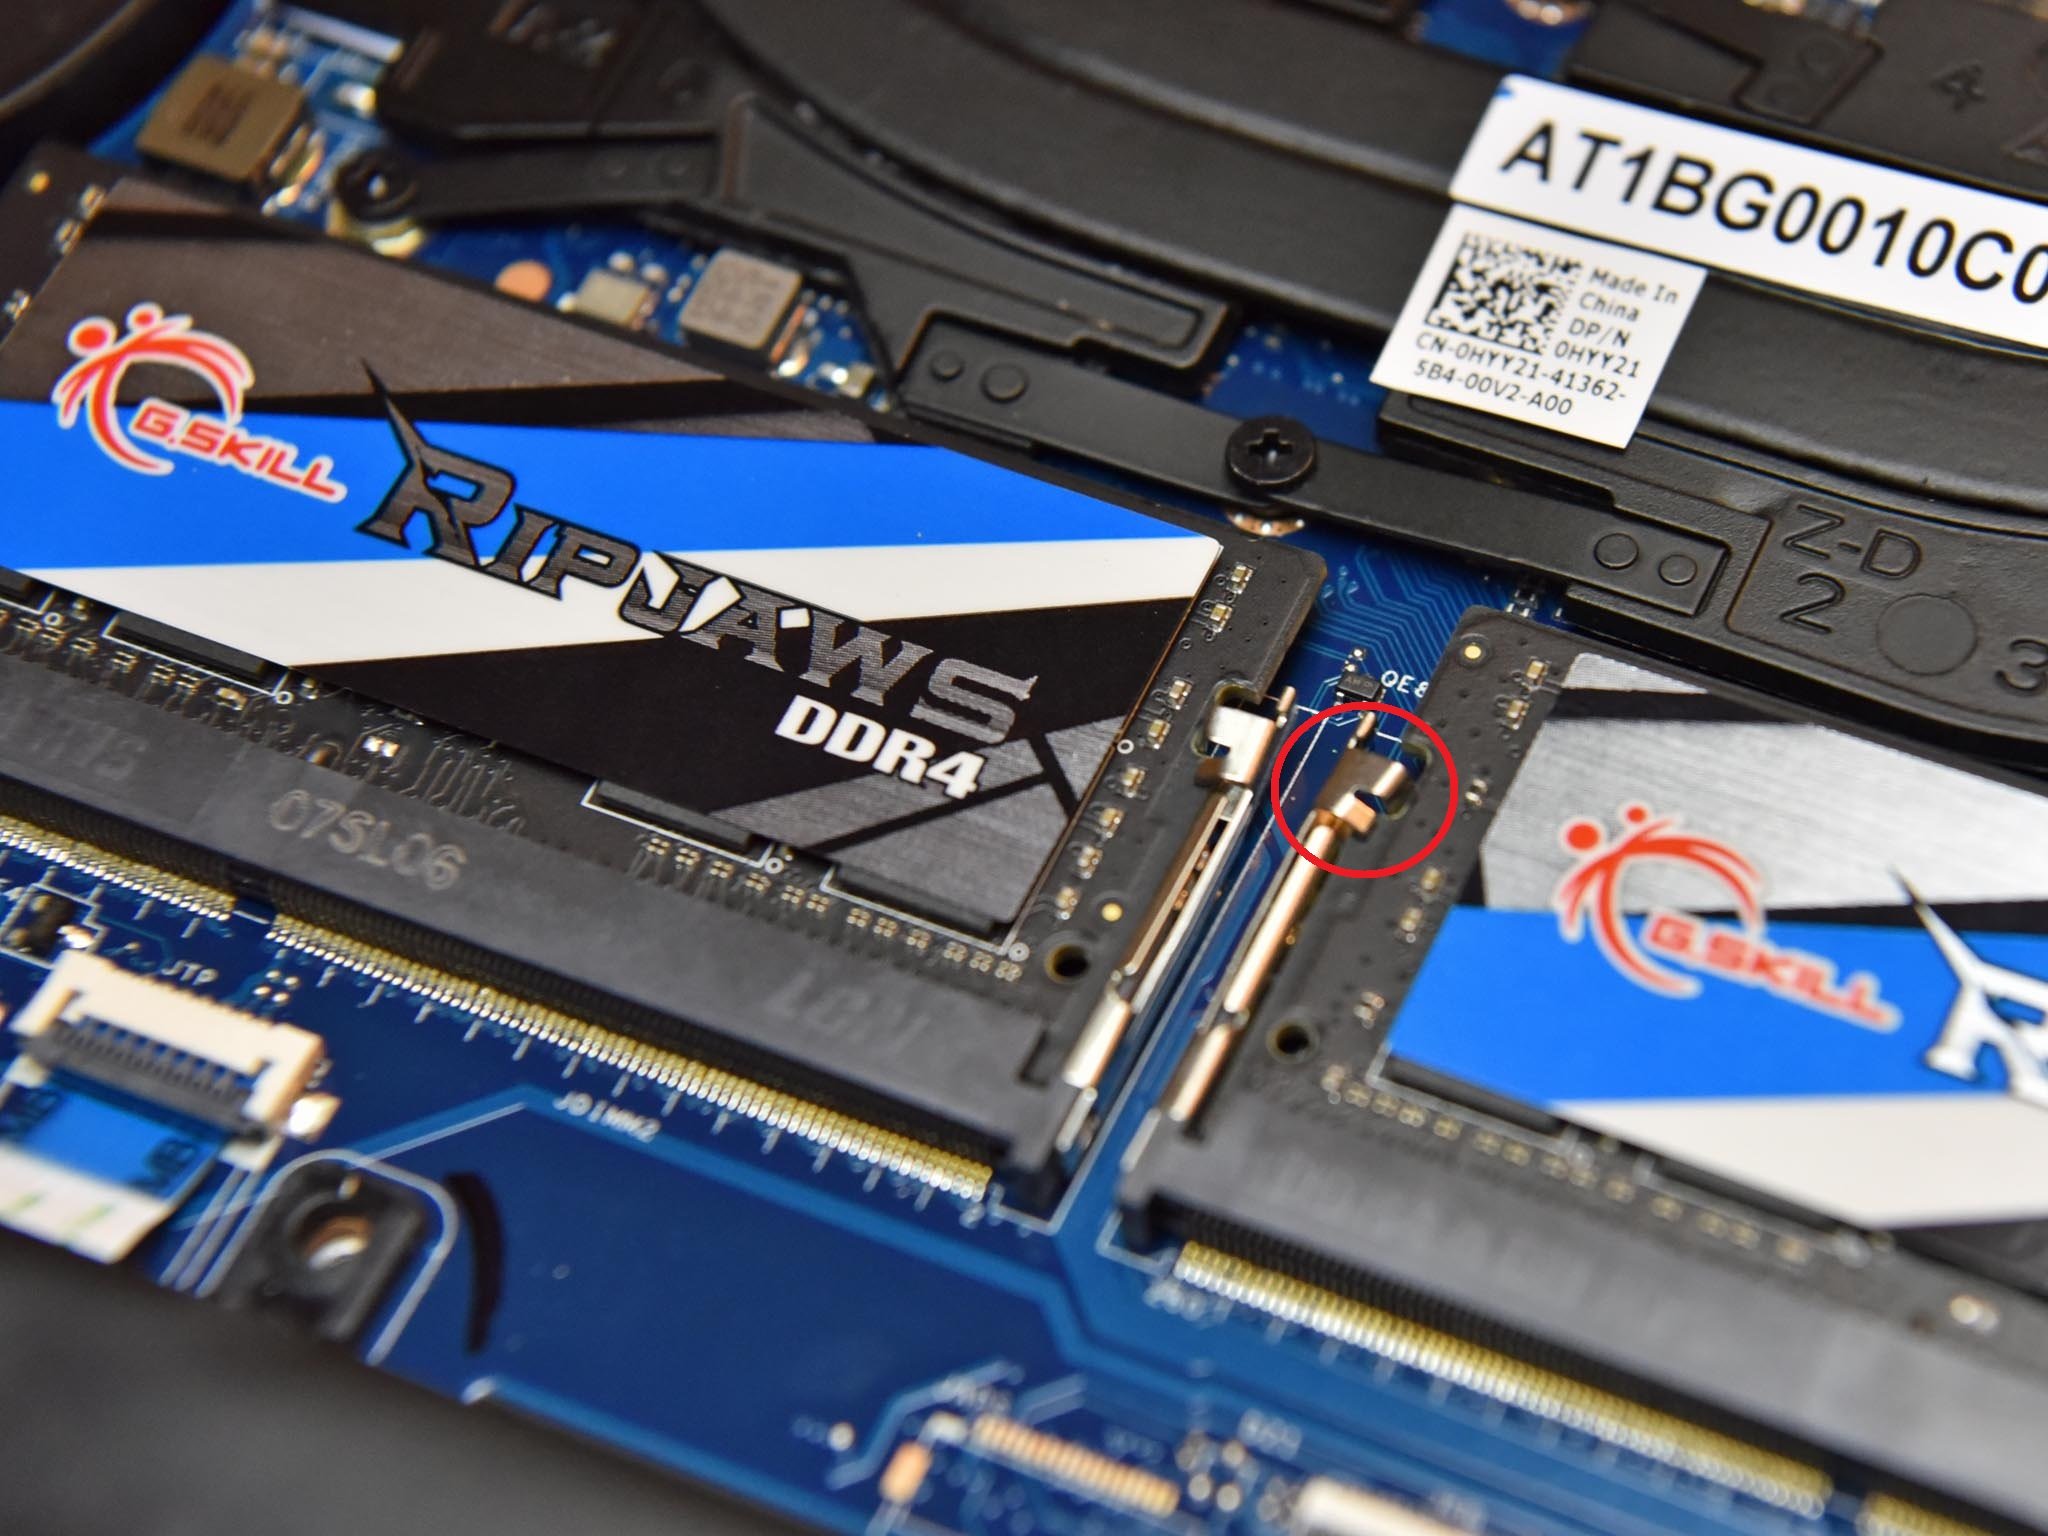
- Repeat for secondary RAM chip
That's it. Once the RAM is clicked into place, and the clamps are holding it you can reassemble the XPS 15. Start from the center (under the XPS label cover) then do the four corners and finally fill in the middle and side screws. DO NOT OVER TIGHTEN as the Torx head screws are relatively soft and you can easily strip the heads. Tighten them gently just until they are not loose. It's much easier to buy a replacement screw then to drill out a stripped one!
When you turn the XPS 15 on for the first time, you will likely see a BIOS-like screen informing you that the hardware changed. This behavior is normal, and you can select Continue to proceed to boot up Windows.
You should not have to change anything in the system BIOS or Windows as both will just recognize the new RAM. If you want to check that you have the correct speed and amount when the XPS 15 is booting
- Hit F12 when you see the Dell logo
- Go to BIOS settings
- Navigate to General > System Information and check Memory Speed
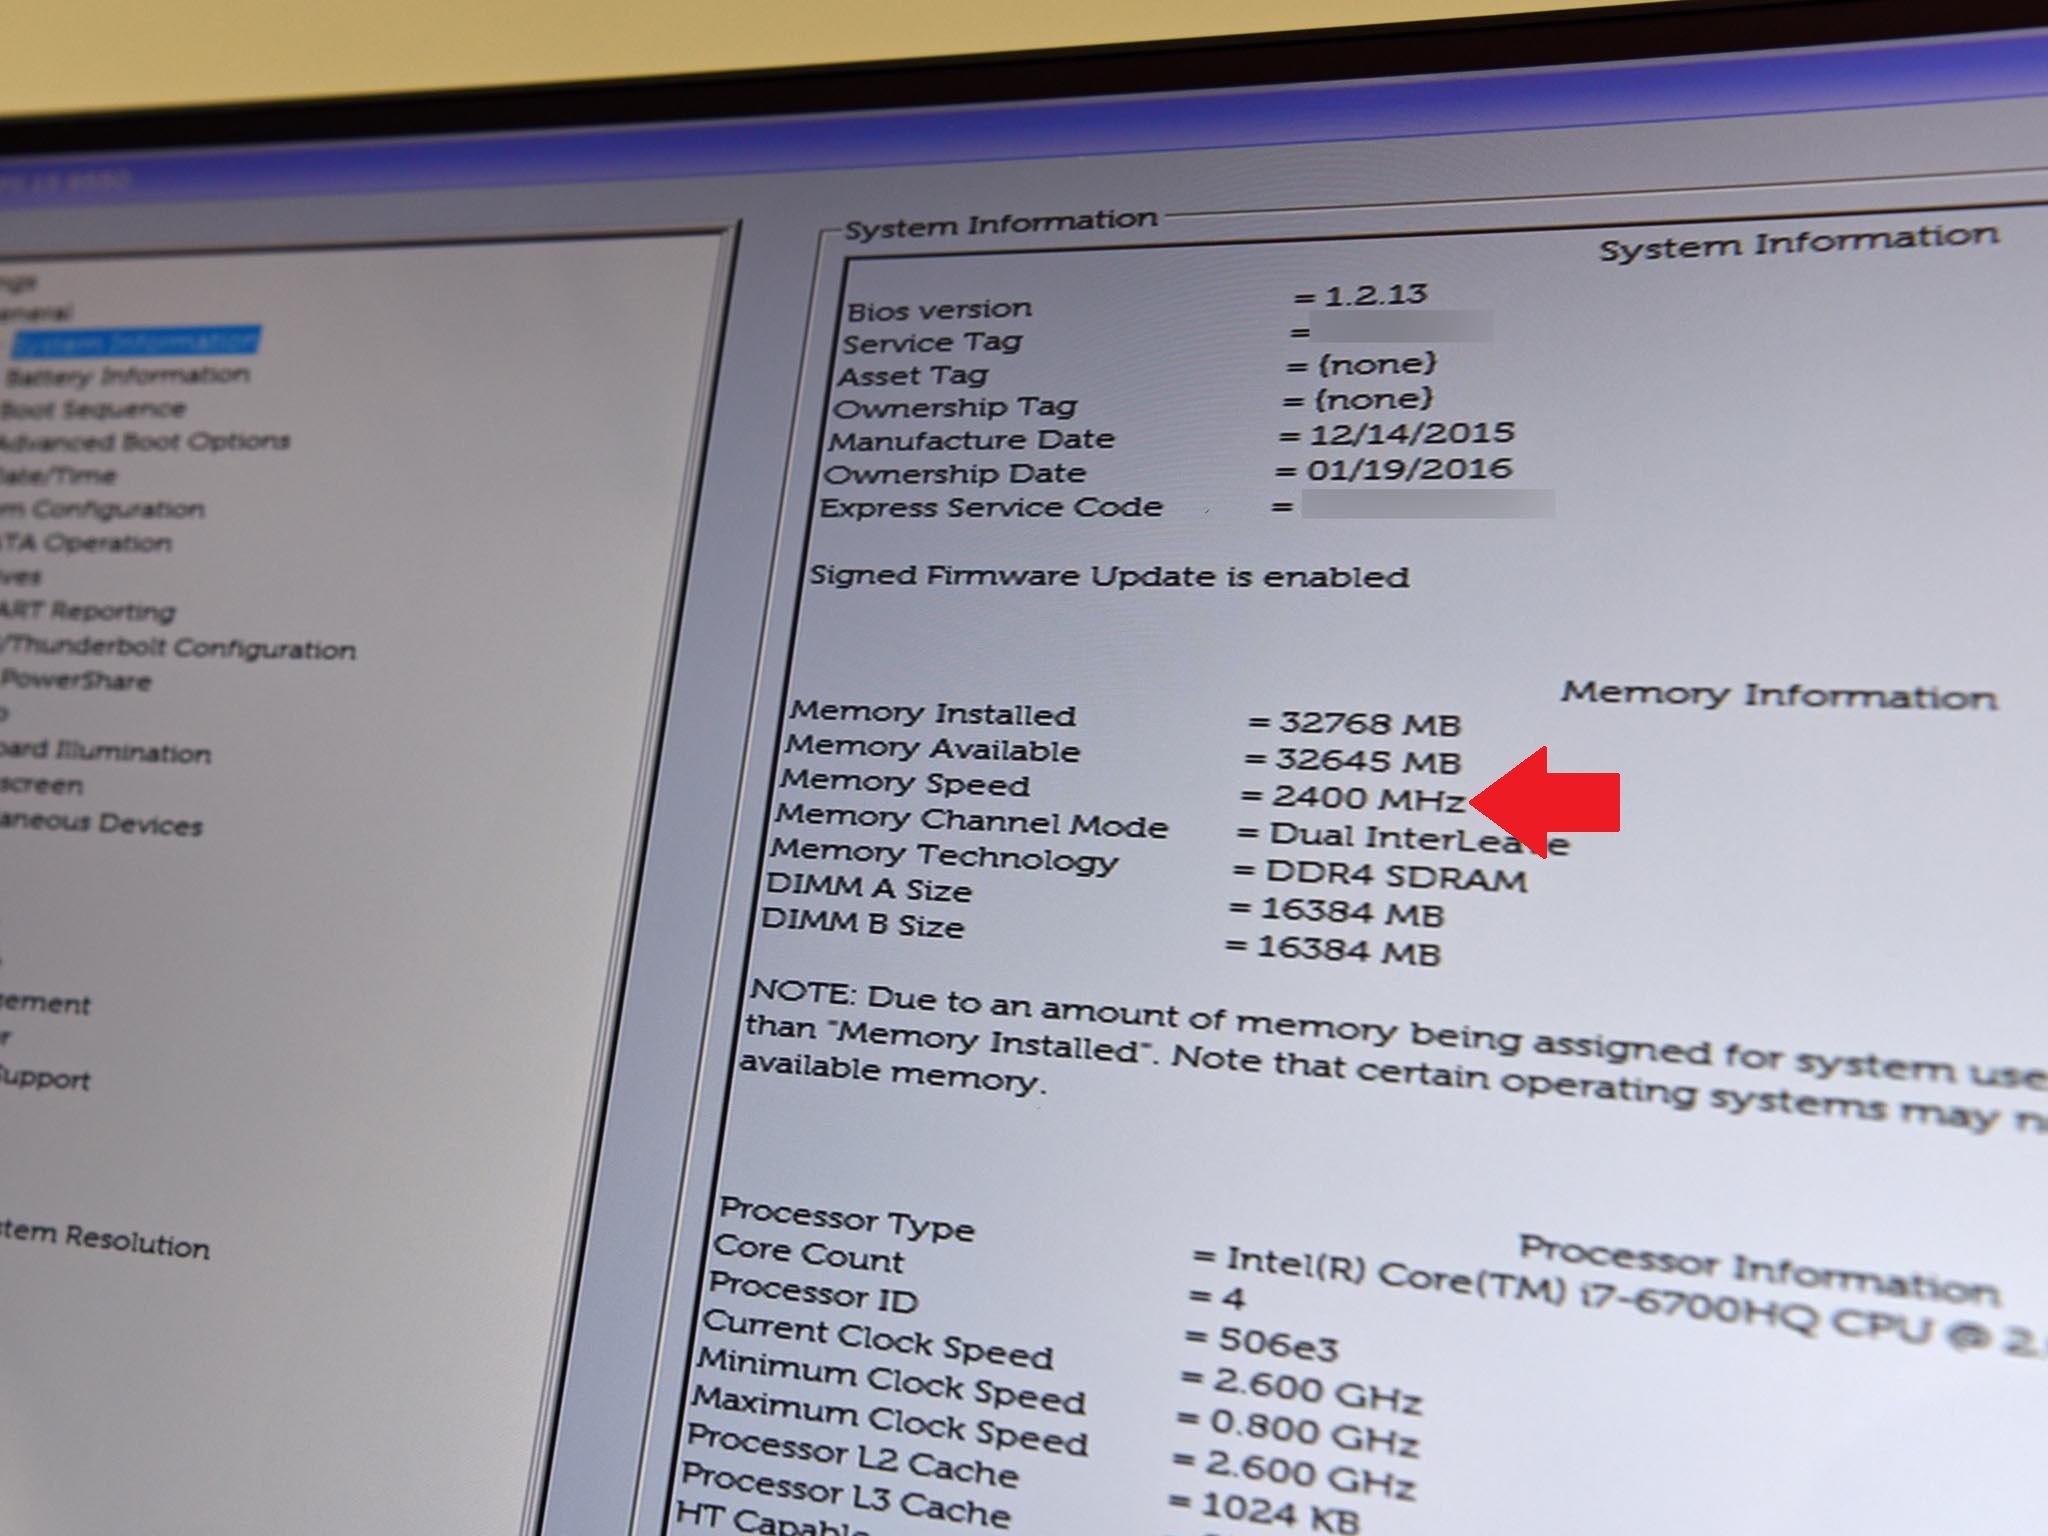
You should see 2400MHz (even if you bought 2800MHz) and the amount of RAM listed under System Information.
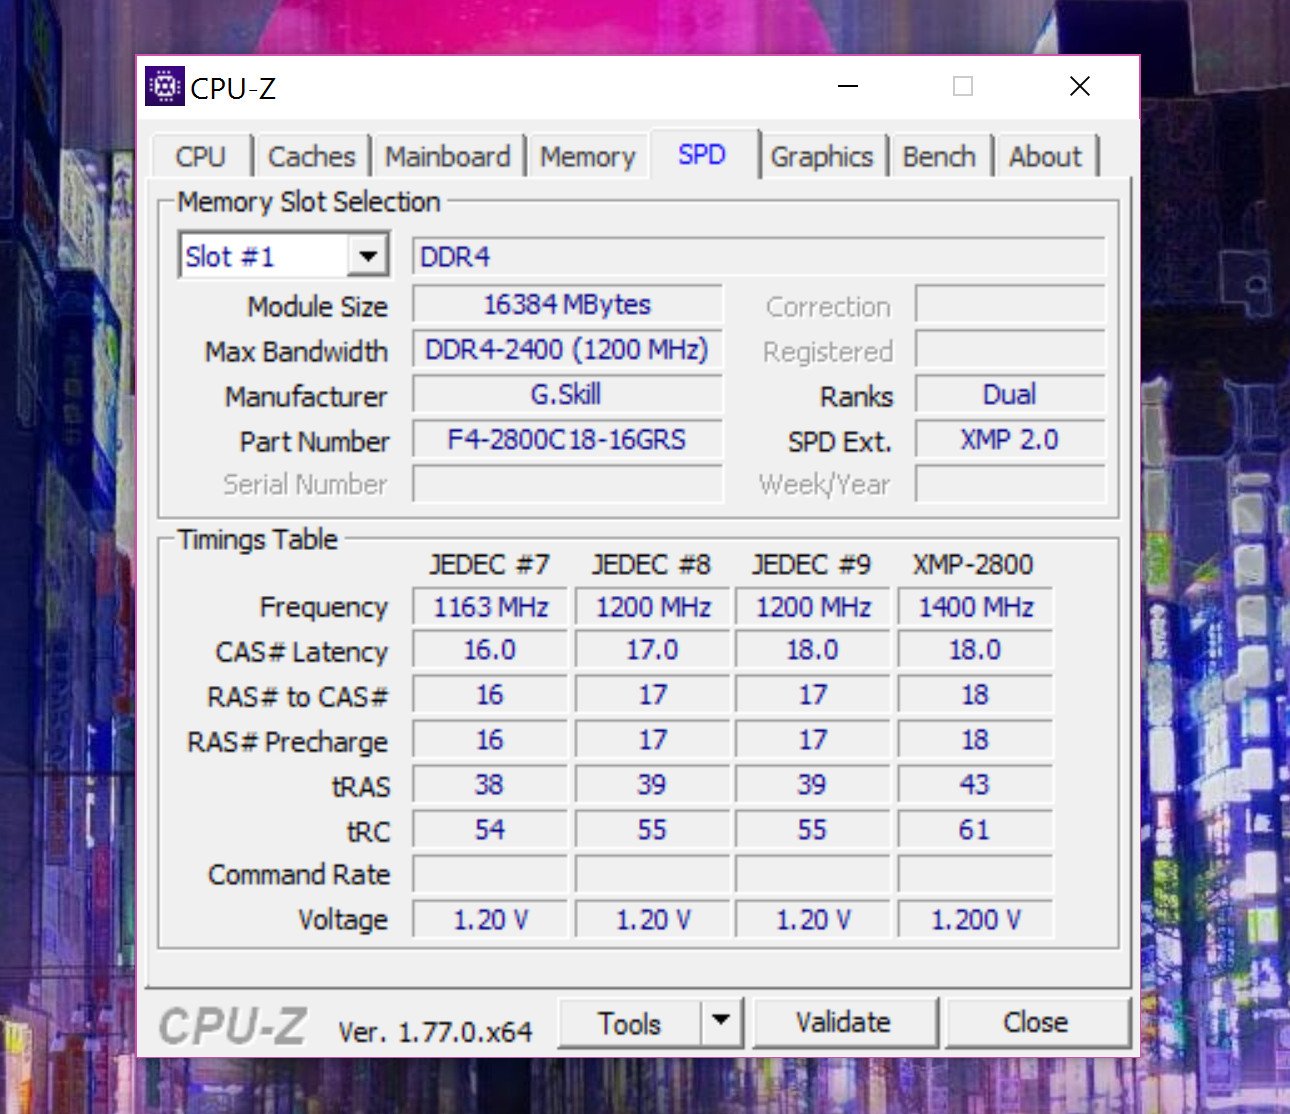
Alternatively, you can use the free app CPU-Z to verify even more details about your system's configuration.
Let me know in comments if you need 32GB of RAM in your laptop and why!
Updated December 1, 2017: We modified this post to make it clear that these instructions also apply to the Dell XPS 15 (9560).

Daniel Rubino is the Editor-in-chief of Windows Central. He is also the head reviewer, podcast co-host, and analyst. He has been covering Microsoft since 2007 when this site was called WMExperts (and later Windows Phone Central). His interests include Windows, laptops, next-gen computing, and wearable tech. He has reviewed laptops for over 10 years and is particularly fond of 2-in-1 convertibles, Arm64 processors, new form factors, and thin-and-light PCs. Before all this tech stuff, he worked on a Ph.D. in linguistics, performed polysomnographs in NYC, and was a motion-picture operator for 17 years.
