How to use Microsoft's Sway presentation program to tell a better story
Do you have a story to tell? Microsoft Sway is a versatile presentation program. Let Sway bring your story to life through beautiful, visual storytelling.

Microsoft Sway turns the information you want to share into a website that your viewers can to visit. Sway provides a visually appealing means to help get your message across while also providing a measure of interactivity for your audience. It's your personal story in their personal viewing experience.
Sway is beneficial for experienced and novice presenters alike. If you have a difficult time communicating your message, using Sway to provide additional ways to convey the details helps to ensure the story doesn't get lost. And you may find it easier to use than PowerPoint.
How to access Sway
Option No. 1
- Log into your Office 365 account.
- Click on the App Launcher.
- Select and click on Sway from the list of app tiles.
Option No. 2
- Navigate to https://sway.office.com/.
- Click on Sign in at the top right of the menu bar.
- Enter your company's email account, or a Microsoft account and password.
The Sway home page offers a simple interface. This makes sense because the company claims you can create a story in three minutes.
The main screen gives you several ways to let you begin capturing your story. The bar near the top gives you a few options:
- Create New — Allows you to create a Sway without any predefined setup.
- Start from a Topic — Populates cards with content provided through search results.
- Start from a document — Extracts information from files and adds it to cards for you.
Further down the page, Sway offers assistance by giving you a list of templates to start with, including newsletters, DIY project recaps, and student reports. Another section serves to inspire you by featuring existing Sways. To begin, let's look at starting a Sway from scratch.
Creating a 'Storyline'
All of the components of a Sway are given unique names, so it's helpful to know them to understand the process.
A "Storyline" is a place where you will compose your work. Each item created is applied to the Storyline, much like adding subcategories to a category. The content that is applied to the Storyline lives within Cards. These cards appear in consecutive order and house all items that appear in your story. In the edit screen, the Storyline section is on the right side, while card options are on the left by default. Keep in mind that the order of the cards can always be sorted based on your needs.
Get the Windows Central Newsletter
All the latest news, reviews, and guides for Windows and Xbox diehards.
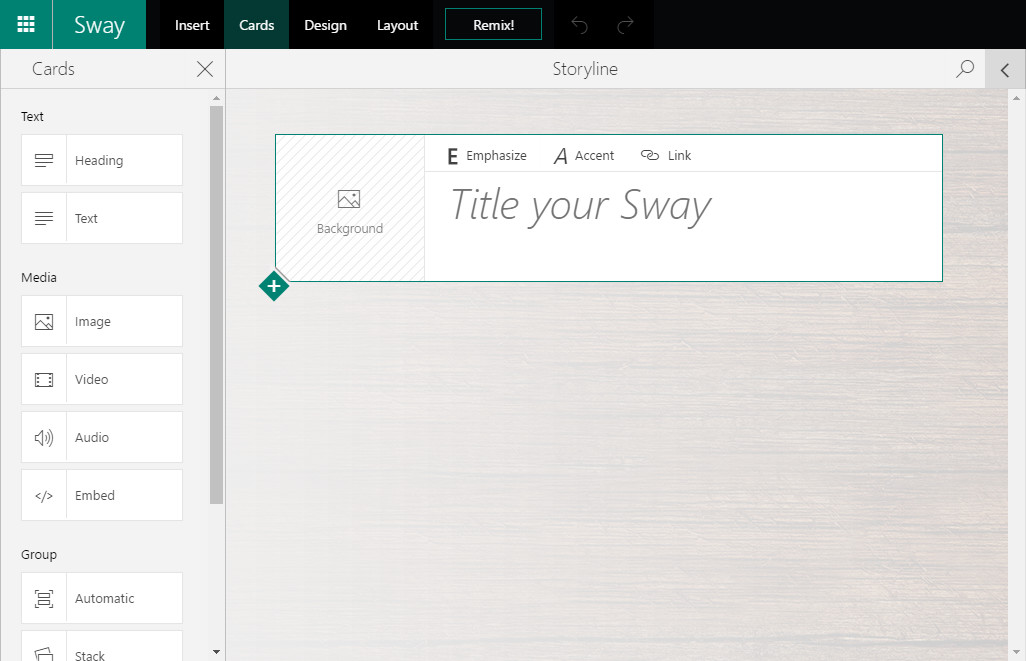
Create a title card
- Click Create new from the home page.
- On the automatically generated card, input a title in the Title your Sway field.
- Choose to bold or italicize the title or add a link. (optional)
- Click on Background to select a background image.
- Click on an image category displayed to the left of the storyline, or click on My Device or Onedrive for Business to upload your own image.
- You can also enter search terms in the search field to display image results from Bing. Click on an image and then click add to insert or click and drag the image onto the card.
- Click on the + icon at the bottom left corner of the card to complete working on it and begin another.
Create a content card
Below each card, Sway will display additional options for the new card, including:
- Heading — Creates another title card, used to indicate the beginning of sections. It can also give a header for a card containing content.
- Text — Creates a card to display information.
- Image — Allows you to insert an image into a card.
- Insert from my device — Enables images and other files to be uploaded.
Add text to a card
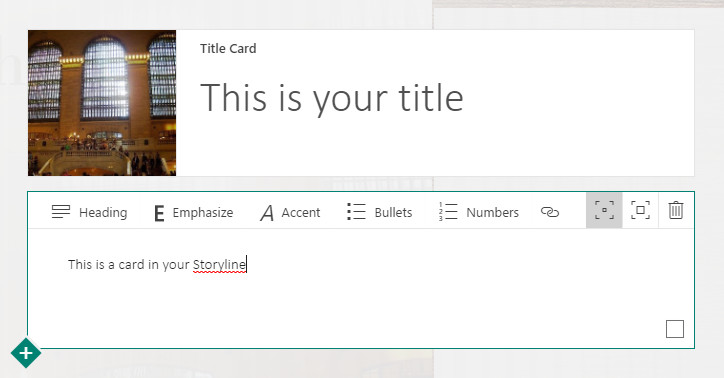
- From the previous card, click on the +.
- Click on text.
- Type in the text that you want to display or copy and paste from another source.
- Use the editing items in the toolbar above the text entry field to emphasize (bold), accent (italicize), convert to bulleted or numbered list, or add a link (either the actual link address or hyperlinked text displayed).
- Click on the + icon to create a new card.
For easy text input options, you can use the "Insert from my device" option to upload the text from a Word document into a new card. The document name is automatically added as a header or title, and the remaining text is added to the text card.
Adding media to a card
The process and results of adding media to a card are different than adding a background image. The impact that this media makes is also different. You can select the type of media you want to add from the Card column and then choose from Image, Video, Audio or Embed. Clicking on a media type generates a card in the Storyline.
To add an image, video or audio file
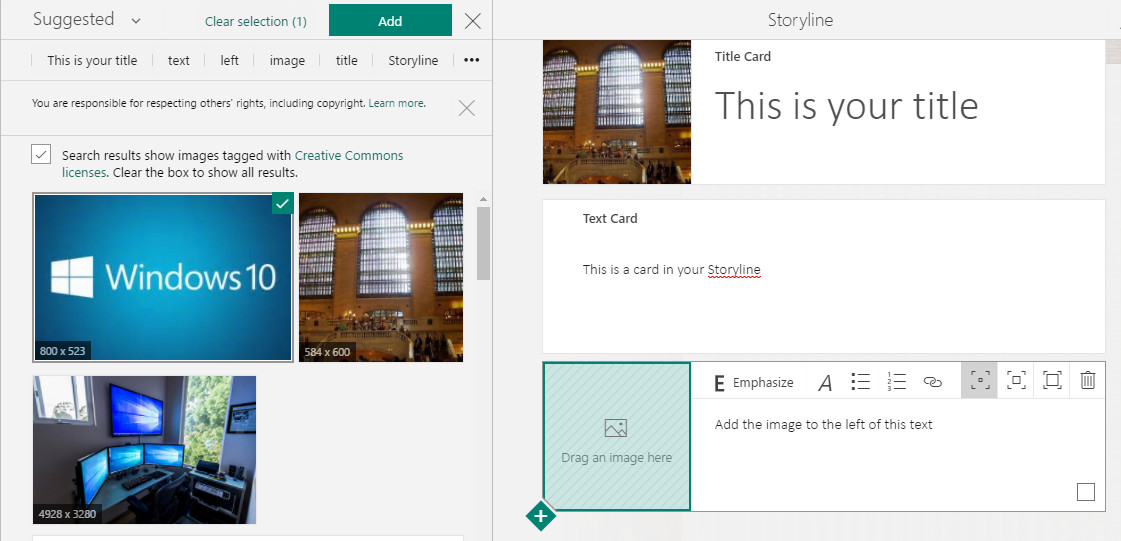
- Select Image, Video or Audio from the Card column.
- Add a media file by clicking on the Add field or click and drag the file to the Drag (media type) here field.
- Use the text entry field to the right of the Drag an image here field to enter in a caption.
Media cards can also be grouped together, allowing for multiple files to appear at the same time. By doing so, you can create a message with more impact, having video or music playing to compliment powerful imagery. By using the Group section in the Cards column, you can create various layouts, such as a slideshow, side-by-side comparisons or a grid view.
Embed content in Sway
You may choose to embed many different files, charts or social media posts directly into your Storyline. If you decide to embed a URL into your Sway, keep in mind that it will only work if you use the https:// secure prefix. Sway allows content to be embedded across a variety of apps and services from Microsoft, Google and other companies. An example of this is using Microsoft Forms to embed a form into your Sway. By doing so, your audience can partake in a survey, leave feedback or even take a quiz.
It's also possible to embed a Sway within a Sway, providing a means to share more in-depth content in a contained space.
How to embed a Sway within a Sway

- Locate and open the Sway to be embedded.
- Click the Share icon found in the navigation bar at the top.
- Click on Get embed code.
- Copy the generated code found in the displayed field.
- Navigate to the Sway that required the embedded content.
- Click on Cards.
- Choose Embed from the Media section in the left column.
- Paste the embed code in the card that appeared in your Storyline.
How to embed content
- From the source, copy the embed code for the necessary content.
- Head back to Sway and click on Cards.
- In the media section, click on Embed.
- Paste the code into the new card.
Preview and share
Once you have captured the story that you want to tell, you can choose to preview it as well as share it with others. Both of these options can be found in the top navigation bar.
How to preview your Sway
- Click on Play to begin the preview session.
- Click on the navigation icon at the bottom-right corner of the screen to move to a different section.
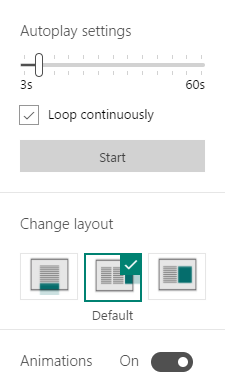
- Click on the Settings icon in the top-right menu tray to manage autoplay settings.
- Use the speed bar to alter the transition speed between three and 60 seconds.
- Choose to have the Sway continuously loop.
- Choose from three different transition type between sections.
While the Sway is in presentation mode, the pause and play, stop and settings icons are displayed on the bottom-right corner, allowing viewers to view the Sway how they see fit. An edit icon at the top-right corner returns you to the Storyline view, in case you need to make any adjustments.
To share your Sway
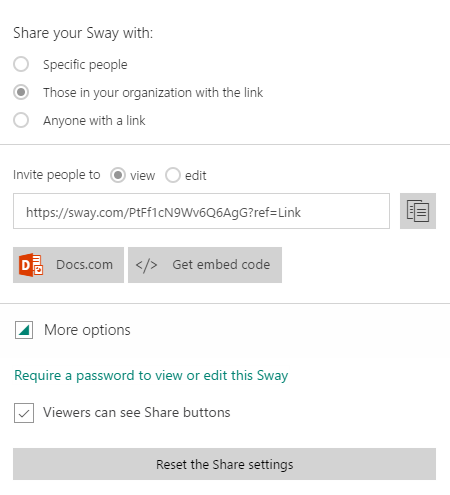
- Click on the Share icon on the top right corner of the navigation bar in Storyline mode.
- In the dropdown, choose who to share your Sway with.
- Specific people — Allows you to enter names or email address for a targeted audience.
- Those in your organization with the link — Generates a web link that can be copied, embedded or published on Docs.com.
- Anyone with a link — Allows the link to be published, embedded or copied, but also provides quick links to Facebook, Twitter or Linkedin.
- Choose if you wish to invite people to view only or permit them to edit as well.
- Choose if viewers are required to enter a password to view the Sway.
- Choose if viewers can see Share buttons to further spread the Sway.
You now have the basics to get your story across to your audience. Sway is a creative way to do it and could allow you to make a lasting impression. It's not just about the information you share, after all, it's also how you share it.
Have you used Sway before? Did it help tell your story? Let us know in the comments
You can also visit our Office 101 help hub for more related articles.
- Microsoft Office 101: Help, how-tos and tutorials

