How to view malware history in Microsoft Defender Antivirus on Windows 10
You can always view the Microsoft Defender Antivirus protection history on Windows 10, and here's how to complete the task using Windows Security and PowerShell.
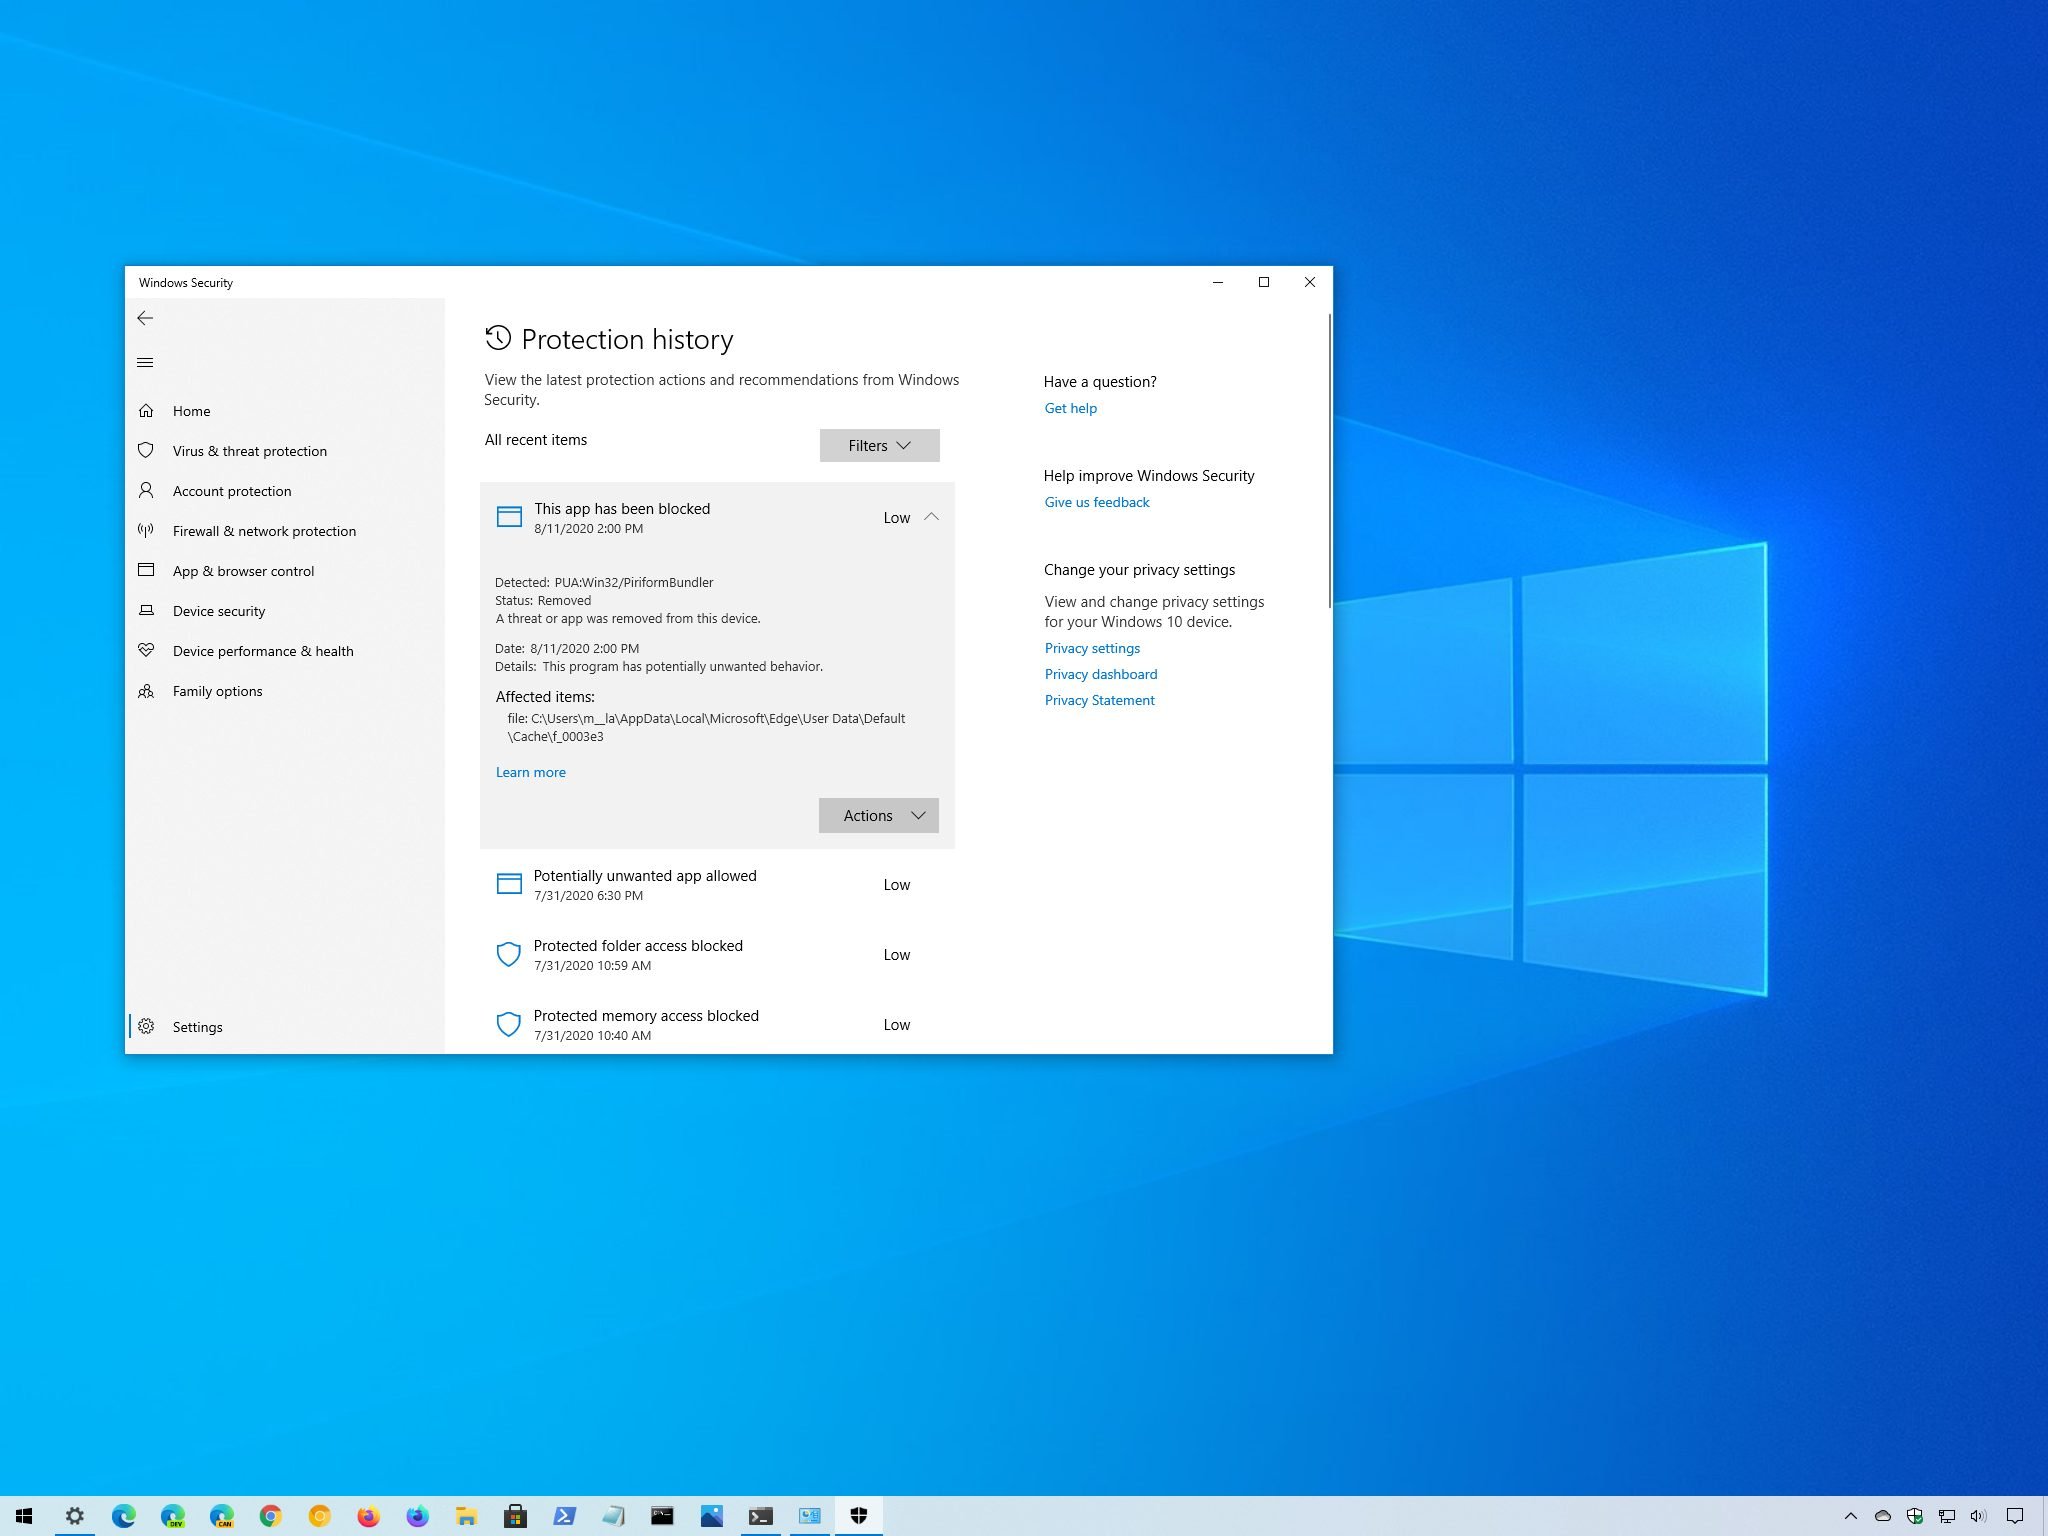
Microsoft Defender Antivirus is one of the best antivirus for Windows 10, which offers real-time protection against viruses, spyware, ransomware, and many other forms of malware. Although the security feature works in the background automatically and usually notifies you of any suspicious or unwanted activities, it also provides a protection history report to help you stay informed and take action on the device security as necessary.
The protection history is part of the Windows Security app, and it shows a list of recent malware detections with information that allows you to determine if the threat has been cleaned, removed, or quarantine until an update arrives to Windows 10 to resolve the problem.
If you're using the anti-ransomware feature, the history will also show blocked actions, which you can review and allow if the default action was a false-positive.
In this Windows 10 guide, we'll walk you through the easy steps to view the malware detection history by Microsoft Defender Antivirus using the Windows Security app and PowerShell commands.
- How to view malware protection history using Windows Security
- How to view malware protection history using PowerShell
How to view malware protection history using Windows Security
To see all the malware detections on your device, use these steps:
- Open Start.
- Search for Windows Security and click the top result to open the app.
- Click on Virus & threat protection.
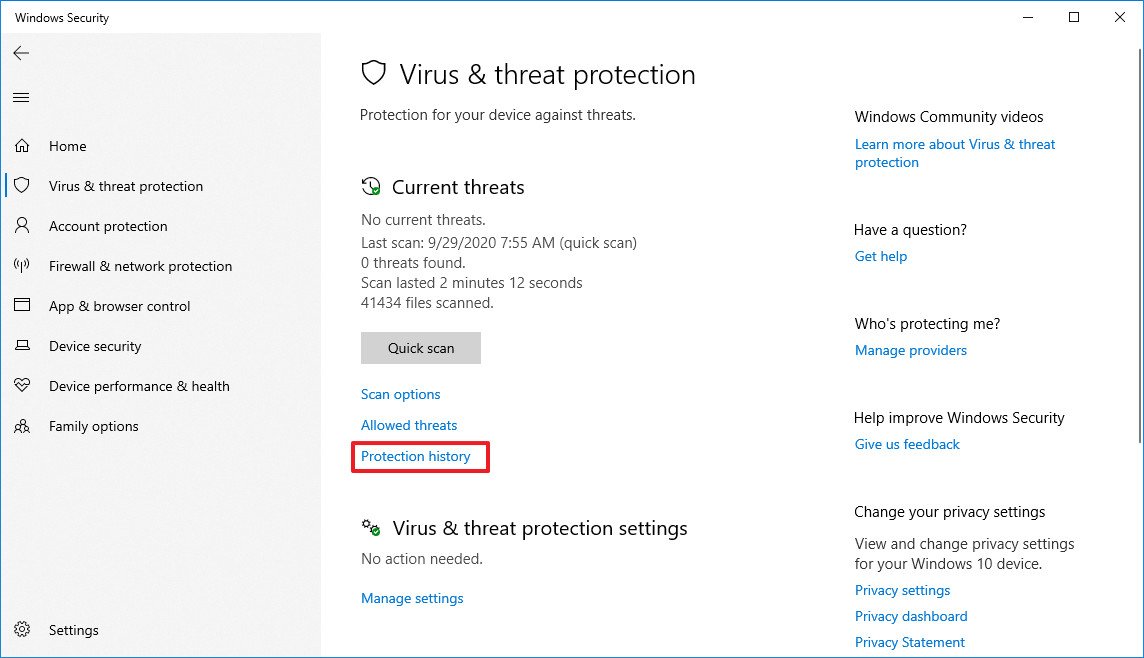
- Under the "Current threats" section, click the Protection history option.
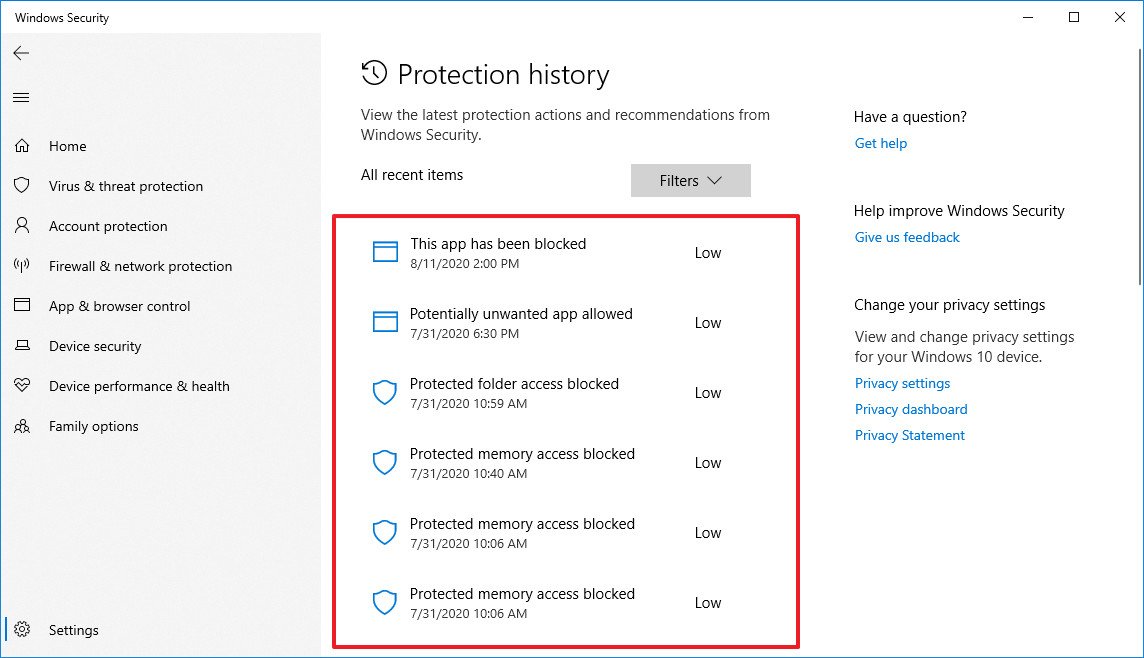
- Confirm the list of threats found by Microsoft Defender Antivirus.Quick note: If you don't see any items listed, you can breathe a little easier since it indicates that Microsoft Defender hasn't detected any malware. If you want to make entirely sure that the device isn't infected, you can always run a full scan with these steps.
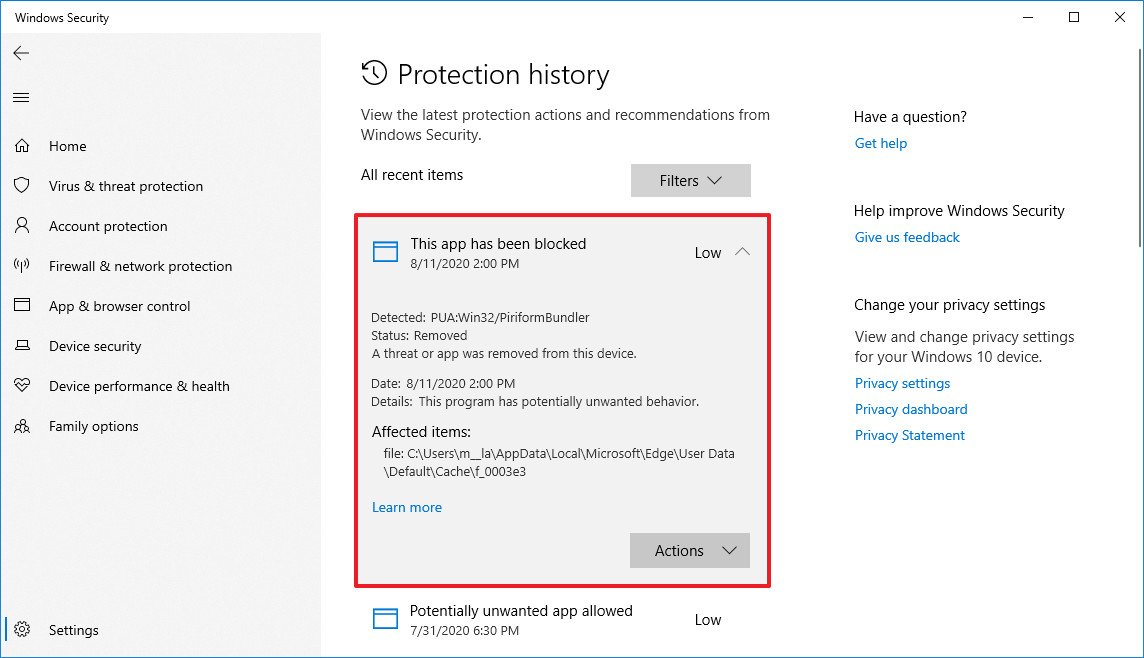
- Select the item to view more information, including malware type, severity level, detection date, category, and information about the item's location.
- (Optional) If the list includes various items, you can also use the Filters option in the top-right corner to filter the view by:
- Recommendations.
- Quarantined items.
- Cleaned items.
- Blocked actions (Blocked folder access, Blocked items, and Rule-based block).
- Severity (Severe, High, Moderate, and Low).
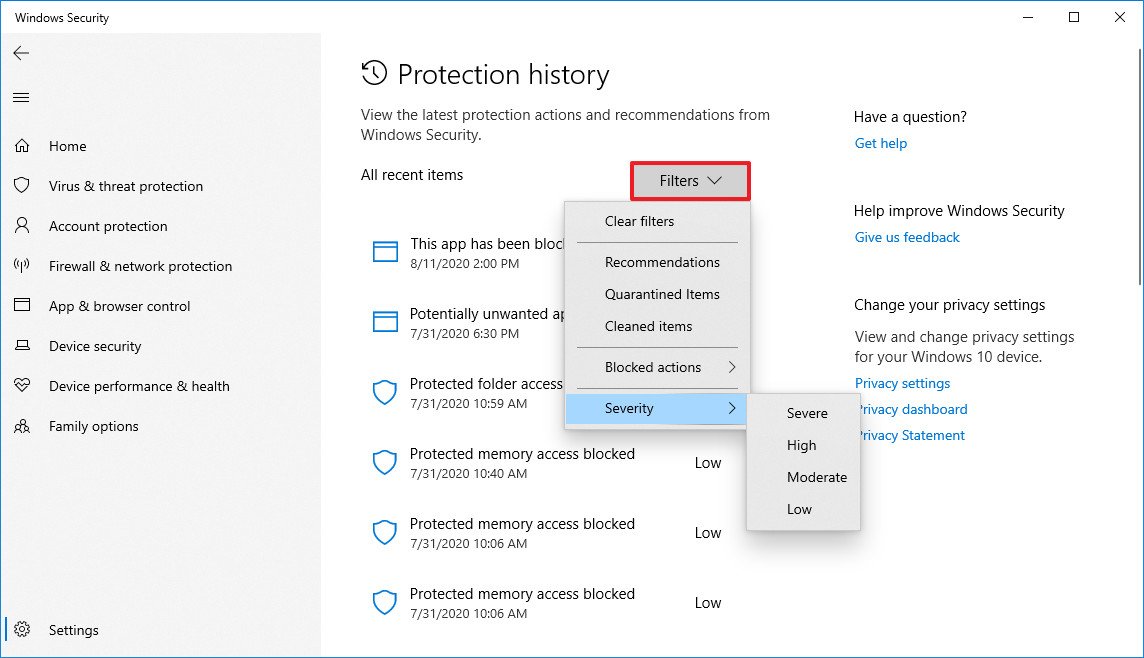
Once you complete the steps, you'll have a better understanding of your device's current security.
How to view malware protection history using PowerShell
Alternatively, you can also get a history list of the malware that Microsoft Defender Antivirus has detected with PowerShell commands.
Get the Windows Central Newsletter
All the latest news, reviews, and guides for Windows and Xbox diehards.
To query a list of detected threats with PowerShell, use these steps:
- Open Start.
- Search for PowerShell, right-click the top result, and select the Run as administrator option.
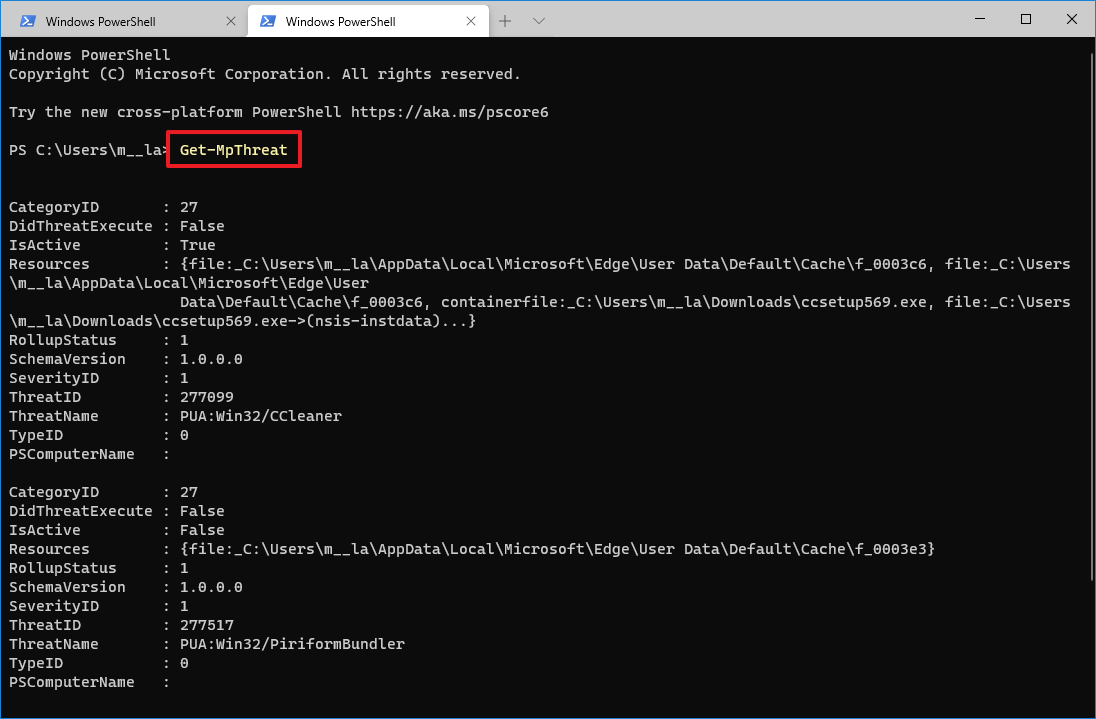
- Type the following command to view a history of threats and press Enter:
Get-MpThreat - See the list of threats found on your computer with information like threat execution, active status, and infected file location.
- (Optional) Type the following command to view a list of active and pass malware detections and press Enter:
Get-MpThreatDetection - See the list of malware detections with information like detection date, location of the infected file, action, and more
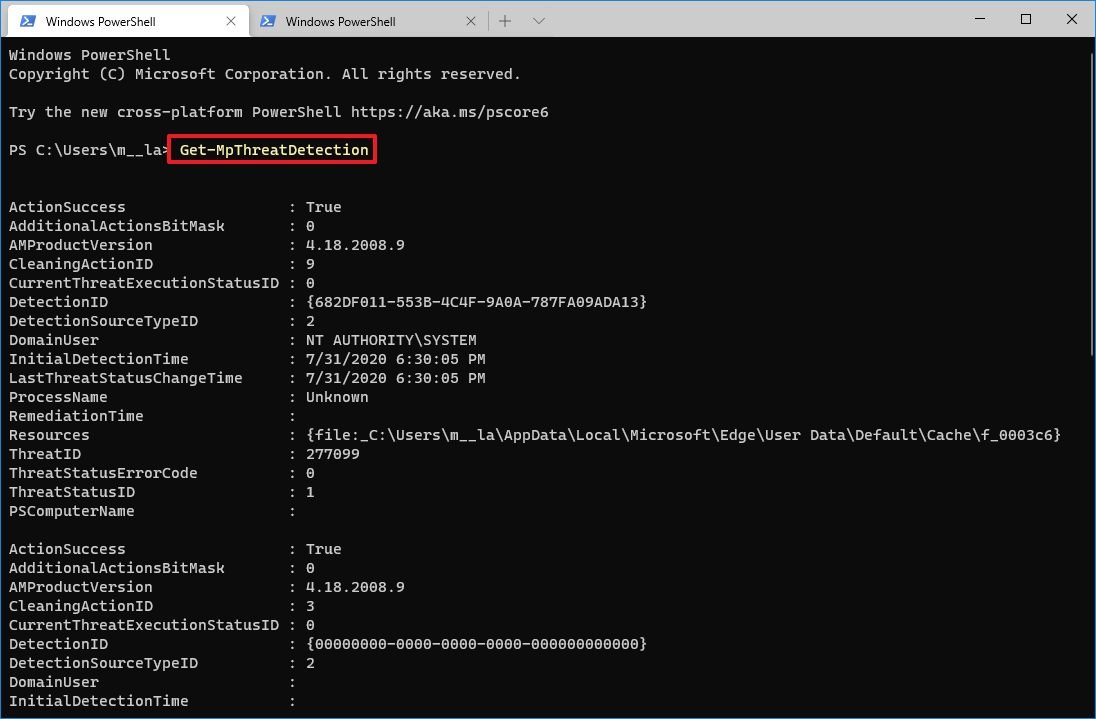
After you complete the steps, you'll be able to determine the malware that Microsoft Defender was able to detect on Windows 10.
In the above steps, we're mentioning to commands, and if you're wondering the difference between the two. The
Get-MpThreatcommand is meant to show a history of threats, while the
Get-MpThreatDetectioncommand can list active and past malware detections by the antivirus.
You can learn more ways to manage the antivirus on Windows 10 using PowerShell with this comprehensive guide.
Mauro Huculak has been a Windows How-To Expert contributor for WindowsCentral.com for nearly a decade and has over 15 years of experience writing comprehensive guides. He also has an IT background and has achieved different professional certifications from Microsoft, Cisco, VMware, and CompTIA. He has been recognized as a Microsoft MVP for many years.

