How to use themes on the Windows 10 Creators Update
You can now customize Windows themes using the Settings app, and get new ones from the Store. Here's how to use the new features in the Windows 10 Creators Update.
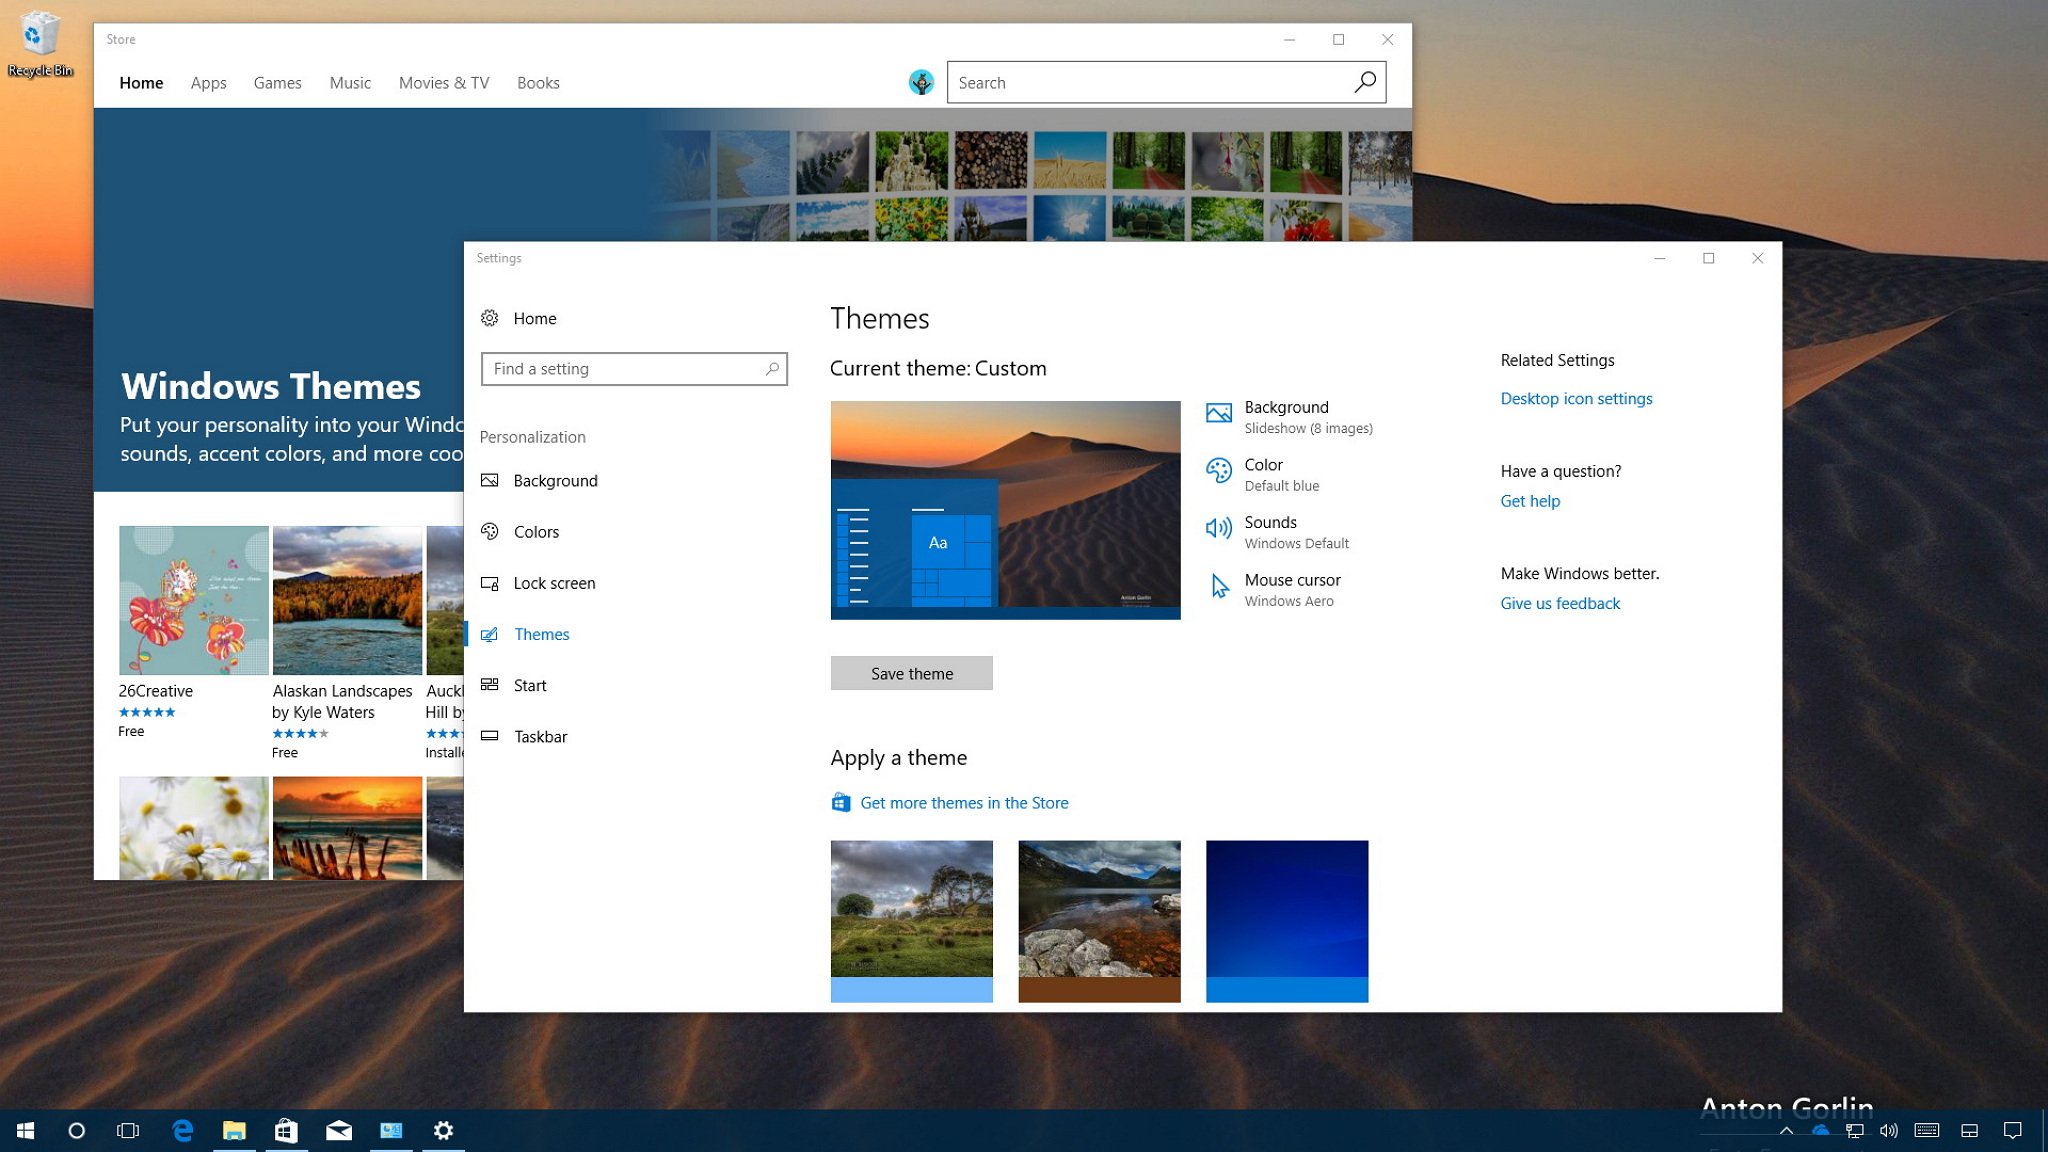
The ability to use themes to personalize your desktop with custom background images and color accents is nothing new on Windows 10. However, in previous versions, you needed to use Control Panel to access the theme options, and use workarounds if you wanted to use a custom accent color.
Starting with the Windows 10 Creators Update, the theme options are available in the Settings app, and you can now get new themes from the Windows Store. In addition, this new version of the OS includes an option to set a custom accent color, instead of just having to pick from a limited list of predefined colors.
In this Windows 10 guide, we'll walk you through the steps to personalize your experience using the new themes and color options included in the Creators Update.
How to use themes on Windows 10
While Settings has included a Themes page for a long time, it was not until the Creators Update that Windows 10 migrated the options from Control Panel to Settings.
Changing themes
To change a theme on Windows 10, do the following:
- Open Settings.
- Click on Personalization.
- Click on Themes.
- Under "Apply a theme," click the one you want to apply to your desktop.
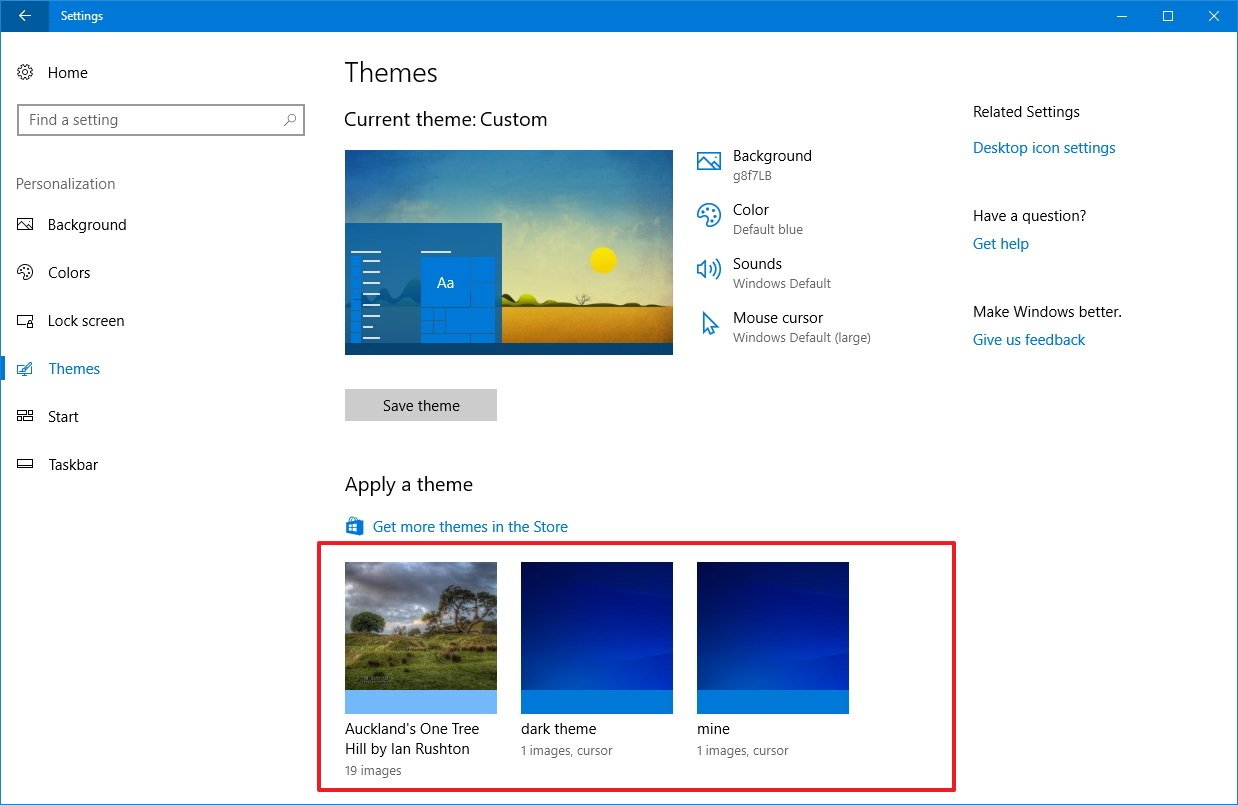
If you're signed in with your Microsoft account, and you have the sync options enable, the theme you set on your computer will sync across devices.
Getting new themes
In the past, themes only used to be available for download on the web, but now you can also get them from the Store.
Get the Windows Central Newsletter
All the latest news, reviews, and guides for Windows and Xbox diehards.
To get new themes from the Store, do the following:
- Open Settings.
- Click on Personalization.
- Click on Themes.
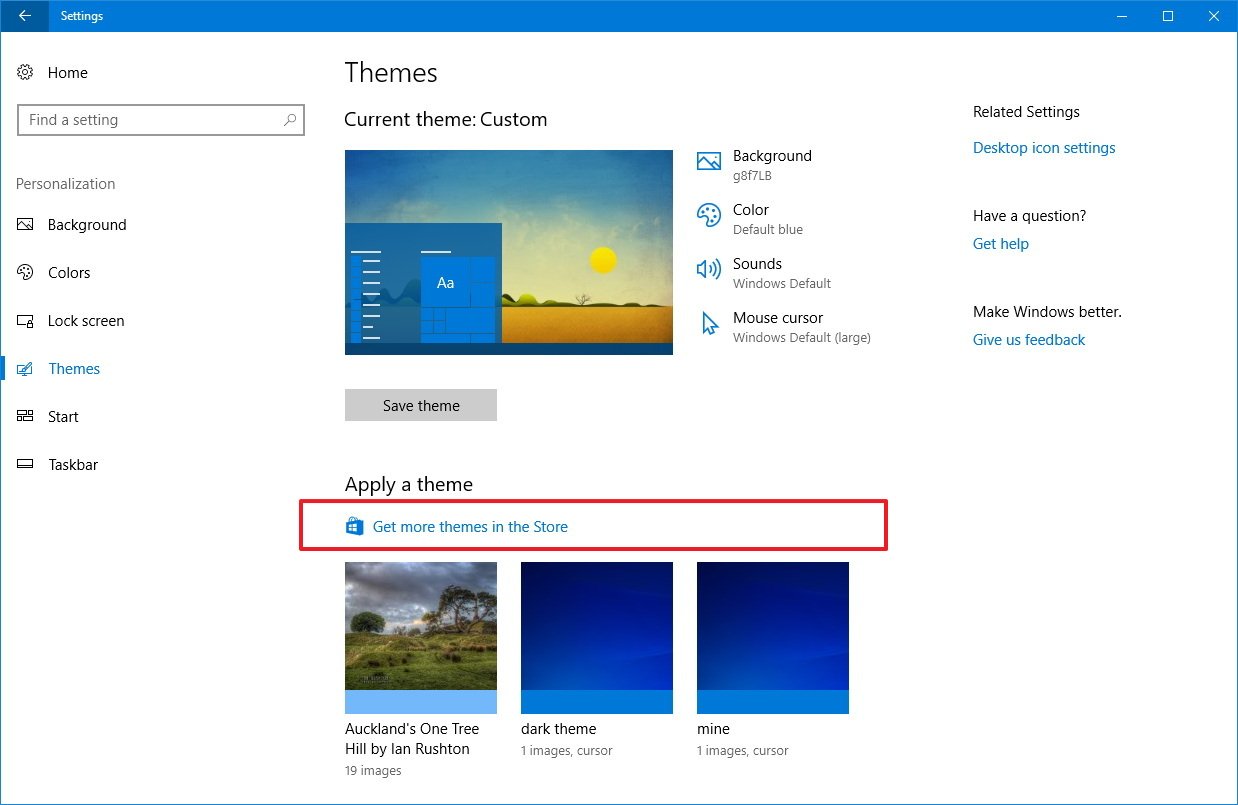
- Under "Apply a theme," click the Get more themes in the Store link.
- Select the theme you want.
- Click the Get button to download.
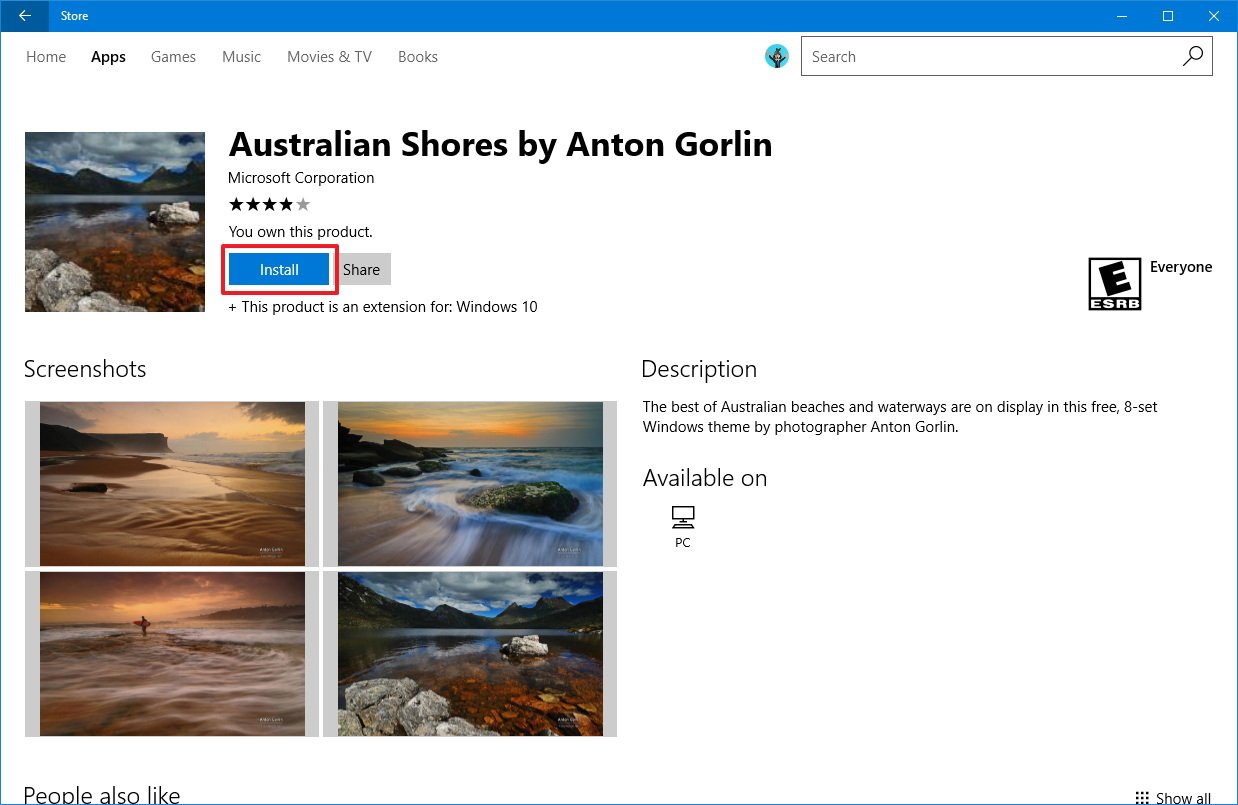
- Click the Launch button to open the Settings app.

- Under "Apply a theme," click the name of the theme you just installed to apply it.
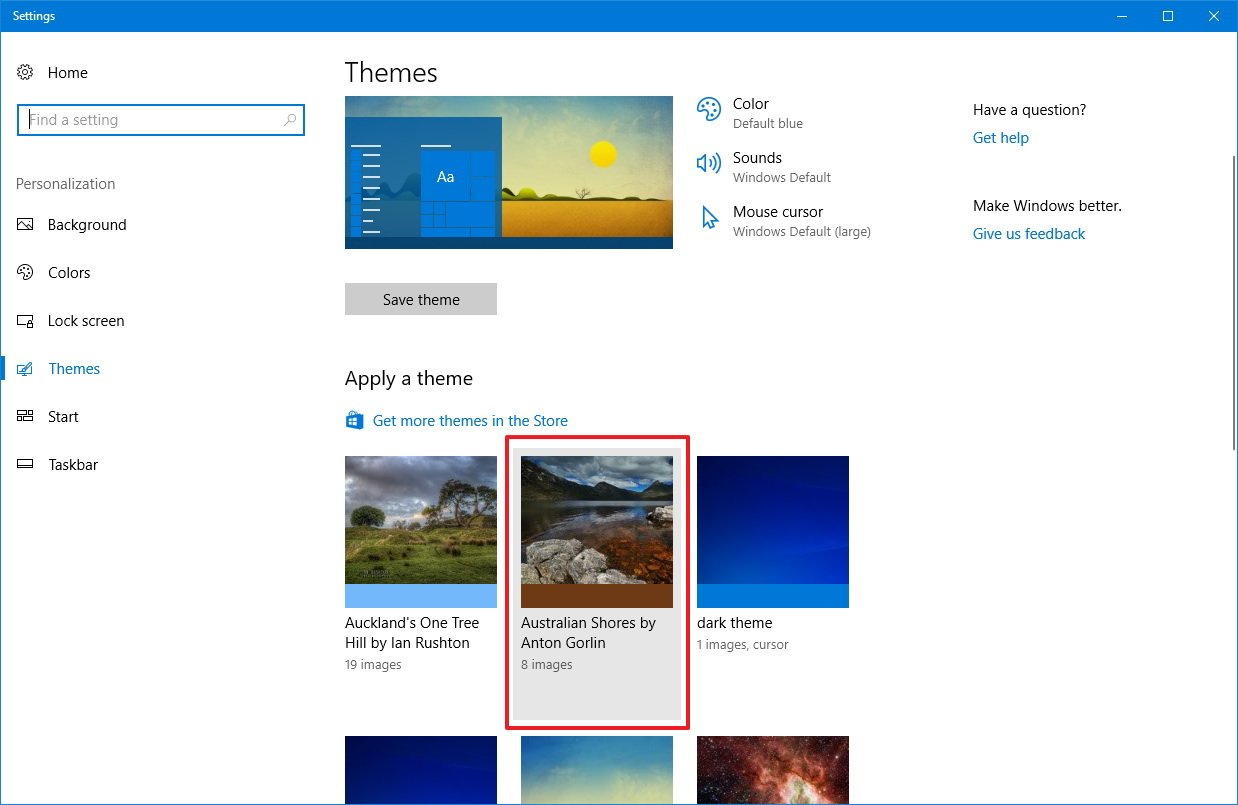
While you can get a lot of themes for free, in the future the Windows Store may also offer paid themes.
Customizing themes
You don't have to settle for the default settings. You can always customize the look and feel of each theme you apply on Windows 10.
To customize your theme settings, do the following:
- Open Settings.
- Click on Personalization.
- Click on Themes.
In the new page, you'll find information about the theme, and next to the preview, you'll see a number of customization options, including background, color, sounds, and mouse cursor.
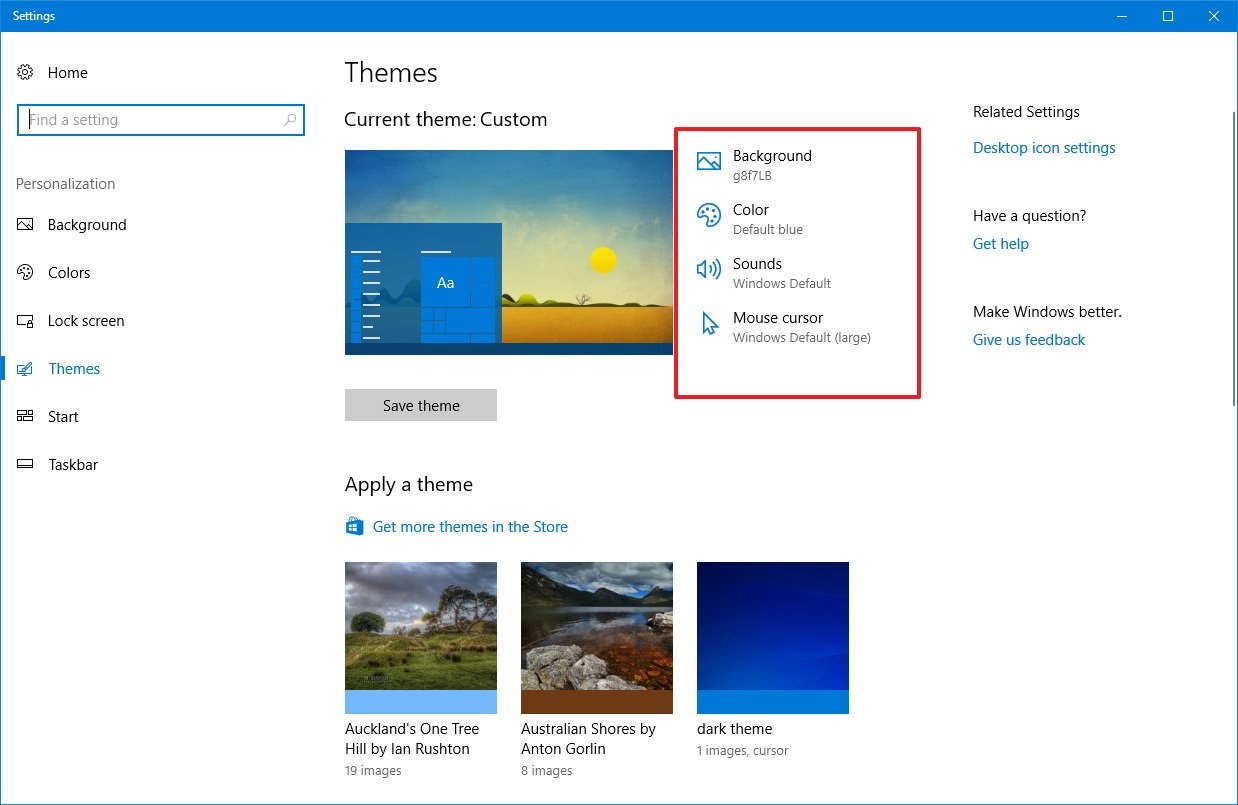
Background
Accessing the Background options, you can use the Change picture every drop-down menu to adjust the frequency that wallpapers should rotate, and you can turn on the Shuffle toggle switch if you don't want to see images in order.
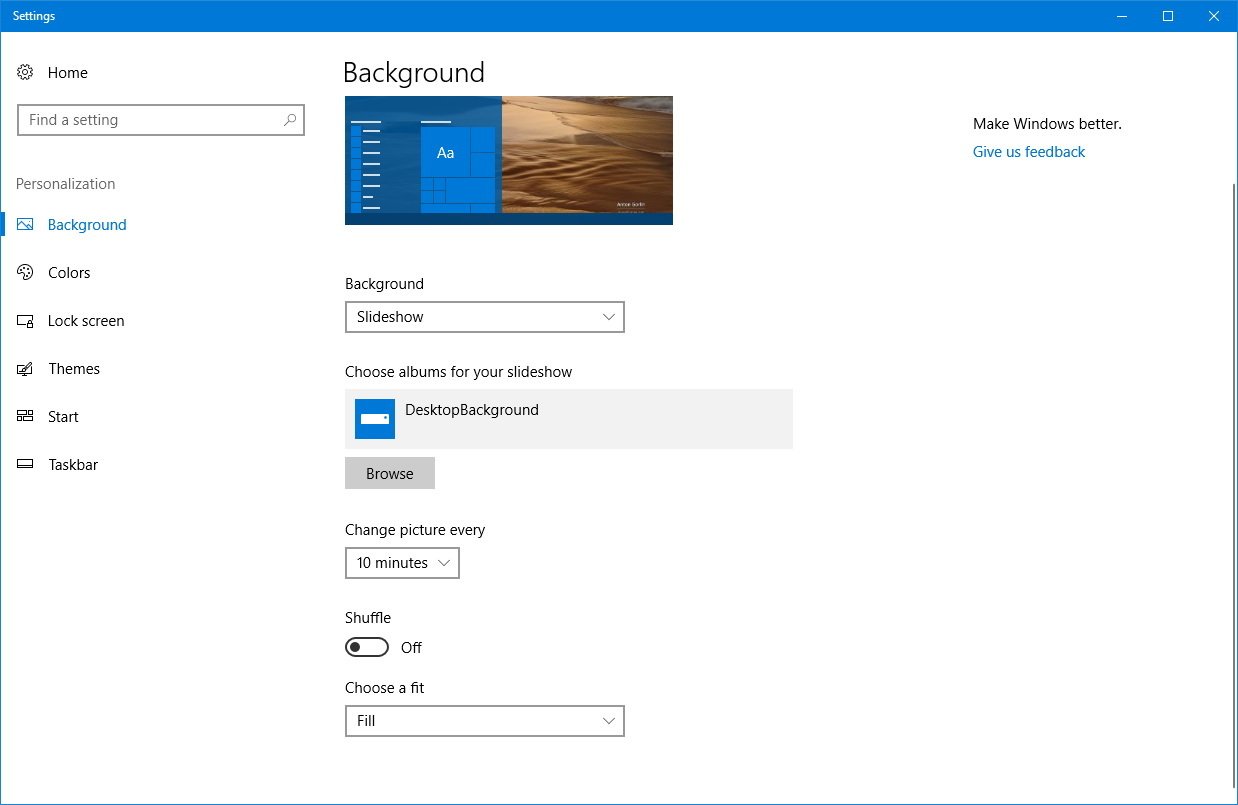
If more image adjustments are needed, the Choose a fit drop-down menu offers a number of options (Fill, Fit, Stretch, Tile, Center, and Span) to select the perfect fit for your background image.
Colors
Themes you install on your device will override your current accent color. If you'd like to change the color accent, or you want to revert to your previous color, click the Colors link.
If you want to go back to your previous color, the Settings app always remembers the last five colors you used. Under "Recent colors," select the color you were using before applying the theme.
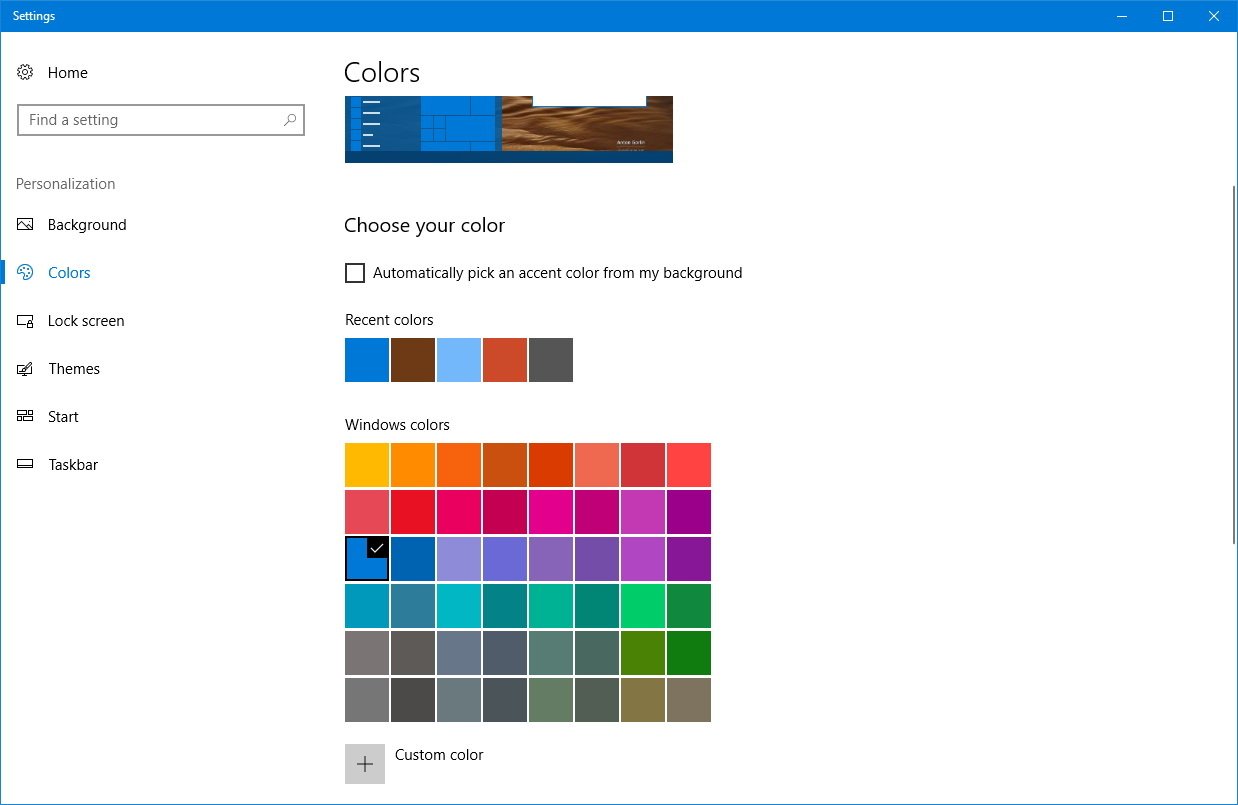
Additionally, some themes will also change colors as images rotate. If you want to stop this behavior, under "Choose your color," you can turn off the Automatically pick an accent color for my background option.
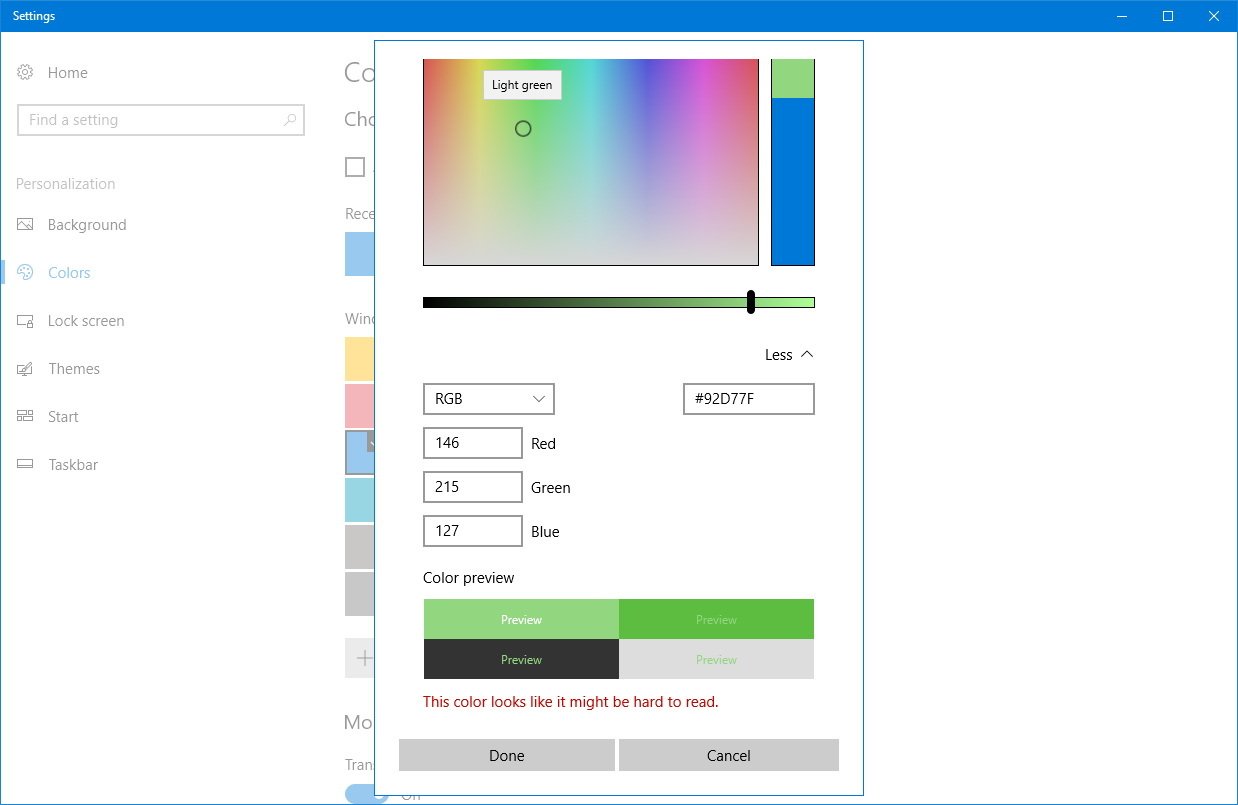
Starting with the Creators Update, it's also possible to set a custom color accent. Just click the Custom color button to pick any color you want.
When selecting a new color, you'll see a live preview that also allows you to see whether the color will be hard to read, or if it's not supported.
Clicking on More gives you the ability to enter specific colors using RGB, HSV, or hexadecimal color annotation.
After finding the color you want, just click Done to complete the task.
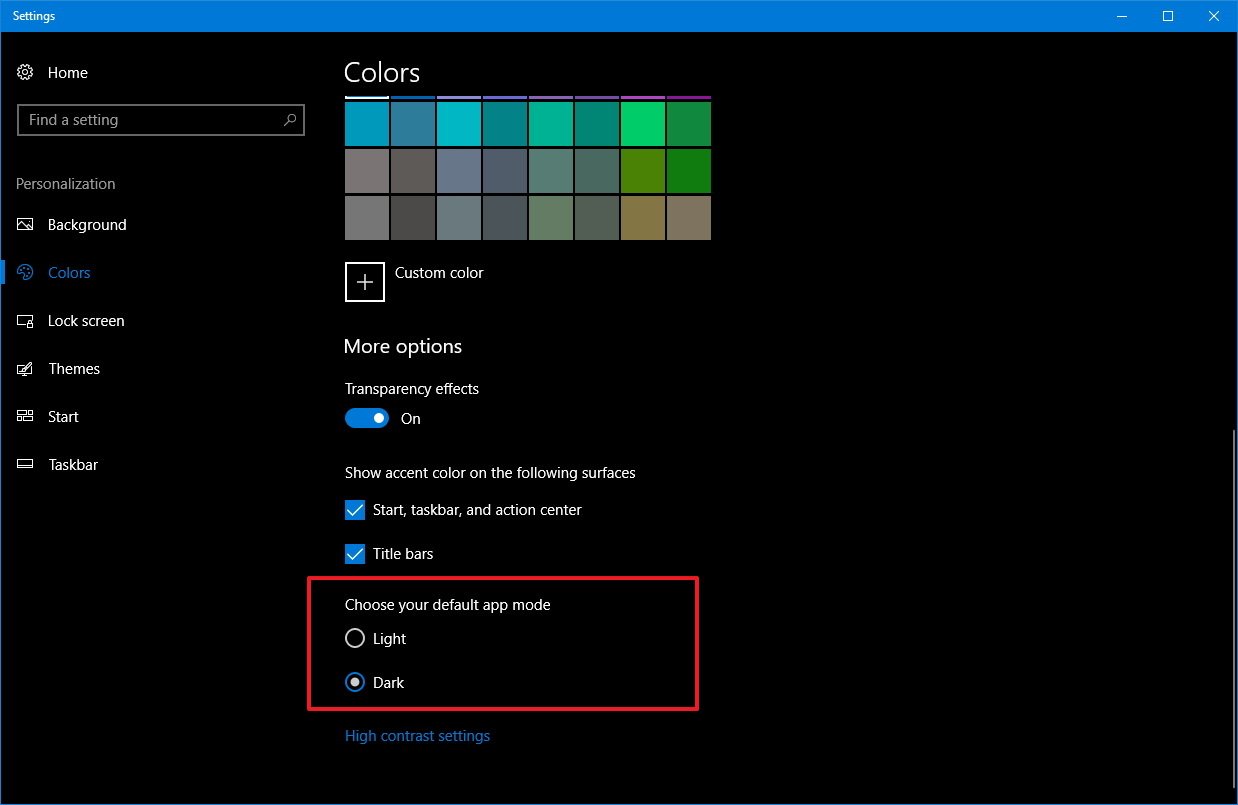
You can also scroll down the settings page to find the option to switch between the light and dark color modes, but note that this option won't be preserved on themes that you save for sharing.
Sound
The Themes page now links to the Sounds settings on Control Panel. If your theme features custom sound effects, you can click the Sounds button to change the sound scheme to Windows Default.
You may also want to read our guide to learn more about customizing the mouse experience on Windows 10.
Saving and sharing themes
On Windows 10, it's possible to save your current background and color settings as a custom theme.
- Open Settings.
- Click on Personalization.
- Click on Themes.
- Click the Save theme button.
- Enter a descriptive name.
- Click Save.
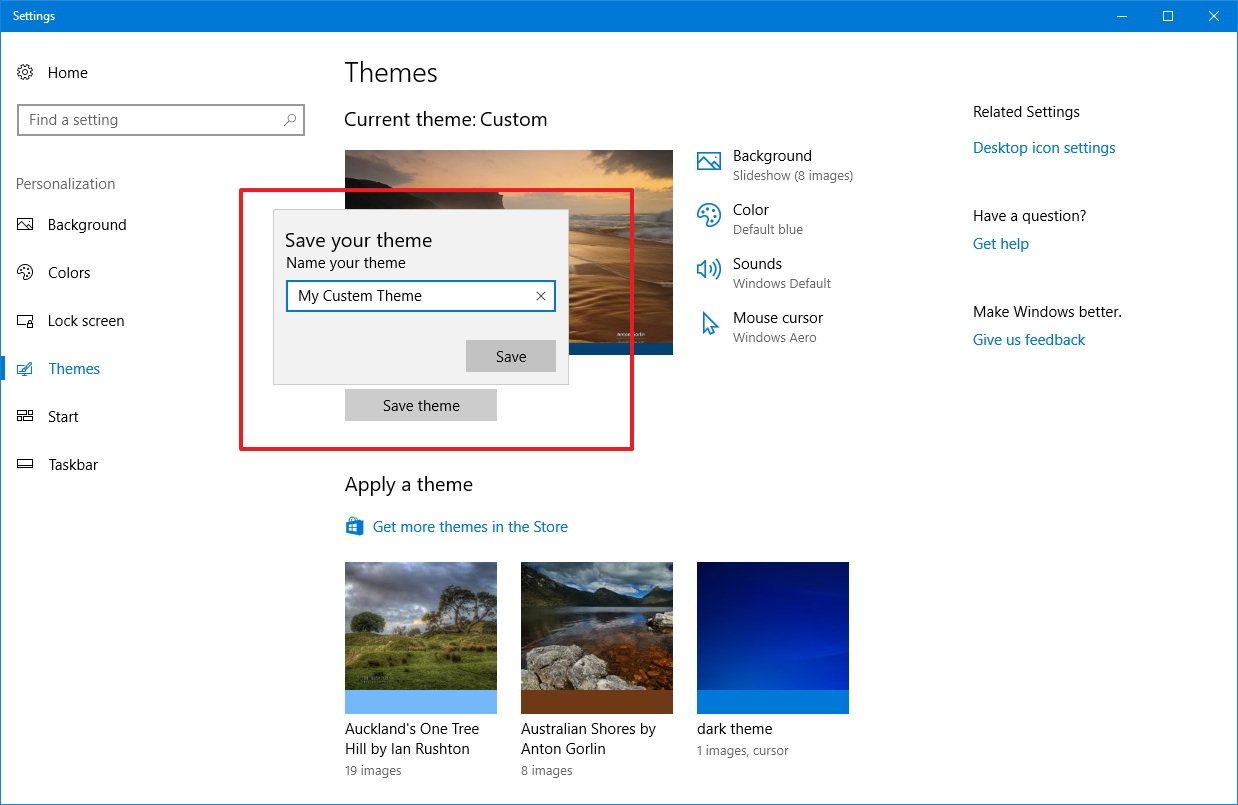
Once you've completed these steps, the new theme will be listed under the "Apply a theme" list.
If you're displaying a particular collection of photos from a trip or party, it's also possible to create a custom theme package for sharing.
- While in the Theme page, right-click your custom theme, and select the Save theme for sharing option.Quick Tip: The save option is only available for the current theme you're using. If you're trying to save a theme you downloaded from the Store, you first need to save it normally, and then the Save theme for sharing option will be available.
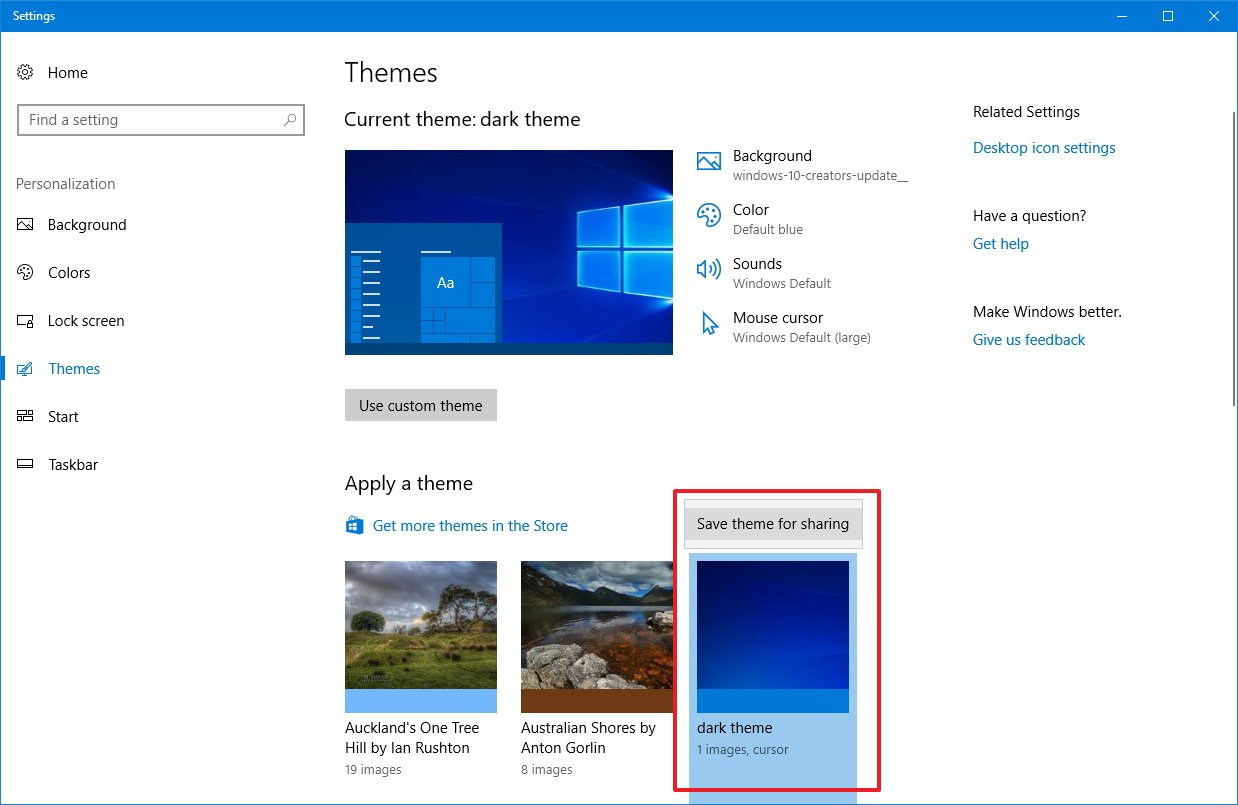
- Browse to a location you want to save the package.
- Specify the file name.
- Click Save.
After completing the steps, you'll end up with a .deskthemepack file, which you can share with other people via email or OneDrive, or you can take it to another computer and double-click the file to apply your custom theme.
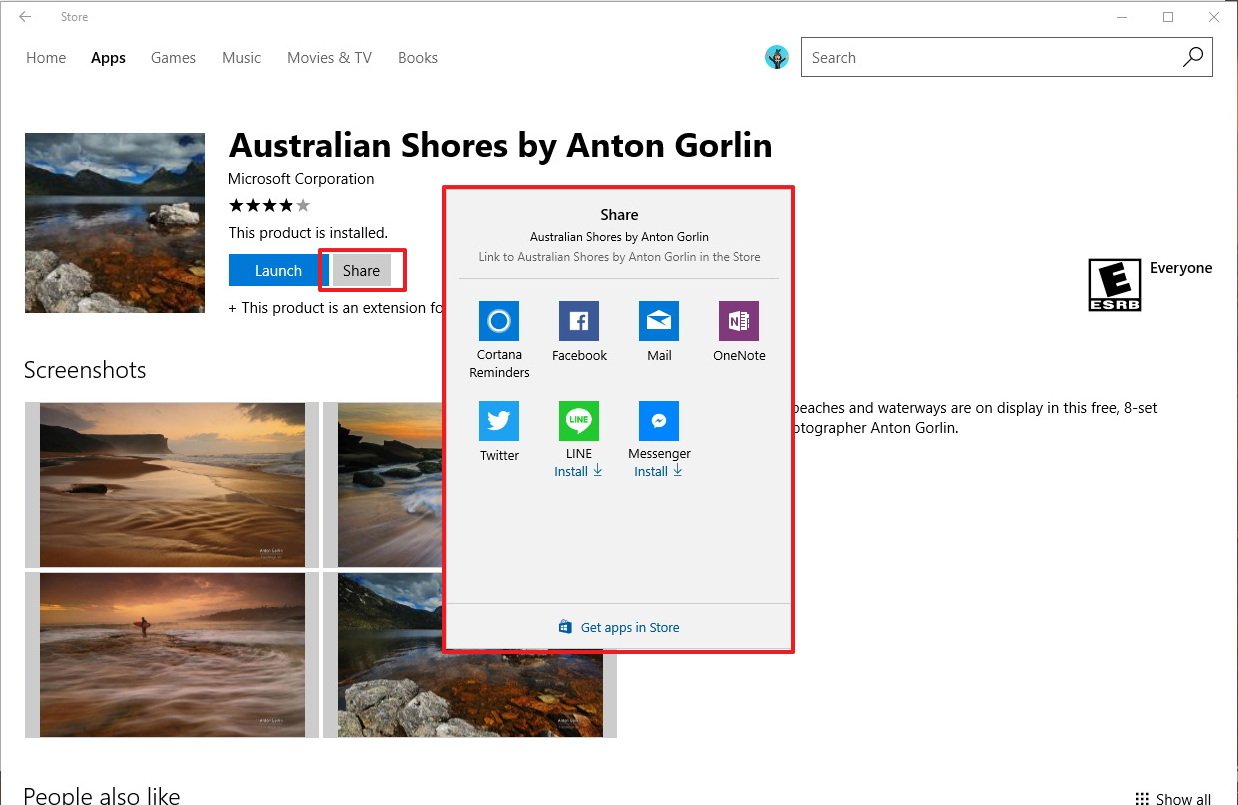
Alternatively, if you want to share a theme from the Store, do the following:
- Open the Store.
- Click the account menu and click on My Library.
- Click the one you want to share.
- Click the Share button.
- Using the Windows Share experience, select the service you want to use to share the theme, and complete any additional step to share the link.
Deleting themes
When you no longer want a theme, you can quickly remove it from your computer with these steps:
- Open Settings.
- Click on Personalization.
- Click on Themes.
- Under "Apply a theme," right-click the one that you don't want to keep and select Delete.
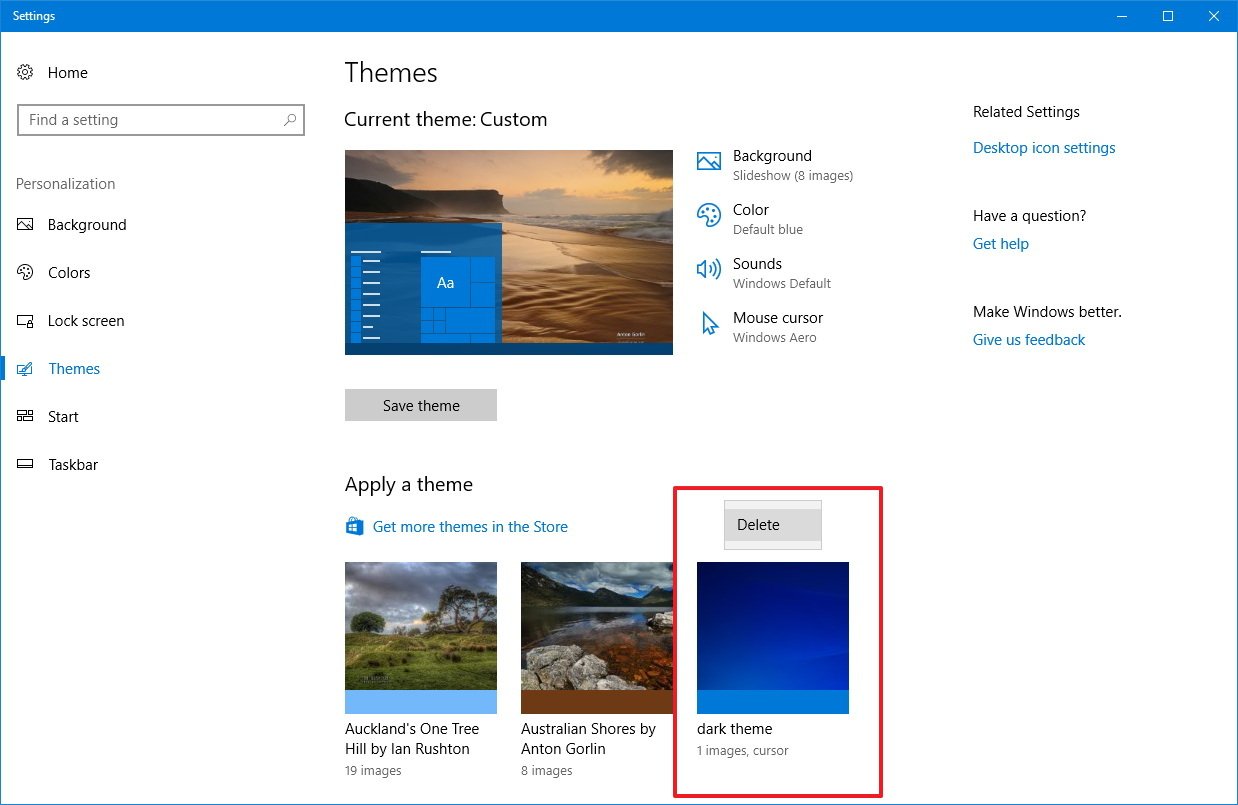
You can't delete a theme that you're currently using, so make sure to switch themes before trying to get rid of it.
More Windows 10 resources
For more help articles, coverage, and answers to common questions about Windows 10, visit the following resources:
- Windows 10 on Windows Central – All you need to know
- Windows 10 help, tips, and tricks
- Windows 10 forums on Windows Central
Mauro Huculak has been a Windows How-To Expert contributor for WindowsCentral.com for nearly a decade and has over 15 years of experience writing comprehensive guides. He also has an IT background and has achieved different professional certifications from Microsoft, Cisco, VMware, and CompTIA. He has been recognized as a Microsoft MVP for many years.

