How to use Storage sense to automatically free disk space in the Windows 10 Fall Creators Update
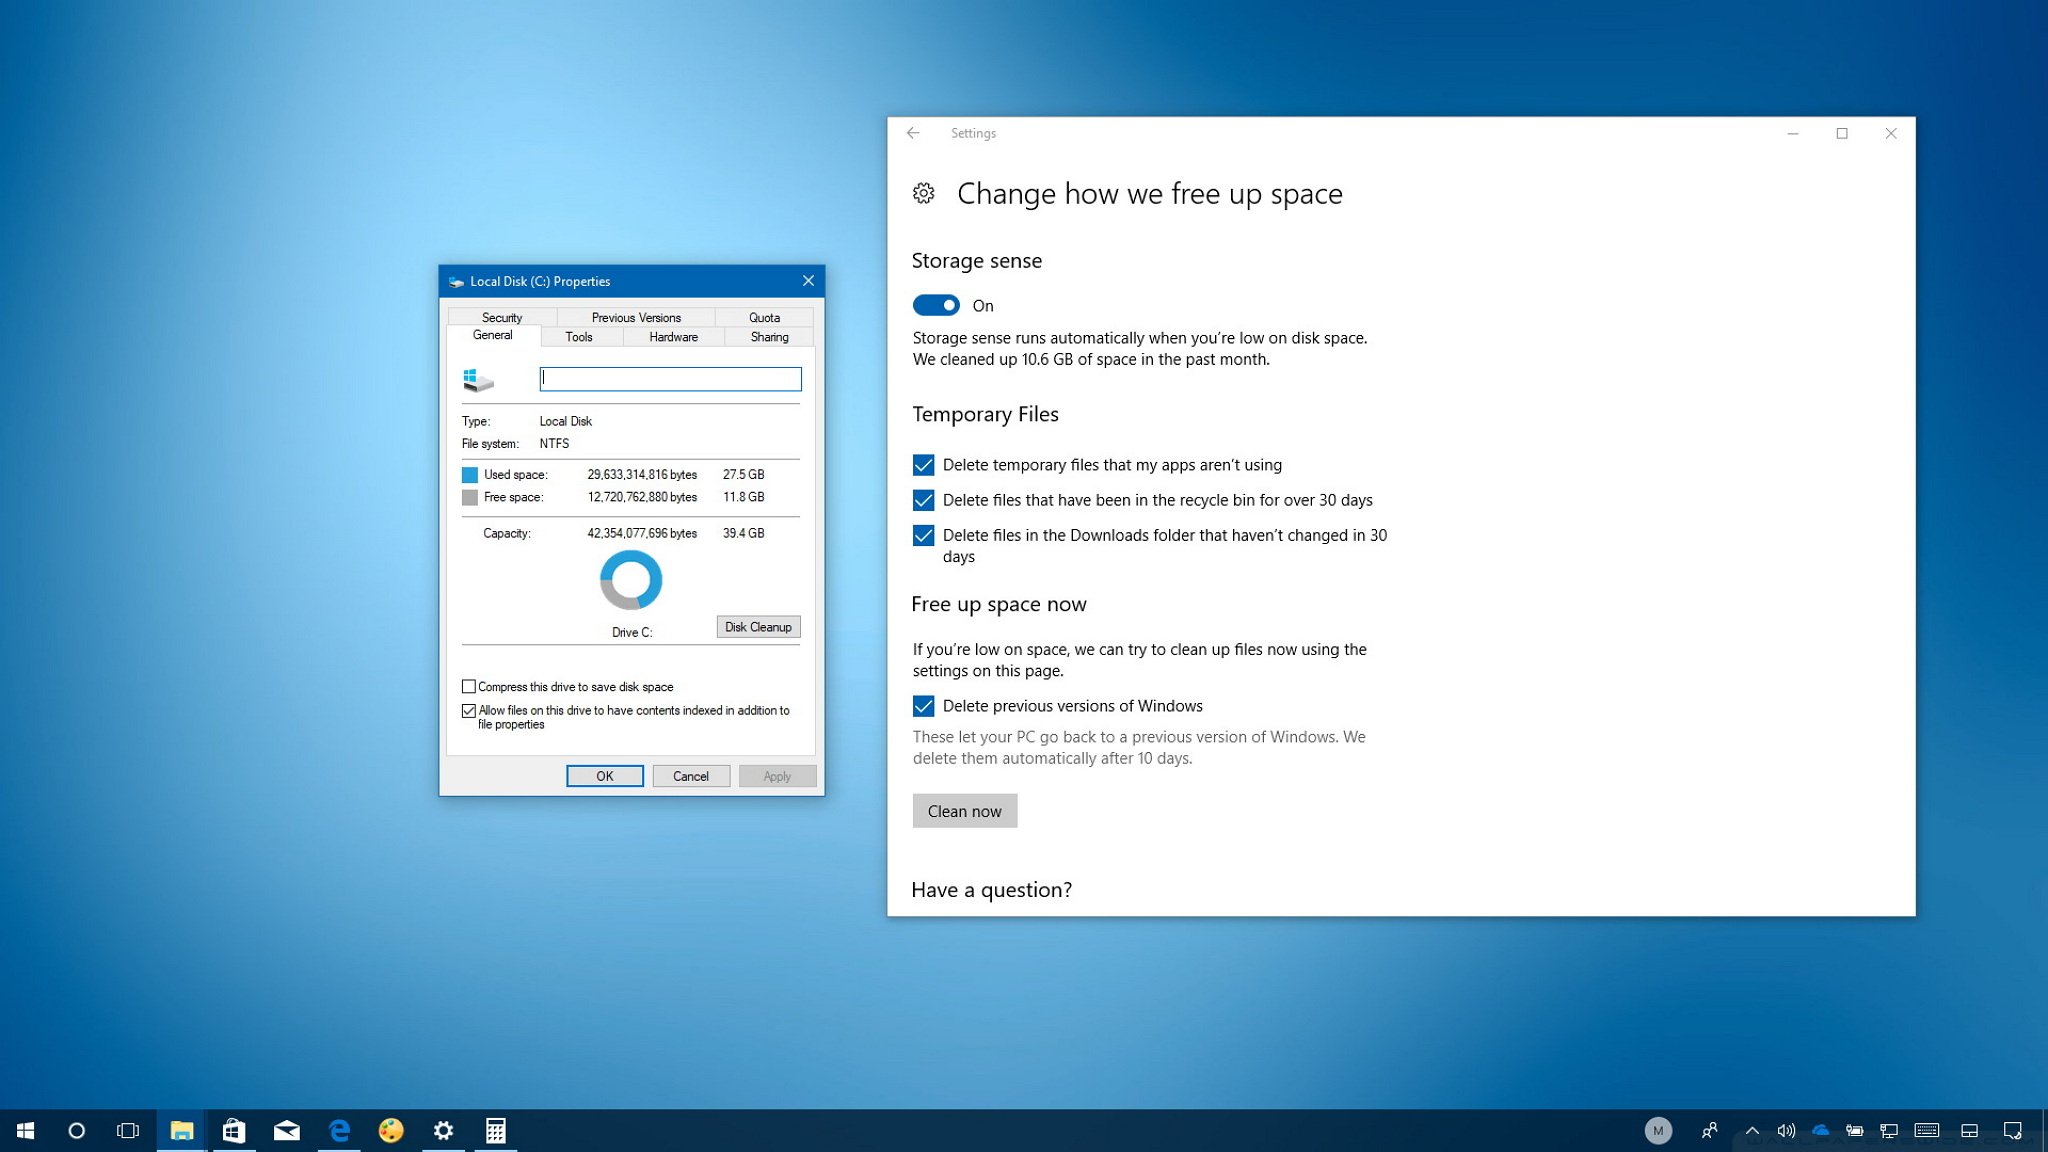
Storage sense can help you to get rid of junk files when you're running low on space, and in this guide, we show you how to use the feature in the Windows 10 Fall Creators Update.

On Windows 10, when your device starts to run out of space, you can empty the recycle bin and delete temporary files to free up space using a number of tools, including Disk Cleanup.
While Disk Cleanup and third-party tools are not difficult to use, they're also not intuitive, and many users don't even know they exist. In order to address this issue, Windows 10 includes the Storage sense tool to monitor and free up space on your device automatically.
Storage sense is an optional feature, which is disabled by default, but when enabled, it'll proactively delete temporary files, like those created by apps. It'll delete files that have been in the recycle bin for more than 30 days, as well as files in the downloads folder that haven't changed in 30 days. If you're running low on space, Storage Sense even includes an option to delete the previous version of Windows 10 to make more room.
In this Windows 10 guide, we walk you through the steps to enable and set up Storage sense with the new options available in the Fall Creators Update, to prevent running out of space.
How to enable Storage sense on Windows 10
On Windows 10, enabling Storage Sense is a straightforward process:
- Open Settings.
- Click on System.
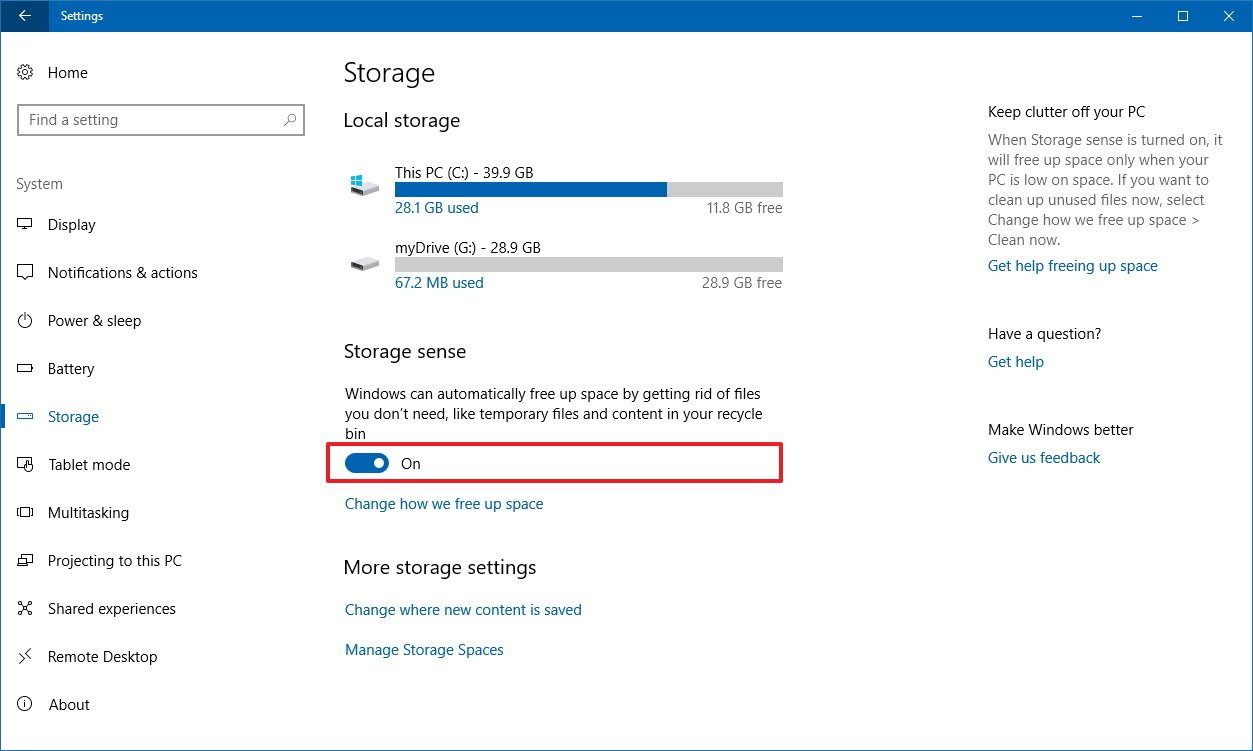
- Click on Storage.
- Turn on the Storage sense toggle switch.

Once you've completed these steps, Windows 10 will auto delete junk files on your device, including temporary files, older recycle bin items, and those files in the Downloads folder that haven't changed in the last month.
Although it might be obvious for many users, if you need to free up more space, and you have large files that have been in the recycle bin for less than a month, you'll need to delete them manually or empty the bin completely.
Get the Windows Central Newsletter
All the latest news, reviews, and guides for Windows and Xbox diehards.
Unfortunately, Storage sense doesn't remove everything you don't need. Some temporary files, Windows Update logs, and other files will remain on your PC.
In the case, you must delete all temporary files; you can use this guide to set up Disk Cleanup to remove temporary files and certain other files automatically.
How to configure Storage sense settings on Windows 10
It's also possible to pick the specific files you want Storage sense to delete automatically from your device, using these steps:
- Open Settings.
- Click on System.
- Click on Storage.
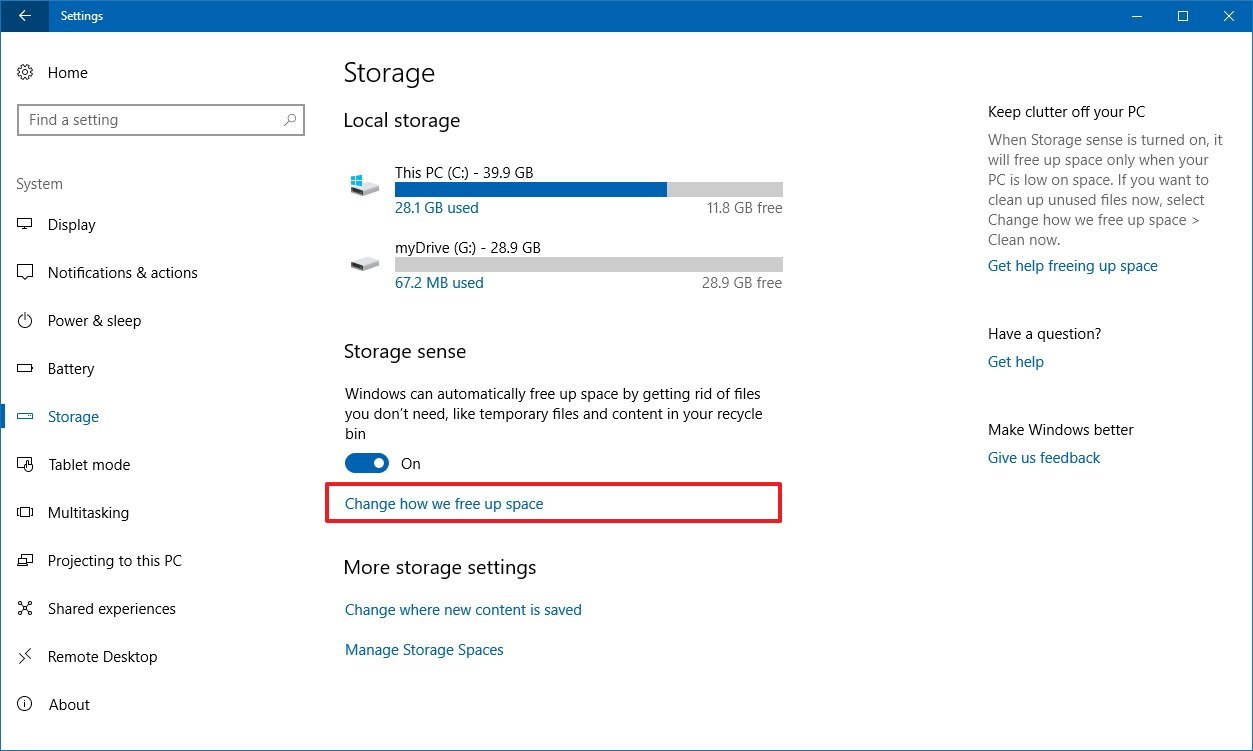
- Click the Change how we free up space link.

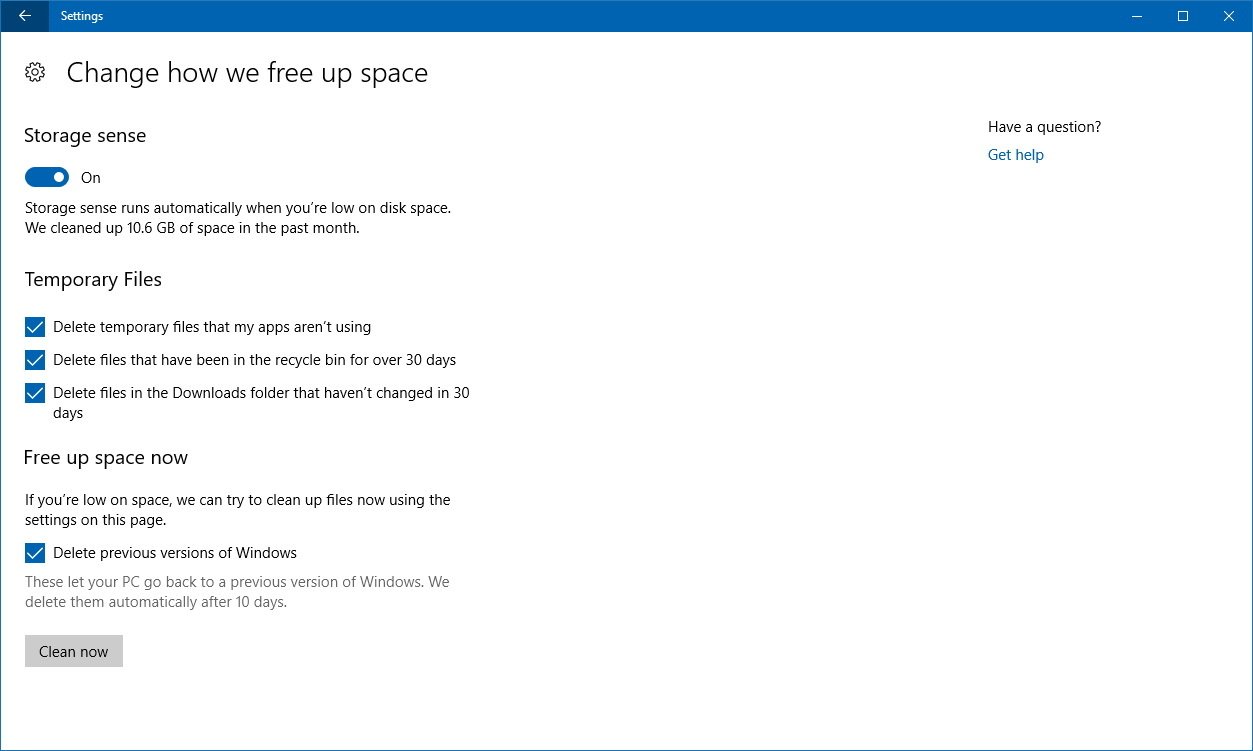
- Under "Temporary Files," check the items you want to delete, including:
- Delete temporary files that my apps aren't using.
- Delete files that have been in the recycle bin for over 30 days.
- Delete files in the Downloads folder that haven't changed in 30 days.
- Under "Free up space now," you can also select the option to delete the previous installation of Windows 10. However, this option is only available after installing a new version of the OS.

After completing these steps, you can click the Clean now button to free up space immediately. If you do not, simply make sure to select the items you want Storage sense to delete, and close the Settings app.
Storage sense was first introduced with the Creators Update, but the Windows 10 Fall Creators Update has redesigned the settings page and added new options, including one to manage the Downloads folder and delete the previous version of Windows 10.
More Windows 10 resources
For more helpful articles, coverage, and answers to common questions about Windows 10, visit the following resources:
- Windows 10 on Windows Central – All you need to know
- Windows 10 help, tips, and tricks
- Windows 10 forums on Windows Central
Mauro Huculak has been a Windows How-To Expert contributor for WindowsCentral.com for nearly a decade and has over 15 years of experience writing comprehensive guides. He also has an IT background and has achieved different professional certifications from Microsoft, Cisco, VMware, and CompTIA. He has been recognized as a Microsoft MVP for many years.

