How to use Nearby Sharing to transfer files between PCs in Windows 10 April 2018 Update
These are the steps to get started with Nearby sharing to transfers files or share links with other in-range devices.
Alongside the new features and a slew of improvements, the Windows 10 April 2018 Update (version 1803) introduces "Nearby sharing," which is a new experience that allows you to quickly and effortlessly transfer files and links wirelessly to nearby devices using Bluetooth and Wi-Fi.
The feature should sound familiar because it's very similar to Apple's AirDrop. In the same way, it's a useful experience that will come in handy in those times when you need to quickly send a document, photo, video, or presentation to another person across the room without having to use network file sharing, cloud services, email attachment, or a USB flash drive.
In this Windows 10 guide, we'll walk you through the steps to get started using Nearby sharing after installing the April 2018 Update on your device.
- How to enable Nearby sharing on Windows 10
- How to change Nearby sharing settings on Windows 10
- How to transfer files using Nearby sharing on Windows 10
- How to troubleshoot Nearby sharing on Windows 10
How to enable Nearby sharing on Windows 10
On Windows 10, Nearby sharing should be enabled by default after installing the April 2018 Update and if Bluetooth is working correctly. However, you can always ensure and enable (or disable) the feature using the Settings app.
Changing transfer settings
In order to enable Nearby sharing, do the following:
- Open Settings.
- Click on System.
- Click on Shared experiences.
- Turn on the Nearby sharing toggle switch.
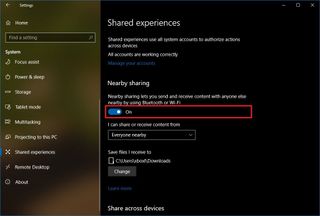
If you want to disable the feature, simply turn off the toggle switch in step No. 4.
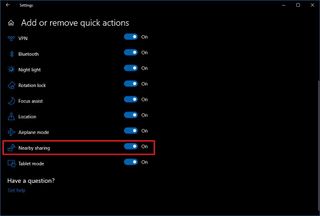
Alternatively, you can also enable or disable the feature by clicking the new Nearby sharing quick button available in Action Center (Ctrl + A).
Get the Windows Central Newsletter
All the latest news, reviews, and guides for Windows and Xbox diehards.

If the button isn't available, you can quickly add it to Quick actions from Settings > System > Notifications & actions, under "Quick actions," click the Add or remove quick actions link, and then simply enable the button.
How to change Nearby sharing settings on Windows 10
Although Nearby sharing is a straightforward feature, using the Settings app, you can customize a few settings.
Specify how to share content
Using this feature, it's possible to restrict how you share and receive content.
- Open Settings.
- Click on System.
- Click on Shared experiences.
- Under "Nearby sharing," using the I can share or receive content from down-down menu, and select:
- Everyone nearby — Your PC will be able to share and receive content from all nearby devices, including those you don't own.
- My devices only — Your PC will share and receive content only with devices using the Microsoft account.
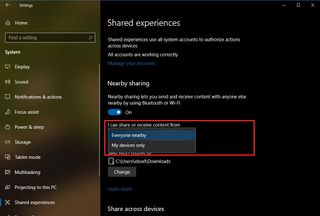
Once you've completed the steps, you'll only be able to share files to the devices you specified.
Changing transfer folder location
By default, transfers will be stored in the Downloads folder, but you can specify another folder or another drive very easily.
- Open Settings.
- Click on System.
- Click on Shared experiences.
- Under "Nearby sharing," using Save files I receive to option, click the Change button.
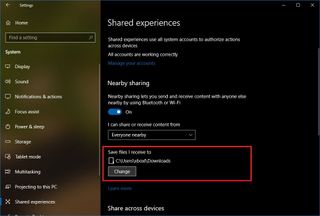
- Select a location to save transfers.
- Click the Select folder button.
After completing the steps, feature transfers will be saved in the new location.
How to transfer files using Nearby sharing on Windows 10
Once enabled, transferring files and links with other device is a very easy process with any application that includes the Windows 10 Share icon, such as Microsoft Edge, File Explorer, Photos, and many others.
Sharing a file
In order to share a document, video, picture, or another type of file, do the following:
- Open File Explorer.
- Right-click the file you want to share.
- Click the Share option.

- Select the device from the list.
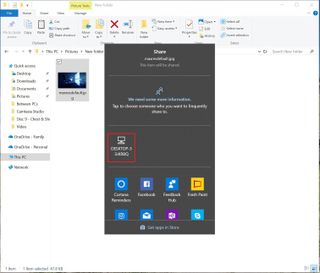
Once you've completed the steps, if the destination device is within Bluetooth range and running at least the Windows 10 April 2018 Update, the user will receive a notification to accept or decline the transfer. (The source device will also get a notification with information about the transfer. Also, if no one responds after a few second the request will timeout automatically.)
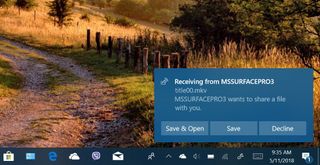
The file will be stored in the Downloads folder, or in the folder location that has been configured in the "Shared experiences" settings page.
Nearby sharing isn't available for OneDrive files, because the cloud storage service already includes its own file sharing capabilities.
Sharing a web link
In order to share a web link, use these steps:
- Open Microsoft Edge.
- Visit the page you want to share.
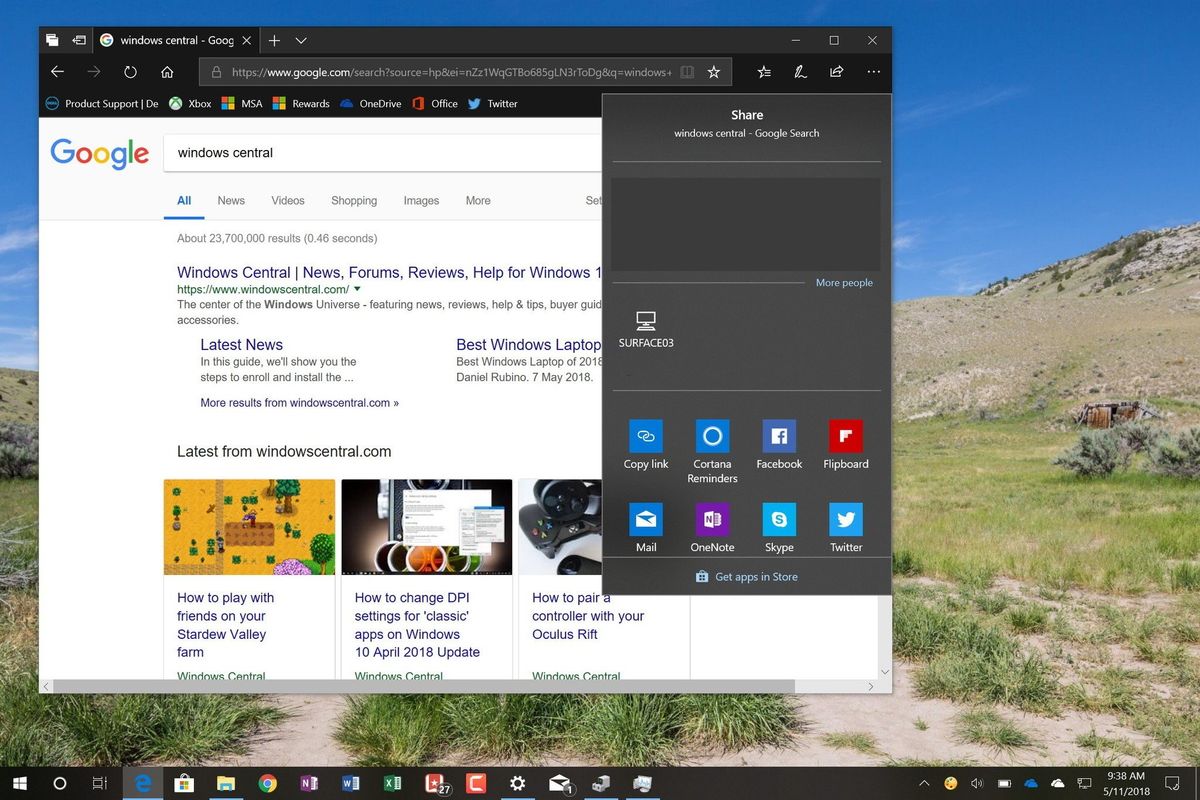
- Click the Share button in the top-right.
- Select the device from the list.

After completing the steps, the other device will receive a notification, which the recipient has to accept to open the link on Microsoft Edge.
How to troubleshoot Nearby sharing on Windows 10
Nearby sharing is an easy-to-use feature, and it should just work out-of-the-box, but if you're unable to share content, below you'll find a few troubleshooting steps to get the experience working.
Checking Bluetooth
On Windows 10, the new share functionality requires Bluetooth to detect computers that are in range and transfer files or links, as such you want to make sure that this device is enabled and working properly.
- Open Settings.
- Click on Devices.
- Click on Bluetooth & other devices.
- Turn on the Bluetooth toggle switch.
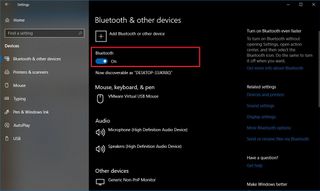
If you don't see the option or Nearby sharing still not working, you may need to install the latest Bluetooth driver on your device. (You can refer to our guide to properly update your device driver.)
Checking Bluetooth on Device Manager
You can check if there's a problem using Device Manager:
- Open Start.
- Search for Device Manager, click the top result to open the experience.
- Expand Bluetooth.
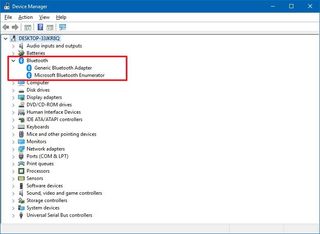
If there's a badge notification in the Bluetooth icon, such as yellow icon with an exclamation mark, then something is wrong with the device. If you don't see a Bluetooth icon, then your device doesn't support this device, or the driver isn't installed.
In the case that your Bluetooth adapter is broken, or your computer doesn't have one, you can always get one on Amazon.
Checking Bluetooth compatibility
In addition, you have to make sure that your Bluetooth is version 4.0 (or later) with Low Energy (LE) support using these steps:
- Open Start.
- Search for Device Manager, click the top result to open the experience.
- Expand Bluetooth.
- Right-click the adapter name, and select Properties.
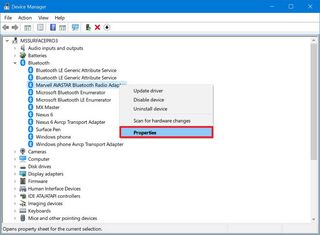
- Click on the Details tab.
- Use the "Property" drop-down menu, and select Bluetooth radio supports Low Energy Central Role option.
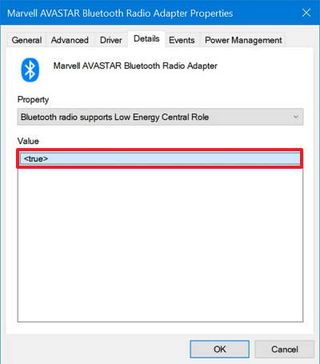
If the value is set to True, then you can use Nearby sharing.
In the case that devices can't discover each other, bring them closer, as they may not be within Bluetooth range.
Checking network connection
Nearby sharing works over Bluetooth and through a wireless connection. If you want to transfer files faster, in addition to a working Bluetooth connection, you'll also need to make sure both devices are connected in the same network, and they can talk to each other.
Checking network connectivity
You can check the connectivity between devices using these steps:
- Open Start on the destination computer.
- Search for Command Prompt, and click the top result.
- Type the following command to find your local IP address and press Enter:
ipconfig - Make a note of the "IPv4 Address," which is your device network address.
- Open Command Prompt in the source computer.
- Type the following command to make sure both devices are reachable and press Enter:
ping 192.168.1.5Important: In the ping command, make sure to use your destination IP address.

After completing these steps, repeat the process in the second machine, and if in both devices you get a reply, then they can connect to each other.
Quick Tip: Using a firewall should not be a problem with Nearby sharing, but if you're using a third-party security solution, you may want to temporarily disable the firewall to see if that's preventing from sending files over Wi-Fi.
Checking network profile
Also, you want to make sure that both devices are set to Private. Otherwise, Nearby sharing will use Bluetooth over Wi-Fi, and transfers will be sent very slowly.
To make sure that both devices are using a Private networking profile, do the following:
- Open Settings.
- Click on Network & Internet.
- Click on Wi-Fi.
- Click the wireless connection.
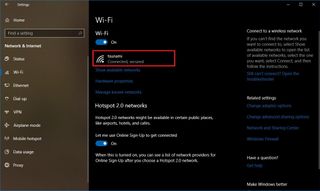
- Select the Private option.
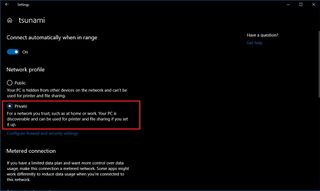
After completing the steps, transferring file will occur much faster using the wireless connection.
Wrapping things up
On Windows 10, Nearby sharing is a nifty feature that makes sharing files and links a very easy process, but it's easy only if it's configured correctly on both devices.
Although this feature works with Bluetooth and Wi-Fi, bear in mind that there are a few catches. For example, you can share files with other devices using Bluetooth, but should only consider this method to send links or smaller files. Otherwise, the transfer will be painfully slow.
Nearby sharing over Wi-Fi will offer the best experience, but it only works if there's a properly configured network connection between both devices, and Bluetooth is enabled.
If one of the device doesn't have a Bluetooth adapter working properly, or doesn't have an adapter at all, the Nearby sharing option and settings will not be available on Windows 10.
And yes, Nearby sharing also works over an Ethernet connection.
Have you already tried Nearby sharing on the Windows 10 April 2018 Update? Tell us in the comments.
More Windows 10 resources
For more helpful articles, coverage, and answers to common questions about Windows 10, visit the following resources:
- Windows 10 on Windows Central – All you need to know
- Windows 10 help, tips, and tricks
- Windows 10 forums on Windows Central
Mauro Huculak has been a Windows How-To Expert contributor for WindowsCentral.com for nearly a decade and has over 15 years of experience writing comprehensive guides. He also has an IT background and has achieved different professional certifications from Microsoft, Cisco, VMware, and CompTIA. He has been recognized as a Microsoft MVP for many years.
