How to use Outlook Categories to manage mountains of mail

Outlook Categories let you assign colors to certain messages, so they stand out in your inbox, and so you can quickly group and view all the messages assigned to a category. If for example, you're a tech blogger, you could create a "Potential Story Ideas" category and then tag relevant press releases, pitches or messages from possible sources in that category for easy access in the future.
To use Outlook categories effectively, you must first create a new category or customize an existing one, then assign a category to a message or messages, and finally, you can sort your inbox by Categories to view all tagged messages.
- How to create a new Outlook Category
- How to rename an existing Outlook Category
- How to add color Categories to Outlook messages using 'Quick Click'
- How to add color Categories to Outlook messages
- How to sort your Outlook inbox by Categories
How to create a new Outlook Category
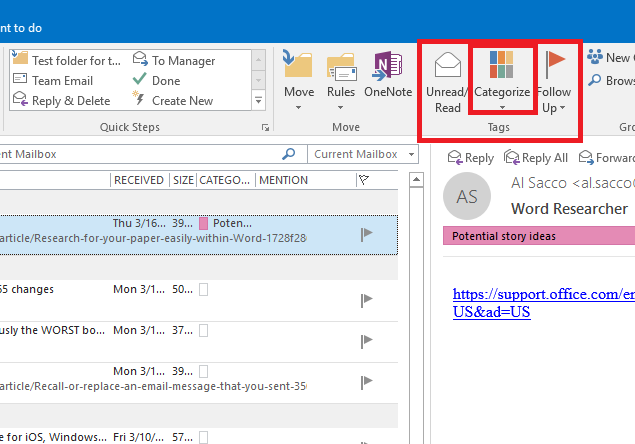
- On your Outlook Home tab, navigate to the Tags section (it's the fifth section from the right) and click Categorize.
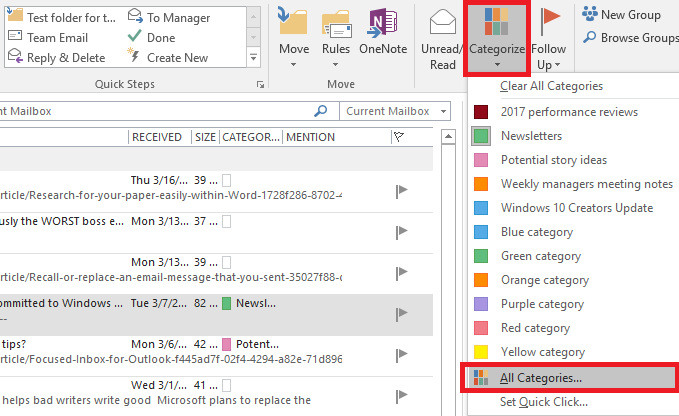
- In the pop-up box, scroll down to the bottom of the list and click All Categories.
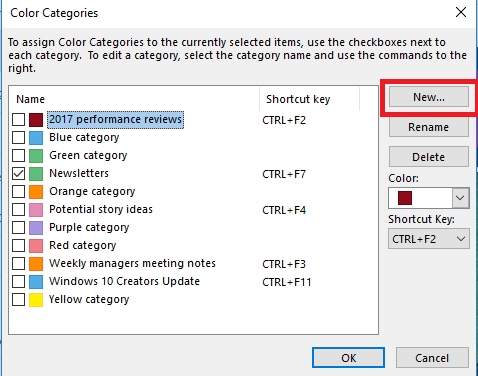
- A box labeled Color Categories appears, and you should click the box for New along the right side.
- In the Add New Category box, add a custom name for your Category by typing the text in the Name field.
- Choose a custom color from the Color drop-down menu.
- Add a shortcut key for your Category using the Shortcut Key drop down, if you want to use one. Leave that menu with the default value of (None) if you don't want to use a shortcut.
- You can use Outlook category keyboard shortcuts to quickly add color categories to messages in your inbox.
- Click OK to close the Add New Category box.
- Click OK again on the Color Categories box to save your new category.
If you'd rather customize the existing default Categories in Outlook, or change the name of a Category, use the following process.
How to rename an existing Outlook Category
- On your Outlook Home tab, navigate to the Tags section (it's the fifth section from the right) and click Categorize.

- In the pop-up box, scroll down to the bottom of the list and click All Categories.
- In the Color Categories box, click on the Category you want to rename to highlight it.
- Click the box for Rename.
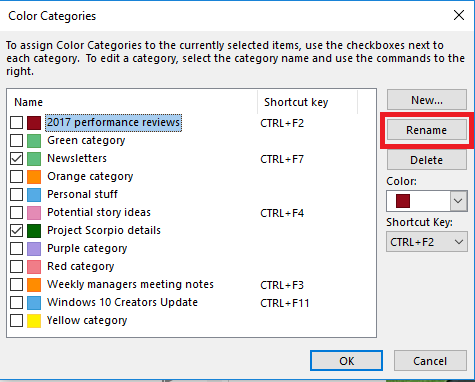
- Start typing your new name, and it will appear next to the Category you want to edit.
- Click OK to save the name of your new Category.
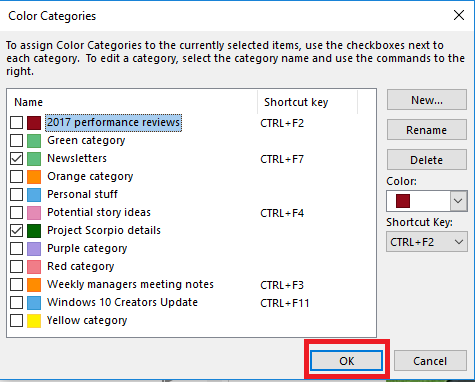
After you've created and customized your Outlook category list the way you want it, you can begin adding color Categories to messages, in a few different ways. (Note: You can add more than one Category to a single message, and all categories you apply attach to future contributions to the email chain — replies and forwards, for example.)
How to add color Categories to Outlook messages using 'Quick Click'
If you use one category more often than any other, you may want to add it to your "Quick Click" function, which sets that color as your default Category.
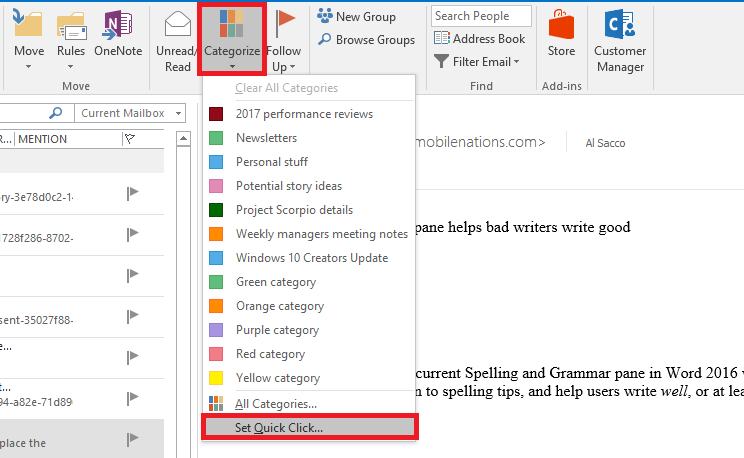
- On your Outlook Home tab, navigate to the Tags section (it's the fifth section from the right) and click Categorize.
- Within the Categories drop-down menu, scroll all the way to the bottom of the list and click Set Quick Click
- In the Set Quick Click box, open the drop-down menu and choose the category you want to set as your default Quick Click Category.
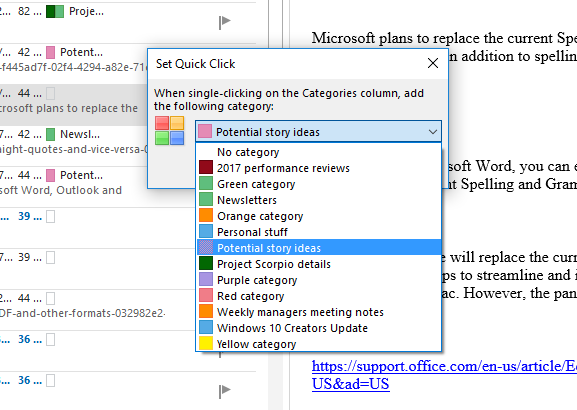
- Click OK to save your Quick Click selection.
- If you ever want to change your Quick Click color, just repeat these four steps.
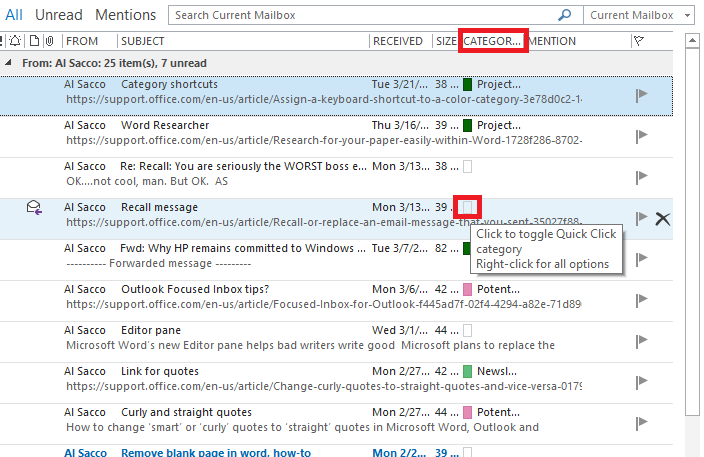
- To quickly add your Quick Click color to messages in your inbox, navigate to your inbox, locate the Category section or column, and click the empty box next to the message you want to categorize with Quick Click. The default color will appear in that box, and the message will be categorized appropriately.
- You can also right-click on the small box in the Category column to access the full Categorize menu and modify categories of your Quick Click default.
- And if you want to remove a Quick Click category, just again click the box in the Category column for the message you want to de-categorize to remove the color label.
It's also easy to add color categories that aren't set as your Quick Click default to messages in your Outlook inbox.
How to add color Categories to Outlook messages
- Navigate to your Outlook inbox, and click on the message you want to categorize.
- With the message highlighted, right click to show a new drop-down menu.
- From that menu, scroll down to Categories.
- In the new menu that appears to the side of the first menu, navigate to the color category you want to add and click to select it.
- That message will now be categorized and tagged with the color label of your choice.
- If you set a custom shortcut key for any of your Categories, you can easily add a Category by selecting the message you want to label in your inbox and then hitting the appropriate key combo. (Note: Some keyboards may require you to lock the Fn key to trigger Outlook Category shortcuts.)
After you've categorized your messages, you can quickly sort your inbox to view correspondence by category using the following process.
Get the Windows Central Newsletter
All the latest news, reviews, and guides for Windows and Xbox diehards.
How to sort your Outlook inbox by Categories
- When you're ready to sort messages by Category, simply click the Categories column or section in the horizontal bar that appears above your Outlook messages.
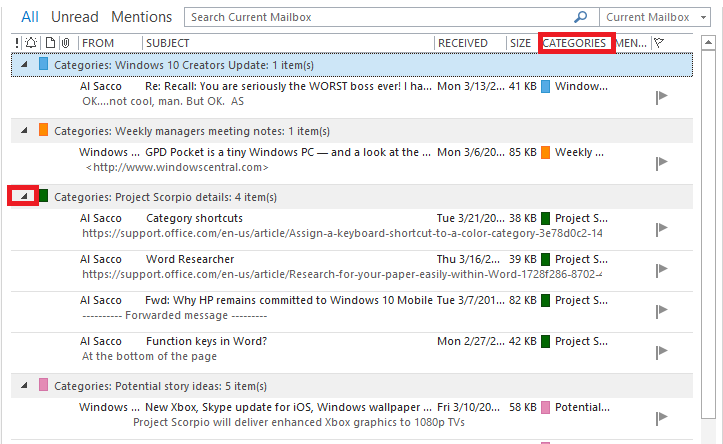
- With the Categories section open, you can close and expand certain category lists using the small triangle in the upper-right corner of the Category header.
Additional Outlook and Microsoft Office resources
For more Outlook tips, tricks and how-tos, read:
- How to recall a sent email message in Outlook
- How to master Outlook's out-of-office automatic replies
- Never miss an important message again with color-coded Outlook mail
You may also want to check out our main Office 101 page:
- Microsoft Office 101: Help, how-tos and tutorials
Al Sacco is content director of Future PLC's Mobile Technology Vertical, which includes AndroidCentral.com, iMore.com and WindowsCentral.com. He is a veteran reporter, writer, reviewer and editor who has professionally covered and evaluated IT and mobile technology, and countless associated gadgets and accessories, for more than a decade. You can keep up with Al on Twitter and Instagram.

