How to use libraries on Windows 10
If you have files scattered across different locations, you can use libraries to organize and bring them together in a single view, and in this guide, we show you how on Windows 10.
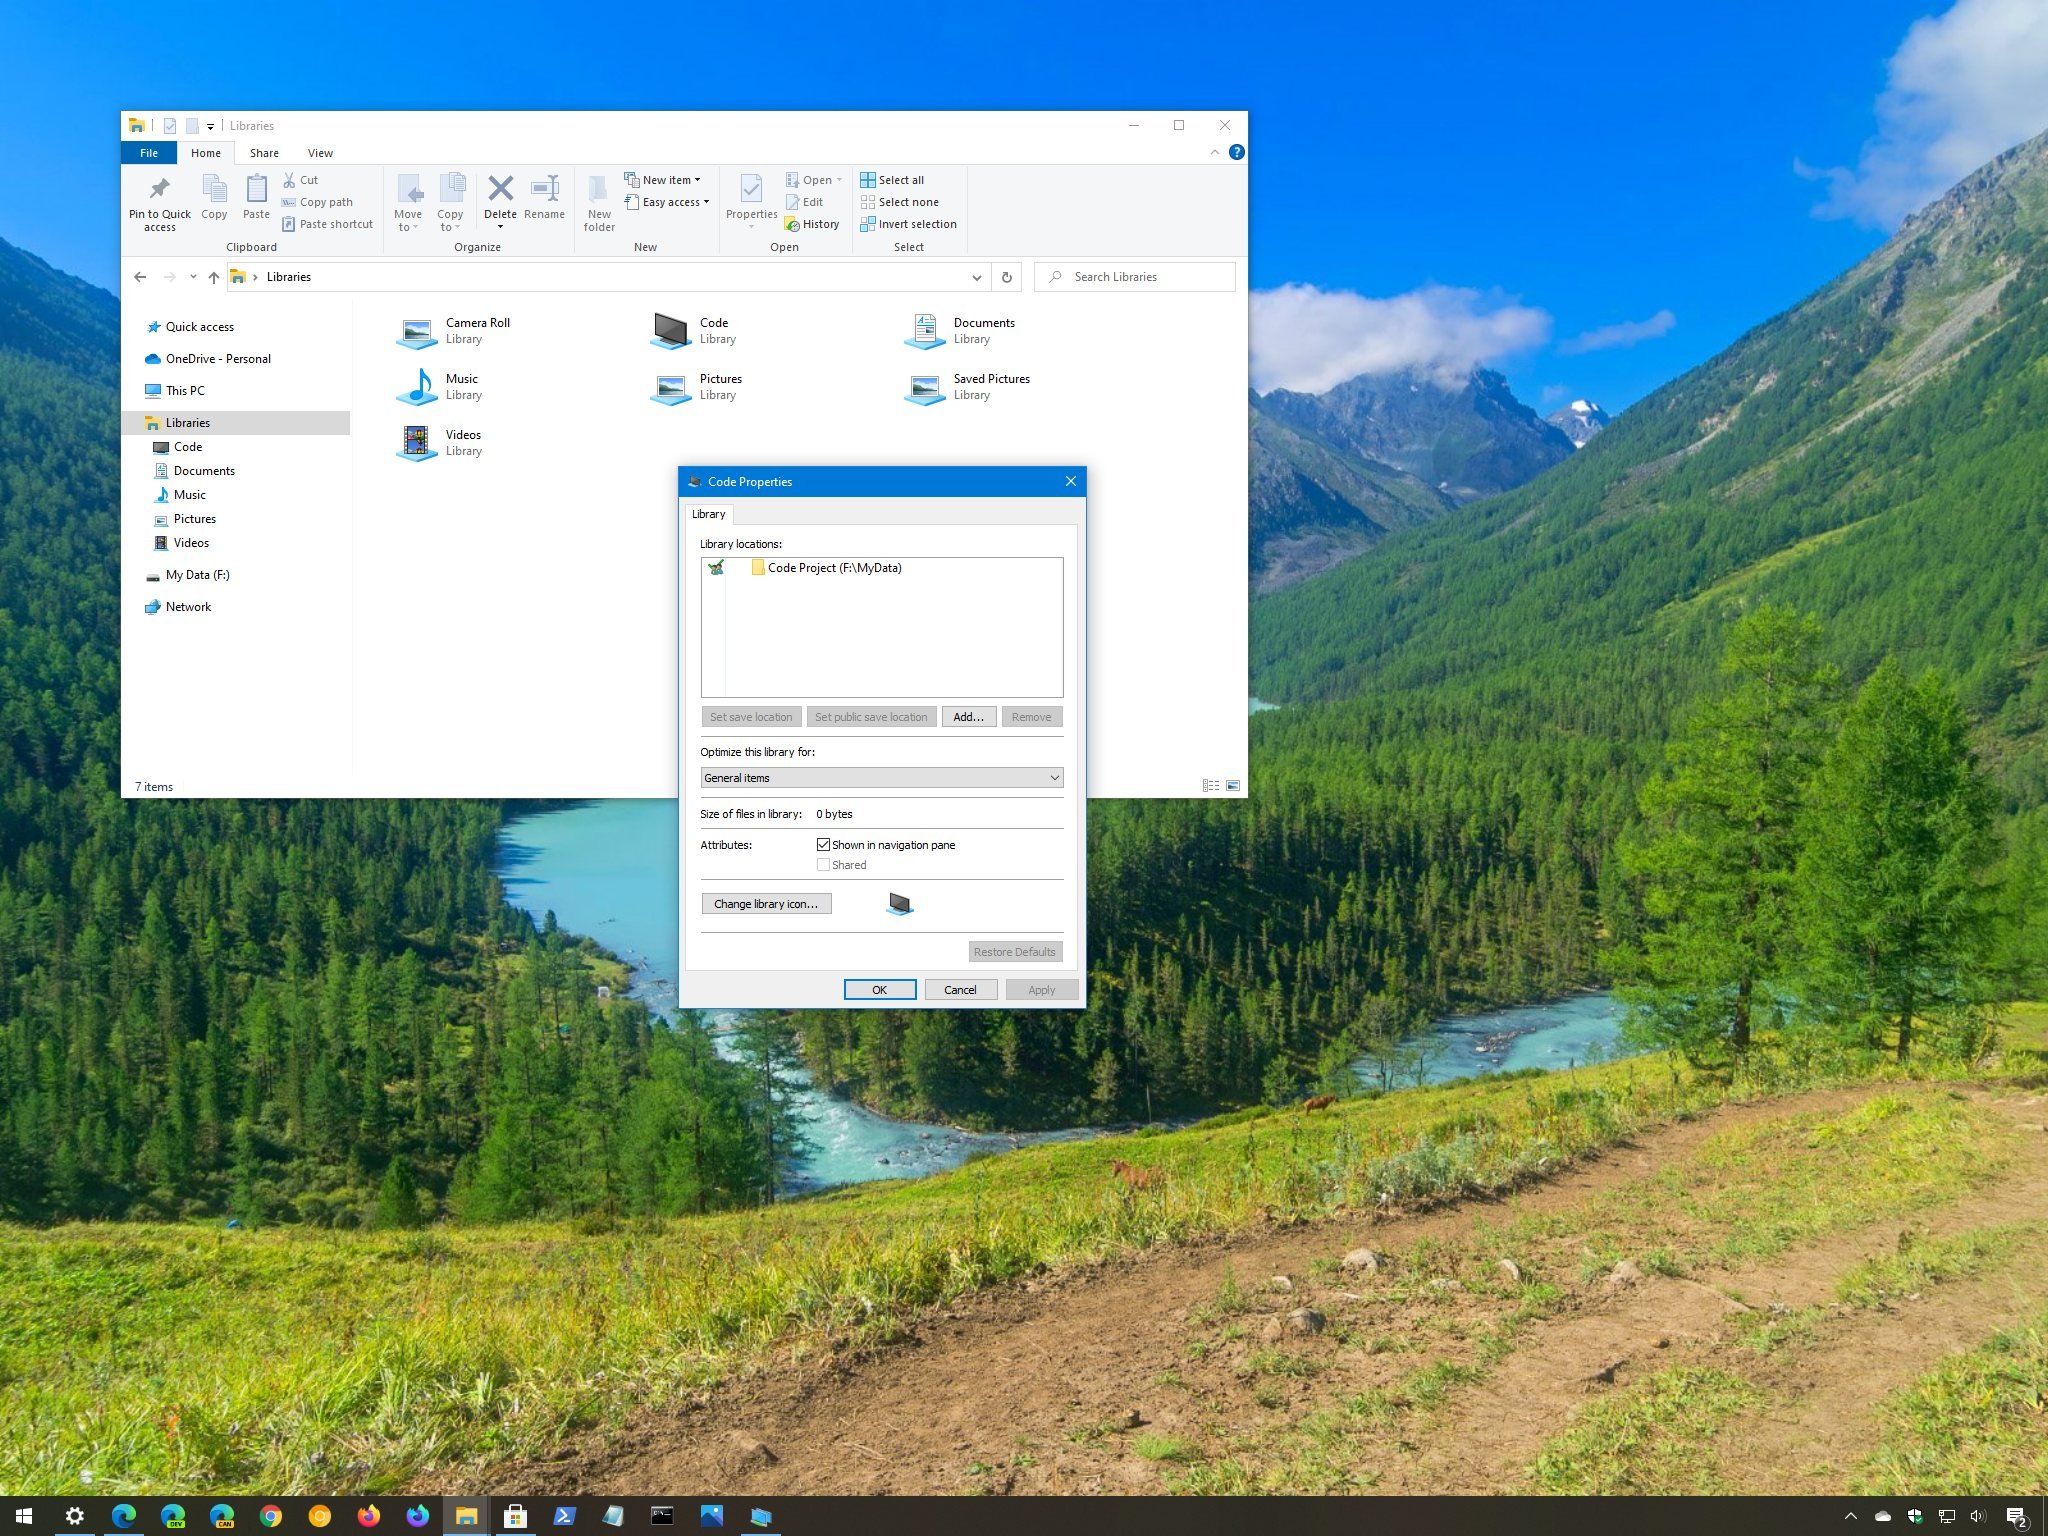
On Windows 10, libraries work similarly to folders, but they have been designed to organize files and folders into logical containers, even when the content isn't stored in the same physical location. For example, a library can include content stored in the primary and secondary drives, allowing you to view the different places in a single unified presentation.
The system comes with four default libraries, including Documents, Music, Pictures, and Videos, and each library includes the locations of the known folders. You can add and remove locations to the default libraries, or you can create custom libraries to organize specific folders.
In this Windows 10 guide, we walk you through the steps to enable and manage libraries on your device.
- How to enable libraries on Windows 10
- How to add folders to library on Windows 10
- How to set default save location for library on Windows 10
- How to delete a library on Windows 10
- How to optimize library for content on Windows 10
- How to create libraries on Windows 10
How to enable libraries on Windows 10
To show libraries on File Explorer, use these steps:
- Open File Explorer.
- Click the View tab.
- Click the Navigation pane menu.
- Select the Show libraries option.
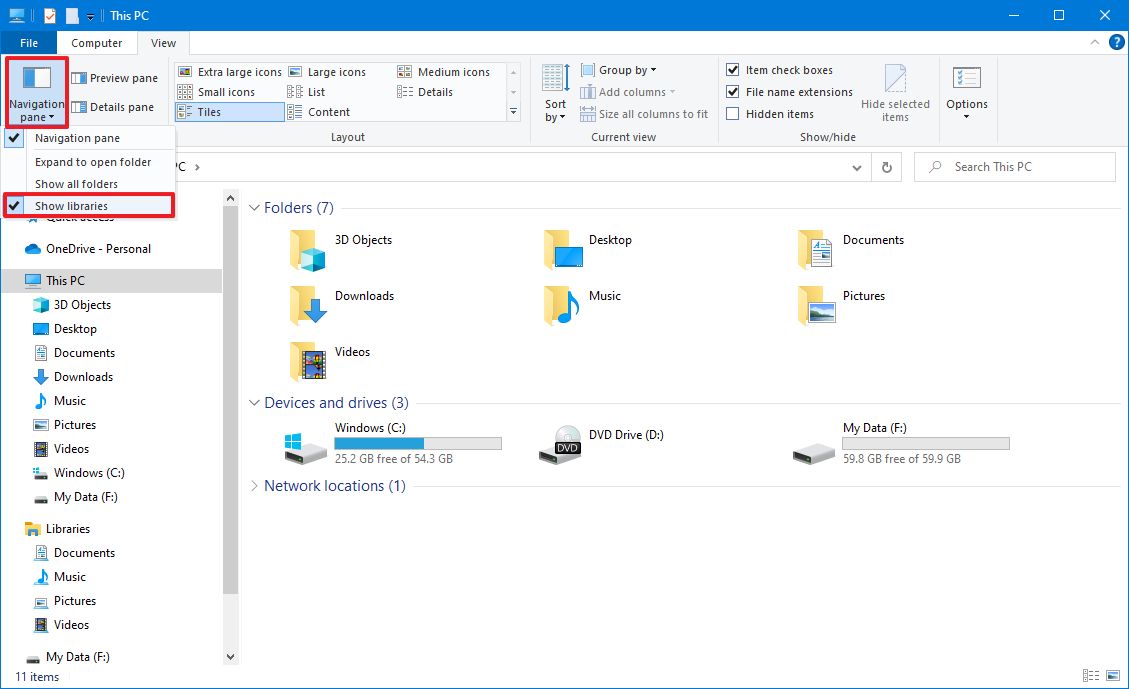
- Confirm the libraries in the navigation pane.
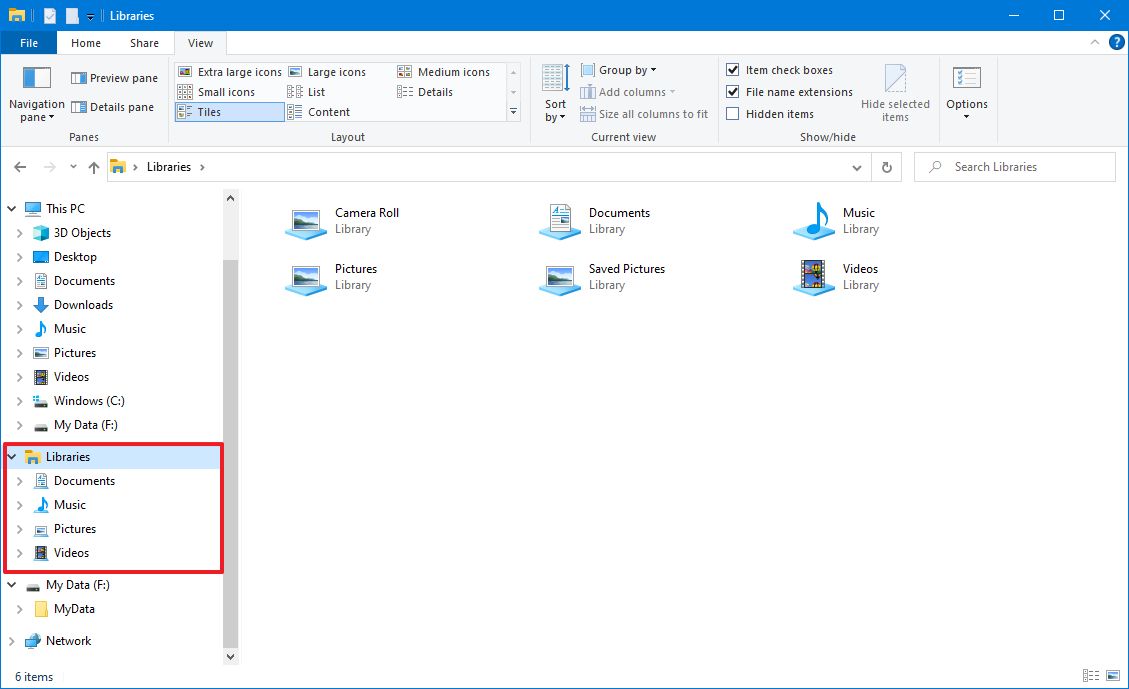
Once you complete the steps, a new "Libraries" item will appear in the left pane. You can then double-click to expand and access the default libraries, including Documents, Music, Pictures, and Videos.
If you want to disable the feature, you can use these instructions, but on Step No. 4, make sure to select the Show libraries option to clear the option.
How to add folders to a library on Windows 10
To add folder locations to a library, use these steps:
Get the Windows Central Newsletter
All the latest news, reviews, and guides for Windows and Xbox diehards.
- Open File Explorer.
- Double-click to expand the Libraries option in the left pane.
- Right-click the library you want to add a folder and select the Properties option.
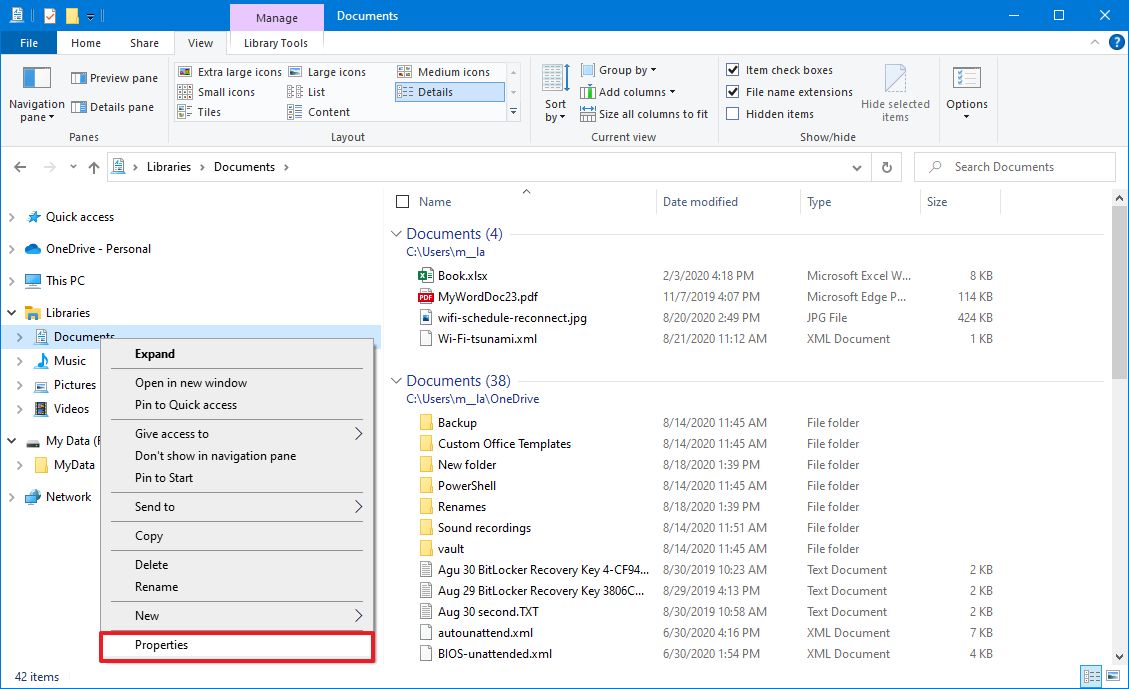
- Click the Add button.
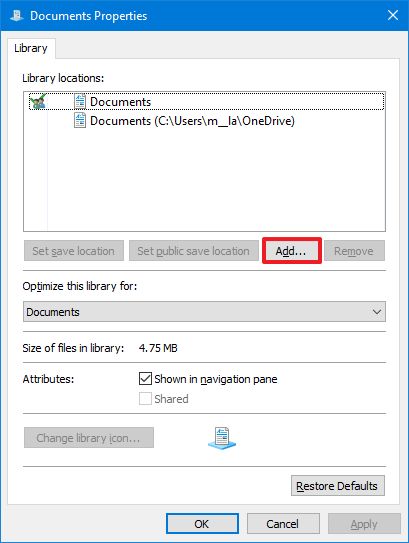
- Select the location, such as secondary drive, or any location that is indexed by Windows Search.
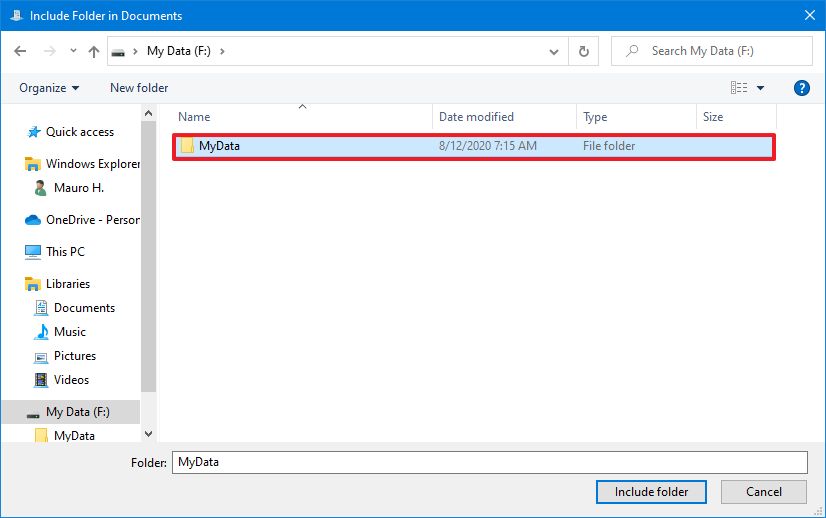
- Click the Include folder button.
- Click the Apply button.
- Click the OK button.
After you complete these steps, the new location will be available via the library.
Alternatively, you can also include new locations by right-clicking a folder, selecting the Include in library option, and choosing the library you want to include the folder.
Remove library location
To remove a library location, use these steps:
- Open File Explorer.
- Double-click to expand the Libraries option in the left pane.
- Right-click a library and select the Properties option.

- Select a location.
- Click the Remove button.
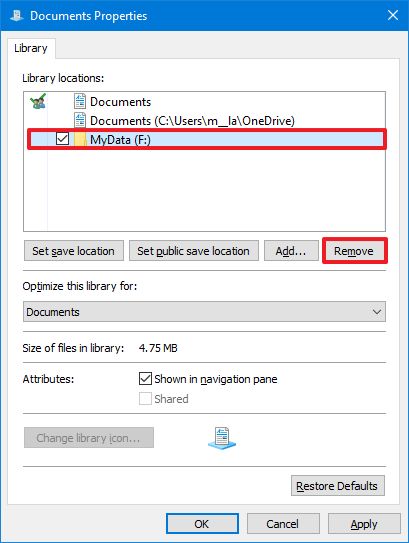
- Click the Apply button.
- Click the OK button.
Once you complete the steps, the location will no longer be available using the library.
How to set the default save location for a library on Windows 10
To specify the default location that apps will use to save files in a library, use these steps:
- Open File Explorer.
- Double-click to expand the Libraries option in the left pane.
- Right-click a library and select the Properties option.

- Select a location you want to set as the new default.
- Click the Set save location button.
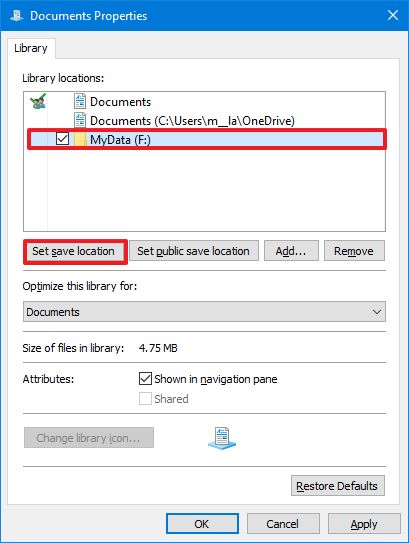
- Click the Apply button.
- Click the OK button.
After you complete the steps, the folder you selected will become the new default location to save files.
How to delete a library on Windows 10
To delete a library on Windows 10, use these steps:
- Open File Explorer.
- Double-click to expand the Libraries option in the left pane.
- Right-click a library and select the Delete option.
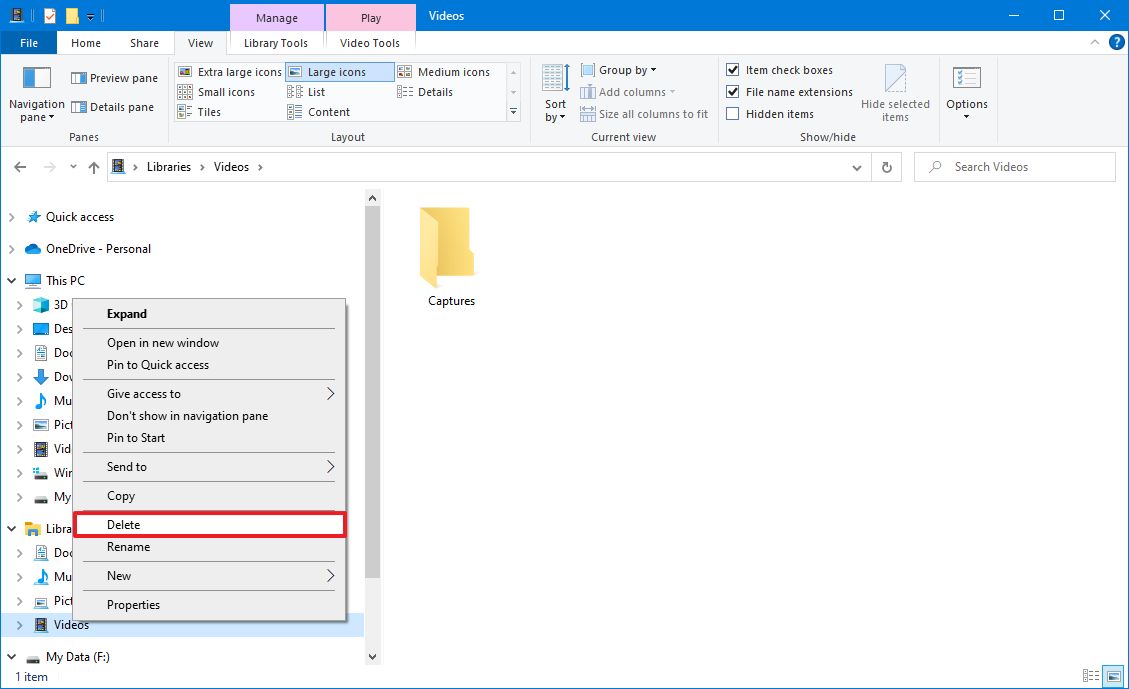
Once you complete these steps, the library will be removed, but the folders included in the library won't be deleted from your device.
If you deleted one of the default libraries by mistake, you can always right-click the Libraries item from the navigation pane, and select the Restore default libraries option.
Hide libraries
Alternatively, you can simply hide the library instead of deleting it with these steps:
- Open File Explorer.
- Double-click to expand the Libraries option in the left pane.
- Right-click the library you want to add a folder and select the Properties option.

- Clear the Show in navigation pane option.
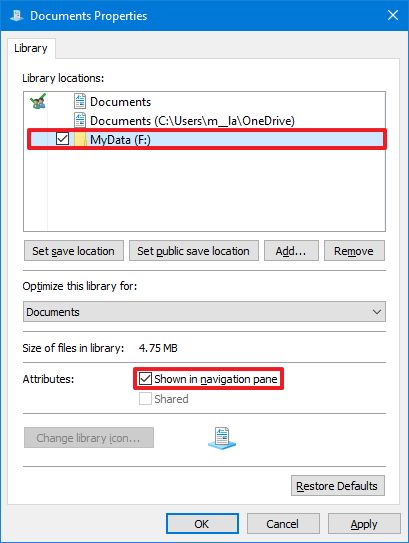
- Click the Apply button.
- Click the OK button.
After you complete the steps, the library will continue to be available, but it'll be removed from the navigation pane. If one of the libraries is missing in File Explorer, it's likely because it is hidden.
How to optimize a library for content on Windows 10
To optimize the view of the library depending on the content, use these steps:
- Open File Explorer.
- Double-click to expand the Libraries option in the left pane.
- Right-click the library you want to add a folder and select the Properties option.
- Under the "Optimize this library for" section, use the drop-down menu and choose the type of content you're planning to store. Options include:
- General items.
- Documents.
- Music.
- Pictures.
- Videos.
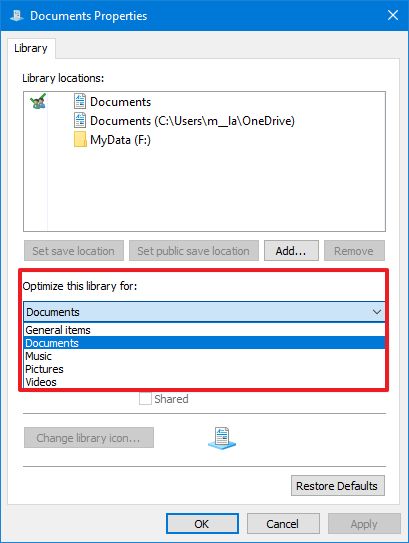
- Click the Apply button.
- Click the OK button.
Once you complete the steps, the default library view will change according to your configuration. For example, if you select the Pictures option, the default view will include large icons and a folder that will show a preview of its contents.
How to create libraries on Windows 10
To create a custom library on Windows 10, use these steps:
- Open File Explorer.
- Right-click the Libraries folder in the left pane.
- Select the New submenu and choose the Library option.
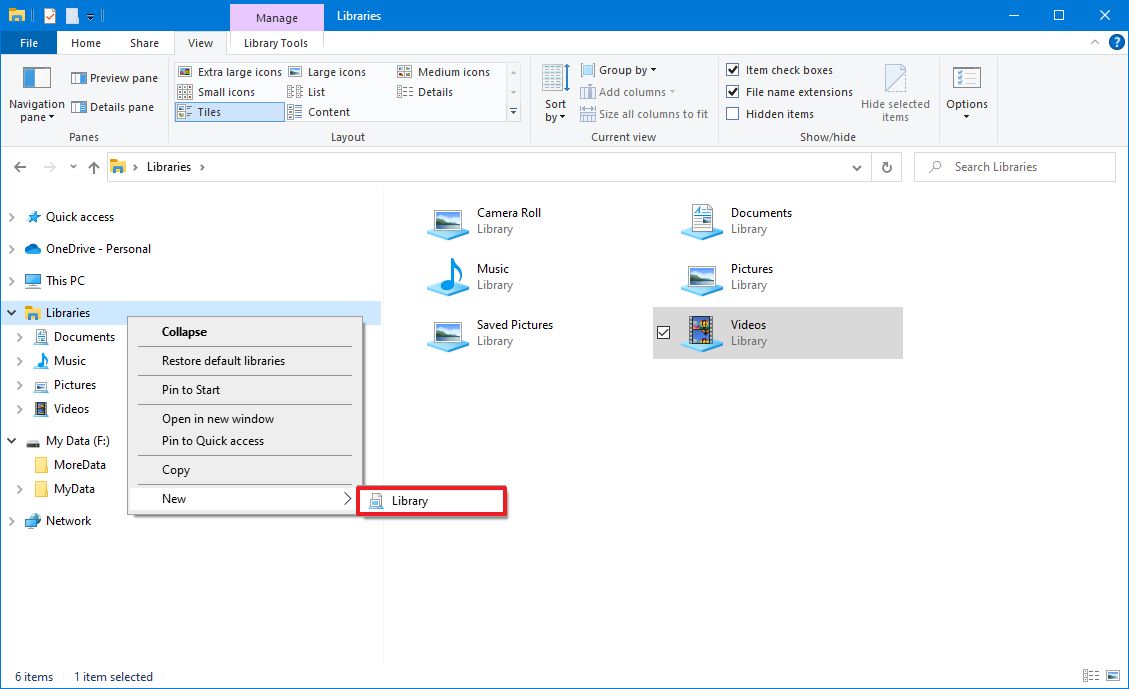
- Confirm the name of the library and press Enter.
- Right-click the library and select the Properties option.
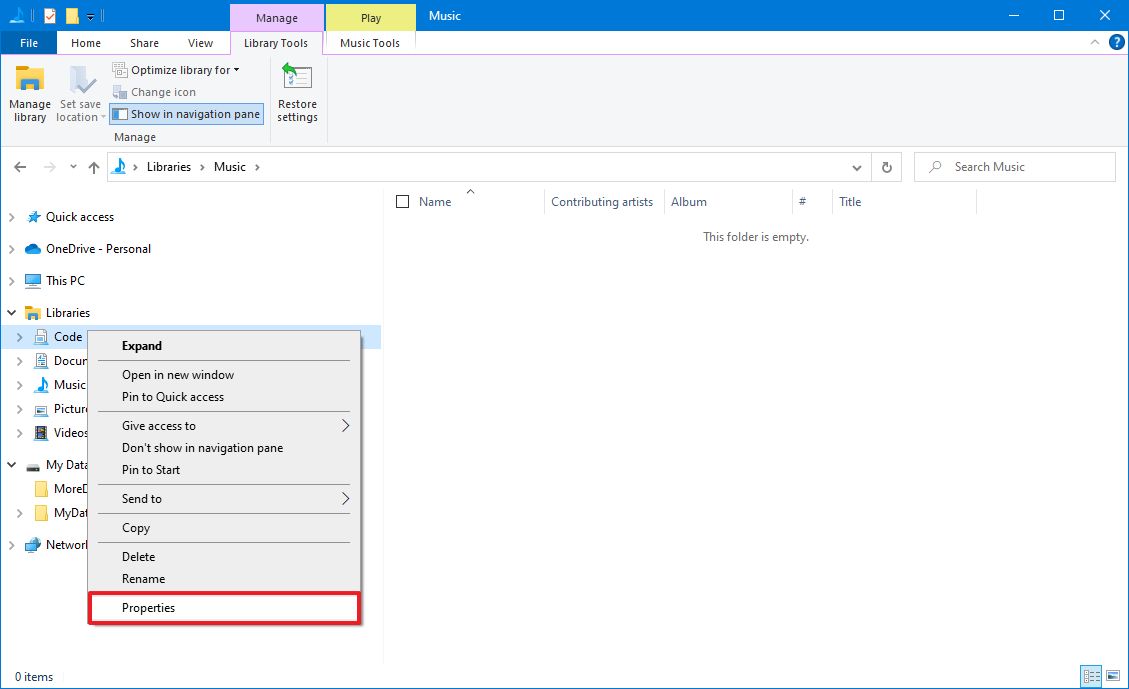
- Click the Add button.
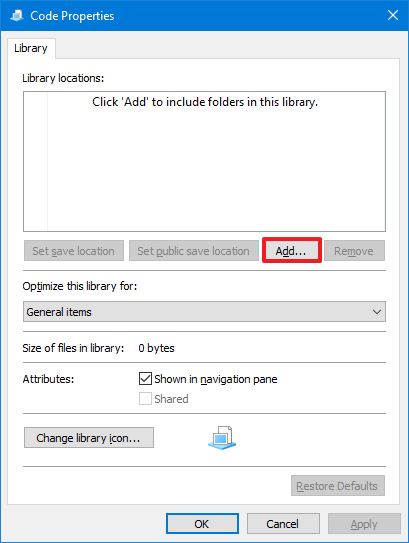
- Select the location you want to include in this library.
- Click the Include folder button.
- (Optional) Repeat step No. 6 and 7 to add more locations.
- Under the "Optimize this library for" section, use the drop-down menu and select the type of content you're planning to store.
- Click the Change library icon button.
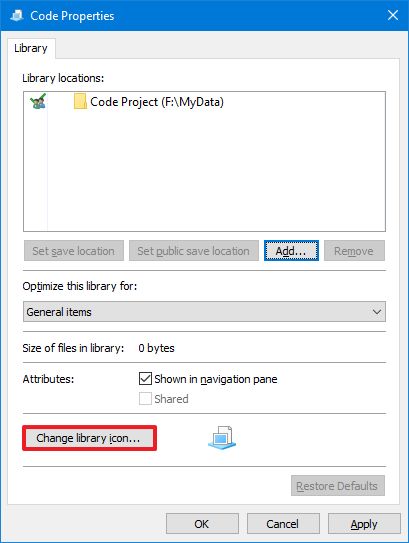
- Select an icon that reflects the content.
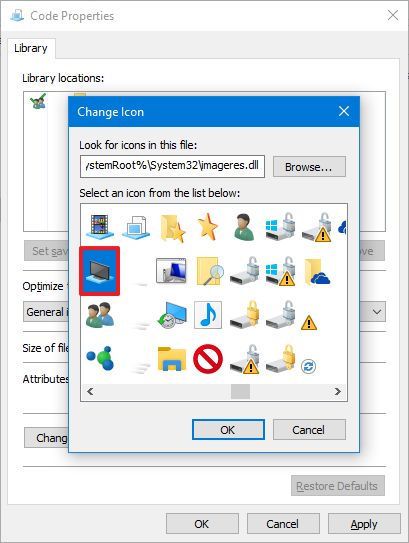
- Click the OK button.
- Click the Apply button.
- Click the OK button.
After you complete the steps, the new library will available in the "Libraries" collection from the navigation pane.
Mauro Huculak has been a Windows How-To Expert contributor for WindowsCentral.com for nearly a decade and has over 15 years of experience writing comprehensive guides. He also has an IT background and has achieved different professional certifications from Microsoft, Cisco, VMware, and CompTIA. He has been recognized as a Microsoft MVP for many years.
