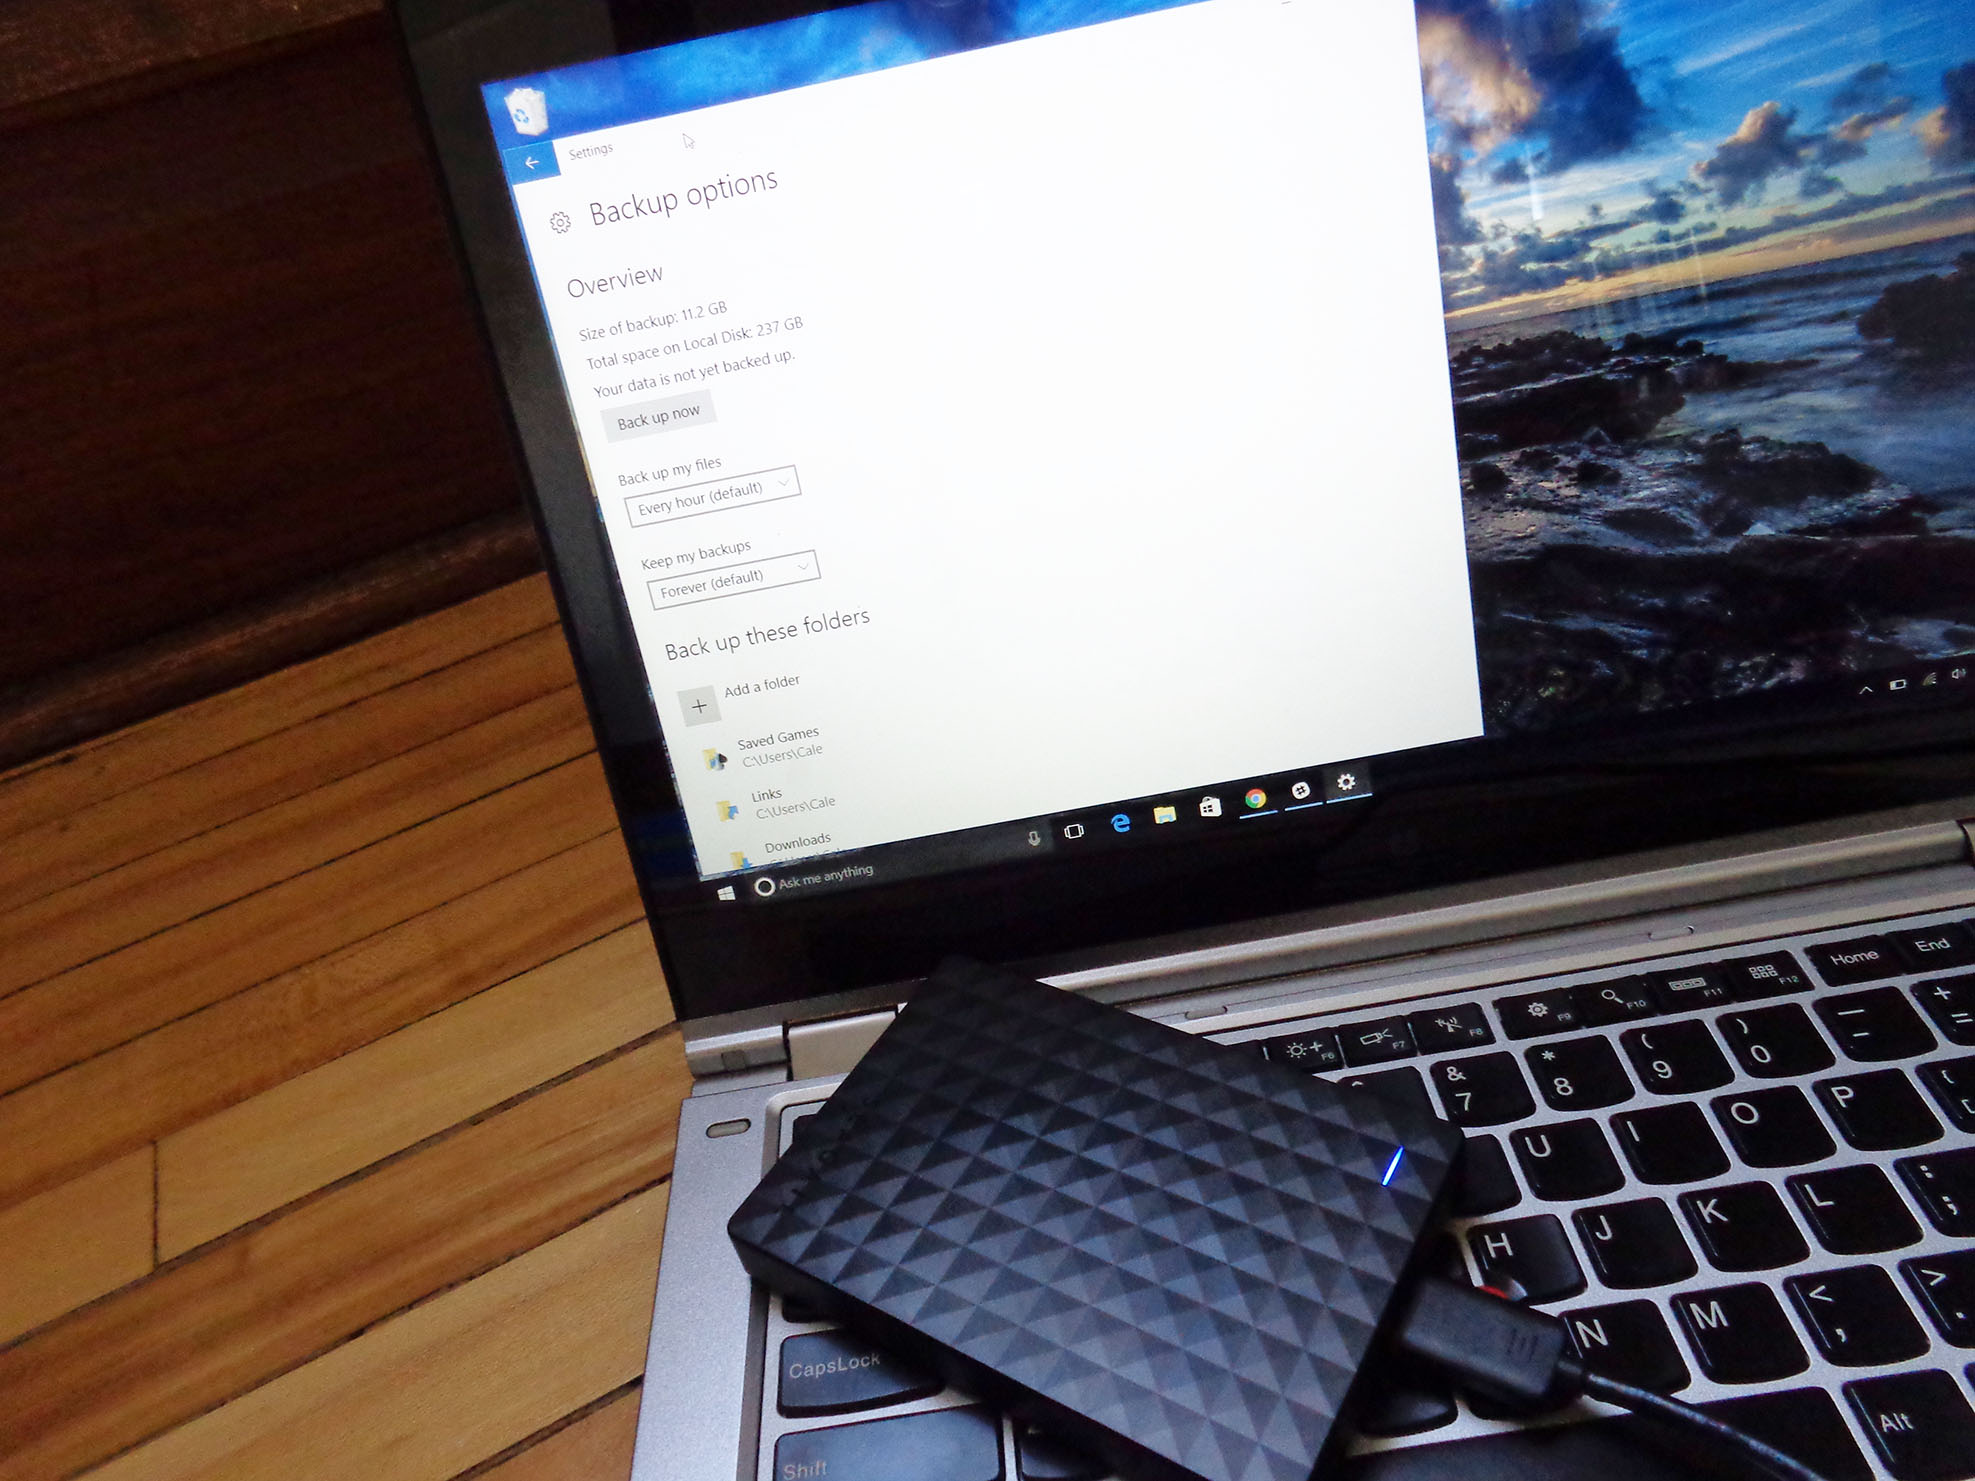
File History is a handy tool that lets you back up files on your PC to any hard drive connected to it, whether that connection is external via USB or internal via a bus. You can also back up to a network location if one is available. Here's how to use File History to safeguard your important files.
- How to add a drive to use with File History
- How to back up files using File History
- How to change the frequency of backups
- How to switch the drives that use File History
- How to restore files from File History
- Best external drives and NAS solutions
How to add a drive to use with File History
Before starting these steps, you should ensure a secondary drive is connected to your PC or that a network is set up.
- Click the Start button.
- Click the Settings button. (It looks like a gear and is located in the bottom-left corner of the Start menu.)
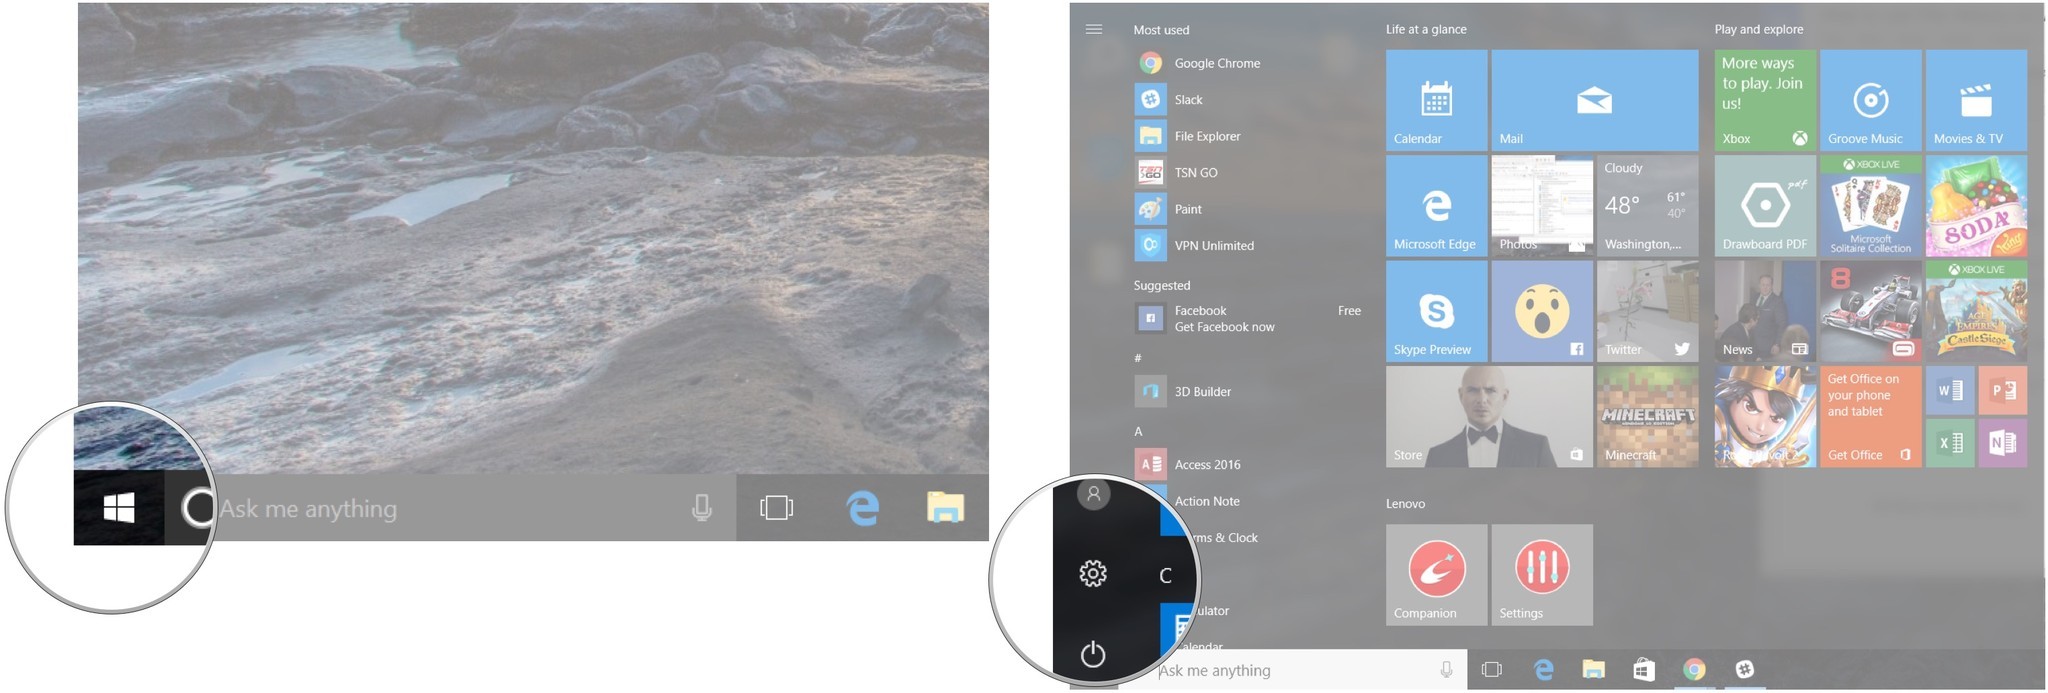
- Click Update & security.
- Click Backup.

- Click Add a drive.
- Click the drive you'd like to use as a backup. You can also choose to back up to a network location if one is available.
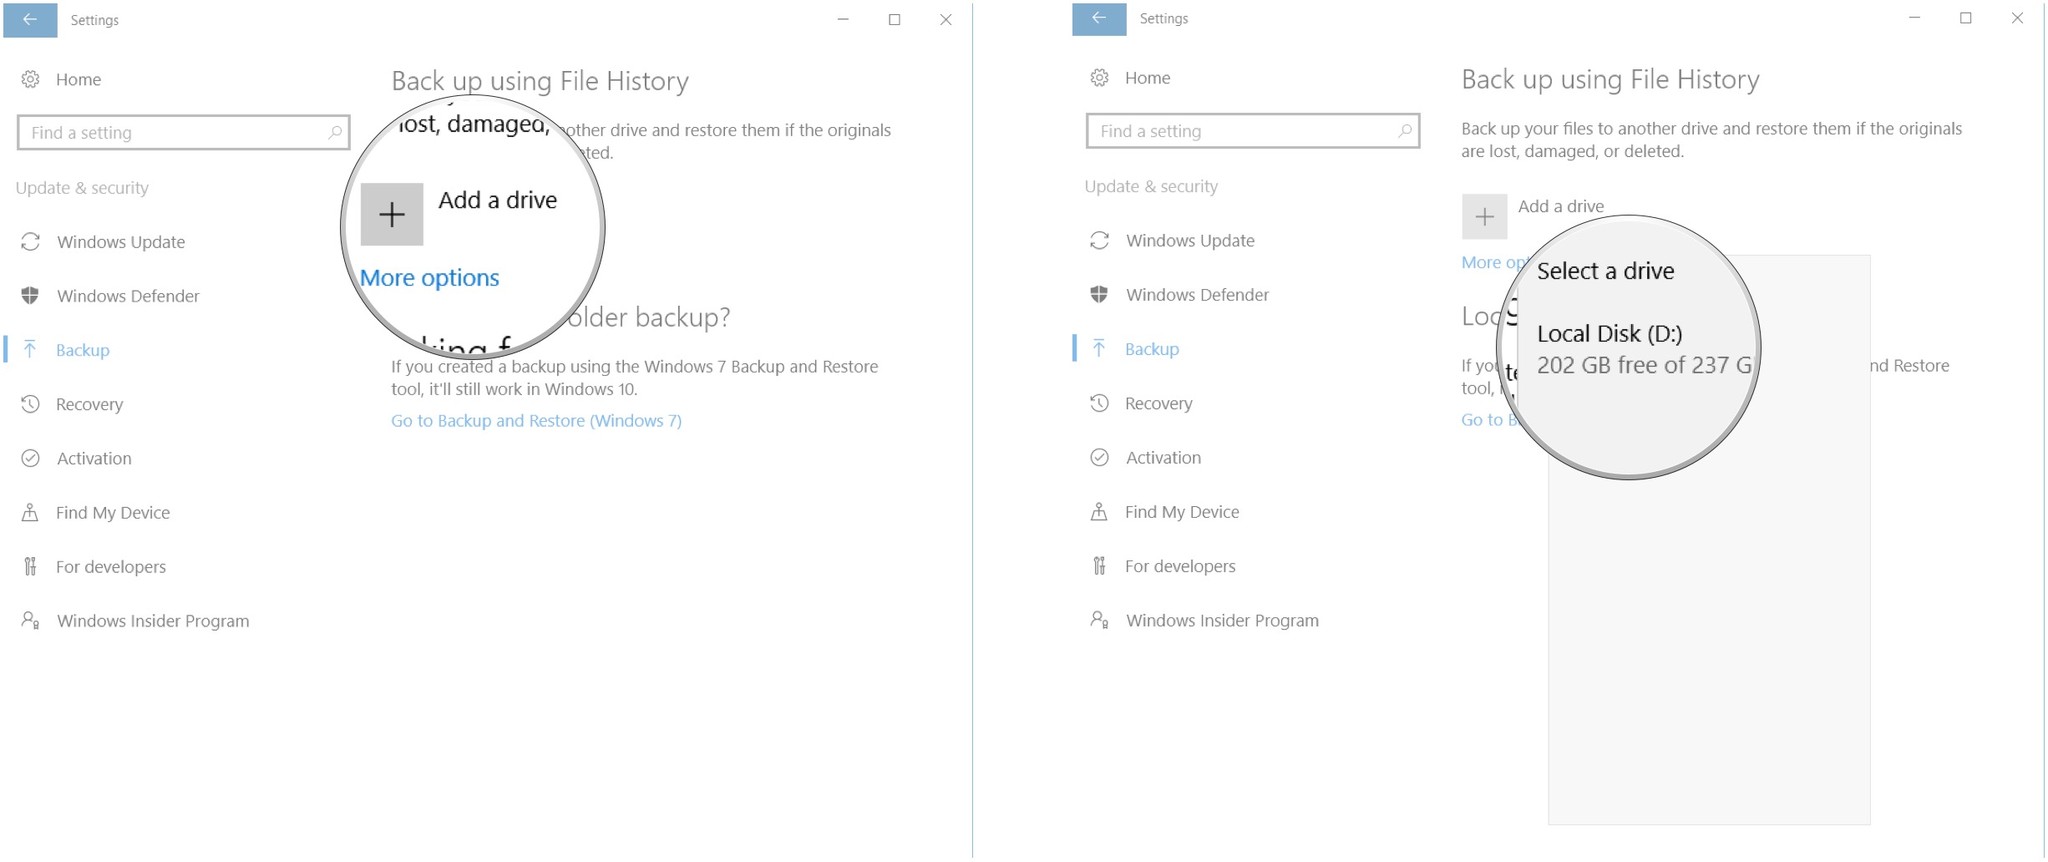
You now have a drive or network location associated with File History, and it's time to choose which files you want to back up.
How to back up files using File History
File History will automatically back up files from folders it deems important, but you can customize exactly which folders and files its backs up.
- Click the Start button.
- Click the Settings button. (It looks like a gear and is located in the bottom-left corner of the Start menu.)

- Click Update & security.
- Click Backup.

- Click More options.
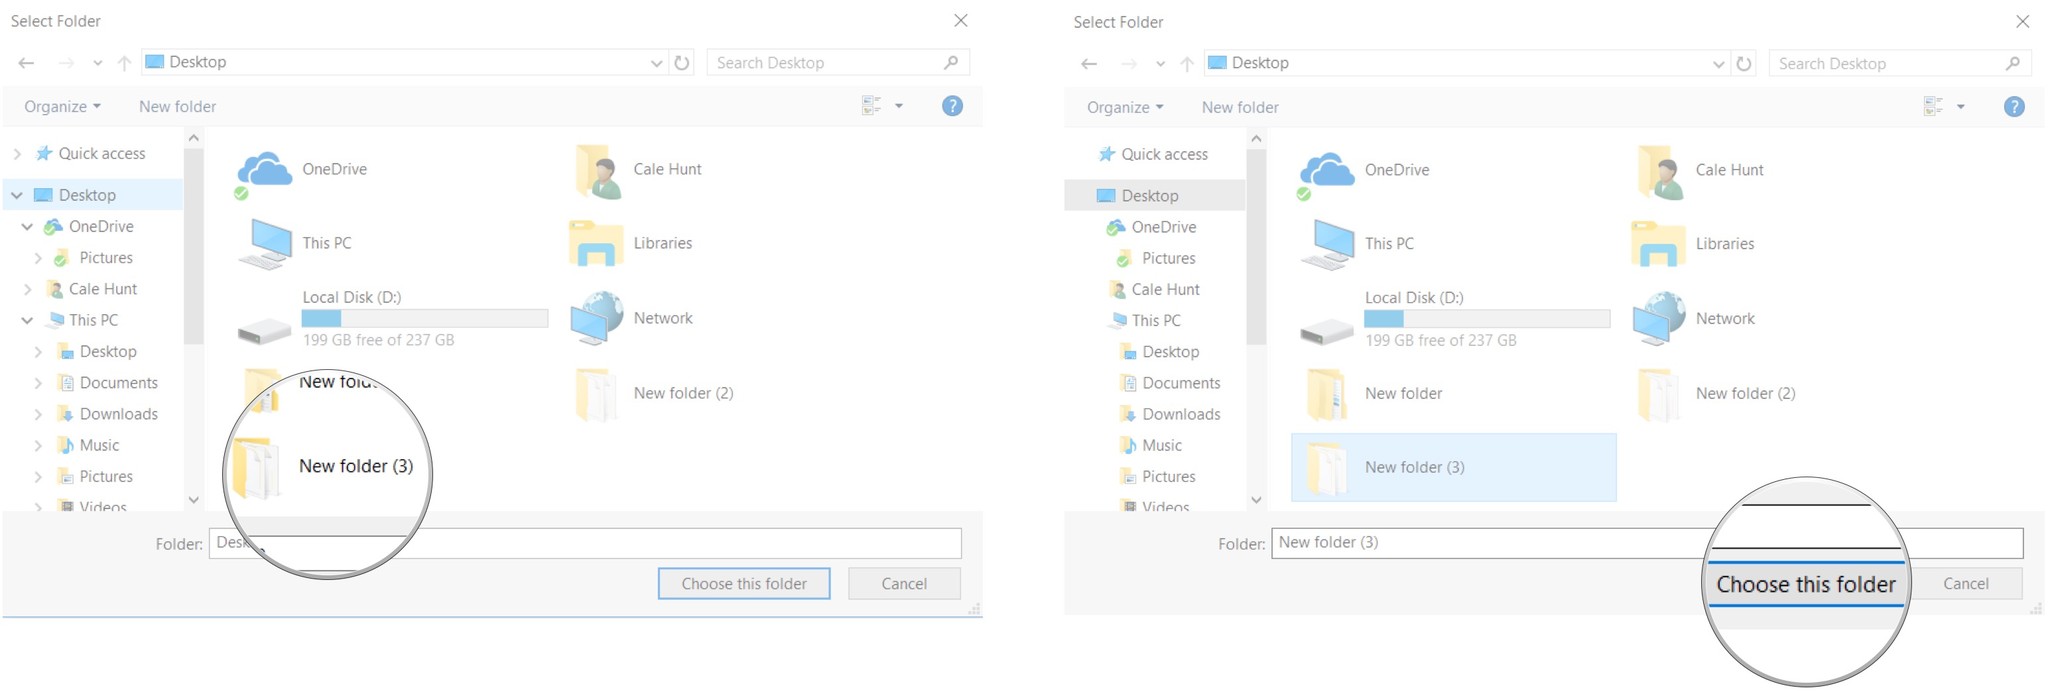
- Click Add a folder.
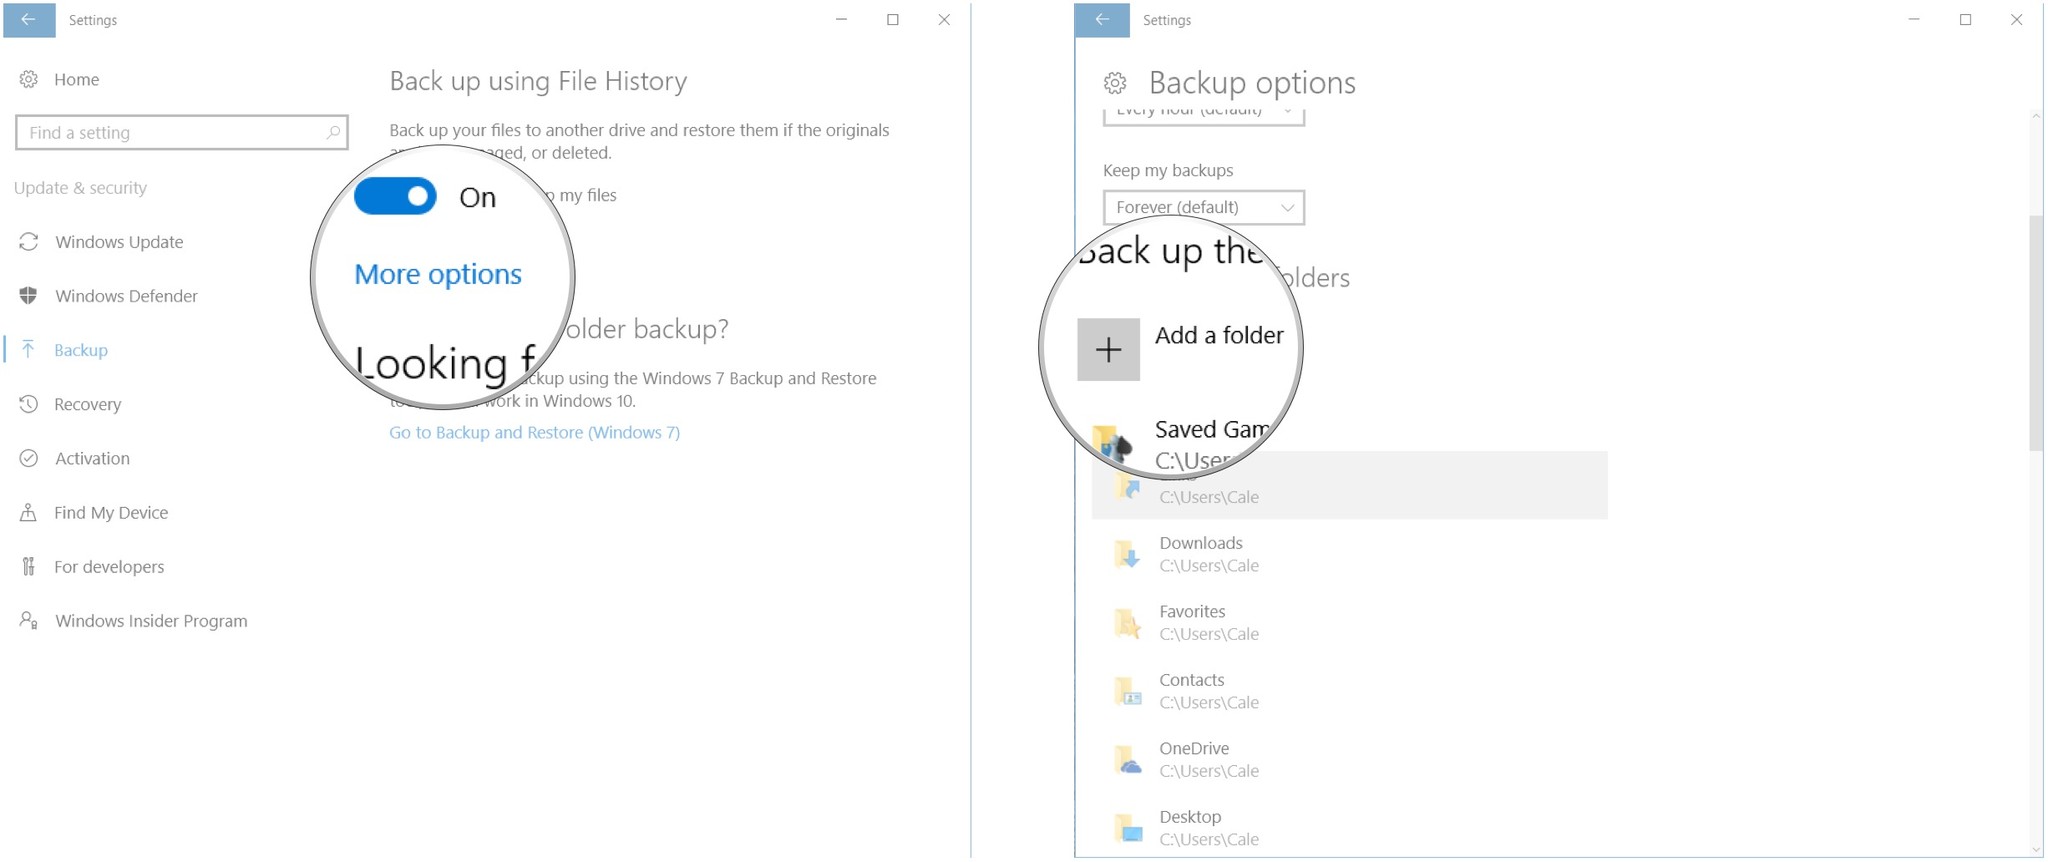
- Click a folder you want to back up.
- Click Choose this folder.
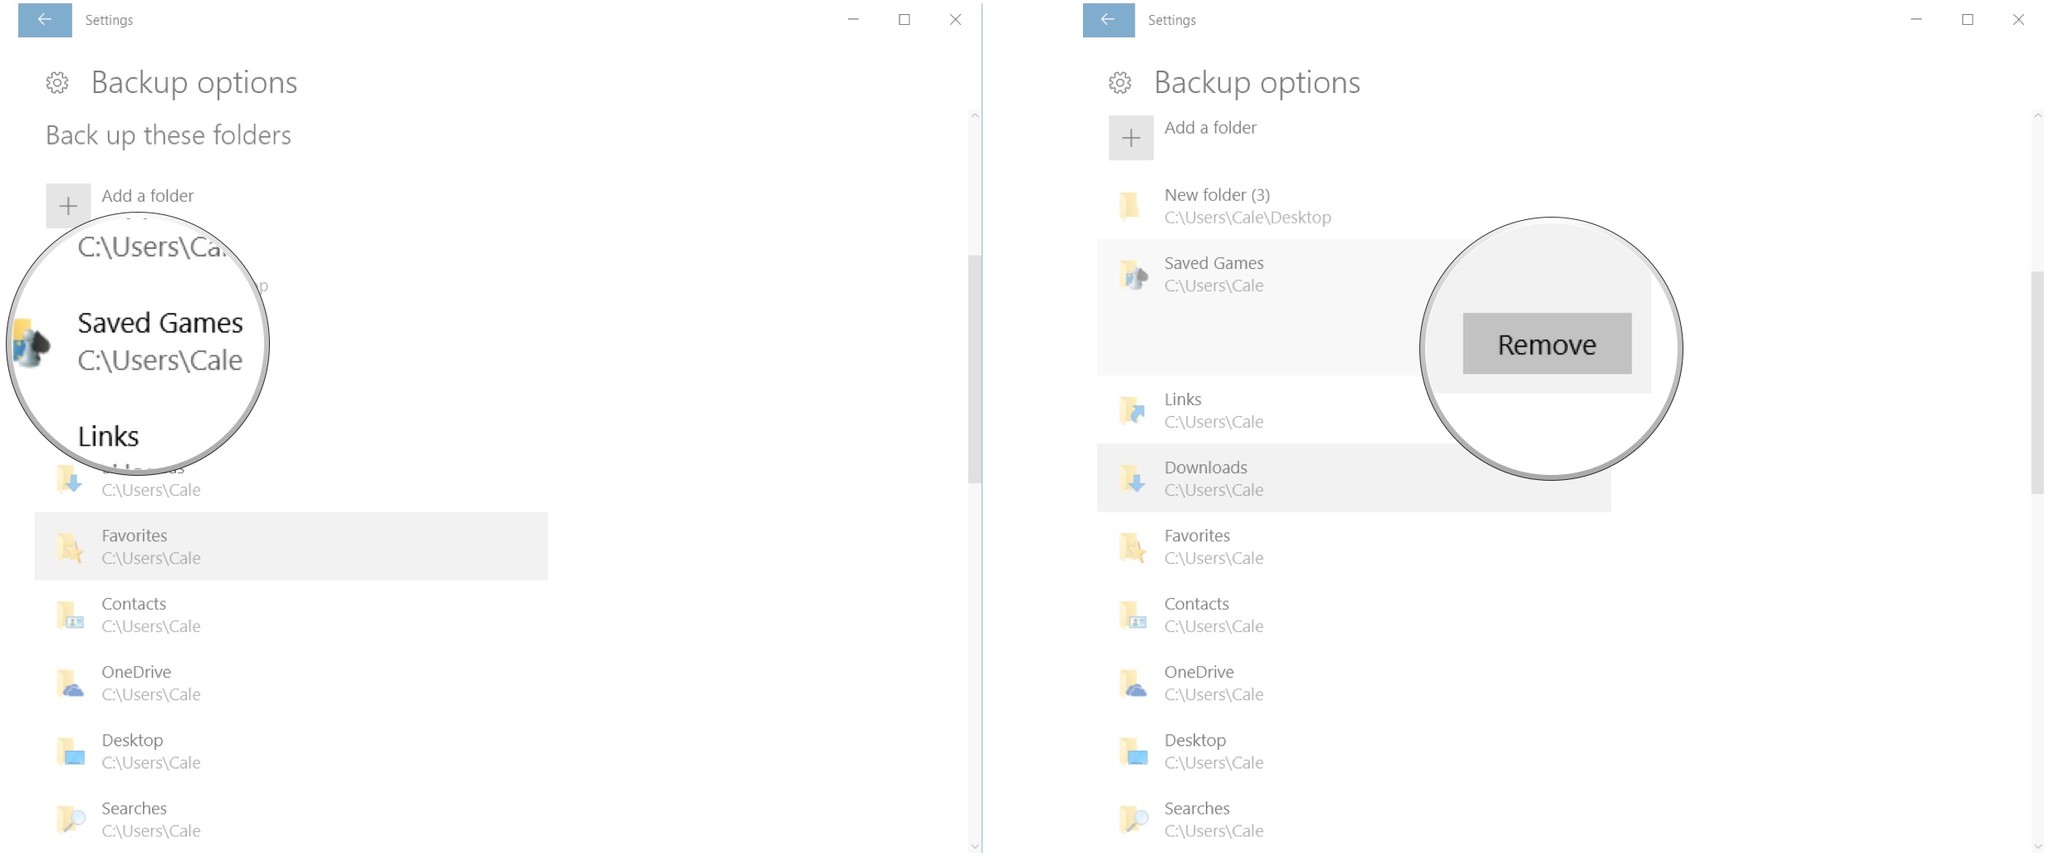
- If you add the wrong folder or simply want to remove a folder from the backup list, perform the following two steps.
- Click a folder in the Back up these folders list.
- Click Remove.
How to change the frequency of backups
If you don't need your files backed up on an hourly basis, you can change how often a backup occurs, as long as the drive is connected or the network location is available.
- Click the Start button.
- Click the Settings button. (It looks like a gear and is located in the bottom-left corner of the Start menu.)
- Click Update & security.
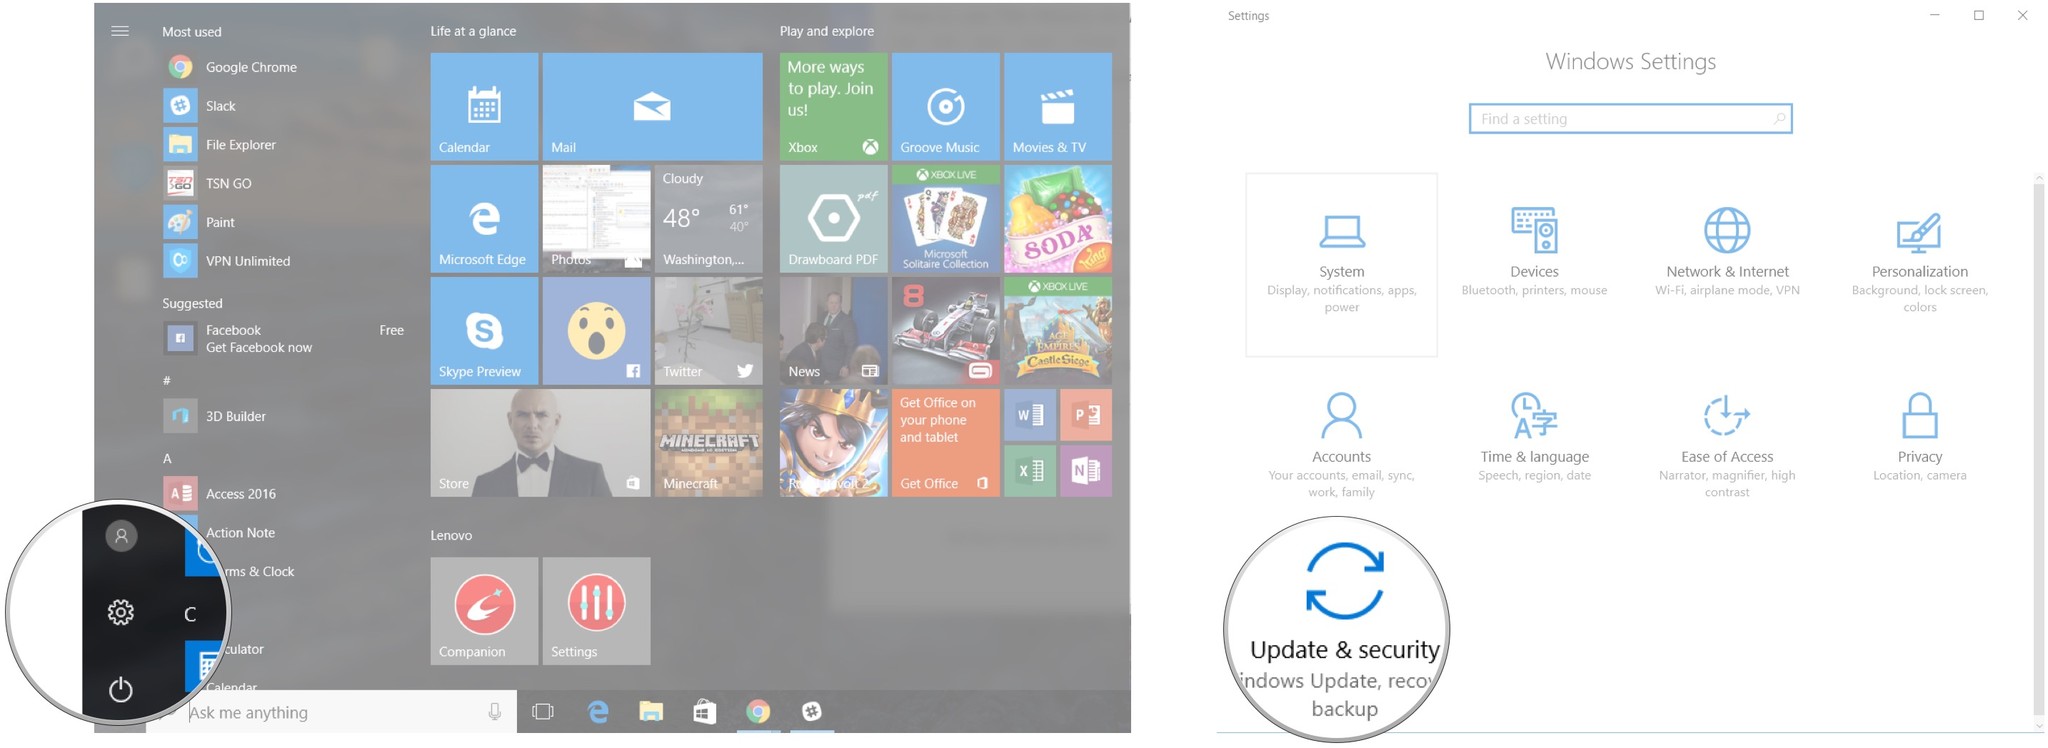
- Click Backup.
- Click More options.
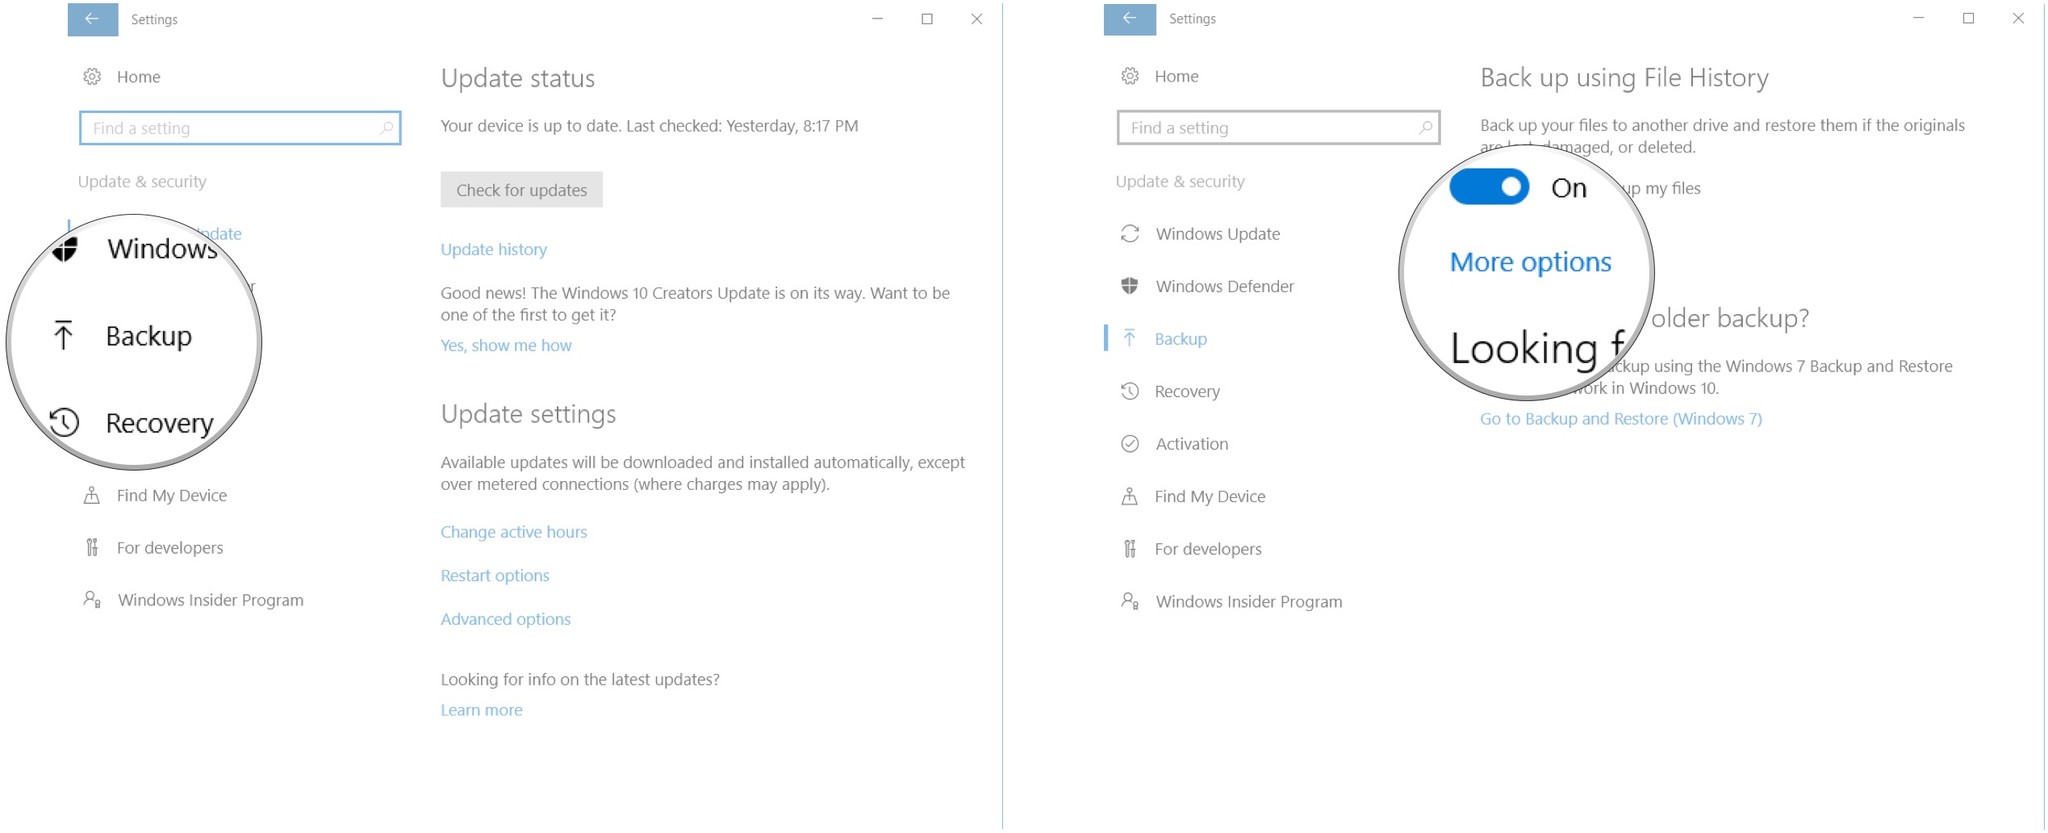
- Click the dropdown arrow beneath Back up my files.
- Click a frequency options.
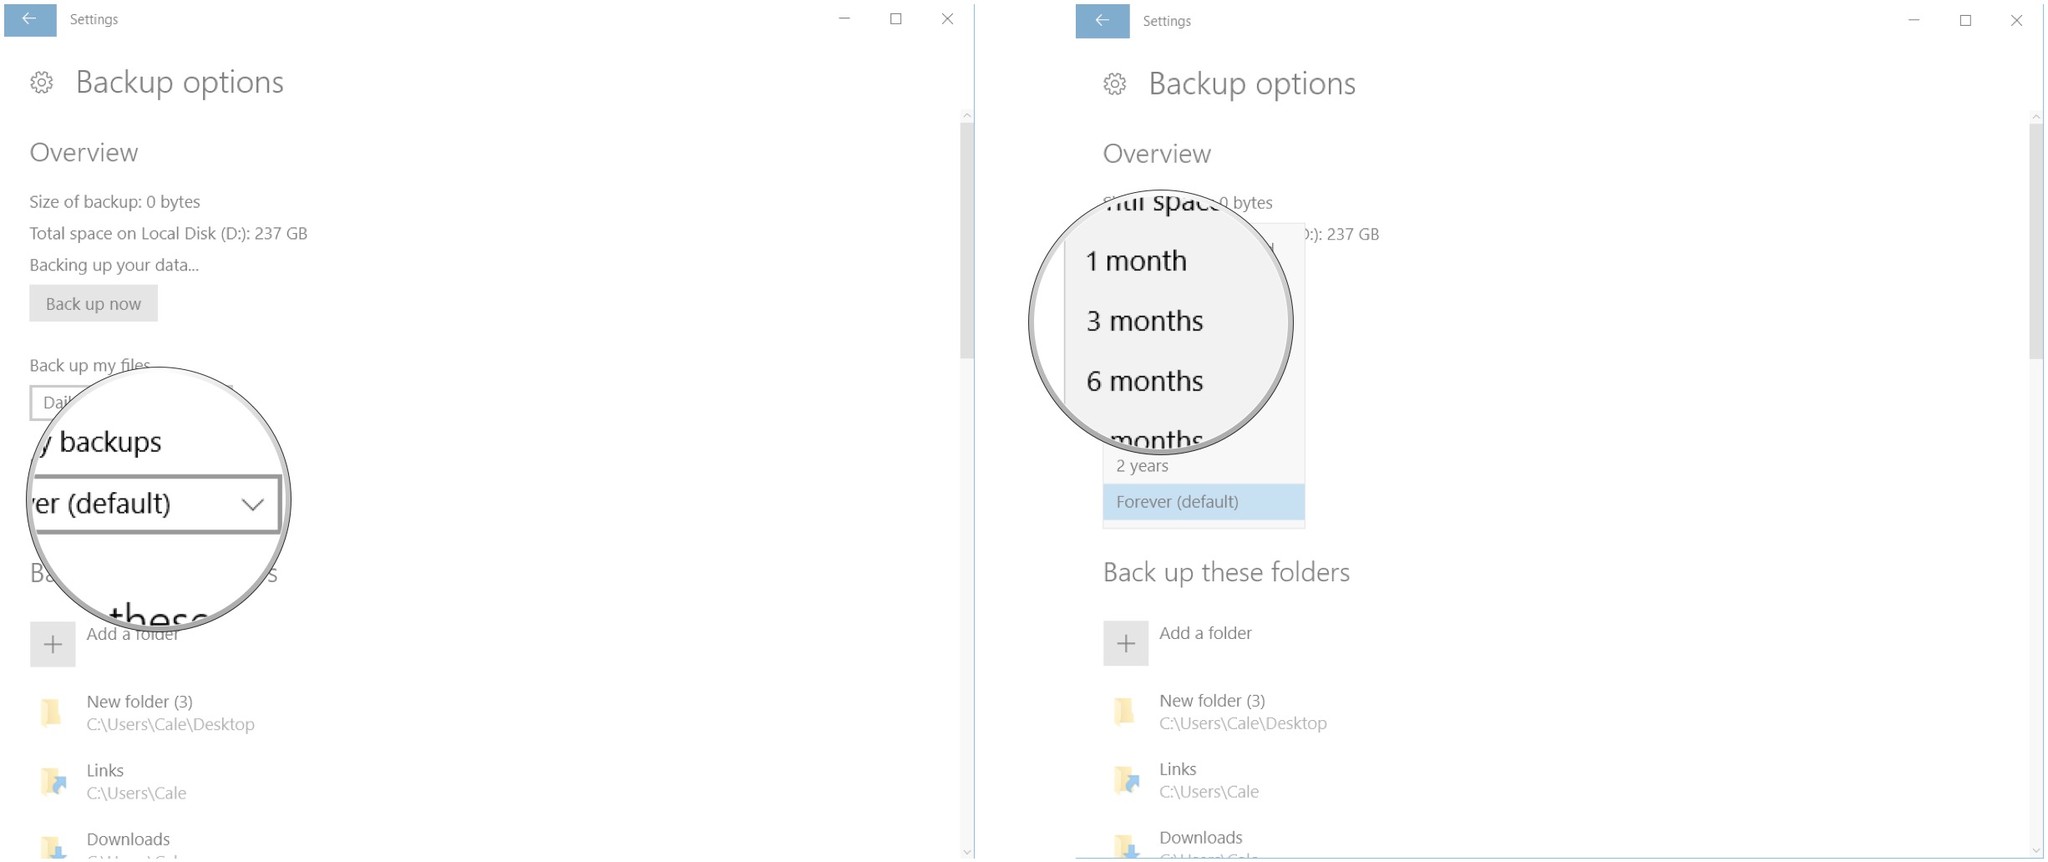
- You can also change how long the backups are kept on the drive or network using the following two steps.
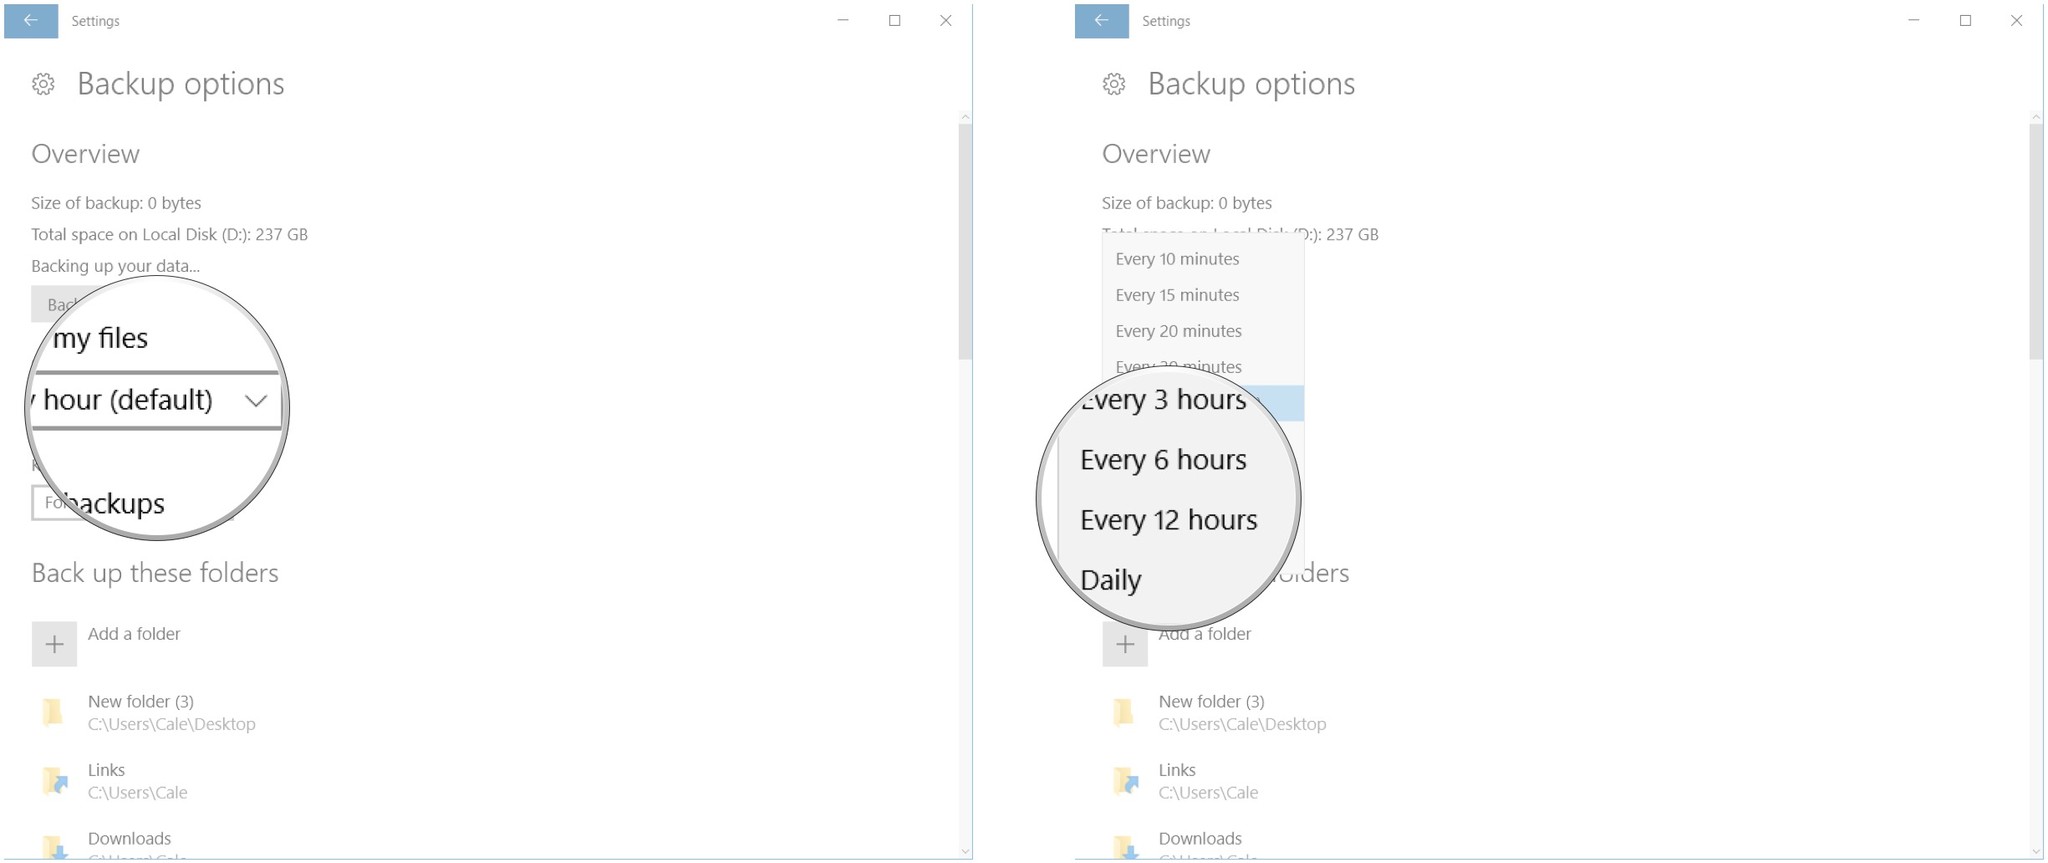
- Click the dropdown arrow beneath Keep my backups.
- Click a time limit.
How to switch the drives that use File History
If your backup drive is full, or if you just want to start using a different drive, you have to manually switch the drive in the File History settings.
- Click the Start button.
- Click the Settings button. (It looks like a gear and is located in the bottom-left corner of the Start menu.)

- Click Update & security.
- Click Backup.

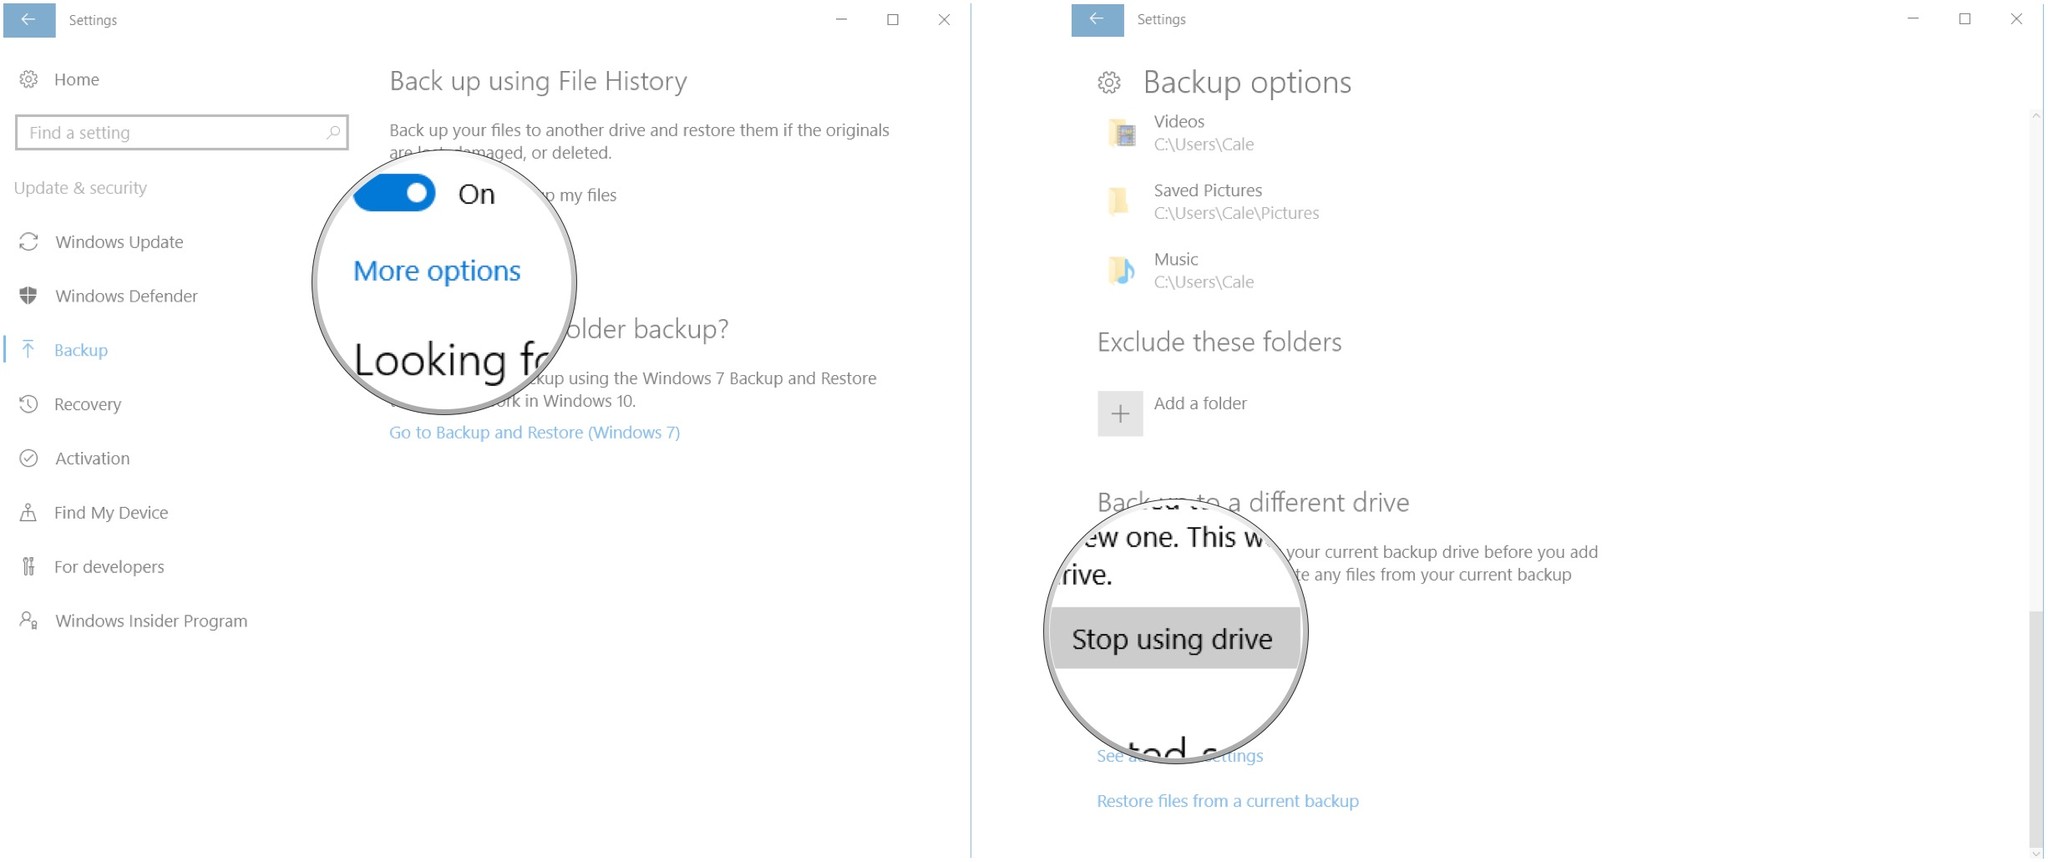
- Click More options.
- Click Stop using drive.
You can now connect a different drive, and back up to it, using the steps listed above.
Get the Windows Central Newsletter
All the latest news, reviews, and guides for Windows and Xbox diehards.
How to restore files from File History
If something goes wrong and you lose files, you can easily restore them from the File History backup. Make sure the drive that contains the backup is connected to your PC or the network location is accessible.
- Click the Start button.
- Click the Settings button. (It looks like a gear and is located in the bottom-left corner of the Start menu.)
- Click Update & security.

- Click Backup.
- Click More options.

- Click Restore files from a current backup. (You might have to scroll down to find it.)
- Click the Restore button. (It is green and has a circular arrow on it.)
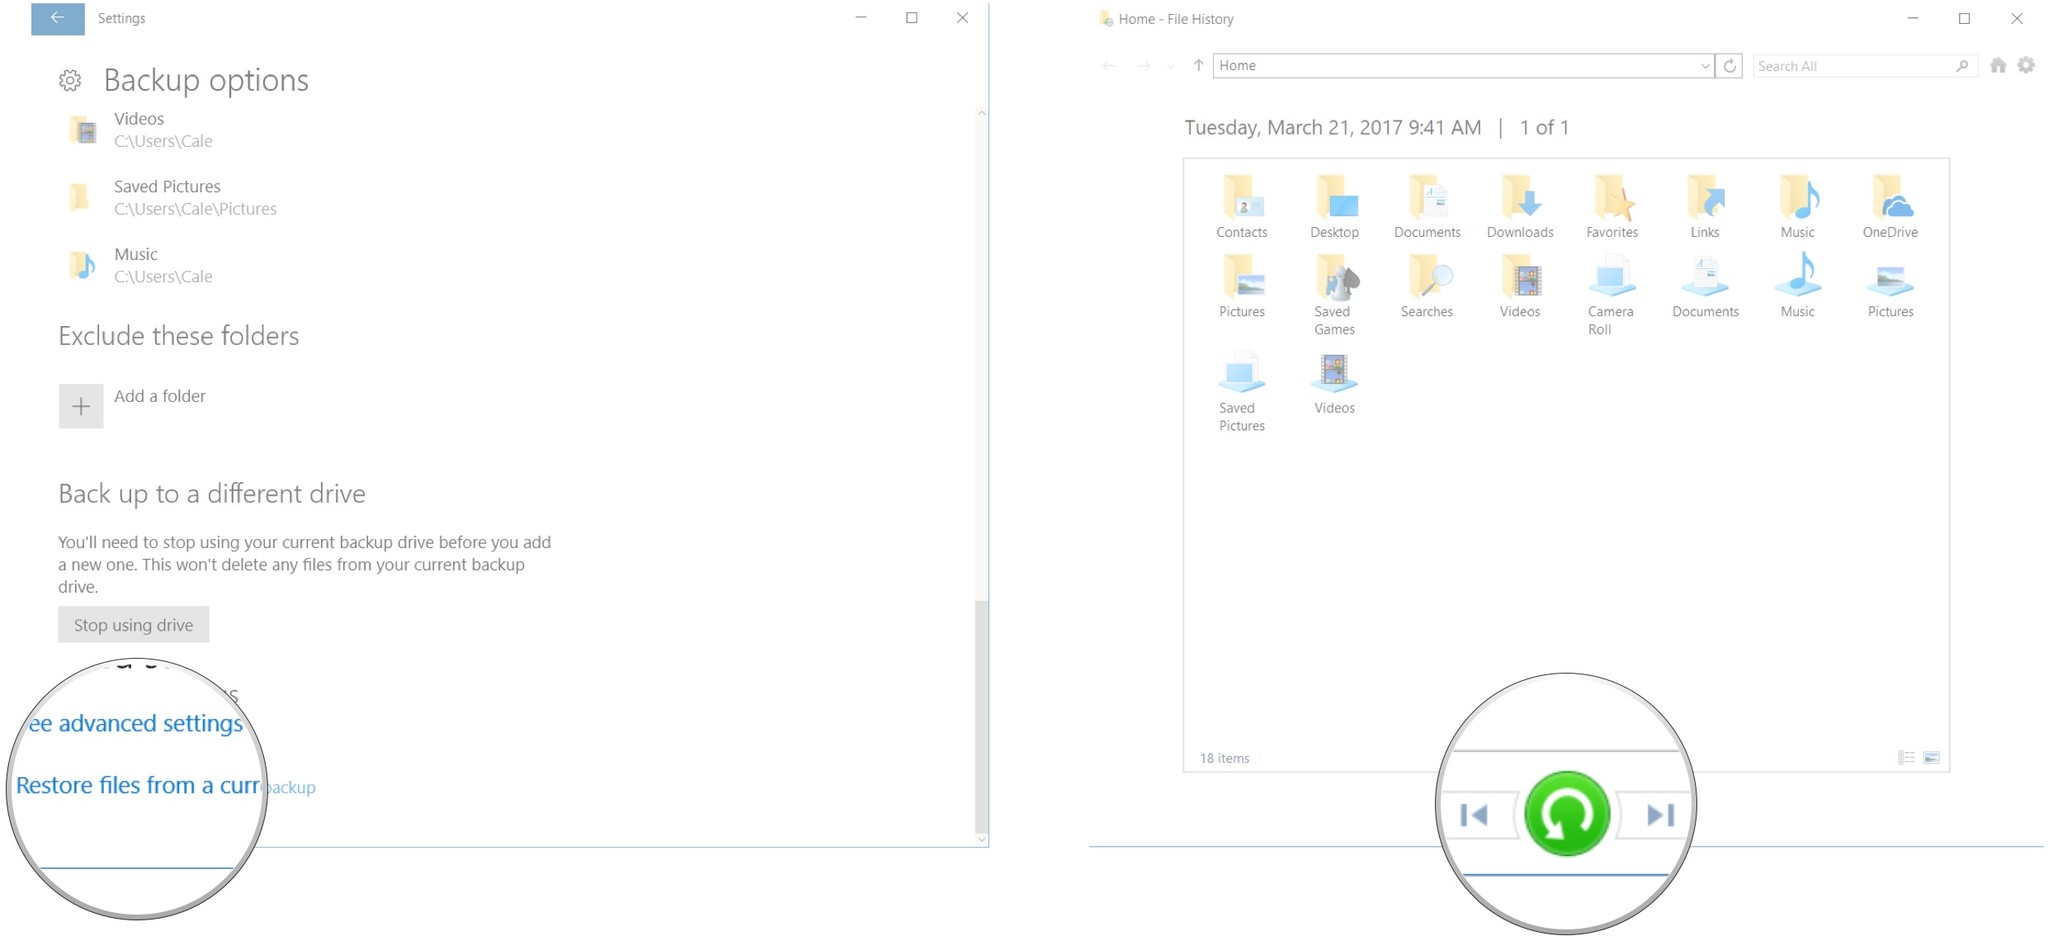
Your files contained in the backup will now be restored to their original location.
Best external drives and NAS solutions
If you don't already have an extra hard drive, check out our picks for the best available right now:
See the best external hard drives
If you'd like to take some extra steps and create a network storage solution, have a look at our guide to building your own NAS, or our collection of the best pre-built NAS systems:
More resources
If you want to create an image of your drive to use in the event of a complete failure, Windows has a built-in tool that is quite easy to use. We've also created a guide to walk you through each step of that process:
How to make create an image backup on Windows 10 and Windows 8.1
Using File History and Windows Image Backup are just the tip of the iceberg. If you'd like more info on creating data backups, have a look at our roundup of six easy backup methods:

Cale Hunt brings to Windows Central more than eight years of experience writing about laptops, PCs, accessories, games, and beyond. If it runs Windows or in some way complements the hardware, there’s a good chance he knows about it, has written about it, or is already busy testing it.
