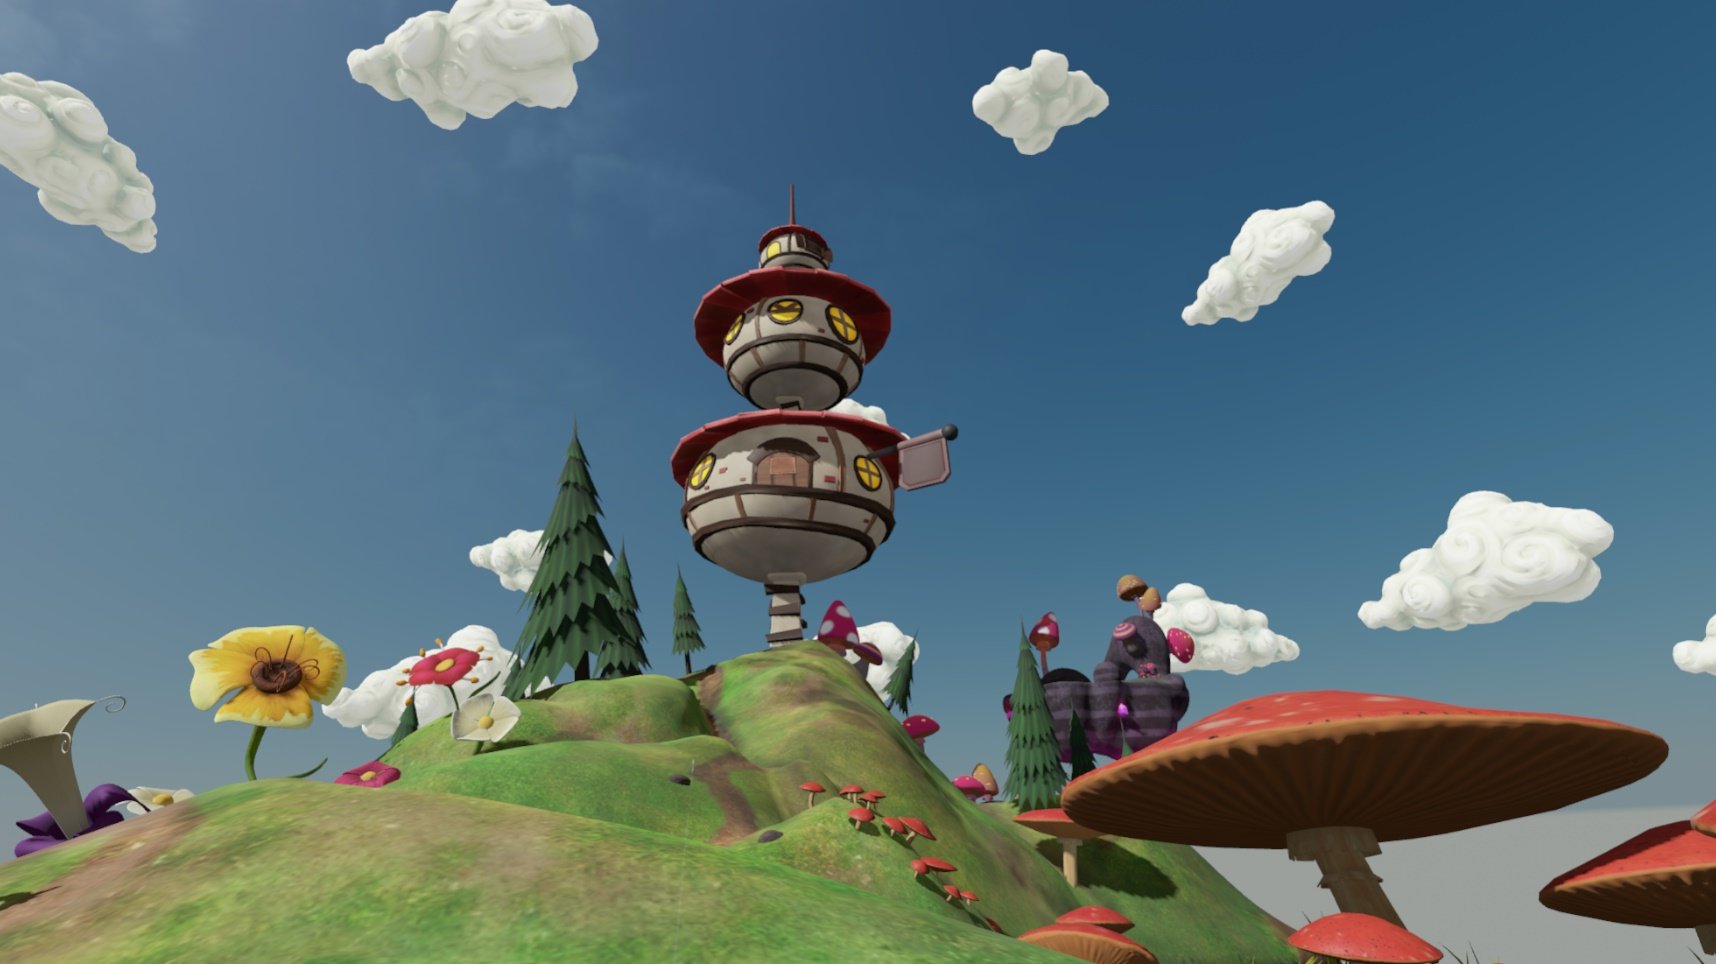
Within Windows Mixed Reality (WMR), Cliff House was the original environment in which everyone spawned when they donned a head-mounted display (HMD) and launched the WMR Portal. With the April 2018 Windows 10 Update, Skyloft was added to the mix, offering up a bit of variety for those who like to spend time using apps and arranging furniture before jumping into a game.
Also with the April 2018 Update came an experimental feature that allows you to add your own custom environments created with 3D modeling software. Let's take a look at how to add your own creations to WMR as well as a few tips on the creation process.
How to add a custom environment to Windows Mixed Reality
I won't show you exactly how to create your own environment — that's a special talent I don't possess — but I will show you how to upload any custom environments you come across, starting with a free sample provided by Microsoft.
This Fantasy Island environment is downloaded as an executable (.exe) from the Microsoft website, but in the case of a self-made environment, it would already be located on your PC and you could skip ahead to step 5.
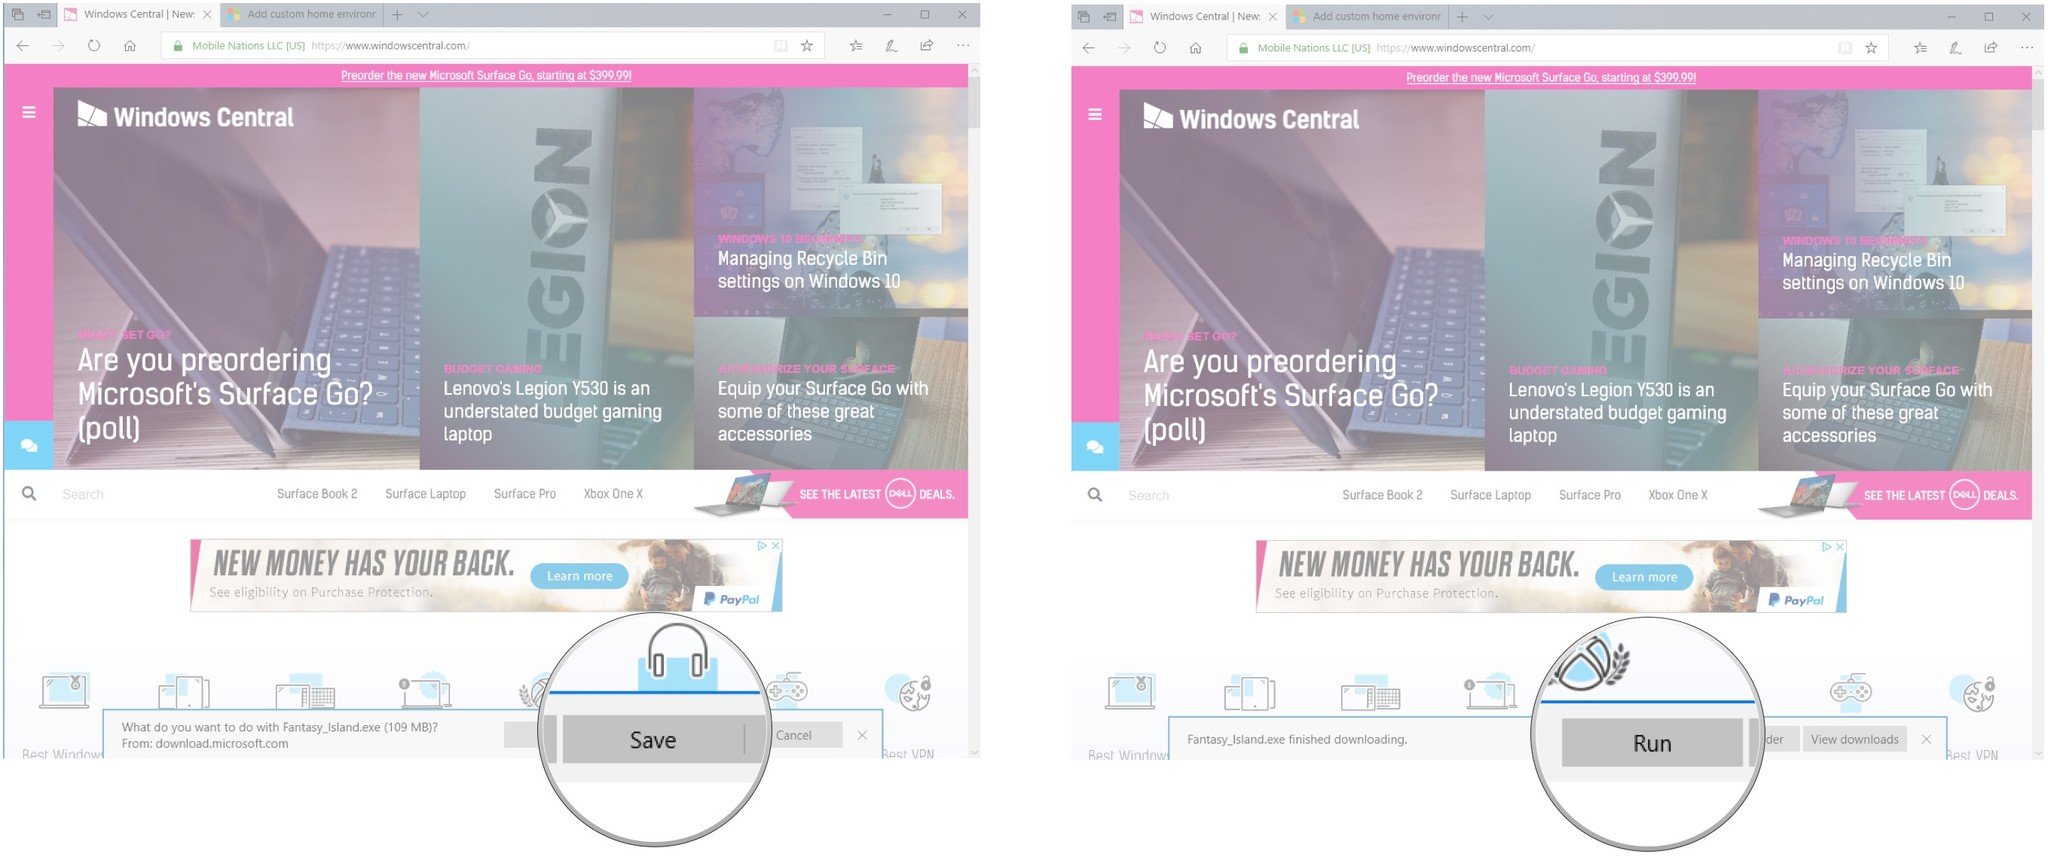
- Navigate to the Fantasy Island download link at the Microsoft website.
- Click Save.
- Click Run. At this point, Windows SmartScreen might attempt to block the program from running. Go ahead and run it anyway.
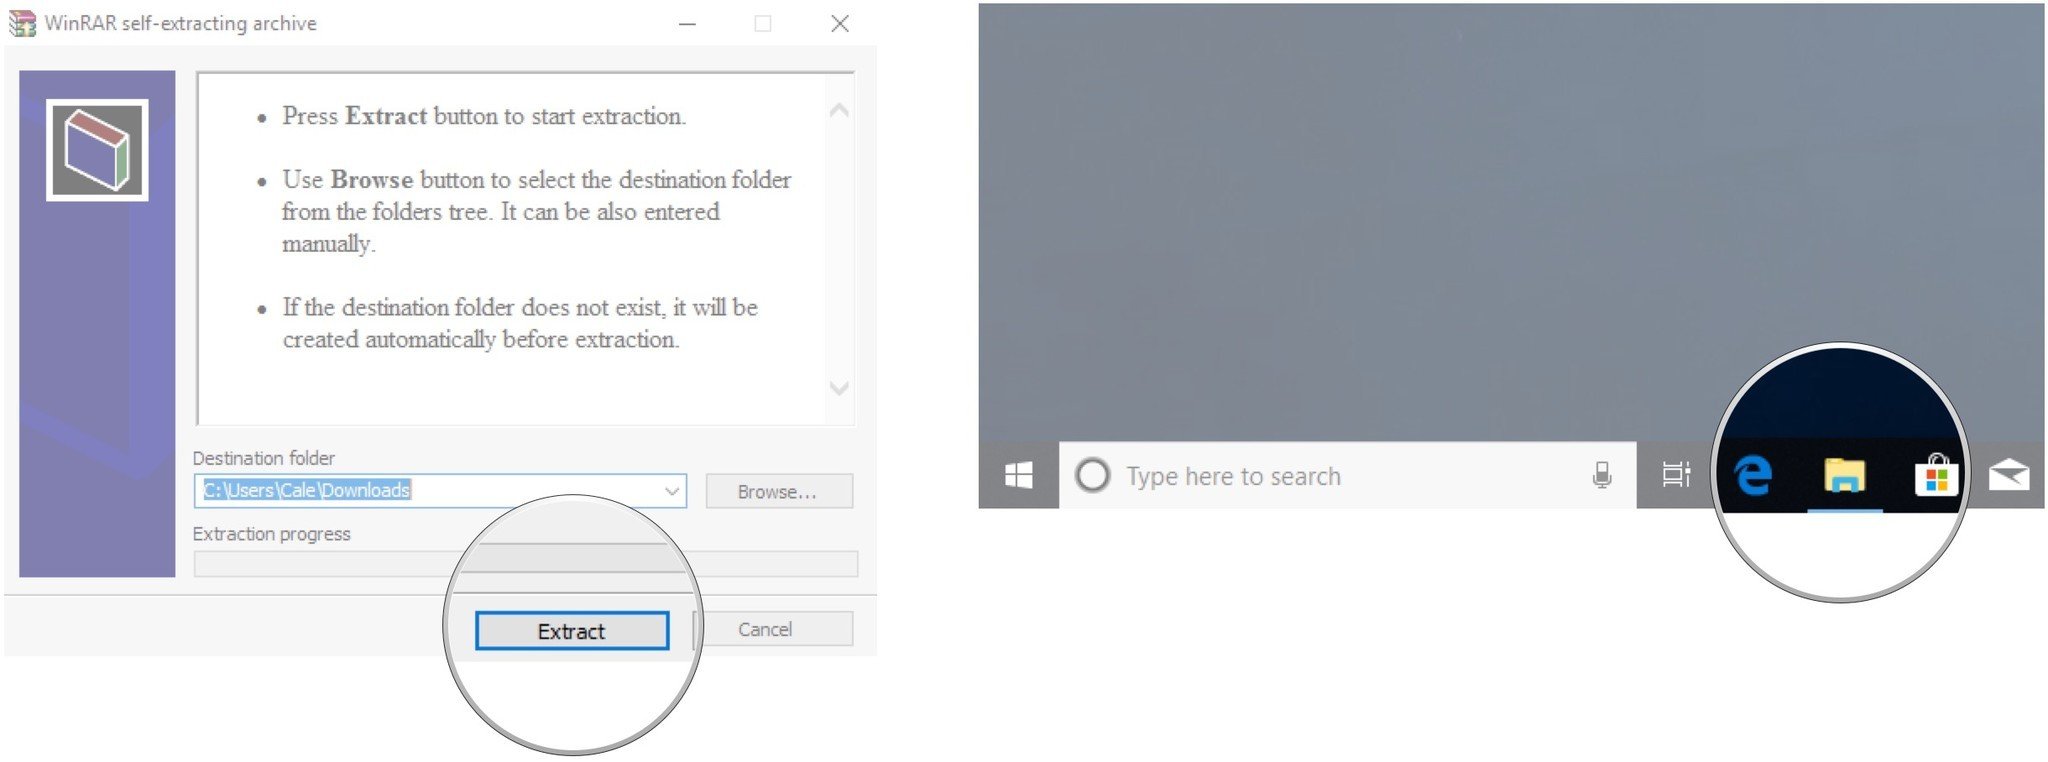
- Click Extract.
- Launch File Explorer from your Start menu, desktop, or taskbar.
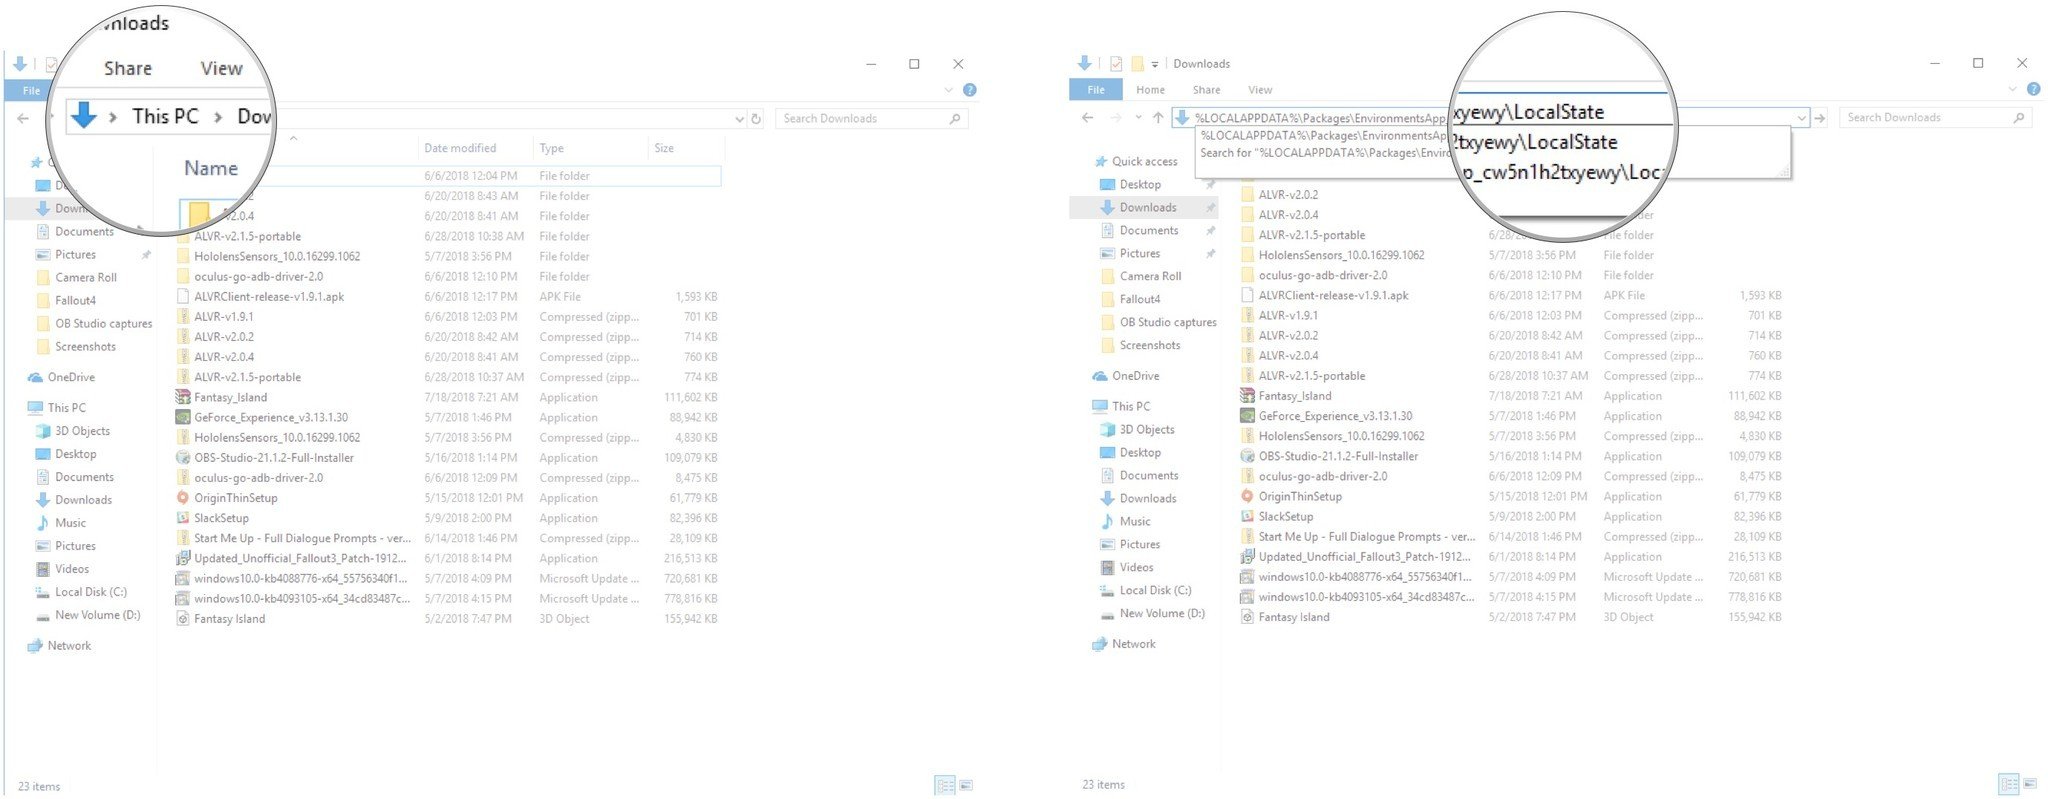
- Click the address bar near the top of the window.
- Type
%LOCALAPPDATA%\Packages\EnvironmentsApp_cw5n1h2txyewy\LocalStatand hit Enter on your keyboard to bring up the WMR Portal environments folder.
- Launch a second File Explorer window.
- Navigate to the Downloads folder or to wherever you extracted the custom environment.
- Drag and drop the Fantasy Island 3D Object file into the WMR Portal environments folder.
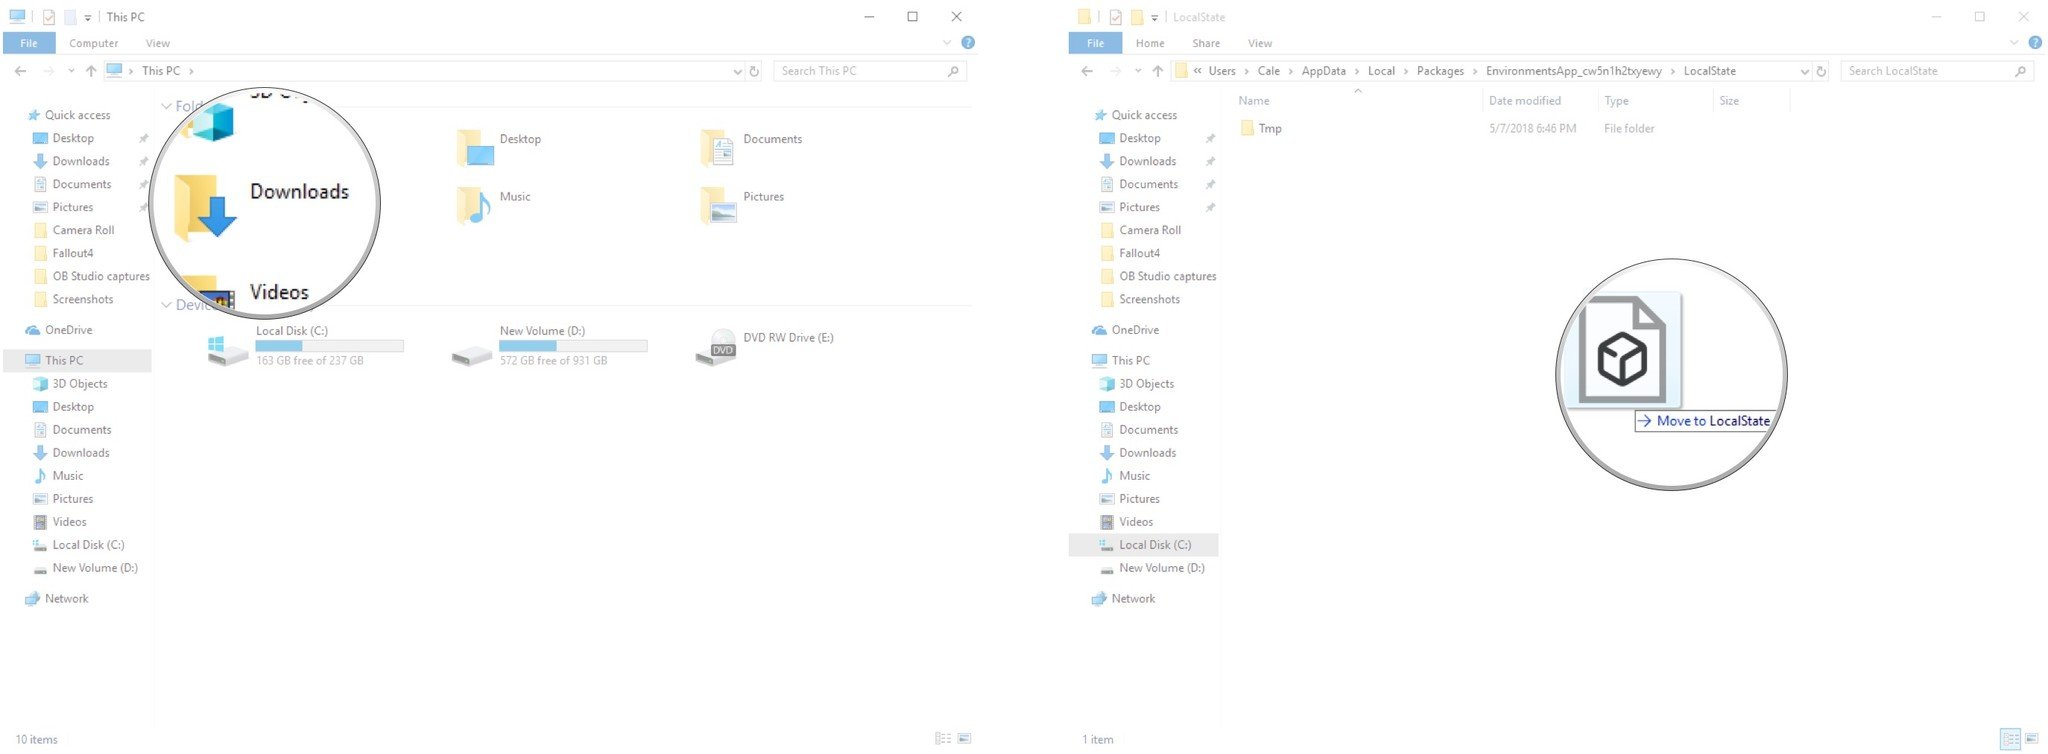
You can now launch the WMR Portal. If you already had it running, be sure to restart it before attempting to switch between environments, or else the custom option will not show up. Remember, this is an experimental feature, so expect a few (or a lot) of bugs.
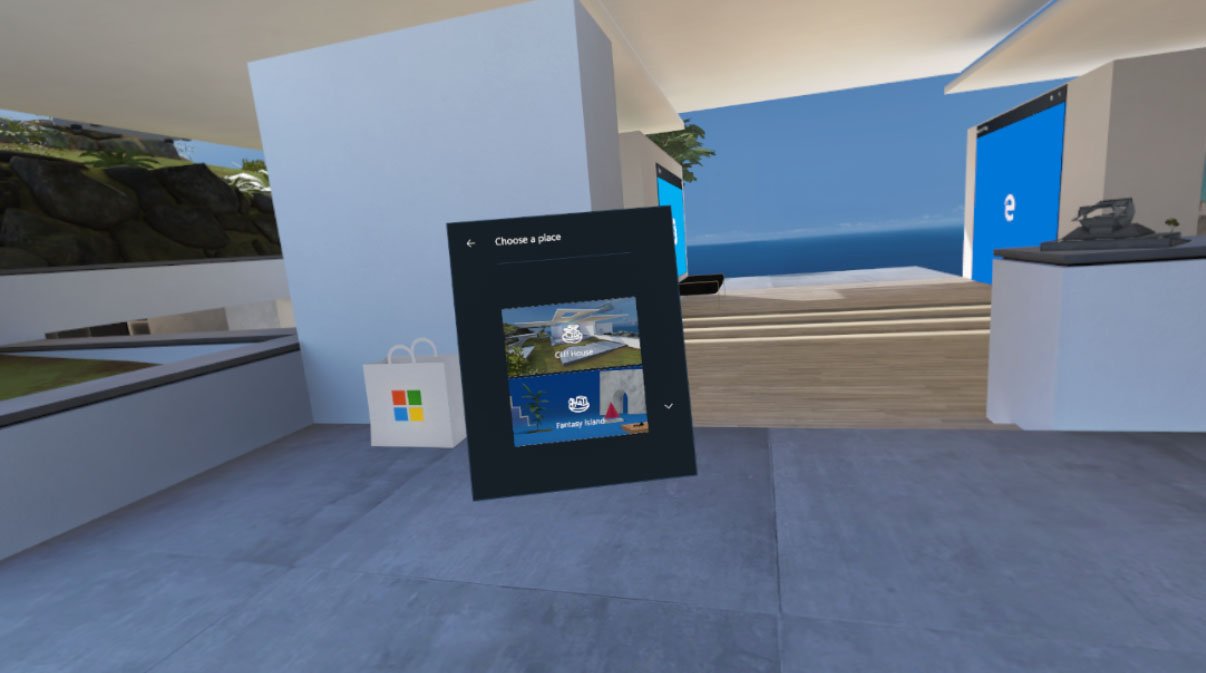
How to switch between environments in Windows Mixed Reality
Get the Windows Central Newsletter
All the latest news, reviews, and guides for Windows and Xbox diehards.
How to remove a custom environment
If you grow tired of seeing a custom environment in the Places section of WMR, you can always revisit the WMR Portal environments folder and delete the 3D Object file that you initially dragged over. Once you've restarted the Portal app, you should no longer see it in the list of Places.
Tips on creating your own environments
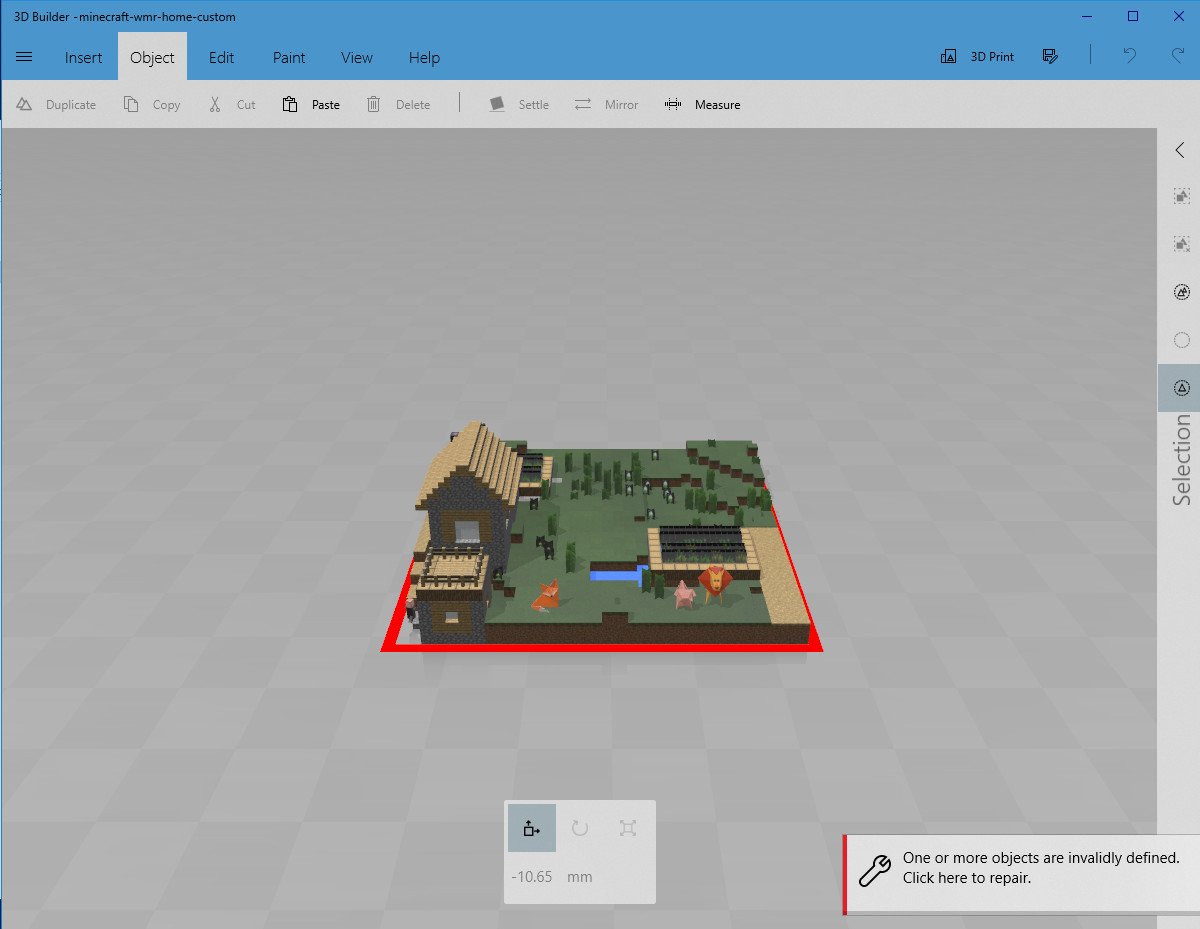
One of the easiest ways to get started with your own WMR environment is to fire up Paint 3D and get busy creating a world out of pre-made 3D models or those imported from the available library. Of course, other 3D modeling software will work as well, as long as you end up with the same glTF 2.0 file (ending in .glb) as the sample Fantasy Island environment.
If you need to convert your assets over to glTF 2.0 or you'd just like to check out some other modeling software, be sure to have a look at the GitHub page recommended by Microsoft.
Those of you who get carried away and build an enormous environment might want to check out the free WMR Asset Converter (likewise available at GitHub) that will optimize your creations.
As always, refer back to the official Microsoft page for more information and for troubleshooting tips to do with creating your own WMR environments.
More resources

Cale Hunt brings to Windows Central more than eight years of experience writing about laptops, PCs, accessories, games, and beyond. If it runs Windows or in some way complements the hardware, there’s a good chance he knows about it, has written about it, or is already busy testing it.
