How to upgrade the RAM, SSD and HDD in the HP Omen 15
The HP Omen 15 is already a powerful gaming laptop, but if you need more oomph here's how to change out the M.2 SSD, RAM, and HDD.
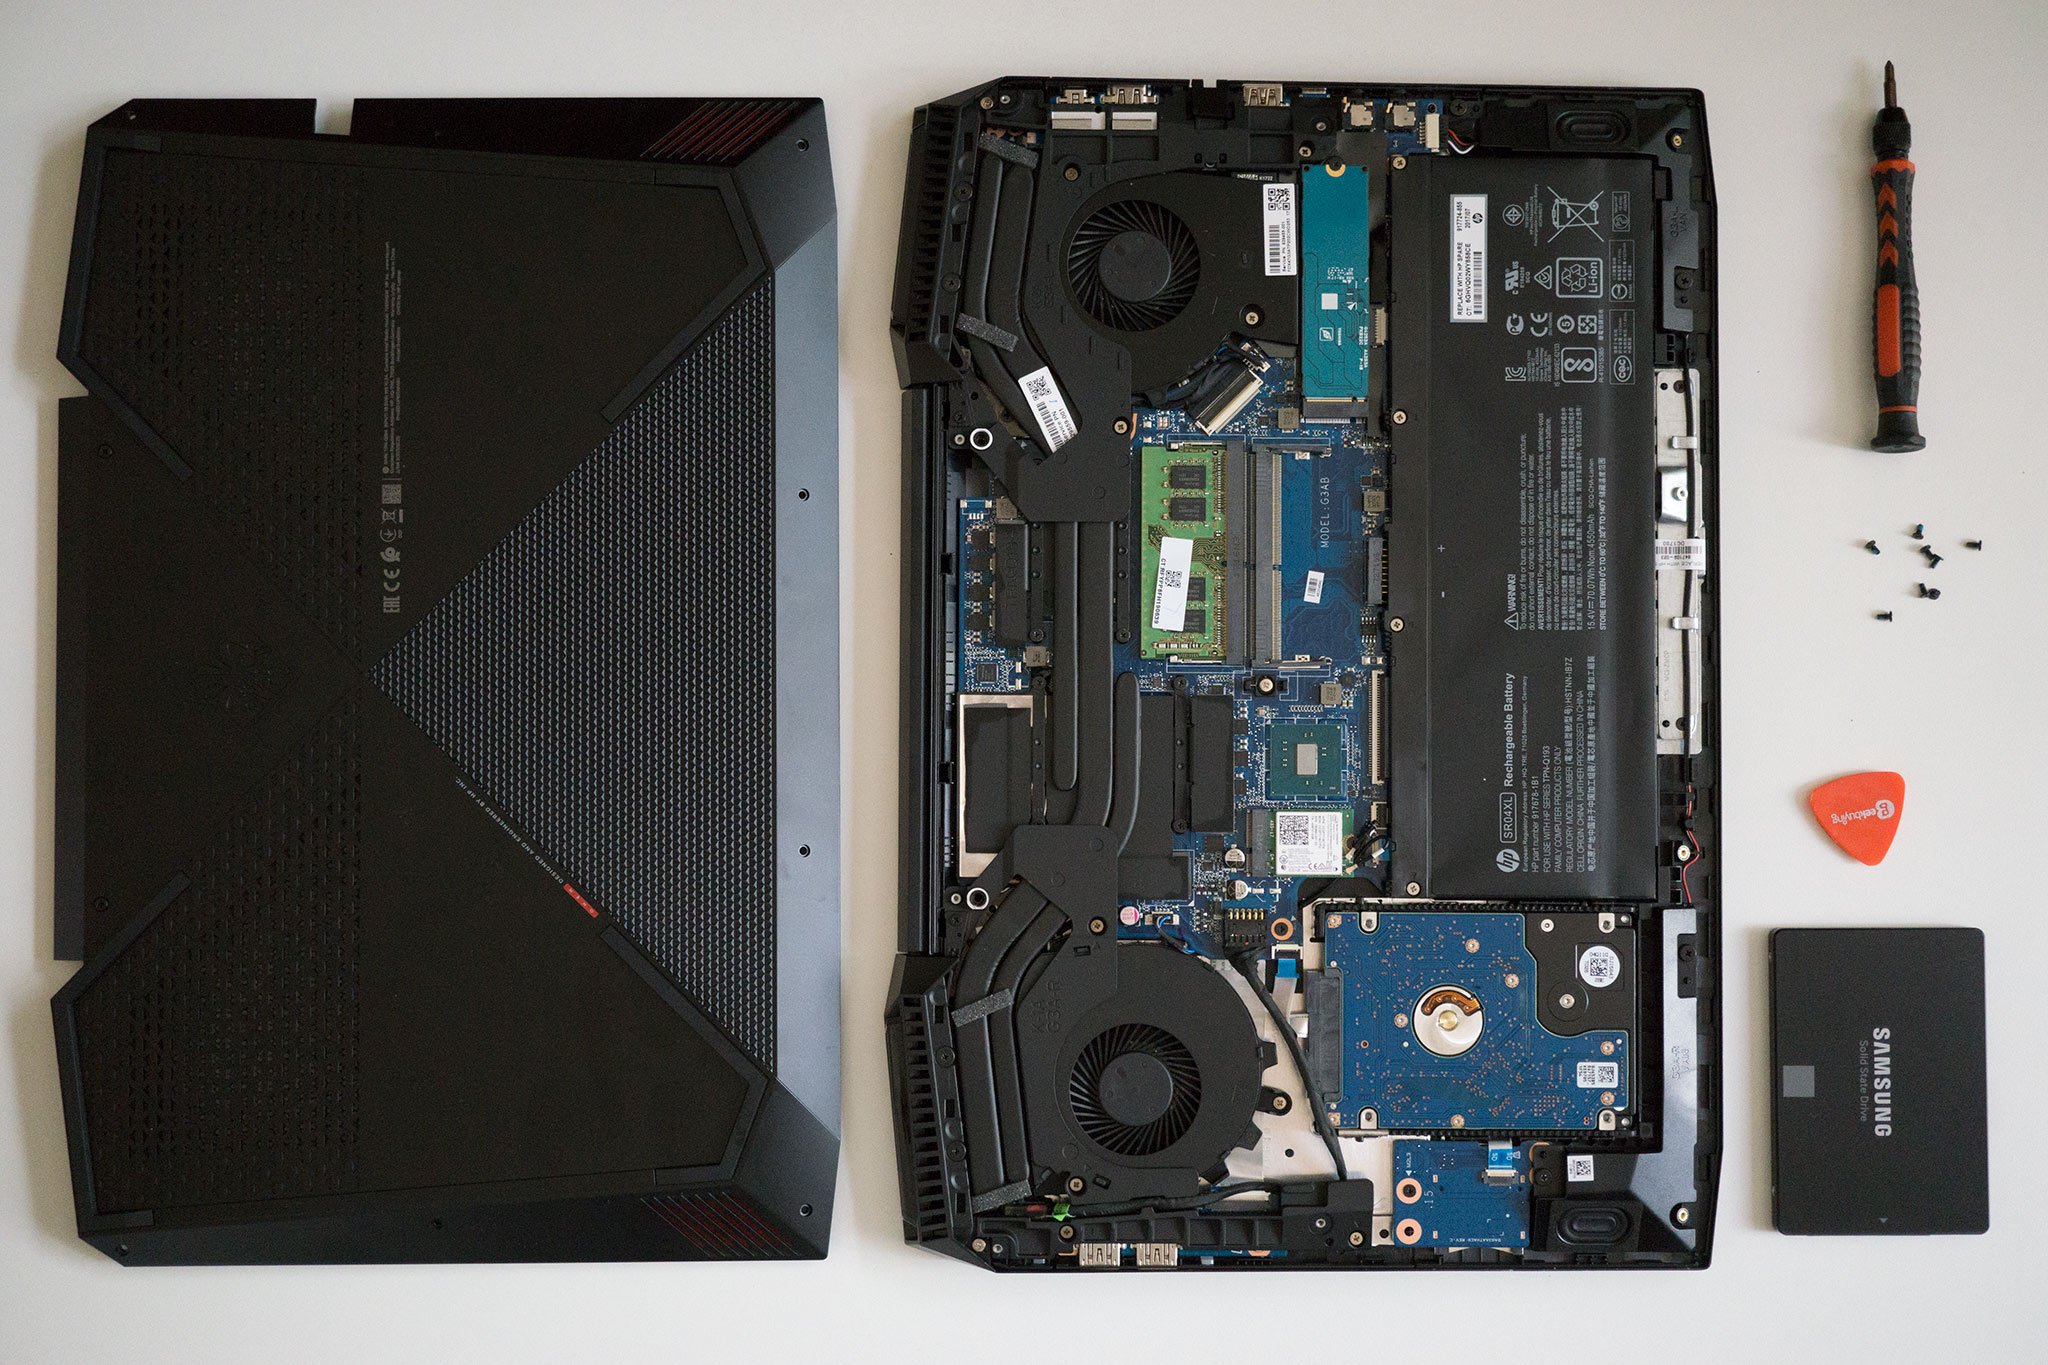
Gaming laptops like the HP Omen 15 are killer mobile computers. Configurations can pack an Intel Core i7 processor, GTX 10 series GPU, 16GB of RAM, and solid storage performance thanks to M.2 technology. That said, even with the available horsepower, it's possible to add even more power to the notebook.
Today, we'll be taking a look at how you can add (or change out) the RAM, replace the mechanical HDD, and even replace the M.2 stick that houses the Windows OS.
Before upgrading
This guide will run you through how to change out the three components, which should take around 15 minutes per component, or around 20 minutes if you're doing all three in a single session. It's better to go slow with the HP Omen 15 as it's pretty easy to thread screws, damage the chassis by attempting to force it open, and accidentally hitting the main board with a screwdriver. Slow and steady wins the race to a more awesome laptop.
There are a few items you will need:
- Philips screwdriver.
- Small pry tool.
- Tray for the screws.
If you have none at hand, I would recommend picking up the Kaisi Repair Kit Magnetic Screwdriver Set for $12.99. This has not only the right size Philips screwdriver bit but also a pry tool that works flawlessly.
You should use an Anti-Static Wrist Strap when touching the internal components. This isn't required but is highly recommended. (We always use one.)
Get the Windows Central Newsletter
All the latest news, reviews, and guides for Windows and Xbox diehards.
Opening the Omen
Before you even think about opening the laptop, you must shut down (not sleep or hibernate) the computer first. Also, unplug the power adapter if it's charging.
Here's how to open up the Omen 15:
- Place the laptop on a flat surface bottom up. (It's recommended you use a soft cloth to avoid scratching the lid.)
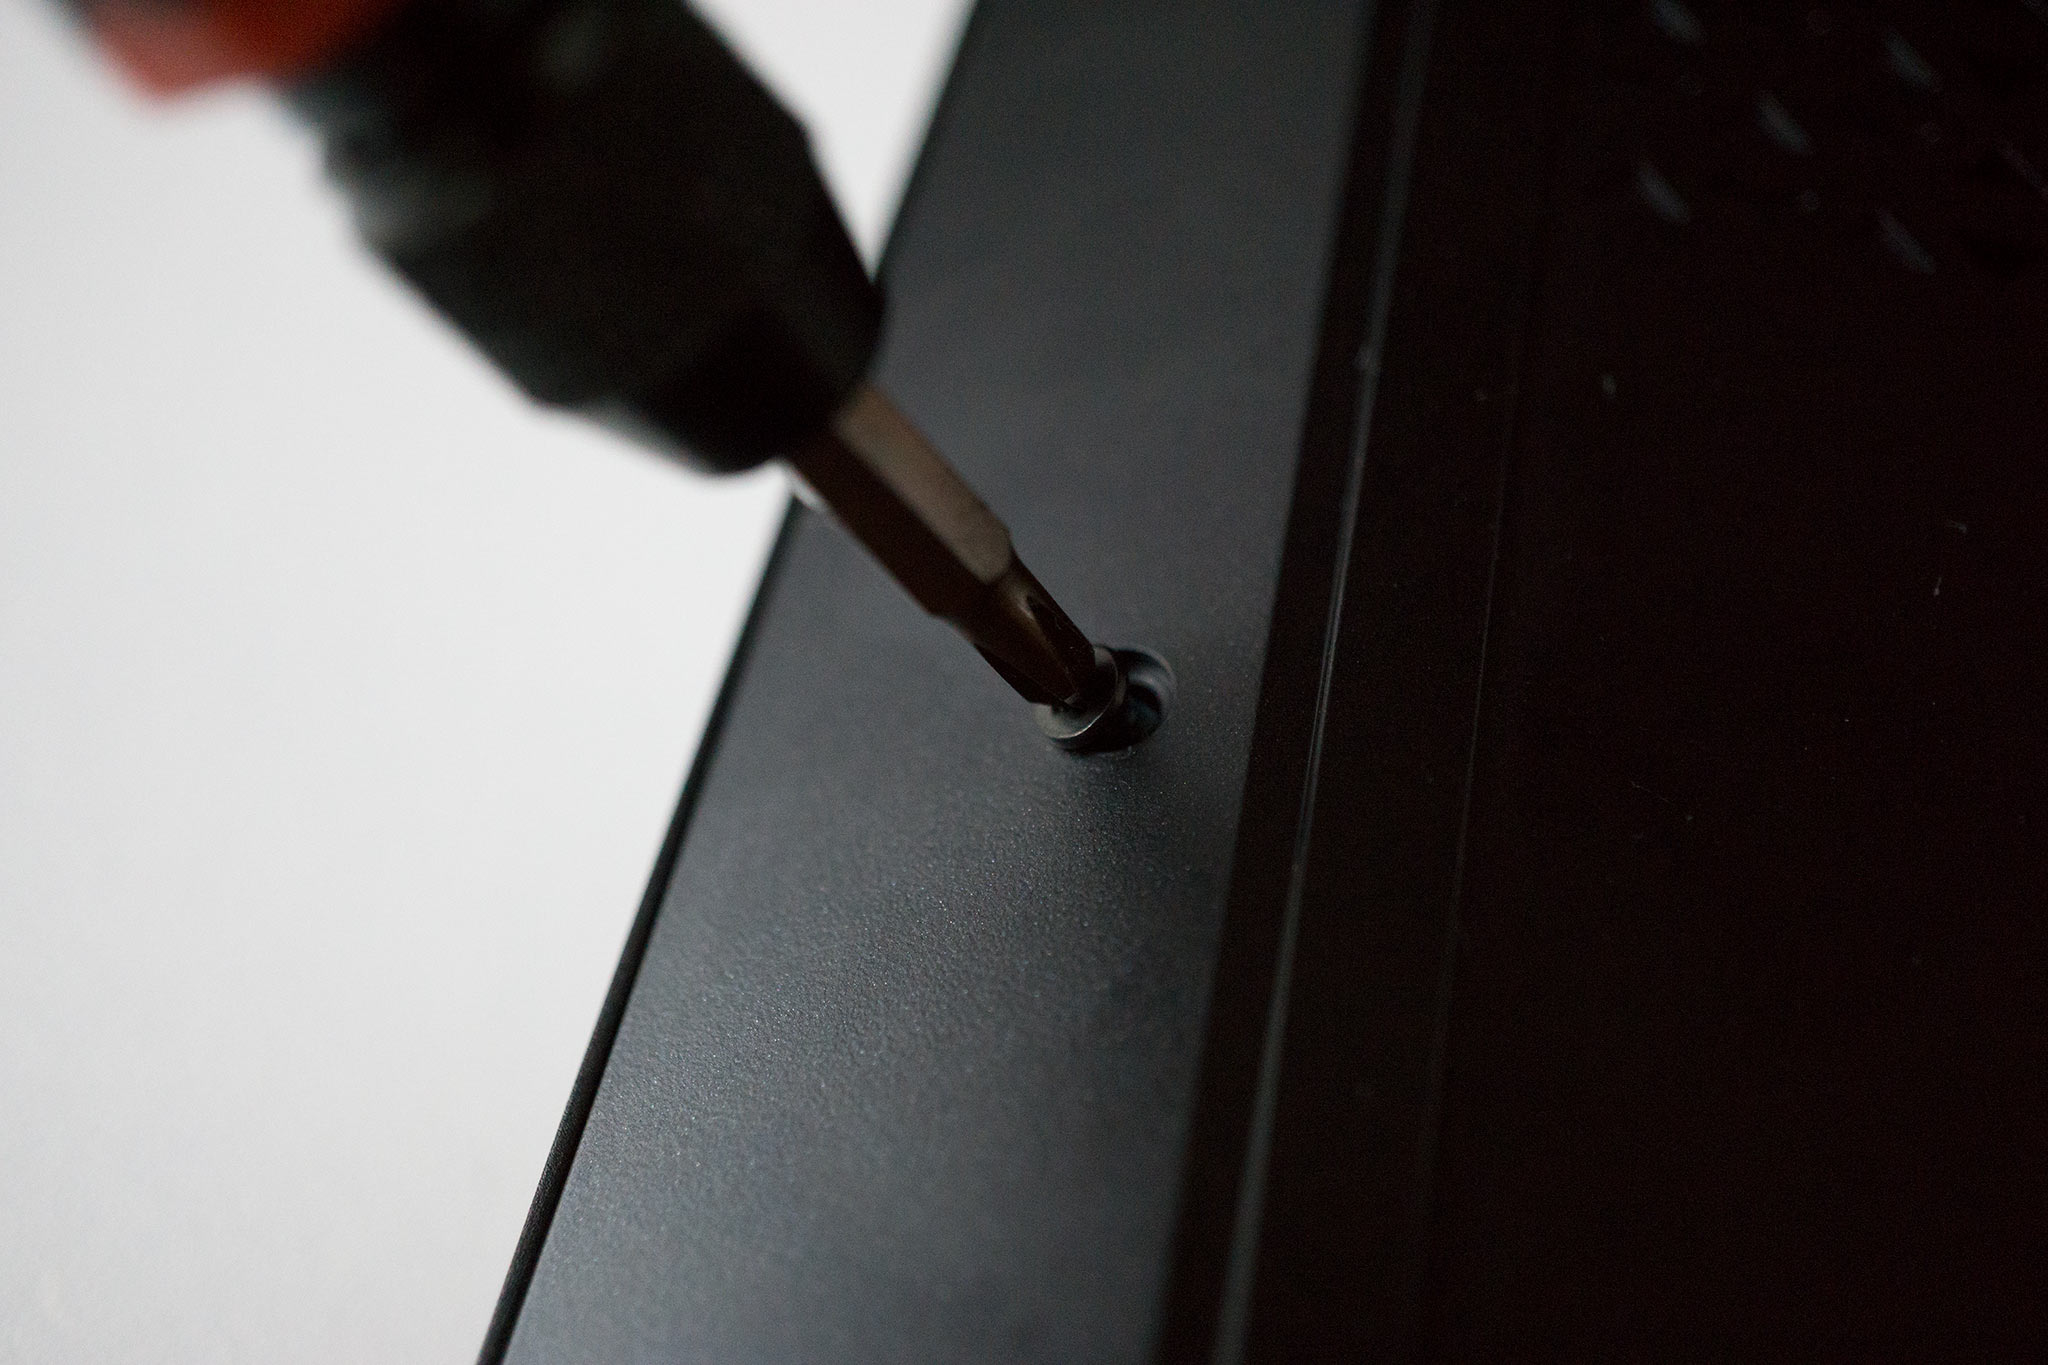
- Remove the eight Philips screws. Take extra care with this as some may be difficult to unscrew.
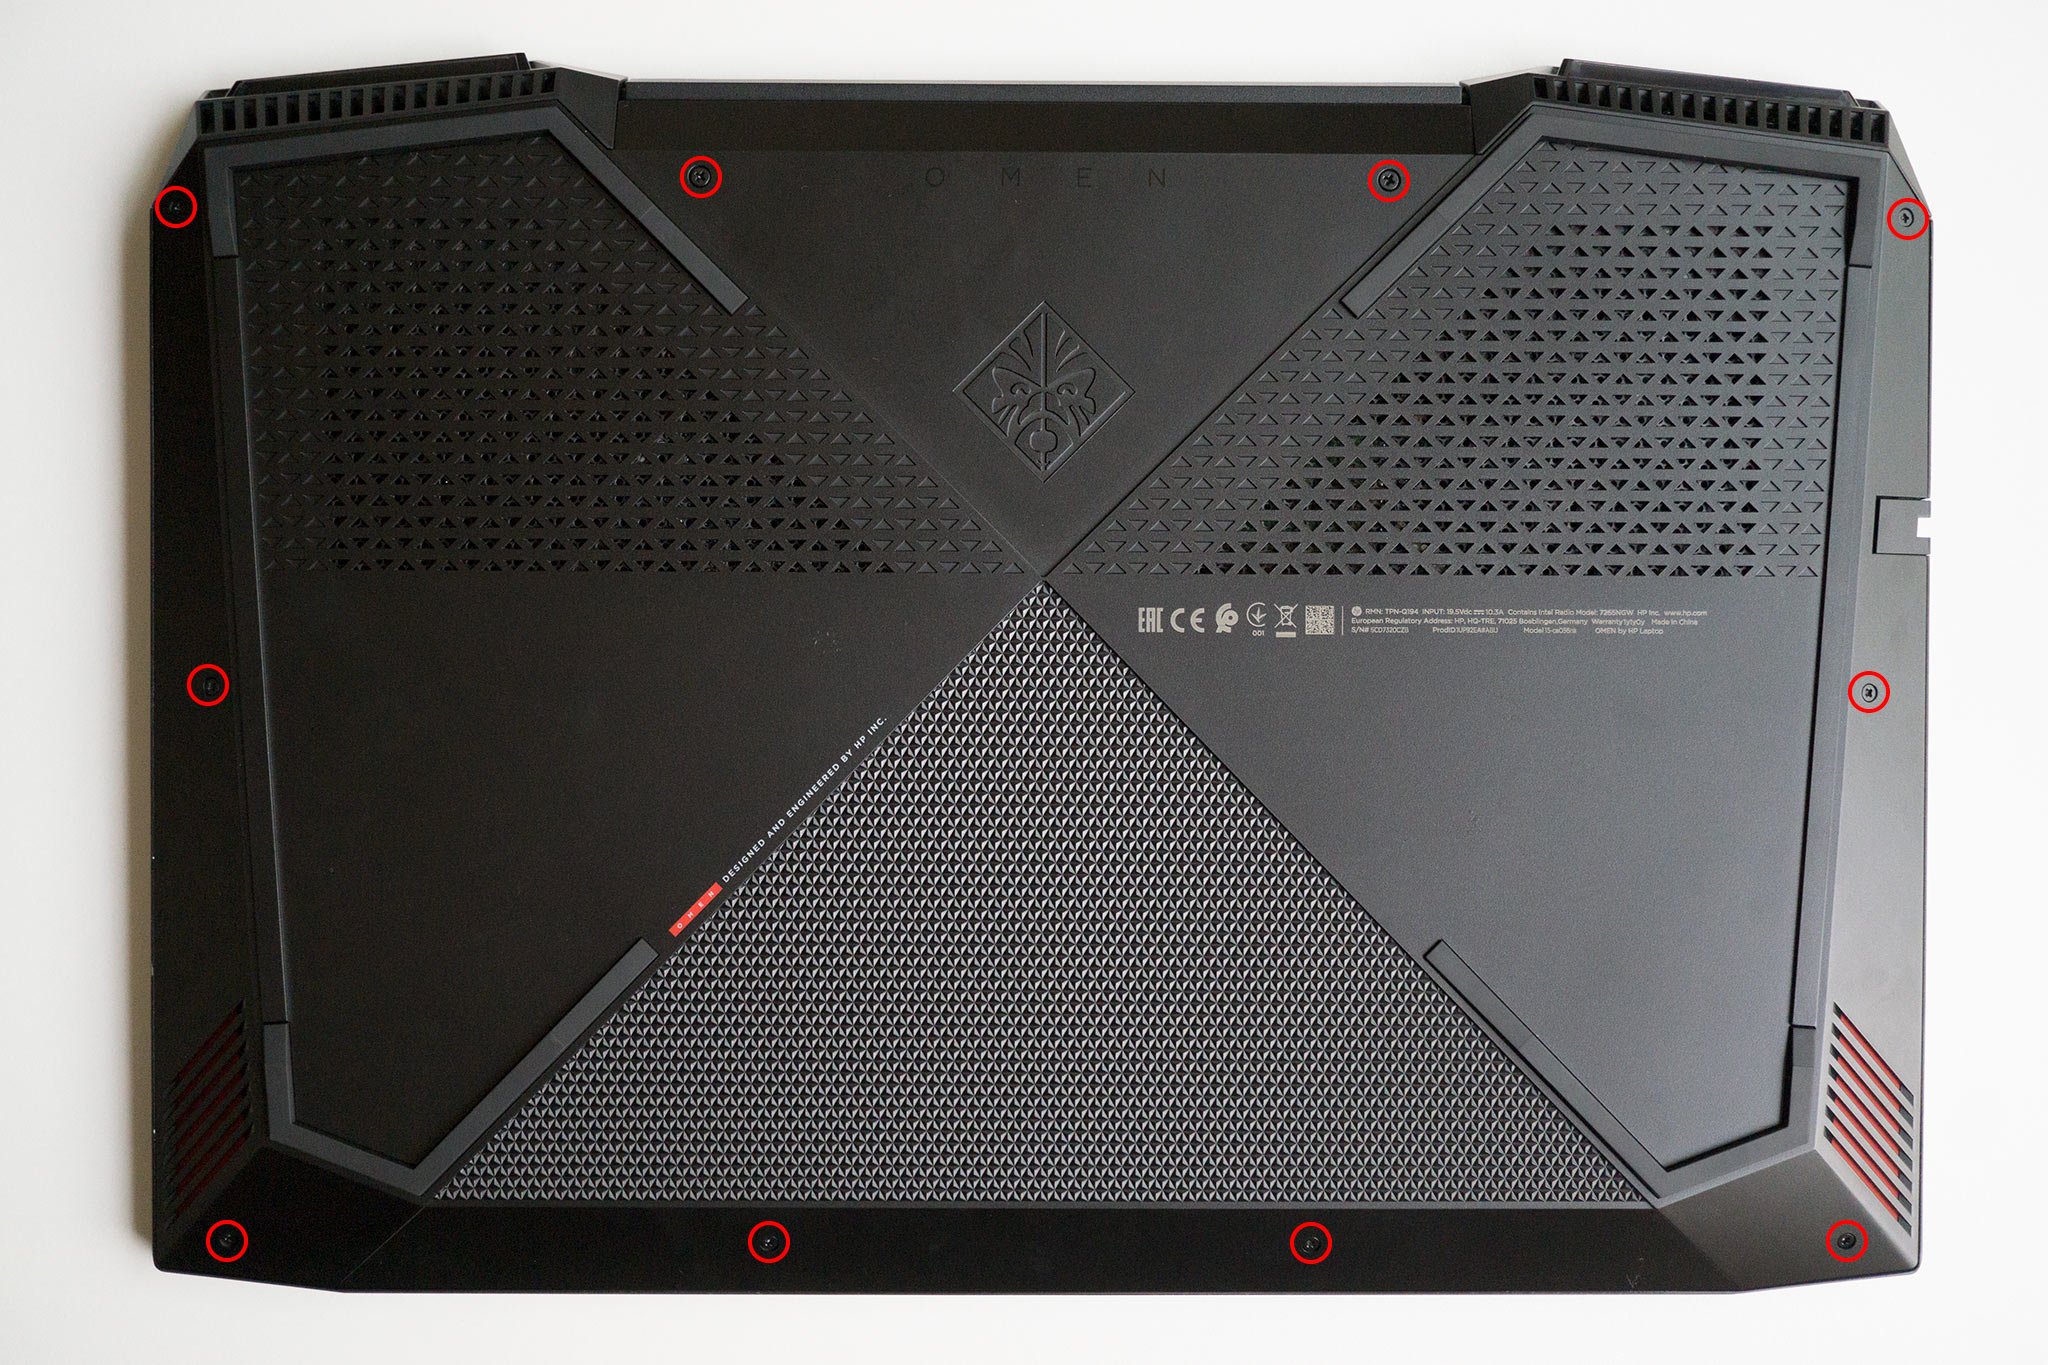
- Unscrew the two central Philips screws located towards the rear of the laptop. These are not retrievable.
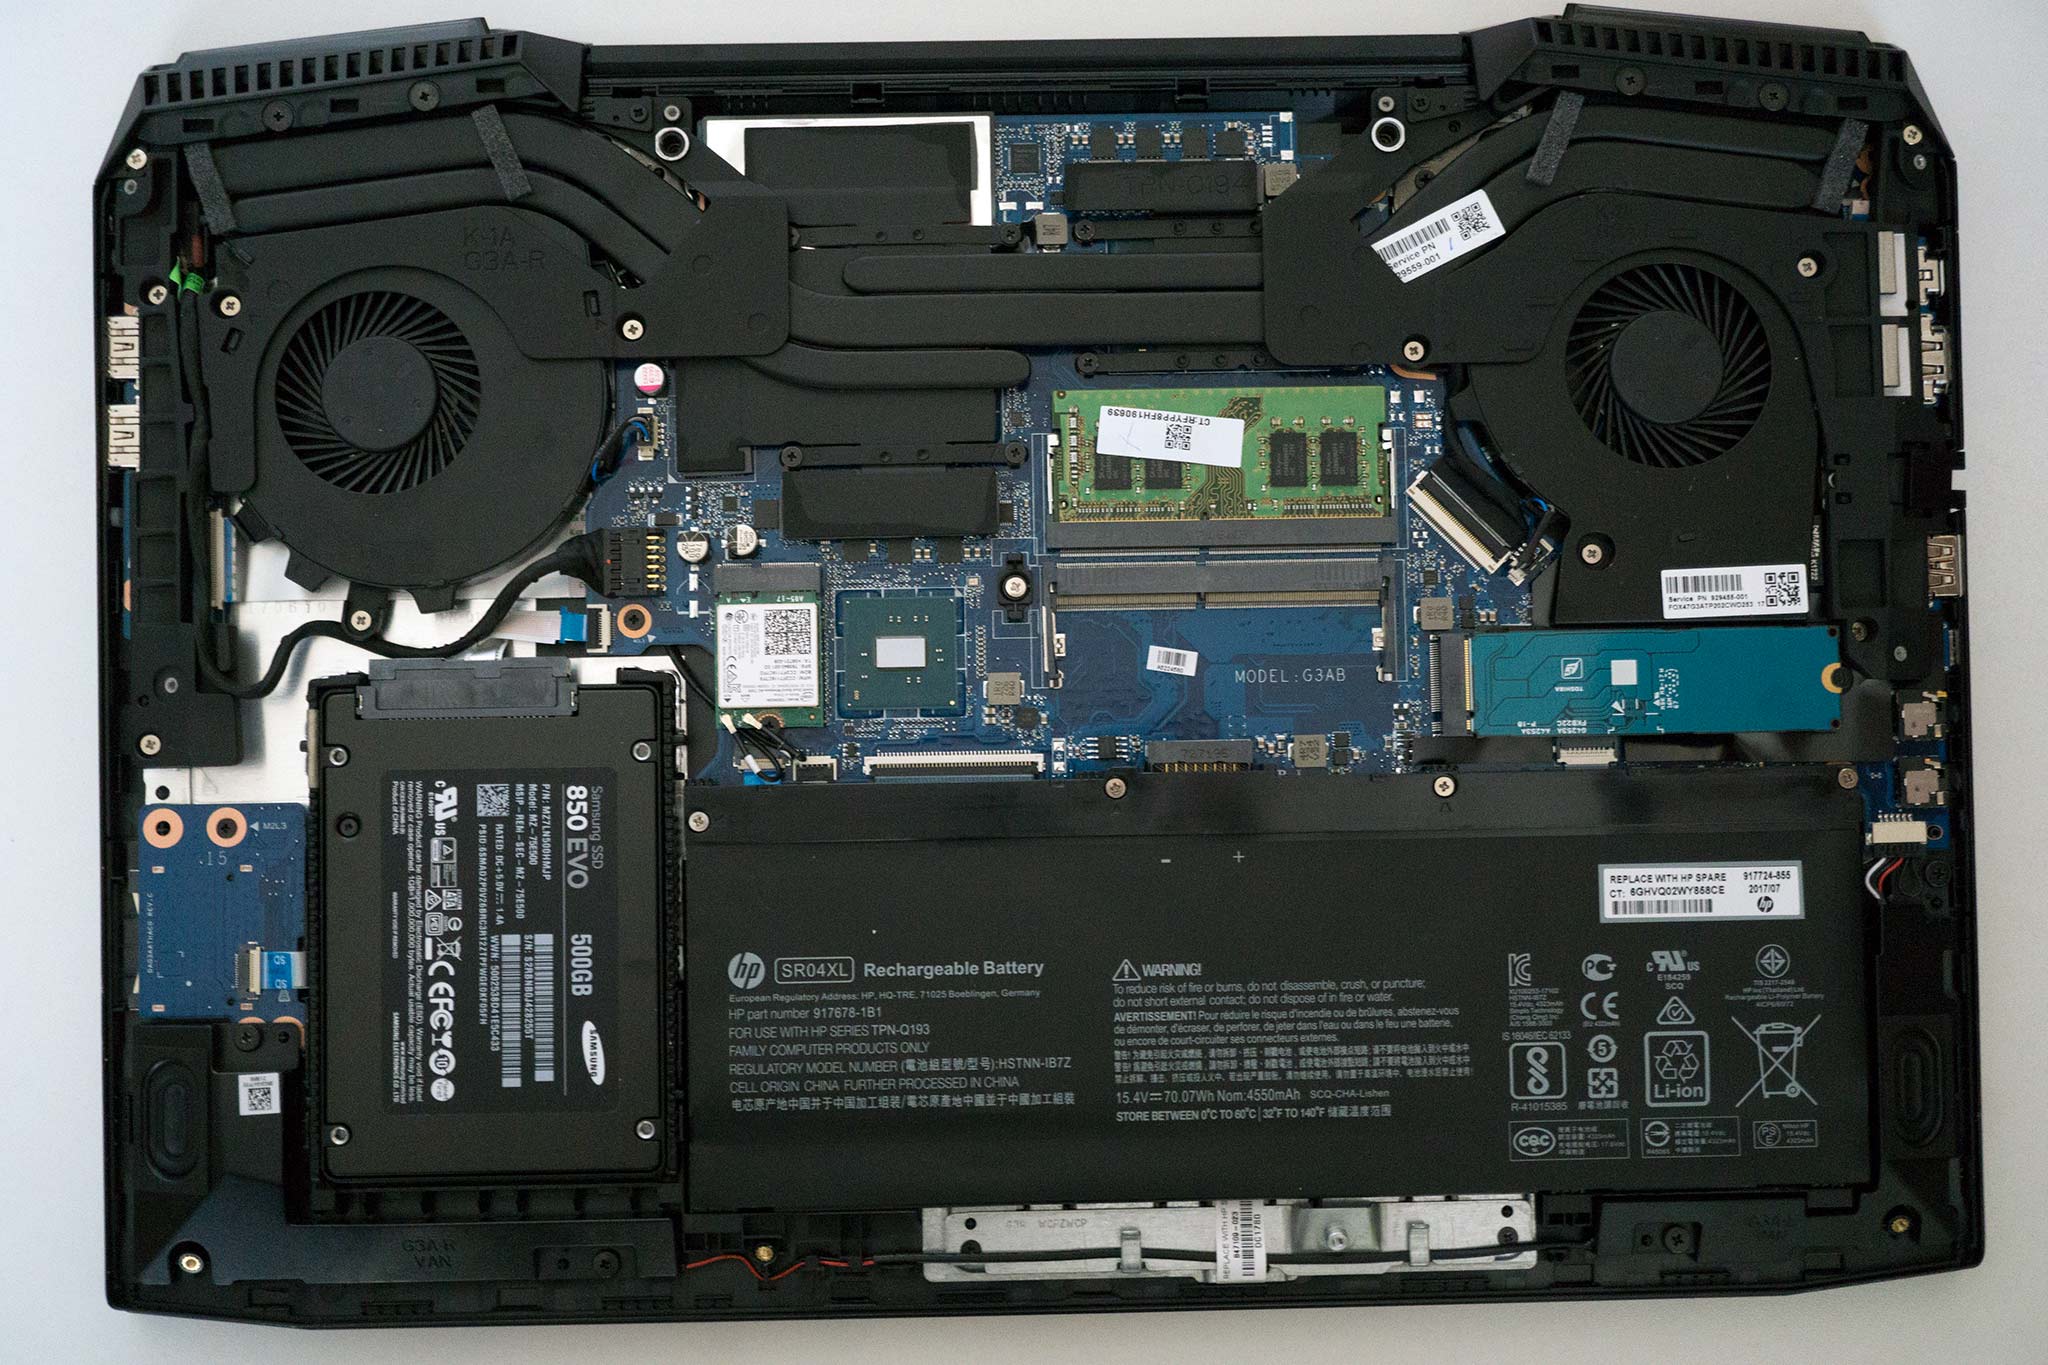
- Carefully pry open the case using a credit card or non-abrasive plastic pry tool.
Remember to place the eight screws removed from the laptop in a safe place.
Changing the M.2 SSD
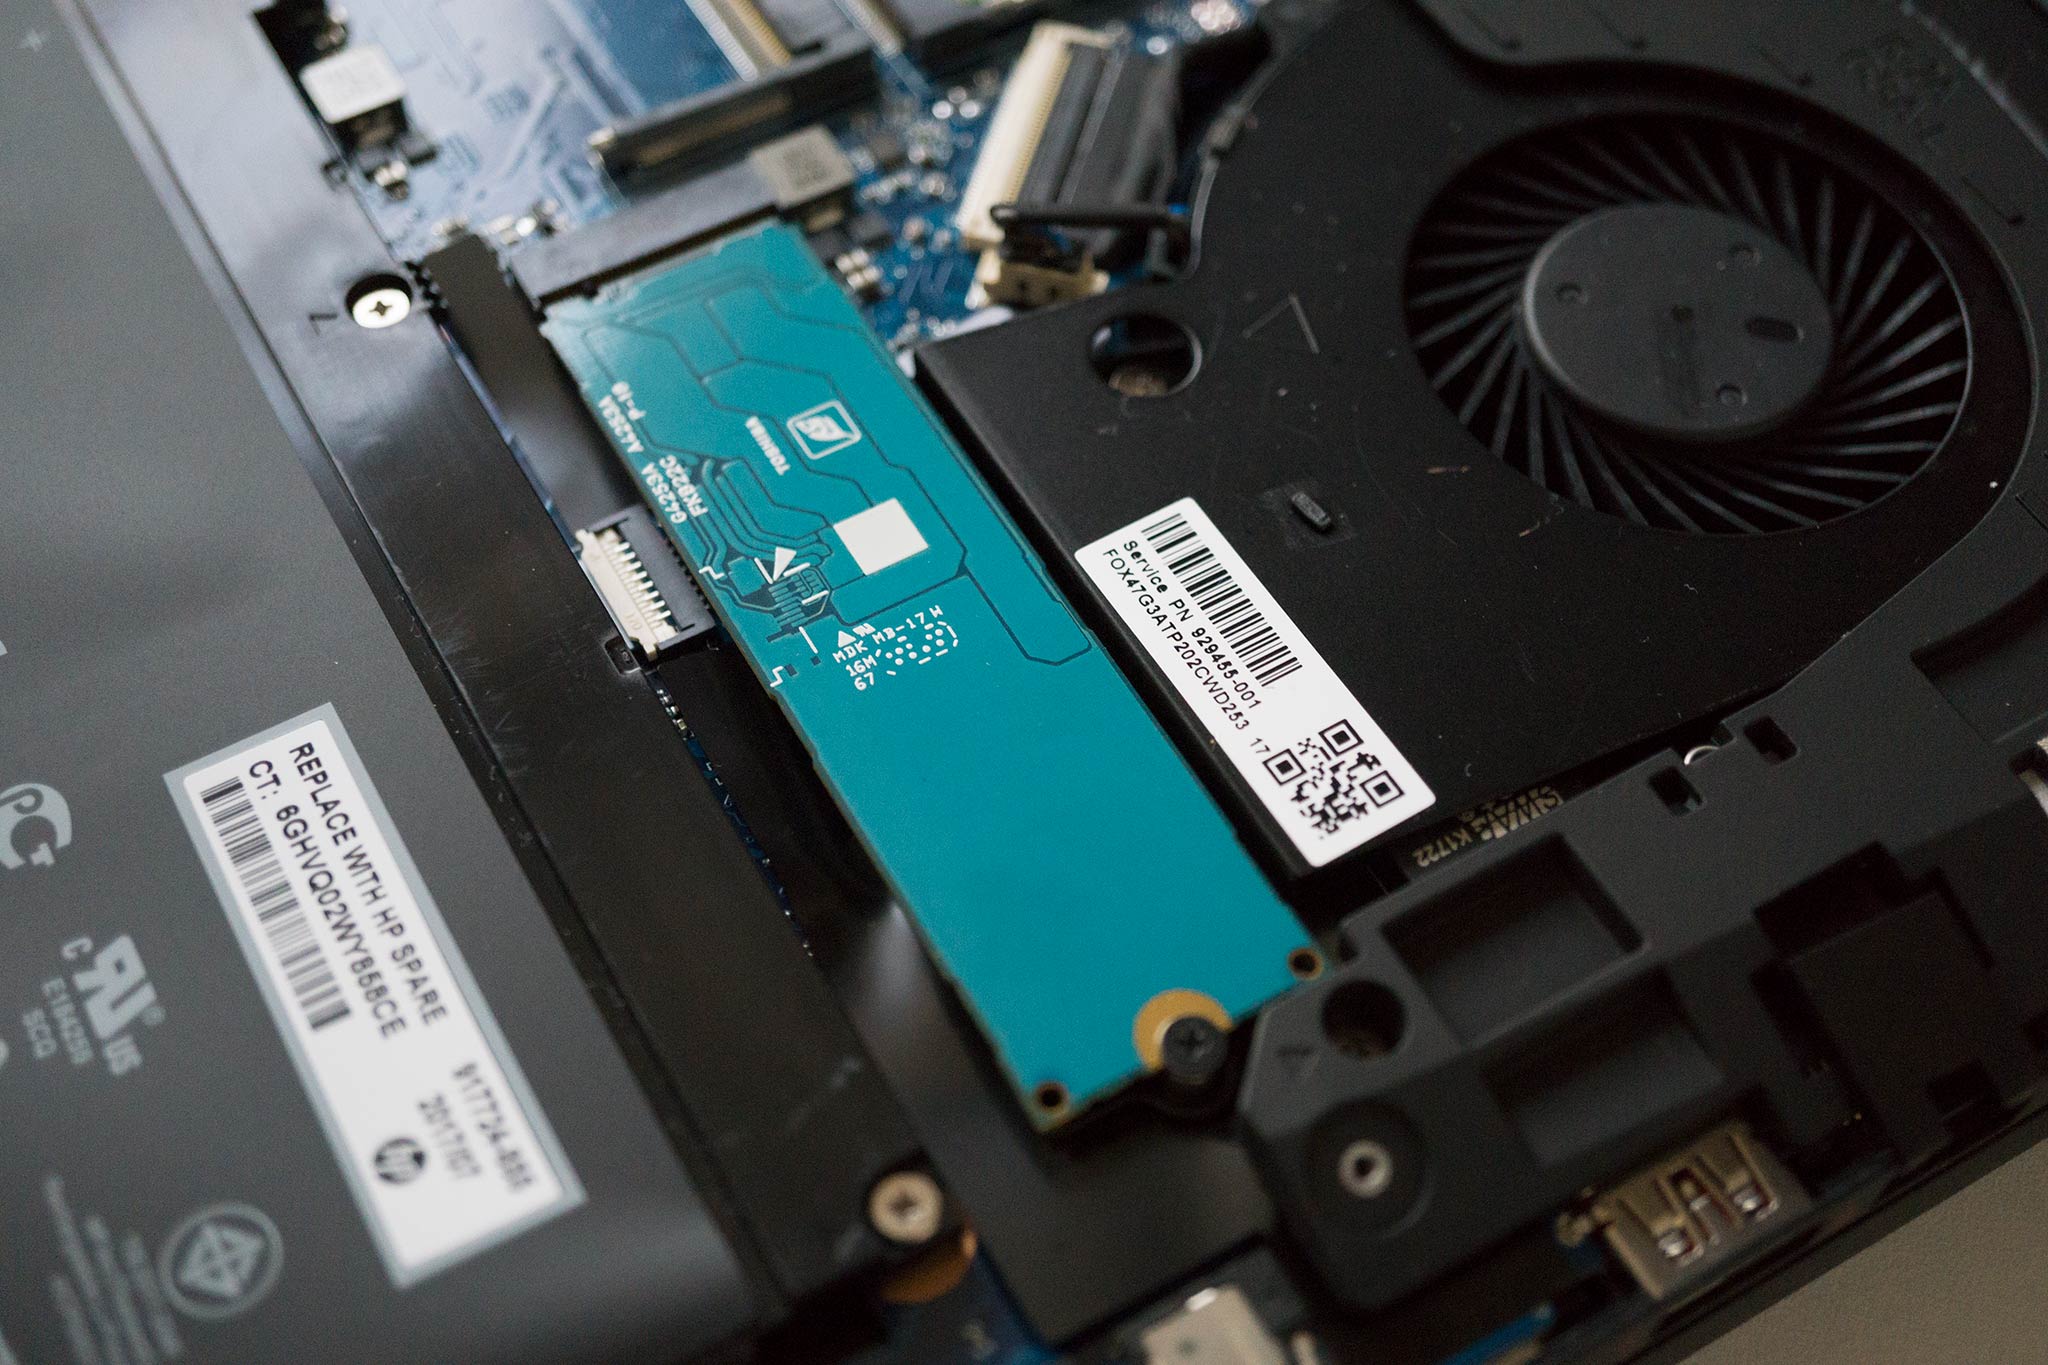
For the system disk, HP opted to employ M.2 SSD technology. This means the storage device housing Windows is already super-fast. You should only really look to replace the card if you require more space. If you have a new one to replace what's already installed, here's how to do it:
- Remove the placement screw at the base of the SSD.
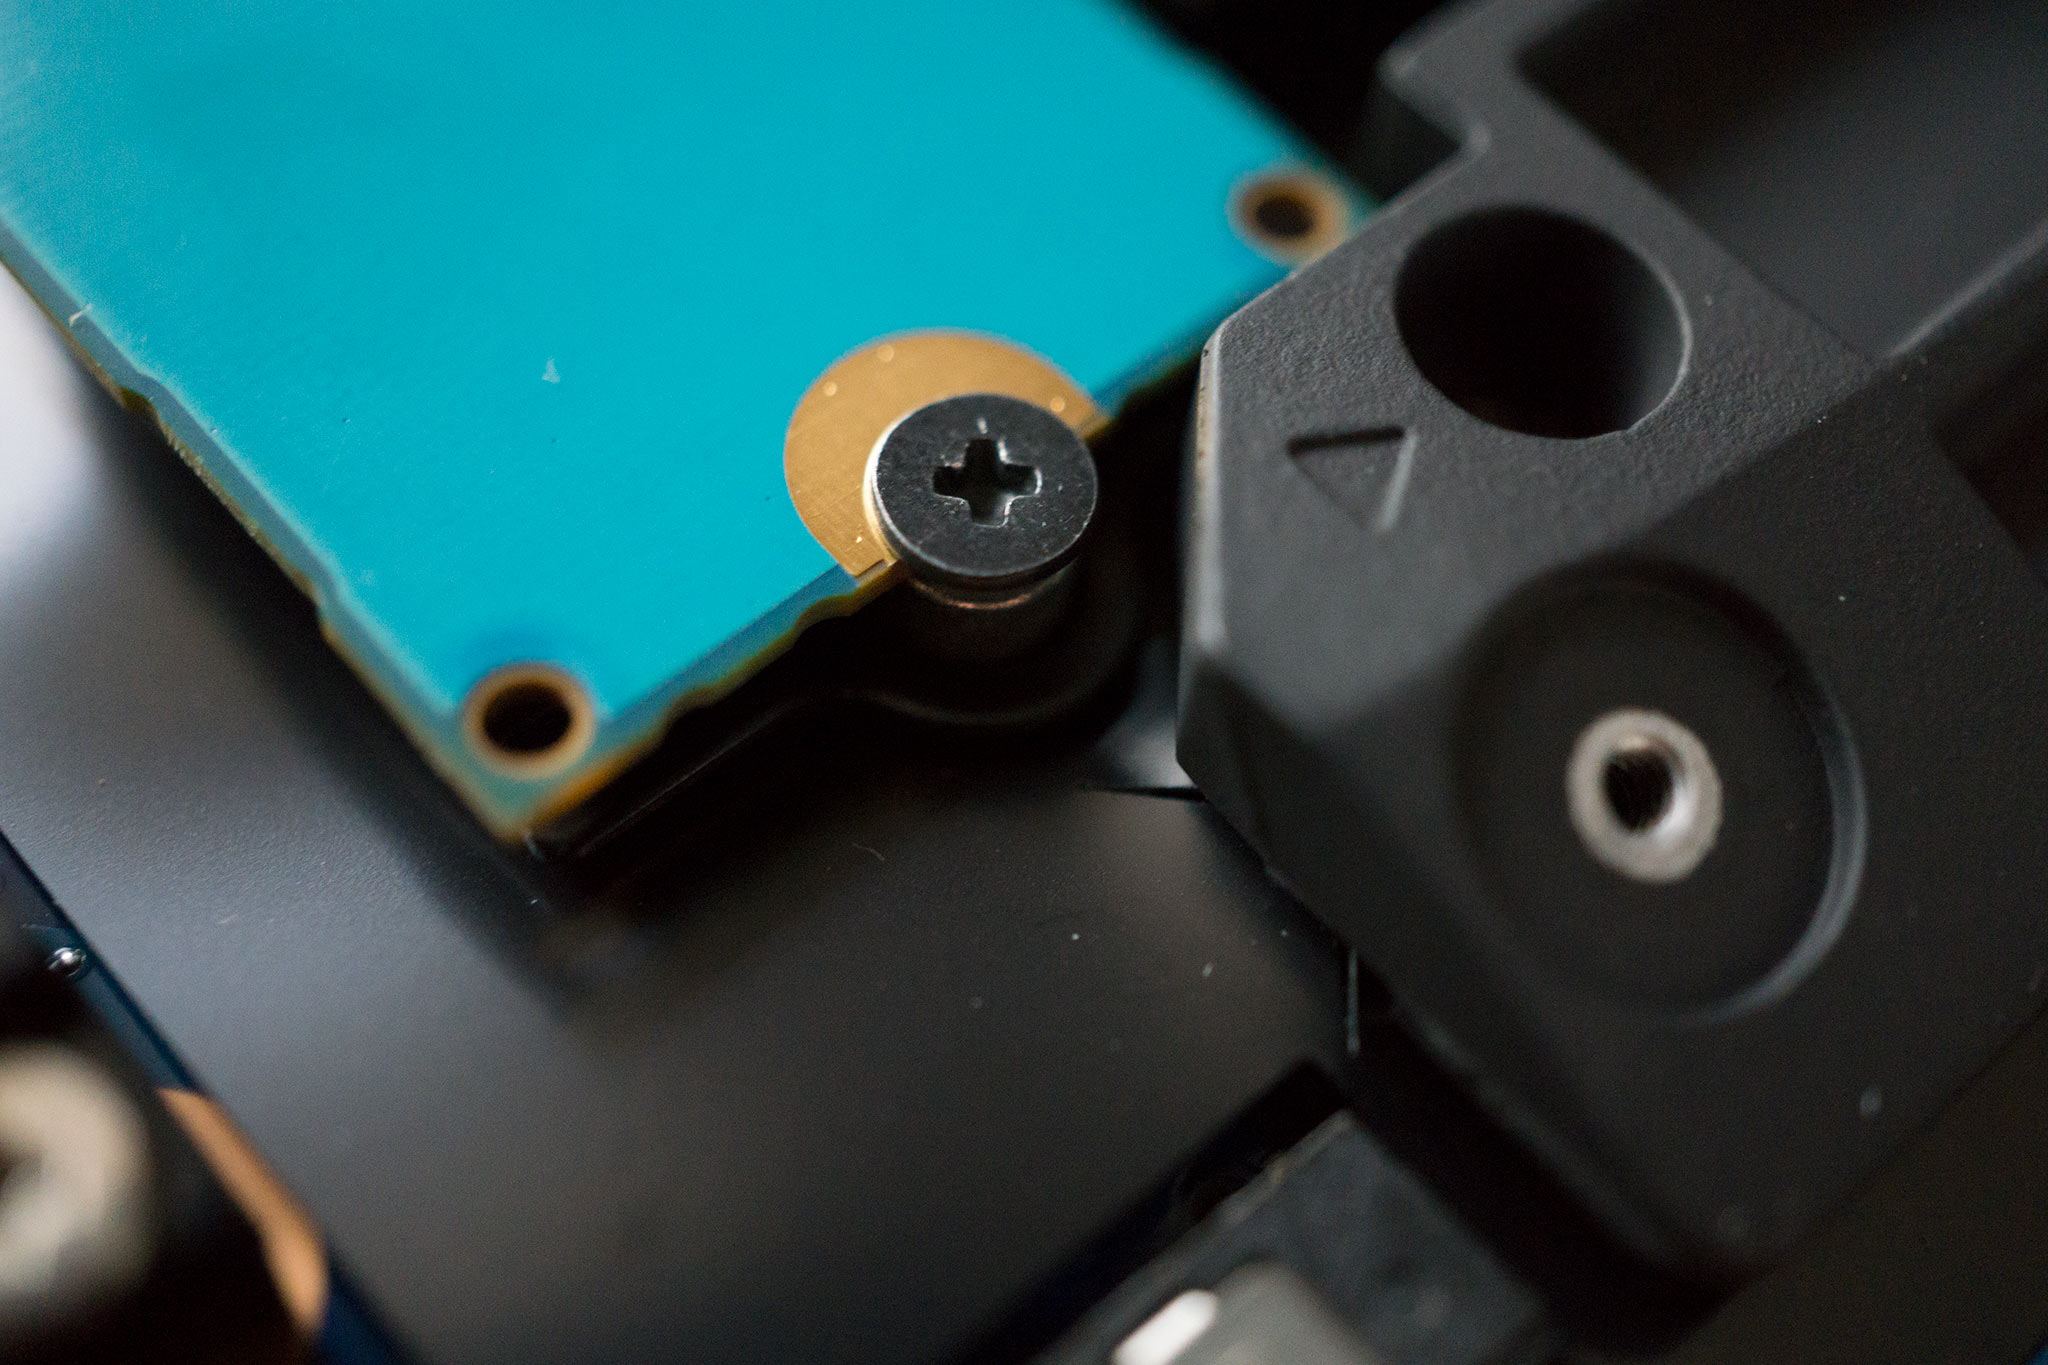
- Gently lift the old SSD at a 20-degree angle and slide it out.
- Insert the new SSD firmly into the slot at the same 20-degree angle.
- Lay down the new SSD flat and replace the placement screw.
Pay extra attention when using a screwdriver inside the laptop as to not cause any damage to nearby components.
Changing the HDD
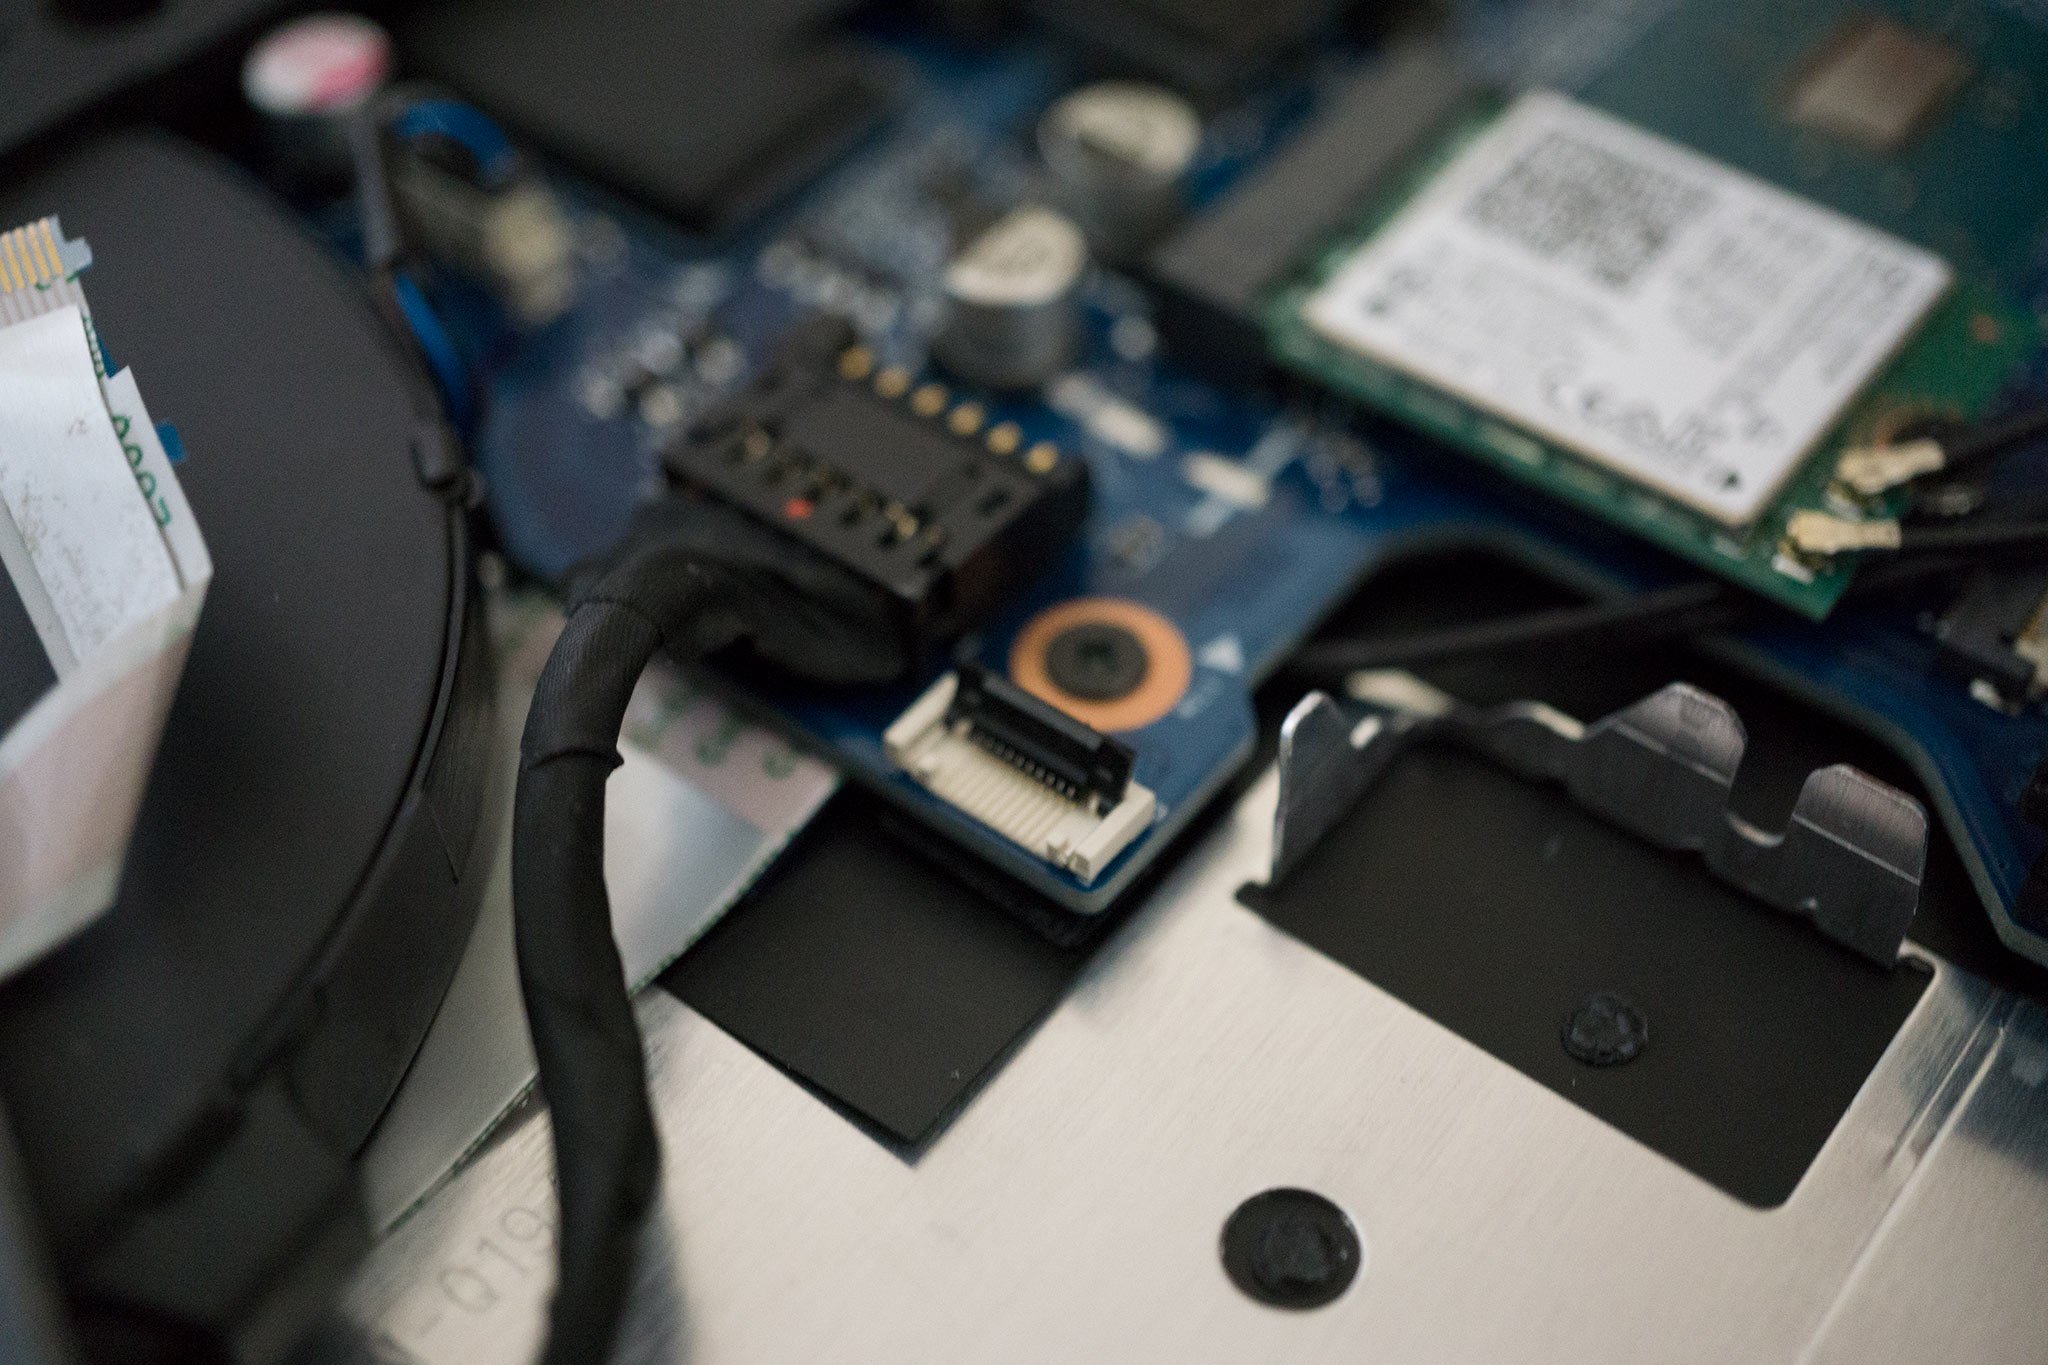
The Omen 15 laptops come packing a mechanical 7200RPM hard-disk drive. This keeps costs down and provides ample amounts of storage space (1TB in our particular model), but no spinning platter hard drive will ever beat an SSD for speed. We opted for a Samsung EVO 500GB SSD, which runs around $150.
Here's how to replace the HDD in the Omen 15:
- Gently pull up on the clip to detach the SATA cable from the main board.
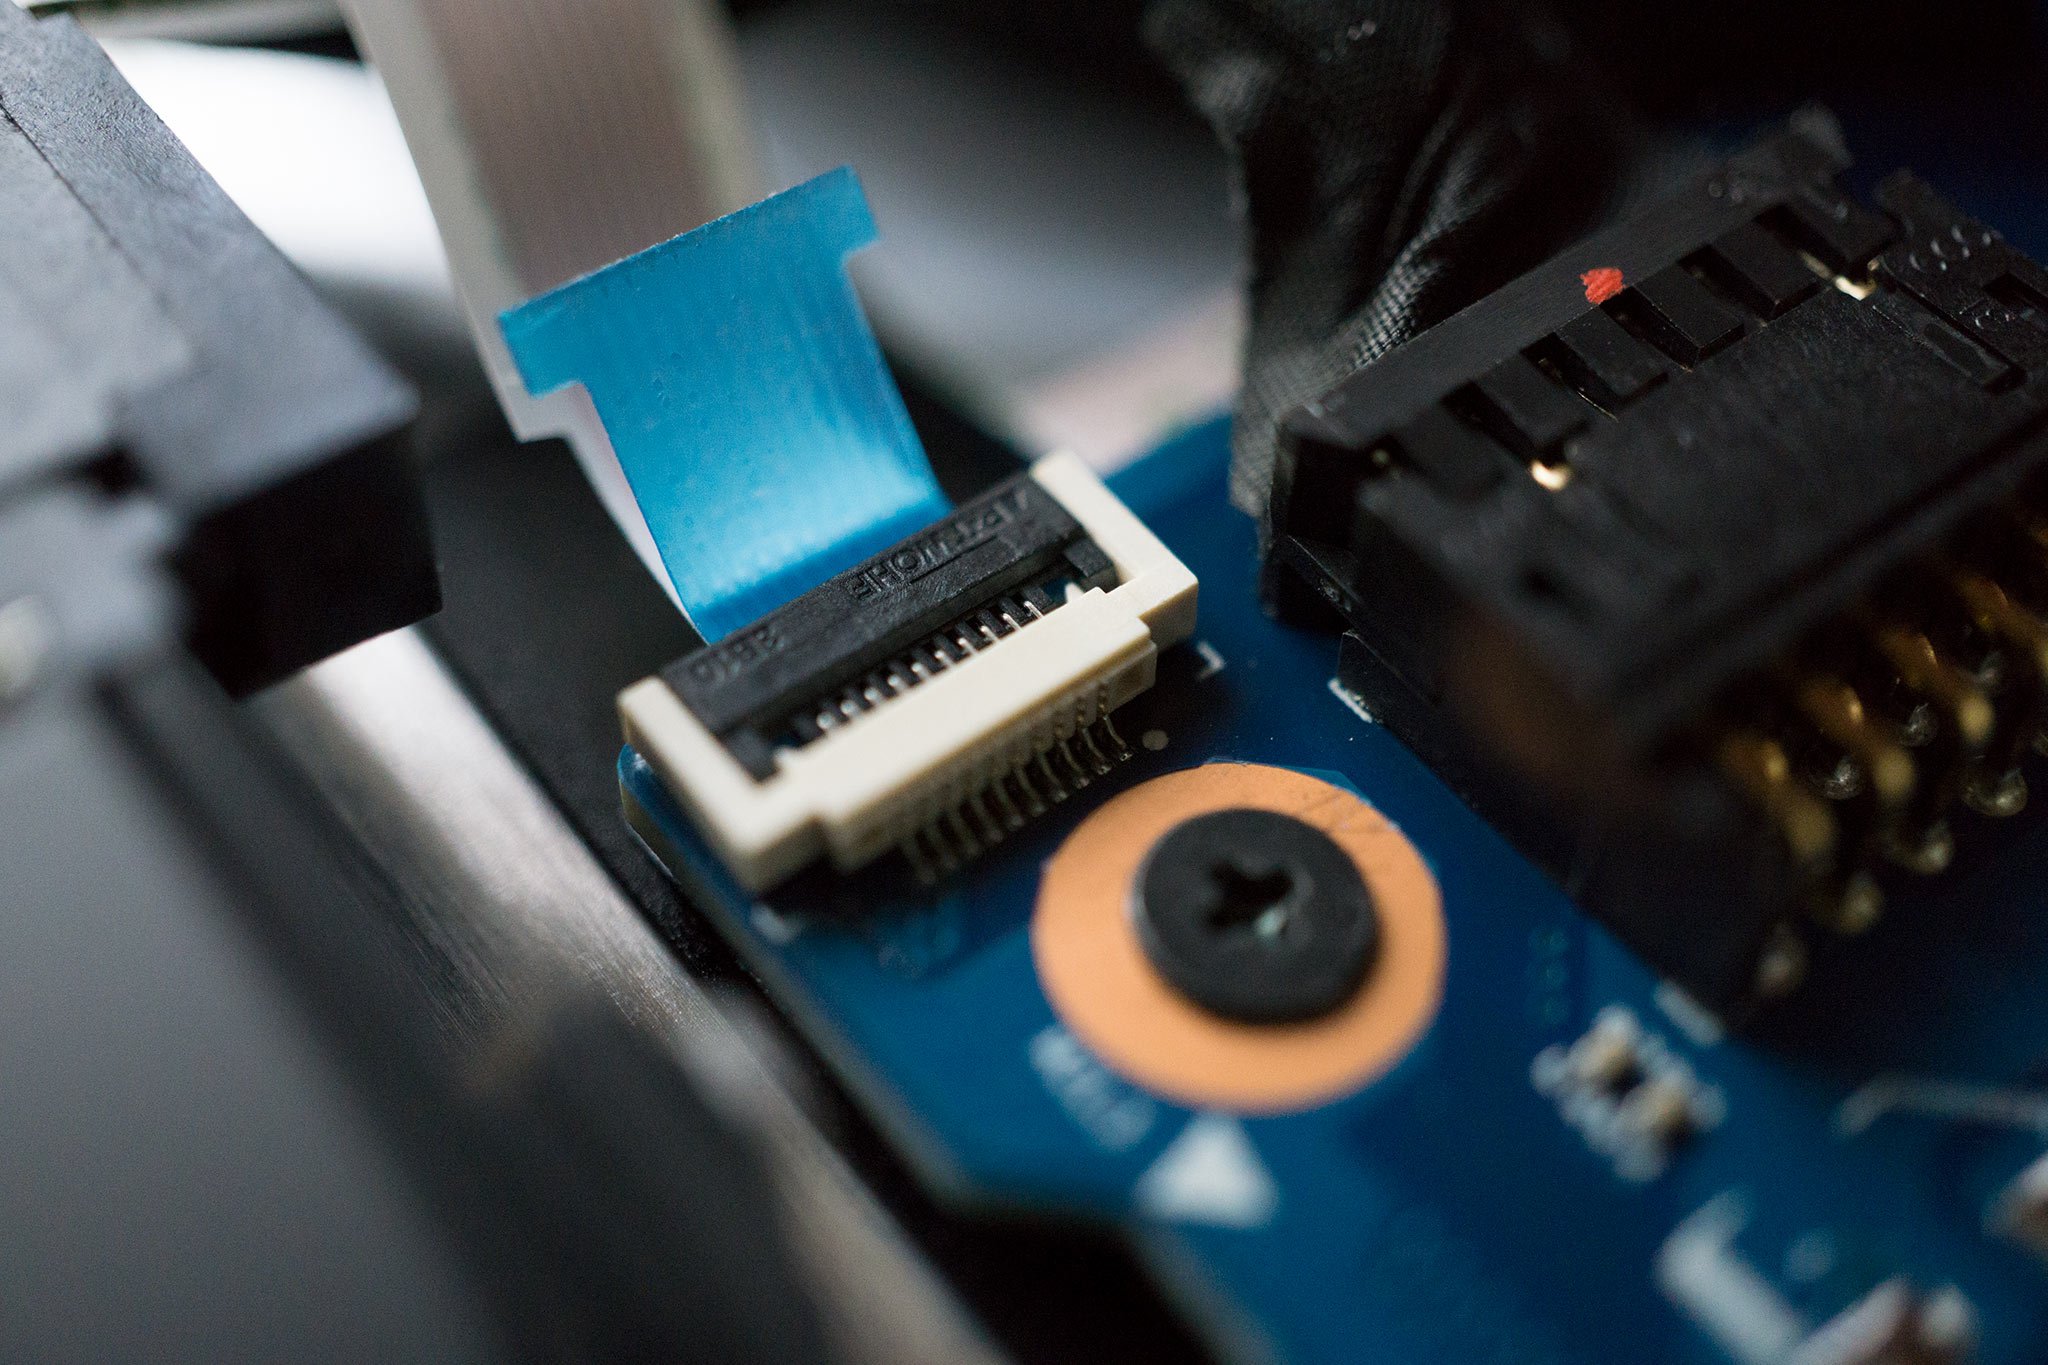
- Extract the HDD by pulling up from the side of the SATA connector.
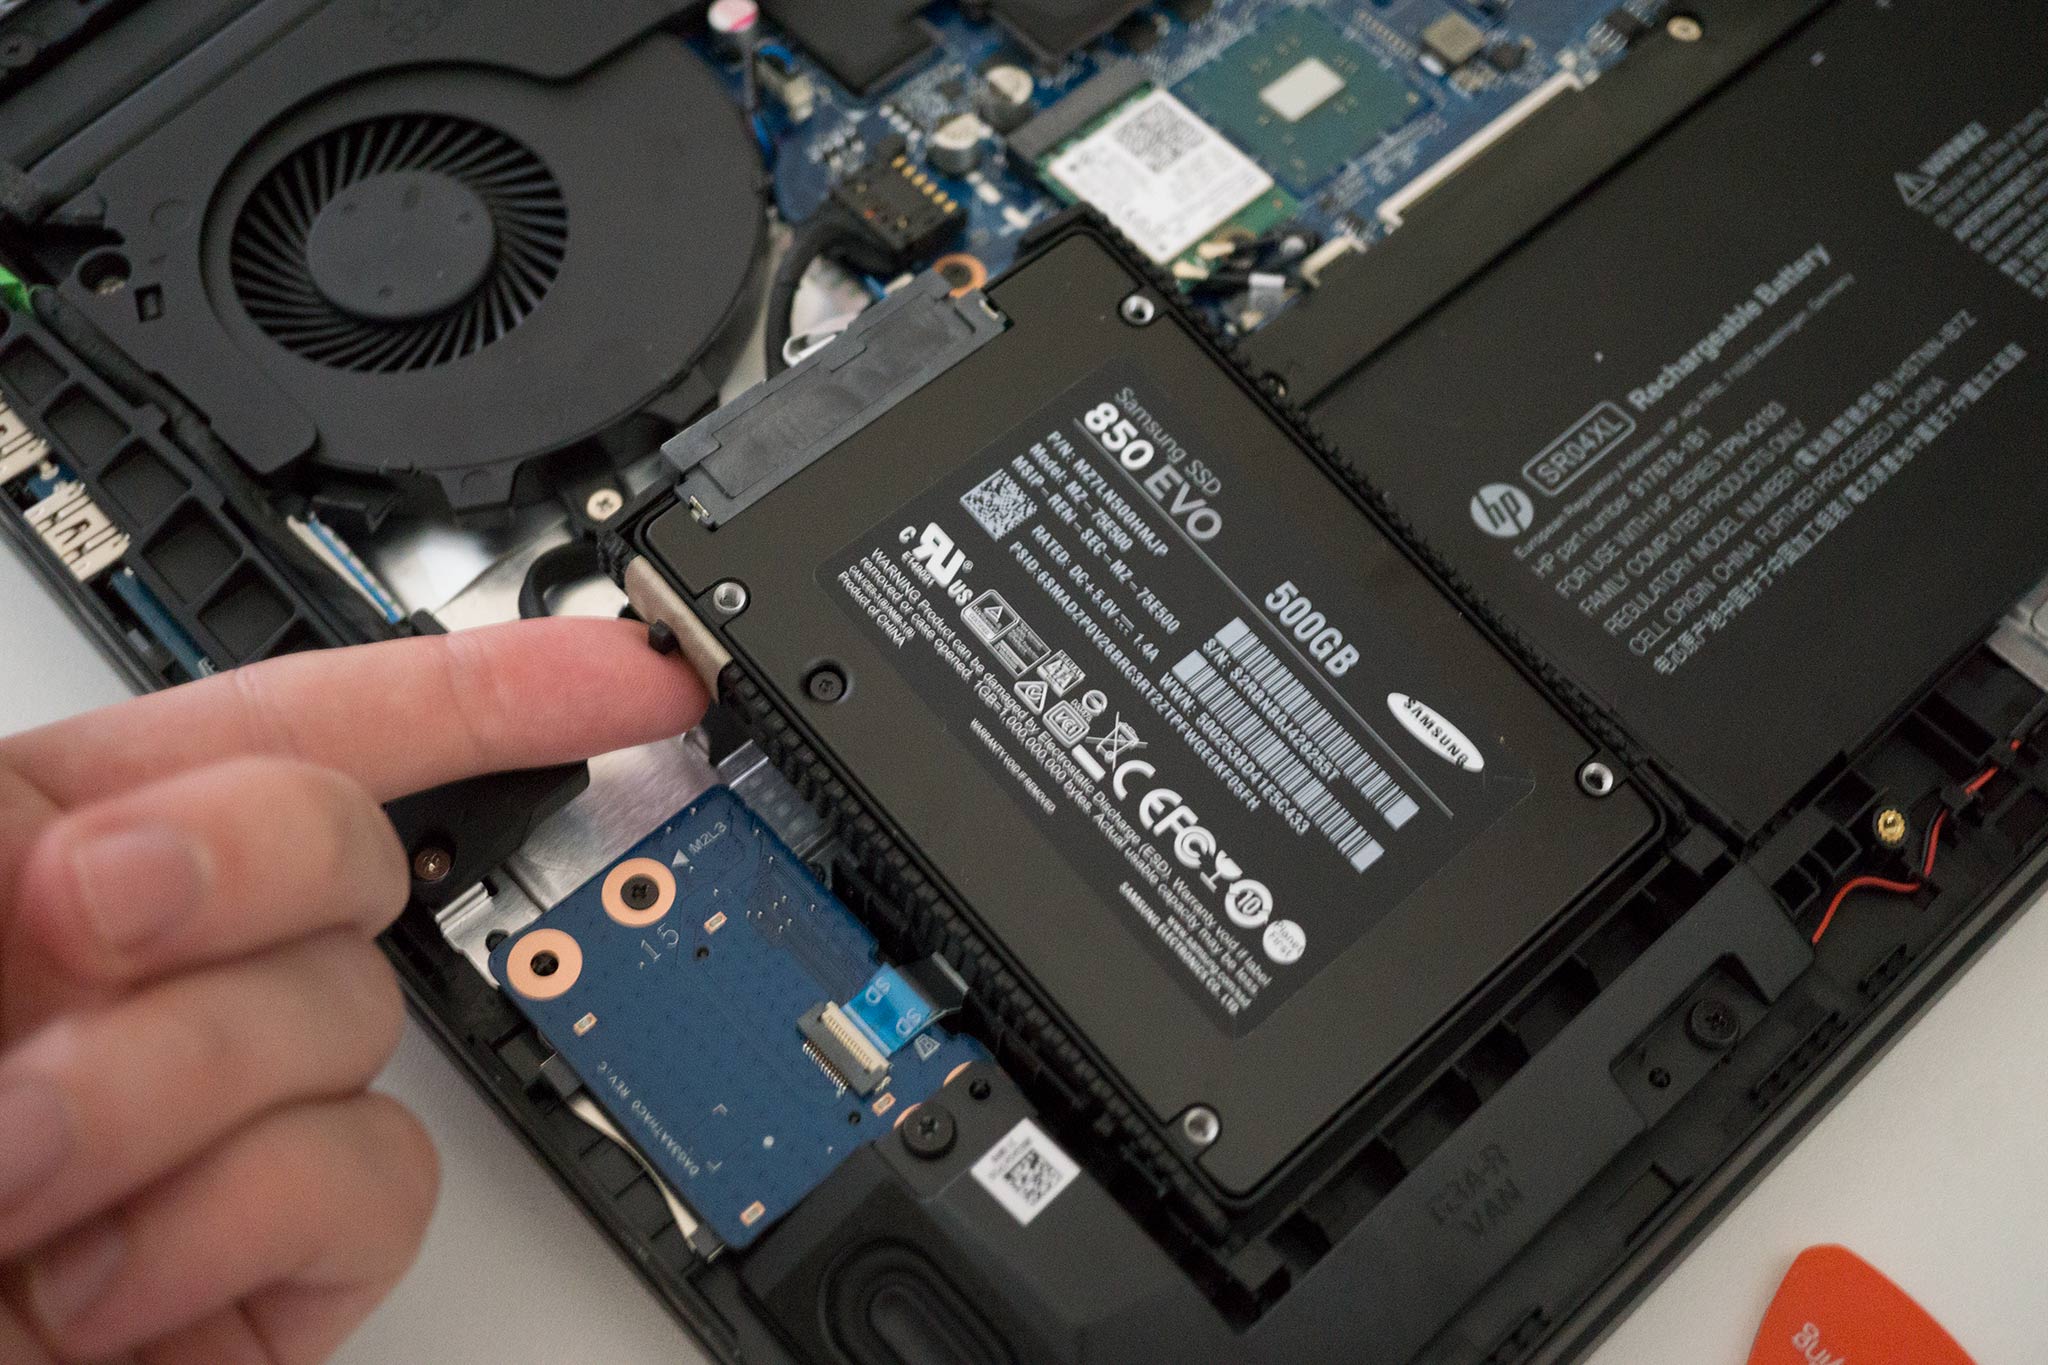
- Remove the two runners from the HDD. (HP blessed everyone by not requiring any screws to be removed here.)
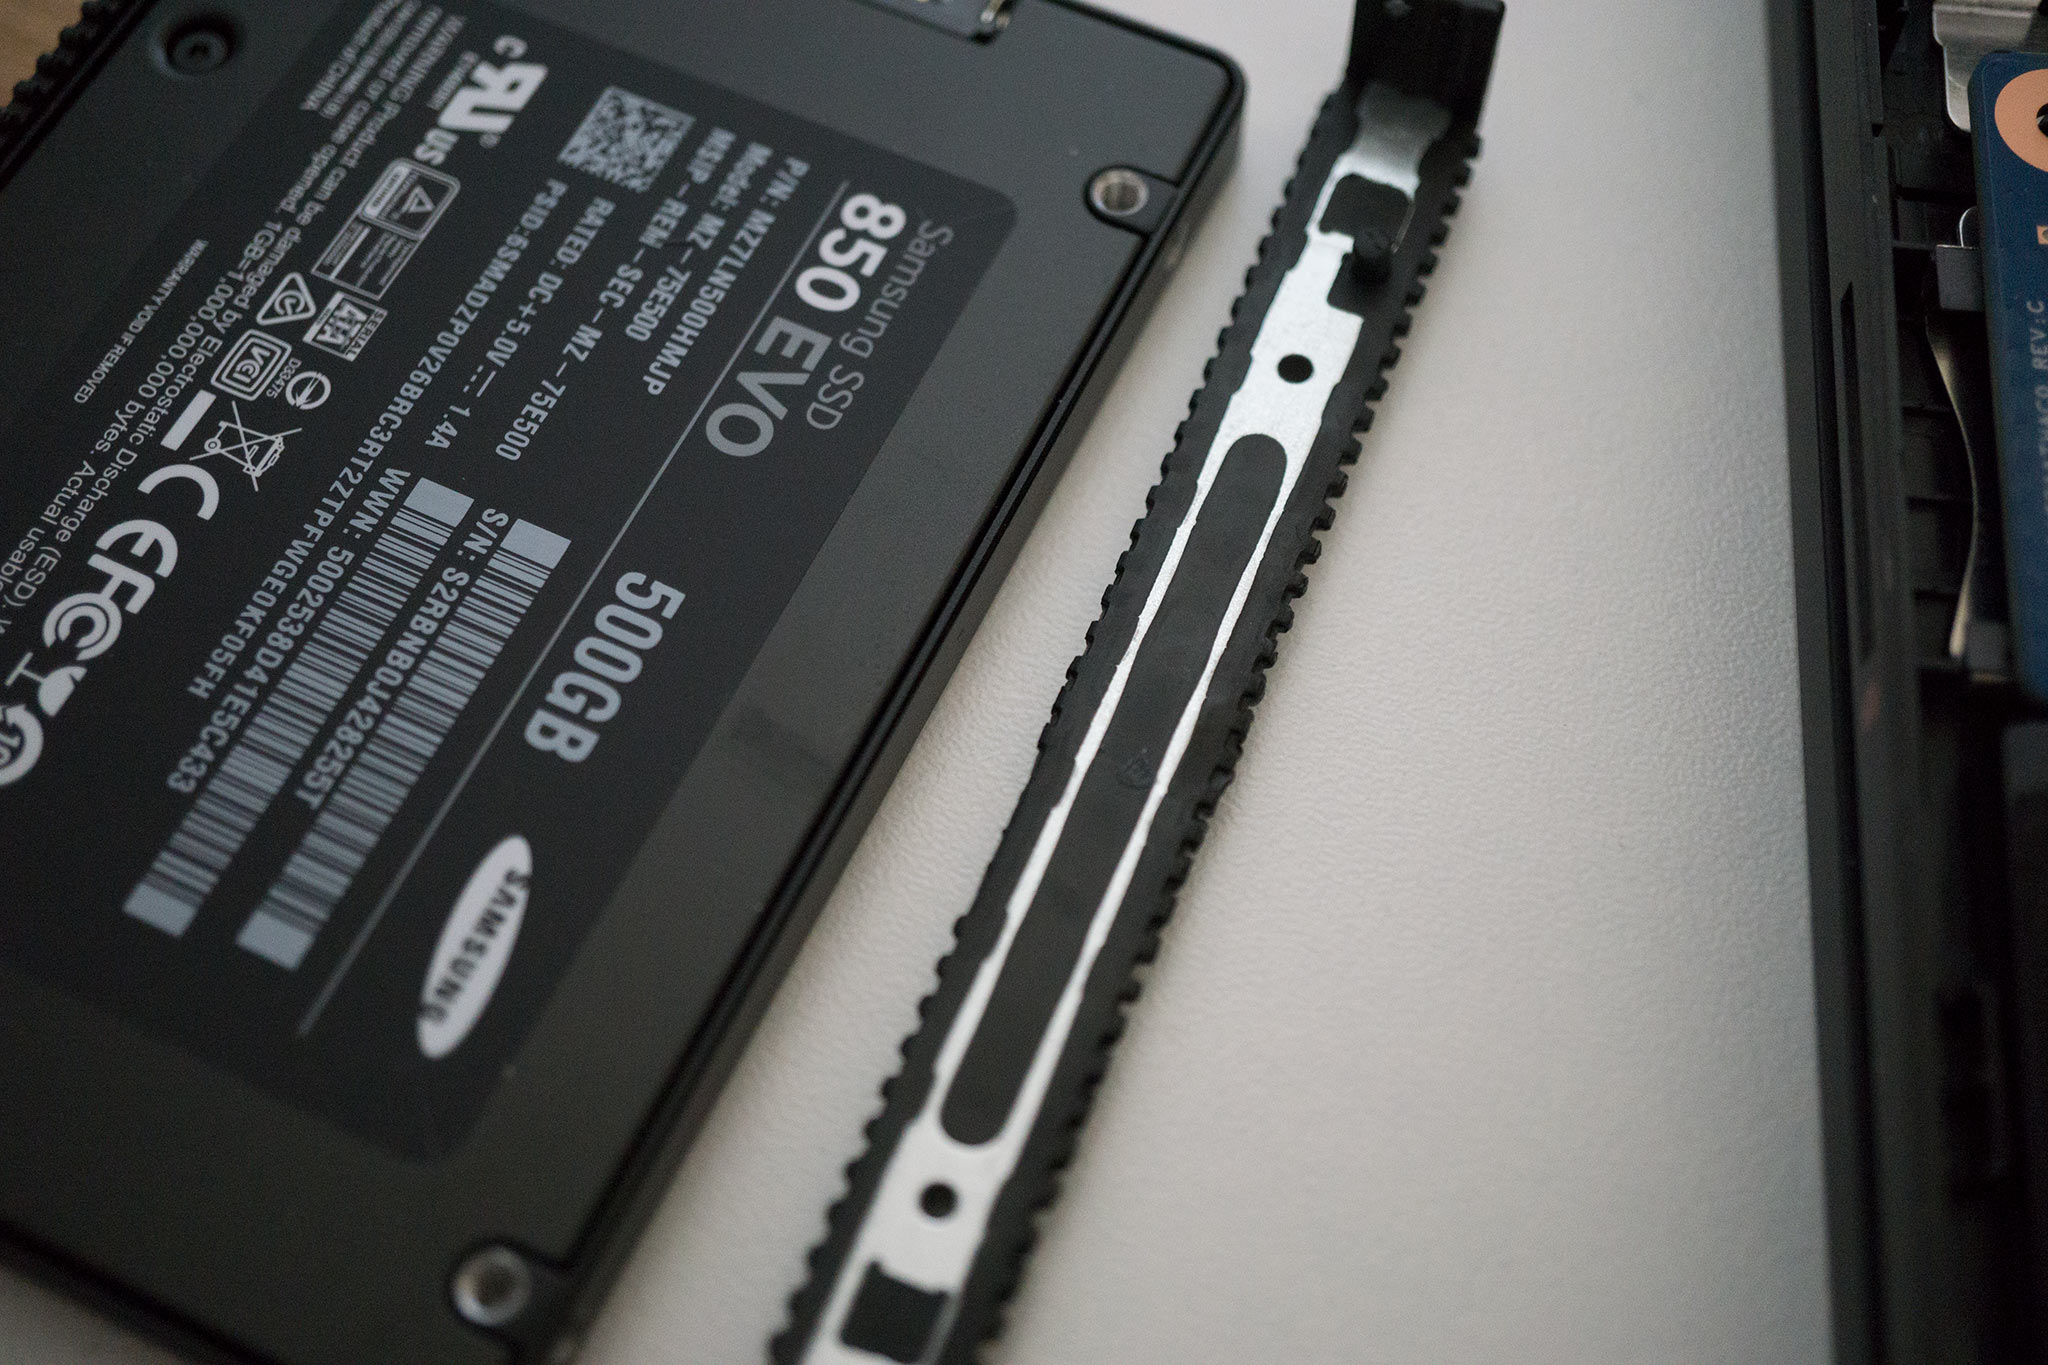
- Remove the SATA connector from the HDD.
- Attach the SATA connector to the new SSD.
- Attach the two runners to the new SSD.
- Lay the SSD in bottom side first.
- Push down on the other end (with the SATA connector) to lay it flat.
- Re-attach the SATA cable to the main board, making sure the blue bumps that hold it in place are past the grove. (You shouldn't be able to simply slide it out without lifting it up.)
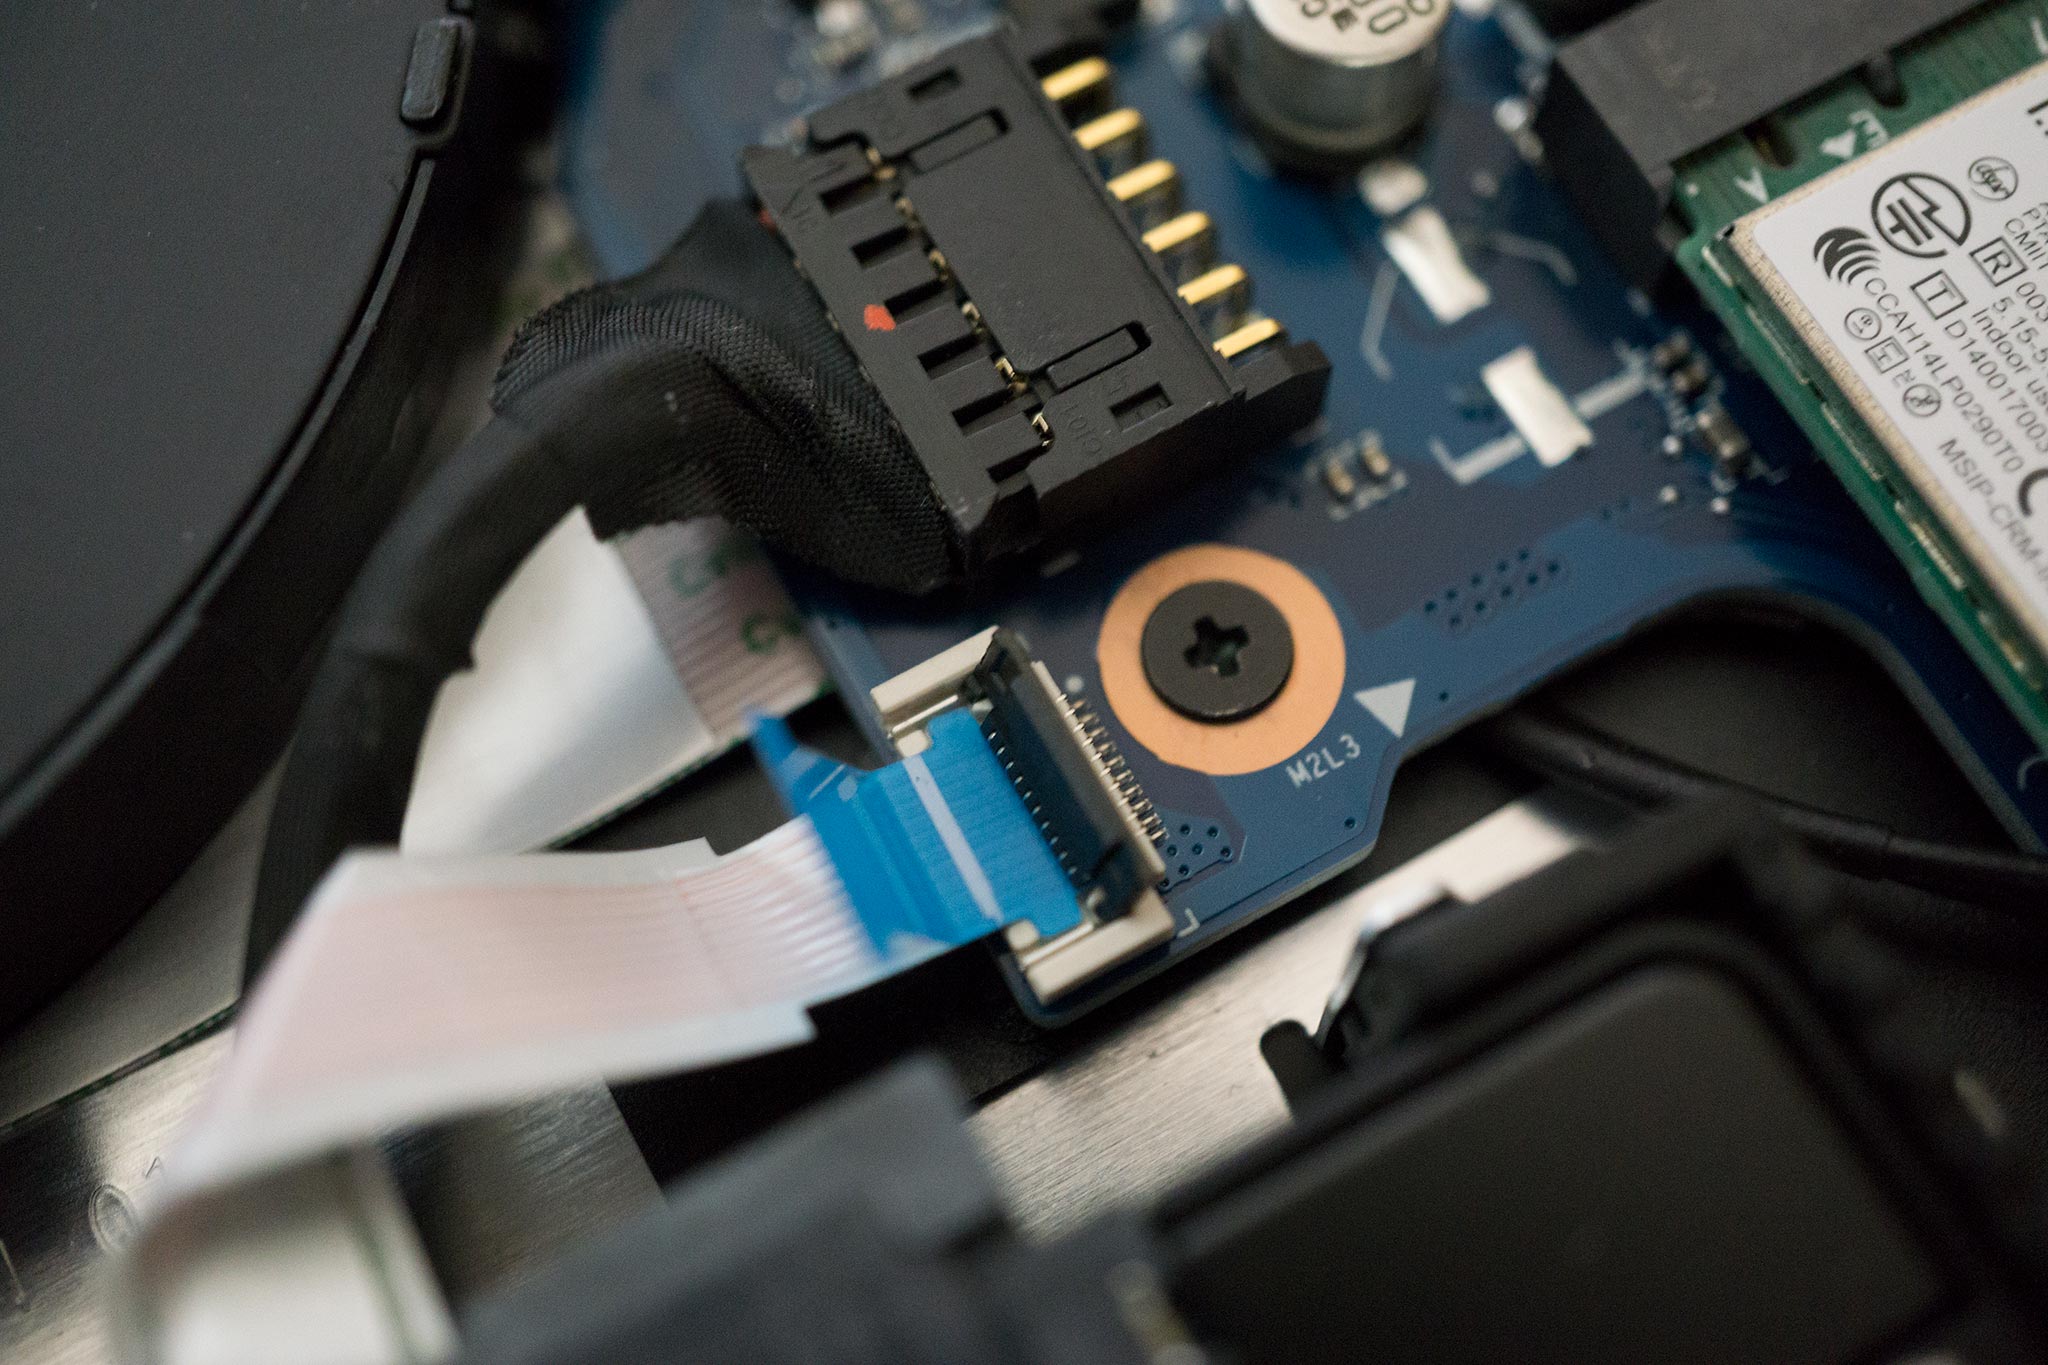
- Push down the clip to hold the cable in place.
Formatting the new drive
In order to use the new drive, you first need to initialize it and have Windows create a partition. Luckily, Microsoft has made this a fairly straightforward process and you'll be installing games in no time at all.
Here's how to get the new SSD working in Windows 10:
- Use the Windows key + X keyboard shortcut to open the Power User menu
- Select Disk Management.
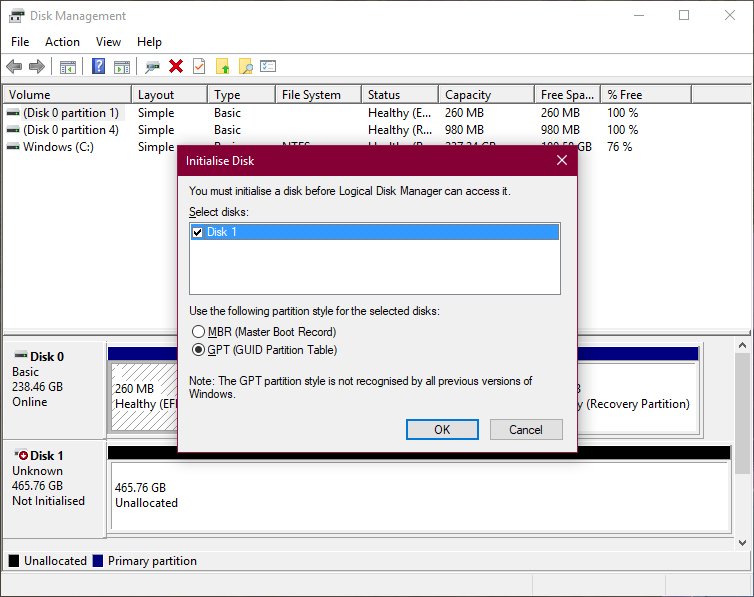
- An alert should ask you to initialize the drive. If not, right-click the "unknown" SSD and select initialize.
- Select one of the partition styles:
- MBR (Master Boot Record) for a hard drive smaller than 2TB in size.
- GPT (GUID Partition Table) for a hard drive larger than 2TB in size.
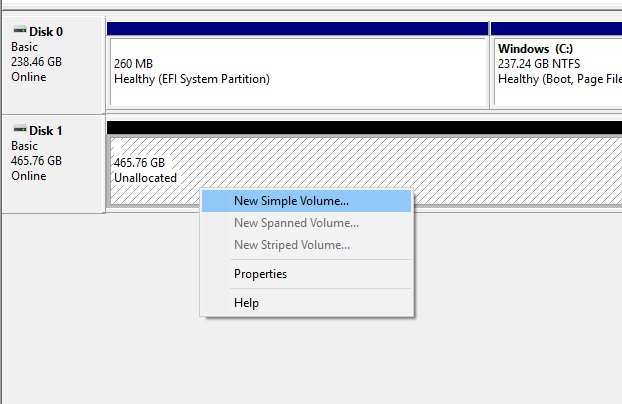
- Right-click the newly created space and select New Simple Volume.
- Click Next.
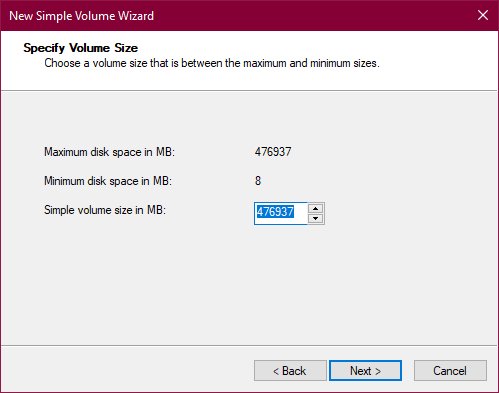
- Leave allocated space as is to take up the entire drive.
- Click Next.
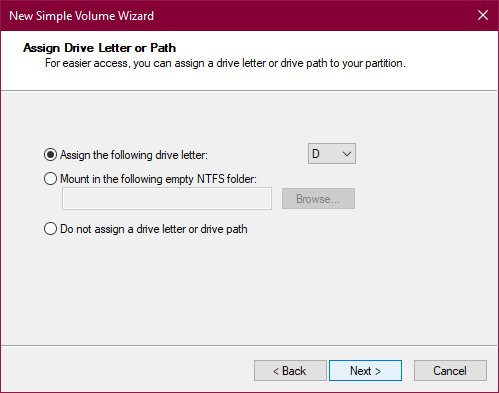
- Select a drive letter.
- Click Next.
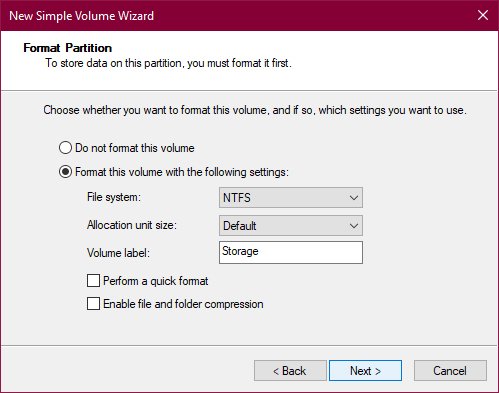
- Select a file system from the drop-down menu. In the case of Windows 10, it's recommended to use the NTFS file system.
- On "Allocation unit size," leave the Default option.
- Type a descriptive name.
- Clear the Perform a quick format option.
- Unless necessary, you don't need to check the Enable file and folder compression option.
- Click Next.
- Click Finish.
We deselected the option to perform a quick format so Windows will do a more thorough format. While this option is handy for times when you need to quickly clear the drive and start afresh, it's better to disable it with a new drive to ensure there are no issues with it. And if you're running into issue formatting the drive for whatever reason, you can give the DiskPart command-line tool a try to see if that fixes the problem.
How to format a new hard drive in Windows 10
Changing the RAM
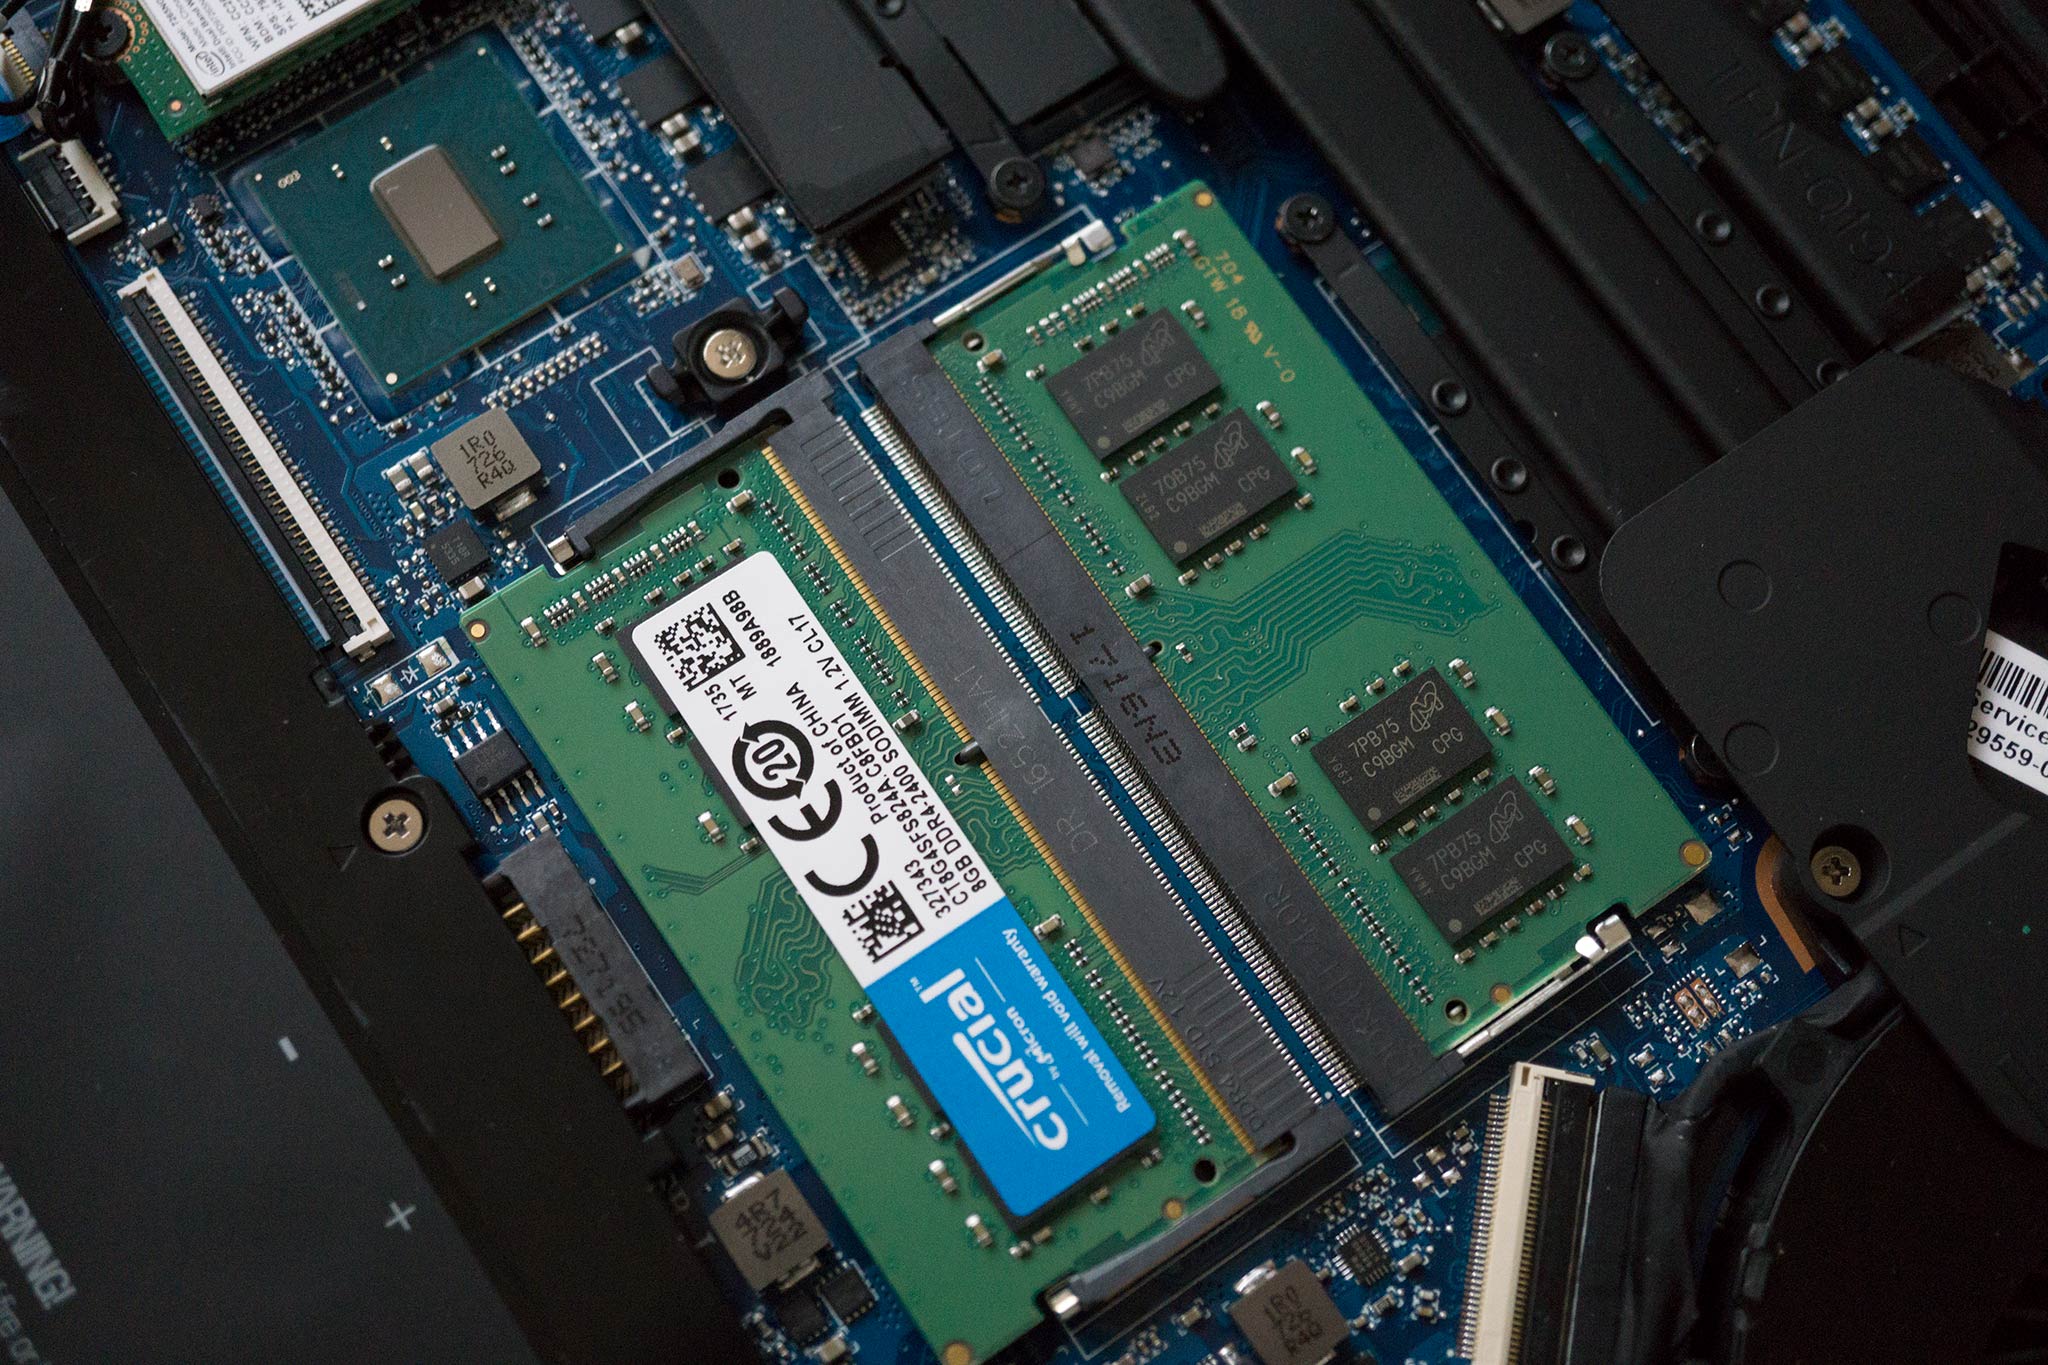
Sometimes 8GB just isn't enough. Other times 16GB even causes a bottleneck. Ideally, when changing the RAM even if the laptop already comes with 8GB you want to replace that stick with a new 2 x 8GB kit. Sure, this means we're replacing an 8GB stick with another 8GB stick, but it saves the trouble of potentially experiencing issues if the CAS latency, timings, and/or voltages are off.
The HP Omen takes DDR4 2400RAM (PC4-19200) SODIMM.
Here's how to change the RAM in the Omen 15:
- Push clamps to the side for each RAM stick.
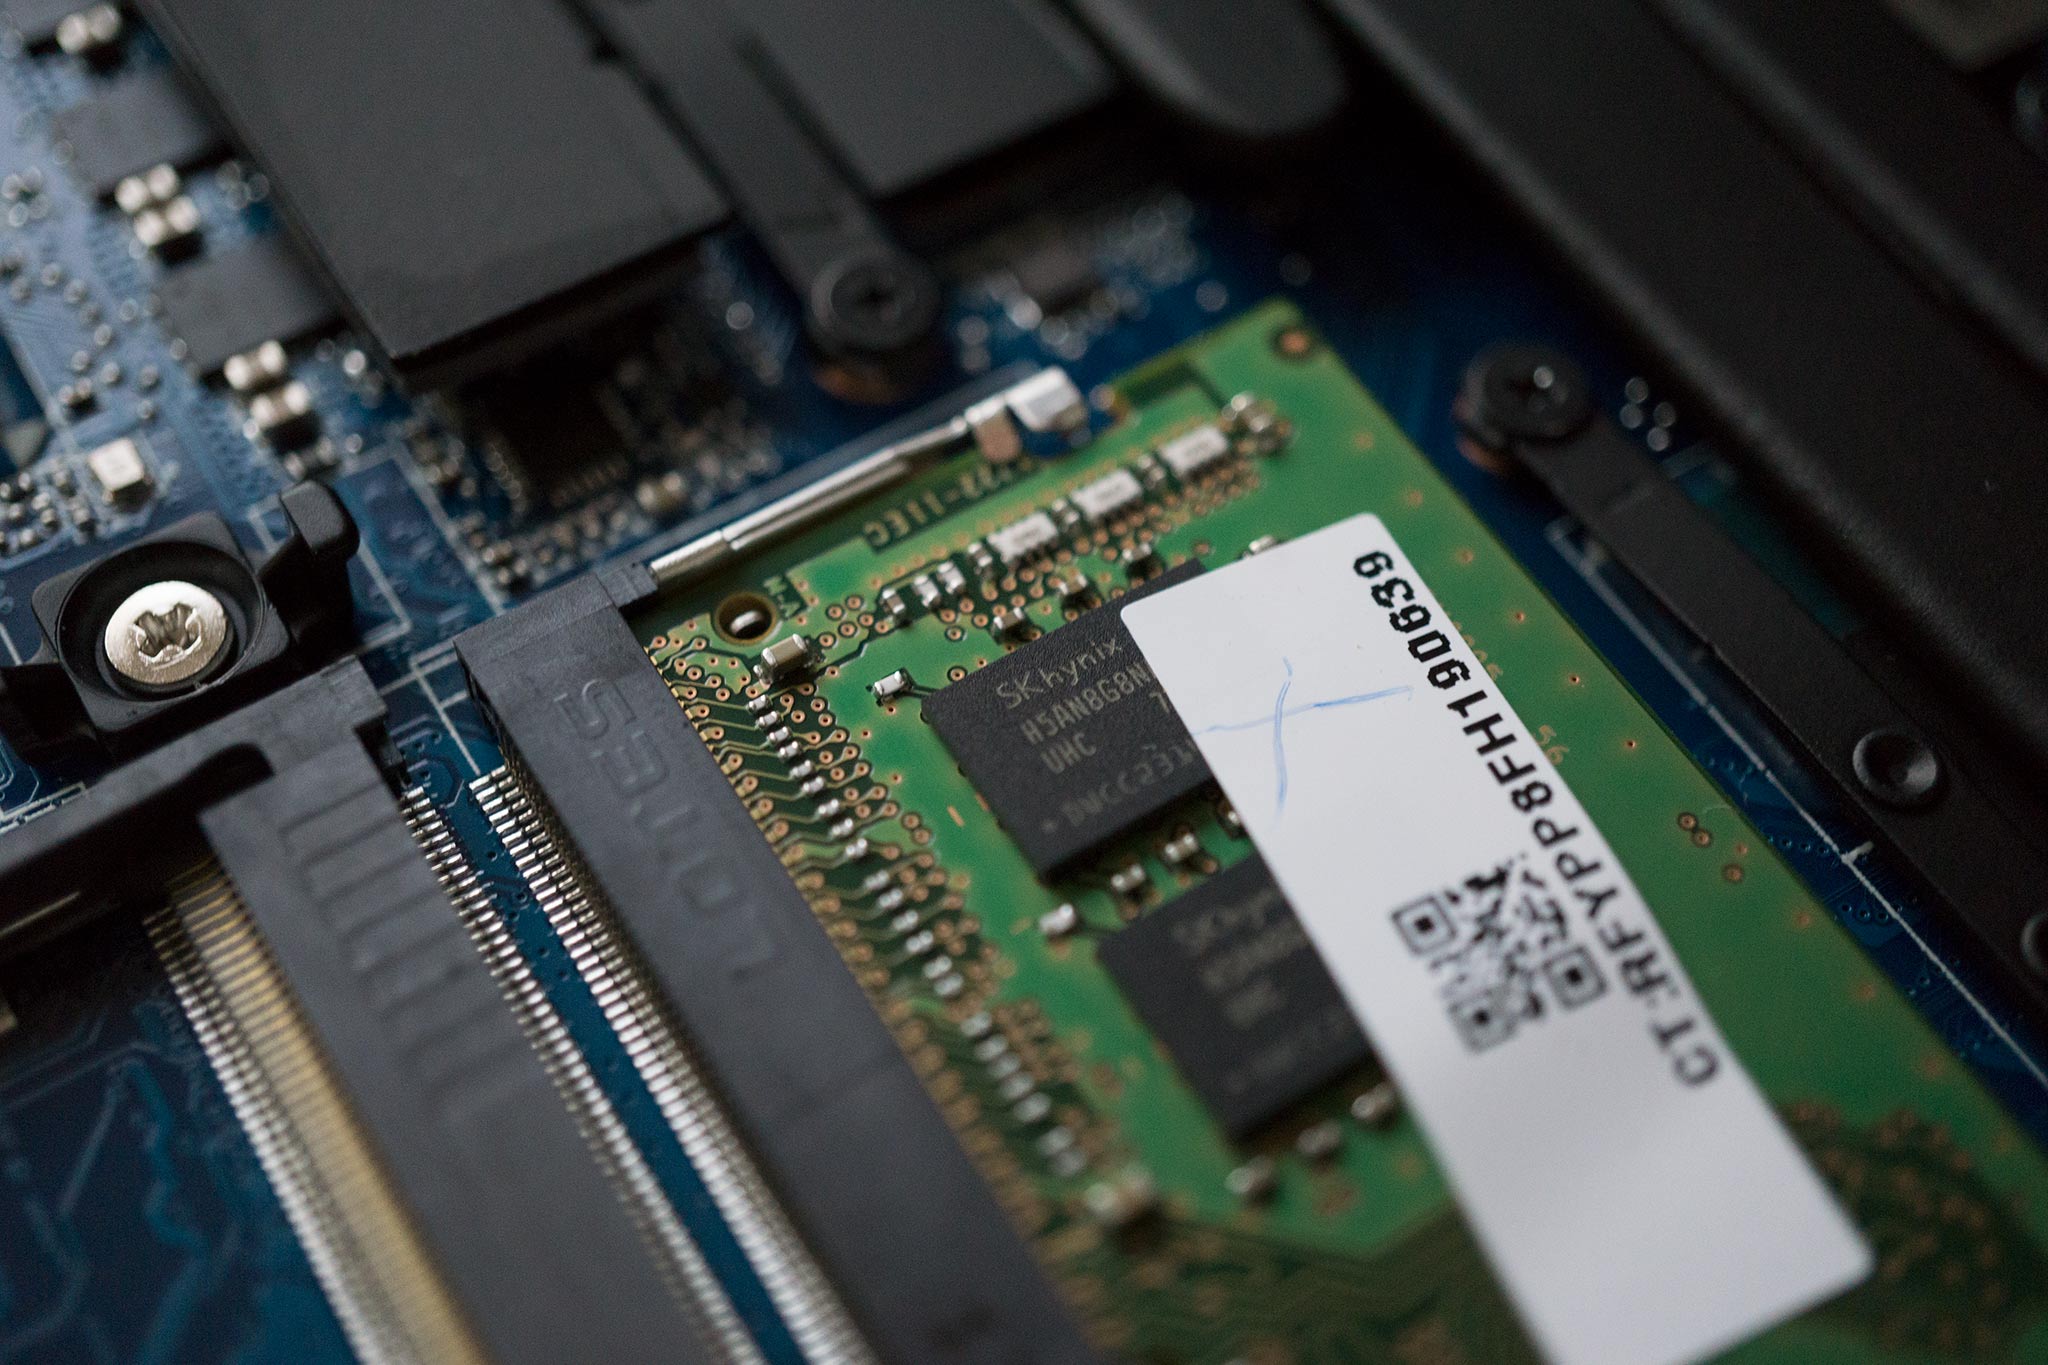
- Extract the RAM module.
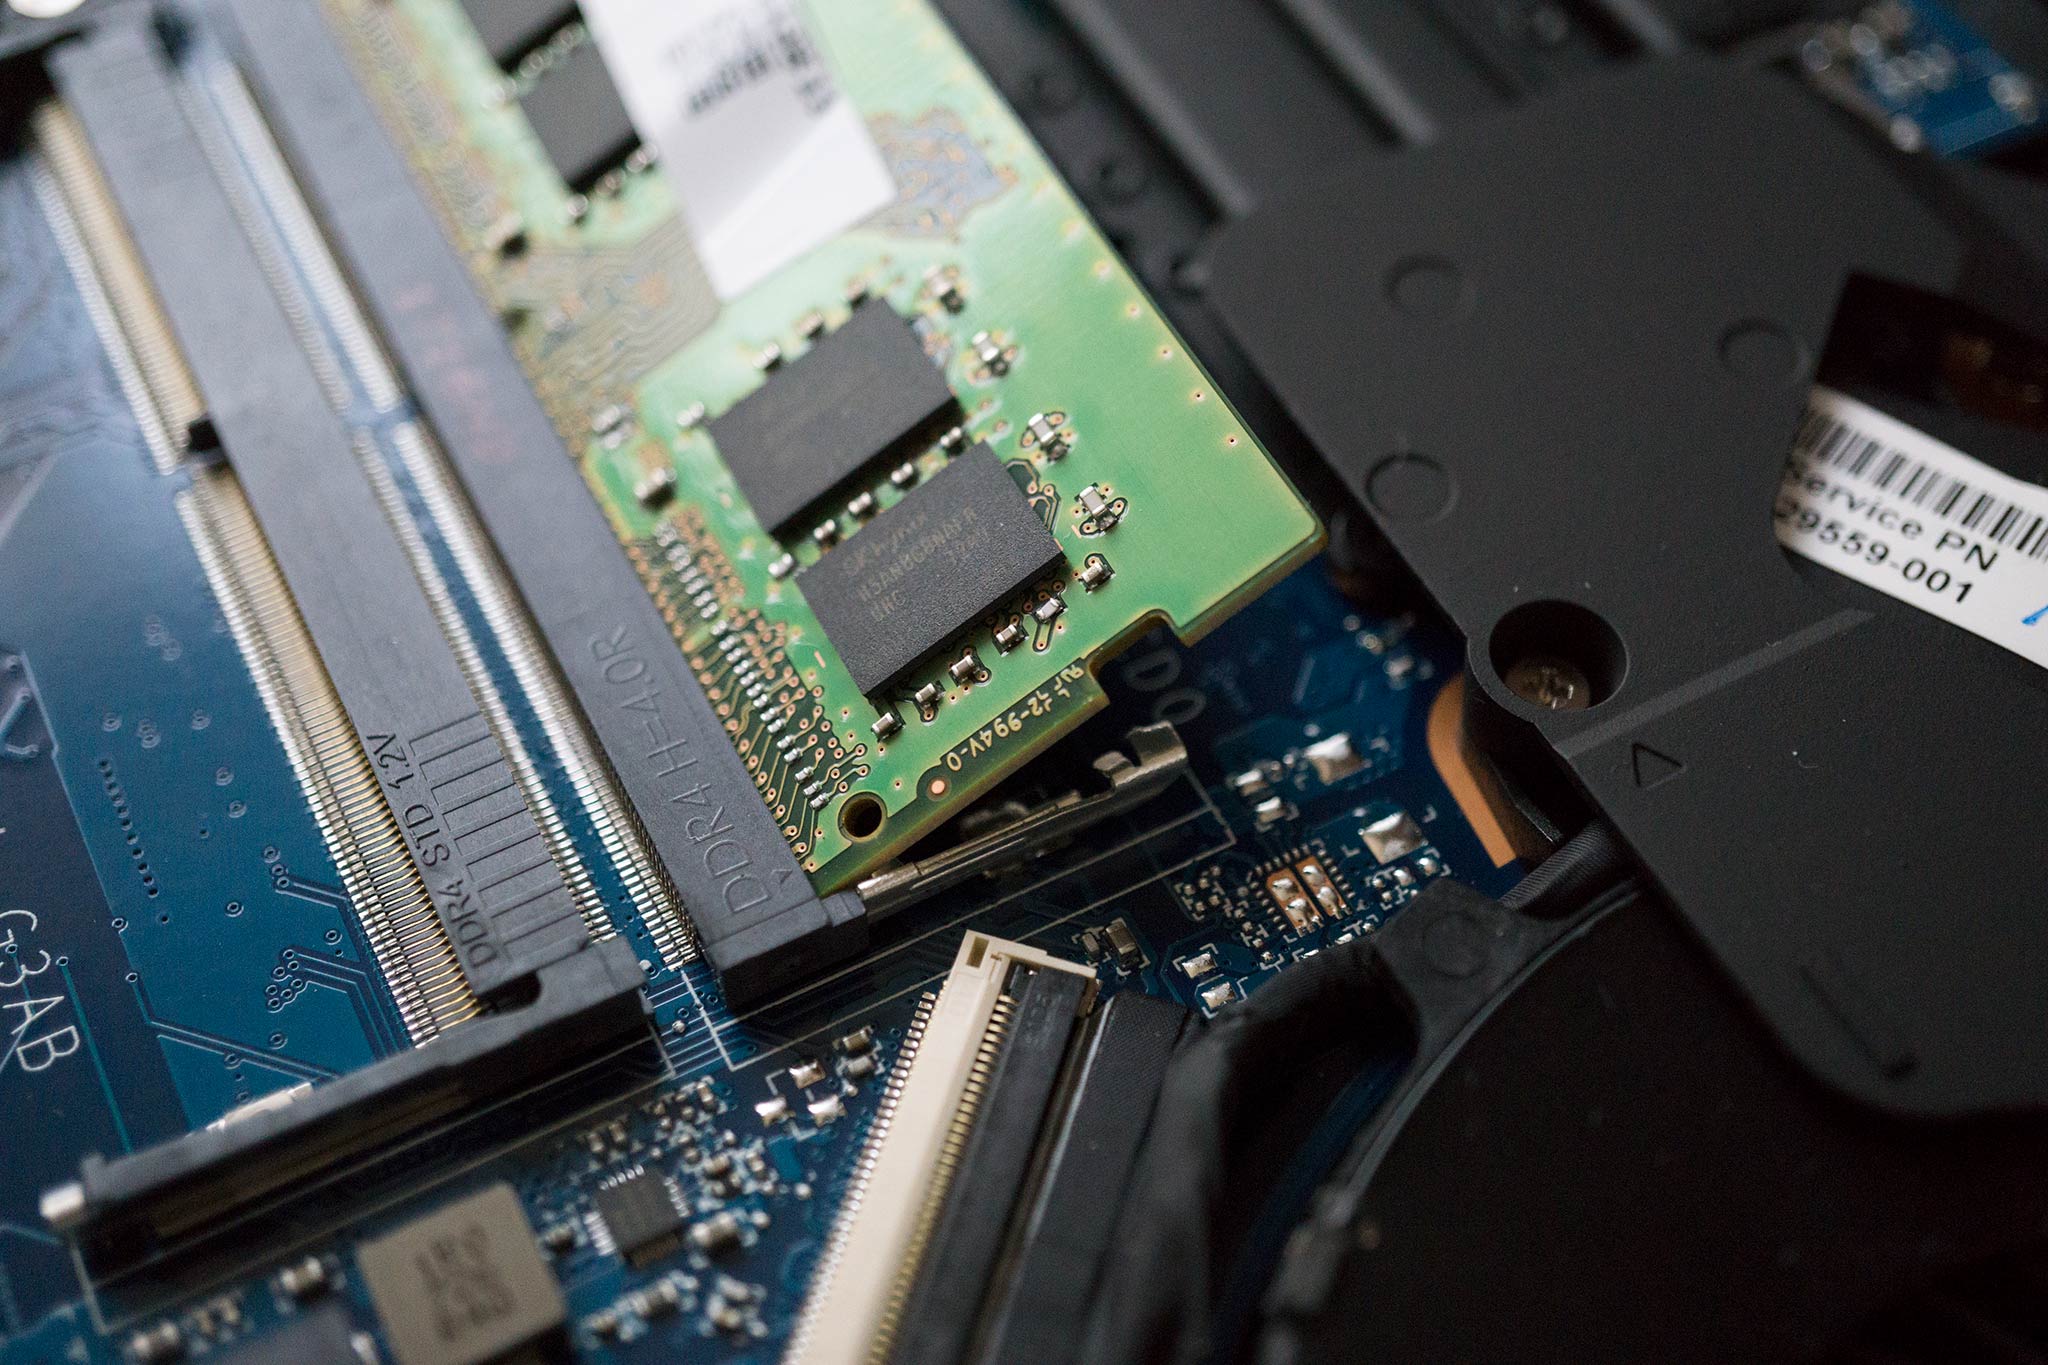
- Match the notch in the new RAM module to the grove in the slot.
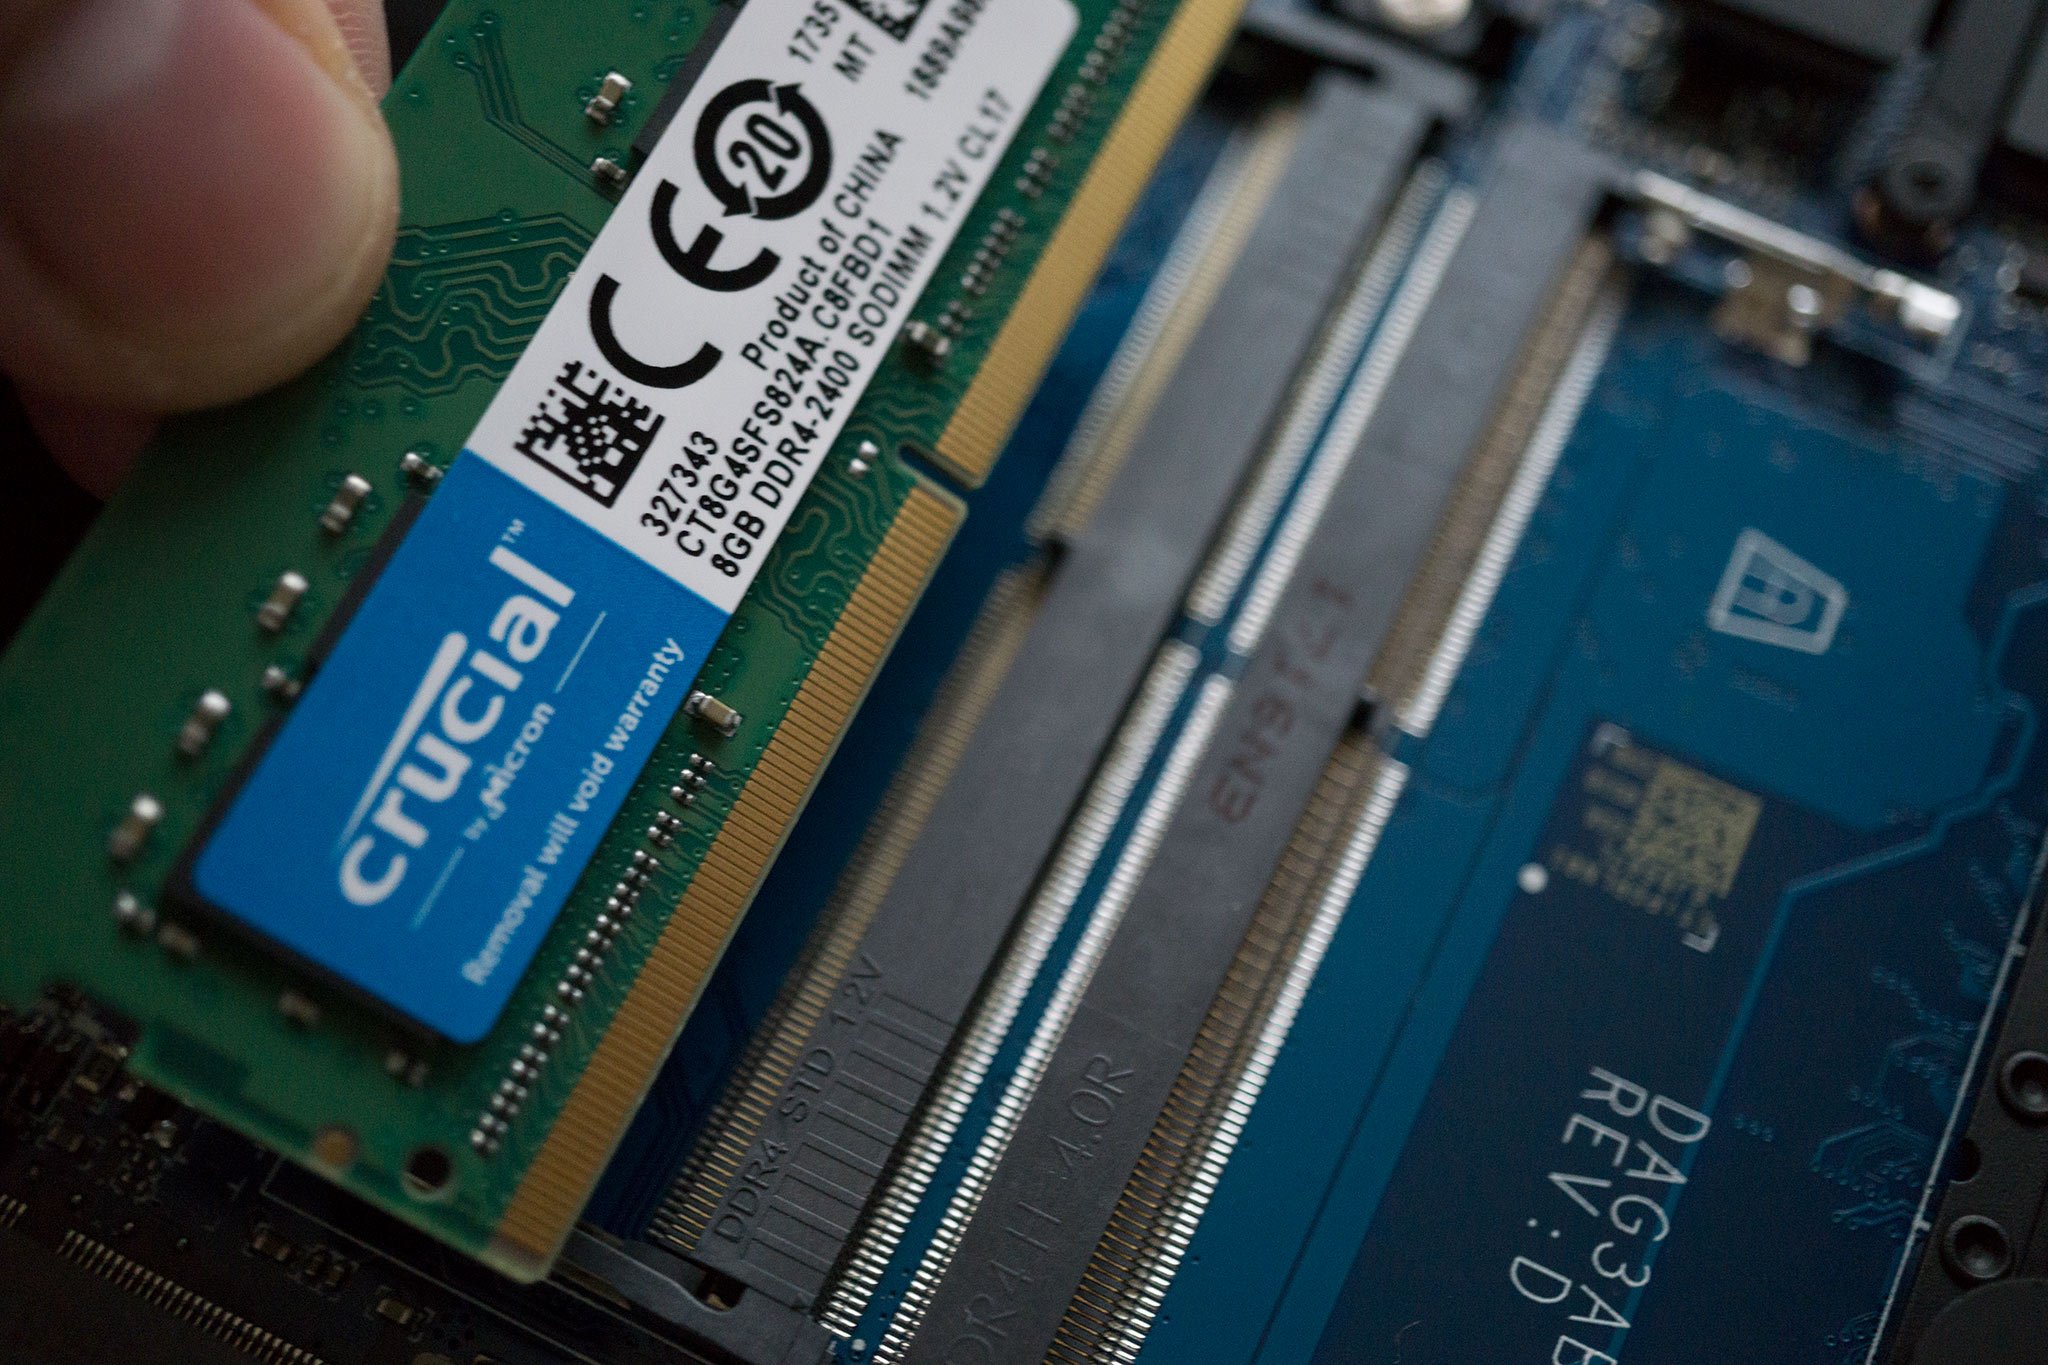
- Slide in the new module.
- Carefully press down on the module until it's locked into place.
- Repeat for the second module if installing.
Job done. You should be able to boot Windows and enjoy a responsive experience in gaming and intense workloads, especially if jumping from 8GB to 16GB or higher.
Questions?
Have a HP Omen laptop but are experiencing issues with upgrading a component? Perhaps you've made the upgrade to a faster SSD for gaming and are stunned by the performance increase. Sound off in the comments.

Rich Edmonds was formerly a Senior Editor of PC hardware at Windows Central, covering everything related to PC components and NAS. He's been involved in technology for more than a decade and knows a thing or two about the magic inside a PC chassis. You can follow him on Twitter at @RichEdmonds.
