How to store unlimited files using Personal Vault (free) in OneDrive
OneDrive limits you to three files in the Personal Vault folder, but you can use a simple workaround to upload as many files as you want, and here's how.
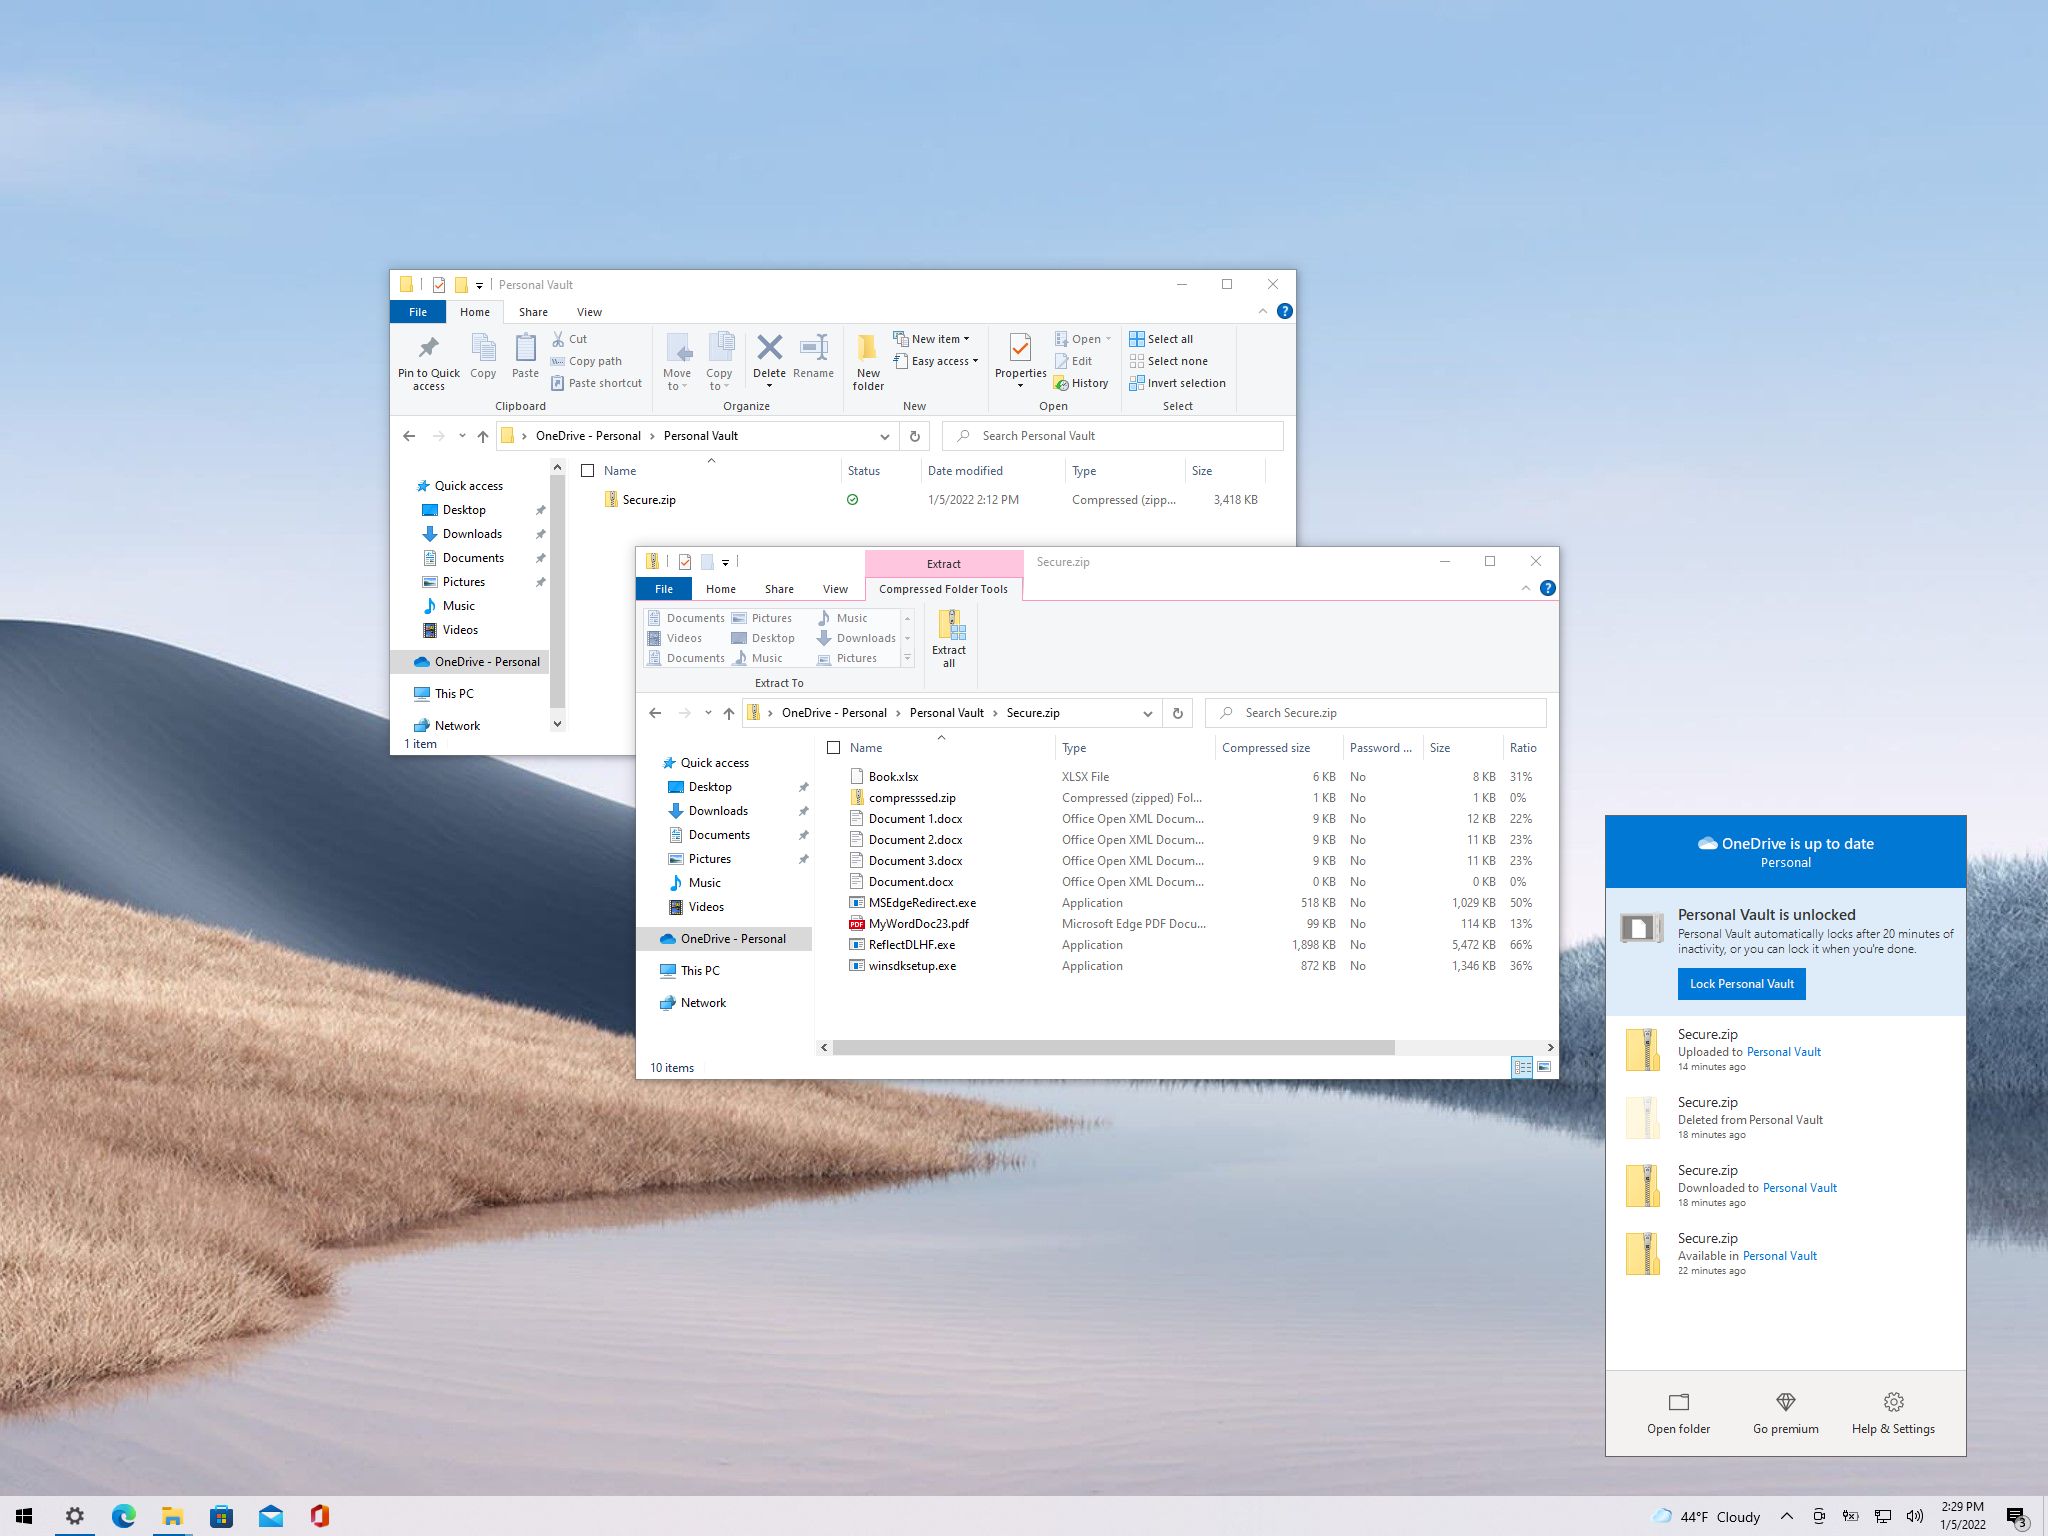
OneDrive Personal Vault is a feature that creates a protected area to store files, such as documents, personal records, pictures, etc.) with sensitive information. The data upload to this area is protected with encryption and using more robust security with two-factor authentication, in addition to the typical sign-in process.
Although this is a useful feature, there's one caveat. If you are using the free version of OneDrive, you can only store up to three files. However, if you don't mind some extra steps, you get around this limitation using a zip container that allows you to upload unlimited files (but limited to your OneDrive storage space) to the protected area using the free version of OneDrive.
In this Windows 10 guide, we will walk you through the steps to upload unlimited files to the free version of Personal Vault in OneDrive.
If you don't want to go through the workaround to use the Personal Vault, you should consider getting a Microsoft 365 subscription to lift the file restriction.
Microsoft 365 gives you full access to all the apps and perks, such as 1TB of OneDrive storage without Personal Vault restrictions and Skype minutes. You can also install Word, Excel, PowerPoint, Outlook, and other apps on up to five devices, and depending on the subscription, you can share the account with up to five people.
How to store unlimited files using the free tier of Personal Vault
The workaround to upload more than three files to the Personal Vault with the free version of OneDrive is to group all files with sensitive information inside of a .zip extension file, allowing the service to see the file as a single item.
Configure Personal Vault on Windows 10
If you have already configured the Personal Vault feature, you can skip these steps and proceed with the upload instructions below.
To configure the Personal Vault feature in OneDrive, use these steps:
All the latest news, reviews, and guides for Windows and Xbox diehards.
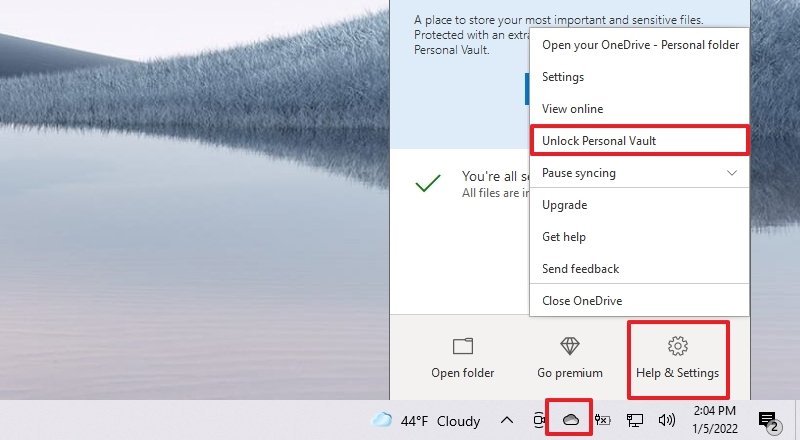
- Click the OneDrive icon from the Taskbar's notification area.
- Click the Help & Settings button.
- Select the Unlock Personal Vault option.Quick note: You may also see a Get started option when launching the OneDrive app, which can help you configure the feature.
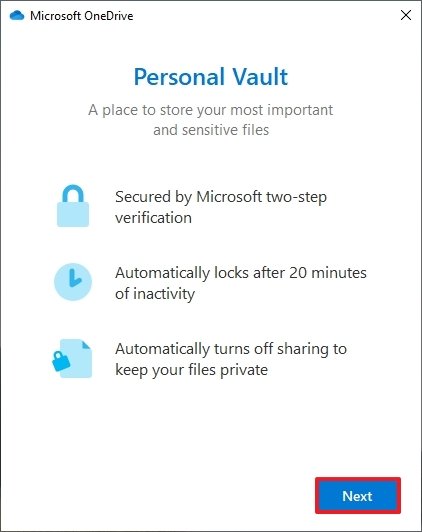
- Click the Next button.
- Click the Allow button.
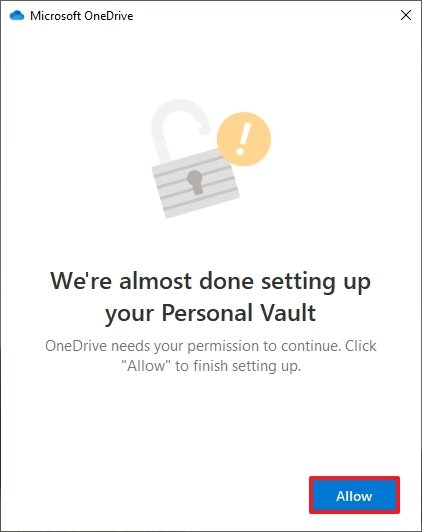
- Confirm your Microsoft account password.
- Click the Sign in button.
- Continue with the on-screen directions (if applicable).
Once you complete these steps, you can start uploading and downloading to the secure area of OneDrive.
If the option isn't available, check the Personal Vault setting page on your OneDrive account, and make sure to enable the feature.
Store unlimited files to Personal Vault
To upload and protect unlimited files with the free tier of OneDrive Personal Vault, use these steps:
- Open File Explorer.
- Browse to the folder with the file you want to protect.
- Click the New items menu from the "Home" tab and select the Compressed (zipped) Folder option.
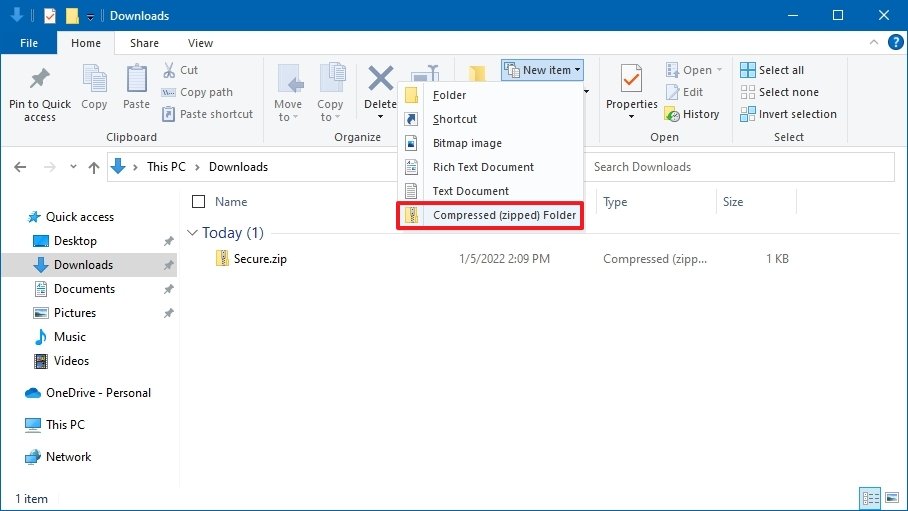
- Confirm a name for the zip folder and press Enter.
- Select the files to upload to the Personal Vault of OneDrive.
- Click the Copy button from the "Home" tab.
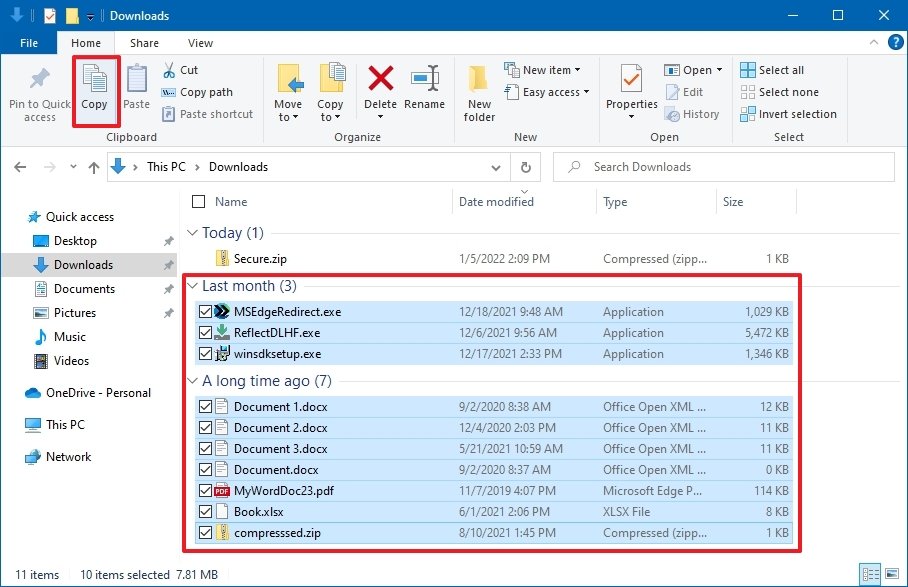
- Double-click to open the newly created zip folder.
- Click the Paste button from the "Home" tab.
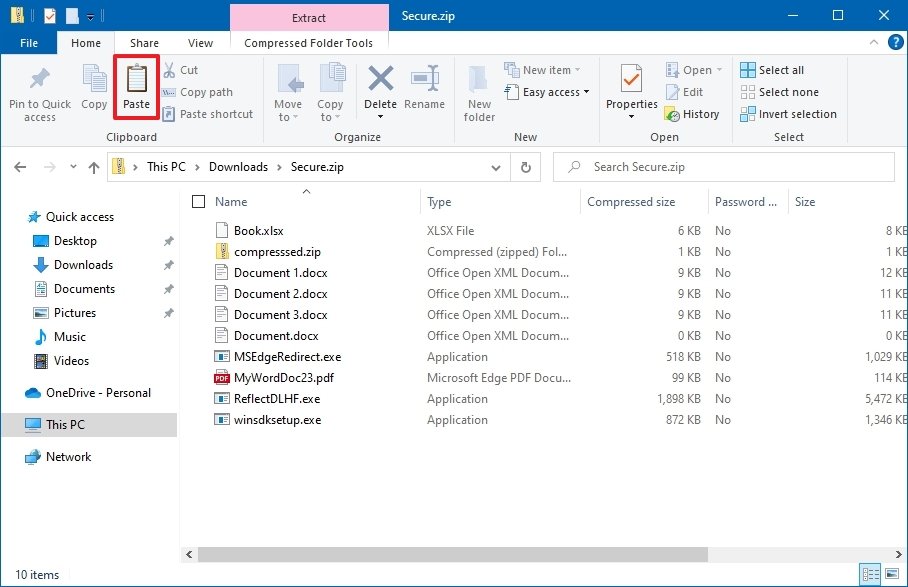
- Click the Back button (Alt + left arrow keyboard shortcut) to return to your document's folder.
- Select the zip folder with the confidential files.
- Click the Copy button from the "Home" tab.
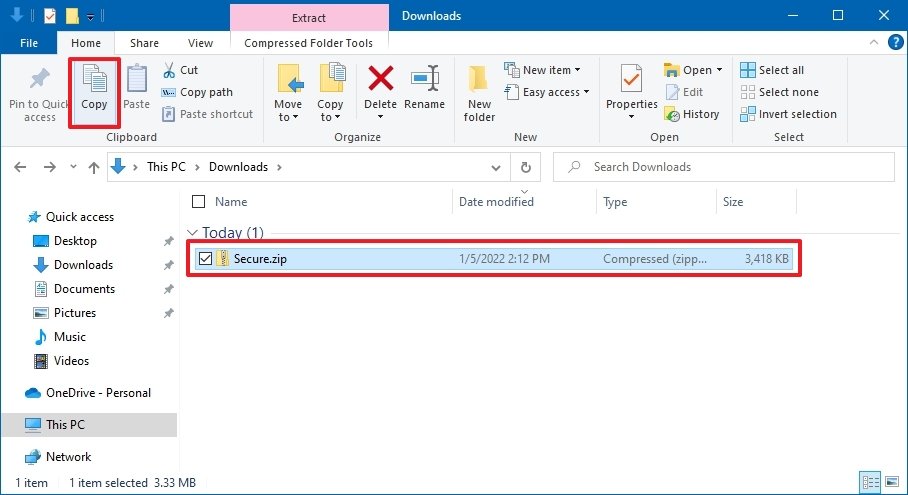
- Click on OneDrive from the left pane.
- Double-click the Personal Vault shortcut.
- Confirm the account credentials (if applicable).
- Click the Paste button from the "Home" tab.
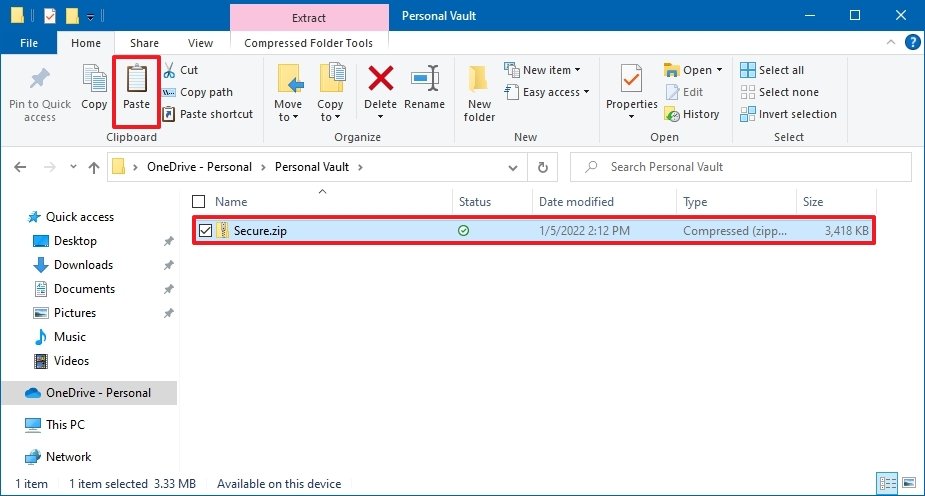
After you complete these steps, the zip folder with unlimited files will upload to your free version of the OneDrive Personal Vault.
Download files from Personal Vault
To retrieve your files from the Personal Vault, use these steps:
- Open File Explorer.
- Click on OneDrive from the left pane.
- Double-click the Personal Vault shortcut.
- Confirm the account credentials (if applicable).
- Double-click to open the zip container to access your files.
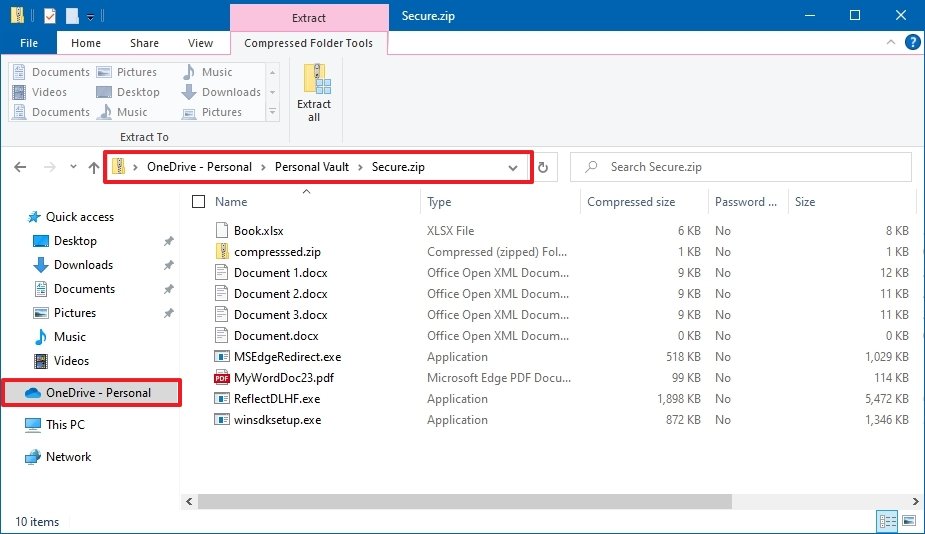
- Right-click the document and select the Open option.
Once you complete the steps, you'll be able to view the contents of the confidential document.
If you need to modify the document, the process is a little tricky. First, select the file, choose a destination folder from the Compressed Folder Tools tab to extract, and then edit the document from the extraction location. After editing the file, right-click the original file from the zip folder and select the Delete option. Finally, copy the newly revised document and paste it inside the zip folder.
More Windows resources
For more helpful articles, coverage, and answers to common questions about Windows 10 and Windows 11, visit the following resources:
- Windows 11 on Windows Central — All you need to know
- Windows 11 help, tips, and tricks
- Windows 10 on Windows Central — All you need to know

Mauro Huculak has been a Windows How-To Expert contributor for WindowsCentral.com for nearly a decade and has over 22 years of combined experience in IT and technical writing. He holds various professional certifications from Microsoft, Cisco, VMware, and CompTIA and has been recognized as a Microsoft MVP for many years.
