How to set up Windows 10 with local account
You can still set up Windows 10 without a Microsoft account, and in this guide, I'll show you the steps to complete the task.
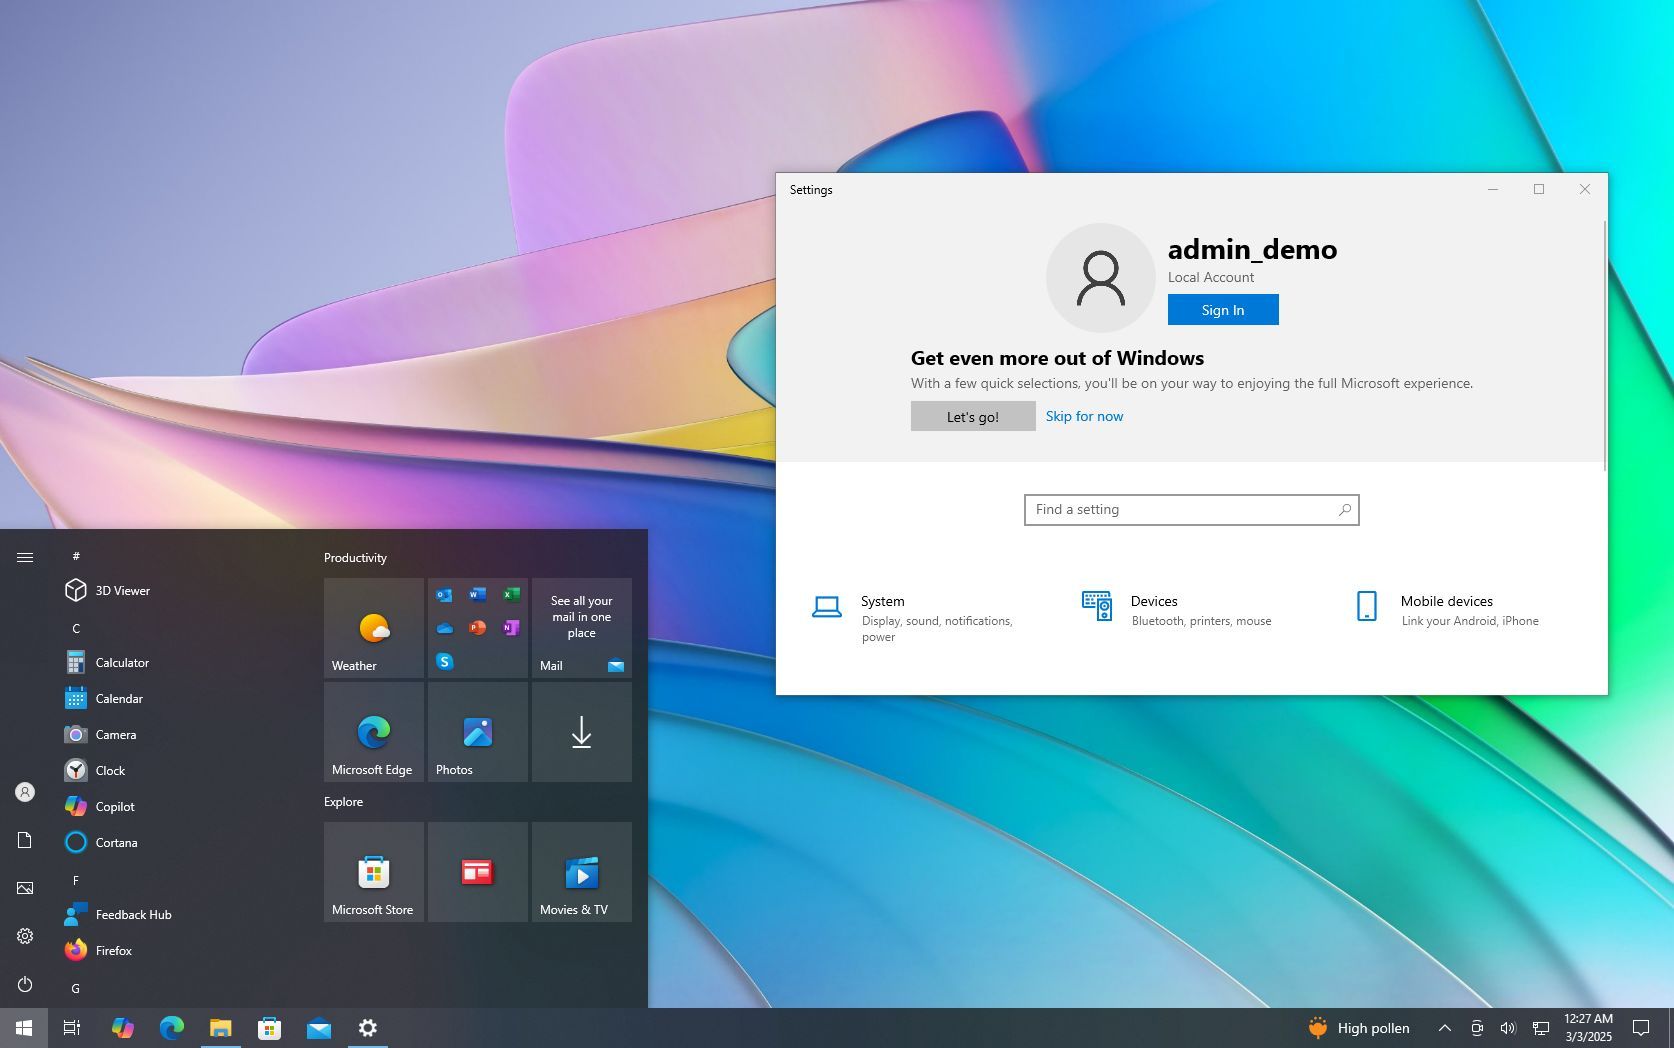
On Windows 10, the Out-of-Box Experience (OOBE) is the guided setup process that helps you configure essential settings, such as language preferences, account, and privacy options. While the initial setup is designed to be user-friendly, Microsoft intentionally encourages users to sign in with a Microsoft account rather than a traditional local account.
The primary reason for this push is that a Microsoft account unlocks cloud-based features and seamless integration with the company's services. For example, signing in with this account type enables automatic settings and file synchronization across devices, provides access to device health monitoring, and allows for remote management of passwords and personal information. Additionally, a Microsoft account includes security features like Find My Device, which helps locate a lost or stolen computer.
However, if you prefer a local account for greater privacy, security, or simplicity, you can still set up Windows 10 without a Microsoft account. The option is available, but its location depends on whether you're installing Windows 10 Home or Pro. Knowing where to find it ensures you can complete the setup with an offline account, avoiding the need for Microsoft’s cloud integration.
In this how-to guide, I'll explain the steps to set up Windows 10 with a local account through out-of-box experience.
These instructions has been updated to ensure accuracy and reflect changes to the process in the operating system.
How to set up local account during Windows 10 Pro setup
To set up a new installation of Windows 10 with a local account, while in the out-of-box experience, use these steps:
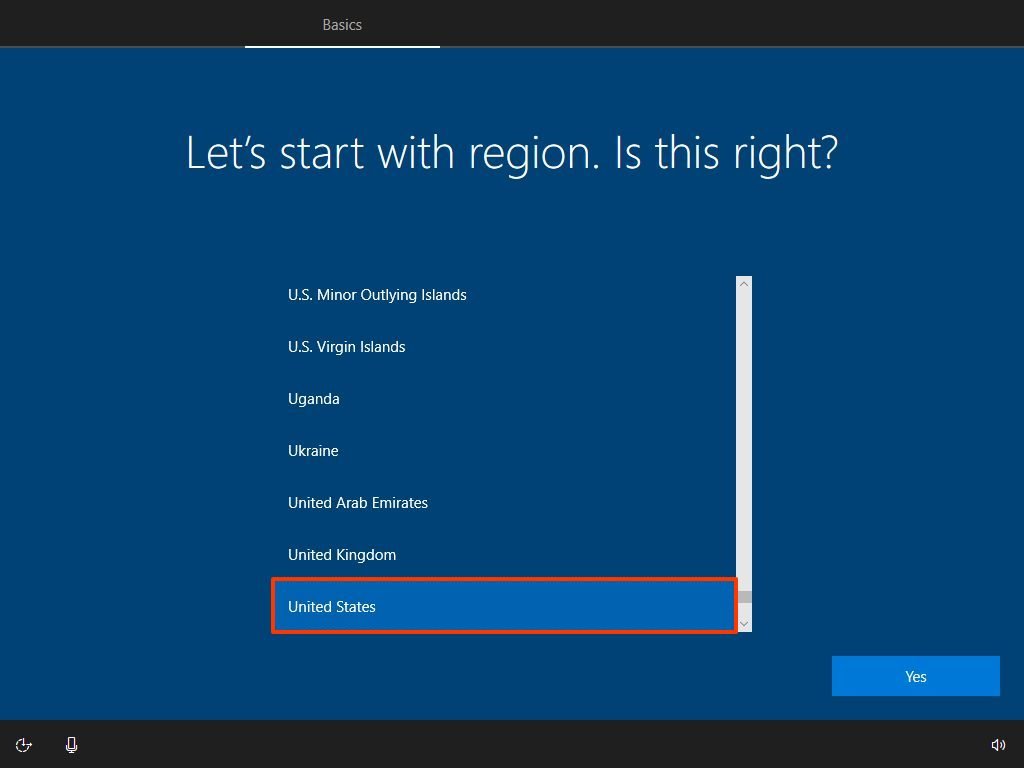
- Select your region.
- Click the Yes button.
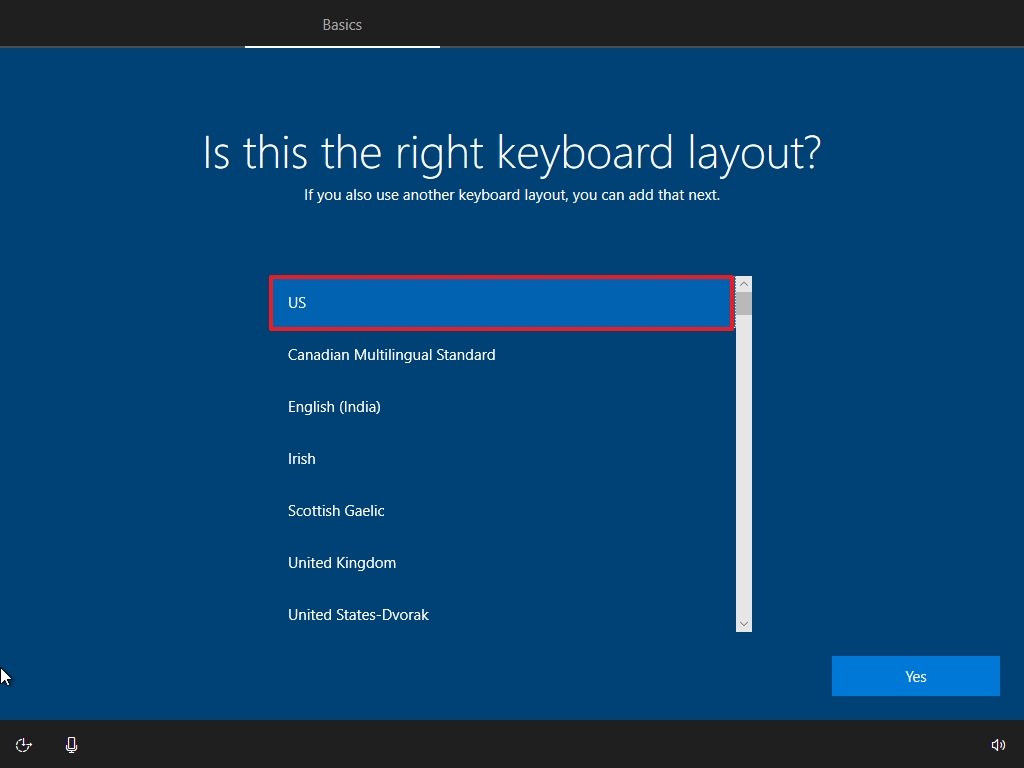
- Select your keyboard layout.
- Click the Yes button.
- Click the Skip button.
- Quick note: If you are not using a wired network connection, you'll have to sign in to the wireless network.
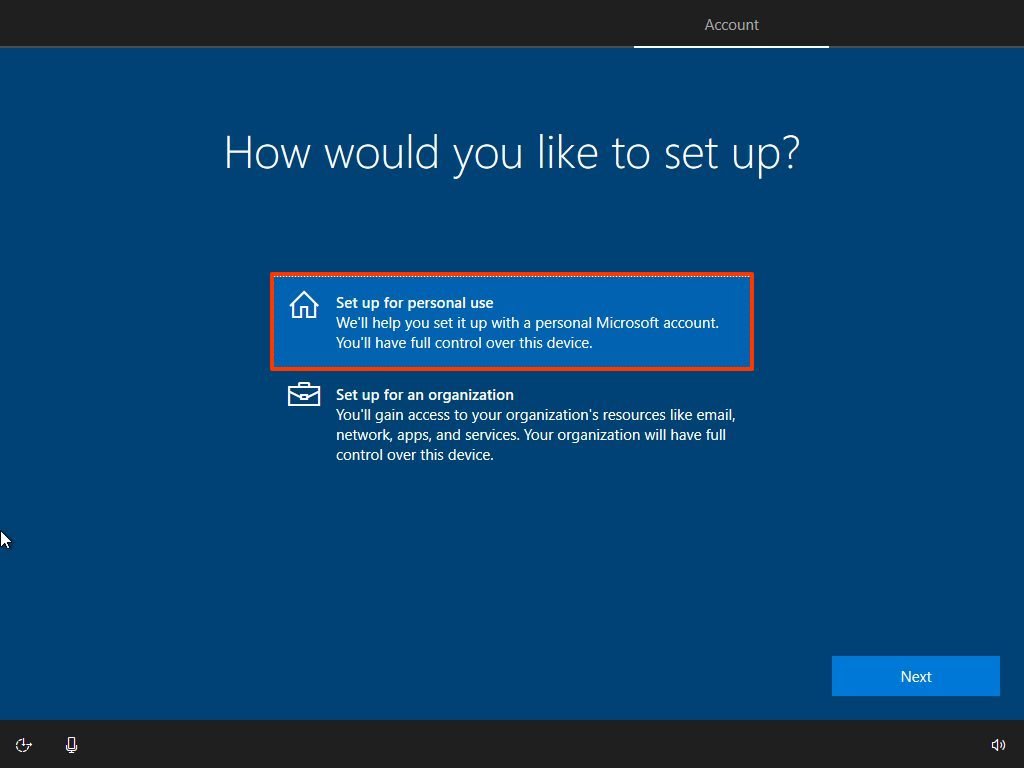
- Select the "Set up for personal use" option.
- Click the Next button.
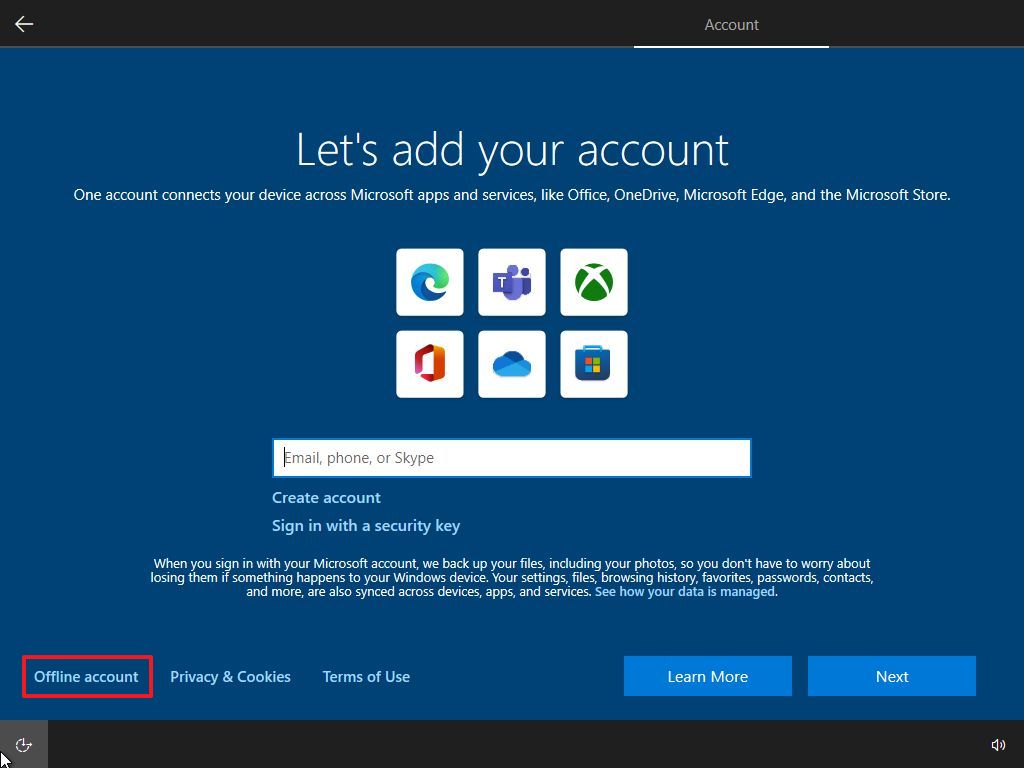
- Click the Offline account option at the bottom left corner.
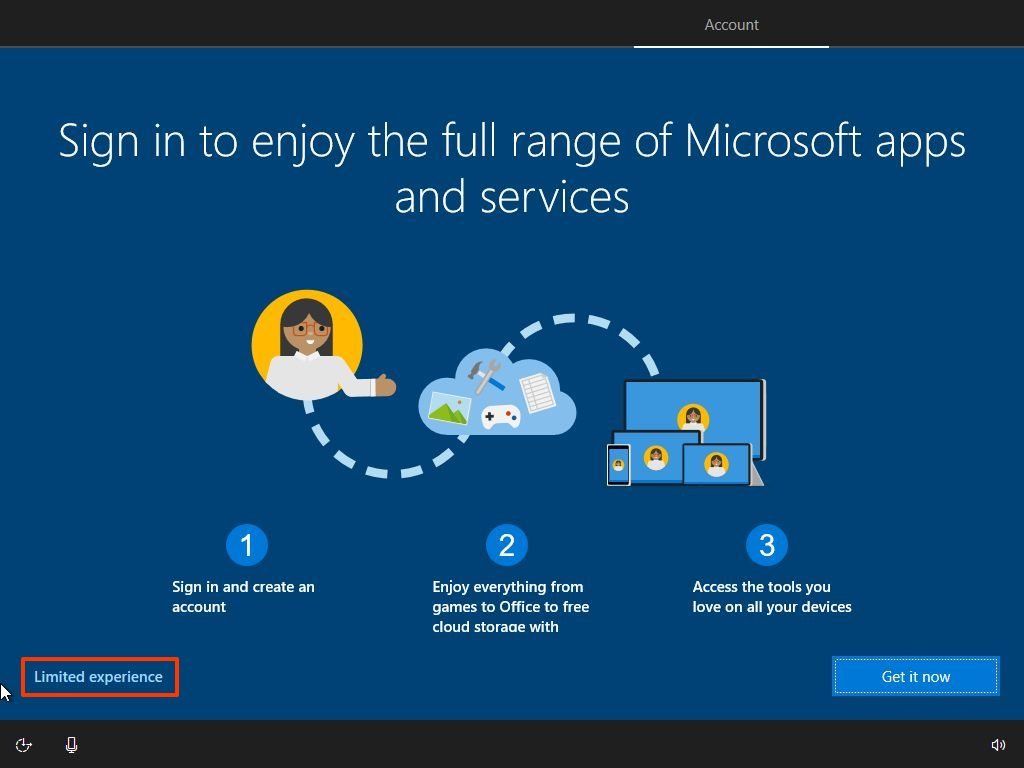
- Click the Limited experience option at the bottom left corner.
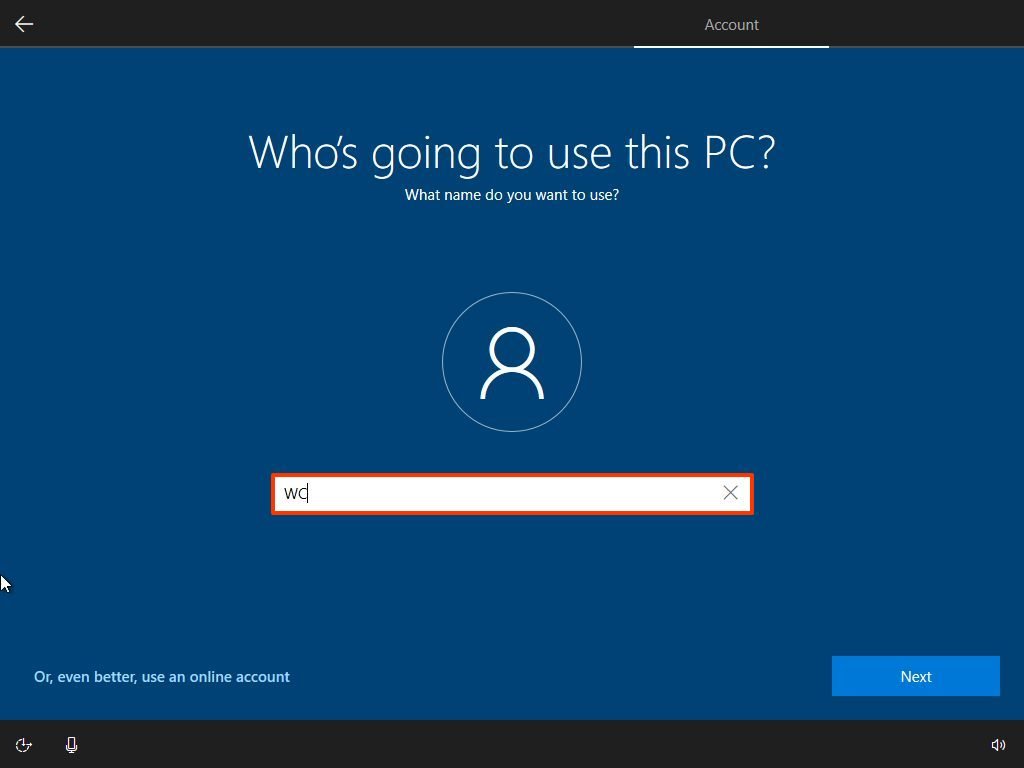
- Confirm the name of the local account.
- Click the Next button.
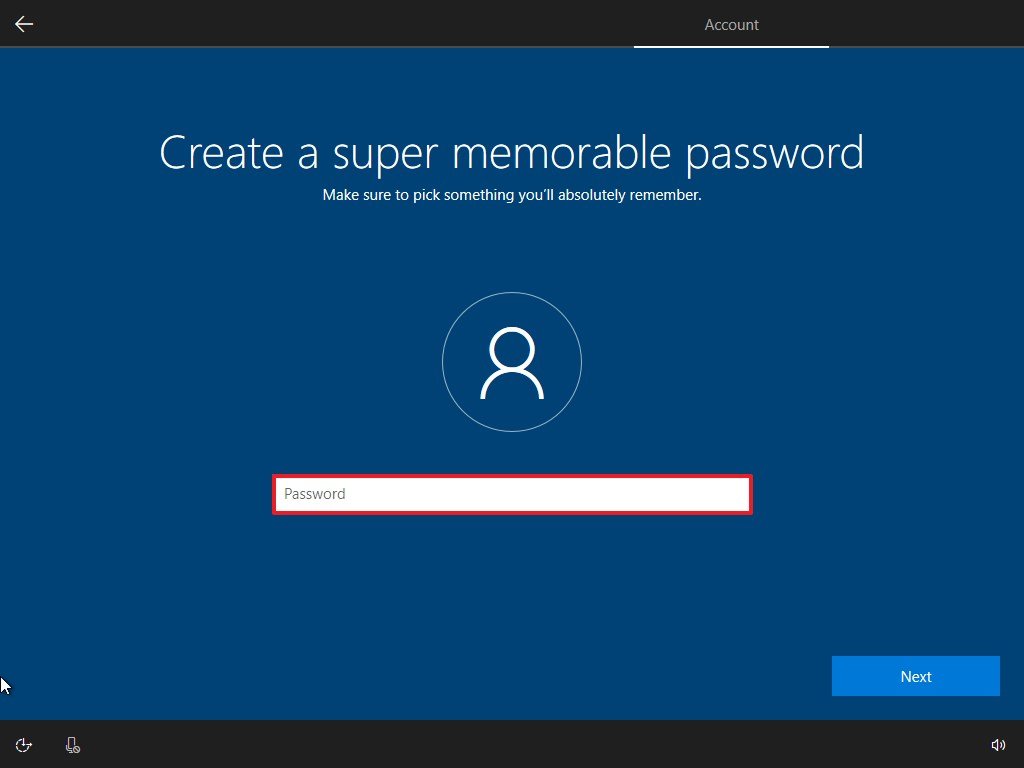
- Create a password for the account.
- Click the Next button.
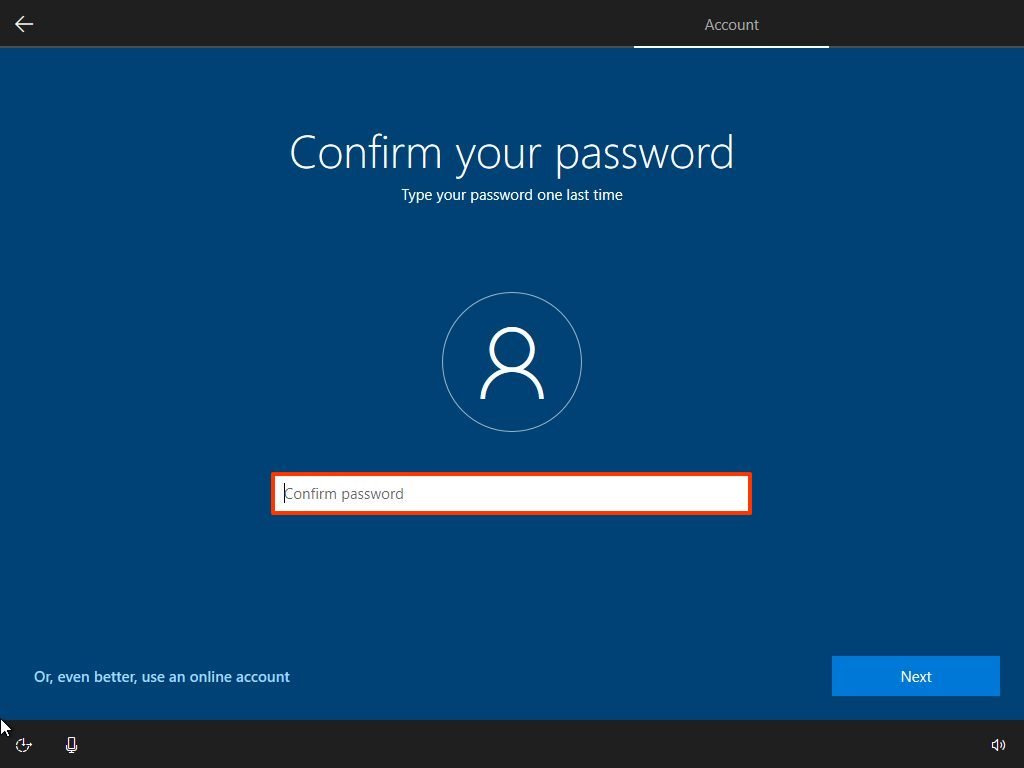
- Confirm the account password.
- Click the Next button.
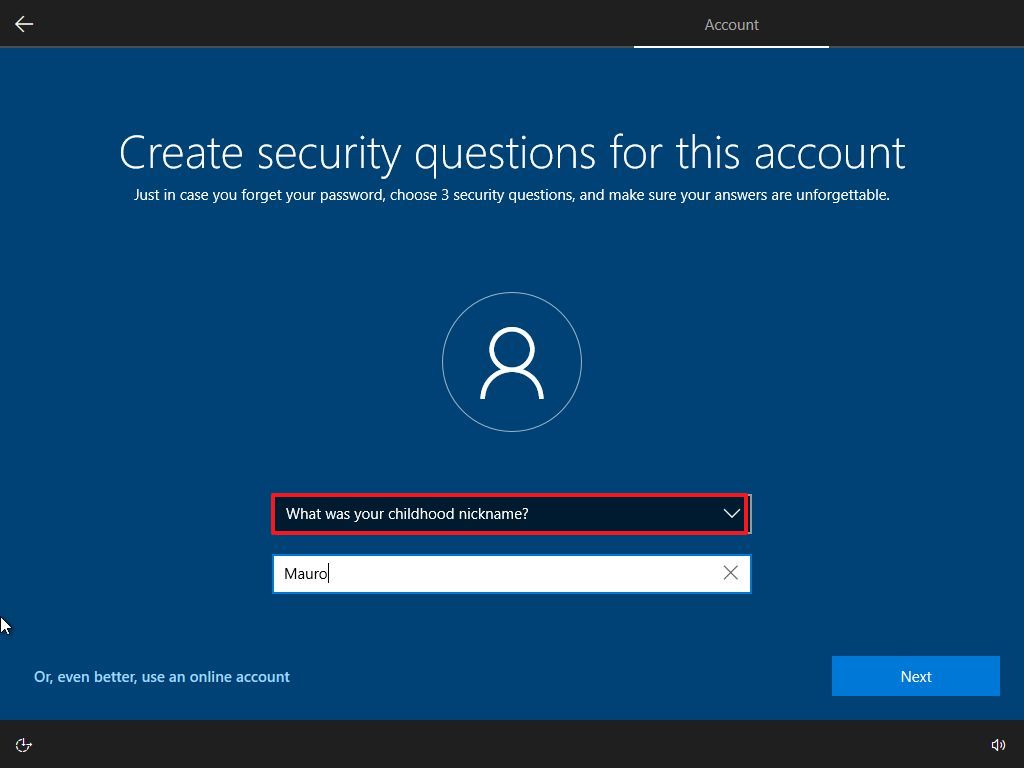
- Create three security questions that will help to reset the Windows 10 account password in case you forget it.
- Click the Next button after answering each question.
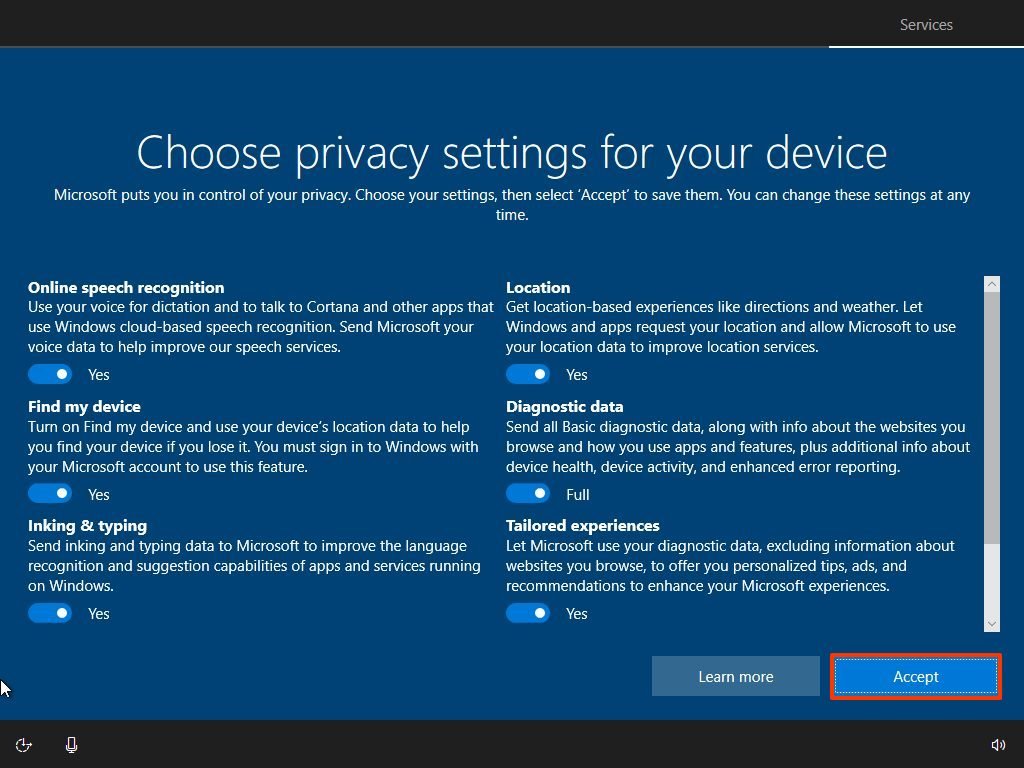
- Select your privacy settings (and don't forget to scroll down the page to review all the available settings).
- Click the Accept button.
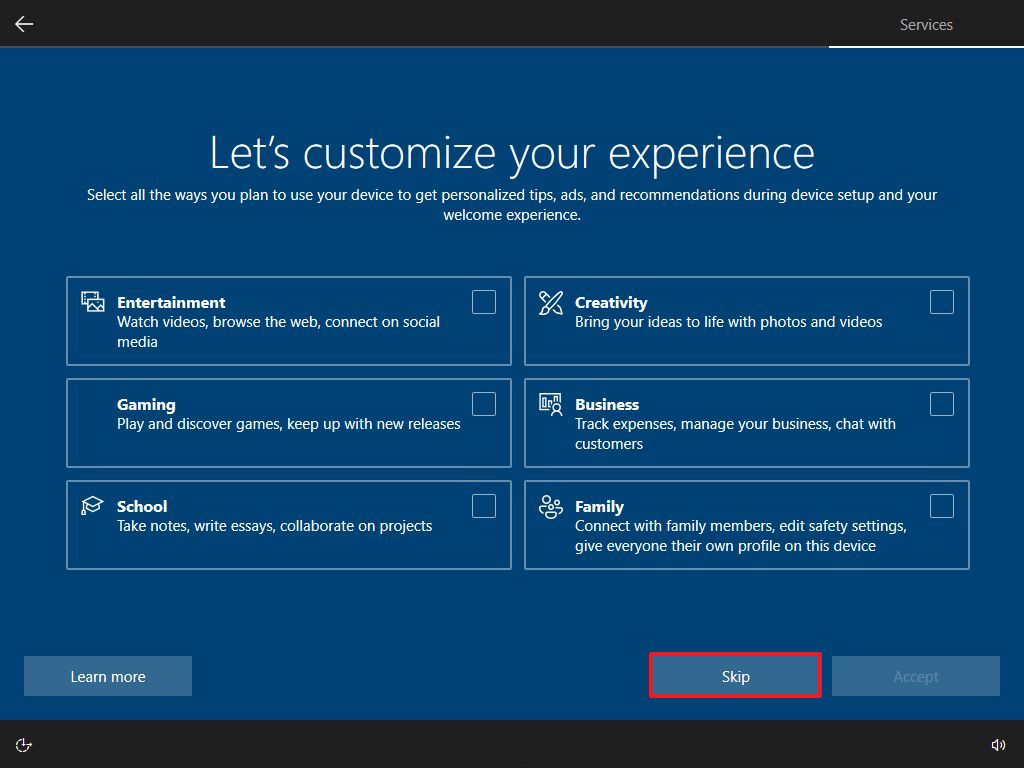
- (Optional) Choose how you will be using your computer to allow the system to promote services and apps more accurately. Or click the Skip button (recommended).
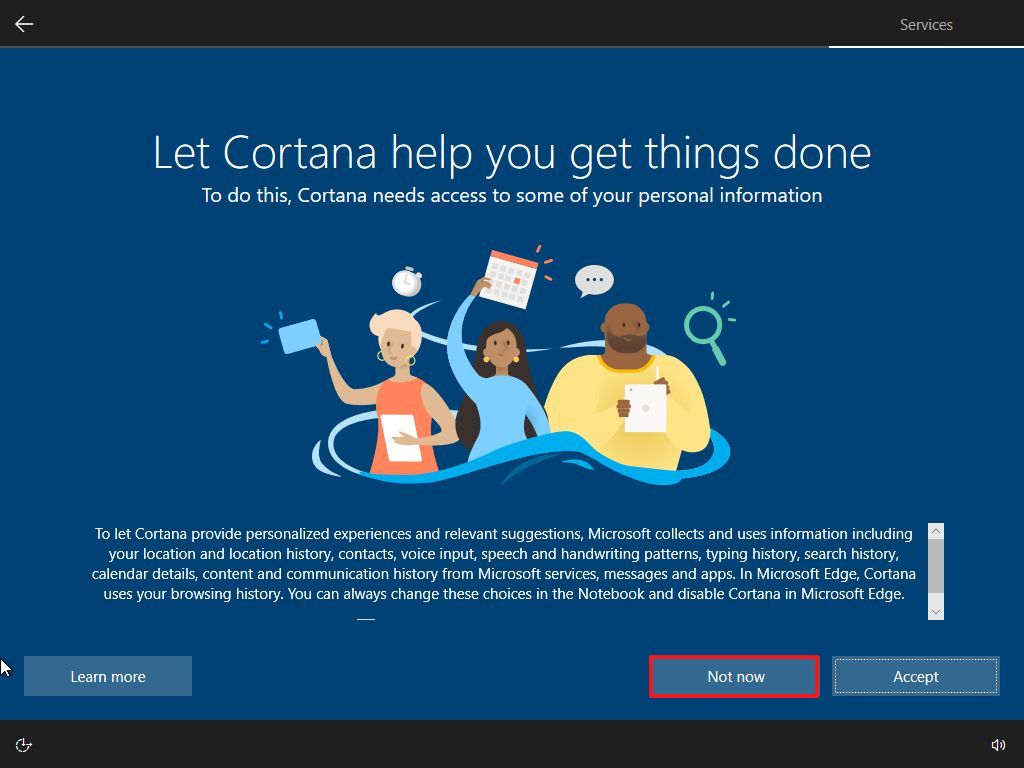
- Click the Not now button (if applicable).
Once you complete the steps, you can start using the device without a Microsoft account.
How to set up local account during Windows 10 Home setup
If you are setting up a new device with the Home edition of Windows 10, the steps will be slightly different since Microsoft has deleted the option from the OOBE setup.
All the latest news, reviews, and guides for Windows and Xbox diehards.
To set up a new device with a local account running Windows 10 Home, use these steps:
- Select your region.
- Click the Yes button.
- Select your keyboard layout.
- Click the Yes button.
- Click the Skip button.
- Quick note: After you click the "Skip" button, the system download the available updates, and the account settings will appear.
- Disconnect the device from the wireless or wired network connection.
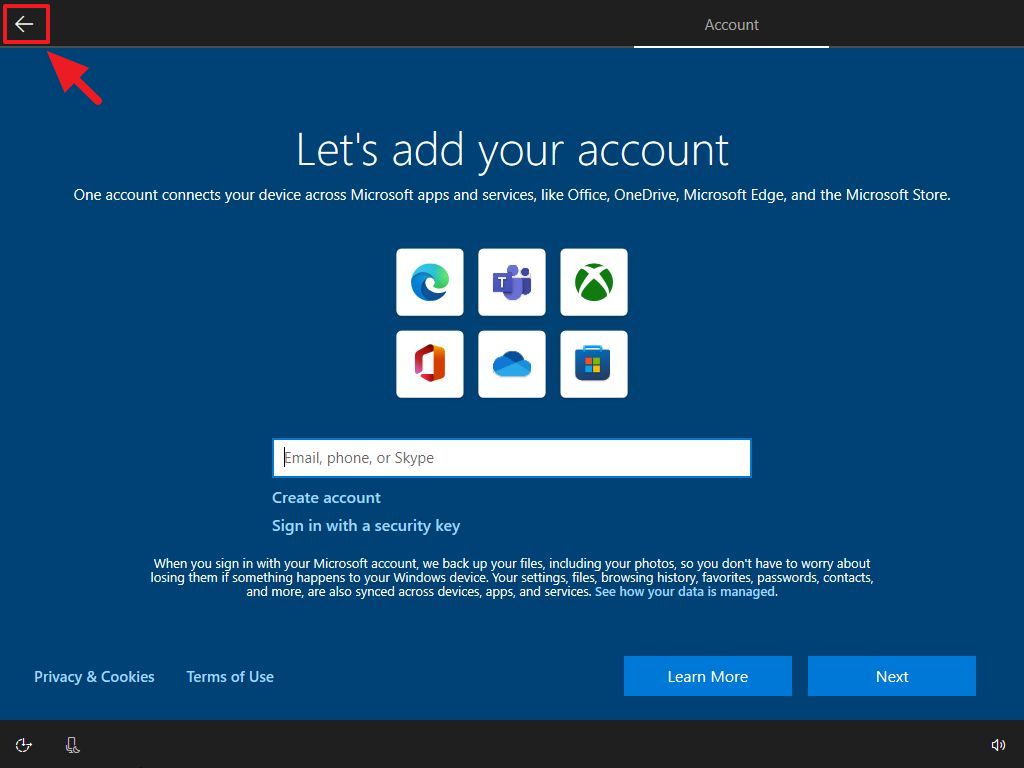
- Click the back button from the top-left corner.
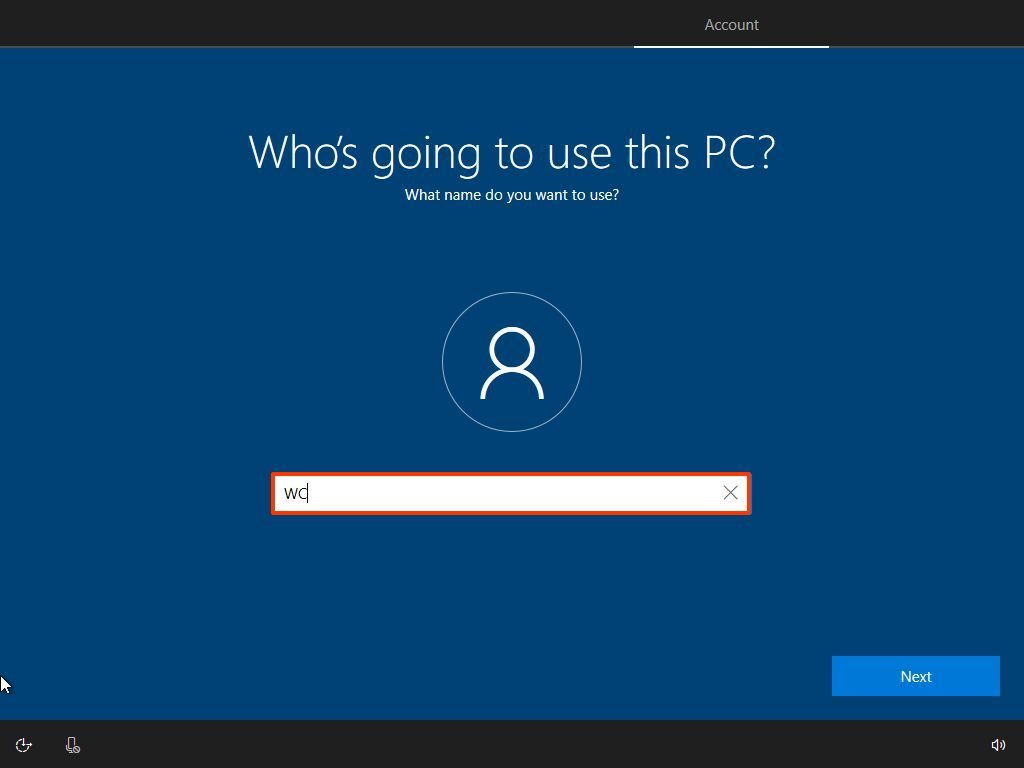
- Confirm the name of the local account.
- Click the Next button.
- Create a password for the account.
- Click the Next button.
- Confirm the account password.
- Click the Next button.
- Create three security questions that will help to reset the Windows 10 account password in case you forget it.
- Click the Next button after answering each question.
- Select your privacy settings (and don't forget to scroll down the page to review all the available settings).
- Click the Accept button.
- (Optional) Choose how you will be using your computer to allow the system to promote services and apps more accurately. Or click the Skip button (recommended).
- Click the Not now button (if applicable).
After you complete the steps, reconnect the computer to the network, and you can now start using the Home edition of Windows 10 with a local account.
More resources
Find in-depth guides, troubleshooting tips, and the latest updates on Windows 11 and 10 here:

Mauro Huculak has been a Windows How-To Expert contributor for WindowsCentral.com for nearly a decade and has over 22 years of combined experience in IT and technical writing. He holds various professional certifications from Microsoft, Cisco, VMware, and CompTIA and has been recognized as a Microsoft MVP for many years.
You must confirm your public display name before commenting
Please logout and then login again, you will then be prompted to enter your display name.
