How to set up kiosk mode on Windows 10 October 2018 Update
Do you need to set up a kiosk device? The Windows 10 October 2018 Update makes it super easy — Here's how to do it.
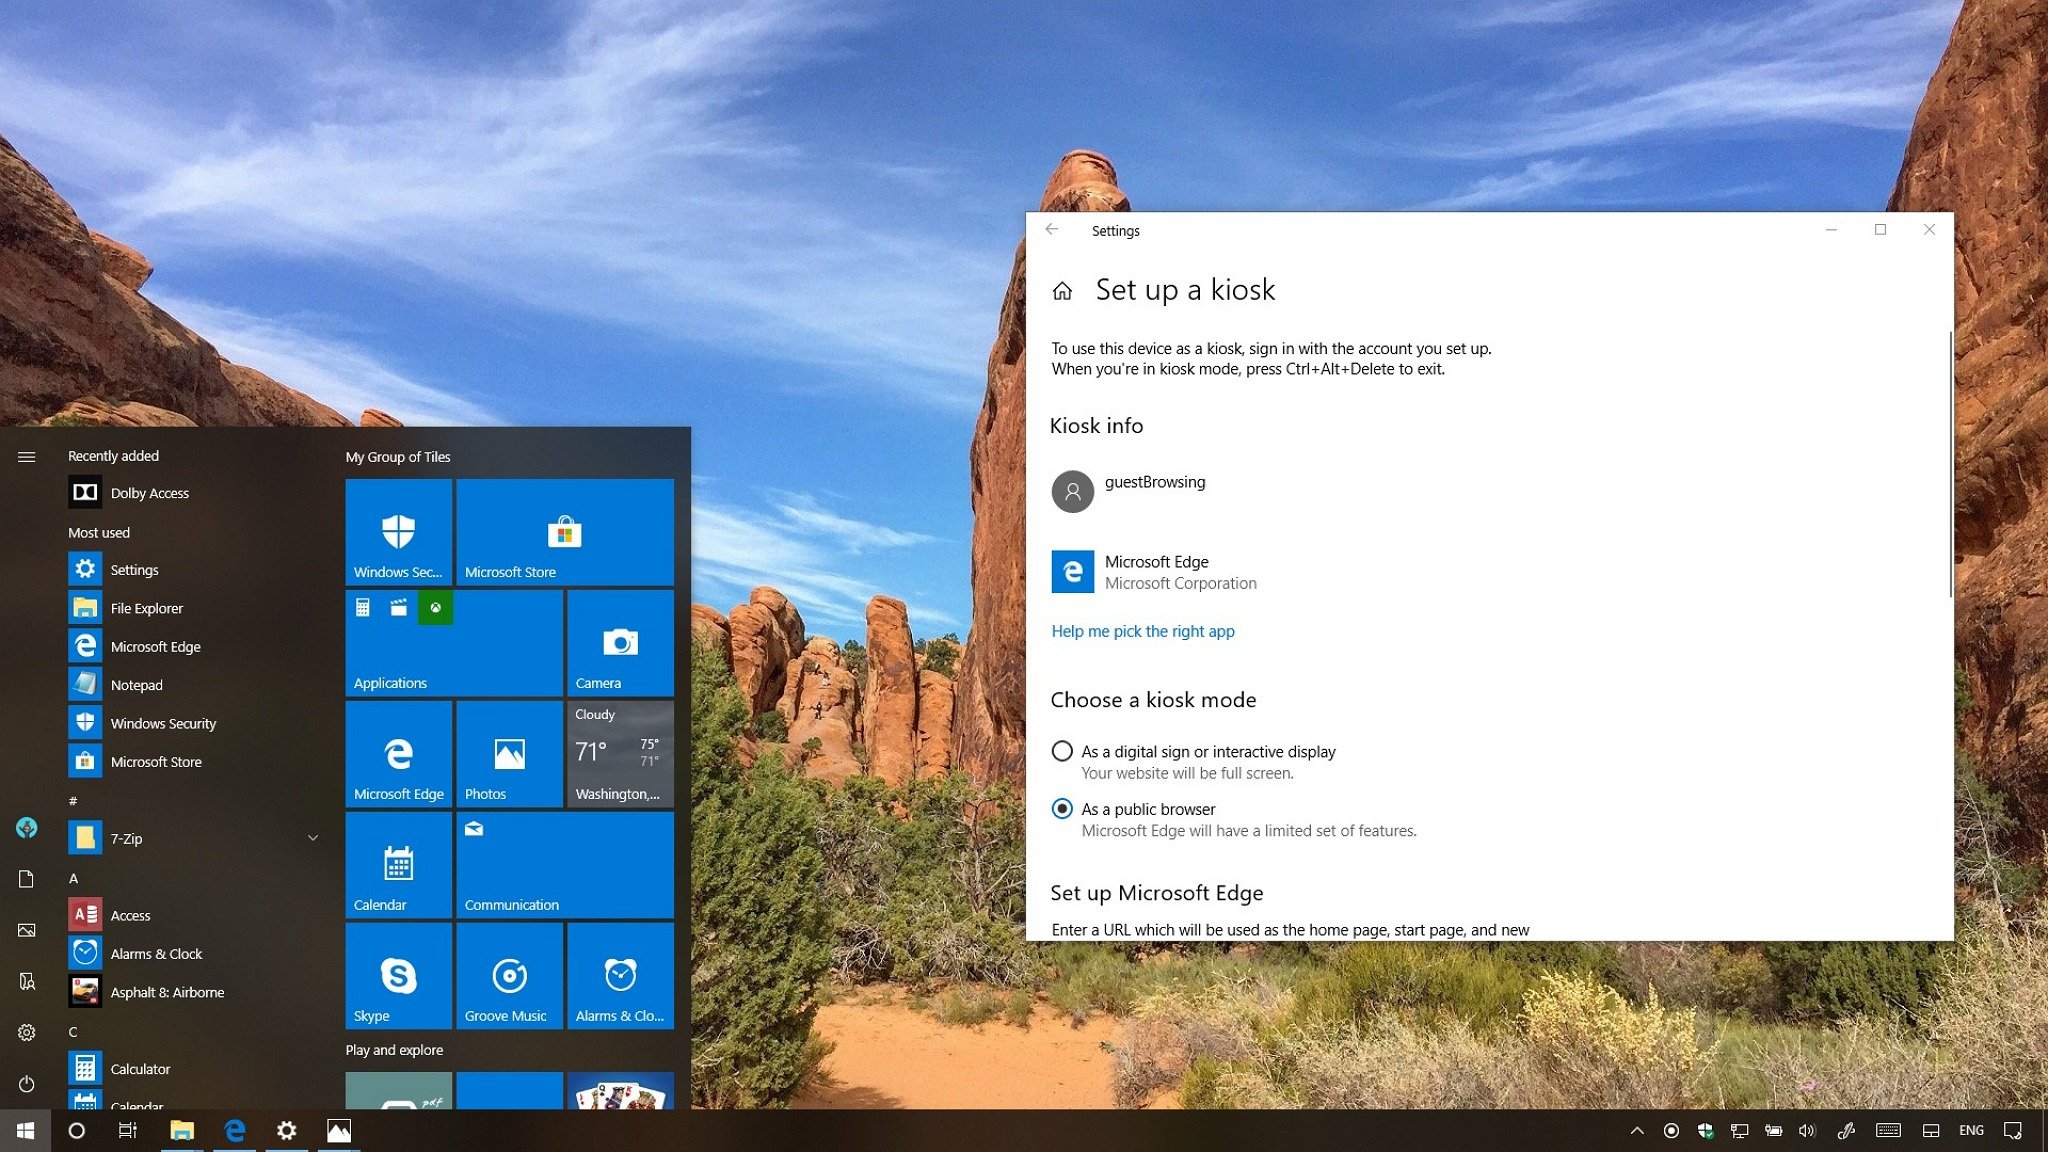
On Windows 10, Assigned Access is a feature that allows network administrators to configure a PC as a kiosk device to serve a specific purpose. Usually, such configuration can be found on a PC in a lobby to allow guests to browse the internet, or on devices that display visual content like digital signs.
When using kiosk mode on Windows 10, the device signs in automatically, and only runs one Microsoft Store app in full screen inside a restricted local user account (above the Lock screen) that prevents anyone from accessing the desktop, switch apps, or change settings.
Although kiosk mode isn't a new feature on Windows 10, starting with the October 2018 Update, Microsoft has redesigned the experience to make it easier for anyone to configure and manage as single-app kiosk machine.
In this Windows 10 guide, we'll walk you through the steps to configure and manage kiosk mode to run a single app in full screen with the settings available starting with the October 2018 Update.
How to configure kiosk mode on Windows 10
To use Assigned access to set up and adjust kiosk mode settings on Windows 10, use these steps:
Setting up kiosk mode
To configure kiosk mode, do the following:
- Open Settings.
- Click on Accounts.
- Click on Family & other users.
- Under "Set up a kiosk," click the Assigned access button.
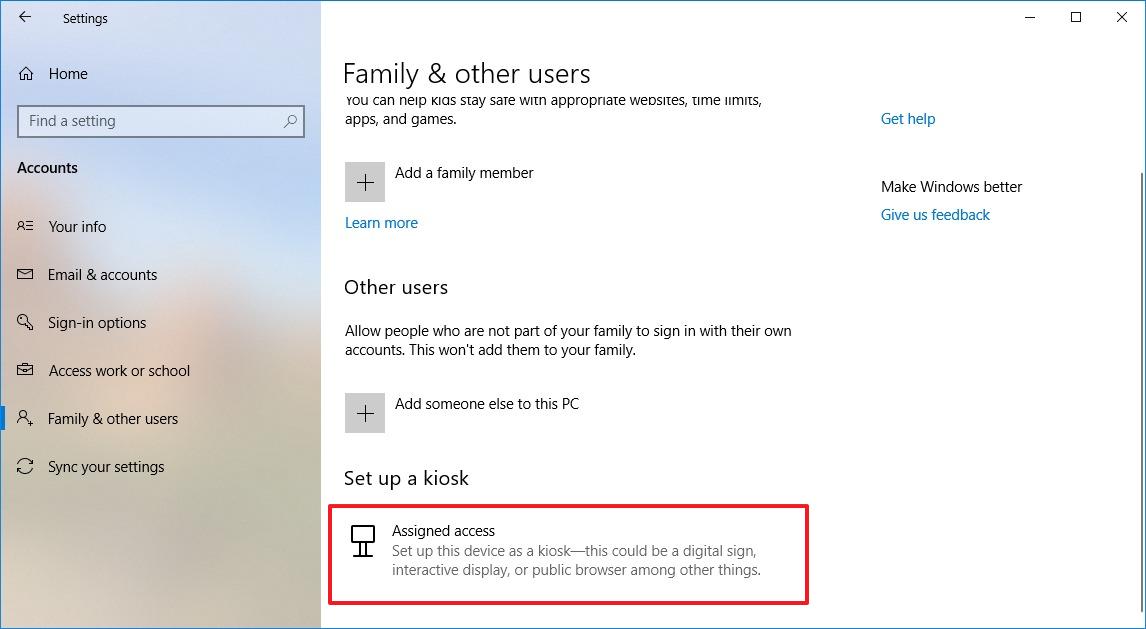
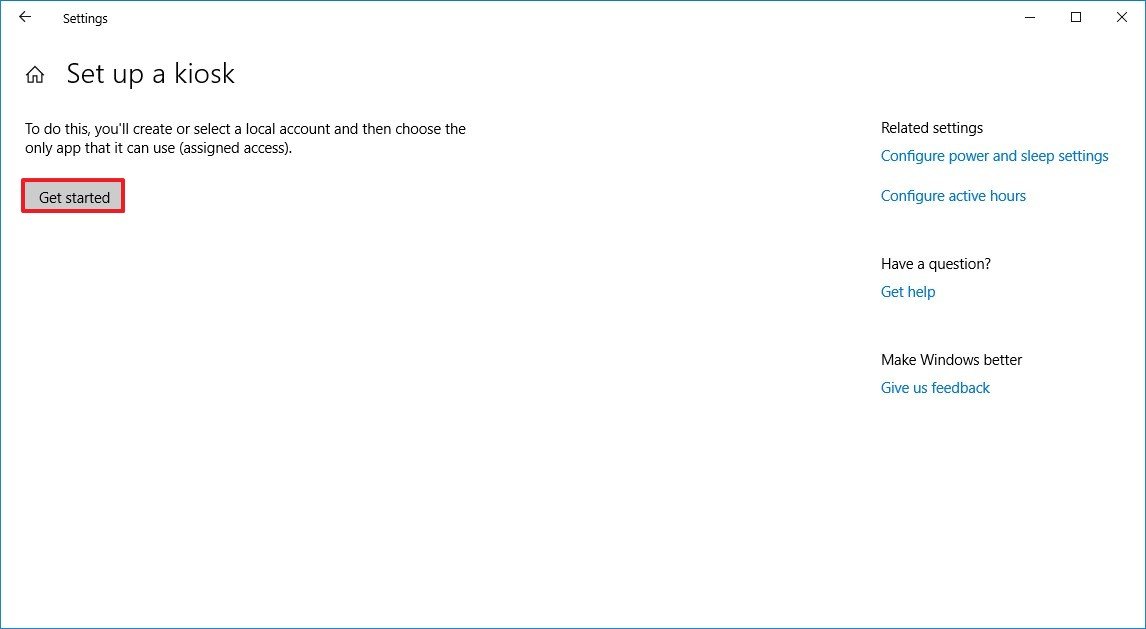
- Click the Get started button.
- Type a short, but descriptive name for the kiosk account.
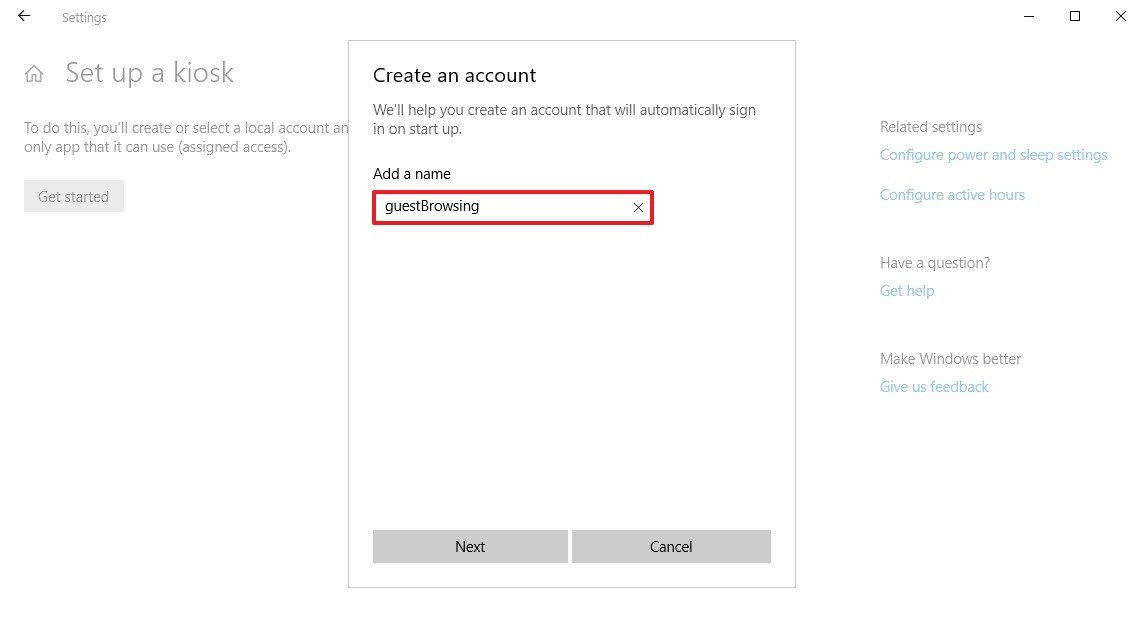
- Click the Next button.
- Select a Microsoft Store app from the list.Info: We're selecting Microsoft Edge, which includes additional configuration options, but the settings for other apps may be different.
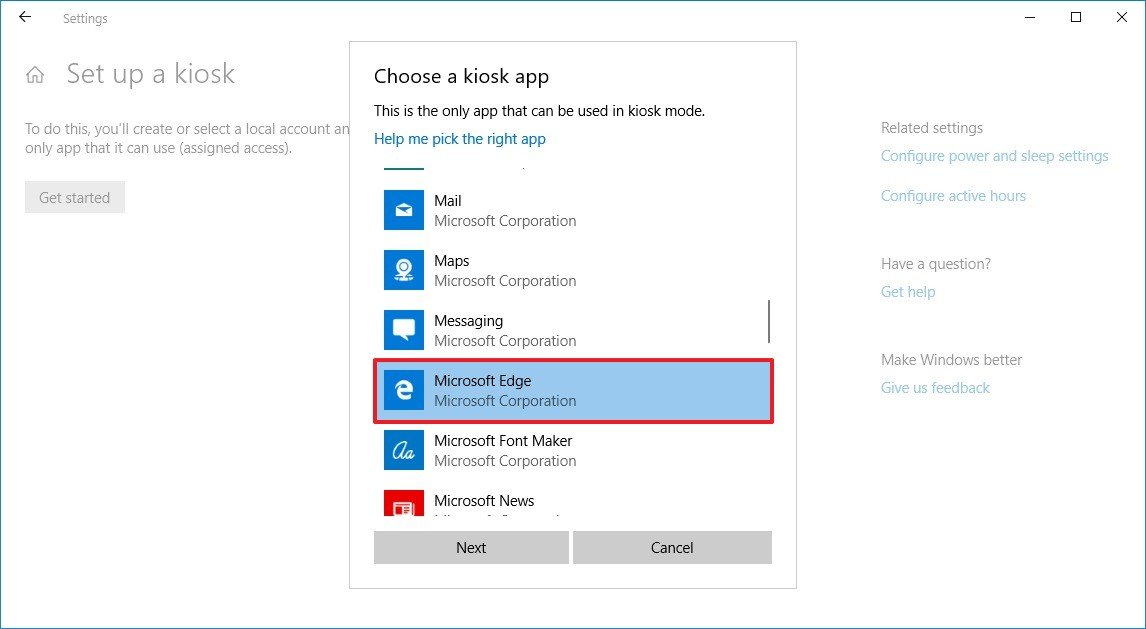
- Click the Next button.
- Select the option that suits your environment. (In this guide, we're selecting "As a public browser," to configure a device that will be used by guests to browse the internet.)
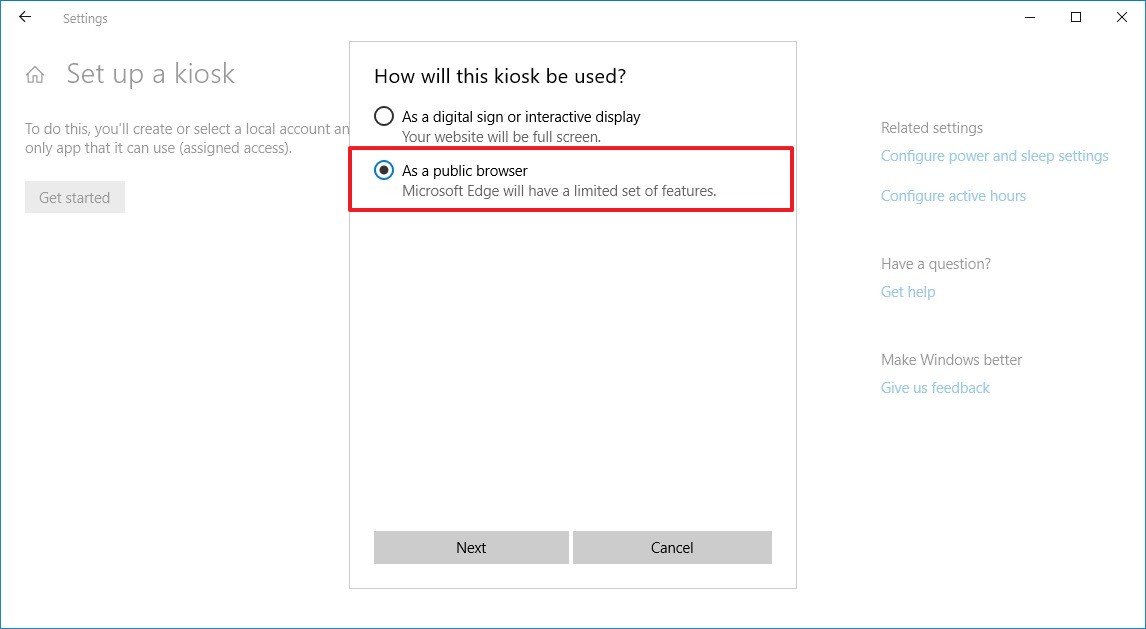
- Click the Next button.
- Type the web page address you want users to use for the home page, start page, and new tab page.
- Specify the time before Microsoft Edge restart the InPrivate session if no one is using the device.
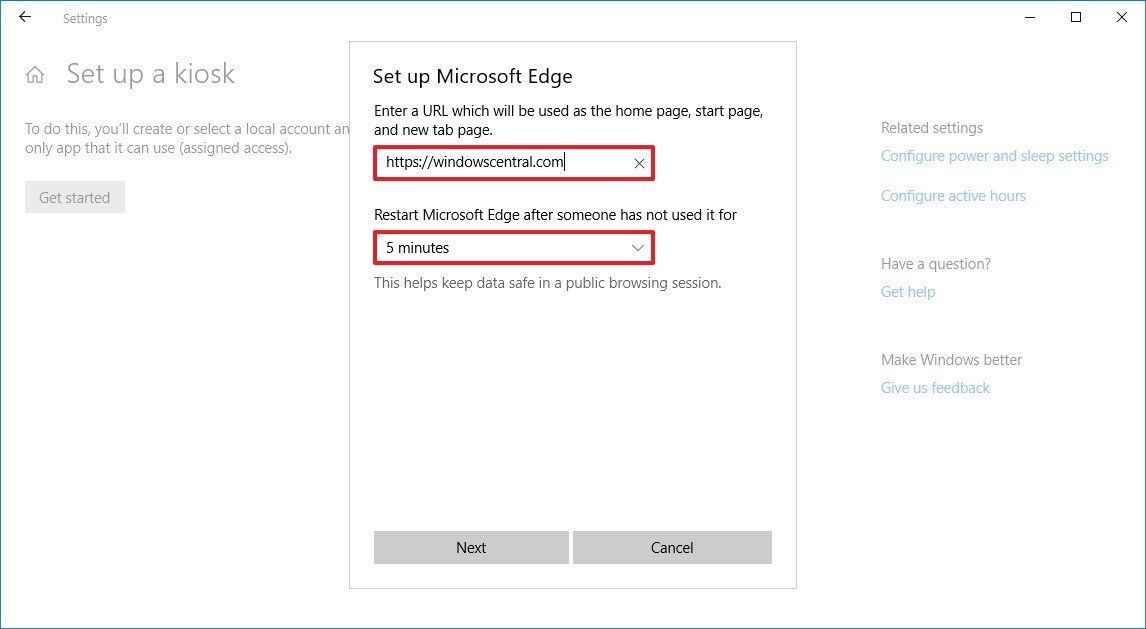
- Click the Next button.
- Click the Close button.
Once you've completed the steps, restart your computer to start in kiosk mode.
Get the Windows Central Newsletter
All the latest news, reviews, and guides for Windows and Xbox diehards.
If you want to exit the experience to shutdown or restart the computer, or access an administrator account, you'll need to use the Ctrl + Alt + Del keyboard shortcut to bring up the Lock screen to access the sign-in screen and power options.
Changing settings
If you want to change the kiosk mode settings, using an administrator account, use these steps:
- Open Settings.
- Click on Accounts.
- Click on Family & other users.
- Under "Set up a kiosk," click theAssigned access button.

While in the kiosk settings page, you can change a number of settings depending on the application you're using.
If you want to use a different app, under "Kiosk info," do the following:
- Select the app, and click the Change kiosk app button.
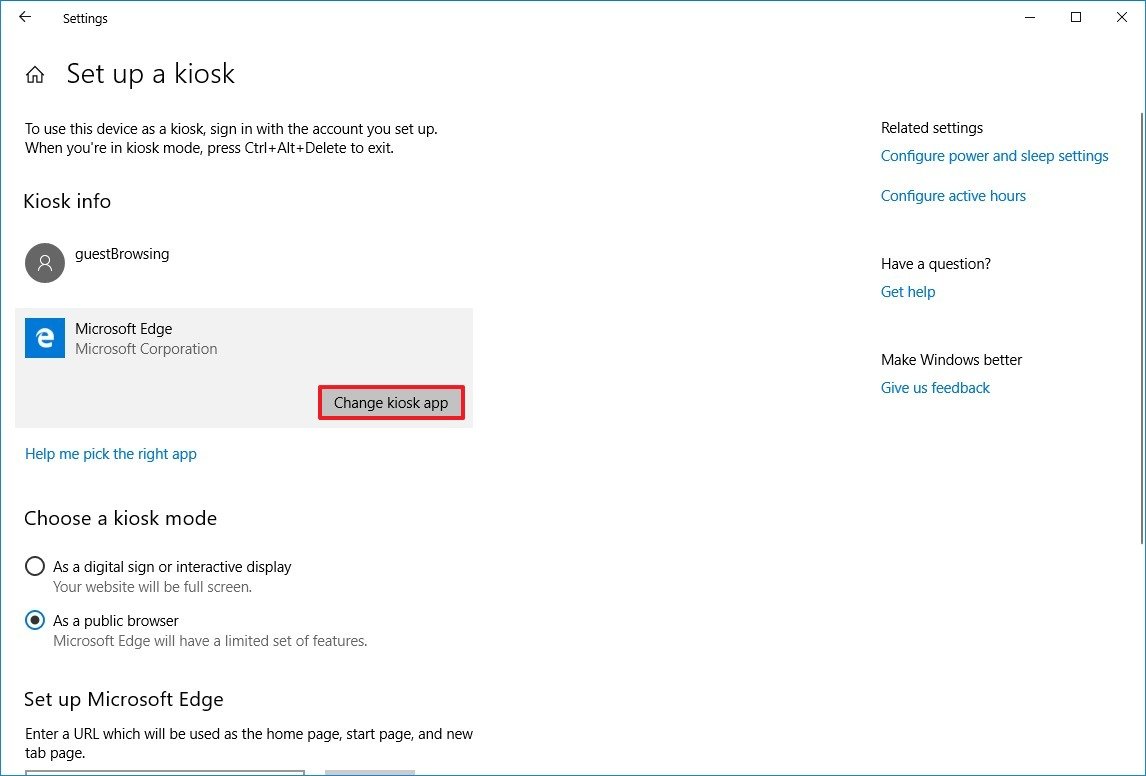
- Choose another application.
- Click the Next button.
- Continue with the on-screen directions to finish setting up the experience.
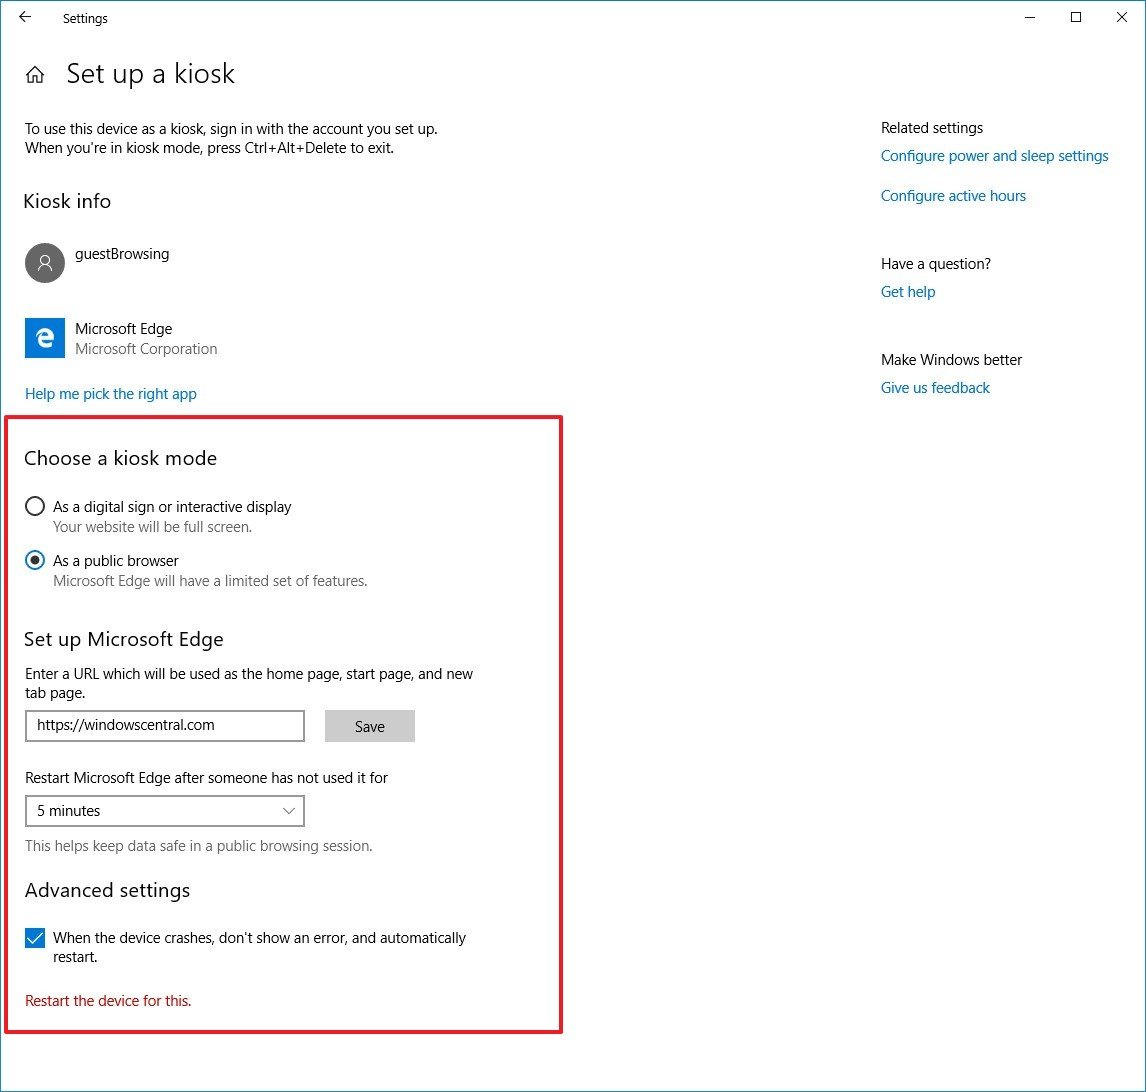
If the app has configurable settings, you can adjust them within the kiosk setup page. For example, when using Microsoft Edge, you can change the mode and adjust some basic browser settings.
How to disable kiosk mode on Windows 10
If you no longer need to use a PC with kiosk mode, you can remove the experience using an administrator account and these steps:
- Open Settings.
- Click on Accounts.
- Click on Family & other users.
- Under "Set up a kiosk," click the Assigned access button.

- Under "Kiosk info," select the account, and click the Remove kiosk button.
- Click the Remove button.
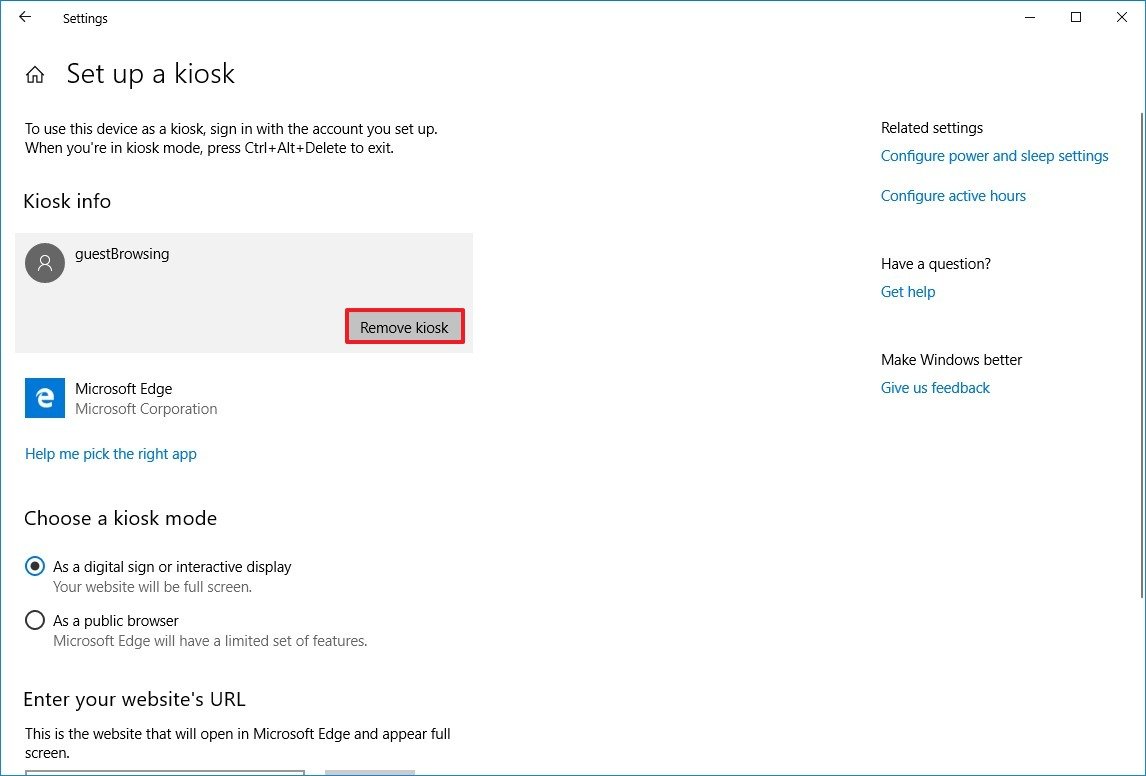
Once you've completed the steps, the account and any data associated with kiosk mode will be deleted from your device.
Assigned access on Windows 10 is a feature designed to set up kiosk devices on organizations, but anyone can enable and use it to turn, for example, an older machine into a jukebox or a Netflix-only streaming device.
More Windows 10 resources
For more helpful articles, coverage, and answers to common questions about Windows 10, visit the following resources:
- Windows 10 on Windows Central – All you need to know
- Windows 10 help, tips, and tricks
- Windows 10 forums on Windows Central
Mauro Huculak has been a Windows How-To Expert contributor for WindowsCentral.com for nearly a decade and has over 15 years of experience writing comprehensive guides. He also has an IT background and has achieved different professional certifications from Microsoft, Cisco, VMware, and CompTIA. He has been recognized as a Microsoft MVP for many years.

