How to set up a guest account to safely share a Windows 11 PC
You can still create a restricted guest account to share the device with other people, and in this guide, I'll show you how on Windows 11.
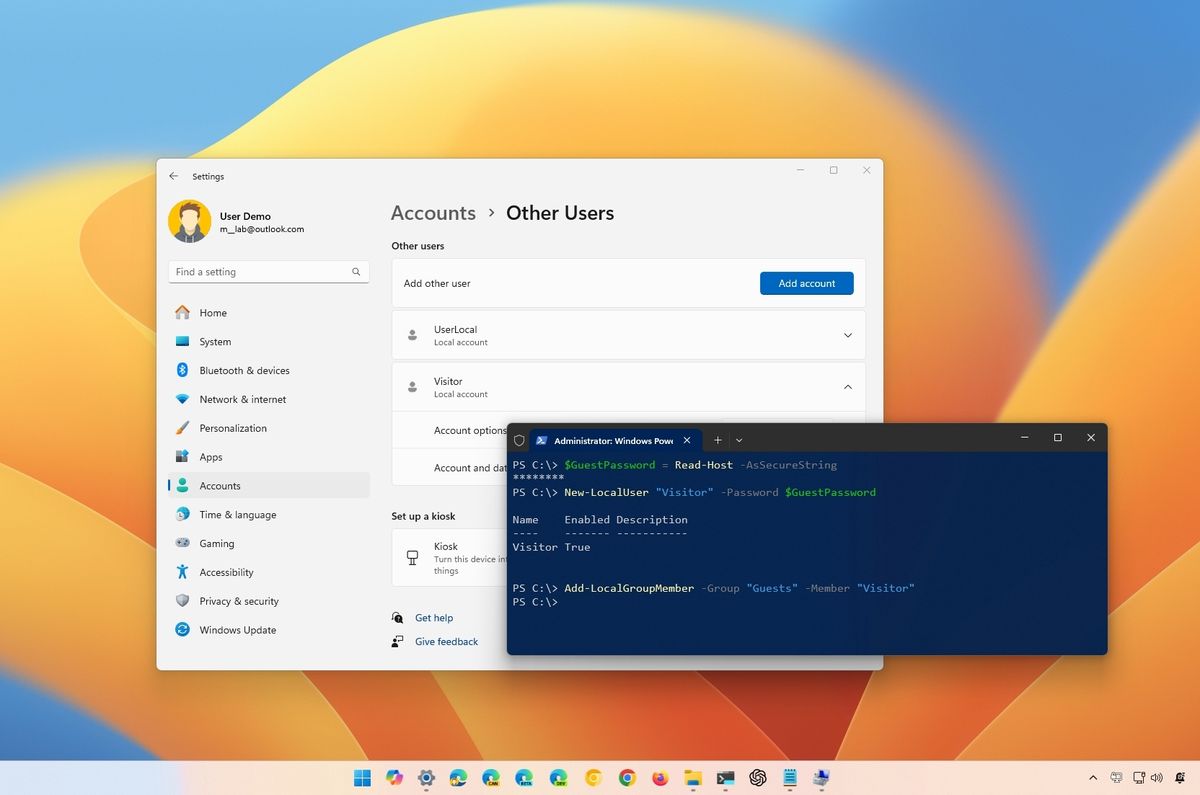
Windows, in previous versions, included a "Guest" account that allowed you to create a locked-down environment to safely and temporarily share a computer with other people to run apps and access the internet, but this special account is no longer available on Windows 11 (or Windows 10).
However, it's still possible to create a limited account on Windows 11 with the same characteristics of a "Guest" account using the Settings app, Computer Management, Command Prompt, and even PowerShell commands.
In this how-to guide, I'll explain how to create a guest account on your computer.
Recent updates
These instructions have been updated to ensure accuracy and reflect changes to the process.
How to create a guest account using Settings
To create a guest account on Windows 11, use these steps:
- Open Settings.
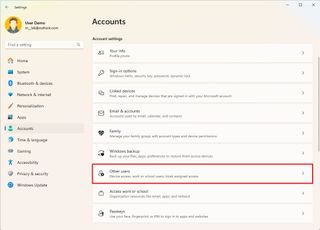
- Click on Accounts.
- Click the Other users page.
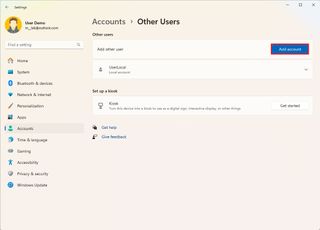
- Click the Add account button under the "Other users" section.
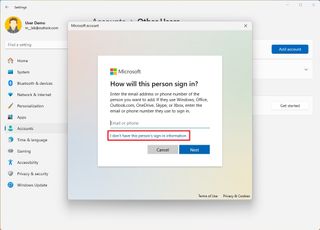
- Click the "I don't have this person's sign-in information" option.
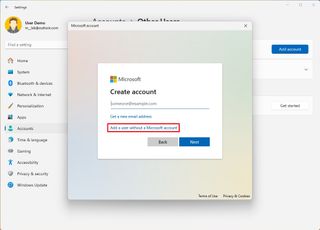
- Click the "Add a user without a Microsoft account" option.
- Create a name for the guest account — for example, Visitor.
- Quick note: Although the built-in "Guest" account has been deprecated, it's still a reserved name, which means that you can't use the same name.
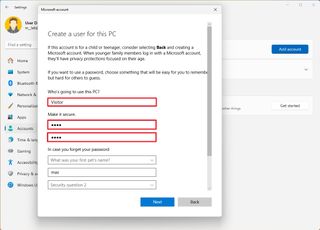
- Create a password for the account.
- Complete the security questions to enable the password recovery feature.
- Click the Next button.
Once you complete the steps, a restricted standard account will be created to share the computer with your guest. The last thing left to do is sign out and sign in with the newly created account.
Although you can always share a computer with a standard account, you can go a step further and add the new account to the "Guest" group to make it more restrictive. However, since it's impossible to change user groups from within the Settings app, you need to use the Computer Management app or Command Prompt.
Add account to the Guest user group
To add a Windows 11 account to the Guest group with Computer Management, use these steps:
Get the Windows Central Newsletter
All the latest news, reviews, and guides for Windows and Xbox diehards.
- Open Start.
- Search for Computer Management and click the top result to open the app.
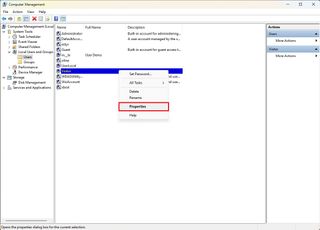
- Browse to the following path: System Tools > Local Users and Groups > Users
- Right-click the account and select the Properties option.
- Click the Member Of tab.
- Click the Add button.
- Click the Advanced button.
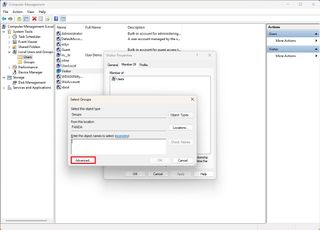
- Click the Find now button.
- Select the Guests group.
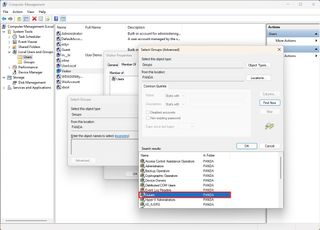
- Click the OK button.
- Click the OK button again.
- Select the Users group.
- Click the Remove button.
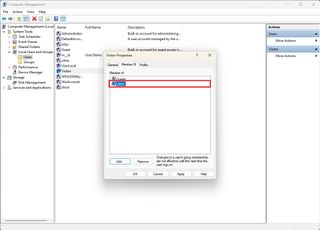
- Click the Apply button.
- Click the OK button.
After you complete the steps, the account will belong to the Guests (more restrictive) system group.
How to create a guest account using Computer Management
To set up a guest account through Computer Management, use these steps:
- Open Start.
- Search for Computer Management and click the top result to open the app.
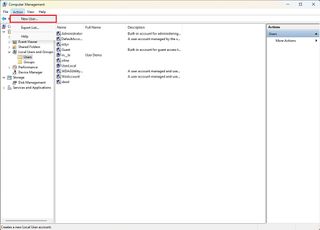
- Browse to the following path: System Tools > Local Users and Groups > Users
- Click the "Action" menu and select the New user option.
- Create the account name (for example, Visitor) in the "User name" field.
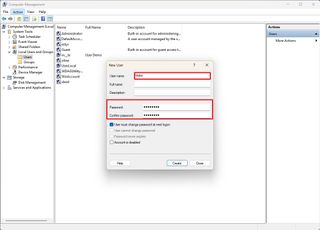
- Create a new password for the guest account.
- Clear the "User must change password at next logon" option.
- Click the Create button.
- Right-click the account and select the Properties option.

- Click the Member Of tab.
- Click the Add button.
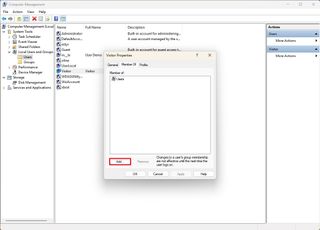
- Click the Advanced button.

- Click the Find now button.
- Select the Guests group.

- Click the OK button.
- Click the OK button again.
- Select the Users group.
- Click the Remove button.

- Click the Apply button.
- Click the OK button.
After you complete the steps, the restricted local account will be created to share the computer with other people.
How to create a guest account using Command Prompt
To configure a temporary guest account through Command Prompt, use these steps:
- Open Start.
- Search for Command Prompt, right-click the top result, and select the Run as administrator option.
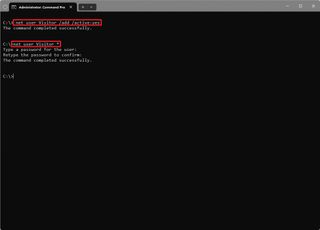
- Type the following command to create a new account and press Enter: net user Visitor /add /active:yes
- Type the following command to set up a password for the account and press Enter: net user Visitor *
- Quick note: If this is a temporary guest account, you don't need to configure a password. You can press "Enter" twice to set a blank password.
- Type the following command to remove the new user account from the "Users" group and press Enter: net localgroup users Visitor /delete
- Type the following command to add the new user account to the "Guests" user group and press Enter: net localgroup guests Visitor /add
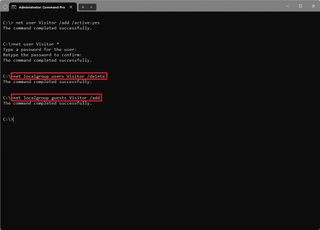
Once you complete the steps, the account will appear on the sign-in screen for anyone to use with the assigned password.
How to create a guest account using PowerShell
To create a guest account with PowerShell commands on Windows 11, use these steps:
- Open Start.
- Search for PowerShell, right-click the top result, and select the Run as administrator option.
- Type the following command to create a password and press Enter: $GuestPassword = Read-Host -AsSecureString
- Create the account password with the blinking cursor.
- Type the following command to create a new account and press Enter: New-LocalUser "Visitor" -Password $GuestPassword
- Type the following command to add the account in the Guests group and press Enter: Add-LocalGroupMember -Group "Guests" -Member "Visitor"
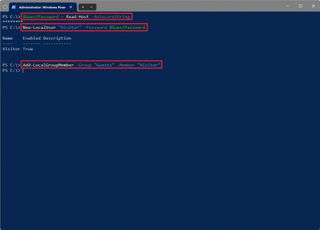
After you complete the steps, PowerShell will create a guest account to share the device with other people.
These steps are meant to set up an account to share a device with visitors temporarily. If you want to share a device more permanently, it's recommended that you create a standard account for each user with a Microsoft account or offline account.
More resources
For more in-depth insights, troubleshooting tips, and the latest updates on Windows 11 and 10, be sure to explore these resources:
Mauro Huculak has been a Windows How-To Expert contributor for WindowsCentral.com for nearly a decade and has over 15 years of experience writing comprehensive guides. He also has an IT background and has achieved different professional certifications from Microsoft, Cisco, VMware, and CompTIA. He has been recognized as a Microsoft MVP for many years.
