How to set up a Discord server
Whether you want to talk to your gamer pals or work colleagues, a Discord server is an effective and free solution.

Discord is an incredibly popular communication tool, primarily among gamers, for several reasons. It's free to use, just about anyone can create a server, and it's an easy place to have both text and voice communication with people who can't be in the same room as you.
With more people working from home than ever, remote communication has never been more critical, and Discord is a fantastic tool to do that with. Discord isn't the only choice out there, but it's incredibly user friendly and a service many may already be familiar with using. Here's what you need to know to get your own server started.
Sign up for a free account
Before you do anything, you'll need a free discord account. You can't log in with other services like Google or Microsoft, but it takes only a jiffy to create an account.
Head to discordapp.com/register and fill out the required details. Discord supports 2-factor authentication, and as always, it's recommended you turn this on.
You can log in to Discord in your web browser to access the service on any machine, but if you're creating a server, you'll need to download the desktop client really from the Discord website.
How to set up a Discord server
Once you've downloaded, installed, and logged into the Discord desktop client, creating a server is incredibly straight forward.
- Click the + button on the sidebar.
- Click create a server.
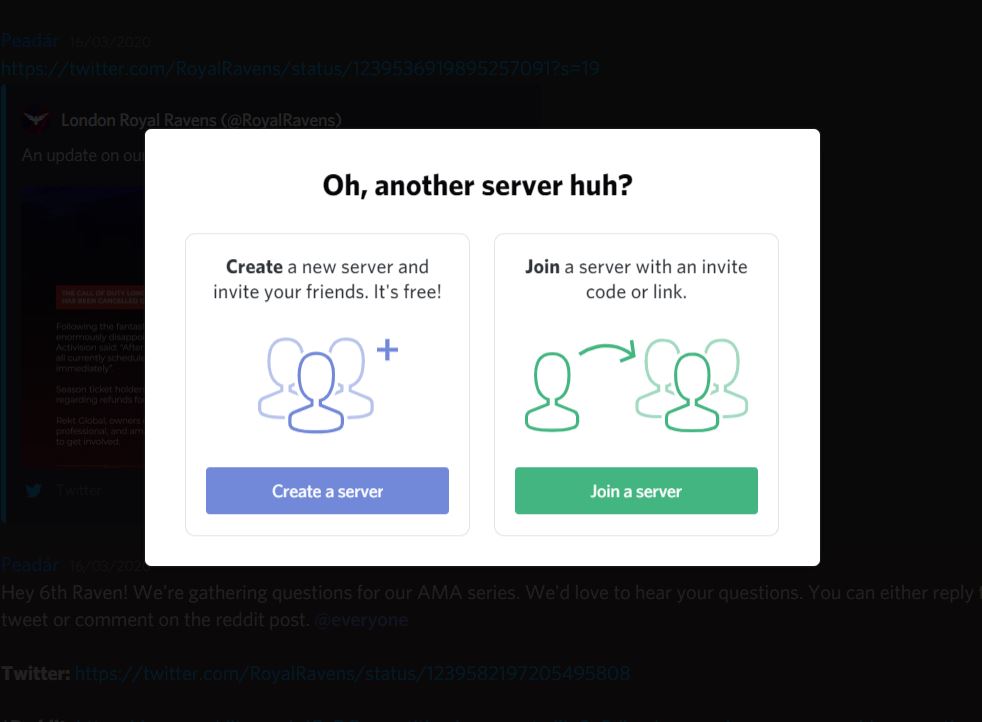
- Enter a name for your server.
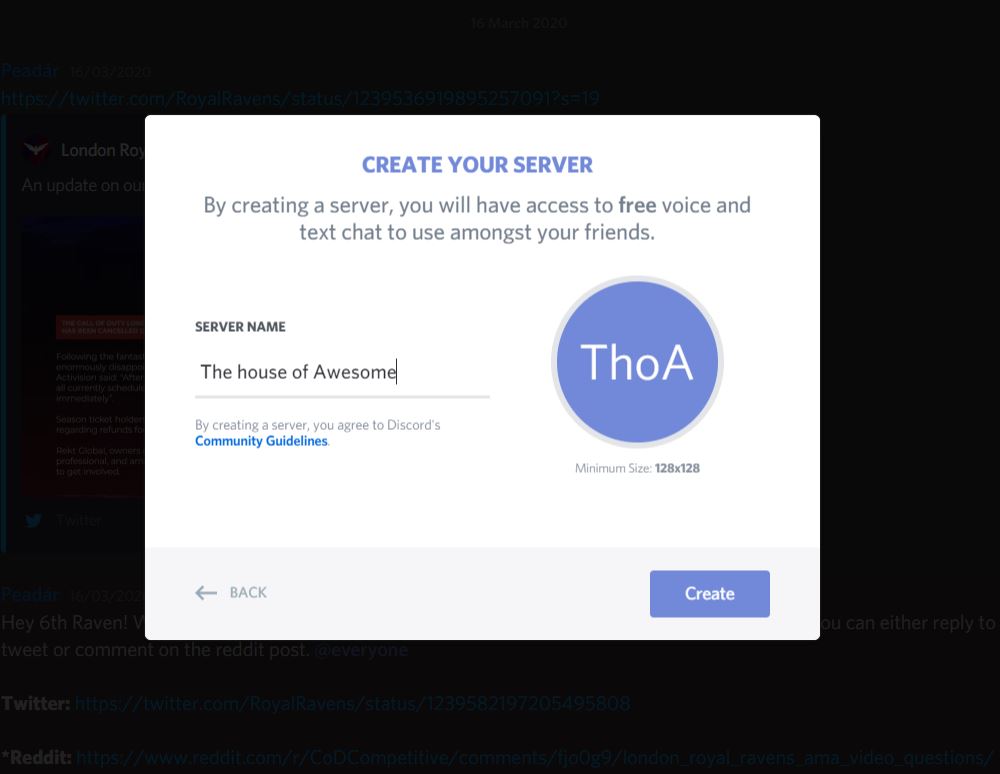
- Click the circular icon to change to a custom icon if you wish.
- Click create.
You'll now have a Discord server up and running with one basic text channel and one primary voice channel. You're free to get creative and add as many of these as you see fit or leave it on a singular channel, the choice is yours.
Get the Windows Central Newsletter
All the latest news, reviews, and guides for Windows and Xbox diehards.
How to invite people to your Discord server
Once the server is set up, then you need to get people into it. There are a couple of ways you can do this. If you're starting from scratch, then it's best to give people an invite link to follow, but if you already have friends on Discord, then you can invite them directly, too.
- Click on your server name.
- Select invite people.
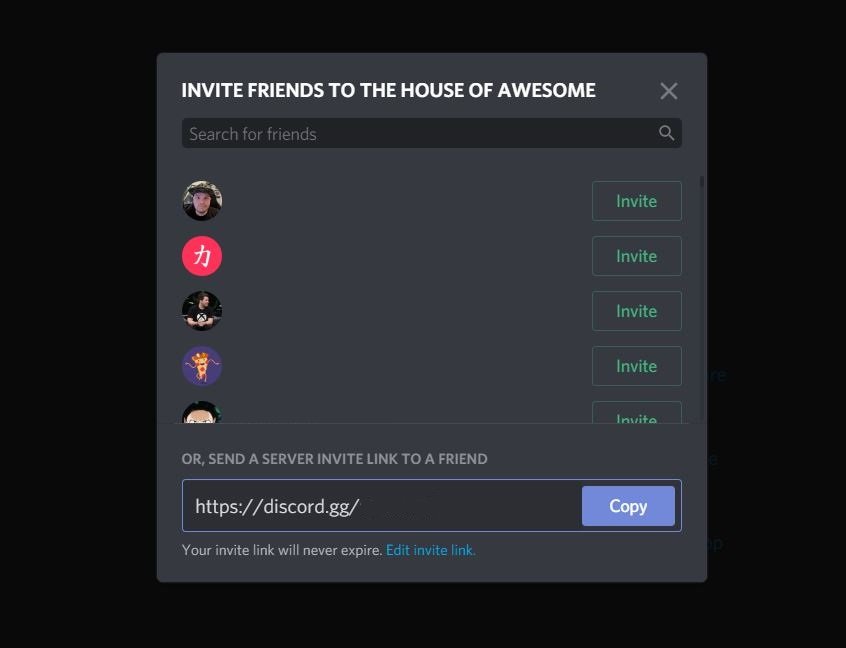
From here, you can send direct invites to friends by simply clicking on the invite button next to their names. You'll also be presented with a URL that anyone can be given to give them access to the server. By default, this link will expire after 24 hours, so you might want to create a longer-lasting one that people can use for multiple days.
- Click on edit invite link.
- In the expiry time dropdown box, select never.
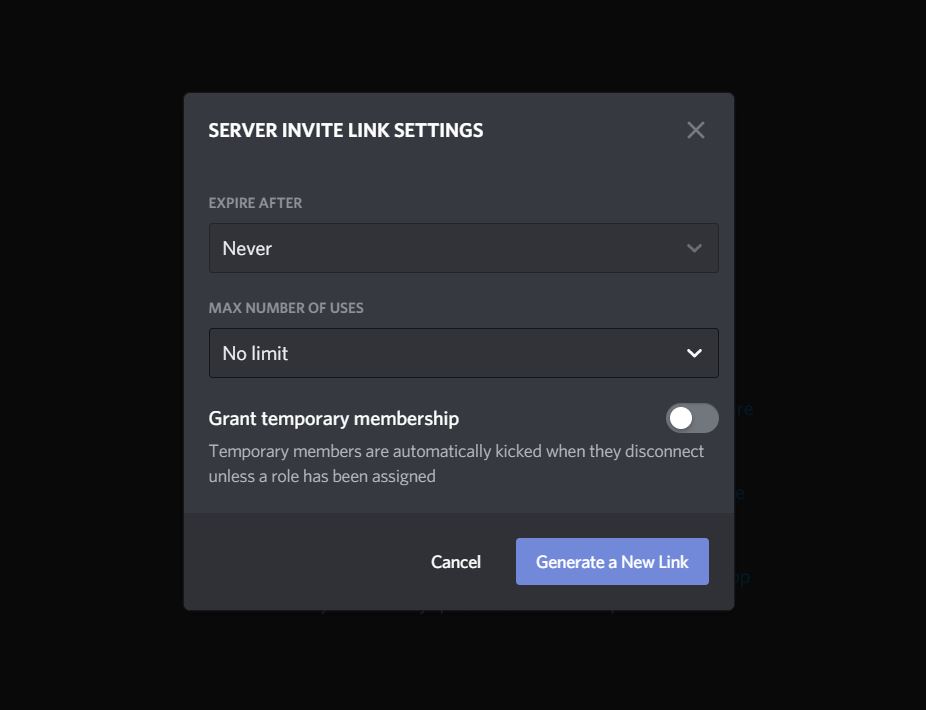
- In the max number of uses dropdown, choose no limit.
Now you'll have a permanent invite link to your Discord server that won't expire and can be used by as many people as you need. If, for whatever reason, you do want to limit the time a link is valid or the number of people who can join a server, there are several options in the dropdown boxes from the steps above to customize to your needs.
By default, everyone will have the same role and permissions, which might well be fine if you're just looking for a place where, say, colleagues can chew the fat. But Discord has tremendous controls relating to who can do what, so if you're looking for something beyond the basic then this guide is an excellent place to start.

Richard Devine is a Managing Editor at Windows Central with over a decade of experience. A former Project Manager and long-term tech addict, he joined Mobile Nations in 2011 and has been found on Android Central and iMore as well as Windows Central. Currently, you'll find him steering the site's coverage of all manner of PC hardware and reviews. Find him on Mastodon at mstdn.social/@richdevine
