How to set up any printer on Windows 11
Do you have to add a new printer to your computer? Here's how to do so on Windows 11.
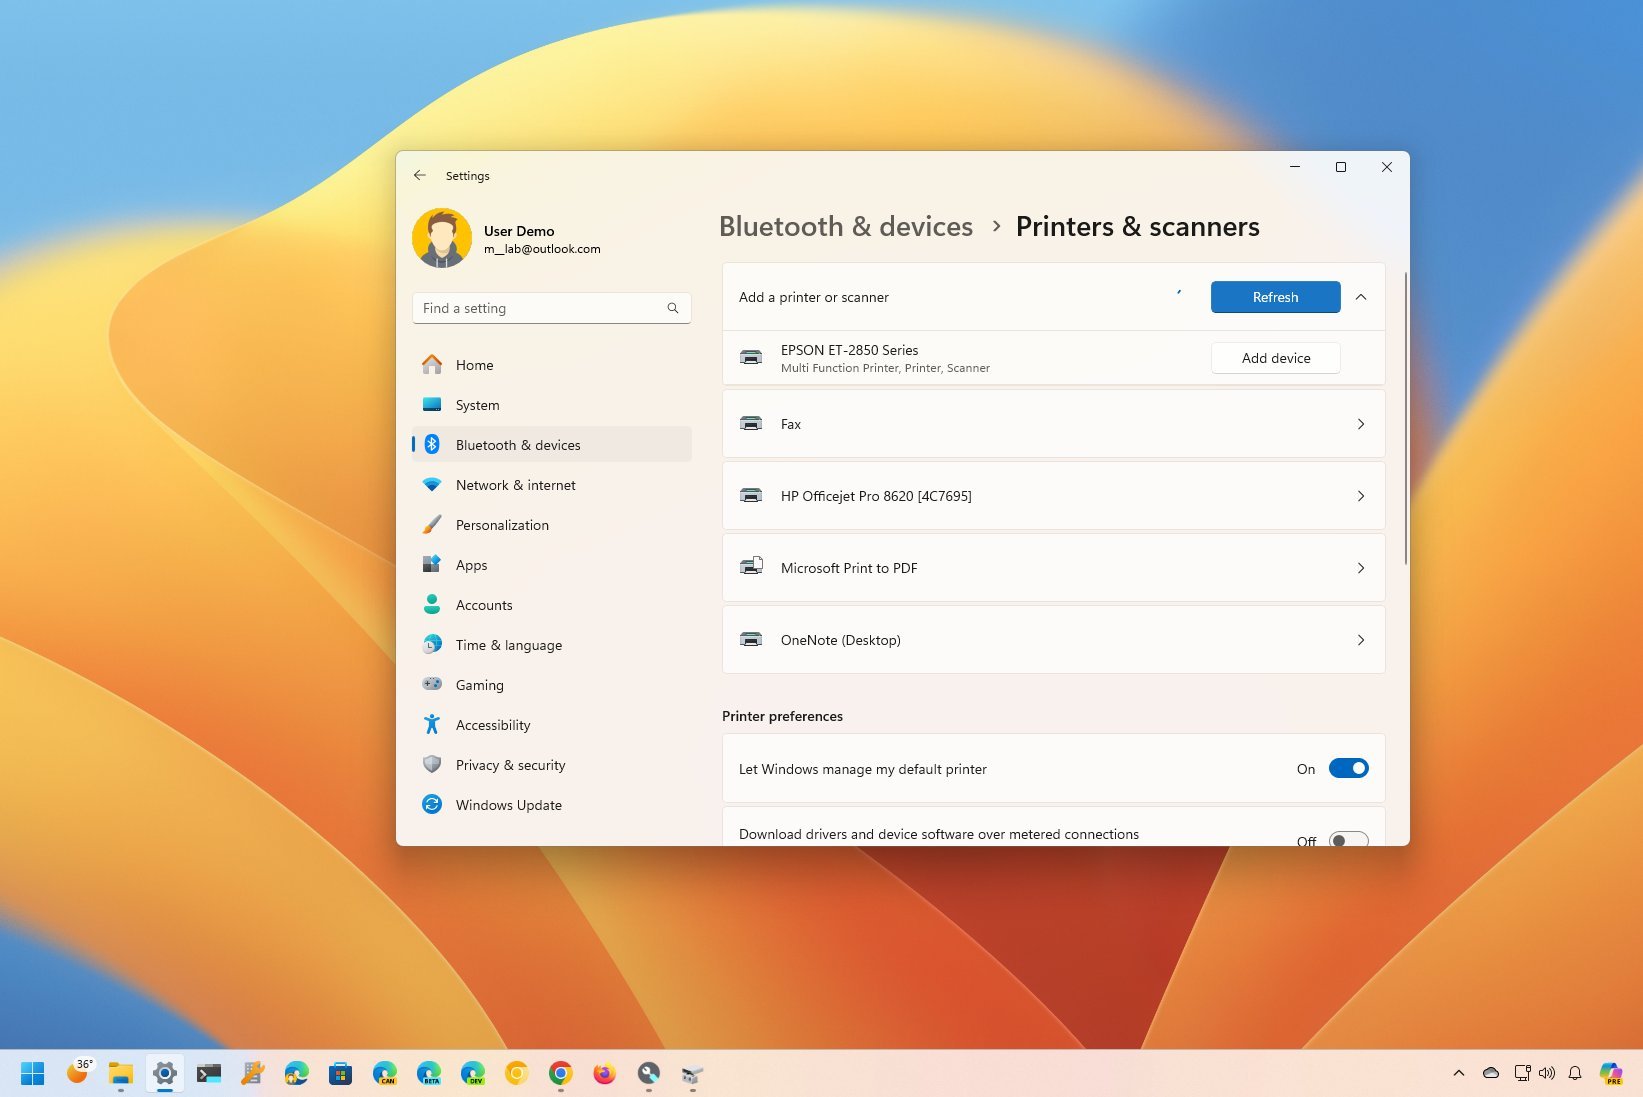
Windows 11 automatically tries to detect and install any local printer (such as those using a USB and DB-25 cables). However, if the system fails to set it up, you're dealing with an old printer, or you want to connect a wireless printer, you will need to add the device manually.
Whether you must install a brand-new multi-function printer or an old dot matrix, inkjet, or laser printer from manufacturers like HP, Canon, Epson, and Brother, Windows 11 offers multiple features to set up the device.
In this how-to guide, I will walk you through how to add a wired or wireless printer to your laptop or desktop computer.
How to set up a USB or Wi-Fi printer on Windows 11
To set up a printer on Windows 11, use these steps:
- Open Settings.
- Click on Bluetooth & devices.
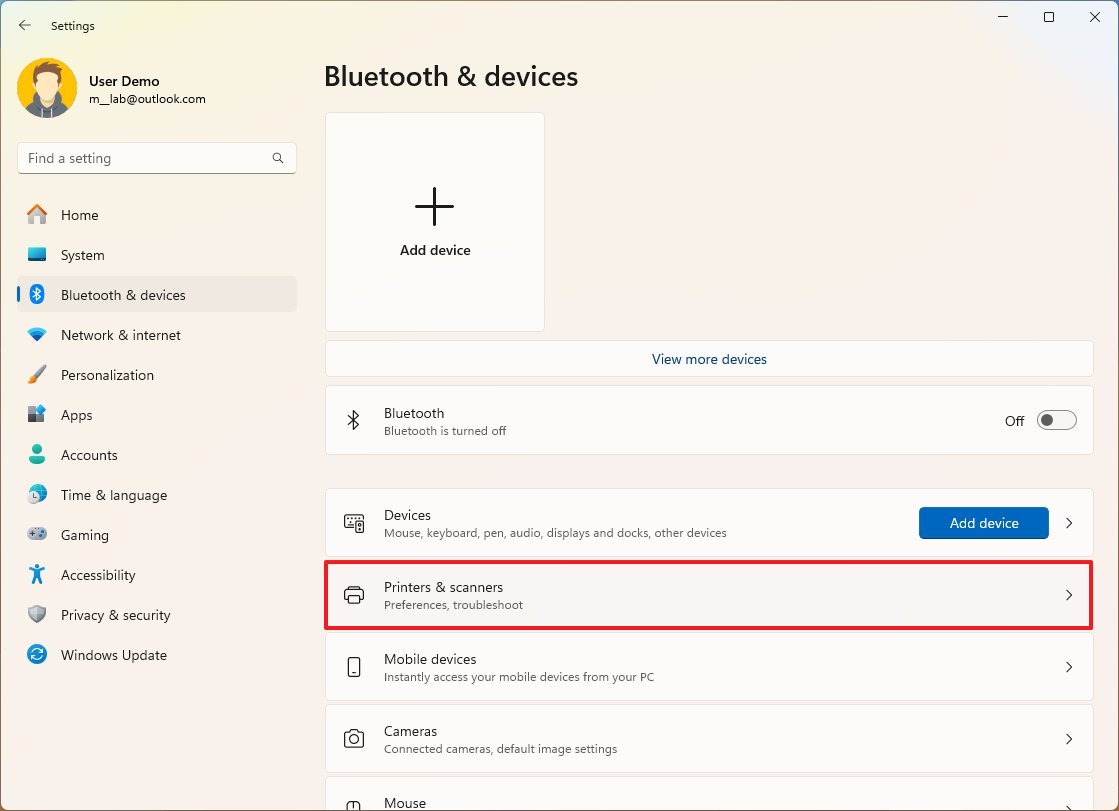
- Click the Printers & scanners setting.
- Click the Add device (Refresh) button.
- Click the Add device button for the wireless or locally connected printer.
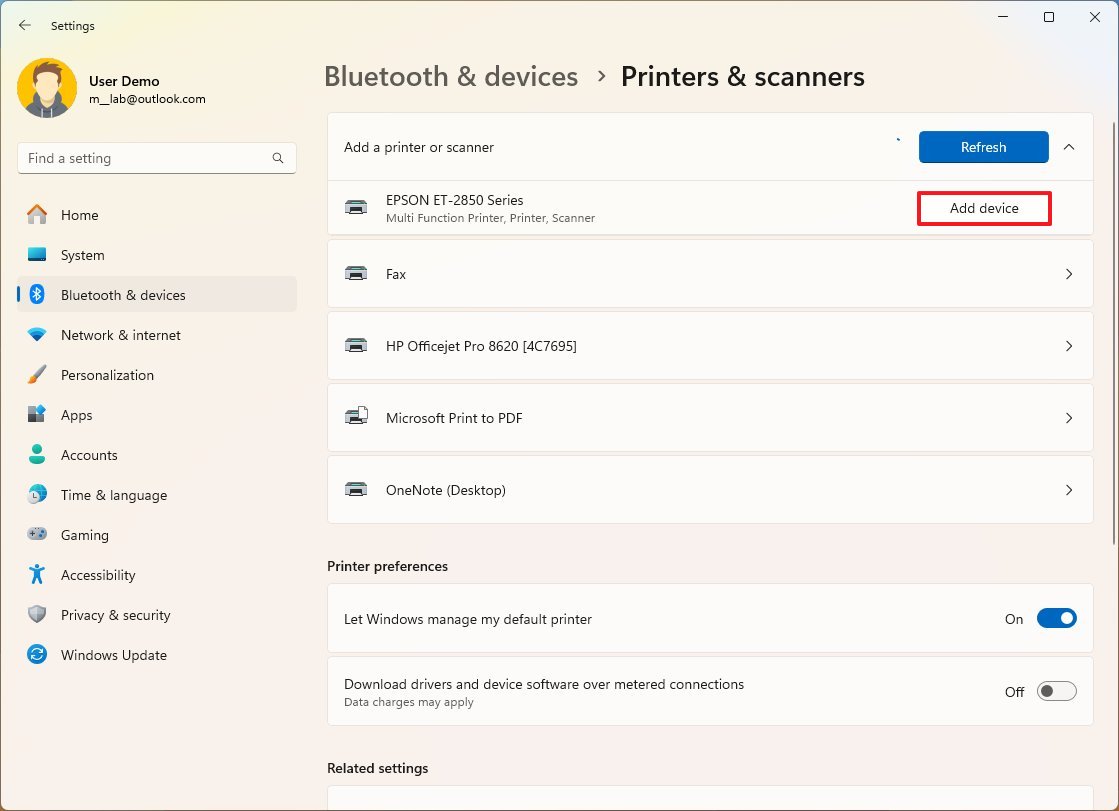
Once you complete the steps, the system will detect and install the basic driver for that specific printer.
How to set up a printer manually on Windows 11
If the system cannot install the printer automatically because it's an old printer or there's a compatibility issue, it's possible to install the device in at least three ways: you can use the legacy wizard to install the printer manually, configure a TCP/IP connection if this is a network printer, or use the option to add a local printer by selecting the port manually.
Install printer manually
To install a printer using the legacy wizard on Windows 11, use these steps:
Get the Windows Central Newsletter
All the latest news, reviews, and guides for Windows and Xbox diehards.
- Open Settings.
- Click on Bluetooth & devices.
- Click the Printers & scanners setting.

- Click the Add device button.
- Click the Add manually option.
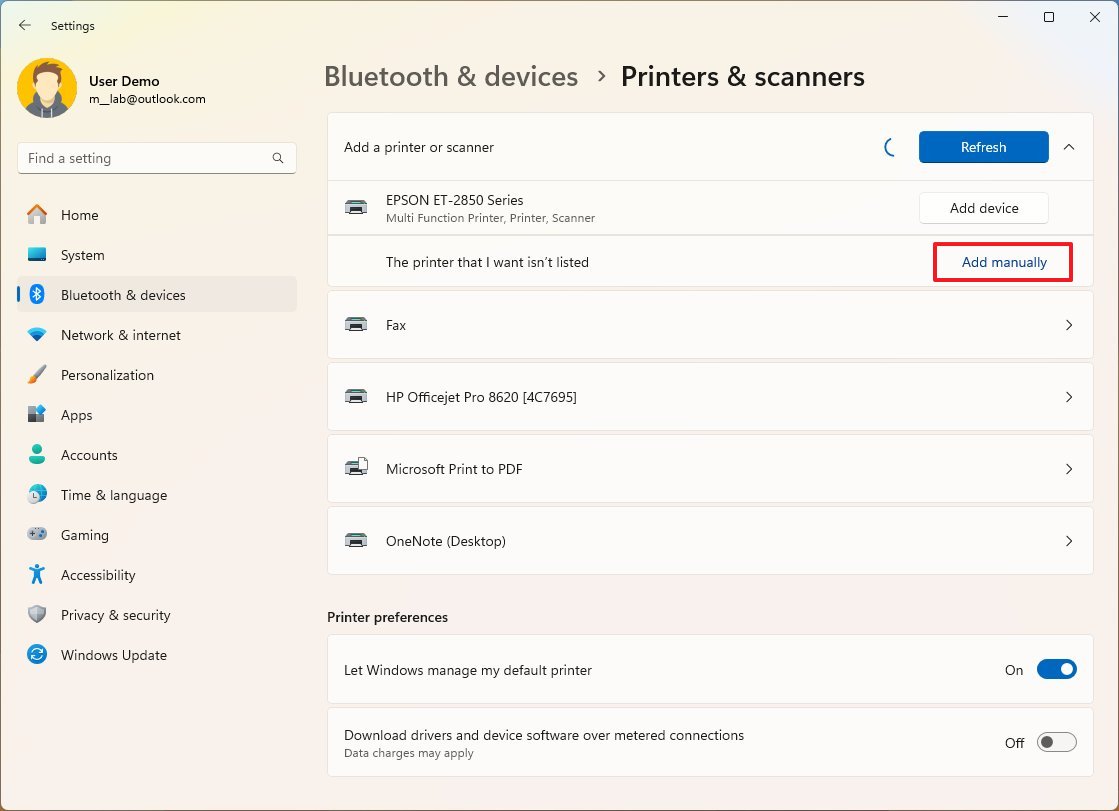
- Quick note: This option may take a little while to appear while the system looks for printers locally and in the network.
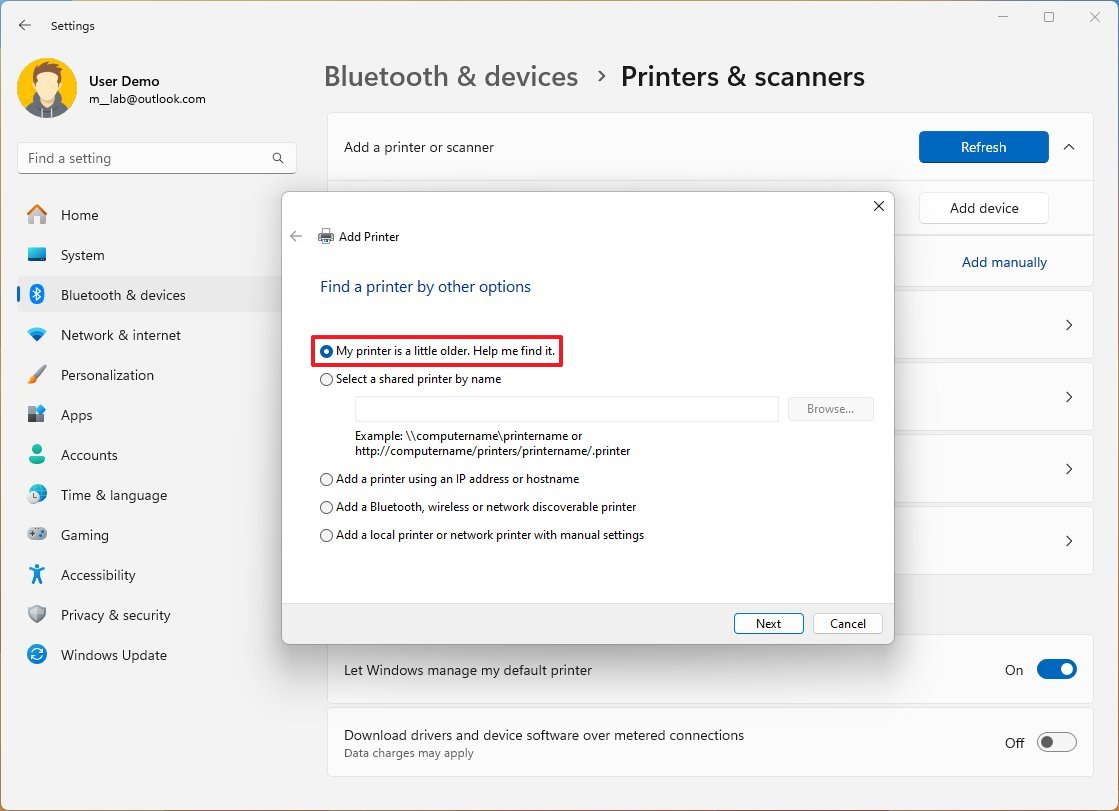
- Select the "My printer is a little older" option.
- Select the printer from the list.
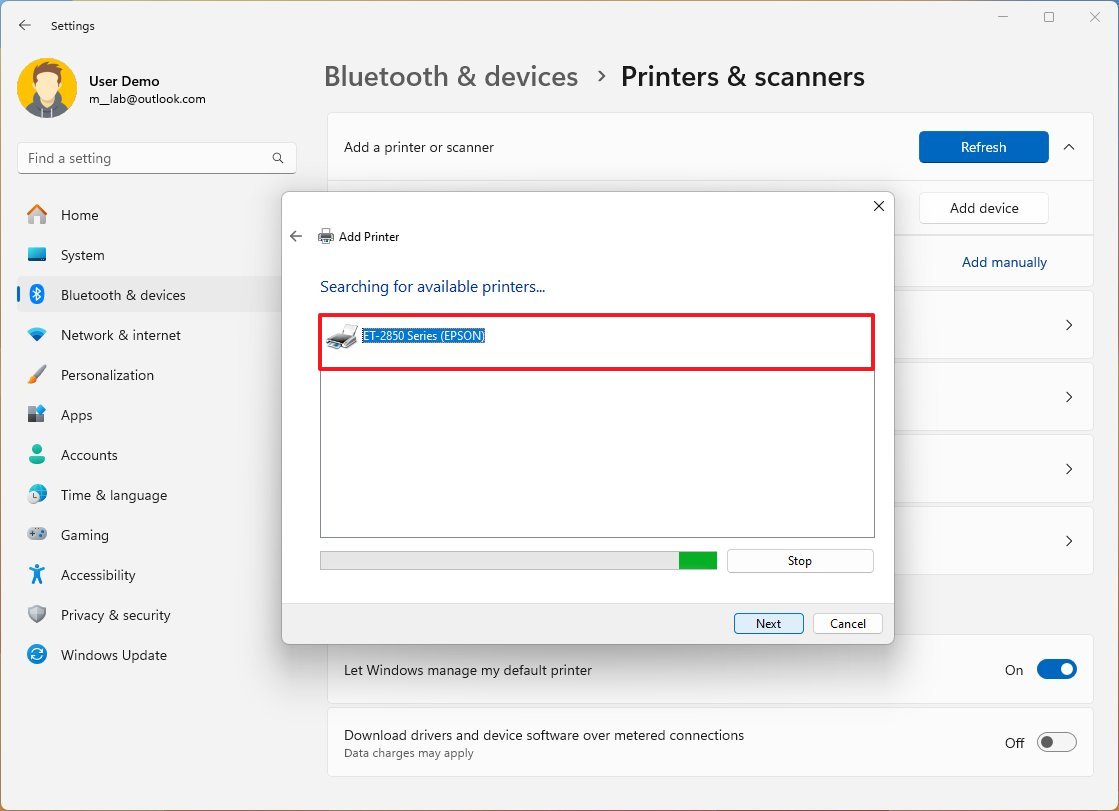
- Click the Next button.
- Click the Windows Update button (if applicable).
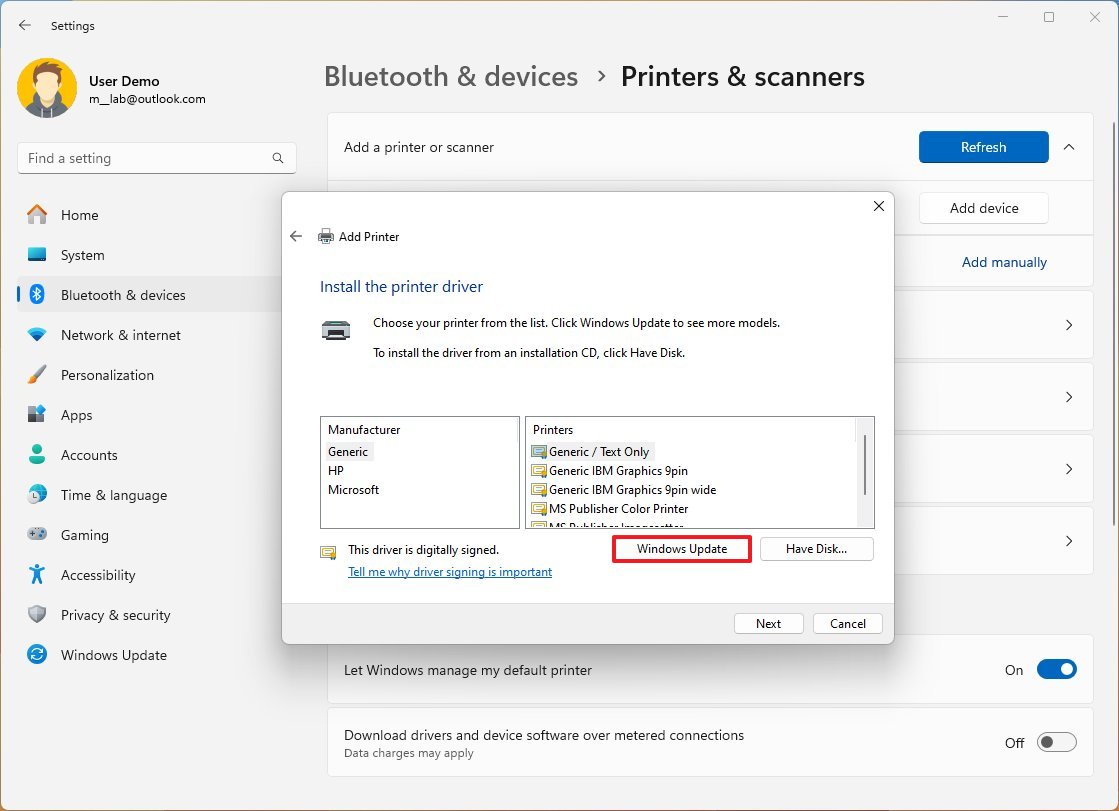
- Quick note: Windows doesn't include the basic printer drivers, which means that when you click the "Windows Update" button, it might take a while until the information is available. If this is an old printer and the exact driver model isn't available, then you could try selecting the closest model.
- Select the printer brand from the left side.
- Select the printer model from the right side.
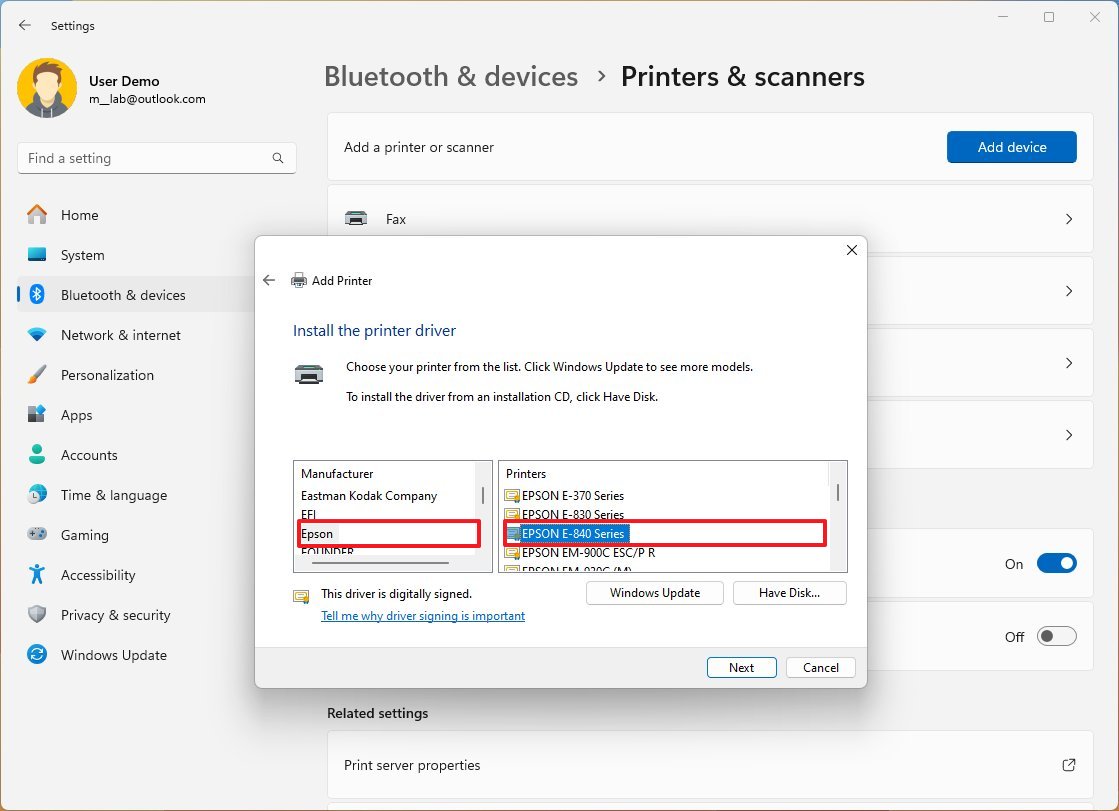
- Quick tip: If the printer driver isn't available, you can click the "Have Disk" button to provide the driver manually. You can always check your device manufacturer to download the printer drivers.
- Click the Next button.
- (Optional) Confirm a name for the printer.
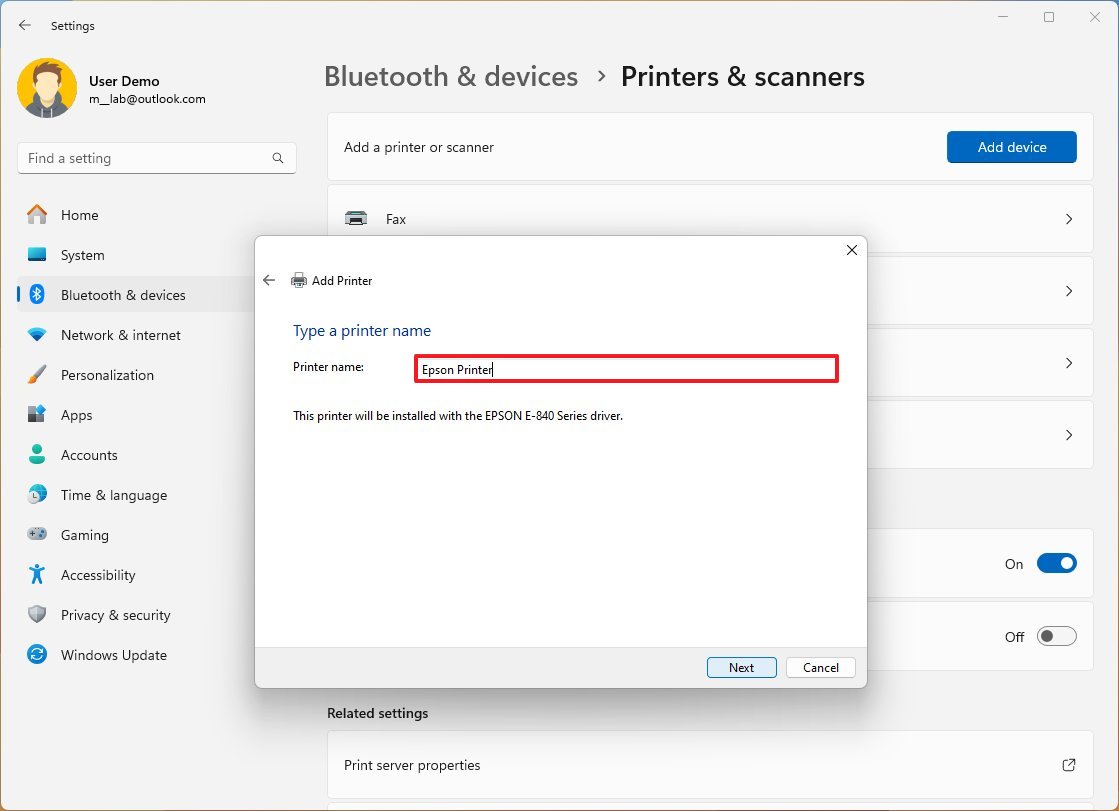
- Click the Next button.
- Select the "Do not share this printer" option.
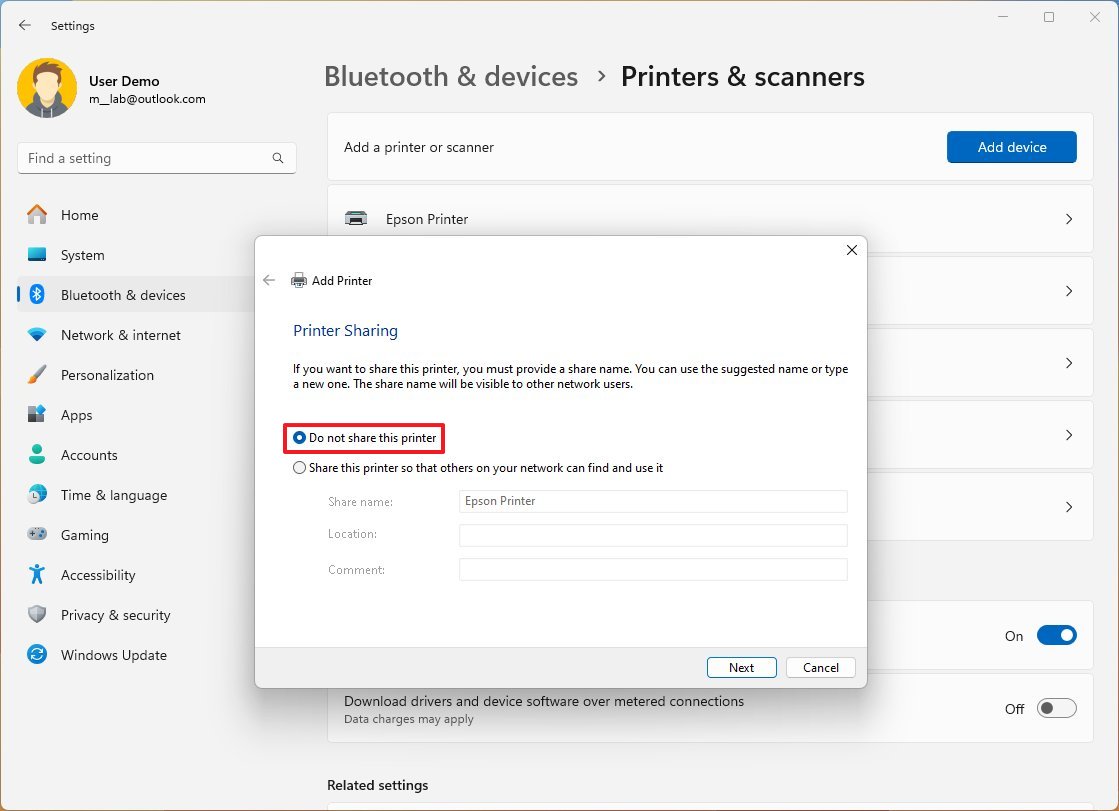
- Click the Next button.
- Click the "Print a test page" button to confirm the setup.
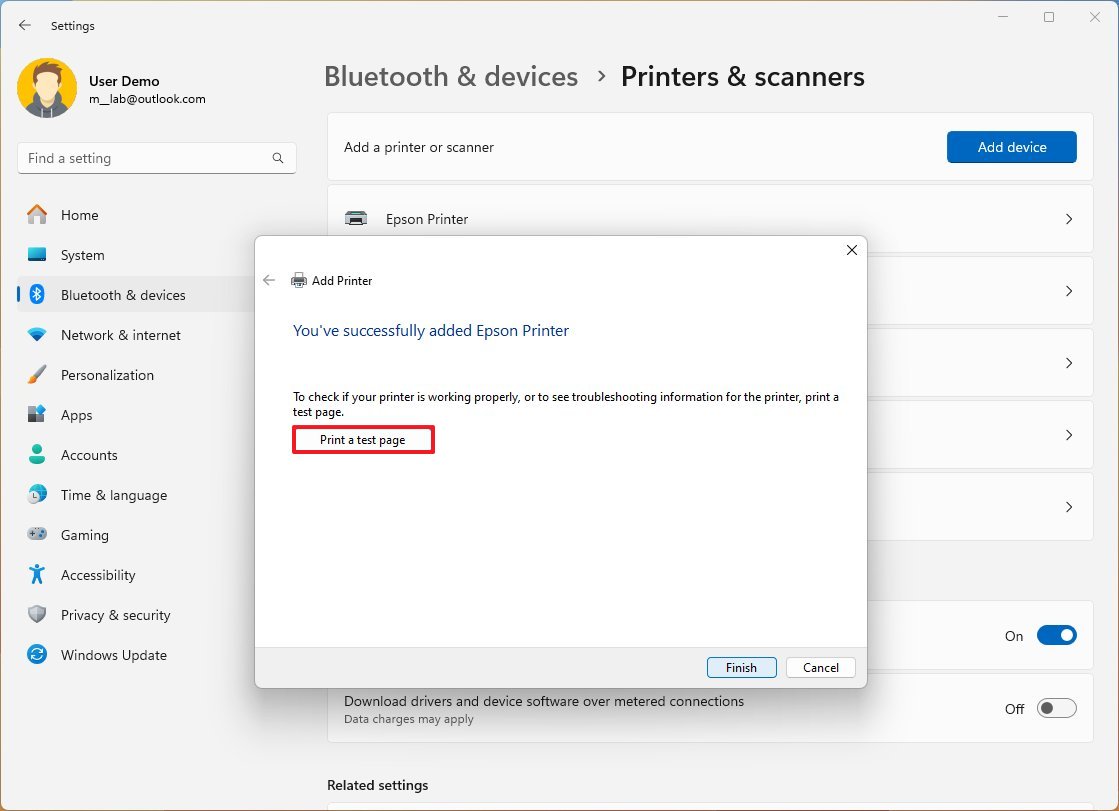
- Click the Finish button.
After you complete the steps, if the test page prints out, you will know that the printer was successfully installed on Windows 11.
Install network printer
To install a network printer, use these steps:
- Open Settings.
- Click on Bluetooth & devices.
- Click the Printers & scanners setting.

- Click the Add device button.
- Click the Add manually option.

- Select the "Add a printer using TCP/IP address or hostname" option.
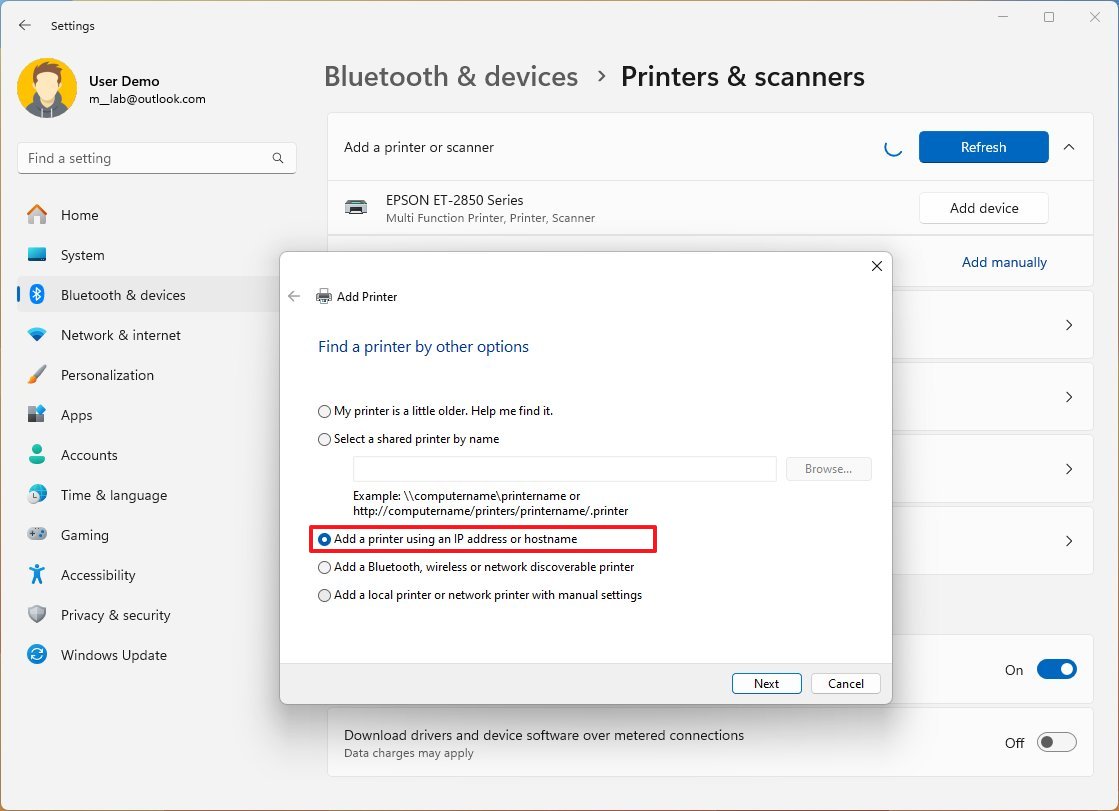
- Click the Next button.
- Select the TCP/IP Device option using the "Device type" drop-down menu.
- Confirm the IP address of the printer in the "Hostname or IP address" field — for example, 10.1.4.128.
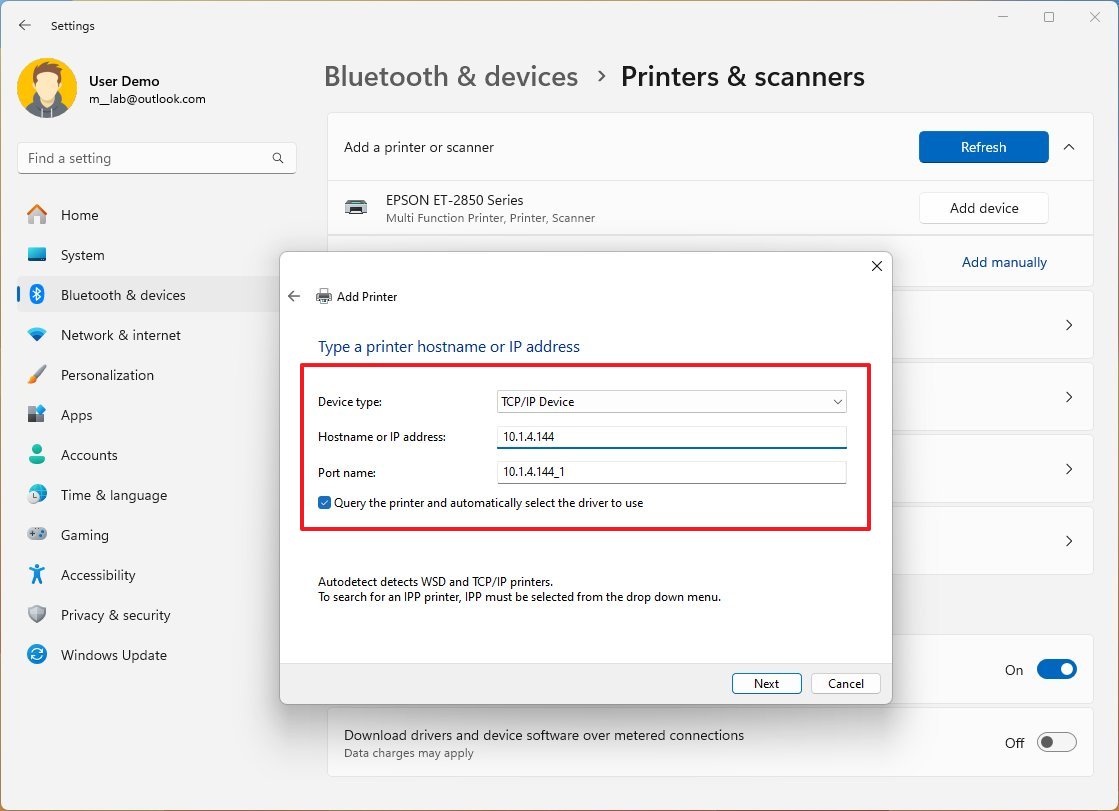
- Quick tip: You can find this information on the device's built-in screen. However, you may need to check your manufacturer support website for more details.
- (Optional) Use the leave the default name in the "Port name" field.
- Check the "Query the printer and automatically select the driver to use" option (recommended).
- Click the Next button.
- Click the Windows Update button (if applicable).
- Select the printer brand from the left side.
- Select the printer model from the right side.
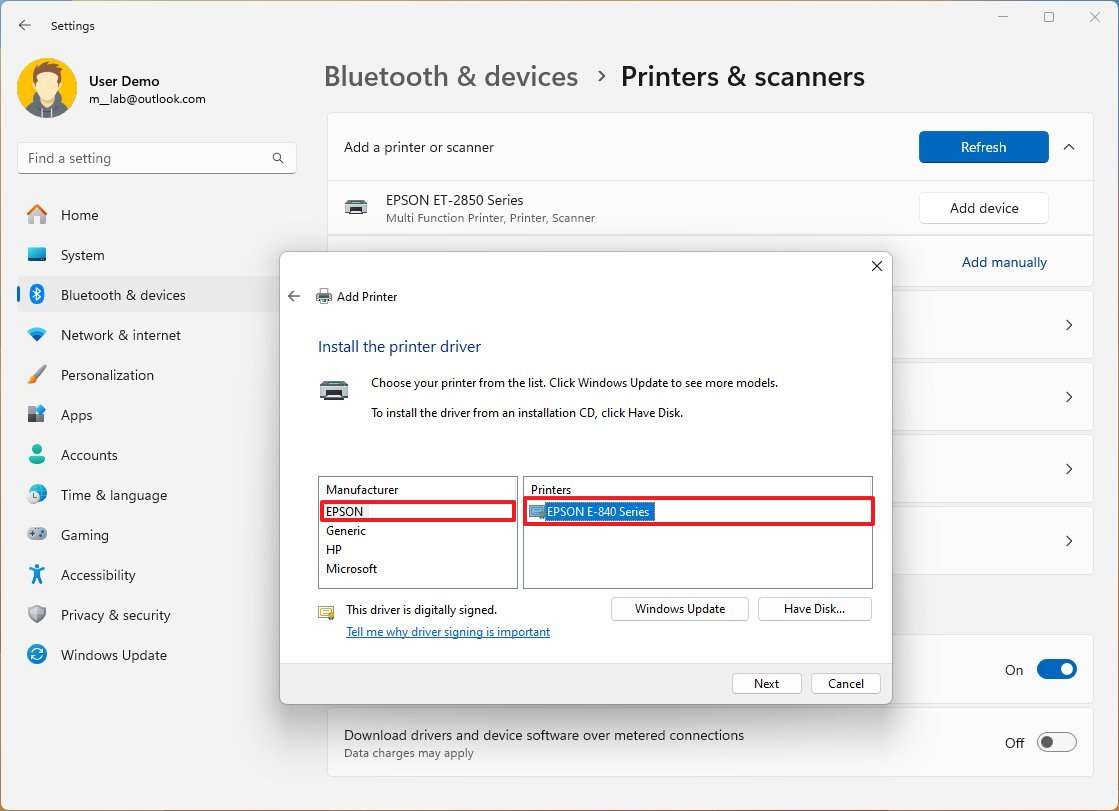
- Click the Next button.
- (Optional) Confirm a name for the printer.

- Click the Next button.
- Select the "Do not share this printer" option.

- Click the Next button.
- Click the "Print a test page" button to confirm that the device is working.

- Click the Finish button.
Once you complete the steps, the network printer will install on the computer.
Install local printer
To install a printer using a parallel or serial cable, use these steps:
- Open Settings.
- Click on Bluetooth & devices.
- Click the Printers & scanners setting.

- Click the Add device button.
- Click the Add manually option.

- Select the "Add a local printer or network printer with manual settings" option.
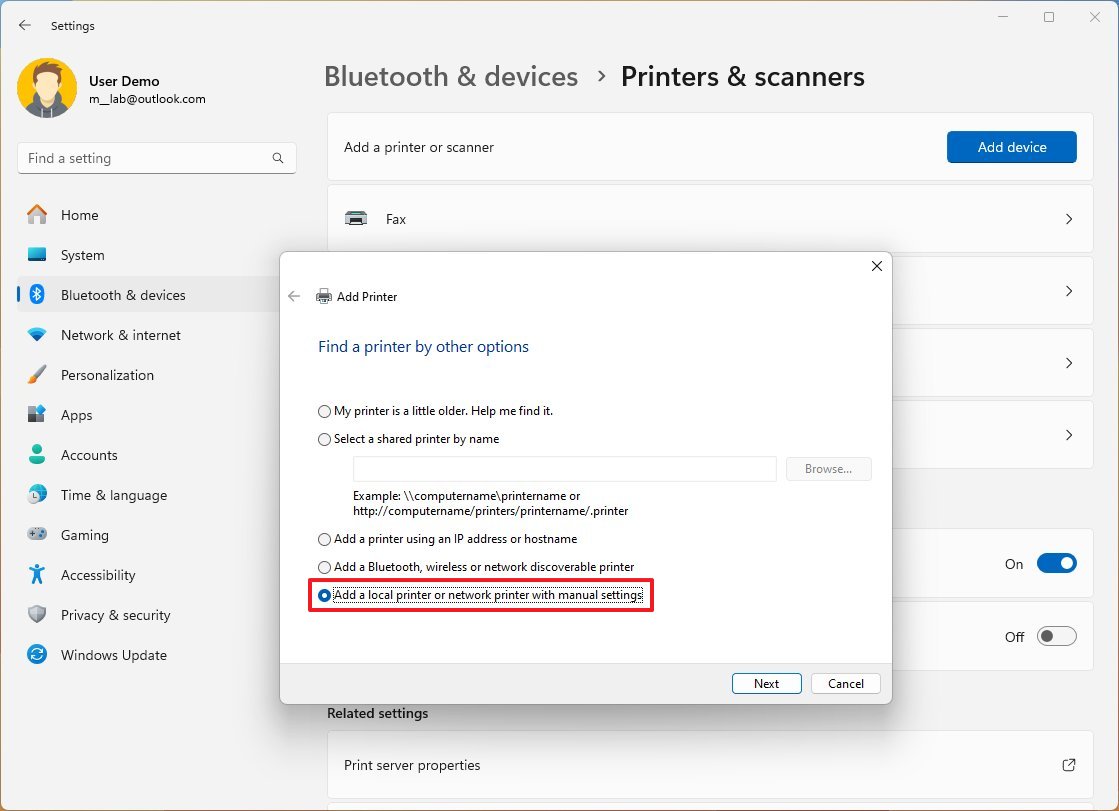
- Click the Next button.
- Select the printer's port using the "Use an existing port drop-down" menu.
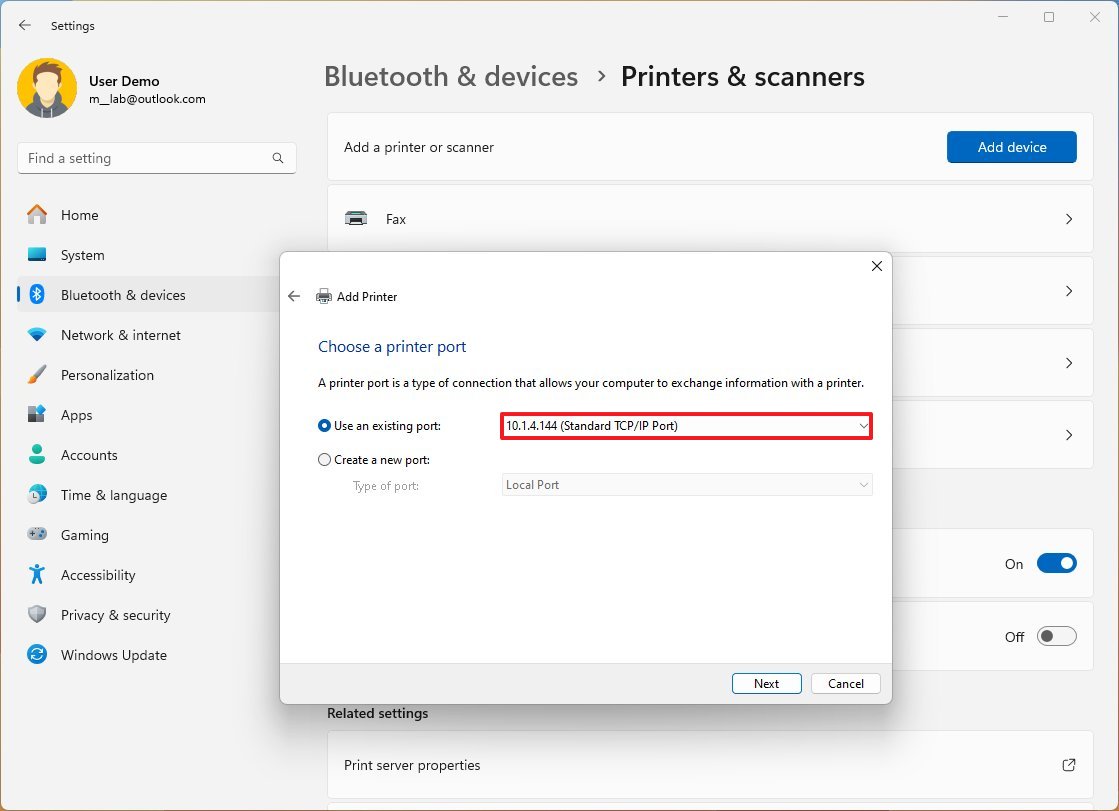
- Quick note: If you're using a USB cable, select the USB option. If you're using a parallel cable with a "DB-25" adapter, select the LPT1 port.
- Click the Next button.
- Click the Windows Update button (if applicable).
- Select the printer brand from the left side.
- Select the printer model from the right side.

- Click the Next button.
- (Optional) Confirm a name for the printer.

- Click the Next button.
- Select the "Do not share this printer" option.

- Click the Next button.
- Click the "Print a test page" button to confirm that the device is working.

- Click the Finish button.
After you complete the steps, the old printer should install and get ready to print on Windows 11.
When using the automatic setup, Windows 11 will install the basic driver for the printer. If you have to take advantage of the advanced features (if applicable), you may need to add the printer using the manufacturer's software.
More resources
For more helpful articles, coverage, and answers to common questions about Windows 10 and Windows 11, visit the following resources:
Mauro Huculak has been a Windows How-To Expert contributor for WindowsCentral.com for nearly a decade and has over 15 years of experience writing comprehensive guides. He also has an IT background and has achieved different professional certifications from Microsoft, Cisco, VMware, and CompTIA. He has been recognized as a Microsoft MVP for many years.

