How to use NextPVR on Windows 10 to watch and record TV
This free TV and DVR for Windows might look a little dated, but it's very useful. And it's free.
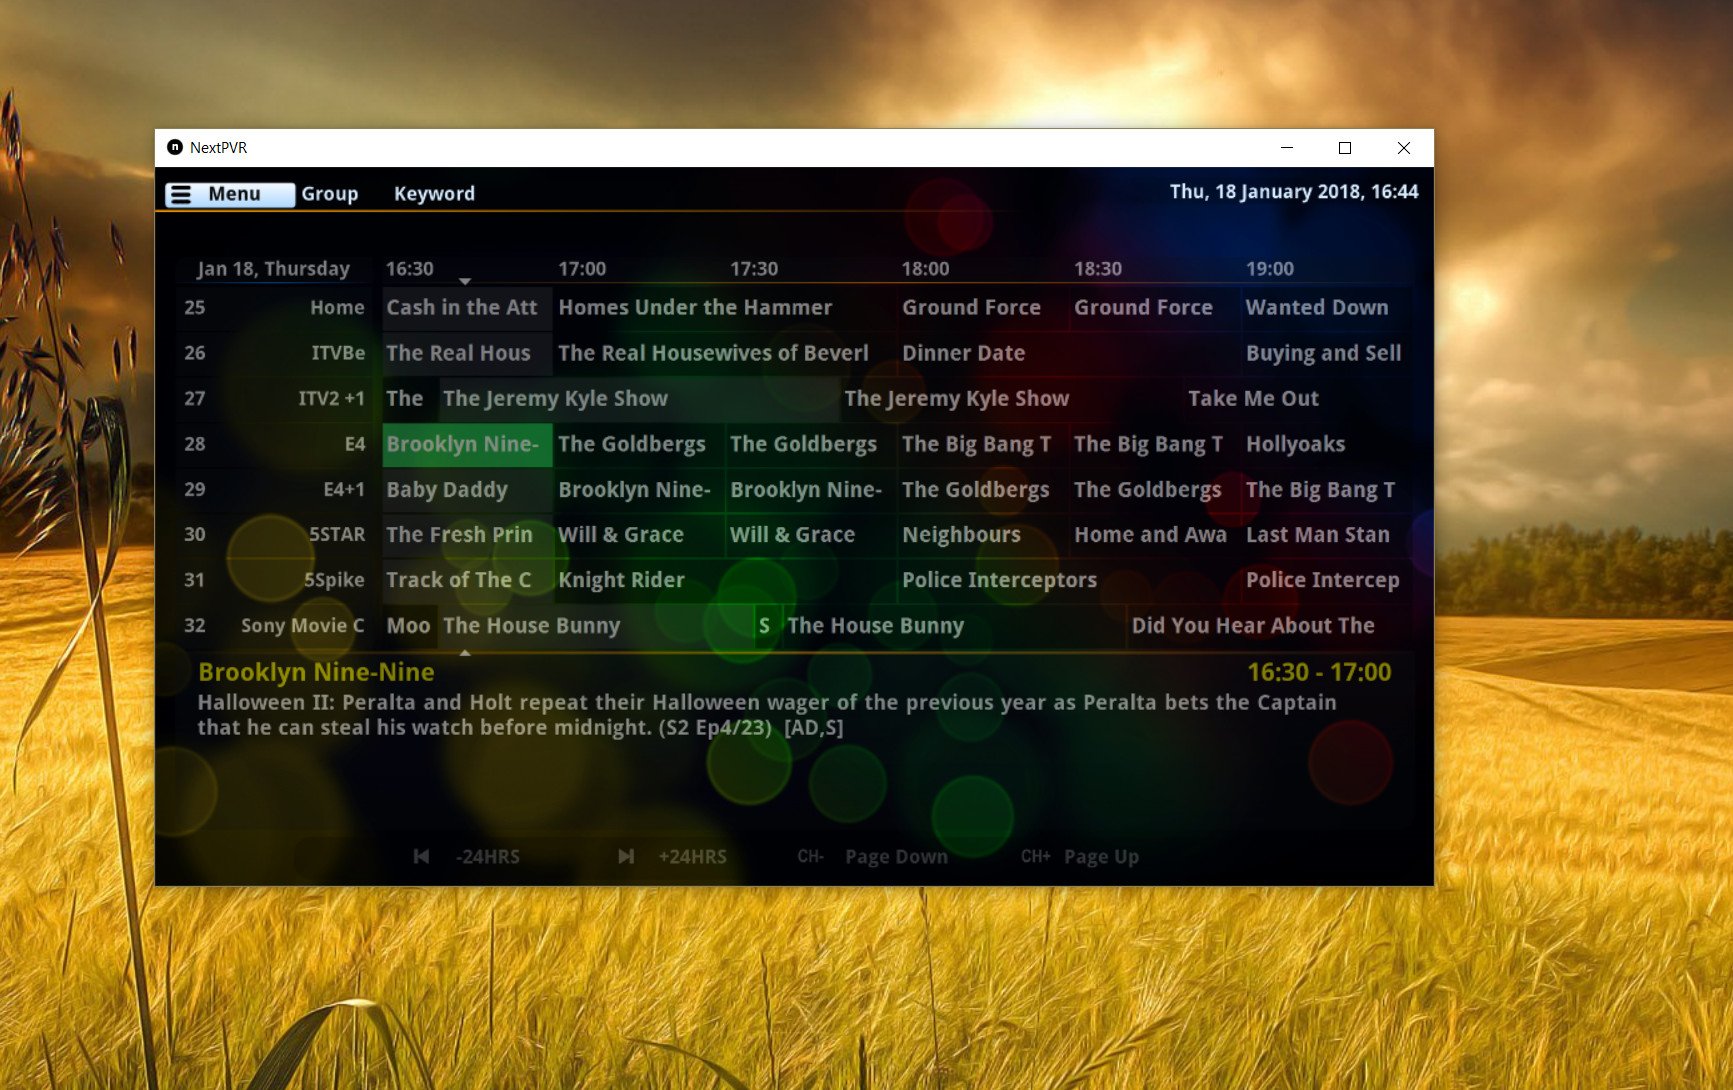
Unlike some other services such as Plex or HDHomeRun DVR, NextPVR is completely free to use. There are no restrictions, but if you like it you can certainly donate to the developer (and you should.)
Essentially, it's another way to get your live TV and DVR features onto your Windows PC if you're using OTA channels. You can also hook it into Kodi, which is extra useful, but here we're just going to look at how to get up and running with NextPVR.
Download NextPVR and assemble your equipment
It goes without saying that the first thing to do is download and install NextPVR for Windows. Hit the link below to get started.
The next thing you'll need is some form of network attached tuner. For the purposes of this guide, we're using the HDHomeRun Connect. You'll need to make sure you set up your individual tuner before you start setting up NextPVR.
How to set up and use a HDHomeRun tuner on Windows
Setting up NextPVR
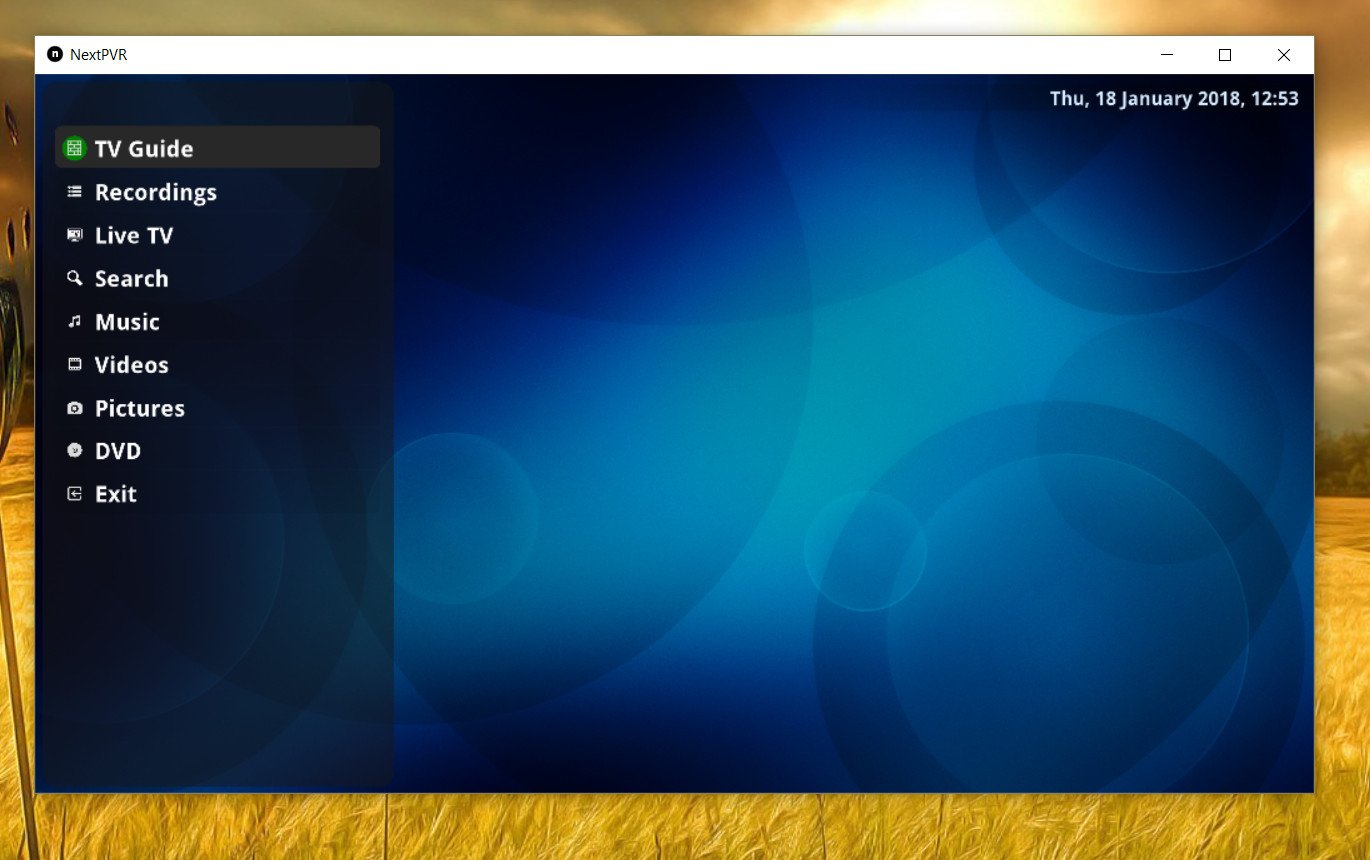
Once you've installed the NextPVR software, you'll have to go and set it all up yourself. The screen above is what you'll be looking at, and the first thing you need to do is right click and select settings.
Get the Windows Central Newsletter
All the latest news, reviews, and guides for Windows and Xbox diehards.
There are many things to tweak, but to get going you'll need to click on the devices tab.
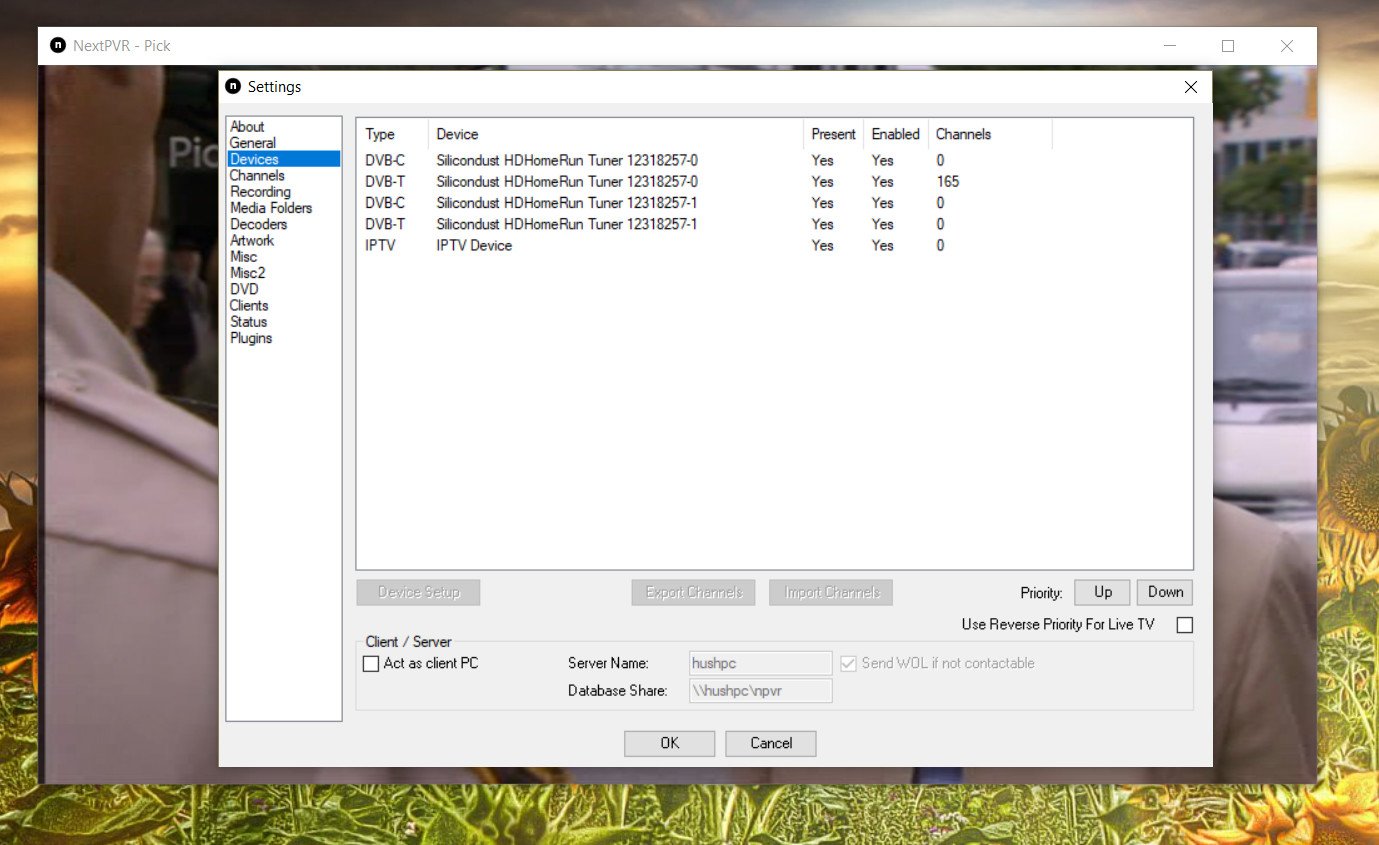
You'll see something like the image above. In my case, I see multiple entries for HDHomeRun because NextPVR is recognizing each individual tuner on the device. Double click on the correct one, and in the next box, you'll have the option to scan for channels. Even if your tuner has done this at set up, do it again here to populate the information and EPG data into NextPVR.
Now, when you go back to the main interface you'll be able to click on live TV or TV guide and get right into watching shows within the NextPVR application.
Setting up DVR
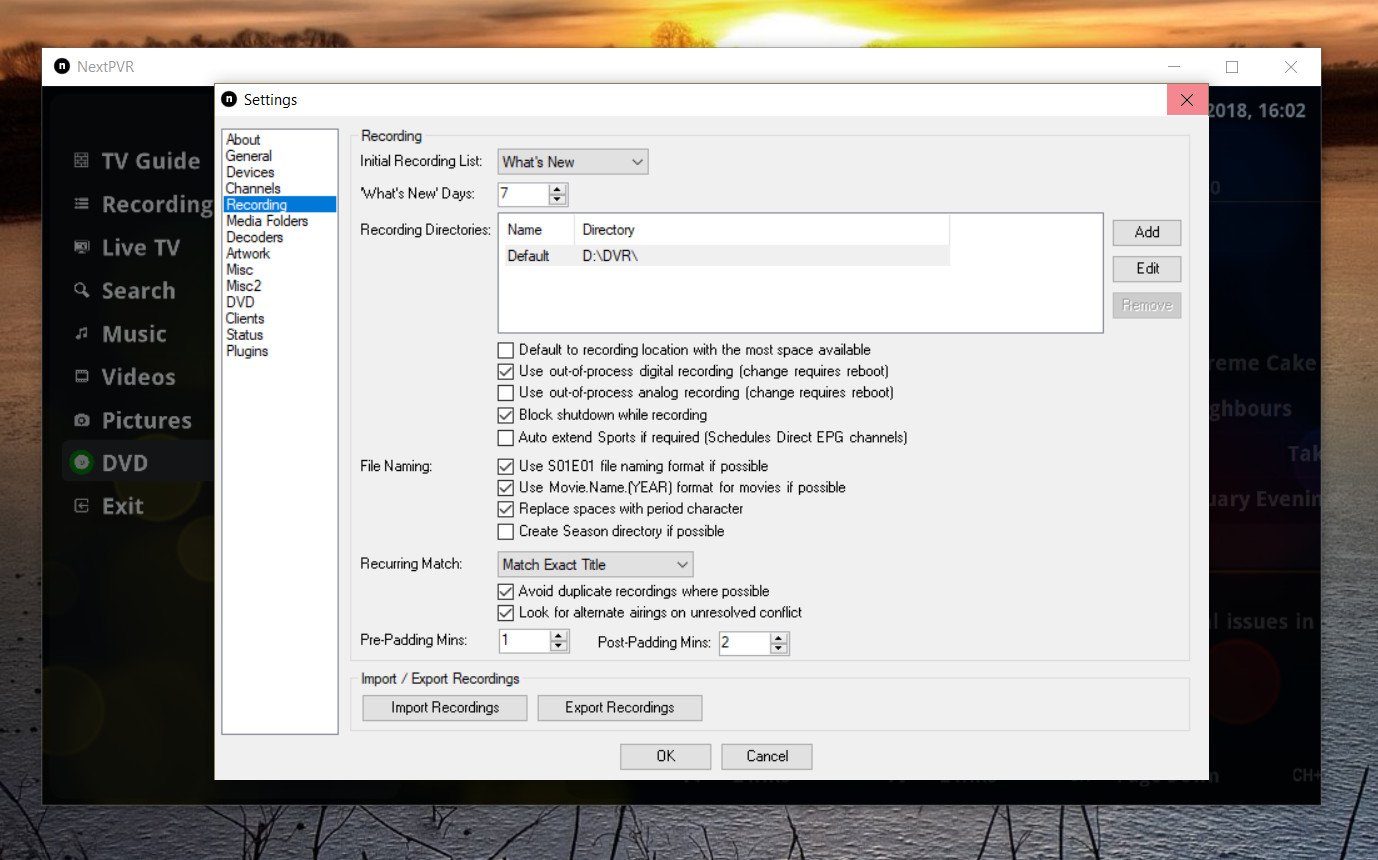
To get going with recording shows you'll need to head back to settings as detailed above and click on the recordings tab. It's here where you can customize your DVR.
The only thing you absolutely have to do is choose a destination drive either on your PC or network to save shows. You also get options to decide how much padding you want on either side to guarantee you get the start and finish (because you can't trust TV channels to be on time), and you can customize the naming format of the files so it's easier to keep seasons of shows organized.
Once you've recorded a show, the NextPVR app will let you watch it by selecting from the recordings tab.
MPEG2 Decoder
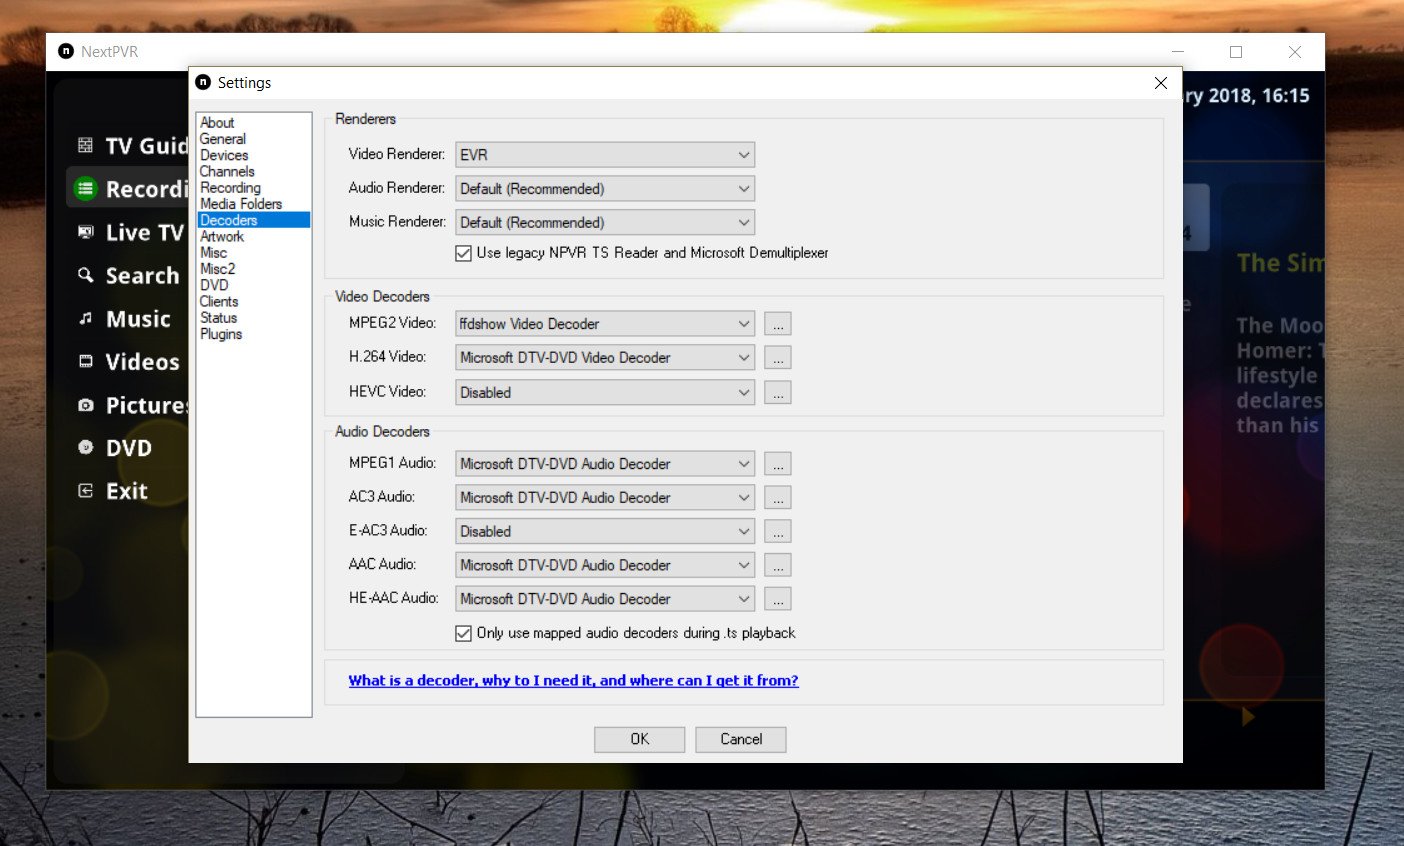
When I first set up NextPVR I was unable to get any video, despite audio coming through. The message was that I needed an MPEG2 decoder, and even though I had the Microsoft one installed from the Store, that didn't seem to be compatible with NextPVR. If you're having similar issues, there's an easy fix.
MPEG2 is specifically important here in the case of live TV since that's the format you need to decode and view it on your PC. The one to get seems to be the "ffdshow" decoder, which you can find at the link below. Once it's installed on your PC, you can select it under the decoders tab in settings and you should now be good to get live TV.
Download the ffdshow MPEG2 decoder
Watching TV and scheduling recordings

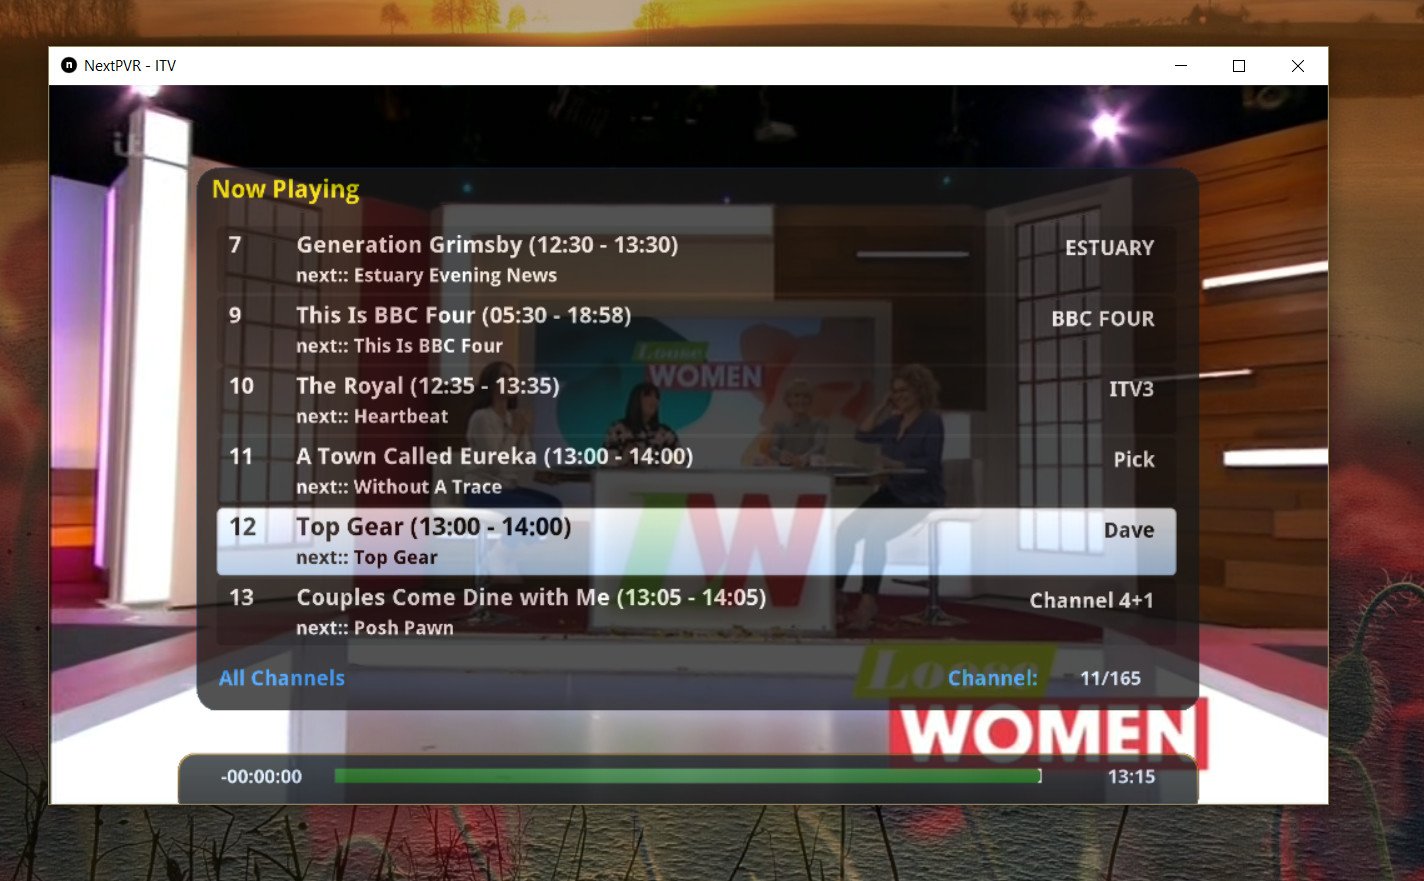
Now that you're set up, the fun part begins. Your TV guide should be populated, and you can begin watching shows. If you just jump right in to live TV, you'll have basic but familiar controls on hand. You can pause, rewind and fast-forward live TV and go up or down a channel right from the toolbar in the player. What you can't do is just hit record and have it save the current show. It's also worth noting that whenever you hit live TV, you'll immediately go back to your last viewed channel.
Recordings have to be scheduled from the TV guide, and it's fairly straightforward. Selecting a show from the guide provides a number of options, and specifically for recording you've got two main ones: Quick record and record.
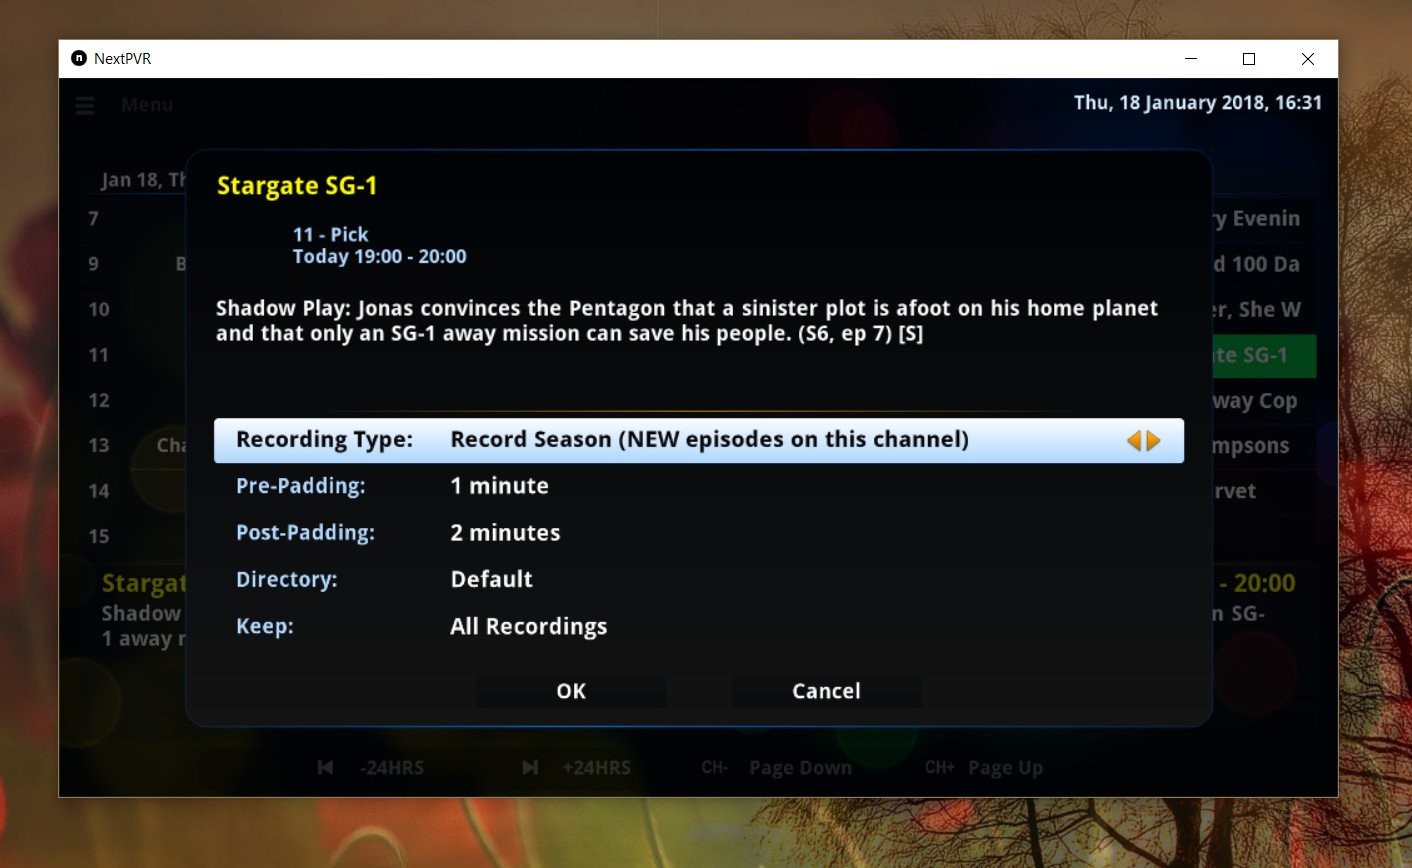
Quick record will use your default settings and record that one show. The record option provides a more thorough experience as shown above. Here you can choose to record just once or all new episodes in a season, as well as alter your default padding at the beginning and end. This is particularly useful for something like a live sports event where it could easily overrun.
You can also tell NextPVR how many recordings to keep, either one or all. If you want to save the whole series, you can, but if you want it to automatically only keep the new episode, that's no problem either.
The bottom line
This guide only scratches the surface of what you can do with NextPVR. There's a lot more you can tweak, as well as being able to play music, pictures, and DVDs. This covers the basics of getting set up to watch and record live TV, and you'll have a solid experience with NextPVR.
The app seems limited to run only up to 1920 x 1200, so there's no HiDPI support, but that's probably the only real critique. It's a very powerful, full-featured application that you can either use on its own or integrate with something like Kodi.
If you're a NextPVR pro with any tips to share, be sure to drop them into the comments.

Richard Devine is a Managing Editor at Windows Central with over a decade of experience. A former Project Manager and long-term tech addict, he joined Mobile Nations in 2011 and has been found on Android Central and iMore as well as Windows Central. Currently, you'll find him steering the site's coverage of all manner of PC hardware and reviews. Find him on Mastodon at mstdn.social/@richdevine
