How to set up and use a Discord voice channel
Discord is used a lot for text-based chat, but it's also a pretty nifty tool for voice chat, whether you're gaming, teleconferencing, or just want to talk to your friends.

Discord is a very popular, cross-platform communication tool, in part because it's free to use, and just about anyone can create a server. A lot of it is text-based chat, but it's also got a pretty solid voice chat feature as well.
With more people working from home than ever, remote communication has never been more critical, and Discord is a brilliant tool to do that with. It's incredibly user friendly and a service many of your friends, family, and colleagues may already be familiar with using. If you're looking for a way to do group voice calls, here's how to get set up.
Sign up and get a server going
The first thing you need is an account and a Discord server for everyone to meet up in. Think of it as a giant group chat, only with different channels, both text and voice, all available to help organize your communications.
Fortunately, we've got a full guide for you to follow that will walk you through getting your server up and running first.
How to set up a voice channel

By default, any new Discord server will have one voice channel already created. Joining it to chat is as simple as just clicking on it, and you'll be automatically connected. When you're in a voice chat, you'll be presented with related controls, including a mute button and a button to end the call.
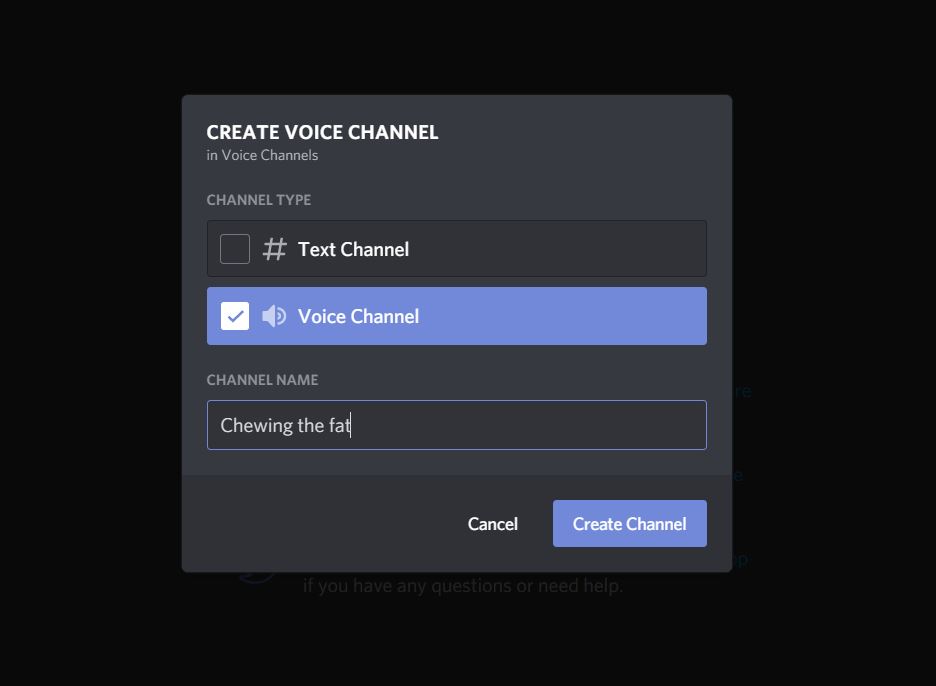
If you want to create a new channel simply:
- Next to voice channels in the sidebar, click the + button.
- Select voice channel.
- Name the channel.
- Click create.
Just like that, you'll have a new voice channel created for anyone to join. If you have categories set up within your server for better organization, you can simply drag and drop the voice channel into any of them. Alternatively, follow the step above, but instead of clicking next to voice channels click the add button next to the category name.
Get the Windows Central Newsletter
All the latest news, reviews, and guides for Windows and Xbox diehards.
Basic audio settings

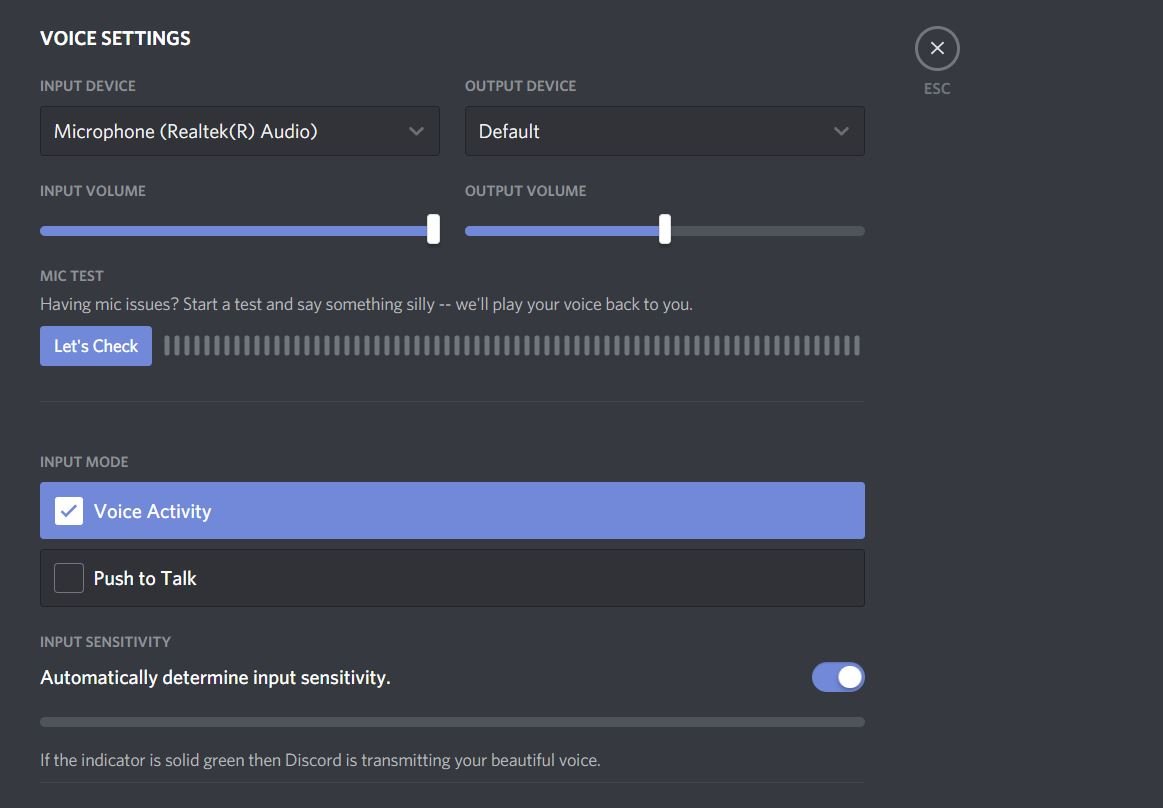
Out of the gate, your audio settings in Discord should be set to whatever your Windows default input and output devices are. It's still worth hitting the settings cog though and heading into the audio and video section to check.
It's also a good idea to check your levels. Discord allows you to adjust input and output levels and has a handy meter to enable you to check your microphone settings won't deafen anyone you jump into a call with.
There are also some more advanced features which you may want to play about with, including echo cancellation and noise reduction, which can be turned on or off as required, as well as Discord being able to tell your router that its data packets are high priority.
Sound quality is generally pretty good, too, and Discord also has some pretty granular permissions settings. If you leave a voice channel open, anyone in your server can join it at any time. So if you don't want certain people using specific channels, tweaking permissions is a good idea, and this guide is an excellent place to start.

Richard Devine is a Managing Editor at Windows Central with over a decade of experience. A former Project Manager and long-term tech addict, he joined Mobile Nations in 2011 and has been found on Android Central and iMore as well as Windows Central. Currently, you'll find him steering the site's coverage of all manner of PC hardware and reviews. Find him on Mastodon at mstdn.social/@richdevine
