How to sell your old Surface, laptop, or desktop without giving away your personal information
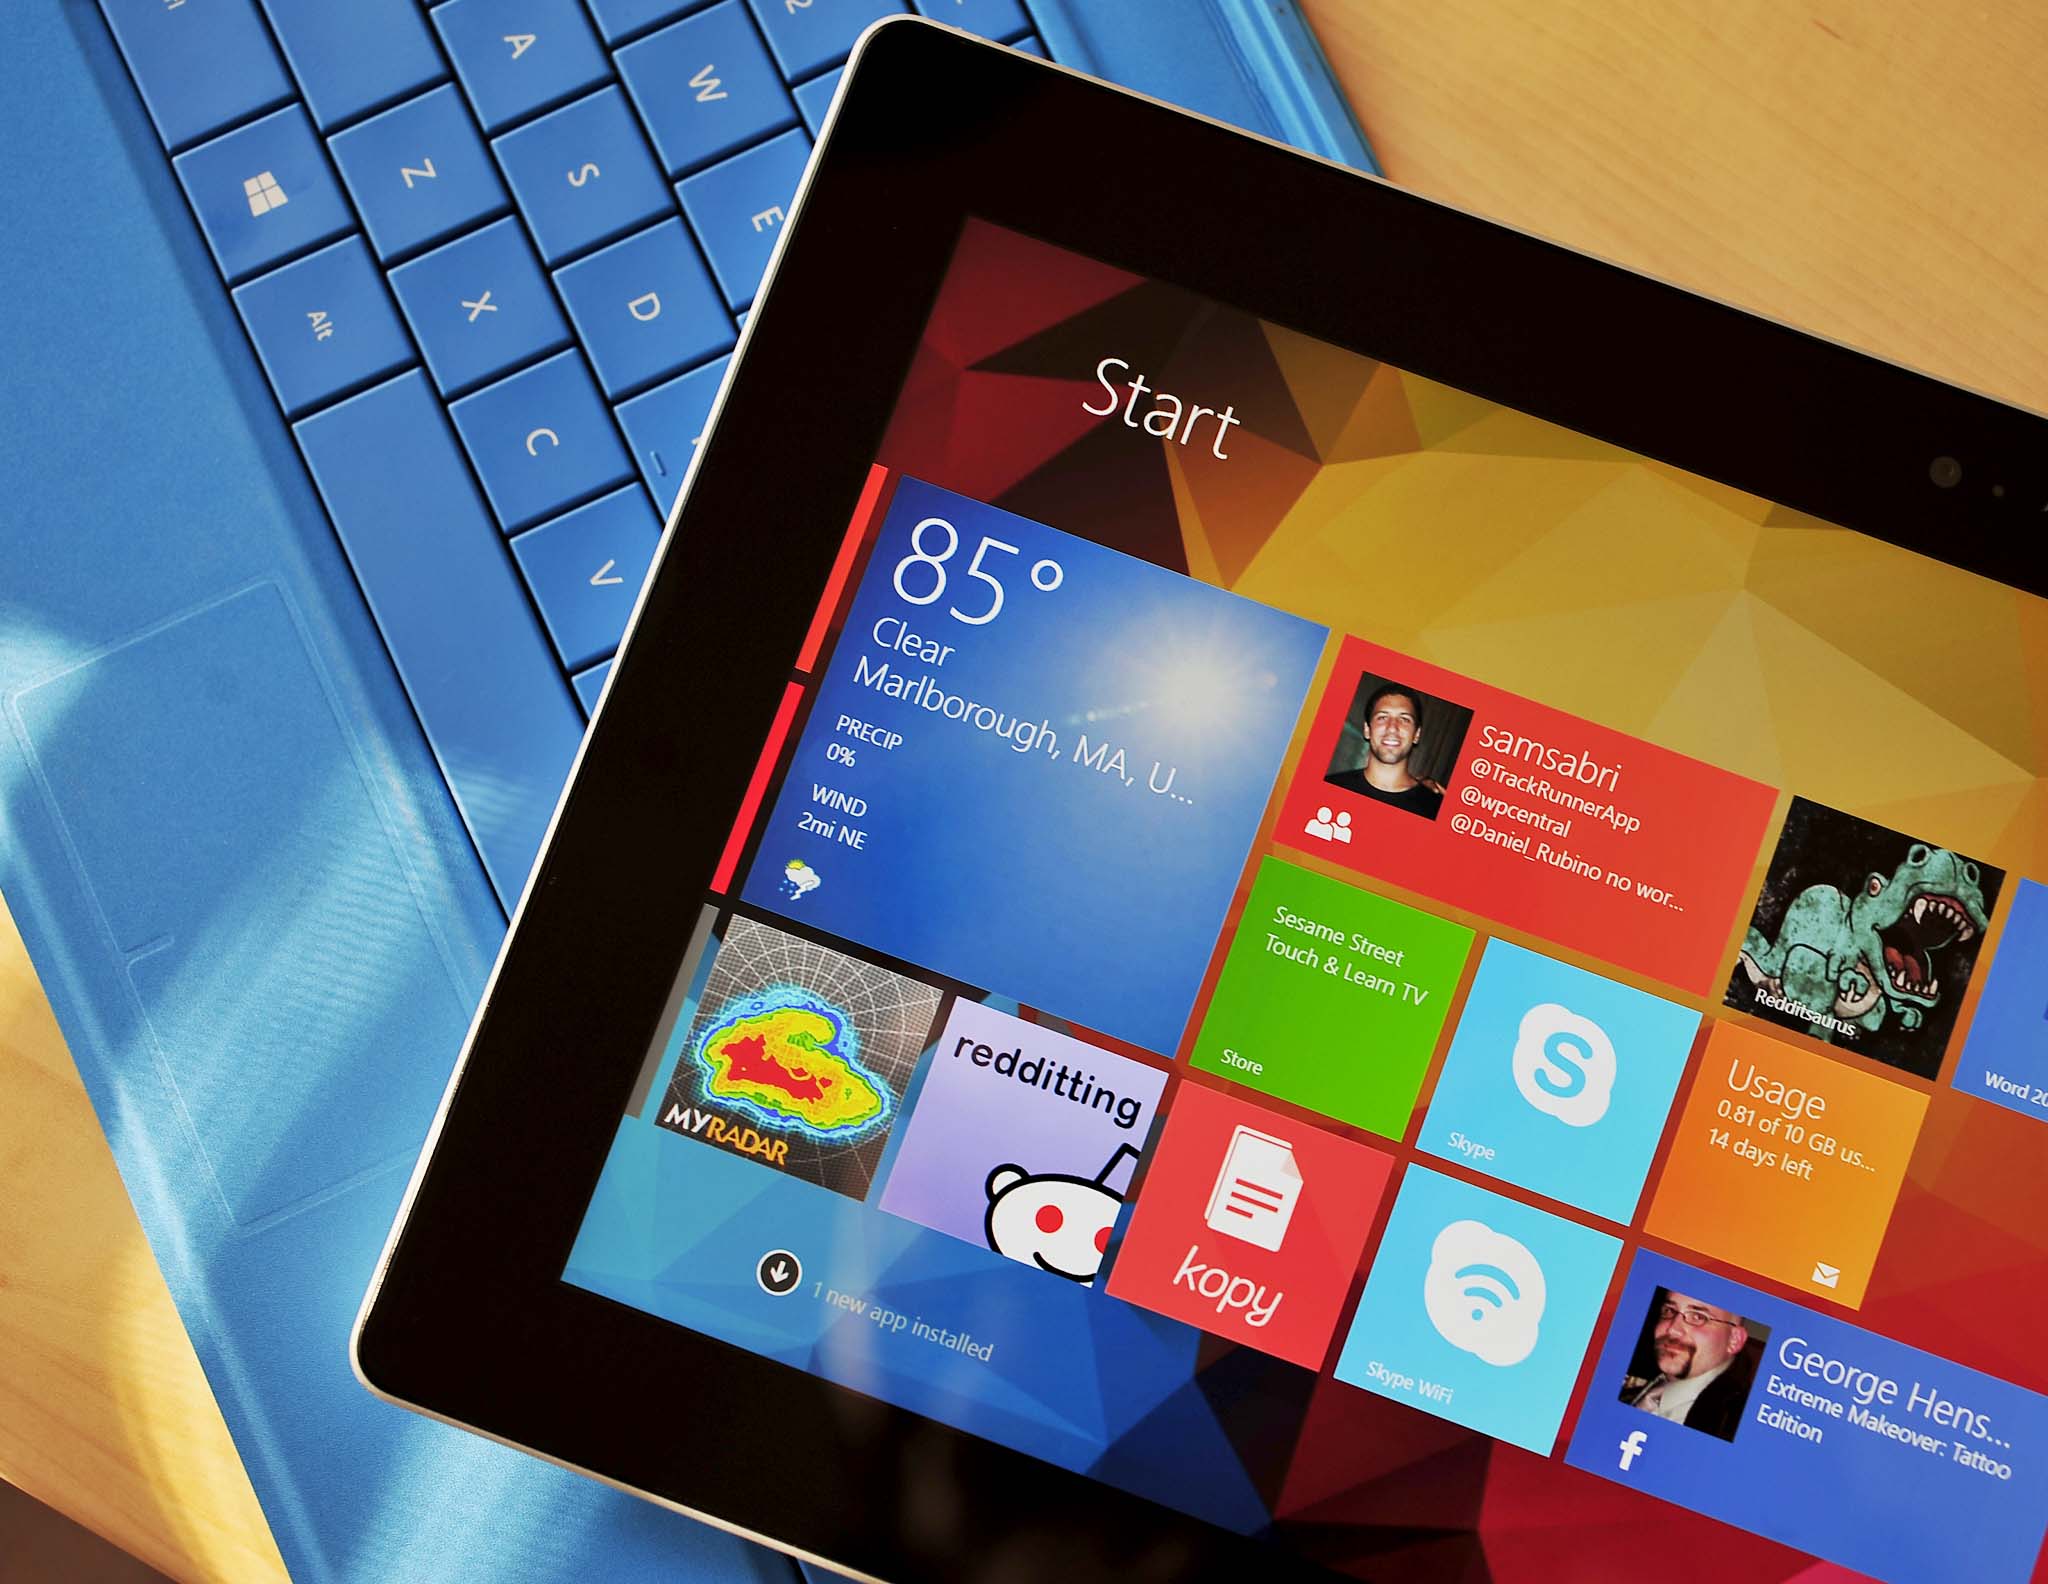
Windows 10 is the next version of the most popular operating system on the planet, it's been out only for a few months, and the adoption of the operating system hasn't been anything short than amazing. In October, the company has reported over 110 million installs in just a few weeks. Of course, these numbers represent activations from upgrades and new computers.
We're now seeing that the new operating system is also slowly stimulating the market, as computer manufacturers more than ever are building new faster and sleeker devices. However, it's also helping the innovation in processors. For example, Intel now has out its sixth-generation Skylake processors, which brings better support for 4K displays, improves power efficiency, graphics, and obviously they are much faster.
Now, with Windows 10 already out on the market and new devices with much-improved hardware, you're probably ready for an upgrade. Perhaps, you are currently thinking to upgrade your computer to a new Surface Pro 4 or Surface Book, or you might be thinking of buying a new Dell XPS 13, or a Lenovo Yoga 900, or any other PC.
Today we'll go through the steps you need to follow to get your old Surface, laptop, or desktop ready for sell while avoiding making it easier for someone else to get any of your personal information and to get the most money for your next device upgrade.

What to do before selling your computer
Always backup first!
At the top of your to-do list on getting your device ready for sell is to make a full backup of your system. This step is always a good thing to do, as this might be the only way to recover if something were to go wrong, or you change your mind and you want to keep your computer for a little longer.
Nowadays, backing up has become something pretty straightforward. You can use third-party software solutions, but it's good to know that Windows 10, Windows 8.1, and even Windows 7 come with the System Image Backup utility to make a full backup of your device, which then you can use as part of your recovery plan.
If you decide to go with System Image Backup feature in Windows, you will get an exact copy of everything there is on your computer, including operating system, programs, settings, and your personal files. This type of backup will restore everything on your computer even after a hard drive failure. You can refer to my previous guide to make a backup.
Get the Windows Central Newsletter
All the latest news, reviews, and guides for Windows and Xbox diehards.
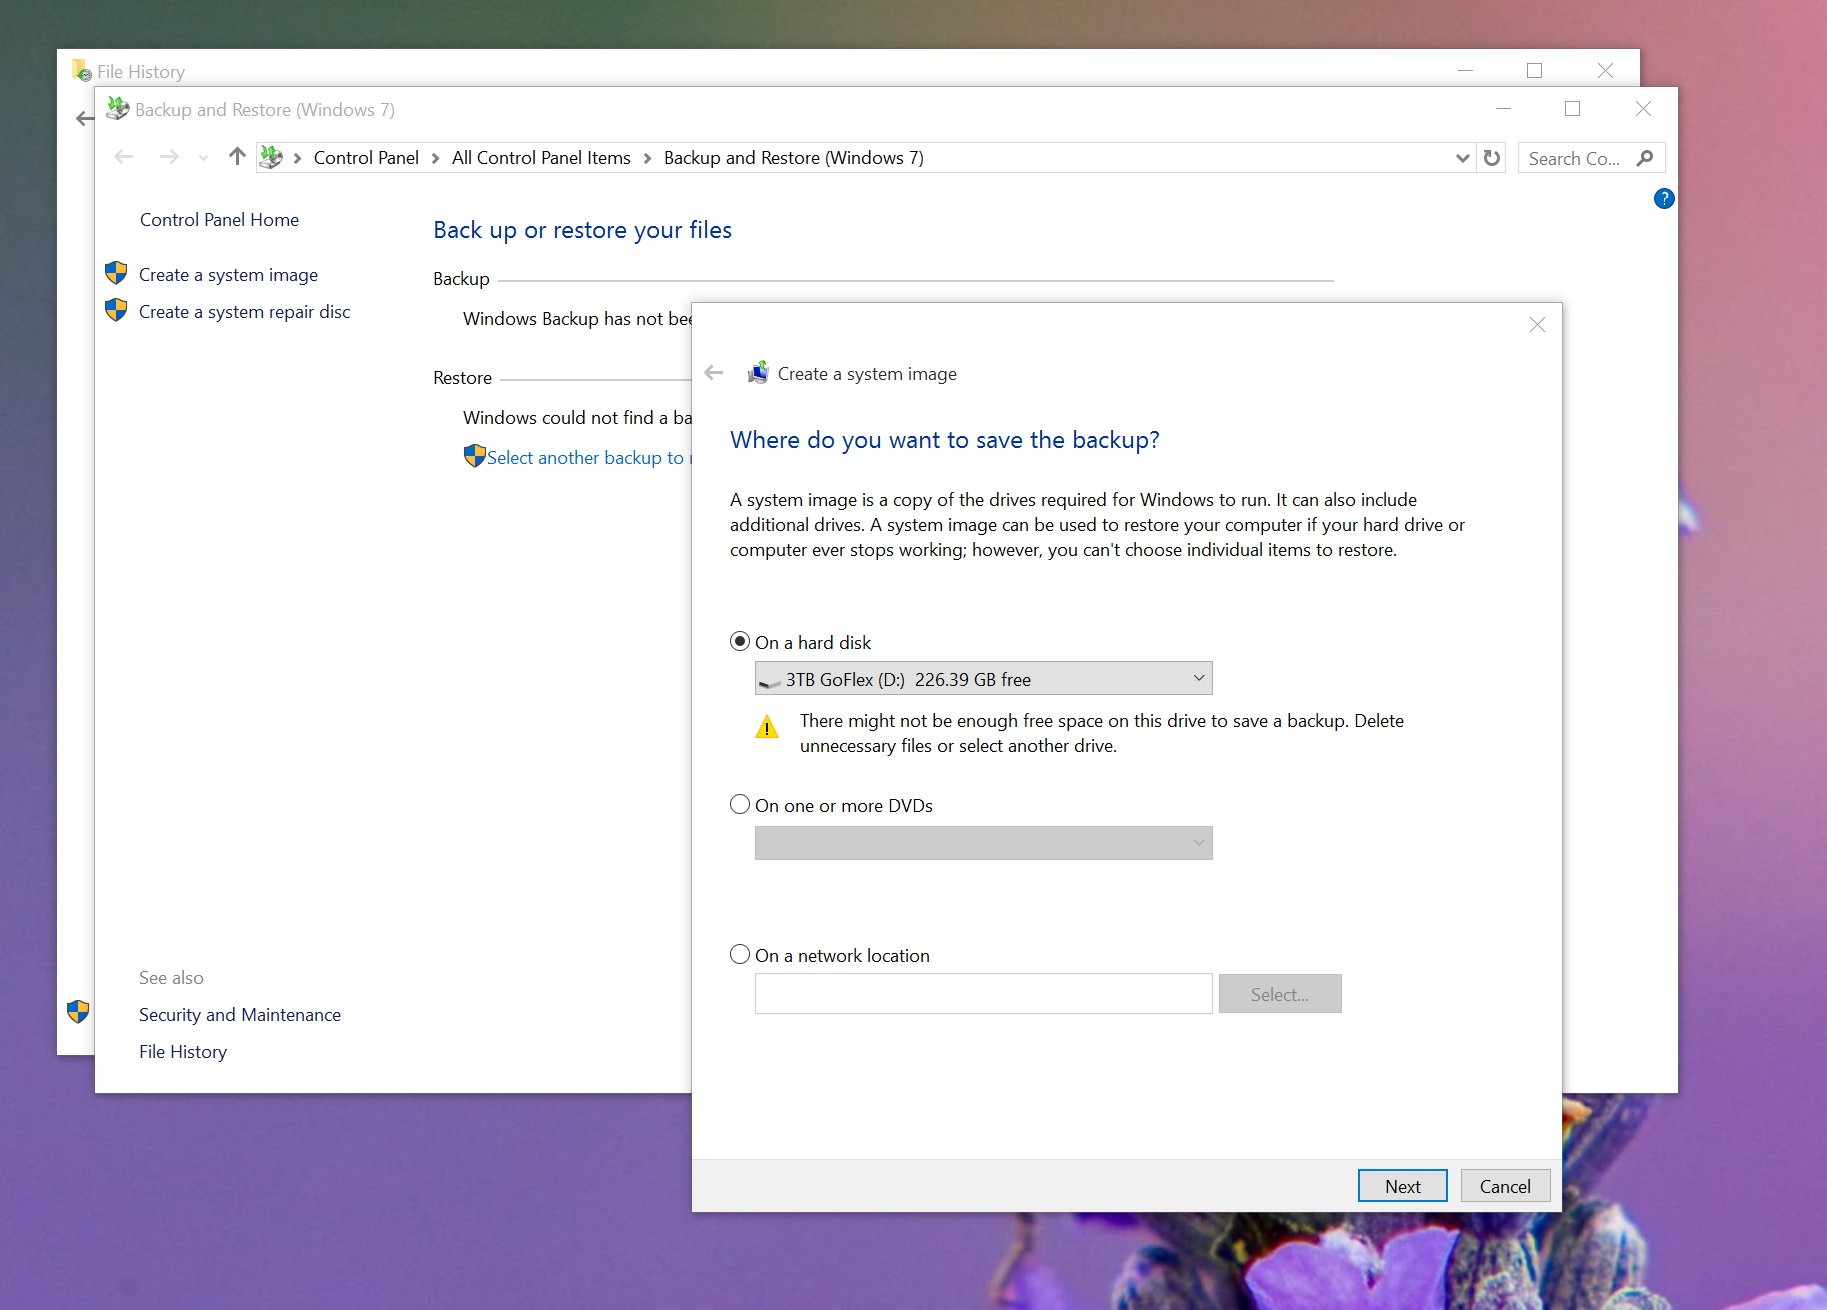
In case, you're planning to get a new computer, you will also want to make a copy of all your files to an external hard drive, which will make it much easier to move them to your new PC. Of course, you can always mount your System Image Backup and extract the files too.
Also, if you use OneDrive, you're pretty much all set, as you personal files already backed up in the cloud and ready to sync to any device you sign-in with your Microsoft account.
Getting ready to reset your computer to the factory default settings
Depending on the device you own, resetting your computer will be slightly different, as most computer companies provide their own recovery solution.
In the past, many computer manufacturers used to ship their PCs with the recovery discs, but later on, perhaps to save cost, most devices started bundled a recovery partition that users could use to reset their system back to the factory defaults.
Of course, users who have done a clean installation of the operating system are likely not to be able to use the recovery partition for obvious reasons.
In the case of Microsoft, technically you should be able to use the recovery option to remove everything and reinstall Windows 8.1, as it's the most secure way the operating system offers to reset your Surface and get it ready for sale.
However, many users will receive a message about missing required system files, and users will be prompted you to provide the Windows installation files to perform the task.
If you find yourself in this situation, you'll need to download the installation media. You can go to this Microsoft support web page to download the recovery image for your Surface RT, Surface 2, Surface 3, Surface Pro, Surface Pro 2, and Surface Pro 3.
As I mentioned previously most computer manufacturers have their own recovery strategy and for on each version of Windows, as such in the next section I will list some resources you can use to reset your system to the factory default settings for different brands and versions of Windows.

Deleting all your personal files and reinstalling Windows
After creating a full backup, and everything is ready, now it's the time to reset your device to the factory defaults.
If you have a branded computer, you can use the following resources to wipe your system and reinstall the operating system, programs, and settings that came originally with the device.
- Lenovo: Windows7, 8, 8.1, Windows 10
- Dell: Windows 7, 8.x, and Windows 10
- HP: Windows7, Windows 8.x, Windows 10
- Asus: Windows 8.x, Windows 10
- Toshiba: Windows 7, Widows 8.x, Windows 10
- Acer: Windows 7, Windows 8.x, Windows 10
- Samsung: Windows 7, Windows 8
Note: If you're using your PC manufacturer recovery solution, remember to choose the option to delete your programs and personal files during the recovery process. Also, if your computer brand doesn't appear on this list, you can also go to your PC manufacturer's support web page to find the specific instructions.
Although, companies used to have different reset solutions with Windows 10 things are changing. Now, Microsoft has made a lot of improvements on its recovery feature that allows users to reset safely their computers without needing to supply the installation media, and the process to accomplish this task is virtually the same on most computers running the latest version of the operating system.
If you have a custom installation of Windows, you'll have to perform a manual reset, and depending on the operating system the procedure will be different. Below, I will outline the steps to remove everything in your device and reinstalling different versions of Windows. You can also use the same steps to reset your Surface tablet running Windows 8.1 or Windows 10.
Removing everything and reinstalling Windows 7
If you're running the good old Windows 7, and you don't have the recovery discs or partition, you will need a bootable media with the installation files, and then follow the steps below:
1- Insert the bootable media and make sure your computer can boot from it.
2- Boot your computer with installation media to begin with the setup.
3- In the wizard, click Next, Install Now, choose the correct version of Windows, and accept the licensing agreement.
4- Click the Custom (advanced) option to continue.
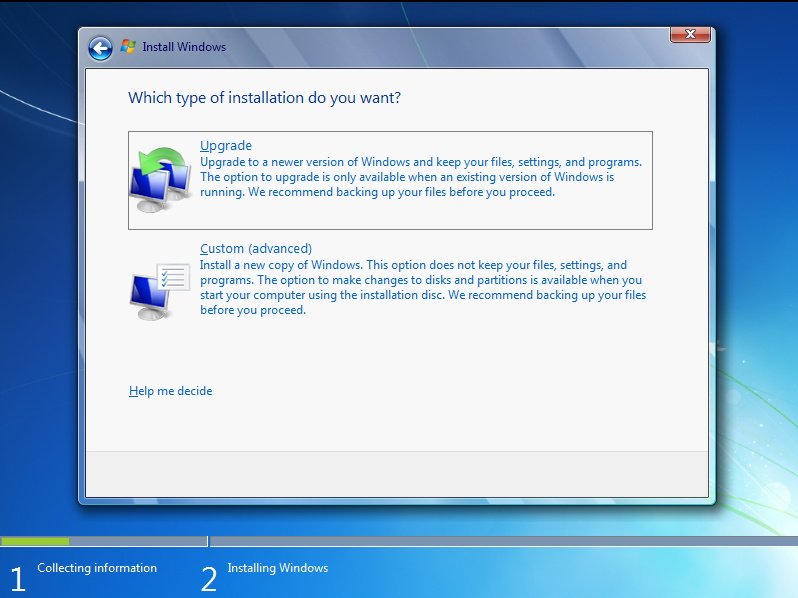
5- In the next page, click Drive options (advanced) to bring up the drive tools.
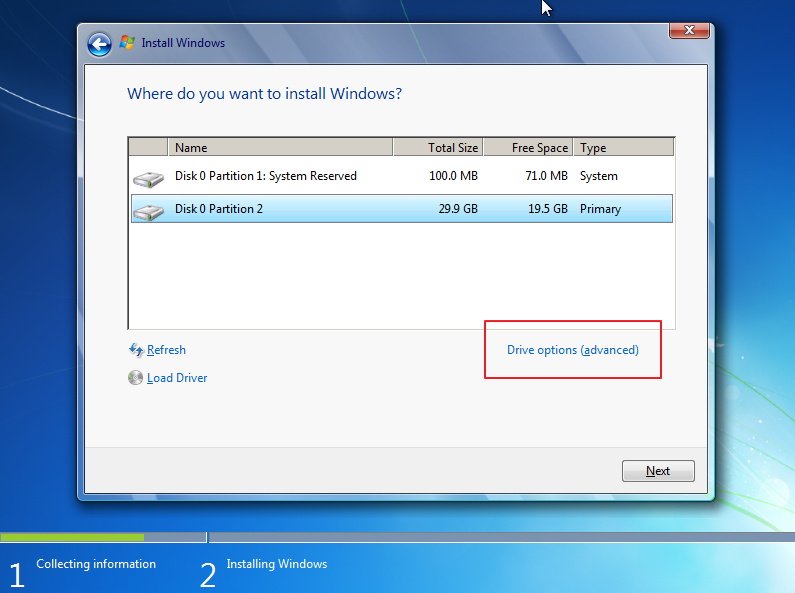
6- Select a partition, and click Delete and OK. You want to do the same for all other partitions until you only see one huge unallocated disk.
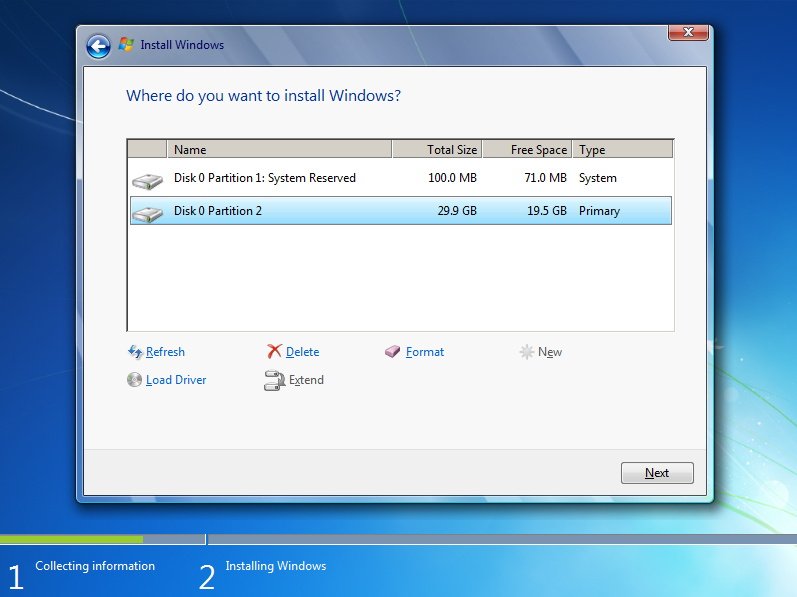
7- Select the only drive available and click New. Use the full disk size and click Apply and OK.
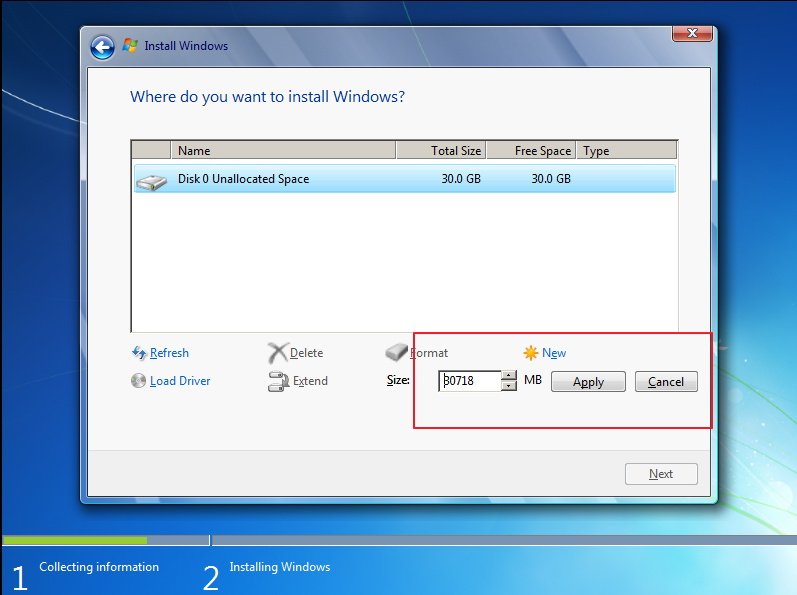
8- Now the wizard has created the necessary partitions to install Windows correctly. Click Next to begin the installation of Windows 7.
Once the reset completes, you will get into the out-of-box experience for Windows 7. At this point, you can simply power off the device and package it nicely for selling.
Important: If you don't complete the out-of-box experience, remember to supply the product key when you sell your computer as necessary.
Removing everything and reinstalling Windows 8.x
If your device runs Windows 8.x do the follow these steps:
1- Use the Windows key + I keyboard shortcut to bring the flyout menu and click Change PC settings.
2- Navigate to Update & security, and then go to Recovery.
3- Click on Remove everything and reinstall Windows. Remember that you may need to connect a bootable media with the installation file.
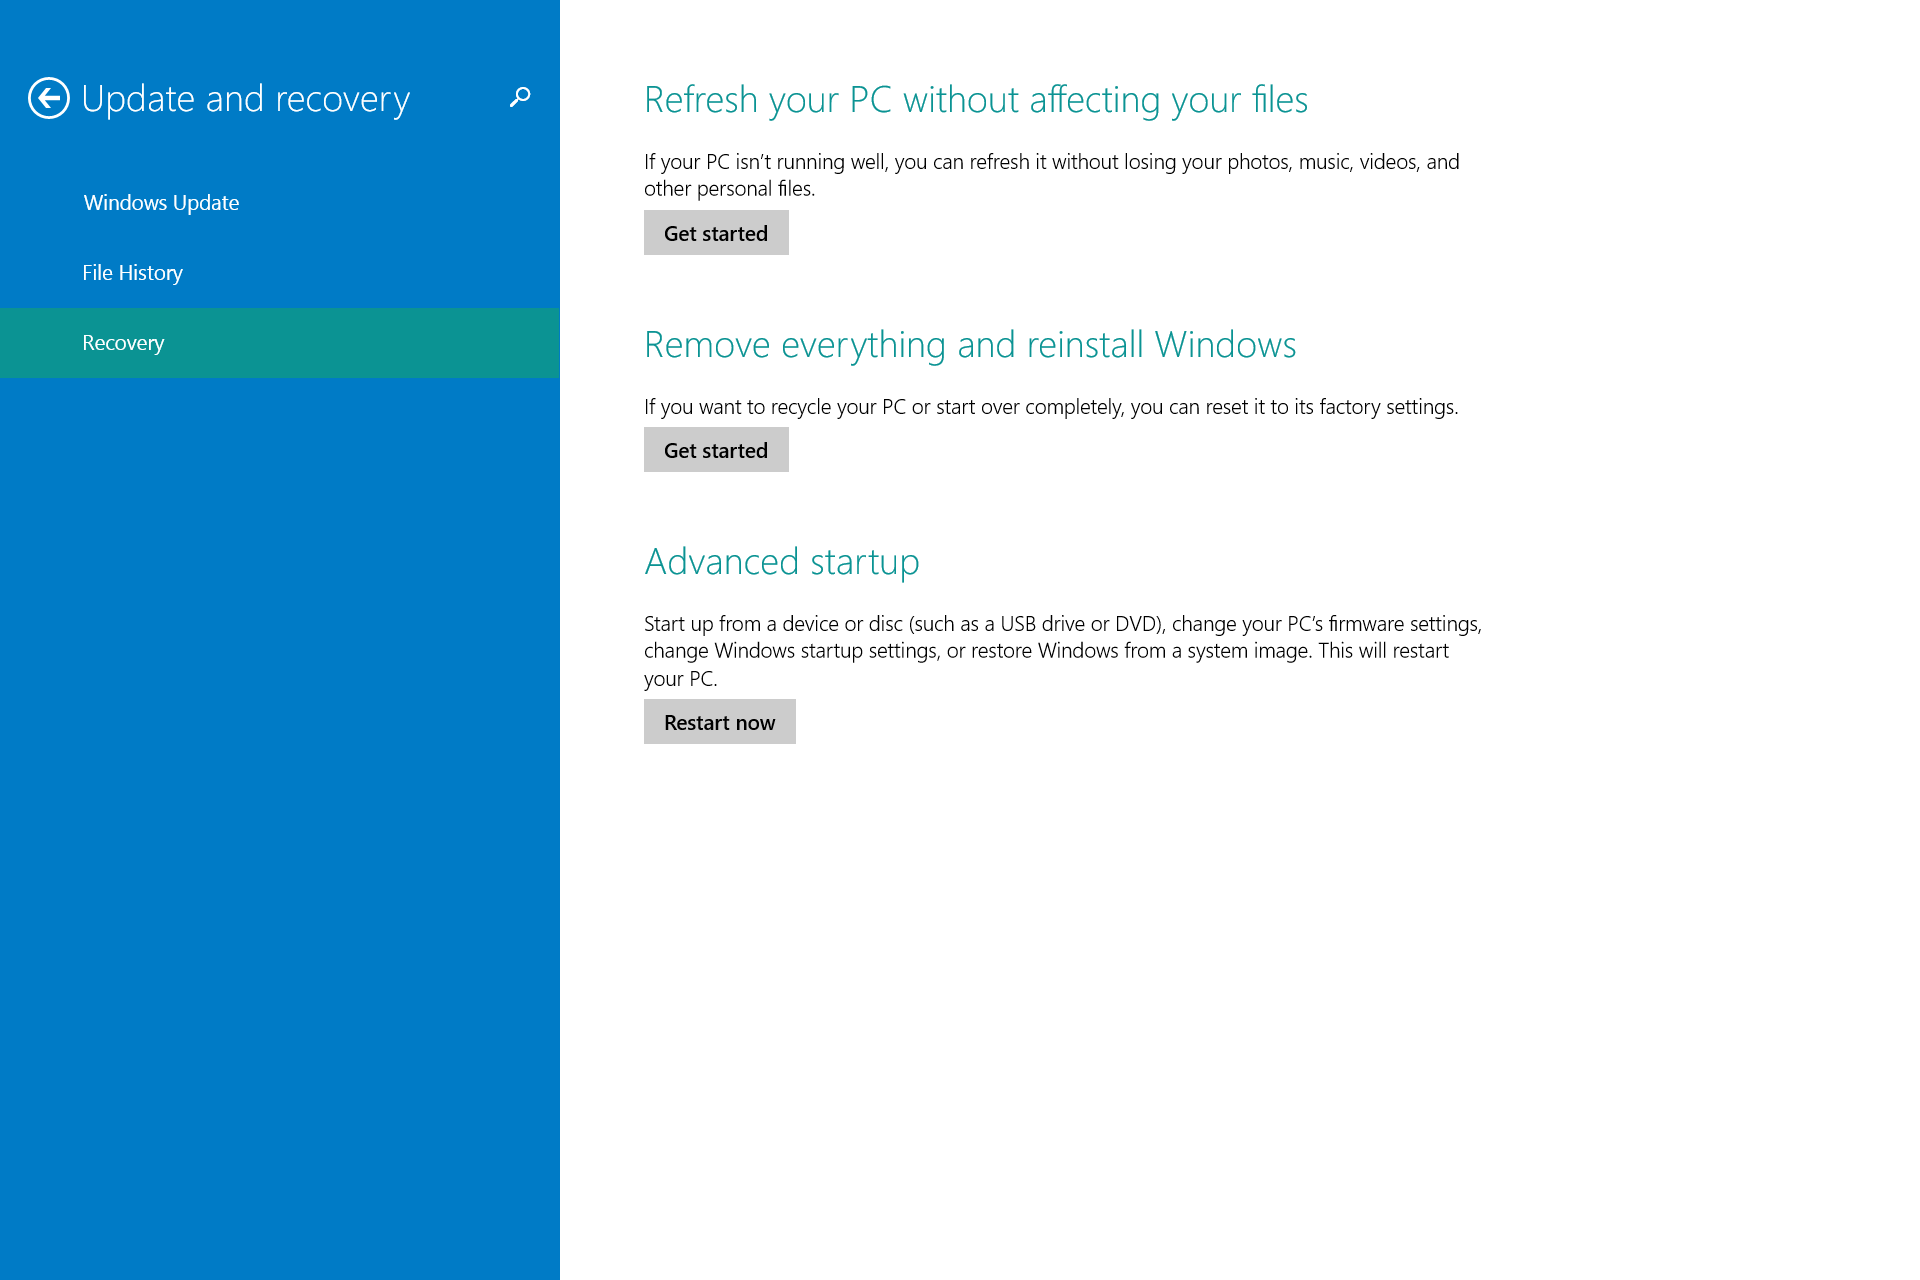
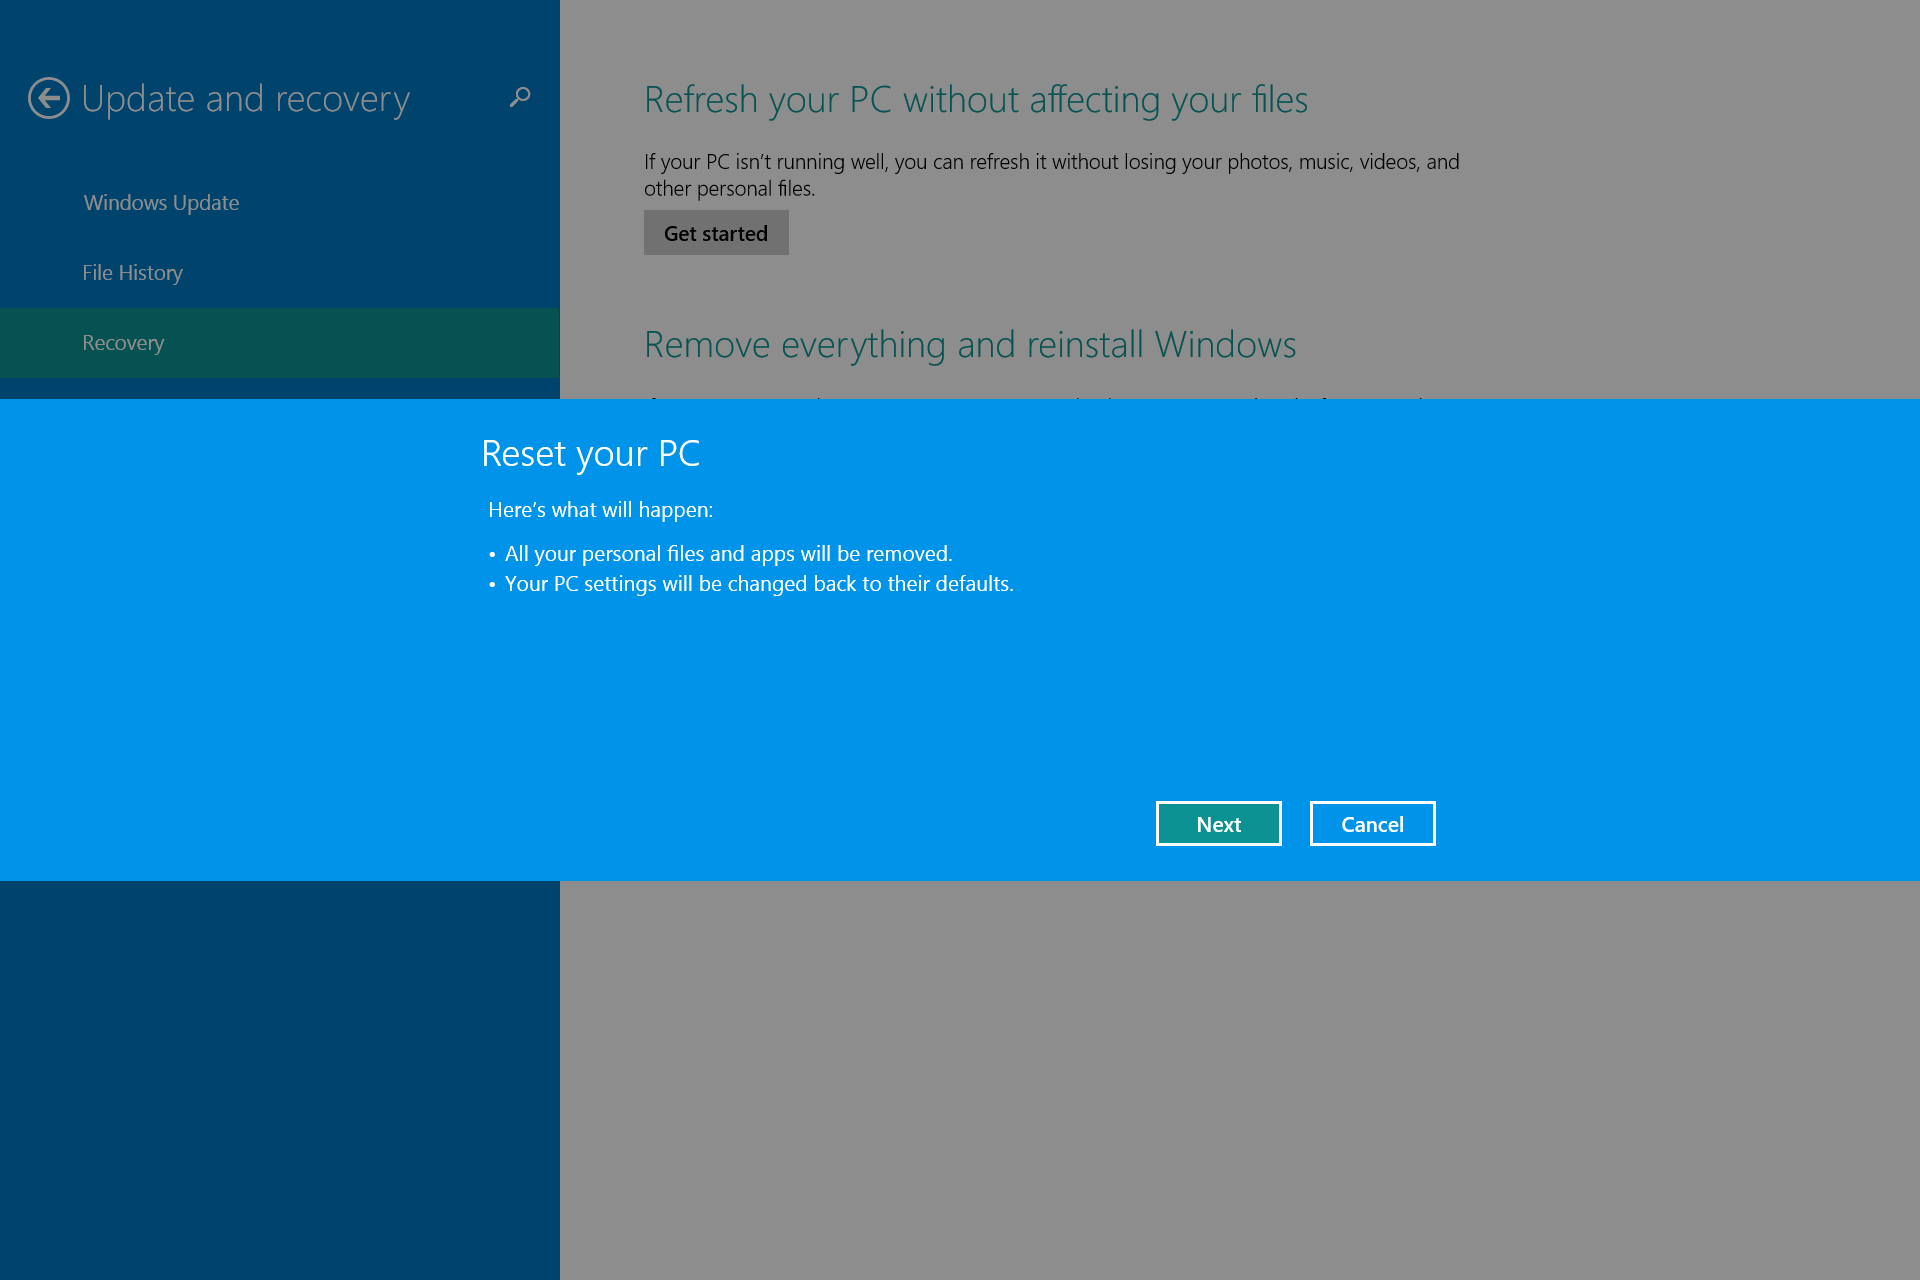
4- On "Reset your PC", click Next.
5- Next, you're getting rid of your computer, as such you want to use the Fully clean the drive option. This is the option that Microsoft recommends to recycle a PC and remember that it could take a few hours for the process to complete.
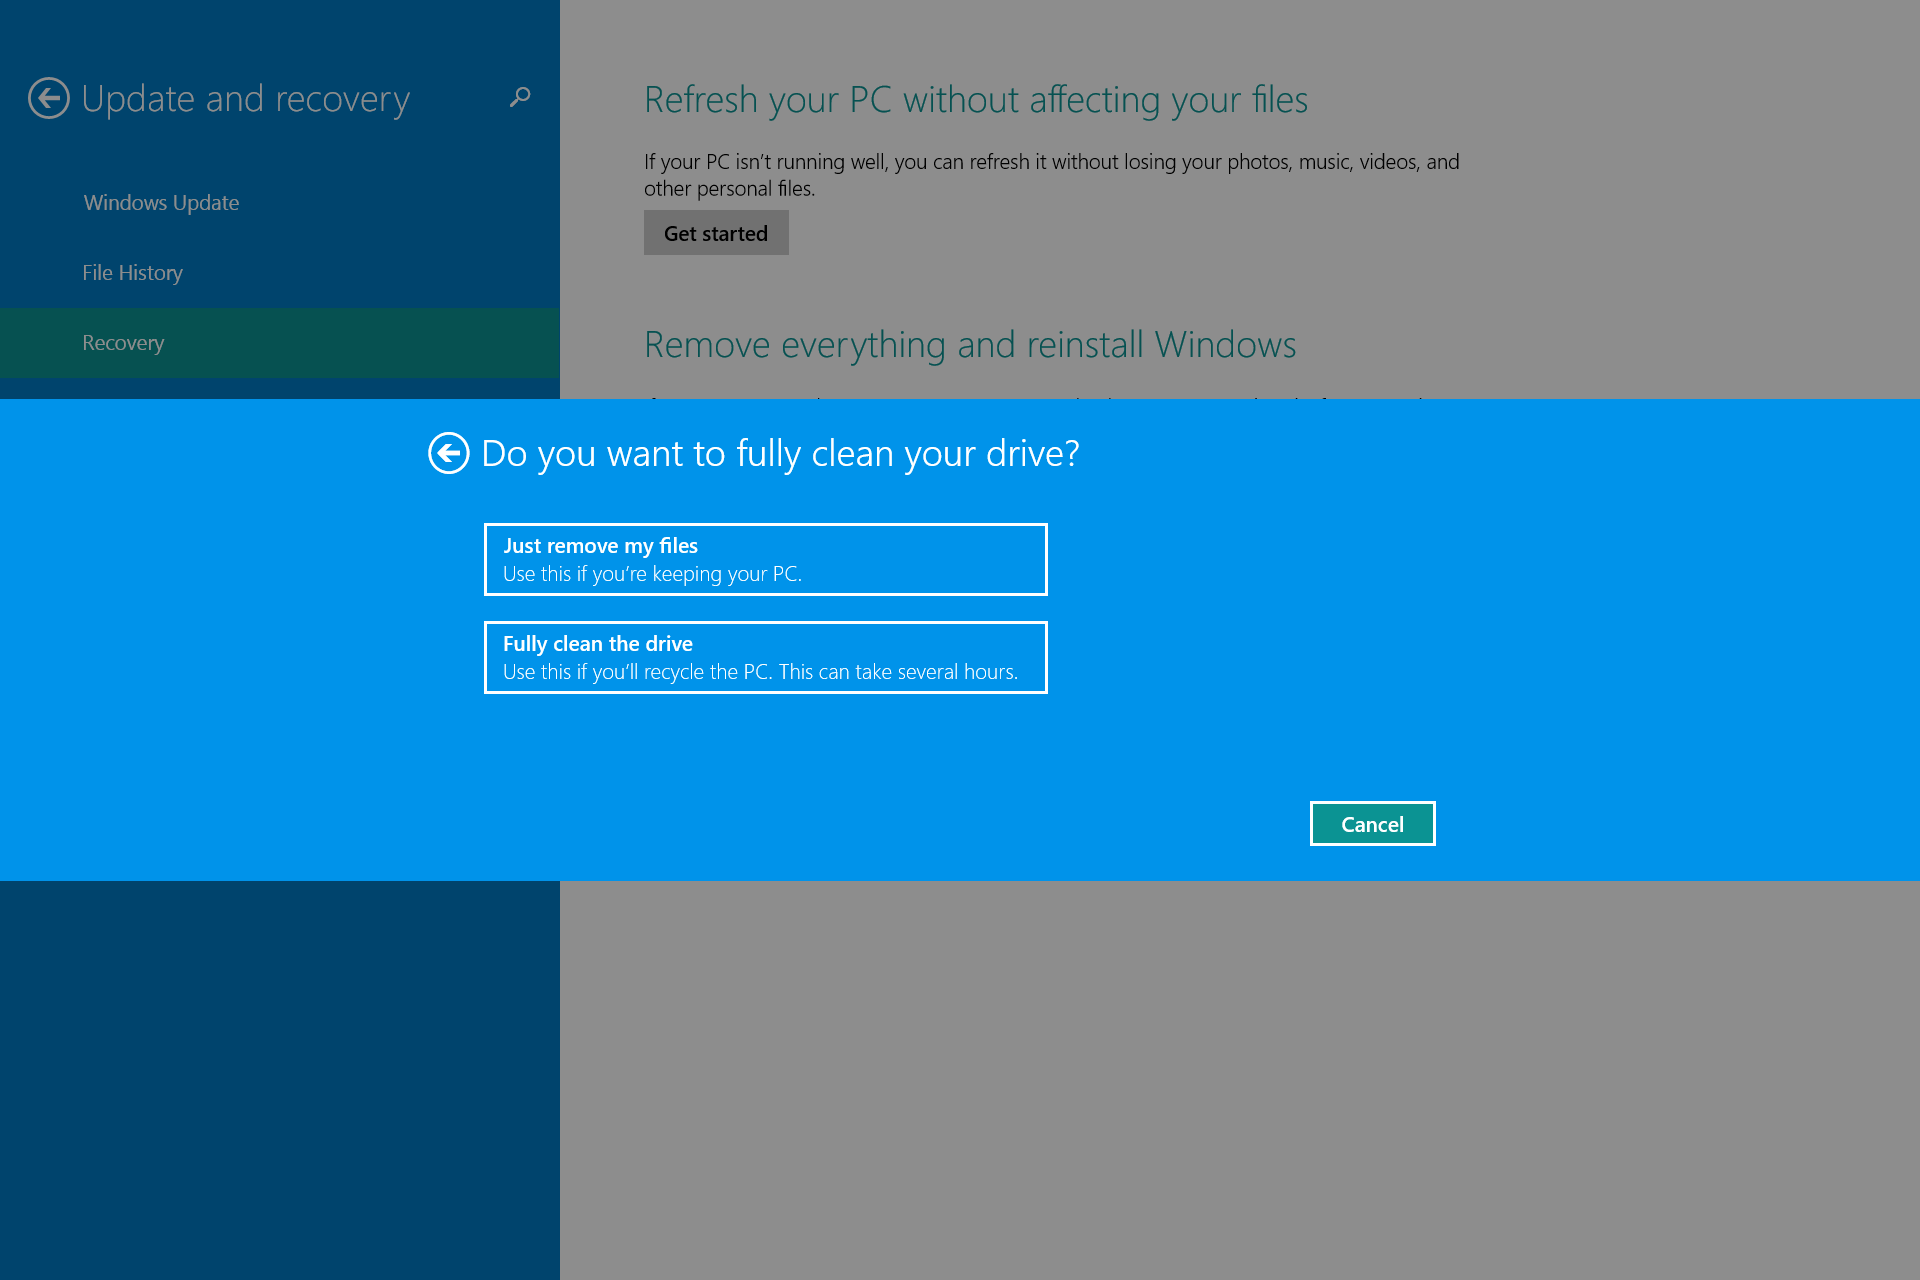
6- Next, click Reset to begin the process.
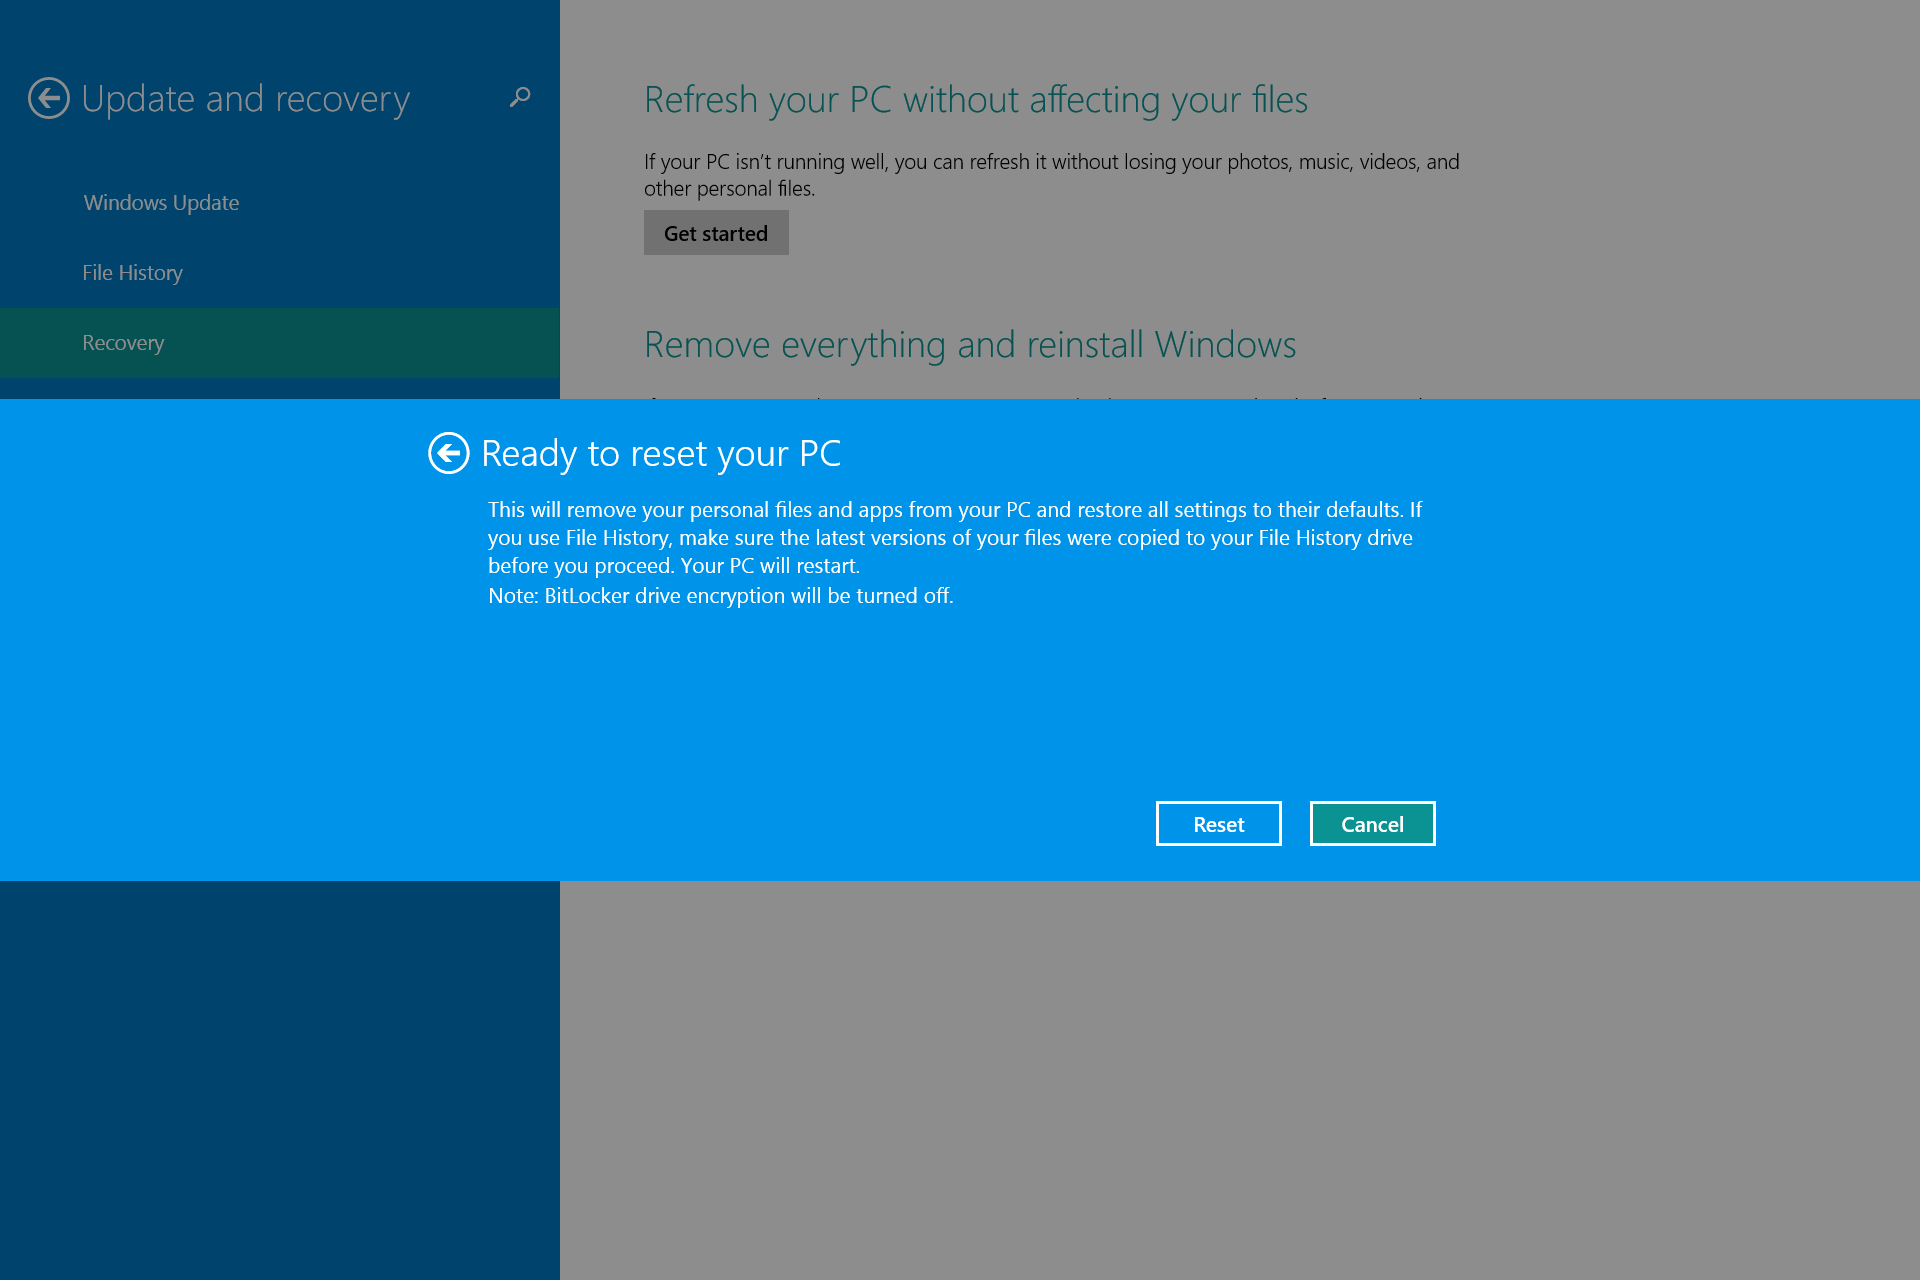
Your computer will reboot and the reset process will begin.
Once the reset completes, you will get into the out-of-box experience for Windows 8.x. At this point, you can simply power off the device and package it nicely for selling.
Remove everything and reinstall Windows 10
In you have upgraded your device to Windows 10, the steps to complete the reset should be easier, as Microsoft has made various advances in the operating system, and users no longer need to supply the Windows 10 installation files.
Use the following steps to reset your device running Windows 10:
1- Open the Settings app using the Windows + I keyboard shortcut.
2- Navigate to Update & security, and go to Recovery.
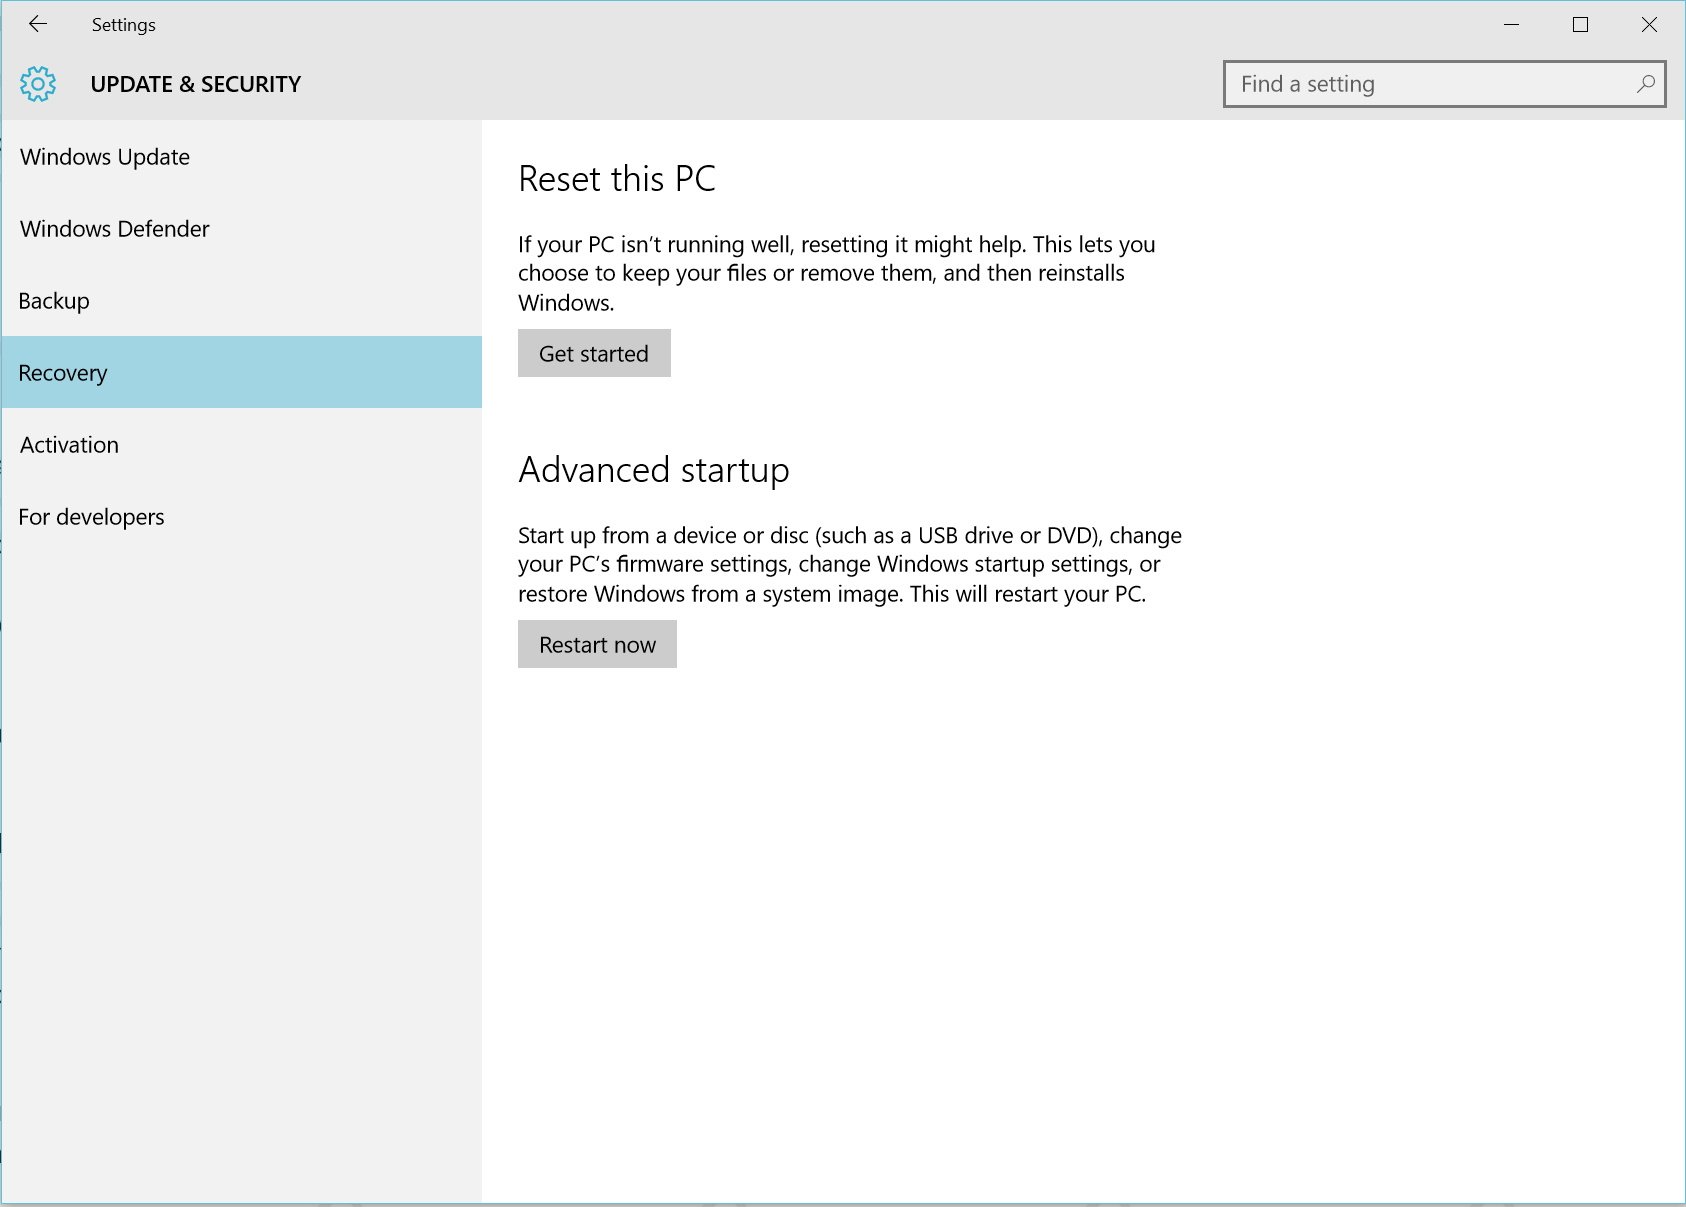
3- On "Reset this PC", click the Get started button.
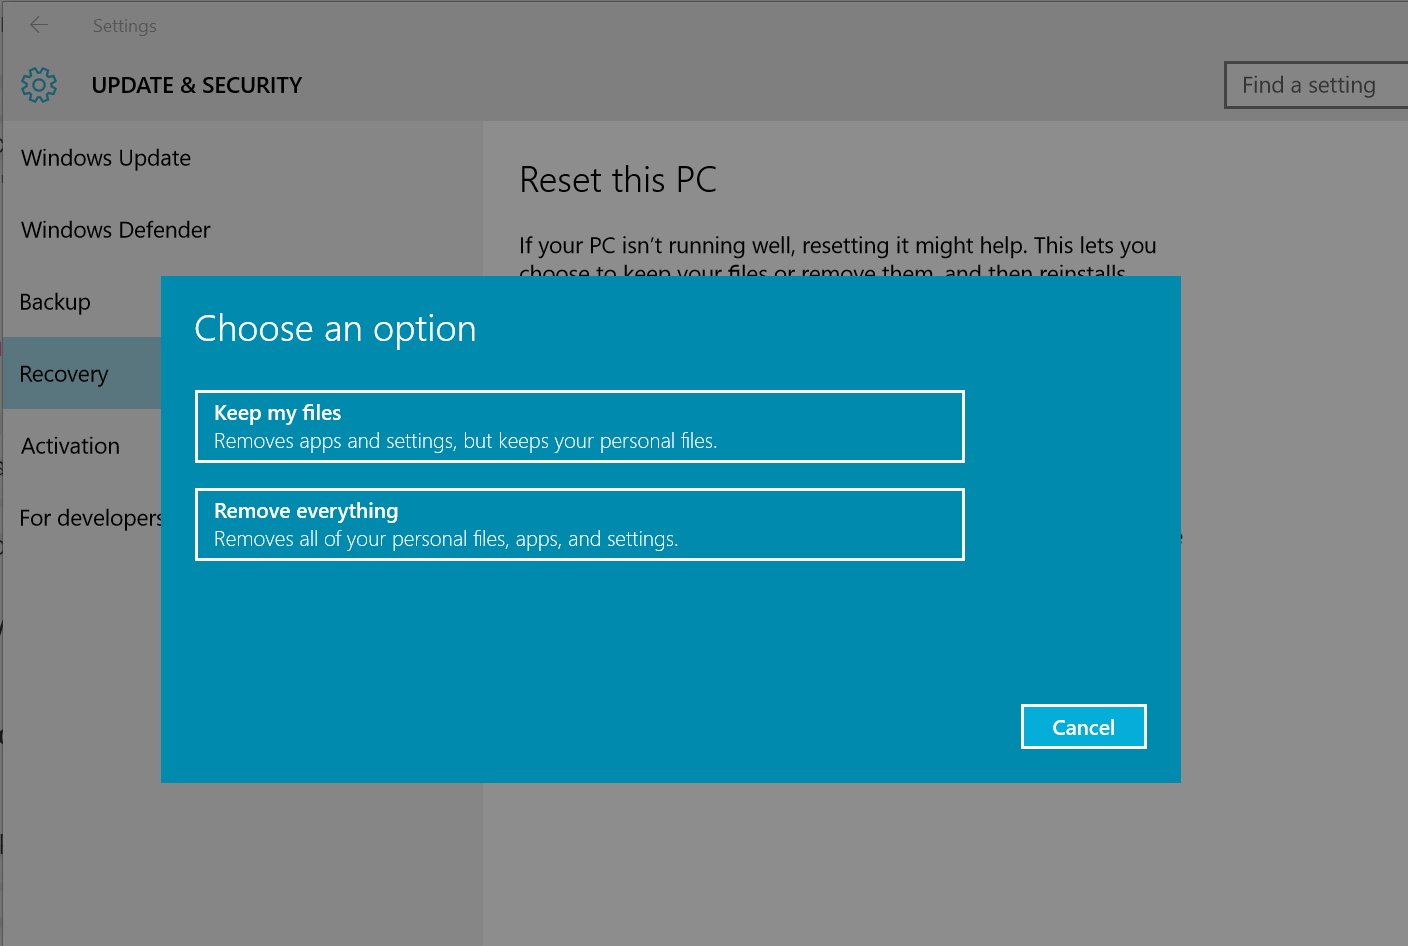
4- Next, click on "Remove everything" to ensure all of your files, apps, and settings will be deleted.
5- Click Remove files and clean drive.
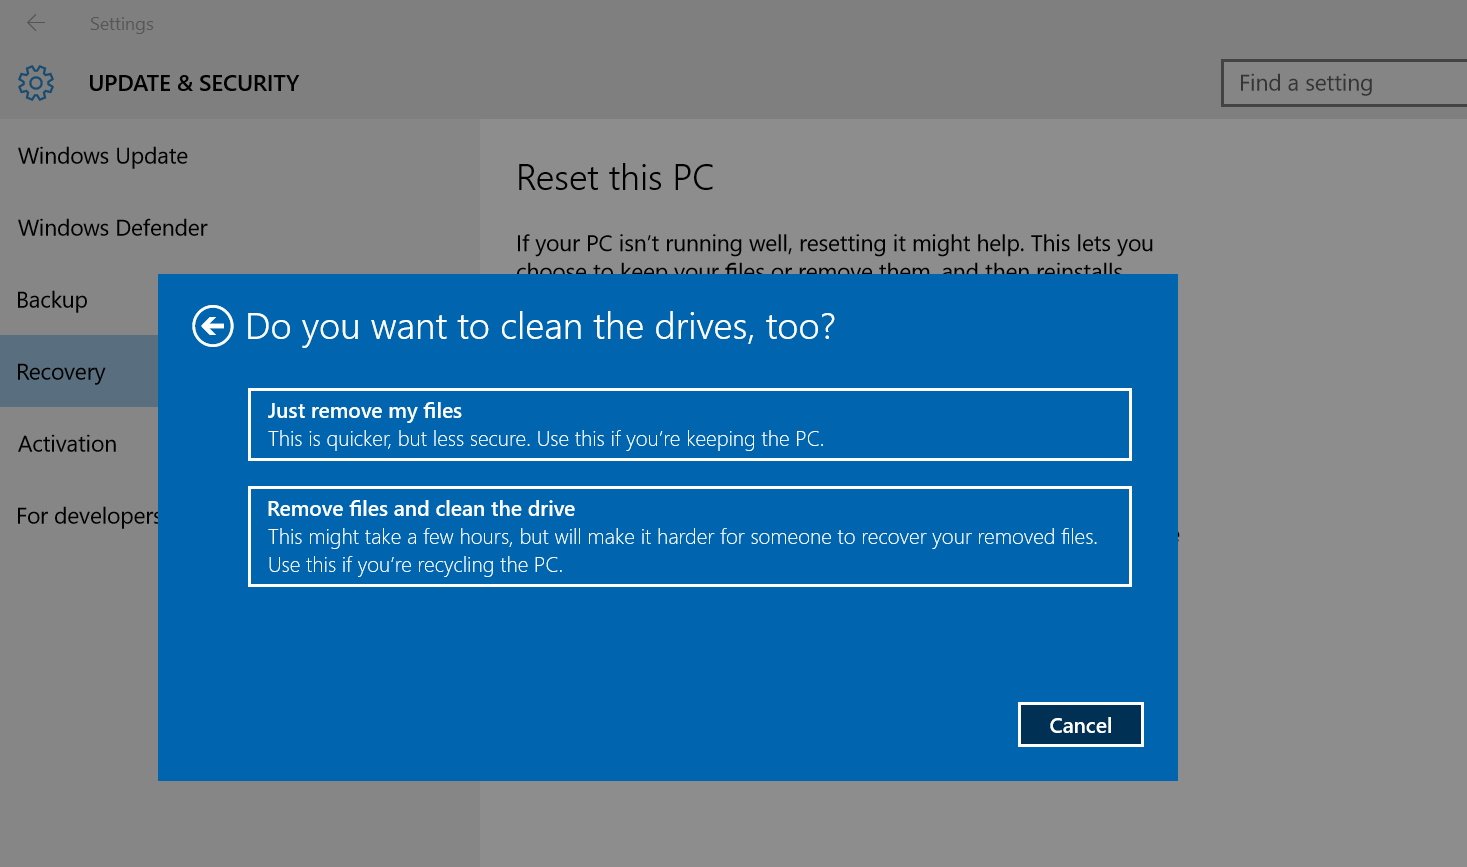
6- Finally, click the Reset button to begin the process. Your computer will now reboot to complete the reset process.
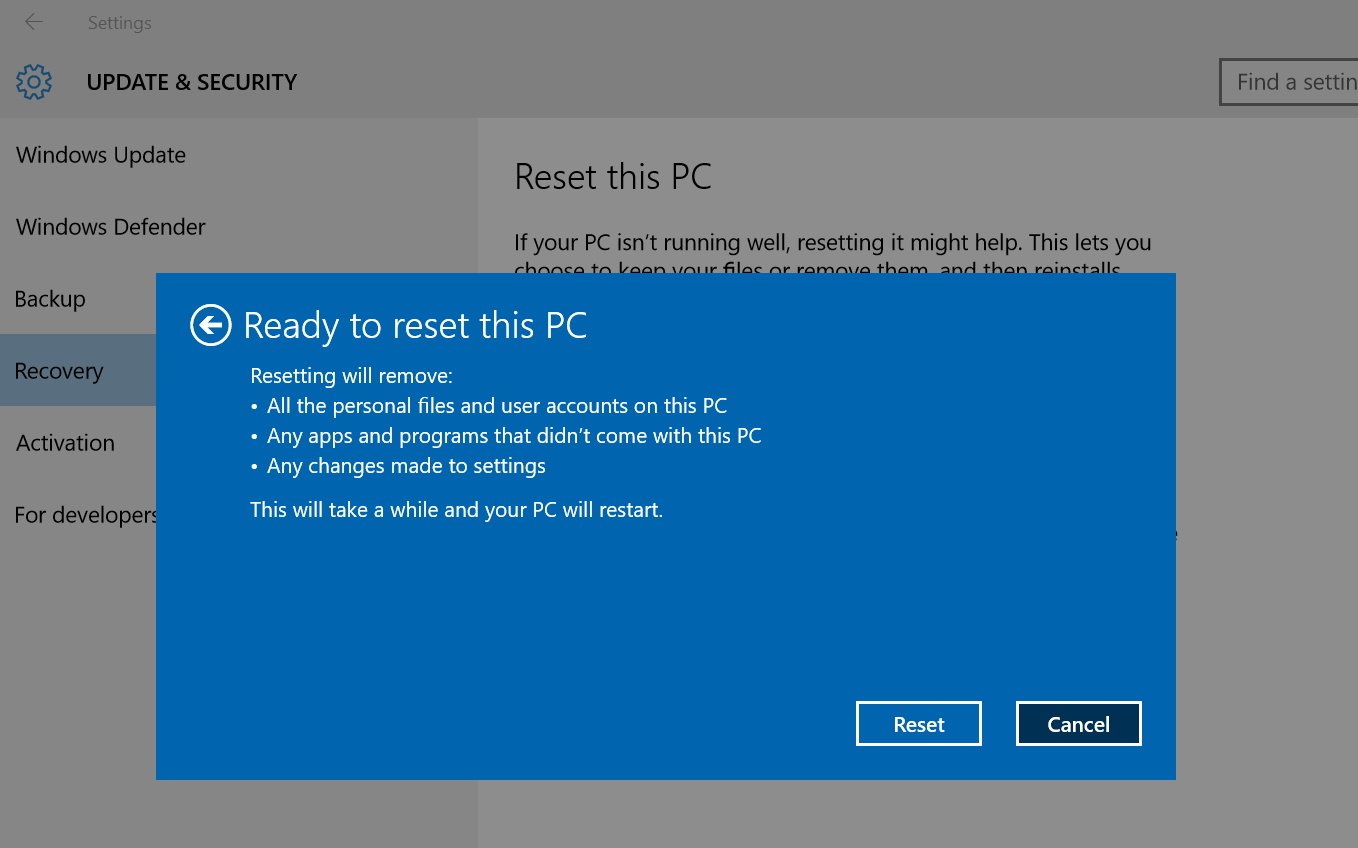
Once the reset completes, you will get into the out-of-box experience for Windows 10. At this point, you can simply power off the device and package it nicely for selling.

Selling your Surface, laptop, or desktop
So far, you have created a full backup, you copied all your personal files to a secure location, and you have securely reset your device to the factory defaults. Next, it's time to sell.
Before you put your device up for sale, you need to figure out how much cash can you make out of it. The price will vary per device, demand, and condition.
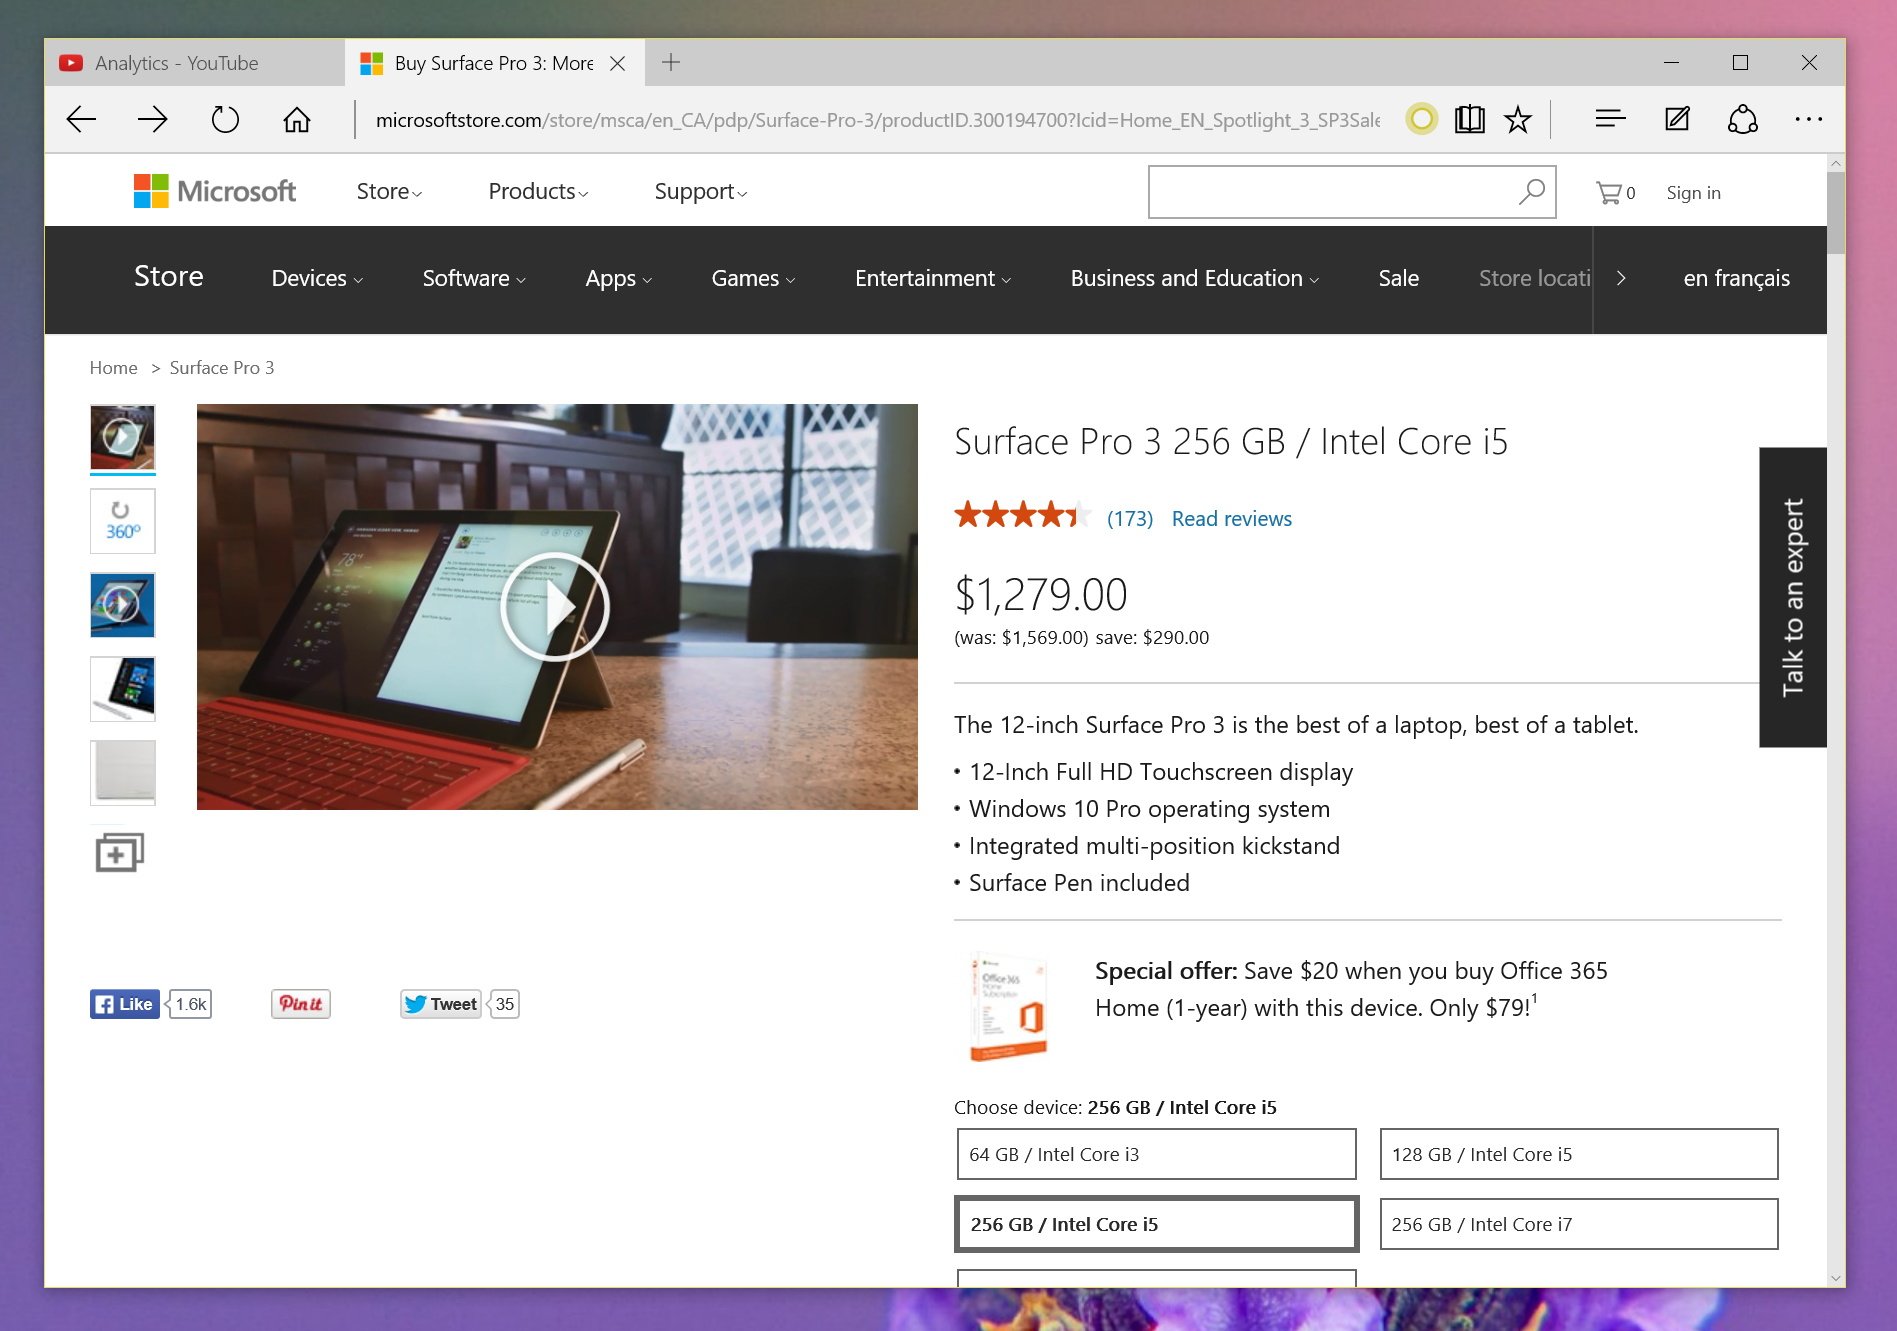
Research, you should be the first thing you want to do. You could go to the online Microsoft Store, Best Buy, http://Amazon.com, and other online retailers, to see the current price for of the product when it's brand new.
Then, you can go to http://Amazon.com and eBay to see the price of the same or similar product in used condition. Pay attention to the condition of the product and if they're offering free shipping as well.
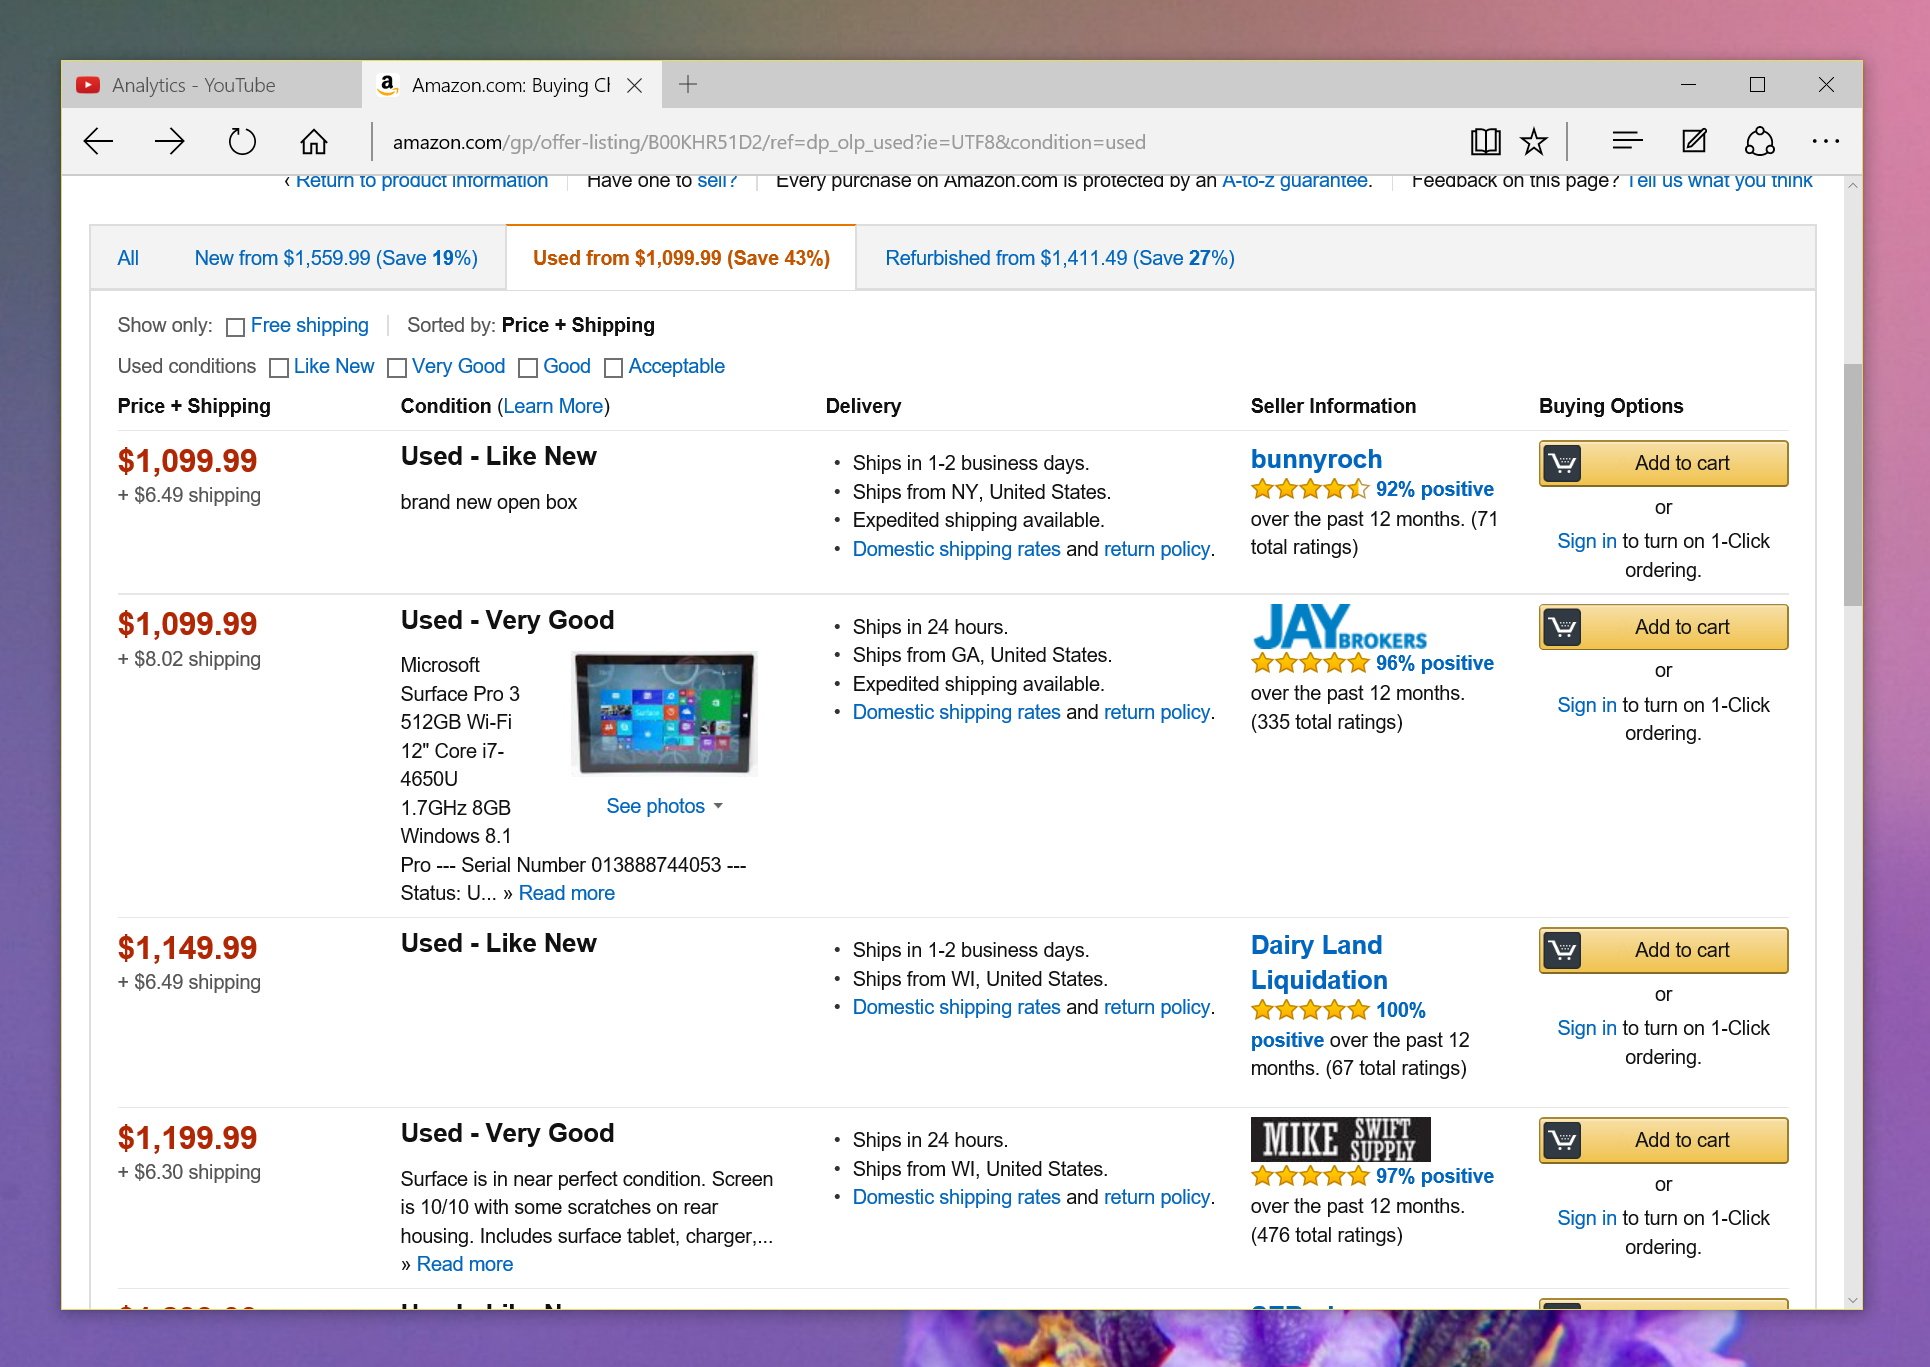
At this point, you will have a pretty good idea on the price to sell your device. Once you have figured out the pricing, you'll need to decide where you want to sell your Surface, laptop, desktop, or anything else in between.
As always, most people will end up with one of these two: Craigslist or eBay. But of course, there are other services you could use, such as NextWorth.com, GdgetSalvation.com, and others.
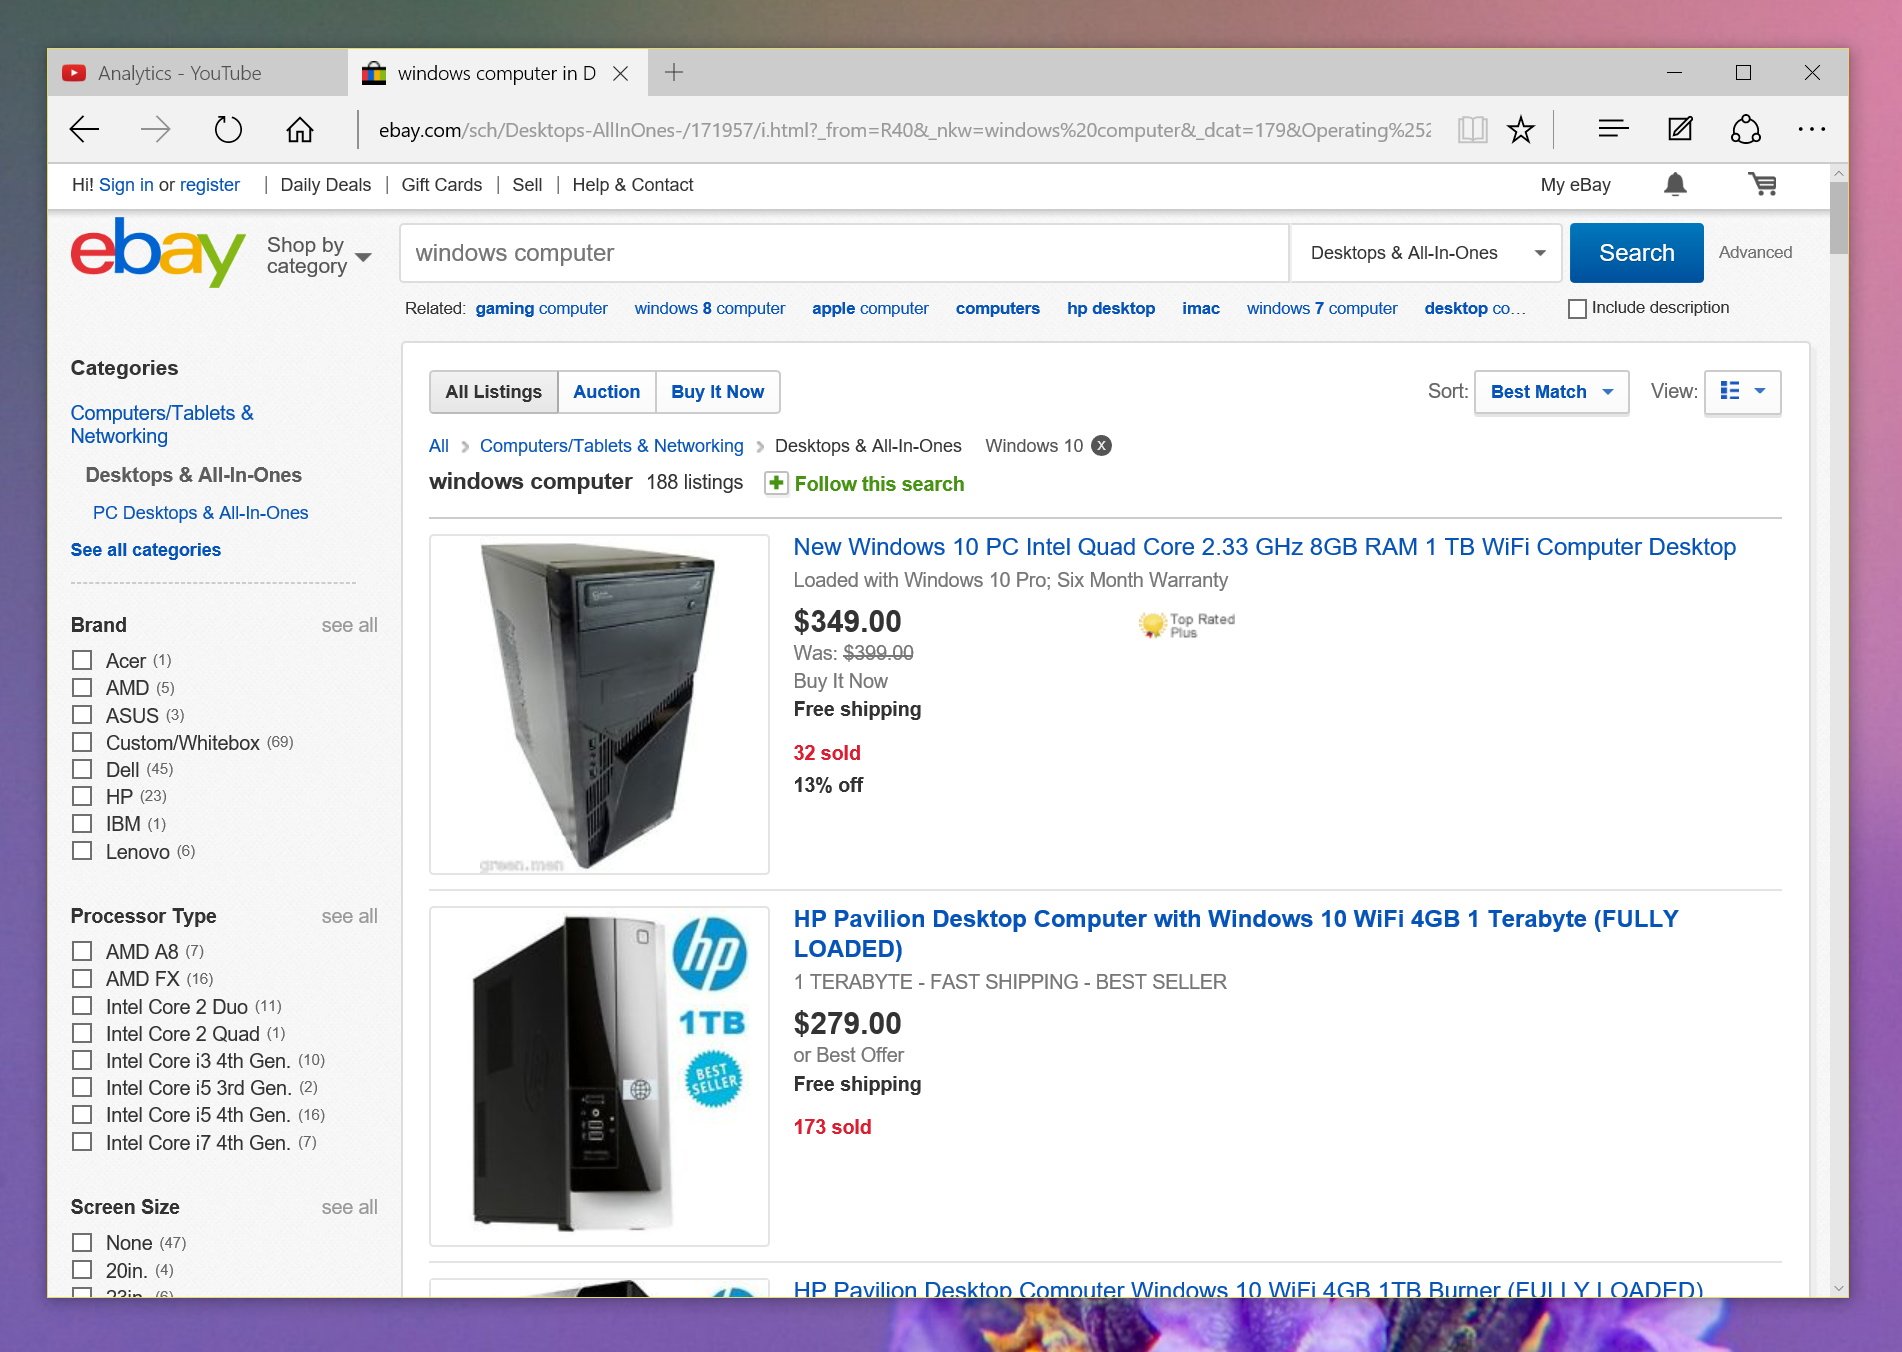
Also, remember that you can try selling your tablet, laptop, or computer to someone you know, you might not get the same amount of money, but it could save you a lot of online hassles.
Depending on the service you use to sell your computer, always make sure to compose a well-written description of the product with all the details of its condition and be as clear as possible to avoid misunderstanding.
When creating the listing, upload pictures that are clear and reflect the actual condition of the device, and don't forget to include in the images the accessories and extras you will be shipping with the product.
Use a headline that makes sense and describes the product you are selling, offer free shipping, and don't forget to use proper packaging to send the item to the new owner to avoid damage while shipping.
If you use eBay, it's a good practice to ship the item with tracking number and signature required to ensure the device gets into the hands of the proper person.
Wrapping things up
With a great new operating system and PC makers now offering new and elegant computing devices, certainly many people will be considering to upgrade their old systems. And with today's guide, you will be able to make some money out of your old computer, which you can use toward the purchase of your new Surface Pro 4, Surface Book, Dell XPS 12, or any other device you might choose.
Also, keep in mind that this guide will help you to get almost any device ready for sale. Just remember always to make a backup first, reset the device to the factory default settings deleting your personal files, and to make a decision on how to sell your device.
If your computer is running Windows 7 or Windows 8.1, you can always upgrade to the latest version of Microsoft's operating system, and sell it as a Windows 10 device.
Finally, if you own a Surface, there is a small chance that you have the tablet registered under your name, as such make sure to remove the registration before selling it. Here are more details on how to sell your Surface tablet.
Do you usually sell your old gadgets? Let us know in comments below.
Mauro Huculak has been a Windows How-To Expert contributor for WindowsCentral.com for nearly a decade and has over 15 years of experience writing comprehensive guides. He also has an IT background and has achieved different professional certifications from Microsoft, Cisco, VMware, and CompTIA. He has been recognized as a Microsoft MVP for many years.

