How to get your Surface Pro 3 ready to sell in preparation for a Surface Pro 4
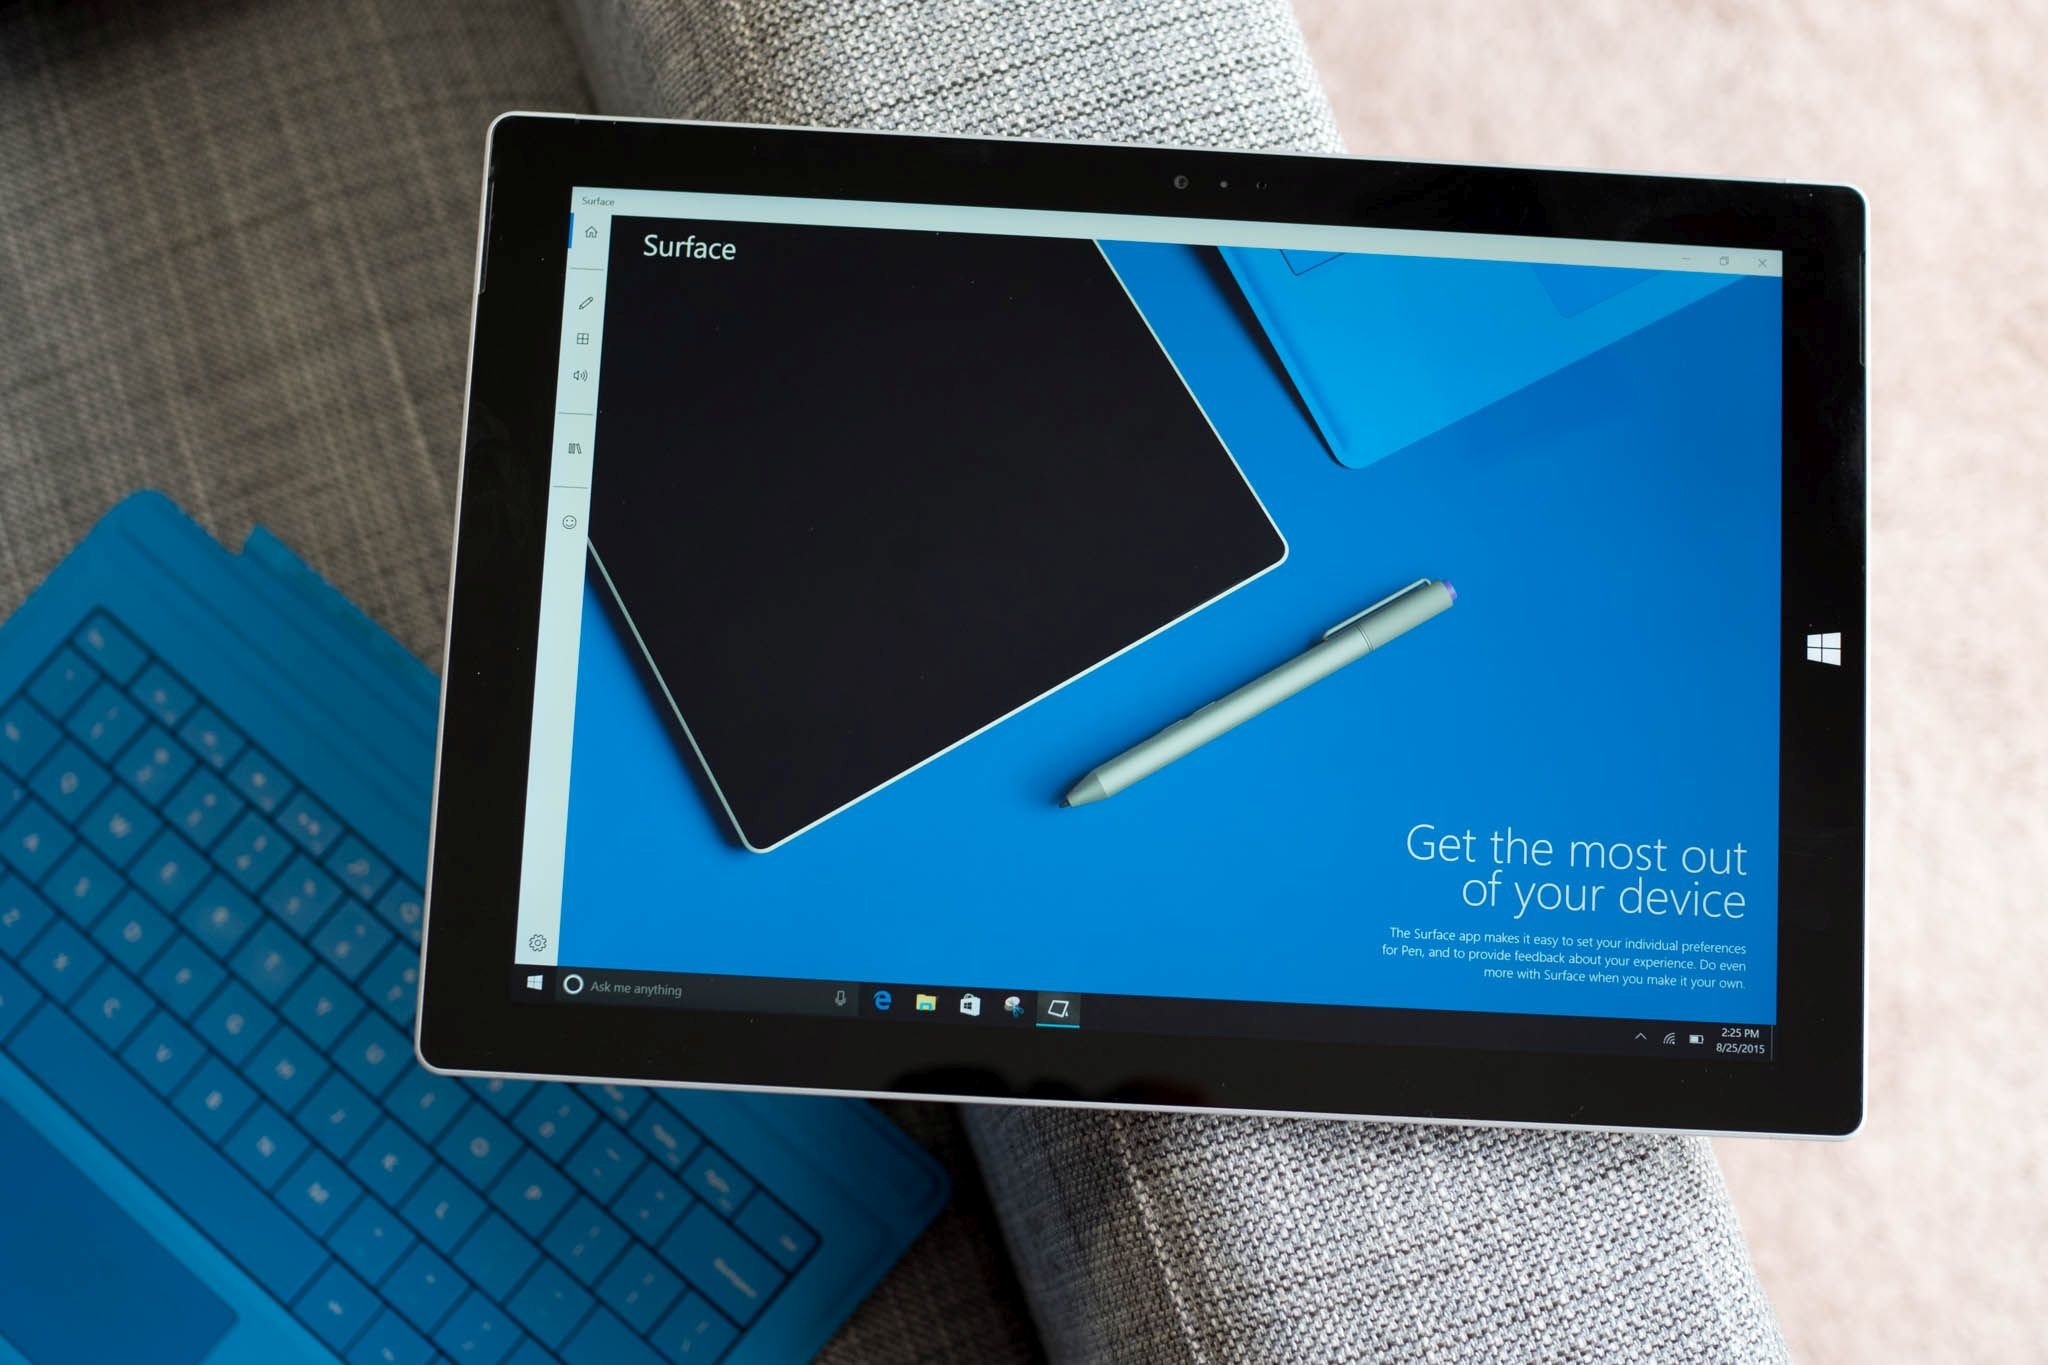
After a few tries, Microsoft hit the nail on the head with the Surface Pro 3. Today, the tablet that can replace your laptop is perhaps the best 2-in-1 device to experience Windows. Not only features a sleek design, but it's thinner and lighter than its predecessor. Also, the Surface Pro 3 is very powerful to tackle virtually any task, and you can easily connect to a 4K external monitor if you need more screen real estate.
Nonetheless, it has been over a year, since Microsoft launched the tablet to the market, which means that it's time for a refresh. While the company hasn't officially announced anything, it has been (unofficially) confirmed that Microsoft will be holding a big hardware event in October. According to the rumors, the software maker will be announcing a new flagship of Windows phones, including the Lumia 950 and Lumia 950 XL, the Microsoft Band 2, and more importantly the Surface Pro 4.
Also, according to rumors, this time around the company plans to launch a new 12-inch display, just like the Surface Pro 3, and a bigger 13- to 14-inch display version of the new tablet. This larger device should have a new name too, although currently it is not yet known. Finally, we're expecting the device to pack the new Intel's Skylake processor, possibly without fans, and with up to 16GB of RAM.
While it can be sentimentally a hard thing to do, now it's a great time to sell your Surface Pro 3. This earliness will get you the most money to buy a Surface Pro 4 when it launches later this year.
Today in this guide, we'll go through a set of steps to securely get your Surface Pro 3 ready for sale without giving away any personal information and to help get the most money so you can save up to buy a new Surface Pro 4.
What you need to do to sell your Surface Pro 3 properly
Backing things up!
As always, before modifying anything in your system, you want to create a full system image backup of your tablet. If something were to go wrong during the process, you always have a way to go back and start over.
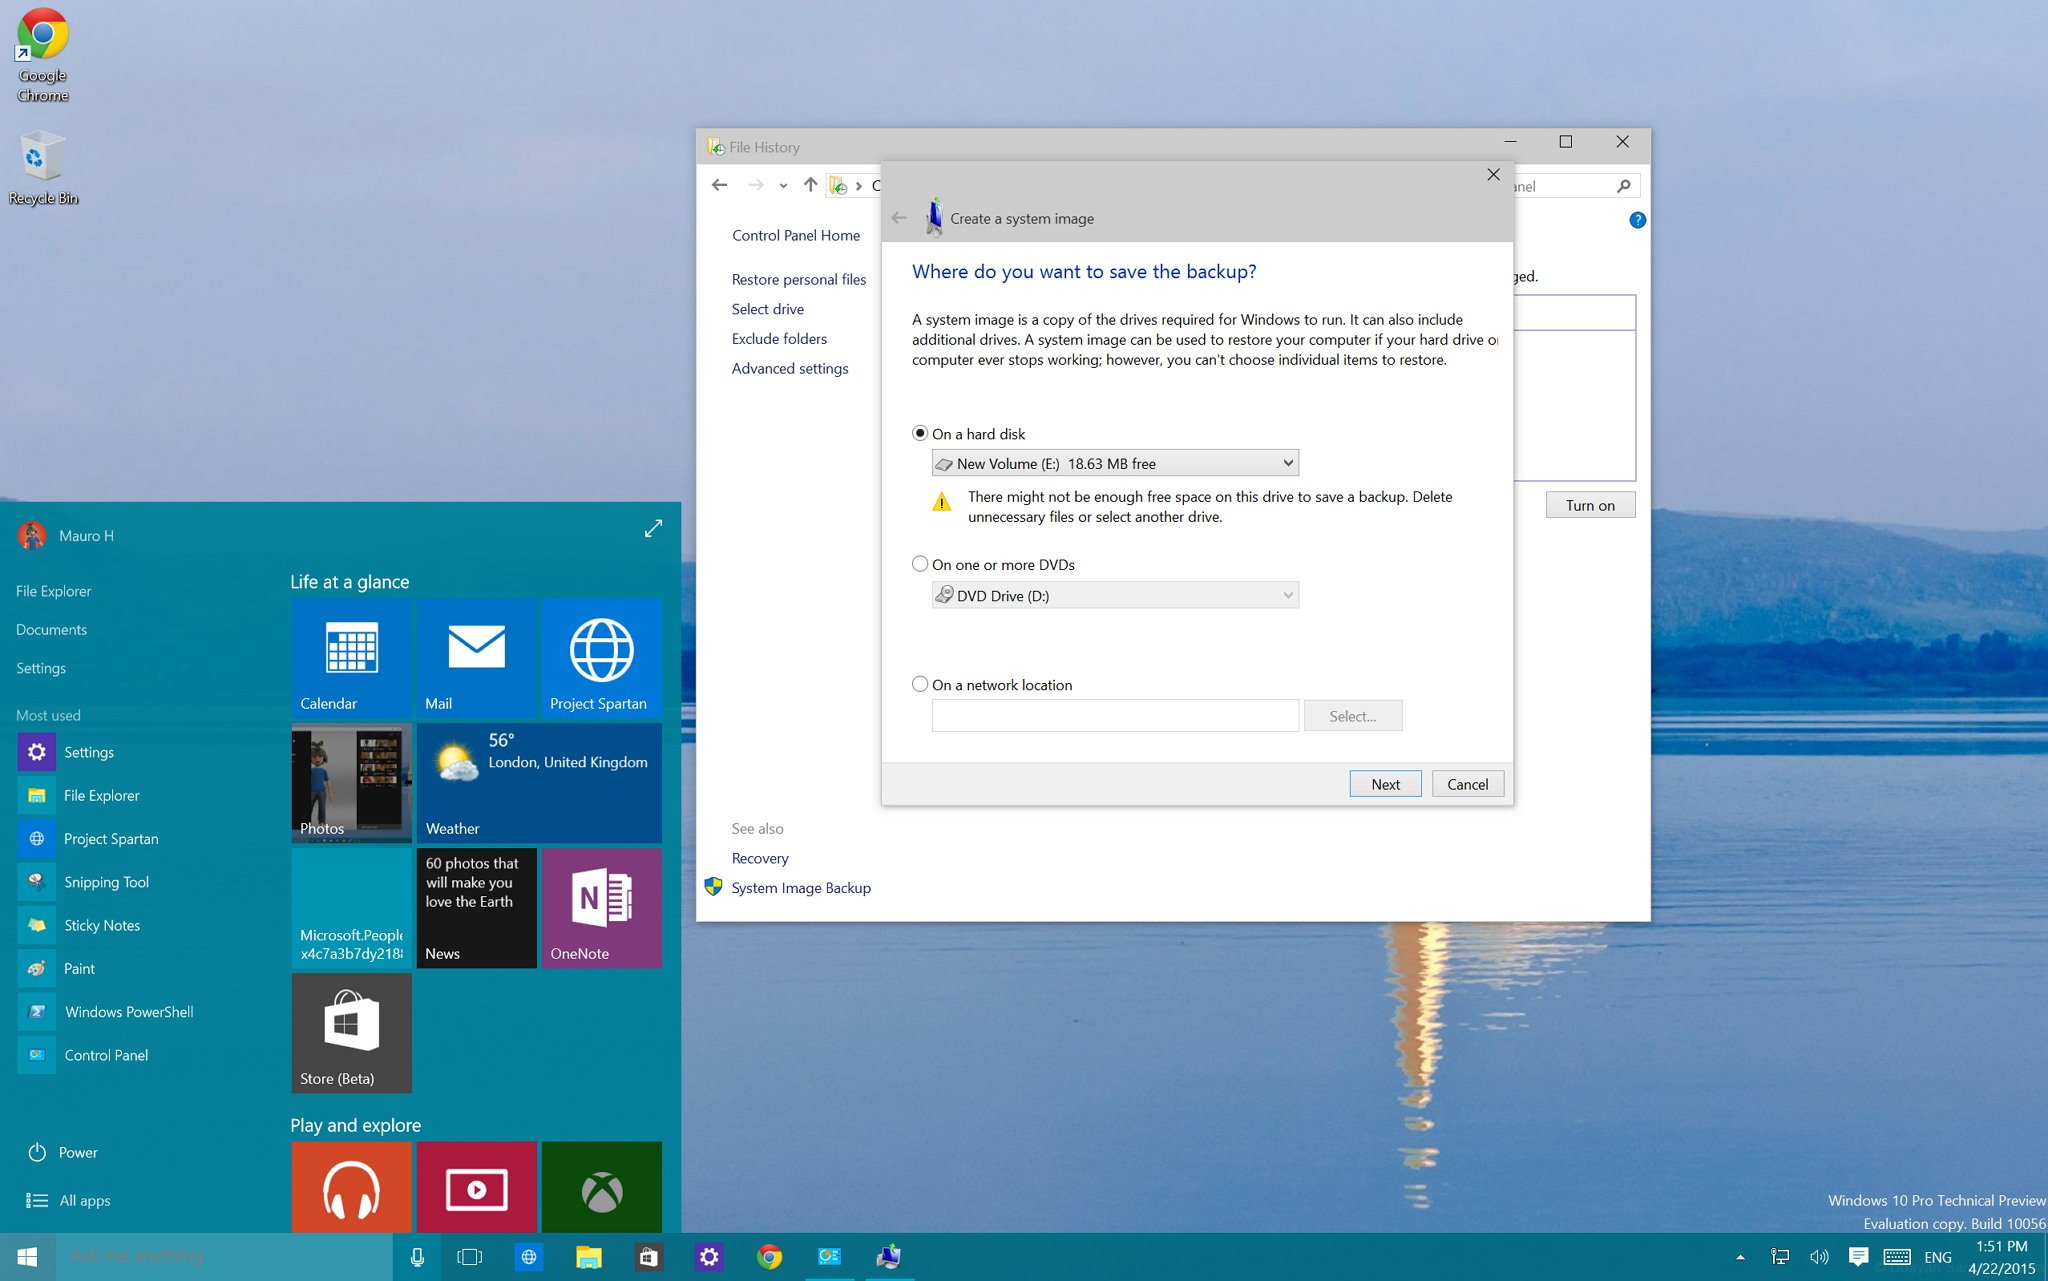
Fortunately, Windows 10 and Windows 8.1 include the System Image Backup tool that allows you to create a bit-by-bit copy of your Surface. You can then use this as part of your recovery plan. You can refer to my previous guide to get this done.
Get the Windows Central Newsletter
All the latest news, reviews, and guides for Windows and Xbox diehards.
Although, you can easily mount the image backup to recover files, there is no such as things as too many backups. As such, what you want to do is to make a backup of everything, making sure you copy all the files in the Documents, Desktop, Downloads, Music, Pictures, and Videos folders to an external USB drive.
If you use OneDrive exclusively to store your documents, then you're set! As your files are already securely backed up in the cloud.
Note that we're doing a full image backup just as a precaution, and the file backup is what actually you're going to use to move your files temporarily to another computer or to recover when you get your Surface Pro 4.
Getting ready to reset your Surface Pro 3
Windows 8.1 comes with two recovery options -- you can refresh your PC without affecting your files, or you can remove everything and reinstall Windows.
We're getting ready to sell the Surface Pro 3 to a complete stranger, so we don't want anyone to get access to our private documents. This reason is why we'll be using the "Remove everything and reinstall Windows" option.
This option will ensure no one will be able to view or easily recover files using special tools. However, when you start the reset process, you'll get a message saying that some of the files are missing, and you'll need to insert the media with your Windows installation files to continue.
If you don't have the installation media -- it's OK, just follow these steps:
1- Head over to the Surface support page to download the Surface recovery files.
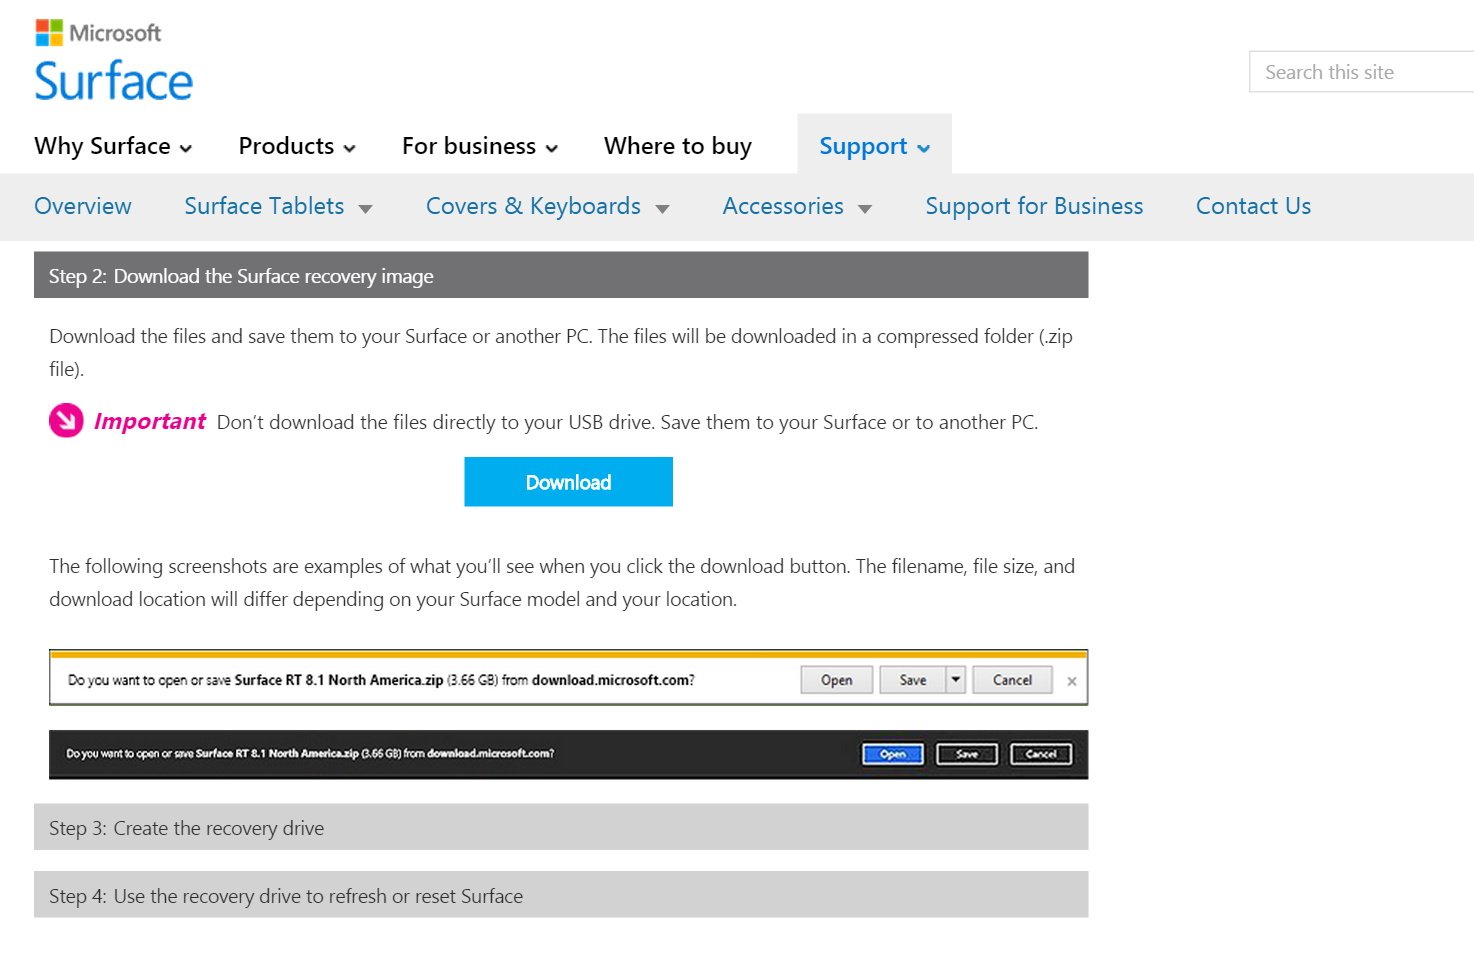
2- Sign in with your Microsoft account and follow the instructions to register your Surface Pro 3 (if you haven't done it already), and download the 5.5GB zip file.
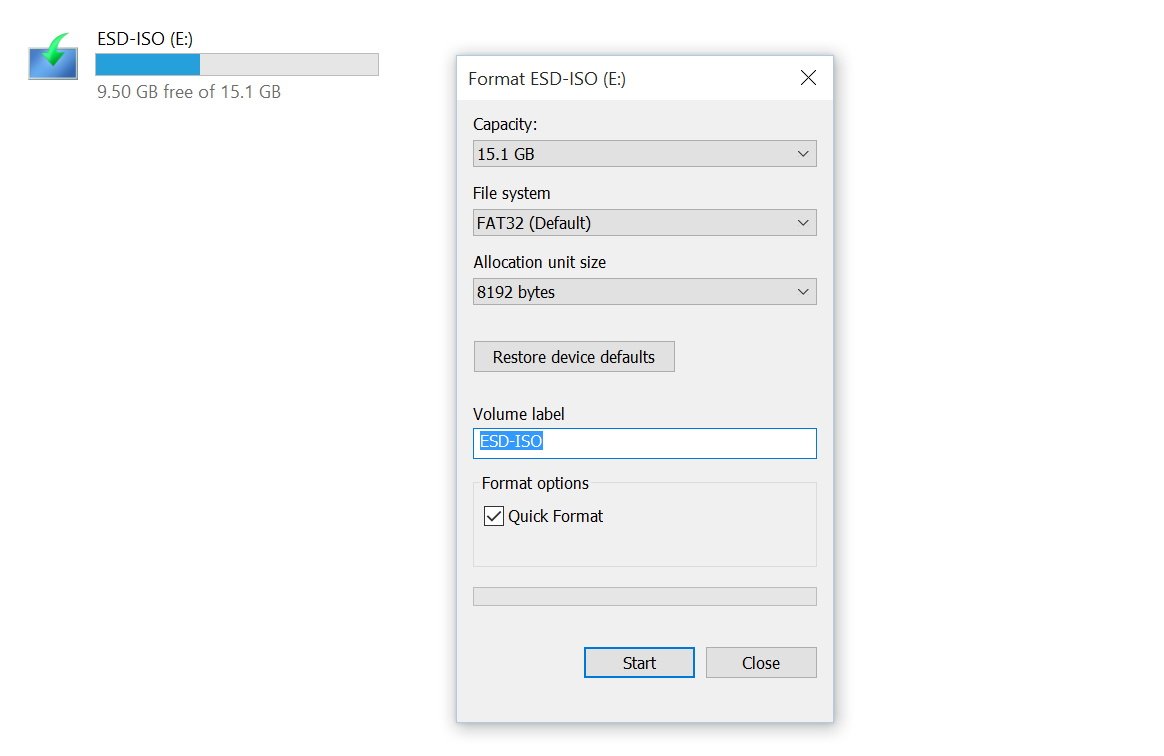
3- Once you have downloaded the files, you'll need a USB flash drive with 6 to 8GB of storage space. You also need to reformat the drive using the FAT32 file system. To do this go to This PC, right-click the USB drive, clicking Format, choosing the FAT32 file system, ticking the Quick Format option, and clicking Start.
4- Finally, unzip the installation files and copy everything to the USB drive.
Warning: Remember that everything on the USB drive will be erased after formatting, as such make sure to backup any important content prior using the "Format" utility.
It's worth pointing out that if you have already upgraded to Windows 10, you won't have any issues with the installation files. The operating system can be reinstalled using the files already in your system. As such, you don't need a Surface recovery media for Windows 10.
Deleting files and reinstalling Windows
Now that you have already created a backup, and you have followed the steps it's time actually to reset your tablet.
Remove everything and reinstall Windows 8.1
Follow these steps to reset your Surface Pro 3 running Windows 8.1:
1- Use the Windows key + I keyboard shortcut to bring the flyout menu and click Change PC settings.
2- Navigate to Update & security and go to Recovery.
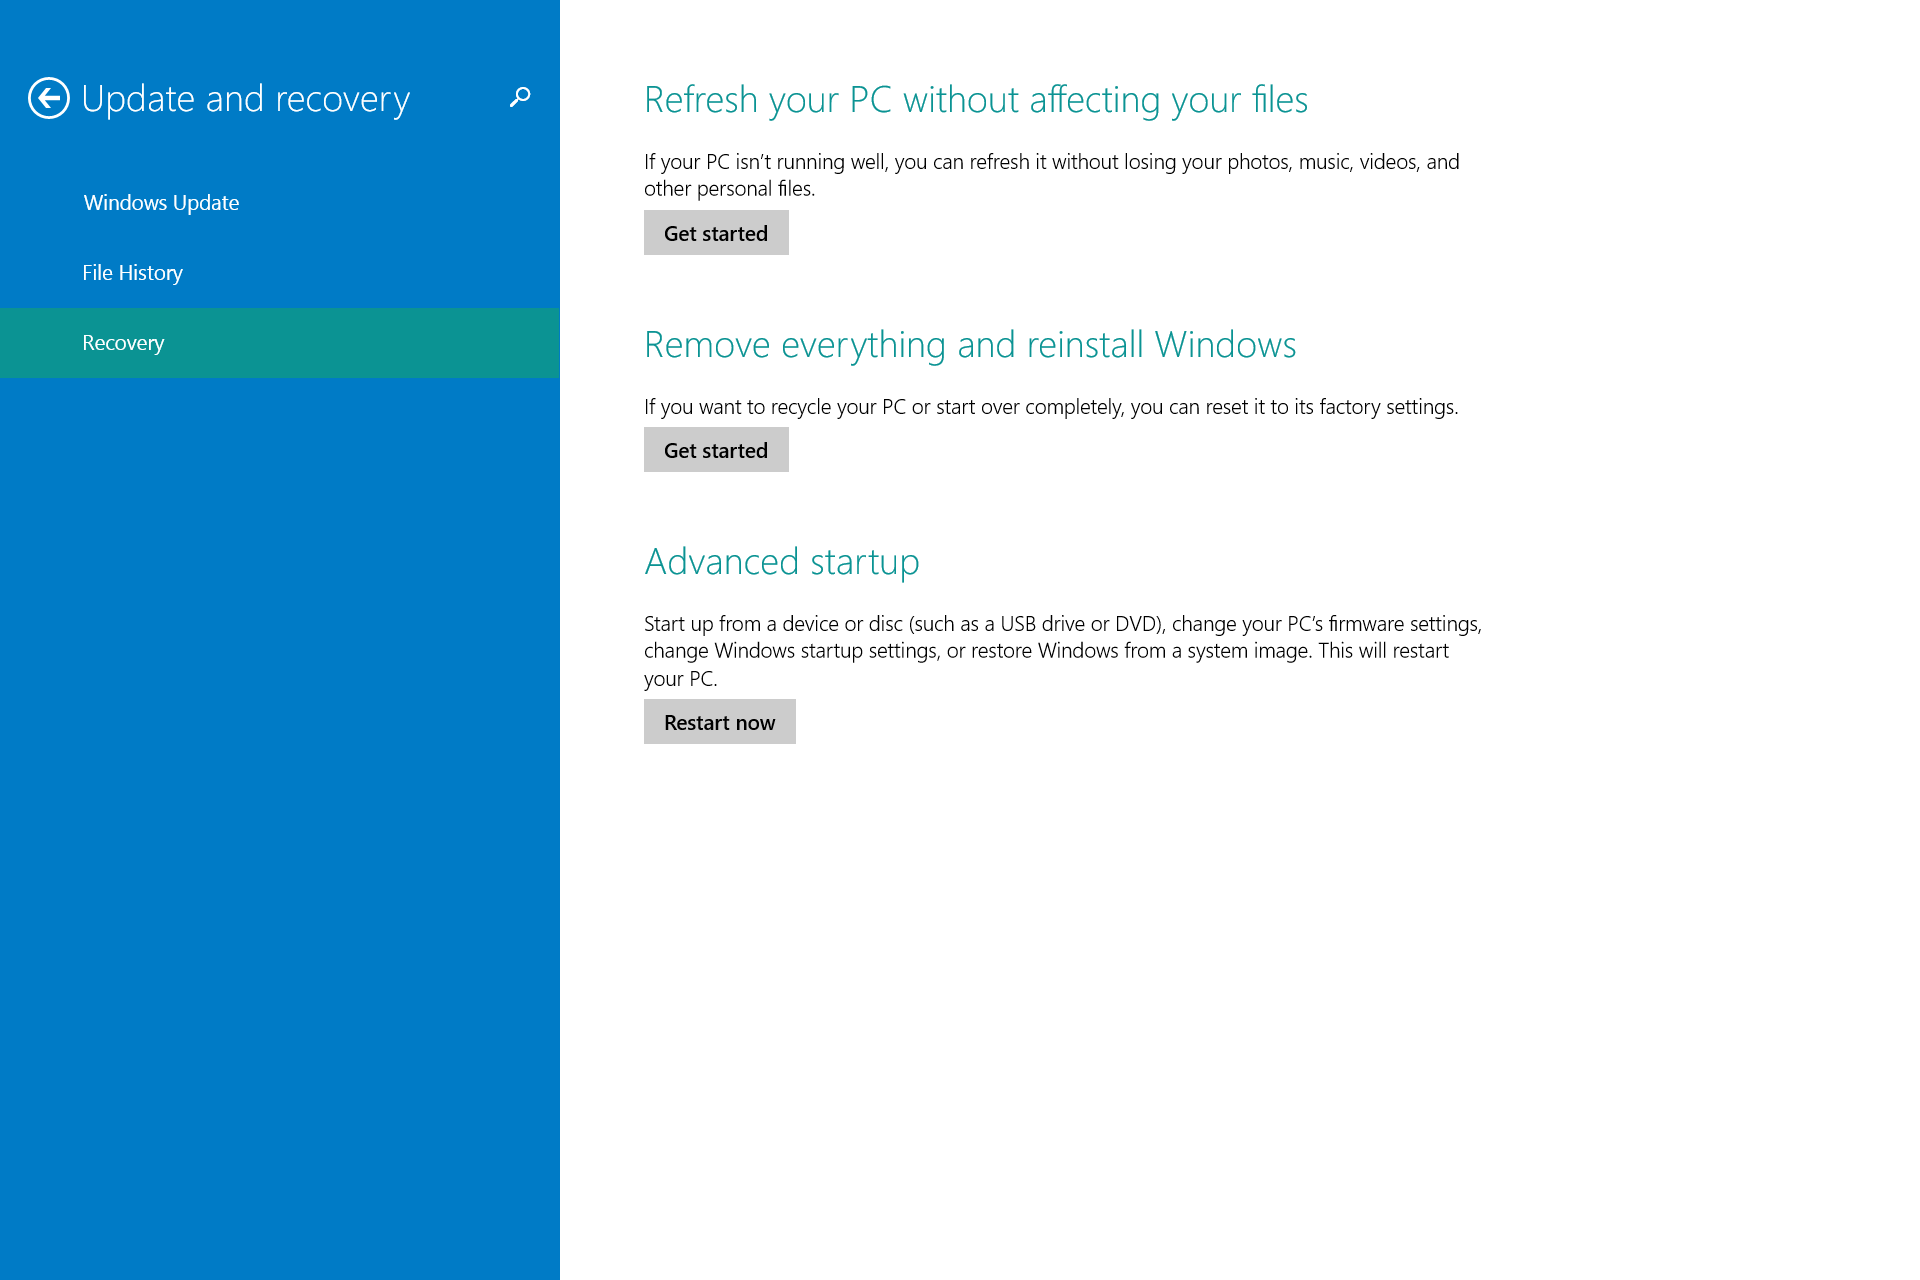
3- Connect the USB drive with the Surface recovery files for Windows 8.x, and click on Remove everything and reinstall Windows.
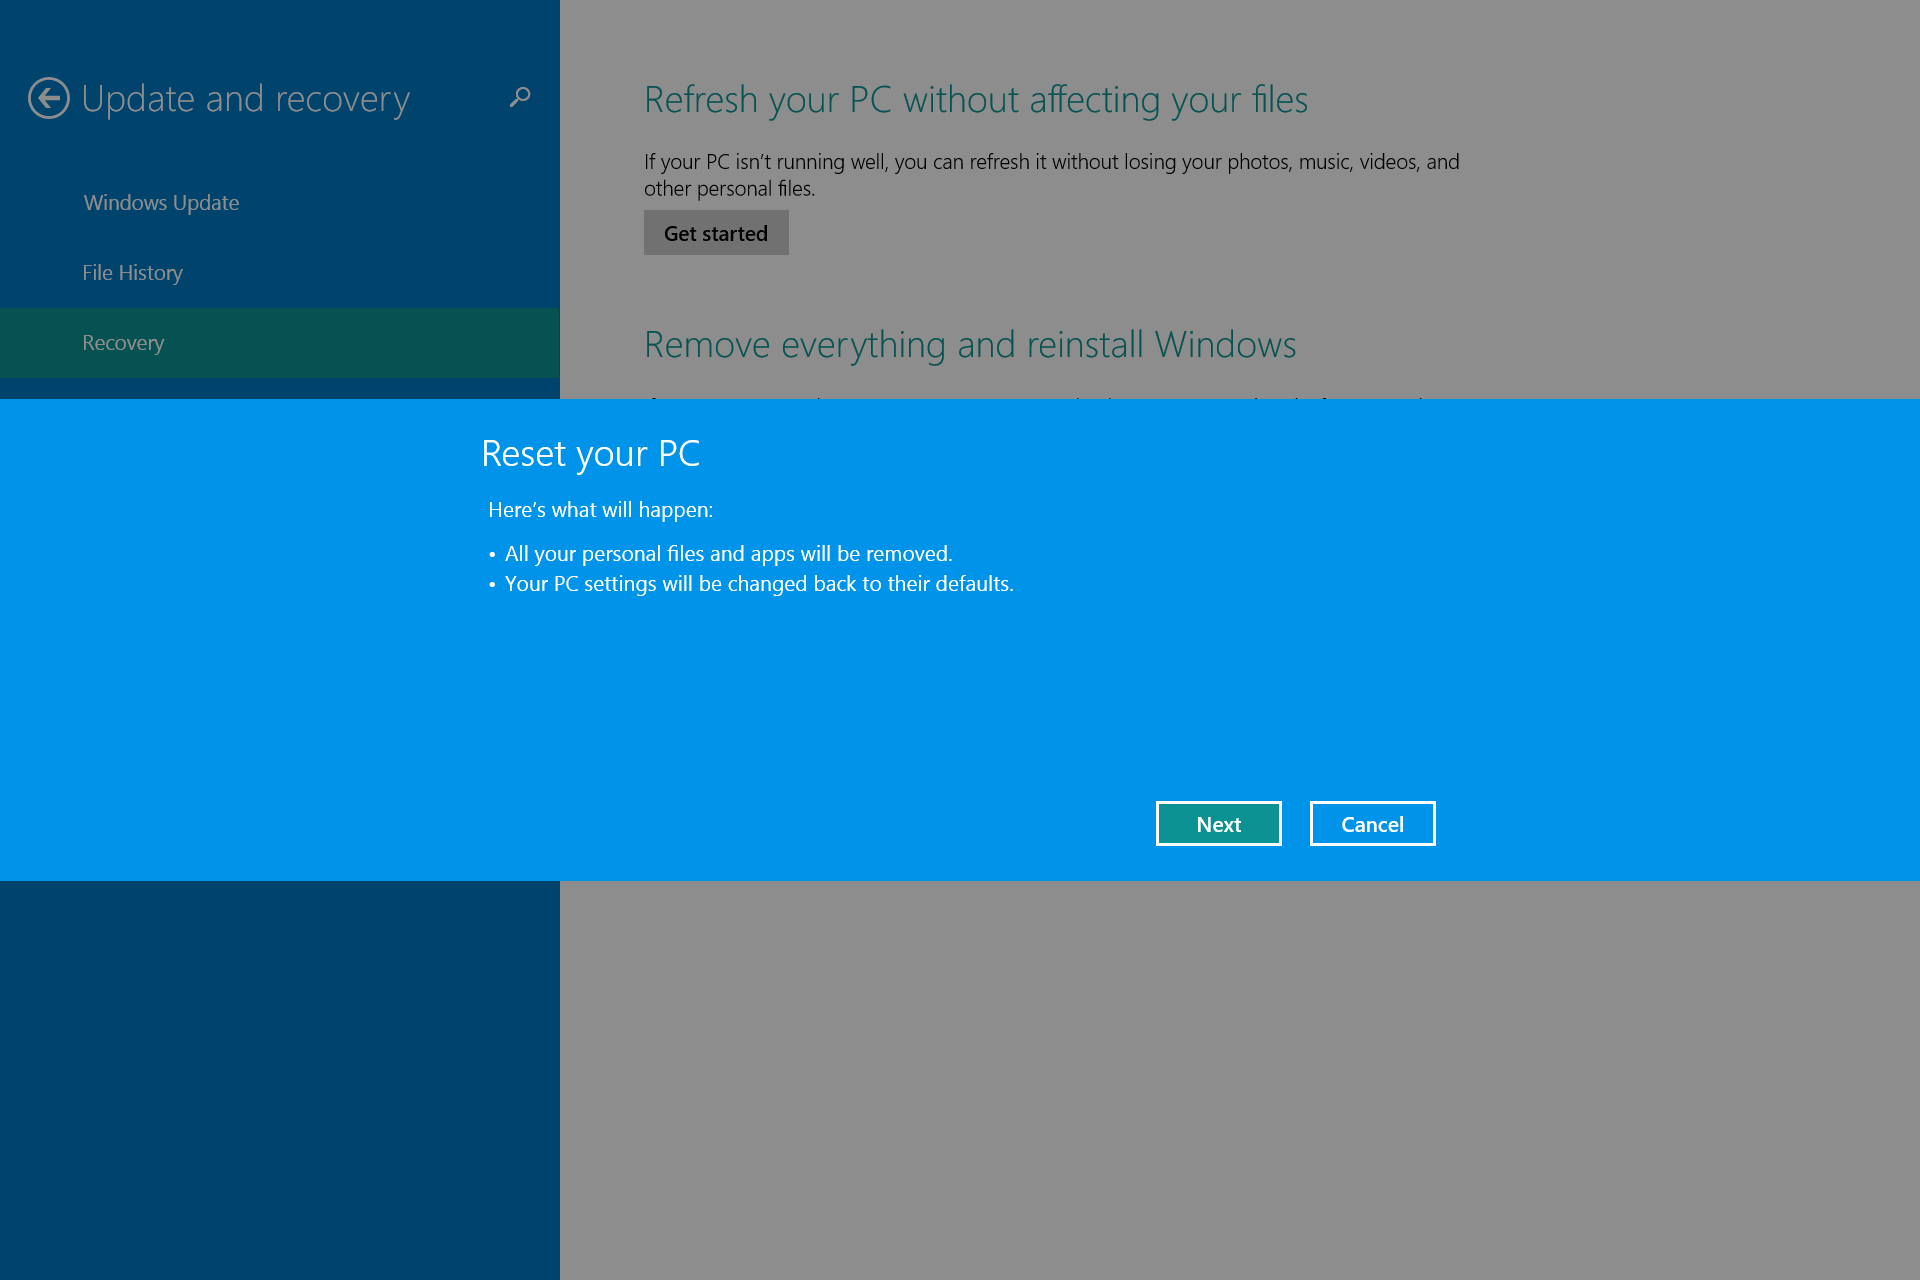
4- On "Reset your PC", click Next.
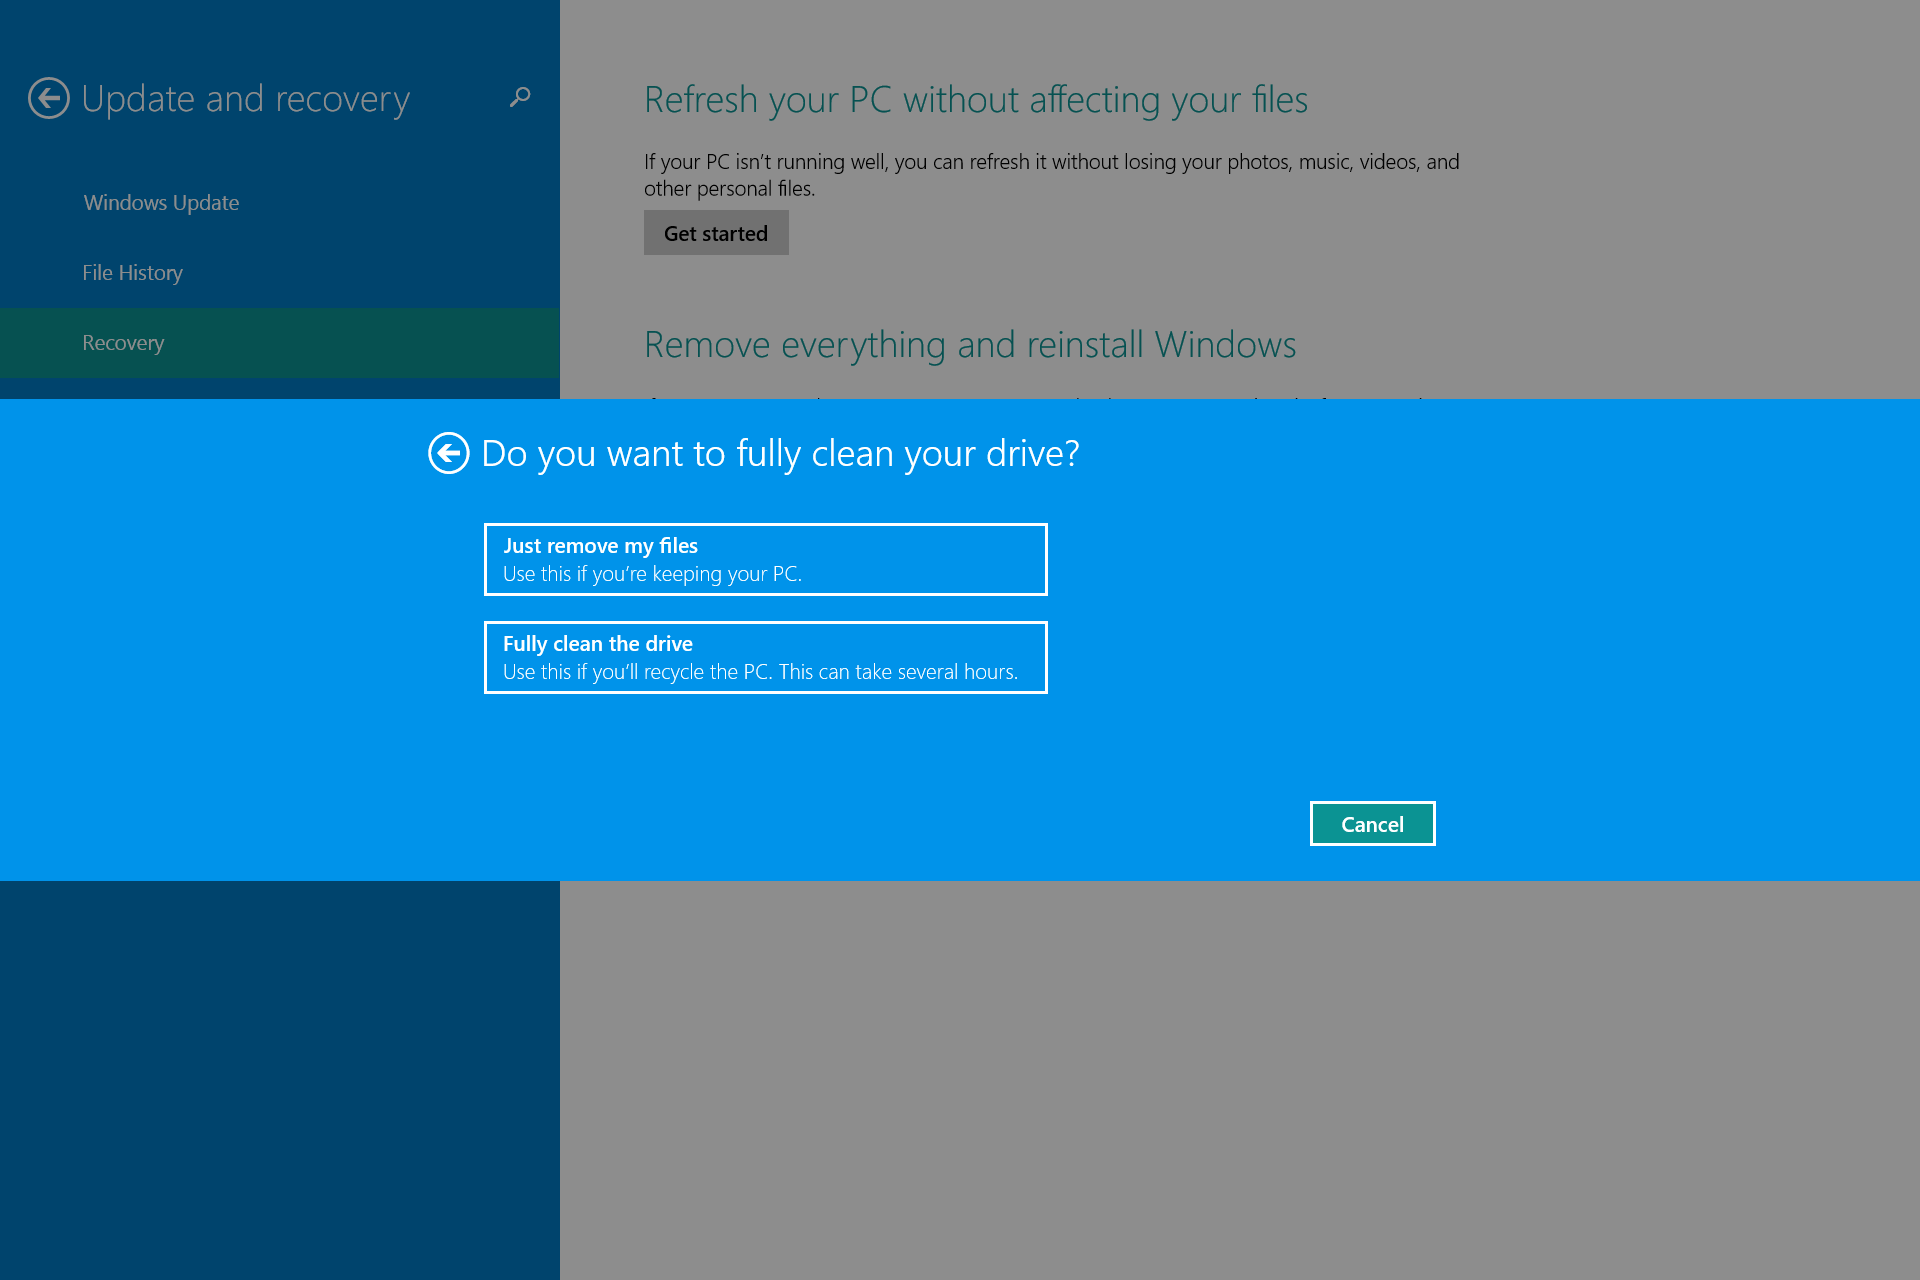
5- You'll be given two choices: "Just remove my files" and "Fully Clean the drive". Because you're getting ready to sell your Surface Pro 3, you want to click on Fully clean the drive. This option is the one Microsoft supports when you need to recycle your PC and keep in mind that it could take several hours to complete the process.
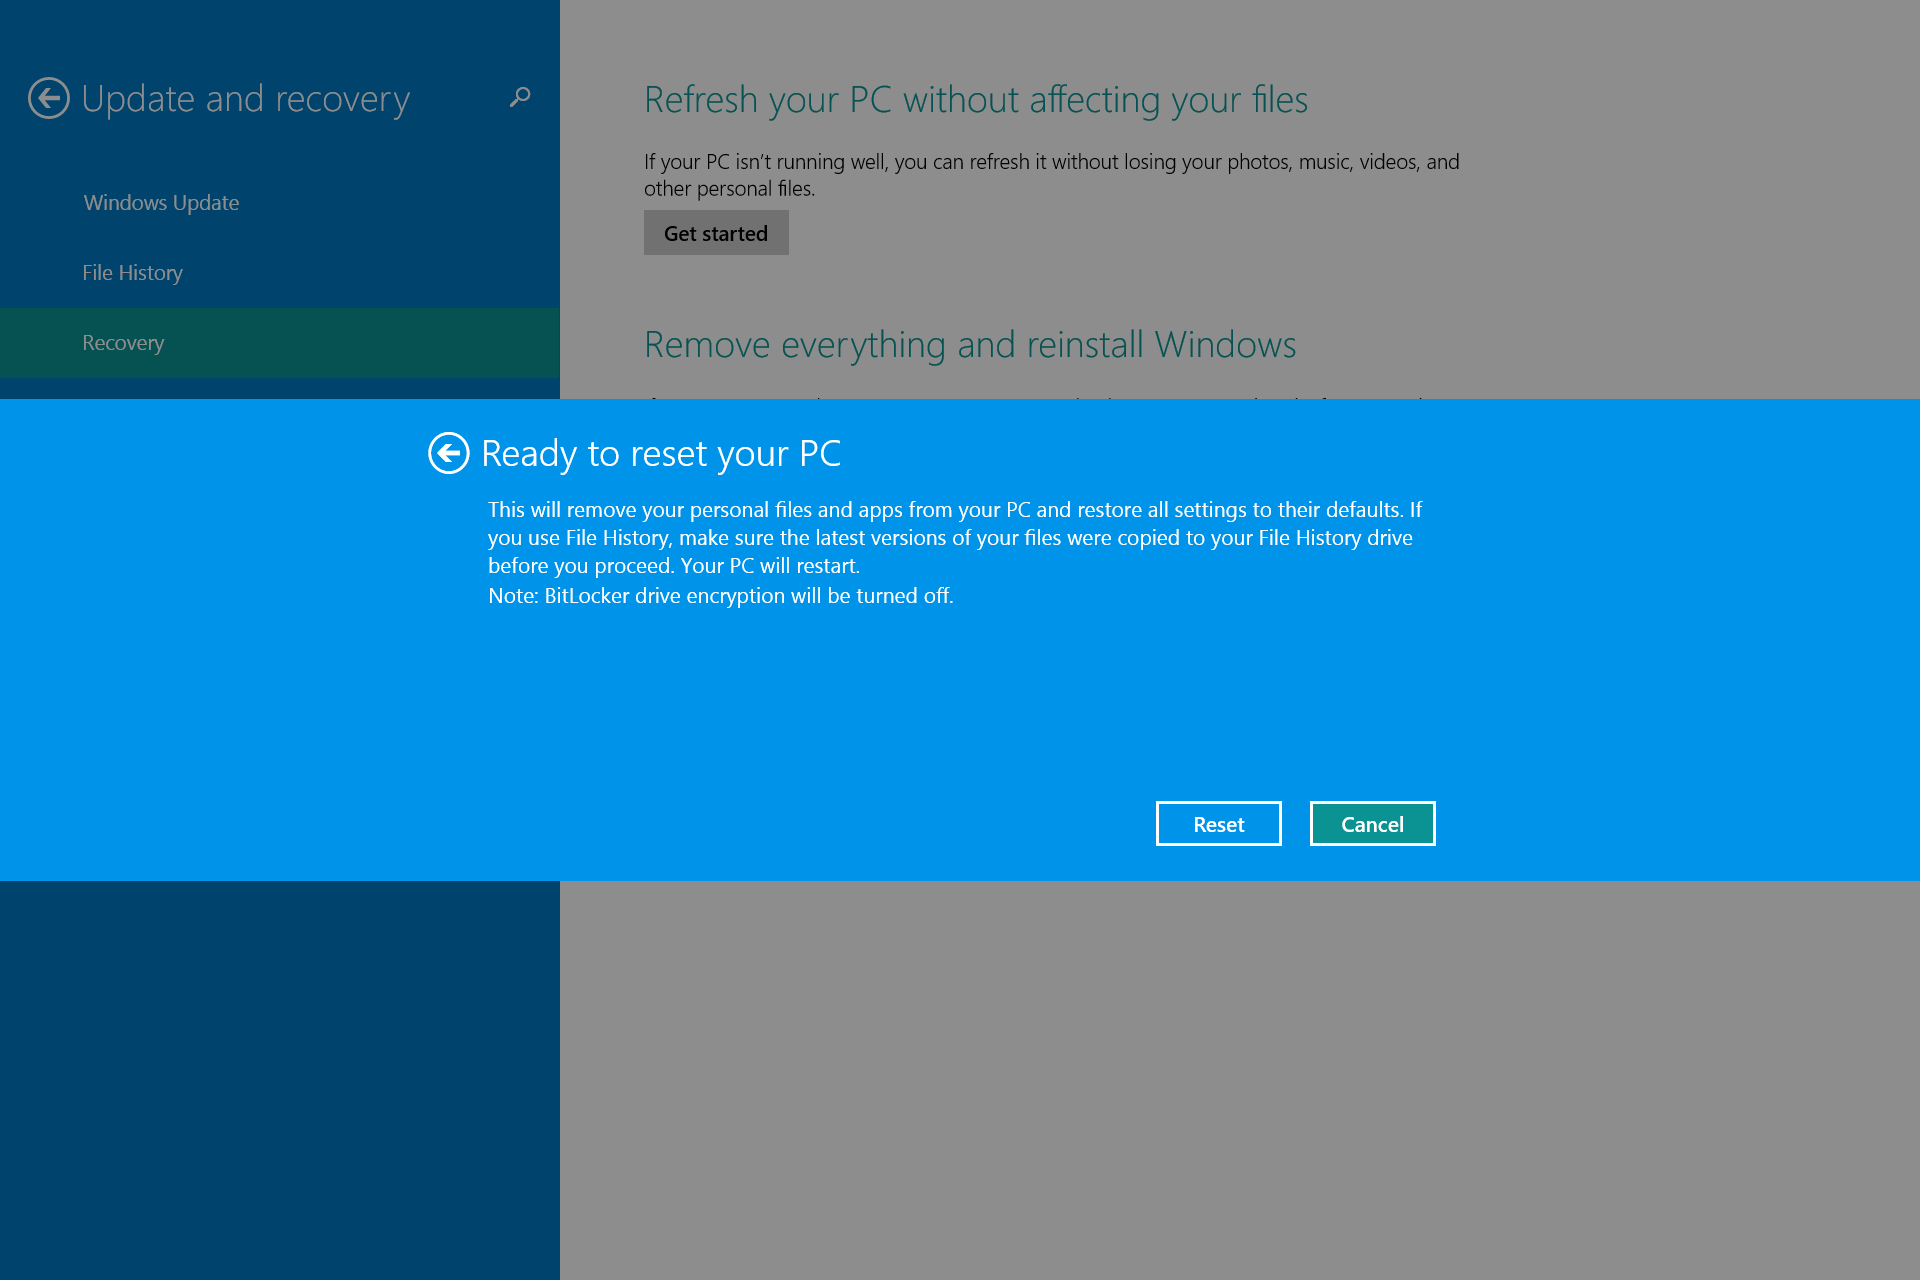
6- On the next page click Reset to begin the process.
At this point, your Surface Pro 3 will commence the recovery process, and it will reboot to complete the reset.
After the process is complete, you'll be presented with the out-of-box experience. At this point, everything you could've done is done. You can simply power off the device and package it nicely for selling.
Remove everything and reinstall Windows 10
If you have upgraded to Windows 10, then resetting your Surface Pro 3 and getting it ready for sale should be much easier. In part, it should be easier because you no longer need to supply the installation files.
Follow these steps to reset your Surface Pro 3 running Windows 10:
1- Use the Windows + I keyboard shortcut to access the Settings app.
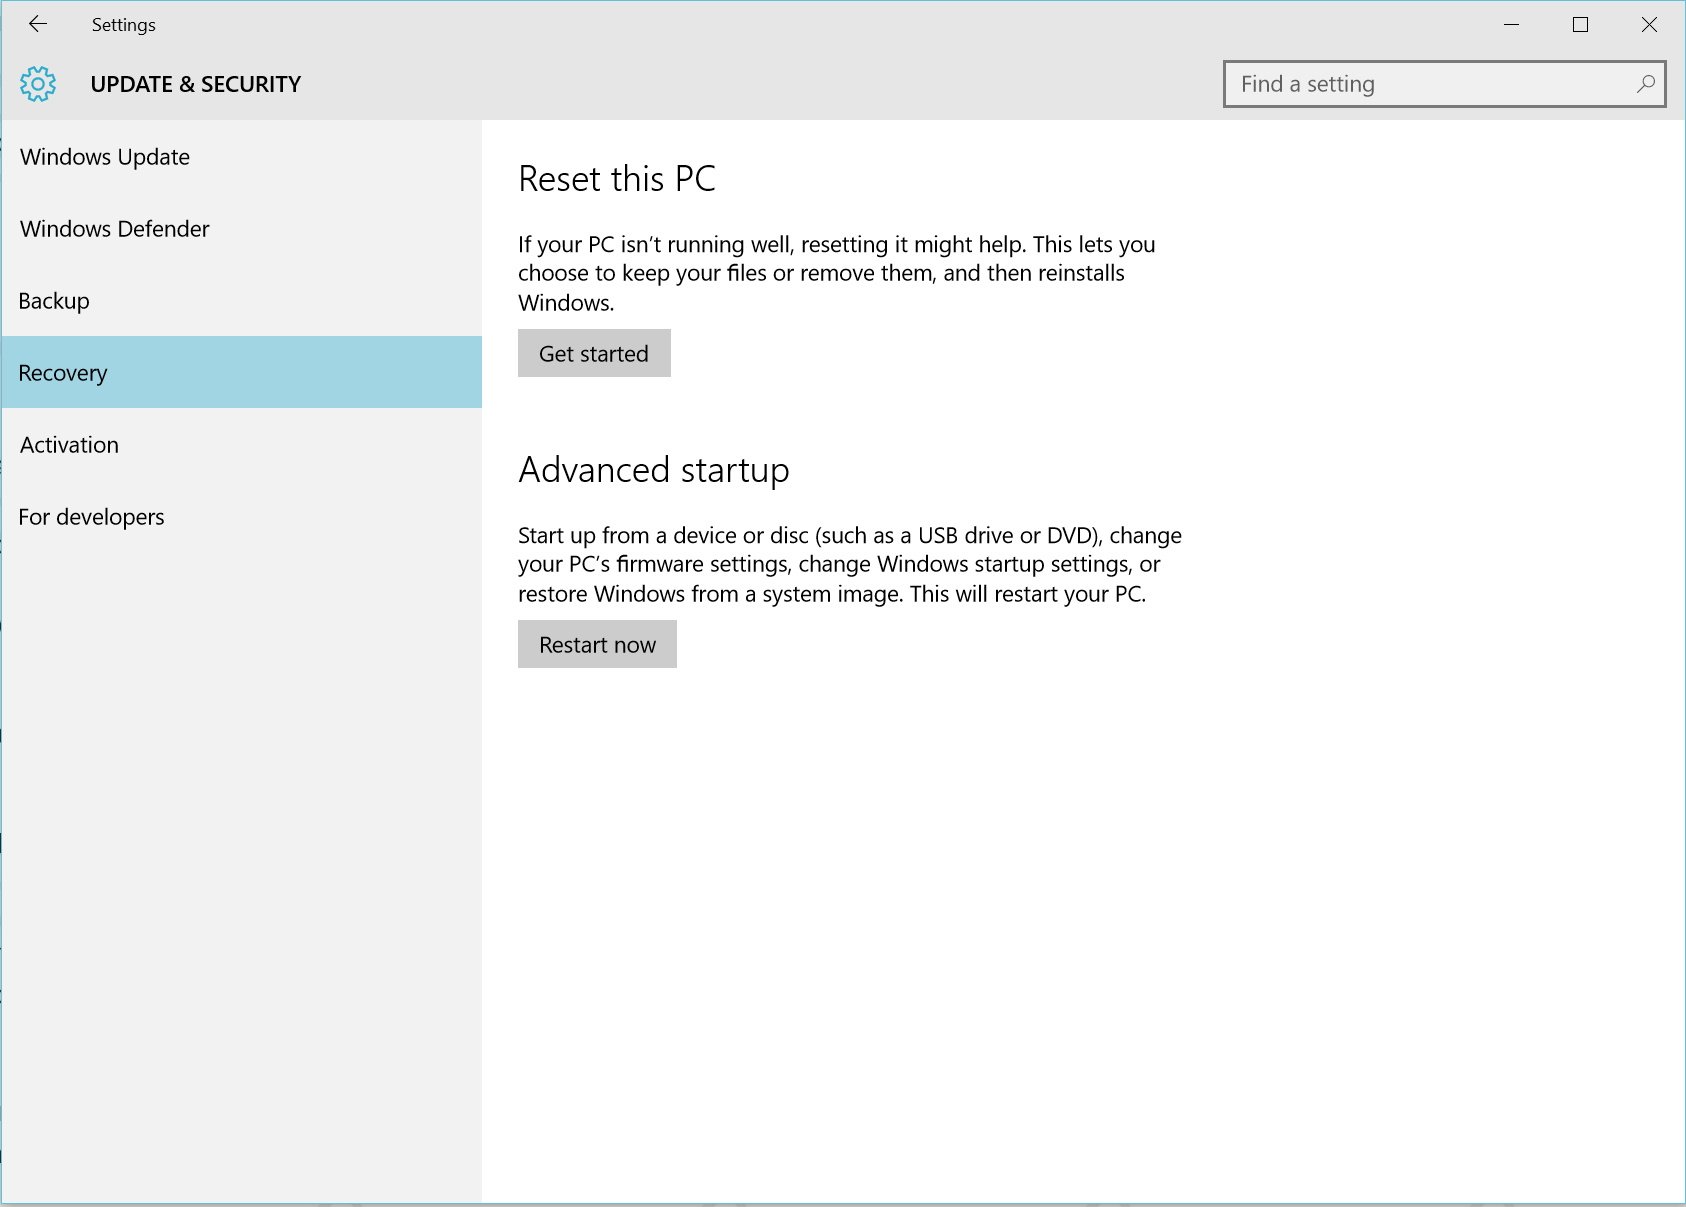
2- Navigate to Update & security, and go to Recovery.
3- On "Reset this PC", click the Get started button.
4- From the options available click on "Remove everything", which is the Microsoft supported option that ensure all of your files, apps, and settings will be removed.
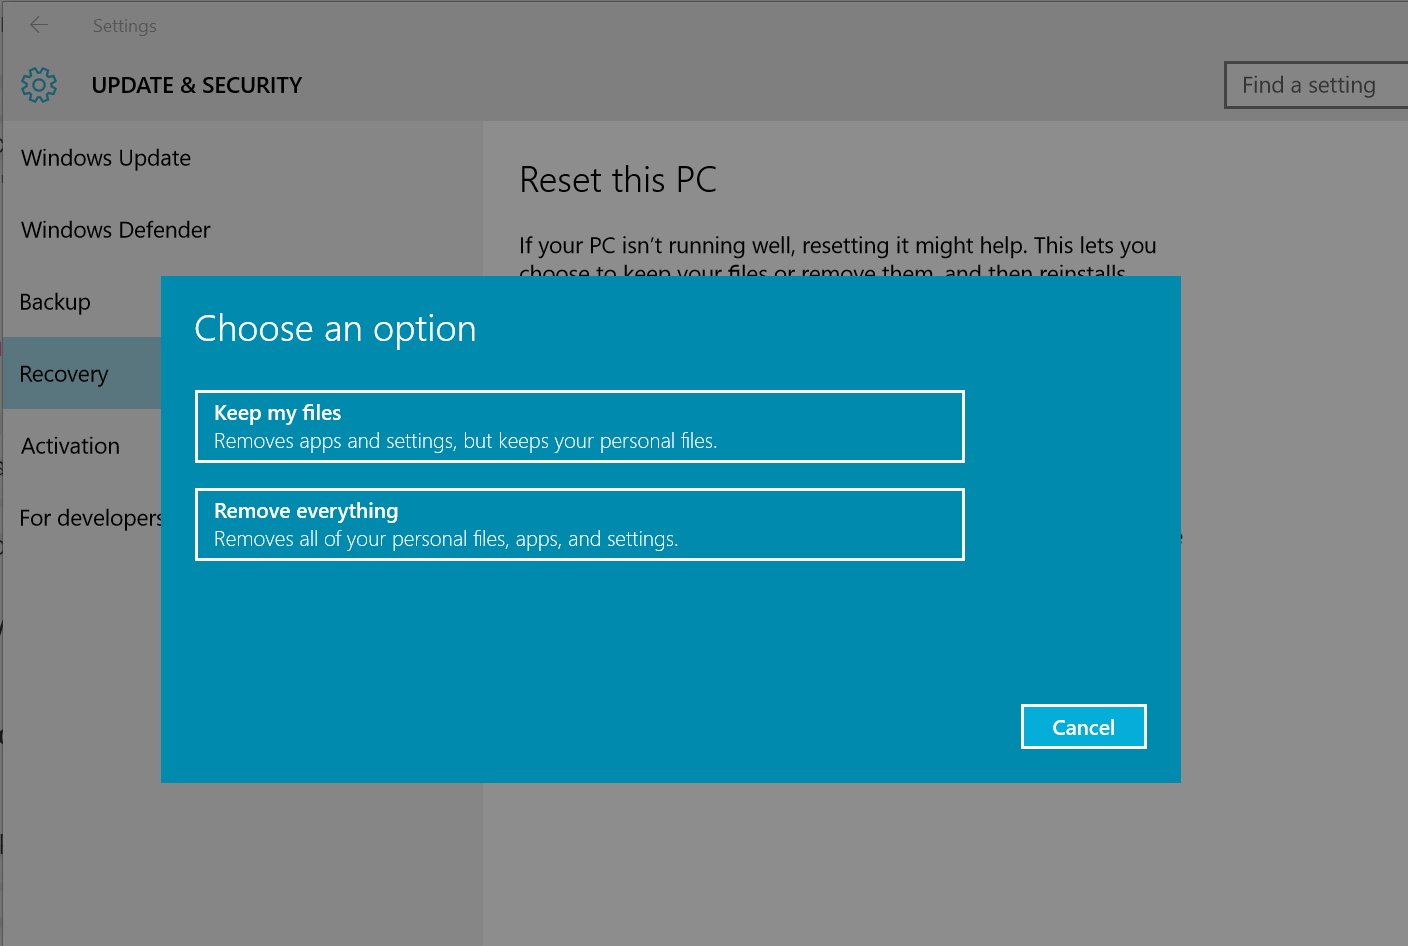
It's worth pointing out that you won't be rolling back to your previous version of the operating system. The reset process will remove everything in your Surface Pro 3 and reinstall Windows 10.
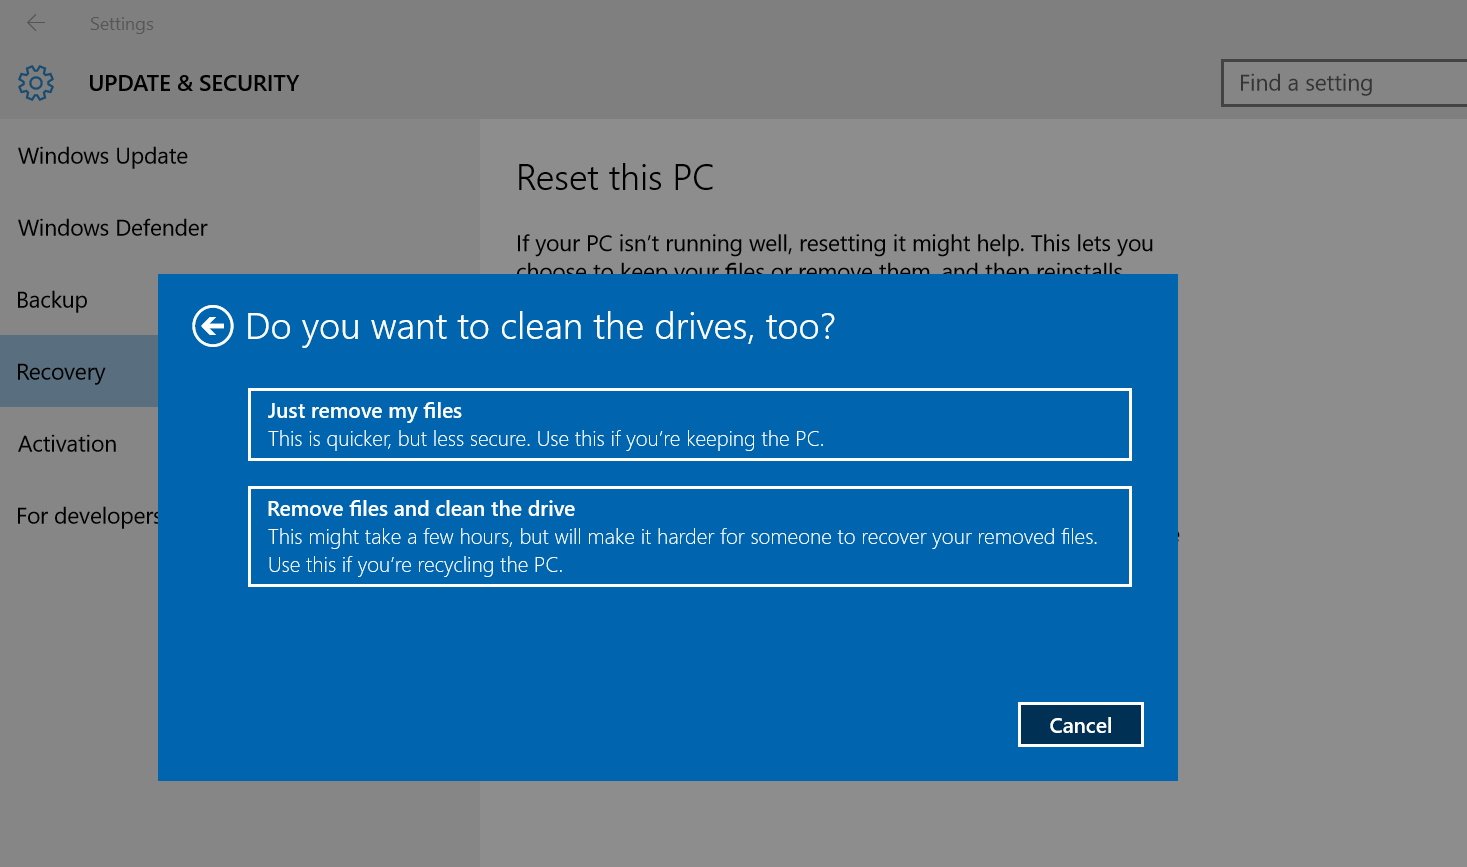
5- Click Remove files and clean drive.
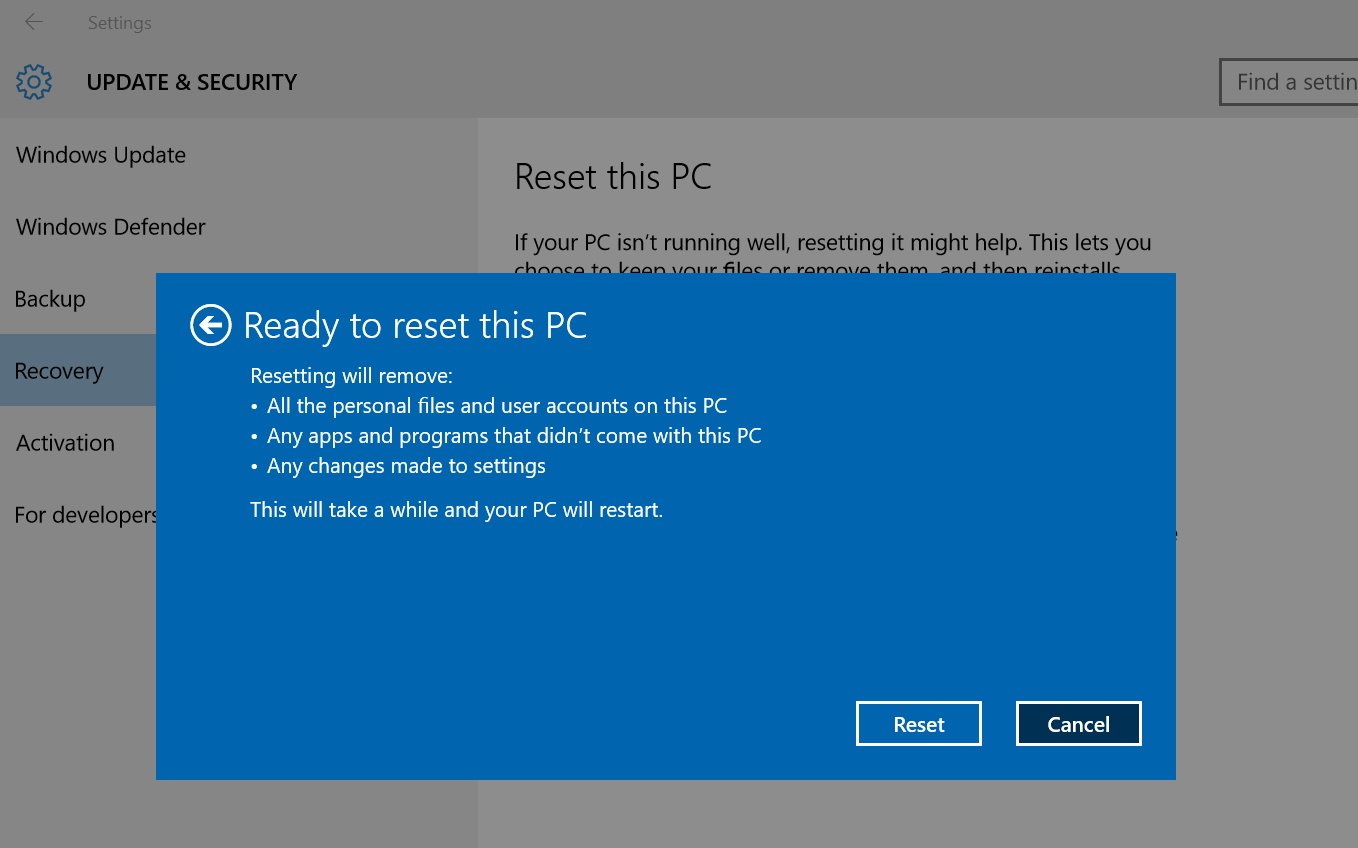
6- Then click Reset to begin the process. Your computer will now reboot, and the reset process will kick in.
If you're still skeptical that your data was completely erased, then you'll need to go through the out-of-experience aka setting up the PC for the first time. To do so, you will want create a new local account instead of using a Microsoft account and verify that everything has been erased.
Furthermore, if you continue being cautious, go through the out-of-box experience, and try to reset your Surface Pro 3 one more time with the previous steps.
Here's the alternative
Today, we have seen the supported methods by Microsoft to recycle your device, in this case, a Surface Pro 3. However, if you don't feel it's enough, you can always resource to third-party software to wipe the hard drive. Afterward, you can then do a clean installation of Windows 8.1 using the Surface recovery files or Windows 10. This method would take more time and work, but it will give a piece of mind to many users.
Removing registration of your Surface Pro 3
There is one last thing you want to make sure you do before finding a new owner for your Surface Pro 3, and that is removing the registration for your Surface. Through the time you have had the tablet or at the time you needed to download the recovery image, you have registered your Surface Pro 3 with Microsoft in your name.
Now, you need to let someone else register the tablet down the road. To do so you want to remove the registration of the tablet from your Microsoft Account before sell your Surface Pro 3.
Here are the steps:
1- Go to https://support.microsoft.com/devices and sign in with the Microsoft Account you registered the device.
2- Click Manage devices and covers.
3- On the "Device Manager", you'll see a list with all the registered devices. If you have more than one Surface, make sure to match the serial number, and select the device.
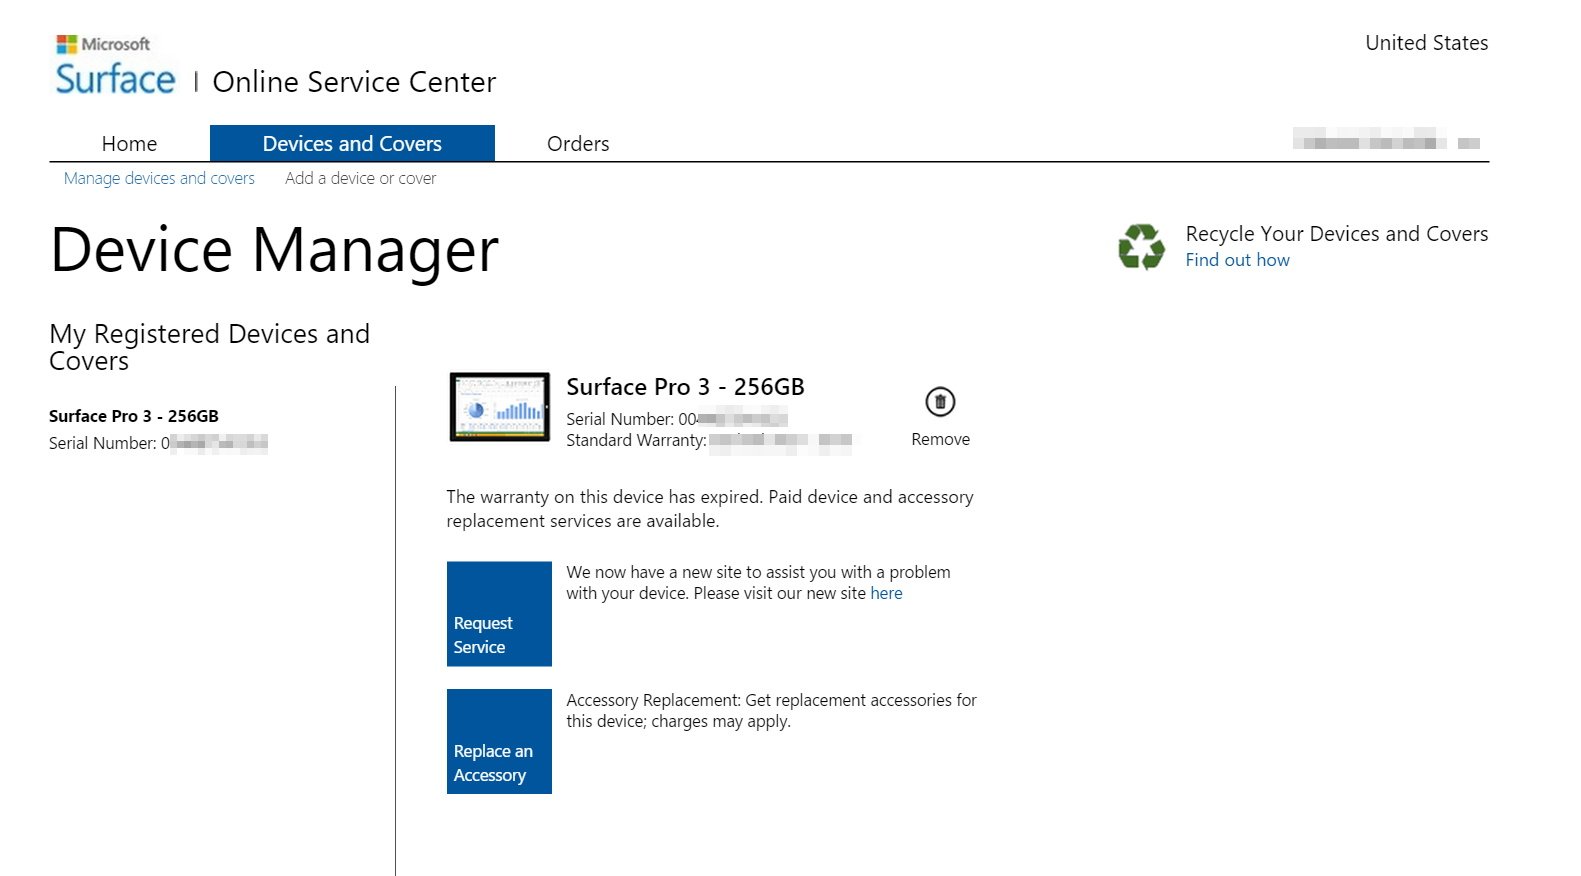
4- Click the Remove button with the trash can icon, and click Confirm Removal.
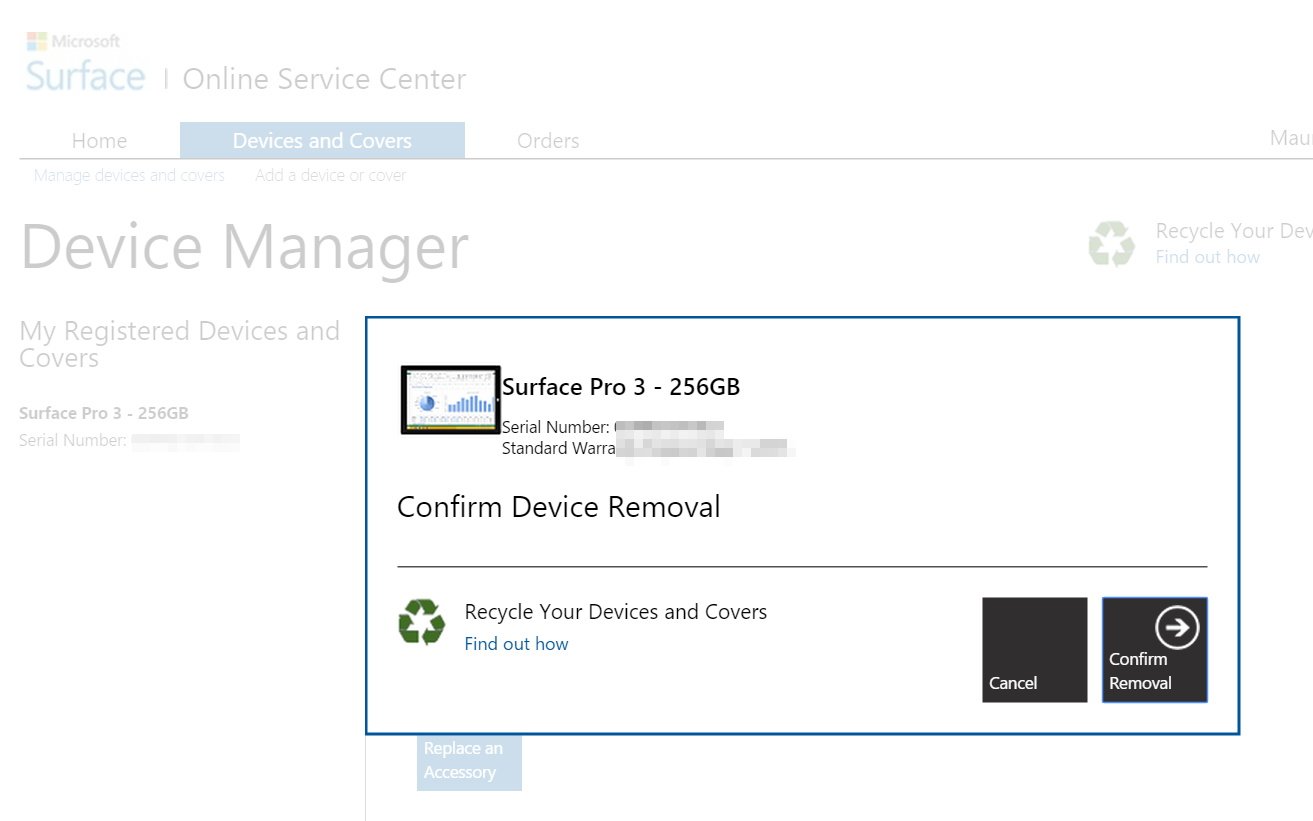
5- Go back to the "Device Manager" to verify that the Surface Pro 3 unregistered successfully, and you should then be good to go.
Time to sell your Surface Pro 3
At this point, you have created a backup of the device, you have made a copy of all your files, you have securely erased everything, and you have removed the registration of your Surface Pro 3. Now, it can be hard to let go, but it's the time to find a new owner!
The first thing you need to do before putting your Surface up for sale is to identify how much you can sell it for. The price will depend on demand and condition.
The best way to understand pricing is to research what other people are currently doing. However, before you do that make sure to go to http://Amazon.com, Microsoft Store, and other online retailers, and check how much it costs for a brand new Surface Pro 3. As you can imagine pricing might have changed since you bought the device.
Next, research http://Amazon.com and eBay to see how much money sellers are asking for the same used model you're trying to sell. See the condition of those devices and if they're also offering free shipping.
You now likely have an idea on pricing. The next step is to decide where you want to sell your device. Here is where you need to be creative, while there many services where you can sell your used devices, you will probably end up with one of the two: eBay or Craigslist.
Before you decide, also consider selling the tablet to someone you know, as this can save you a lot of online hassles.
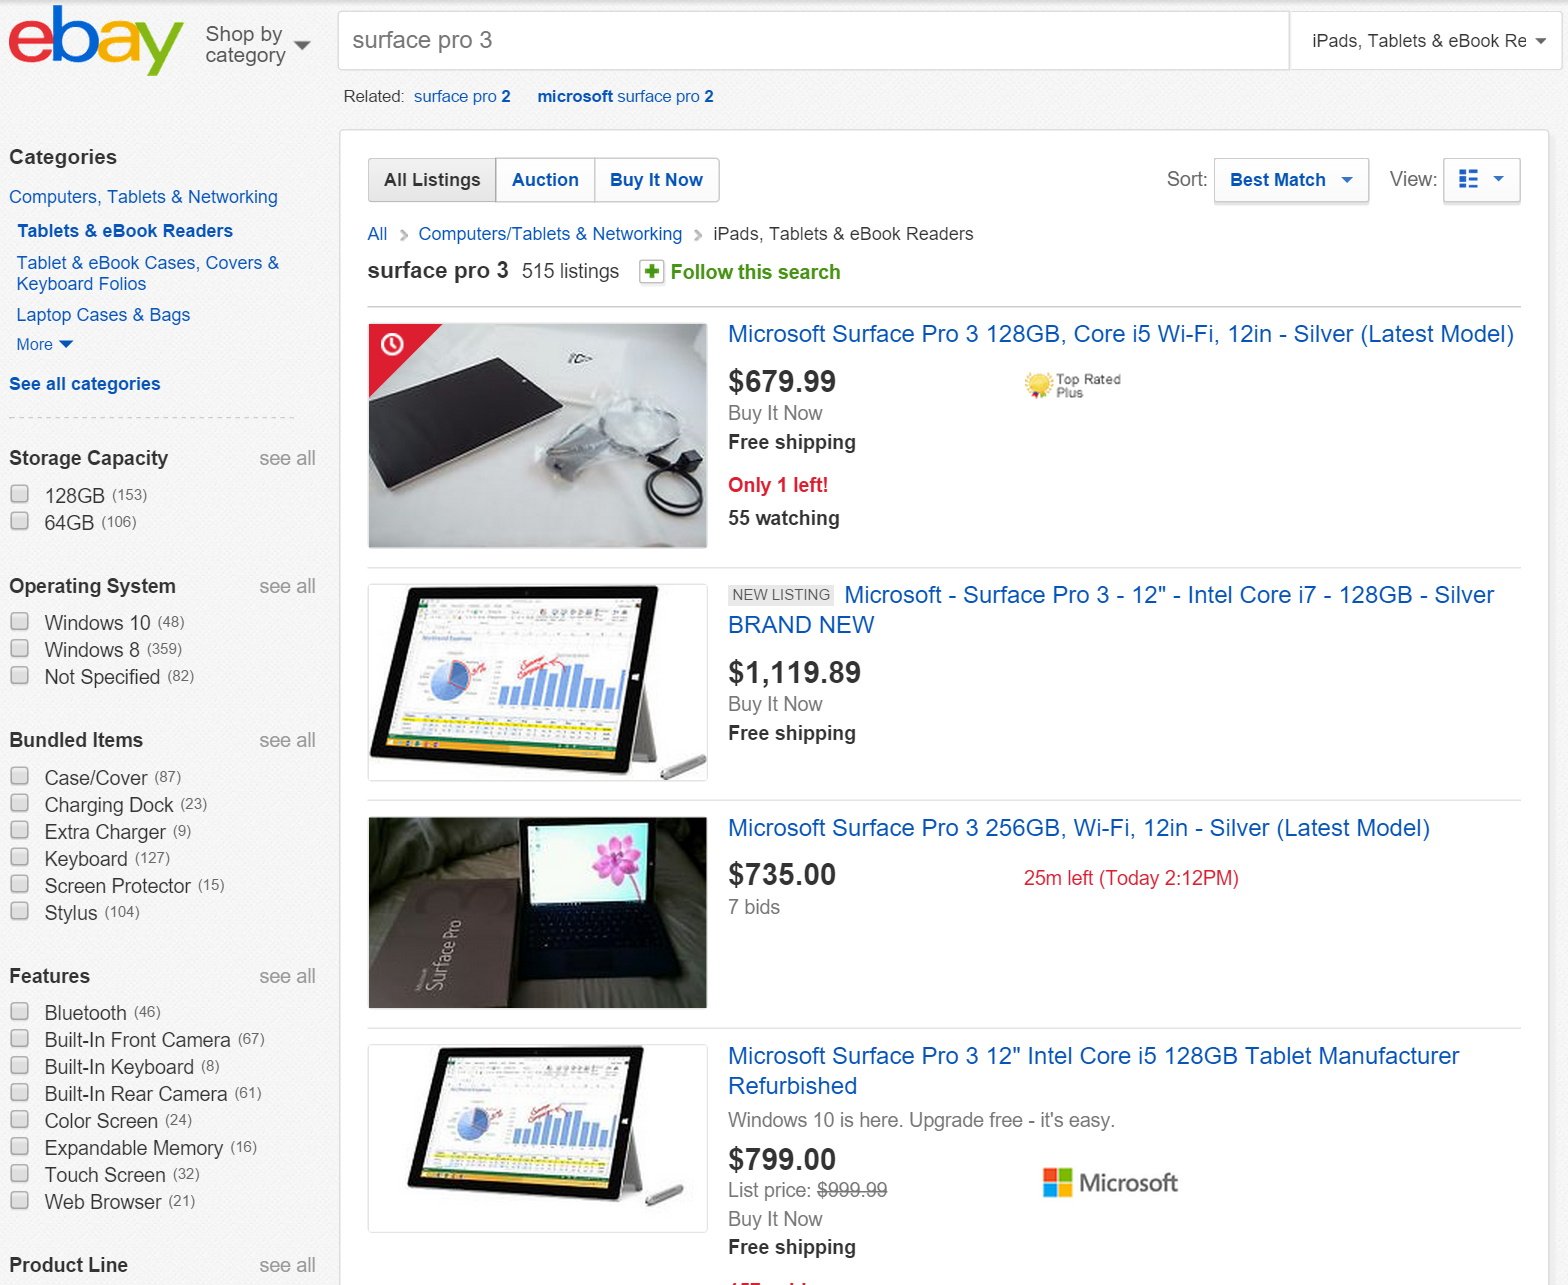
Whether you use eBay, Craigslist, or another service make sure to have a well-written description of the device with all the details of its condition, don't leave anything out, and be as clear as possible.
Take good pictures of the device and the accessories you're including. Also, make sure the images are clear and they reflect the condition of the Surface Pro 3.
If you go with eBay, a good selling practice also includes offering free shipping and use good packaging to send the device to avoid shipping damages.
Wrapping things up
While we don't yet have an official release date for the Surface Pro 4, we know something is coming soon. Also, knowing that new hardware is coming gives you an opportunity to get the most money now. Of course, you can always bookmark this guide and return when Microsoft officially launches the new tablet, but it might turn out a little more difficult to find someone to buy an older version of Surface at the price you want.
Remember that we have focused on Surface Pro 3, but you can always refer to this guide for other Surface tablets and devices as well!
Will you be selling your Surface Pro 3 when the Pro 4 comes out? Let us know in the comments below.
Mauro Huculak has been a Windows How-To Expert contributor for WindowsCentral.com for nearly a decade and has over 15 years of experience writing comprehensive guides. He also has an IT background and has achieved different professional certifications from Microsoft, Cisco, VMware, and CompTIA. He has been recognized as a Microsoft MVP for many years.

