How to create a Linux virtual machine on Windows 10 using Hyper-V
If you work with Linux, or you just want to test drive the OS, you can use Hyper-V to create a virtual machine with the distro you like alongside Windows 10.
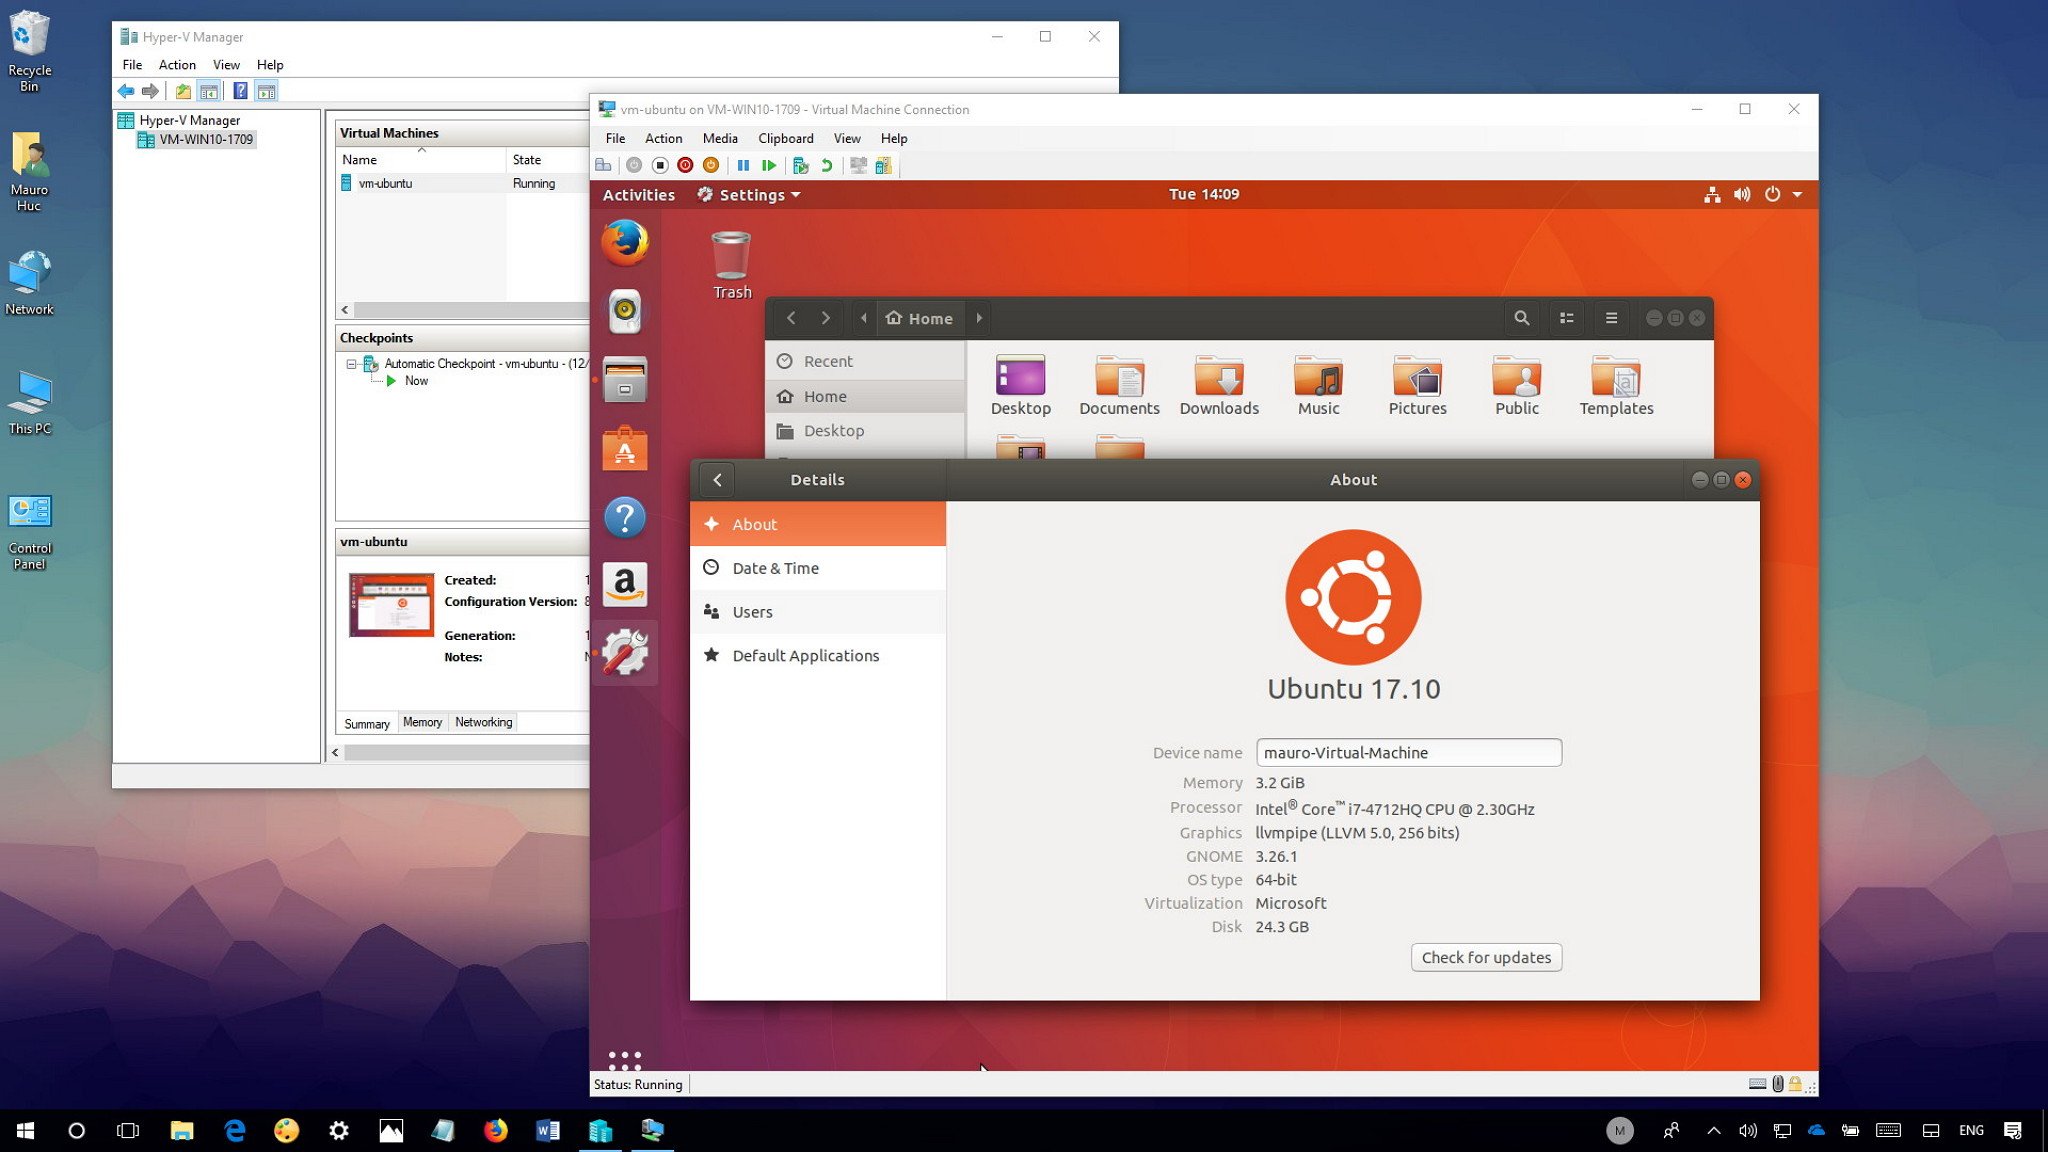
Although it's now possible to run a number of Linux distros natively on Windows 10, these environments can be somewhat limited in features and tools you can use. Also, you can only pick from three distros, including Ubuntu, SUSE Linux Enterprise, and OpenSUSE Leap, and you're stuck with the command-line interface, which means that you can't run any of the graphical experiences (e.g., GNOME, KDE, XFCE) or Linux-based graphical applications.
Of course, you can always install your favorite Linux distro on a second machine, but if you don't have one, it's still possible to run a full-blown version of Linux using a virtual machine (VM).
If you're running Windows 10, you can enable Hyper-V on your device to create a VM to install your preferred distro whether you're a developer or an enthusiast who just wants to know what's the Linux fuzz all about.
In this Windows 10 guide, we'll walk you through the steps to install most Linux distributions on virtual machines using Microsoft's Hyper-V virtualization feature.
- Guide requirements
- How to enable Hyper-V on Windows 10
- How to create a virtual machine using Hyper-V
- How to install Ubuntu Linux using Hyper-V on Windows 10
Guide requirements
To run a Linux virtual machine on Windows 10, you'll need the following:
- A computer with support for Hyper-V.
- An ISO file to install your preferred Linux distribution.
In this guide, we'll be using Ubuntu version 17.10, which you can download from the official Ubuntu website. However, it's possible to install version 16.04, which might be a more stable version of the open source project, and you can also install other distros, including:
- CentOS and Red Hat Enterprise Linux.
- Debian.
- SUSE.
- Oracle Linux.
- FreeBSD.
How to enable Hyper-V on Windows 10
Hyper-V is a virtualization technology from Microsoft available on Windows 10 Pro, Enterprise, and Education, and it allows you to create one or multiple virtual machines to install and run different OSes on the same physical hardware.
Get the Windows Central Newsletter
All the latest news, reviews, and guides for Windows and Xbox diehards.
Verifying Hyper-V support
Although Hyper-V is part of Windows 10, there is a minimum hardware requirement a computer must meet to enable the feature.
- 64-bit CPU with Second Level Address Translation (SLAT).
- Processor must support VM Monitor Mode Extension (VT-c on Intel chips).
- 4GB of memory at a minimum.
In addition, you have to make sure the Virtualization Technology and Hardware Enforced Data Execution Prevention options are enabled on your system BIOS.
You can quickly verify your computer has the required support for Hyper-V using Systeminfo:
- Open Start.
- Search for Command Prompt and click the top result.
- Type the following command and press Enter:
systeminfo.exe - Under Hyper-V Requirements, if the result reads Yes, then you can run Hyper-V.
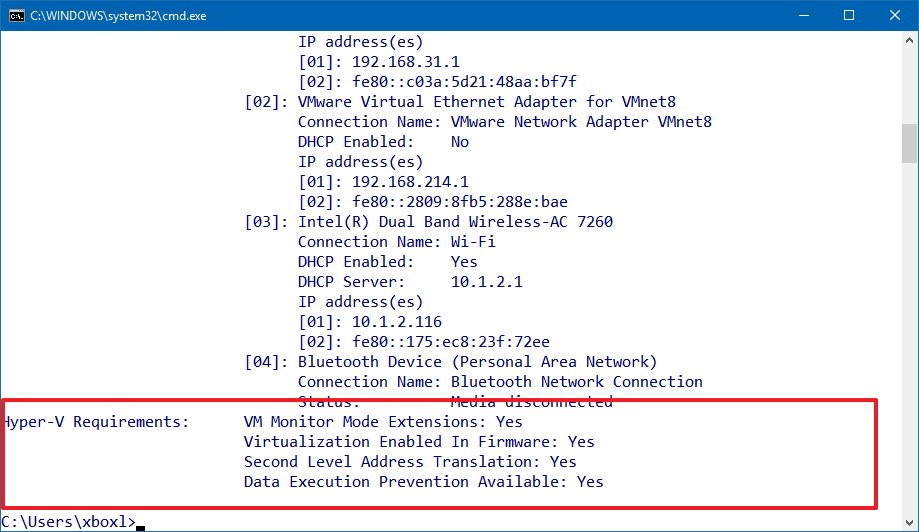
If the command displays No under Hyper-V Requirements, then your hardware doesn't support this feature, or you need to make sure to enable it manually.
Enabling Hyper-V
Use the following steps to enable Hyper-V on Windows 10:
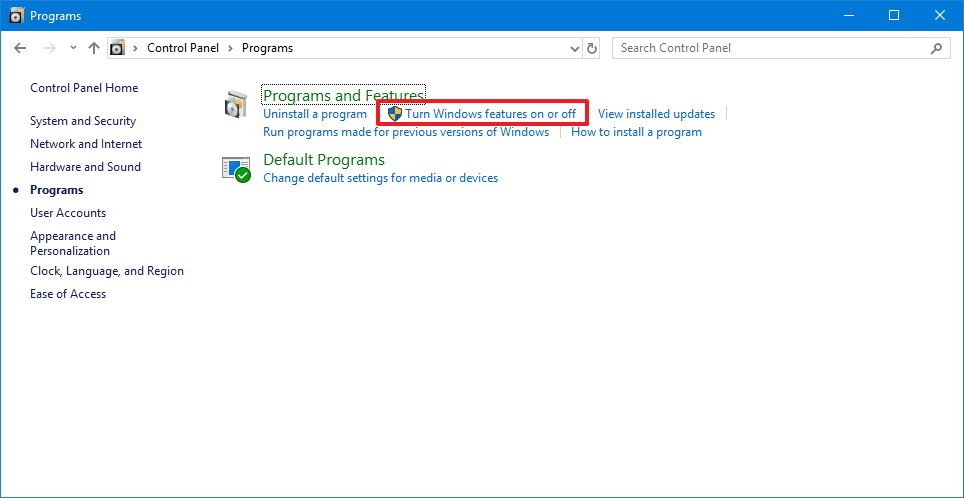
- Open Control Panel.
- Click on Programs.
- Click on Turn Windows features on or off.
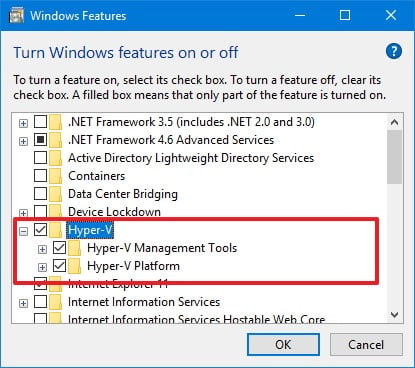
- Check the Hyper-V option making sure: Hyper-V Management Tools and Hyper-V Platform are also selected.
- Click OK to begin the process.
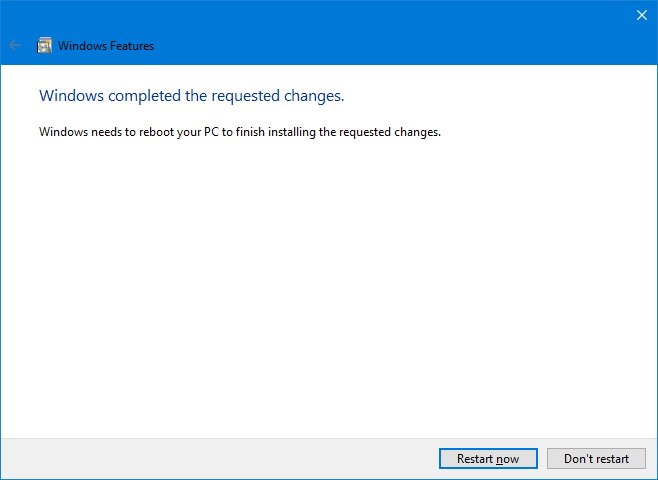
- After the installation completes, click Restart now to apply the changes.
How to create a virtual machine using Hyper-V
Once you've completed adding the virtualization layer to Windows 10, you'll need to create a virtual machine for the Linux distribution you want to use.
However, before you do that, you must create a virtual switch to allow the VM to connect to the internet.
Creating a virtual switch
Use the following steps to configure a virtual switch on Hyper-V:
- Open Start.
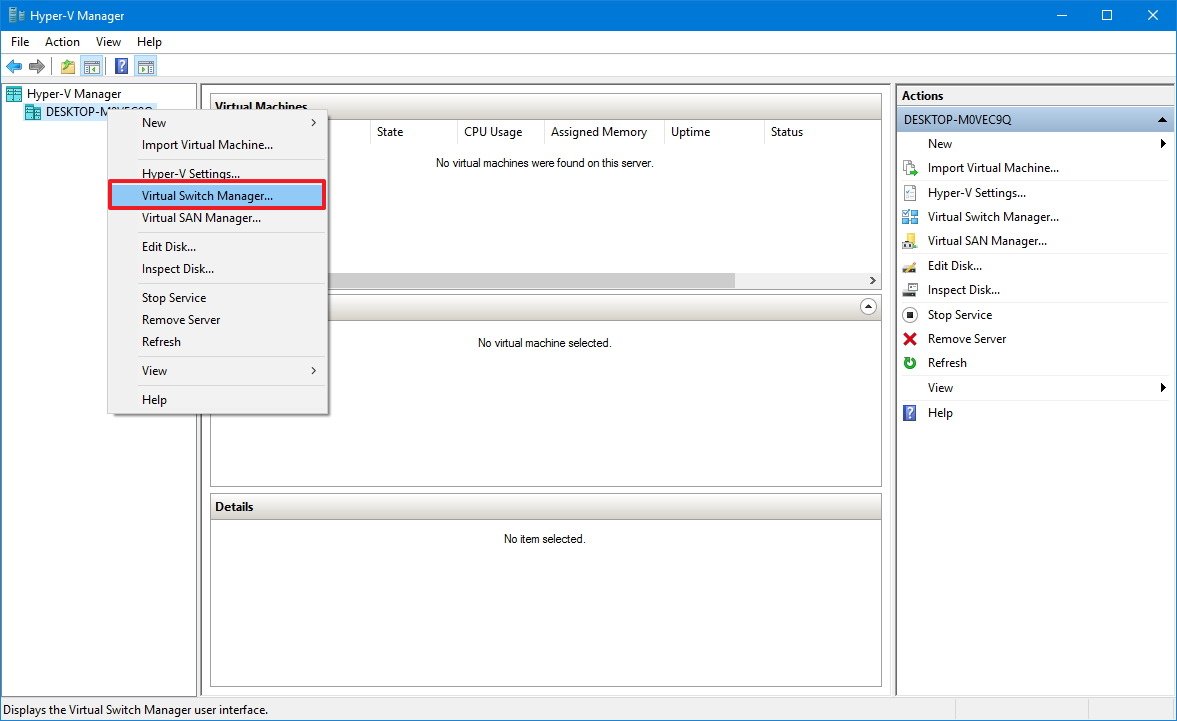
- Search for Hyper-V Manager and click the top result.
- Click on the Action menu.
- Select New and click on Virtual Switch Manager.
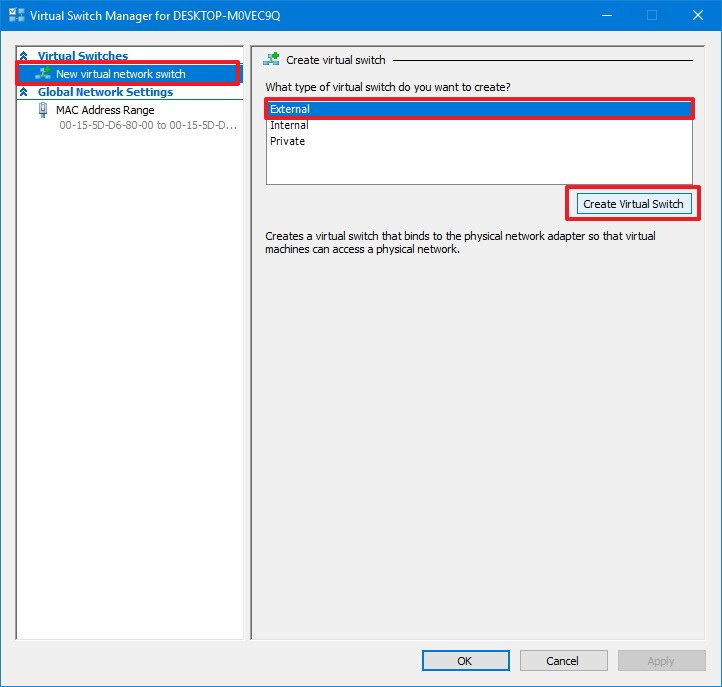
- On the left pane, select New virtual network switch.
- On the right, select External.
- Click the Create Virtual Switch button.
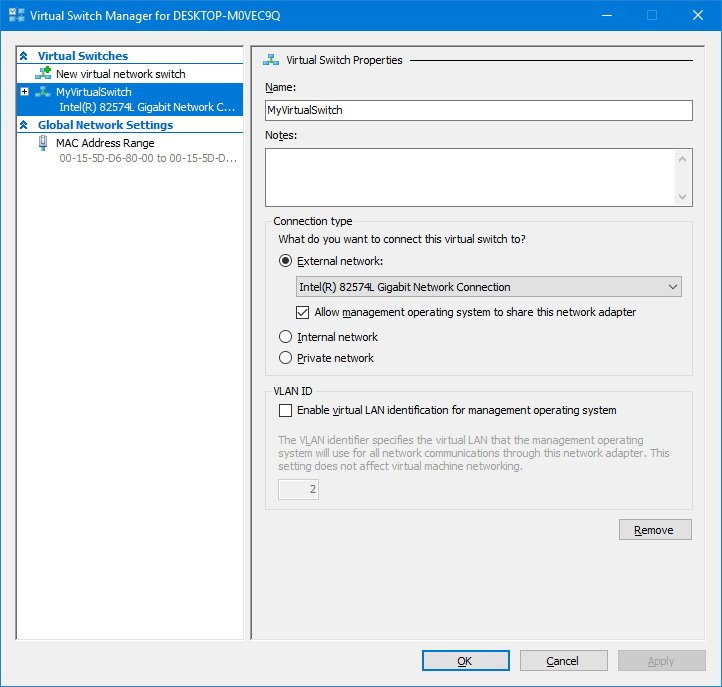
- Enter a new descriptive name for the switch (e.g., MyVirtualSwitch).
- Under connection type, make sure your network adapter is select on External network.
- Click Apply.
- Click OK.
Creating a virtual machine
After creating the virtual switch, you can proceed to create a new virtual machine:
- Open Start.
- Search for Hyper-V Manager and click the top result.
- Click on the Action menu.
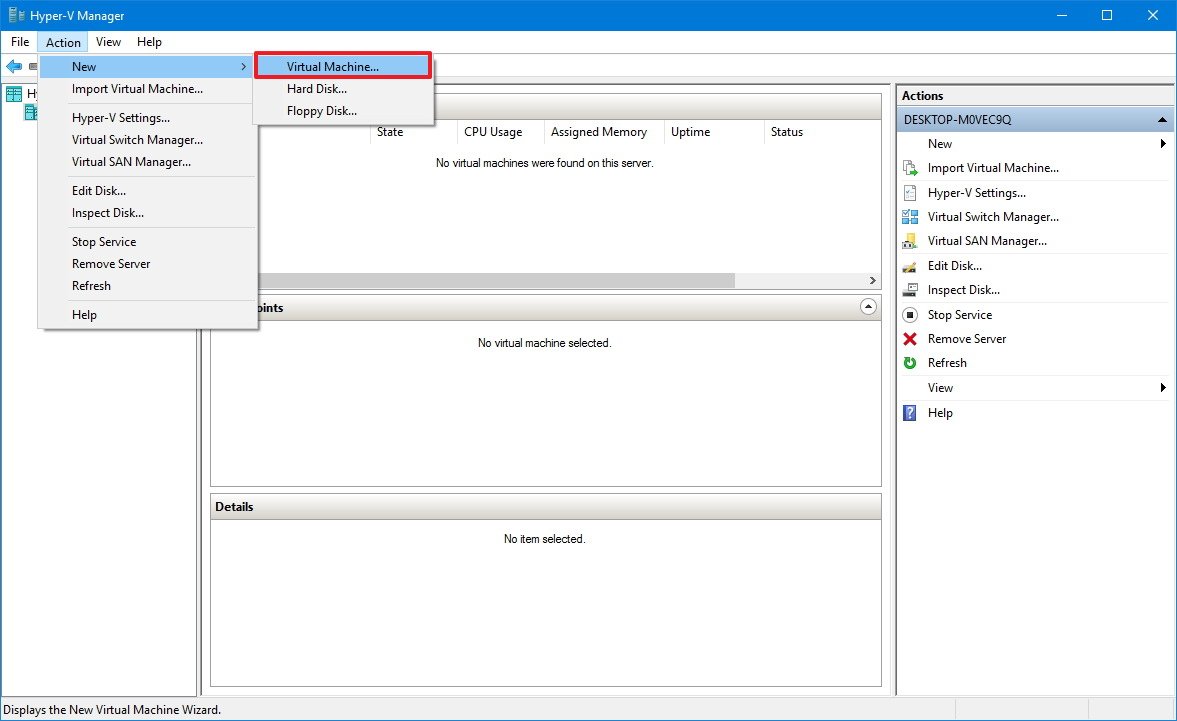
- Select New and click on Virtual Machine.
- Click the Next button.
- Enter a descriptive name for your virtual machine (e.g., vm-ubuntu).
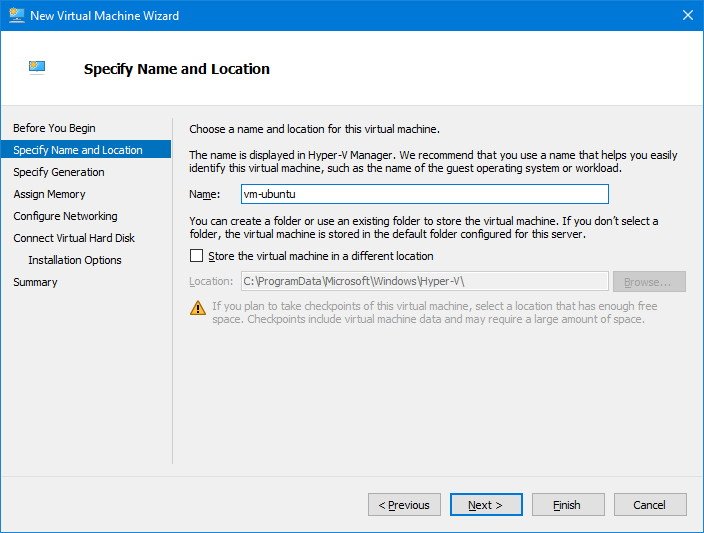
- Use the default location to store your virtual machine, or check the Store the virtual machine in a different location option to select a different path.
- Click Next to continue.
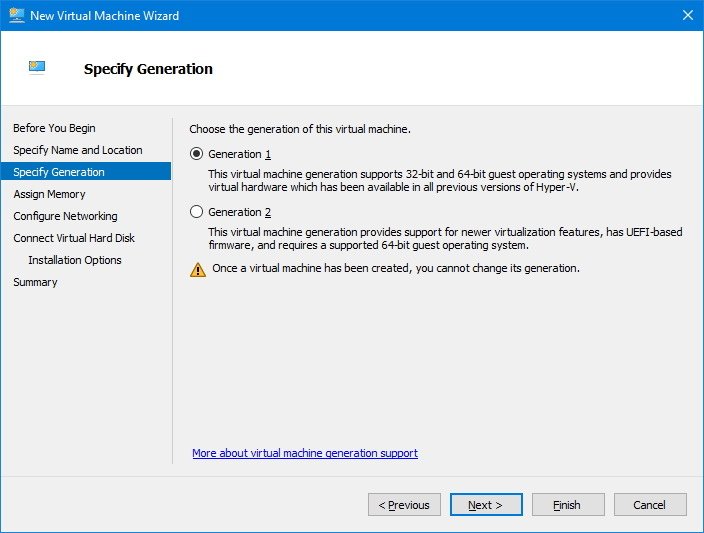
- You can leave the default Generation 1 option selected. Or you can select Generation 2 if you want a UEFI-based firmware.
- Click Next.
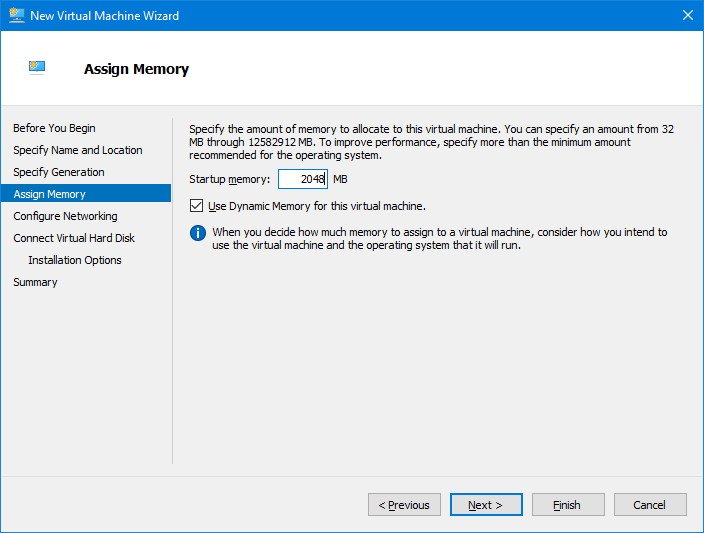
- Select the amount of RAM to allocate for your virtual machine. In the case of Ubuntu, you need a minimum of 2GB of memory.You can allocate as much memory as you want, but this setting will always depend on the physical memory available on your computer.
- Click Next.
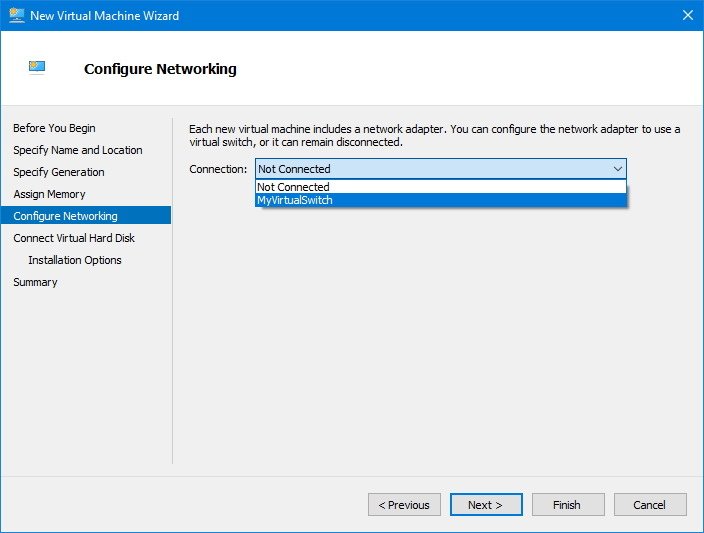
- Use the drop-down menu to select the virtual switch you created earlier.
- Click Next.
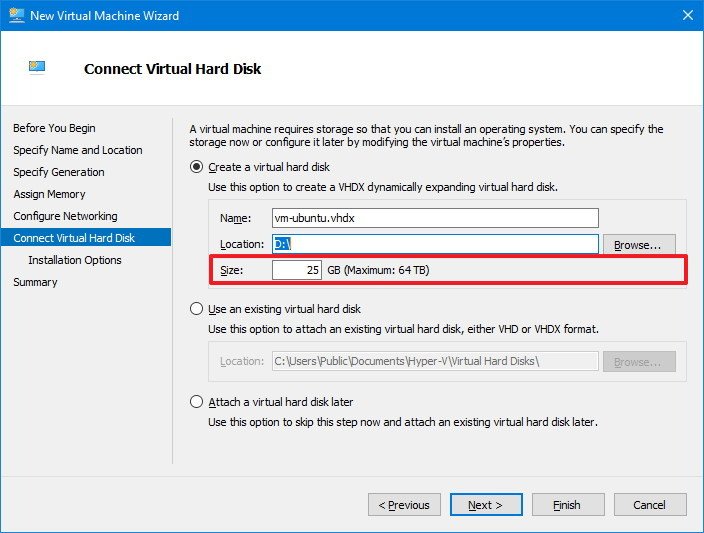
- You can leave all the default settings to create a virtual hard drive, but under Size make sure to allocated at least 25GB of storage, which is the minimum required to run Ubuntu.
- Click Next to continue.
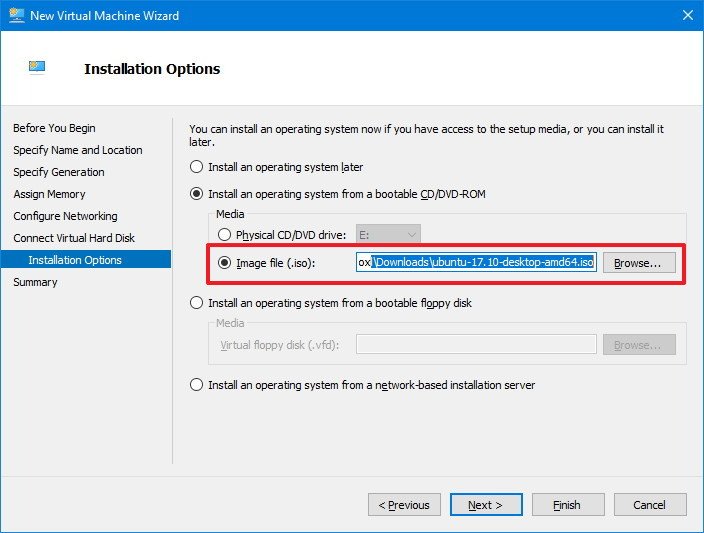
- On Installation options, select the Install an operating system from a bootable CD/DVD-ROM option.
- Select the Image file (.iso) option.
- Select the path for the ISO file with the Ubuntu installation files.
- Click Next.
- Click Finish.
How to install Ubuntu Linux using Hyper-V on Windows 10
The last step is to start the virtual machine and install the Linux distribution you want to use.
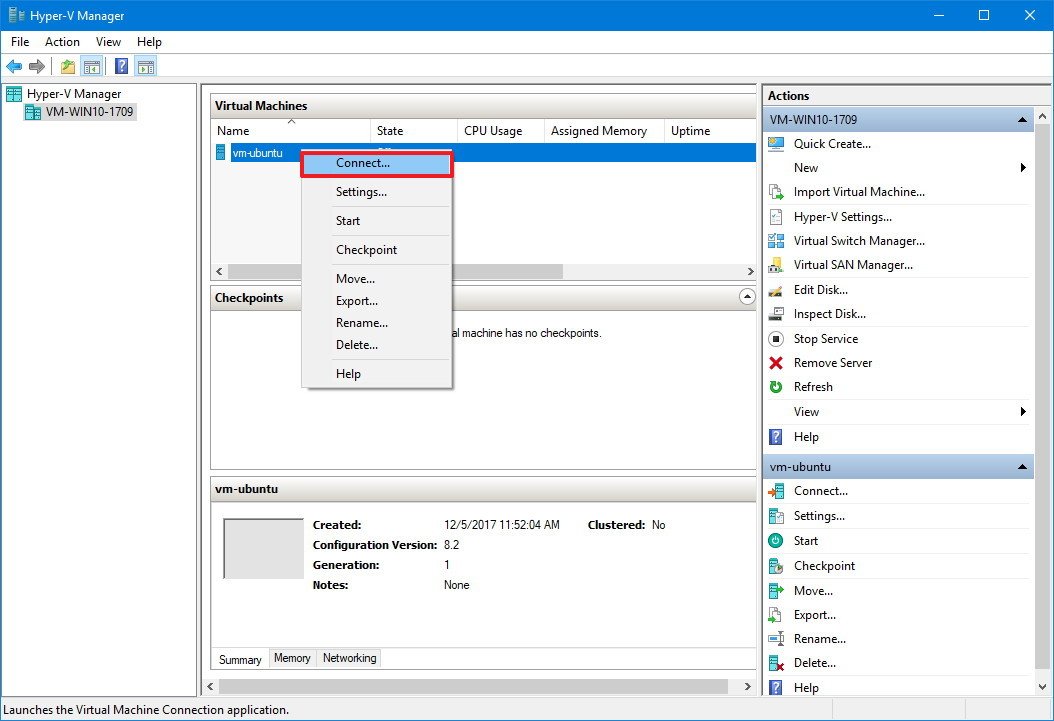
- On Hyper-V Manager, under Virtual Machine, right-click the newly created device, and select Connect.
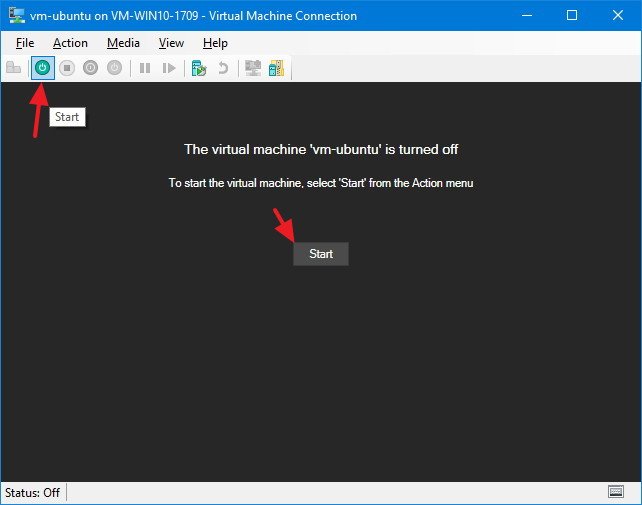
- Click the Start (power) button.
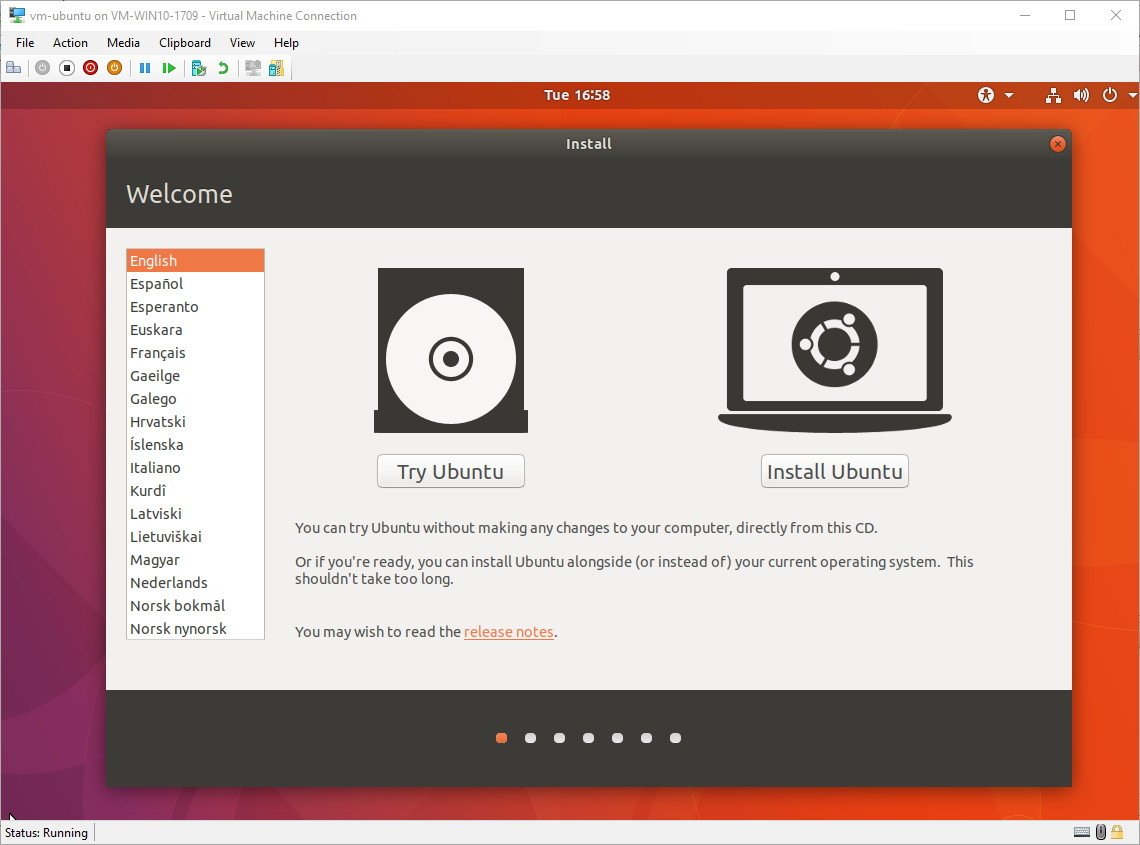
- Select your language.
- Click the Install Ubuntu button.
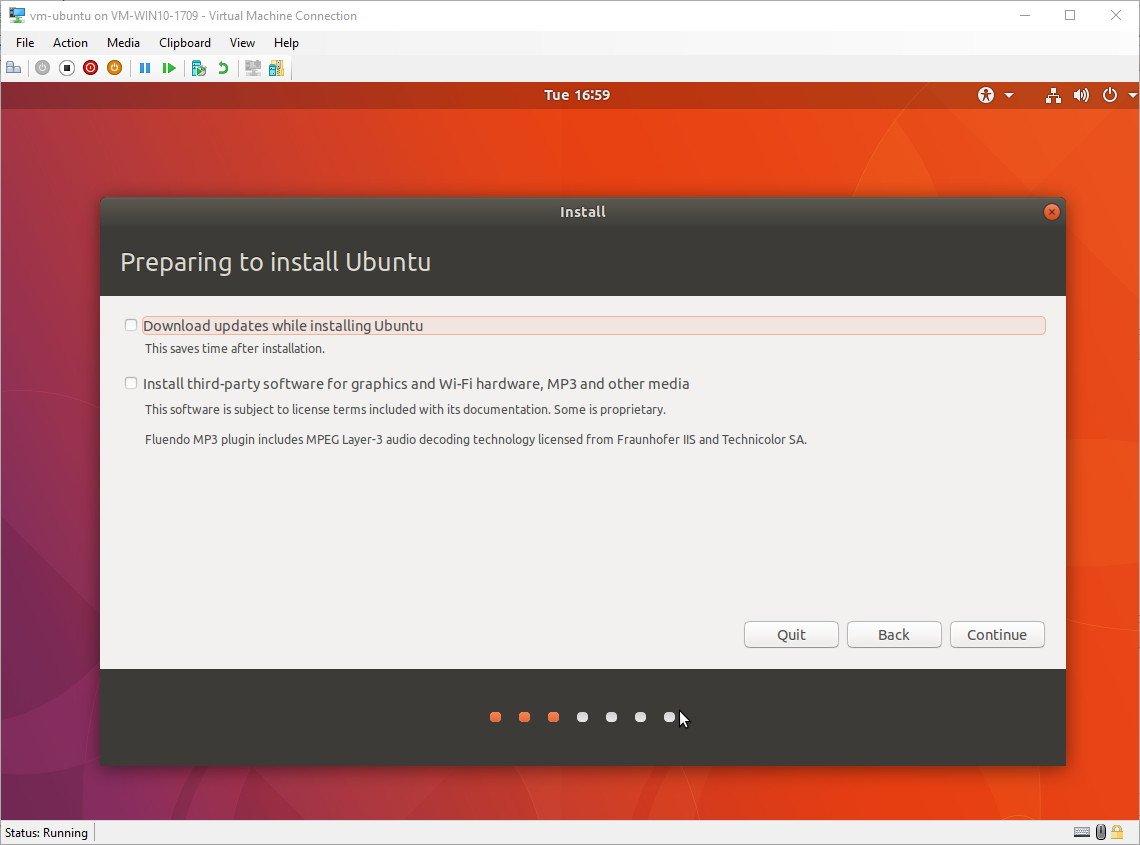
- Check the Install third-party software for graphics and Wi-Fi hardware, Flash, MP3 and other media option.
- Click Continue.
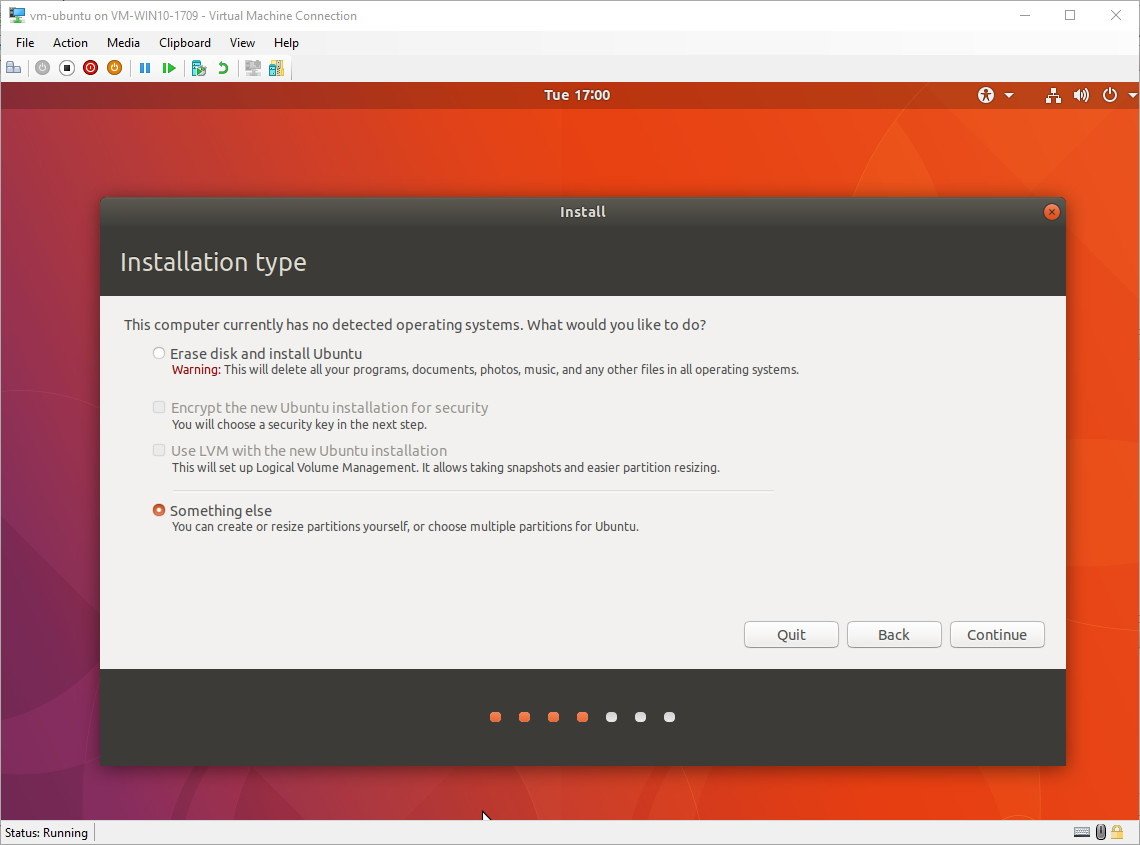
- Select the Something else option.
- Click Continue.
- Double-click the /dev/sda drive.
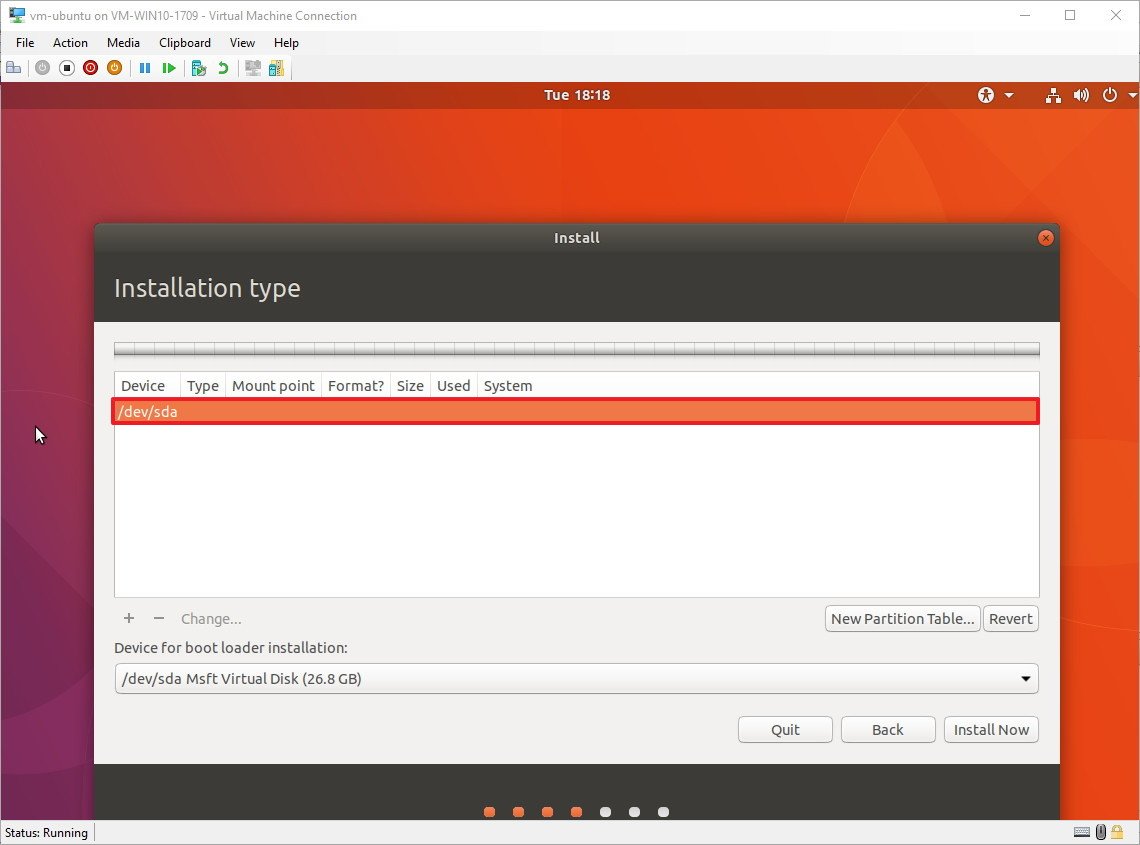
- Click Continue.
- Double-click free space.
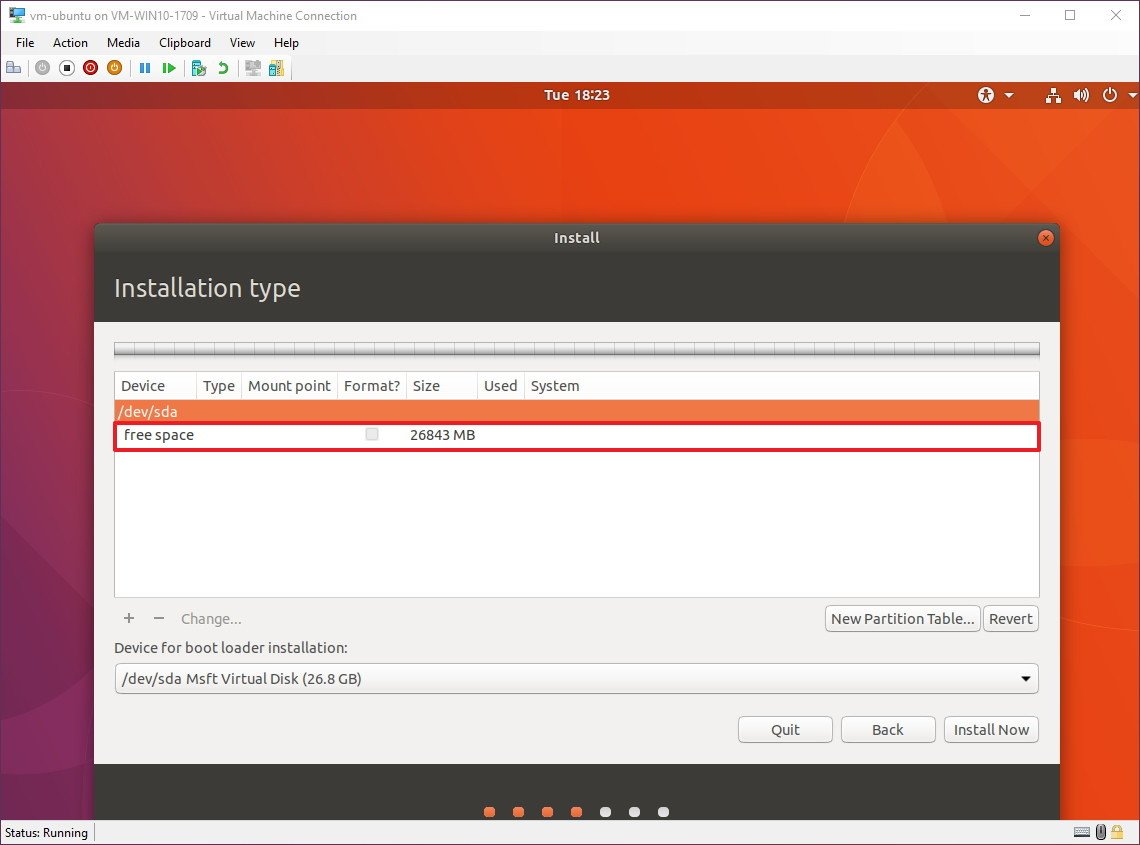
- Under "Use as," use the drop-down menu and select Swap area to create a swap partition.
- Under "Size," select the amount of space for the swap partition, which should be about 2x of the amount of RAM allocated for the virtual machine.
- Click OK.
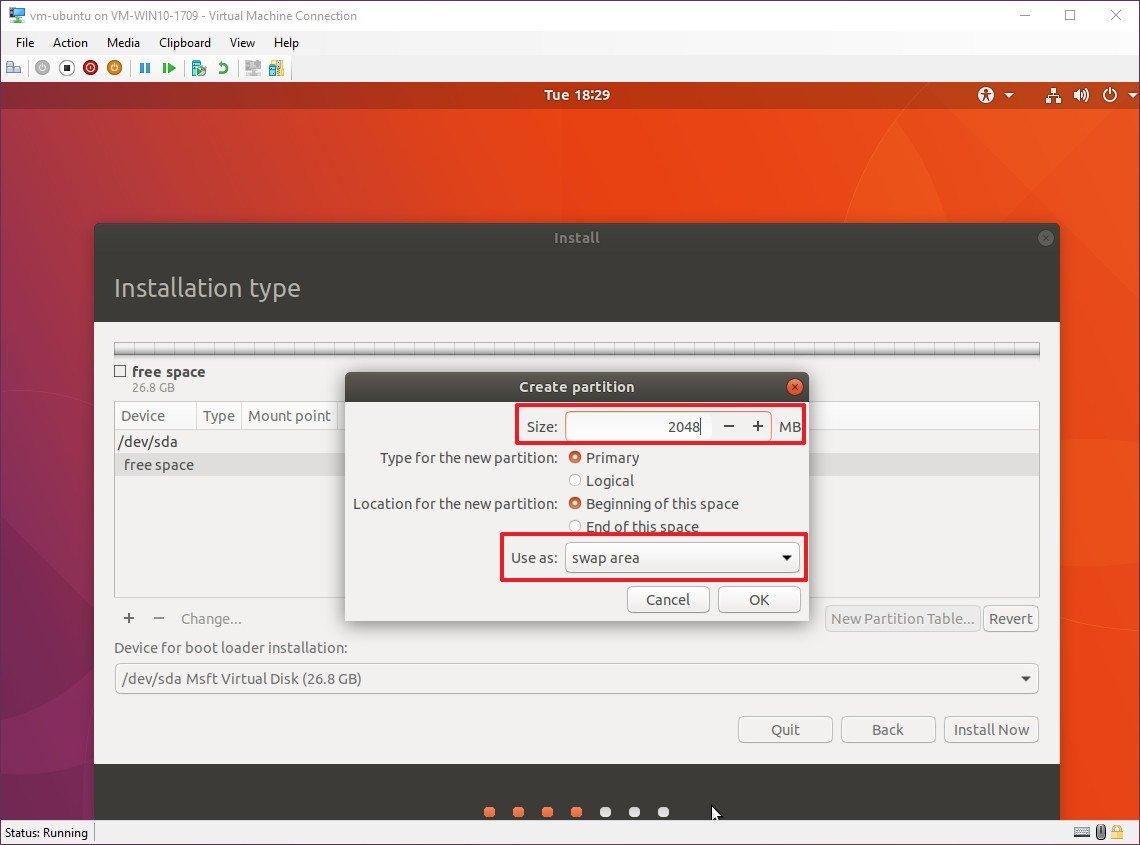
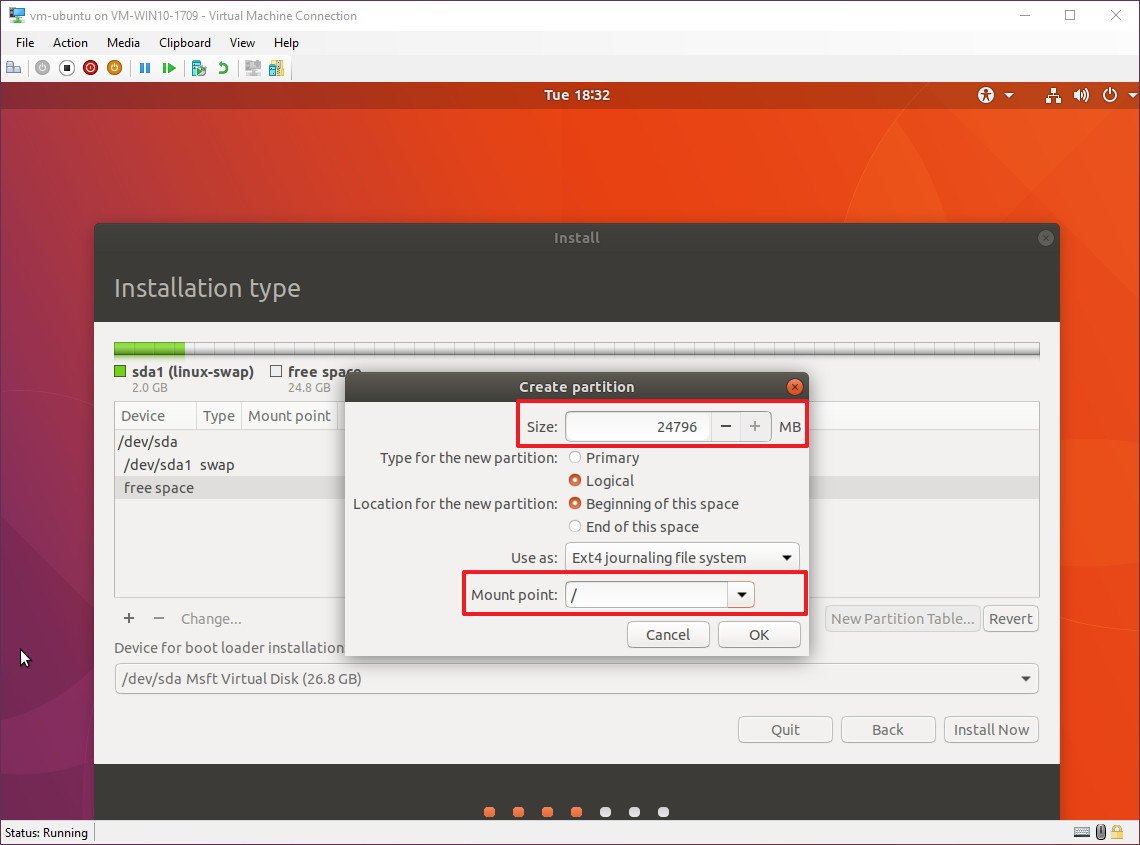
- Double-click free space again.
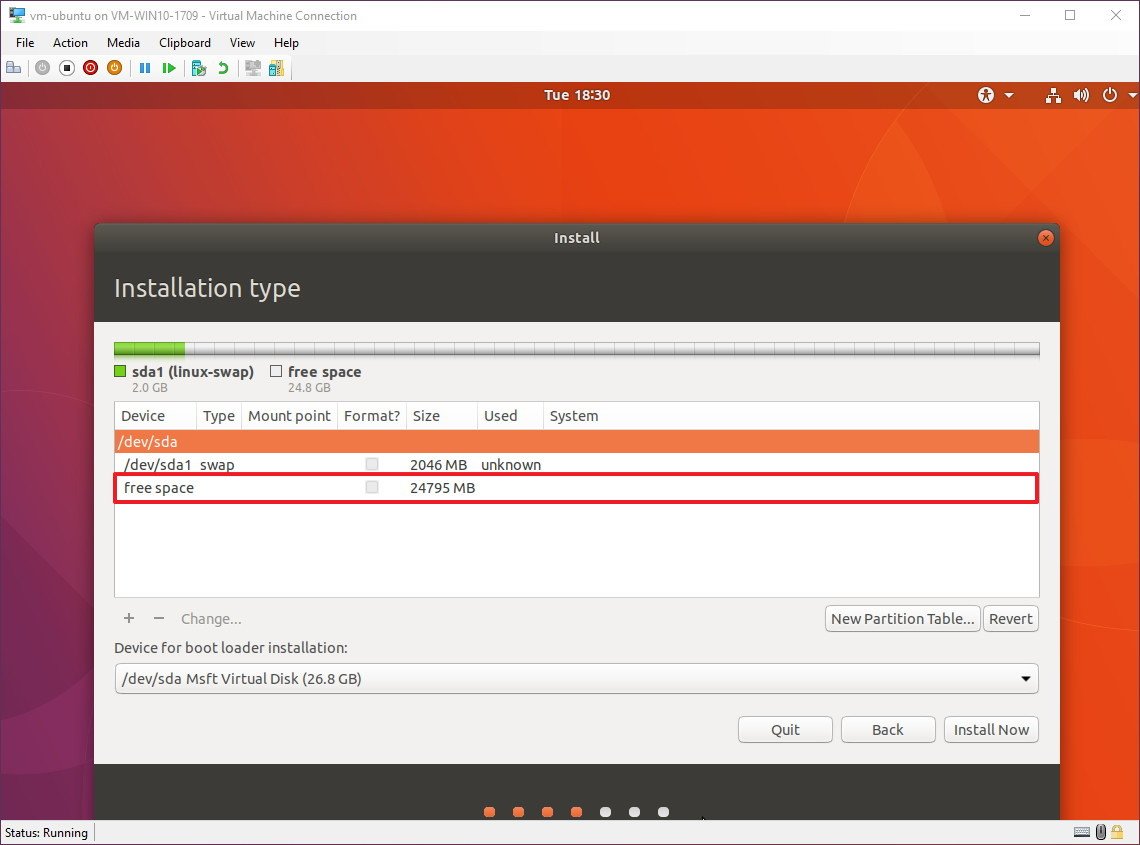
- Select the amount of space to allocate for the installation.
- Under "Mount point," use the drop-down menu and select root /.
- Click OK.
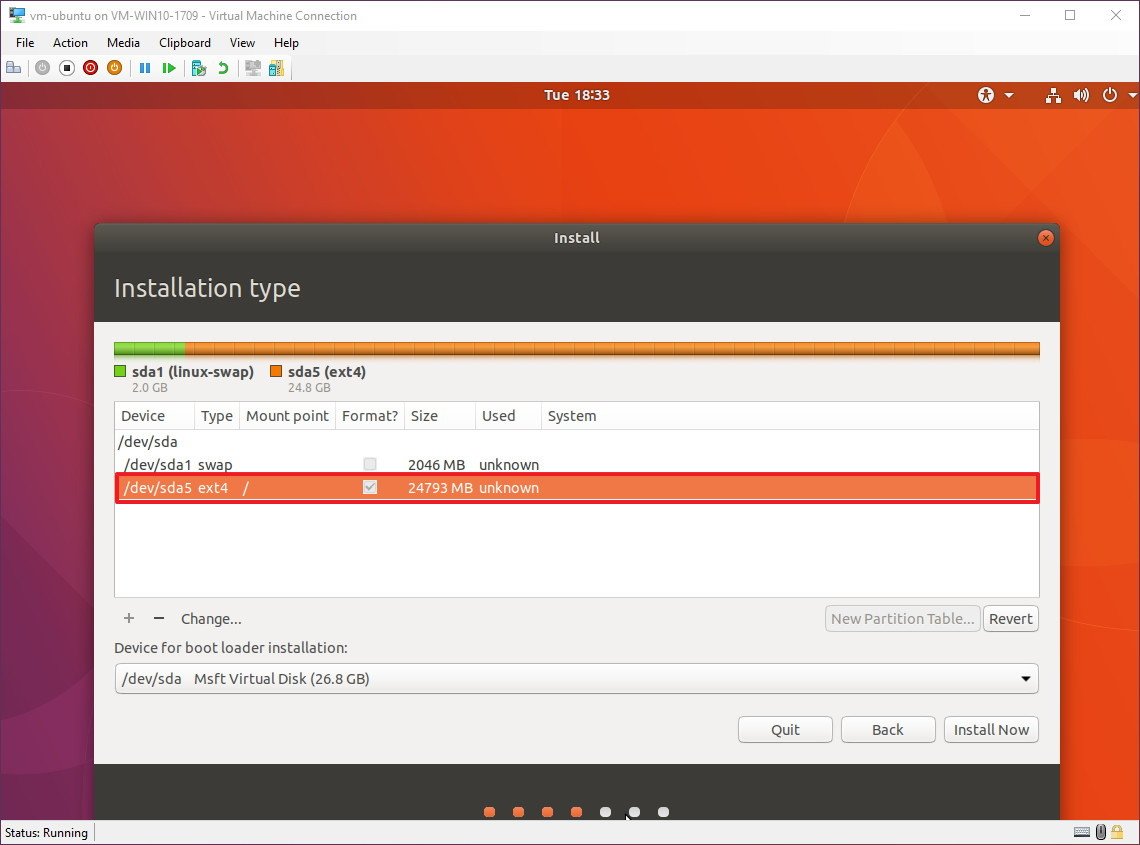
- Select the ext4 partition from the list.
- Click the Install Now button.
- Click Continue to install Ubuntu.
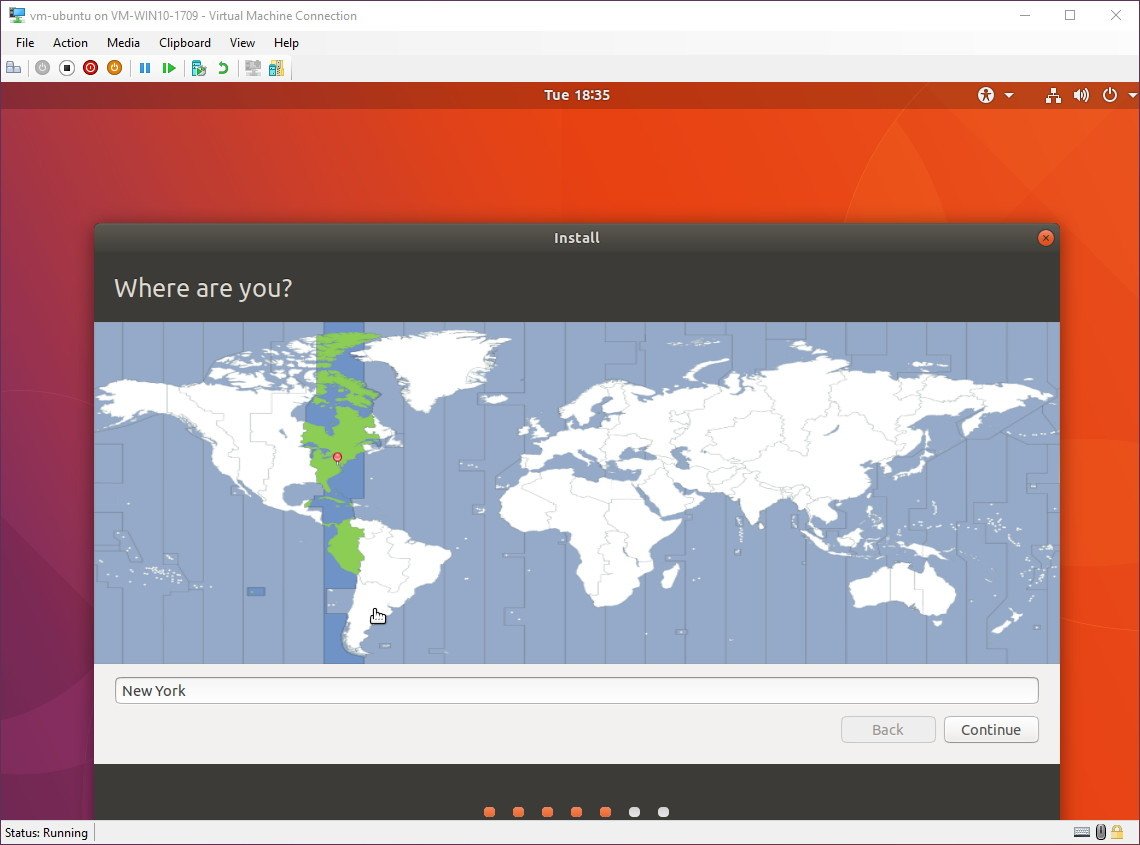
- Select your time zone.
- Click Continue.
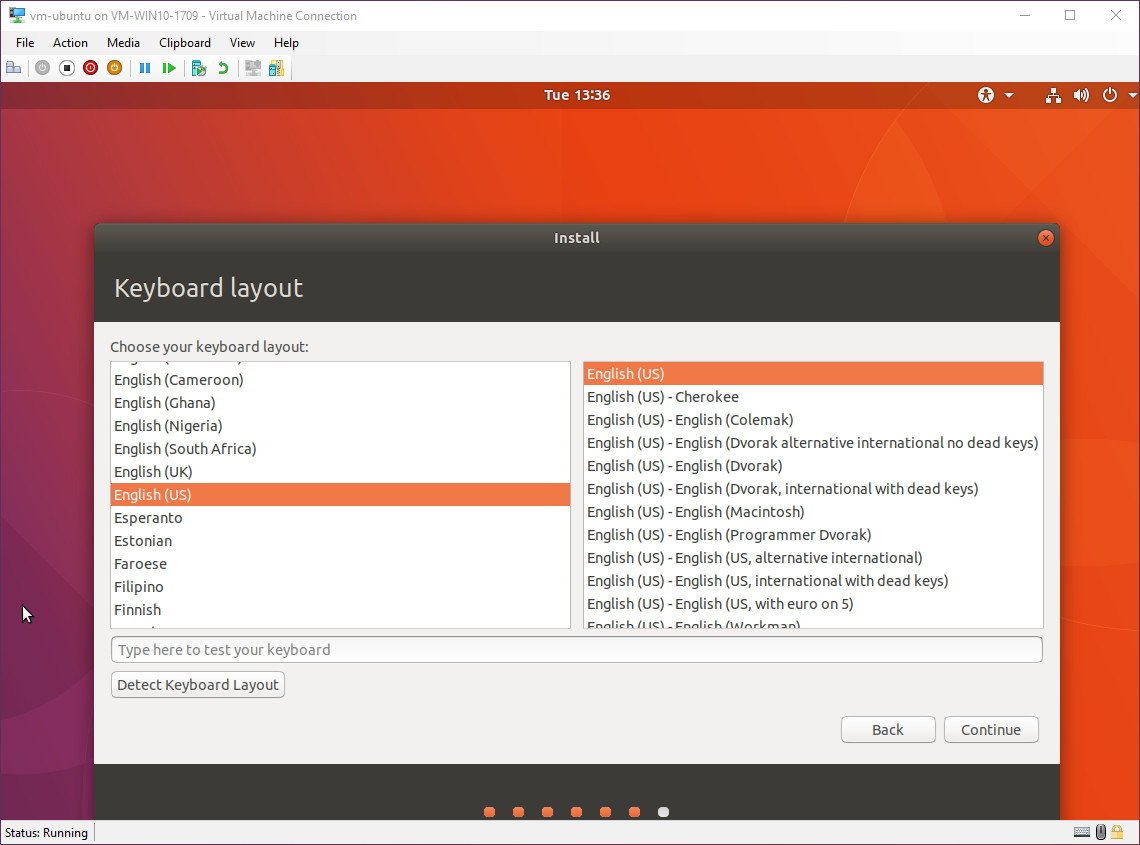
- Select the keyboard layout.
- Click Continue.
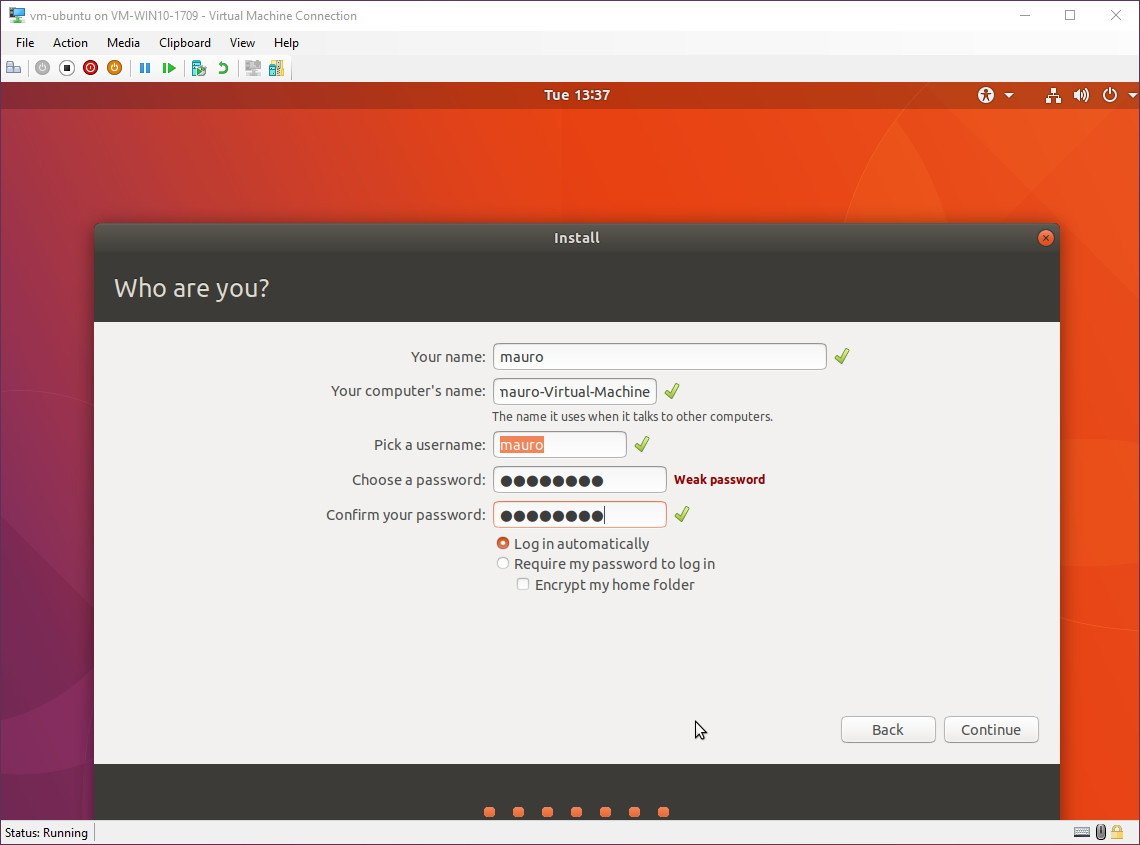
- Create a user account with your information.
- Click Continue.
- Restart the virtual machine to finish the setup.Quick Tip: If during the final restart process, you get a message to remove the installation and press Enter, but hitting the key won't restart the VM, just click the Turn off button and then turn it back on again.
After completing the steps, you can just turn on the VM and start using Ubuntu Linux alongside Windows 10.
While we're focusing this guide setting up Ubuntu, you can also refer to these instructions to run other distributions of Linux.
More Windows 10 resources
For more helpful articles, coverage, and answers to common questions about Windows 10, visit the following resources:
- Windows 10 on Windows Central – All you need to know
- Windows 10 help, tips, and tricks
- Windows 10 forums on Windows Central
Mauro Huculak has been a Windows How-To Expert contributor for WindowsCentral.com for nearly a decade and has over 15 years of experience writing comprehensive guides. He also has an IT background and has achieved different professional certifications from Microsoft, Cisco, VMware, and CompTIA. He has been recognized as a Microsoft MVP for many years.

