How to remap Xbox One controller buttons on Windows 10
You can remap the Xbox controller buttons to anything you want, and in this guide, you'll learn the steps to complete this task on Windows 10.
Although the Xbox controller provides the most optimal button layouts for gamers, it's not the perfect configuration for every game. Sometimes, you may need a different mapping depending on the game, personal or required preferences, which is why it's essential to a quick and easy way to remap buttons on the controller.
If you're using Windows 10, you can use the Xbox Accessories app available from the Microsoft Store, which provides an easy to use interface to remap every button on the controller, whether you have a standard Xbox Wireless Controller, Xbox Elite Wireless Controller (or Series 2), or Xbox Adaptive Controller.
In this Windows 10 guide, we'll walk you through the steps to remap the buttons of an Xbox controller to play games with custom button layouts.
- How to remap Xbox controller buttons
- How to edit remap Xbox controller buttons profile
- How to restore default settings for Xbox controller buttons
How to remap Xbox controller buttons
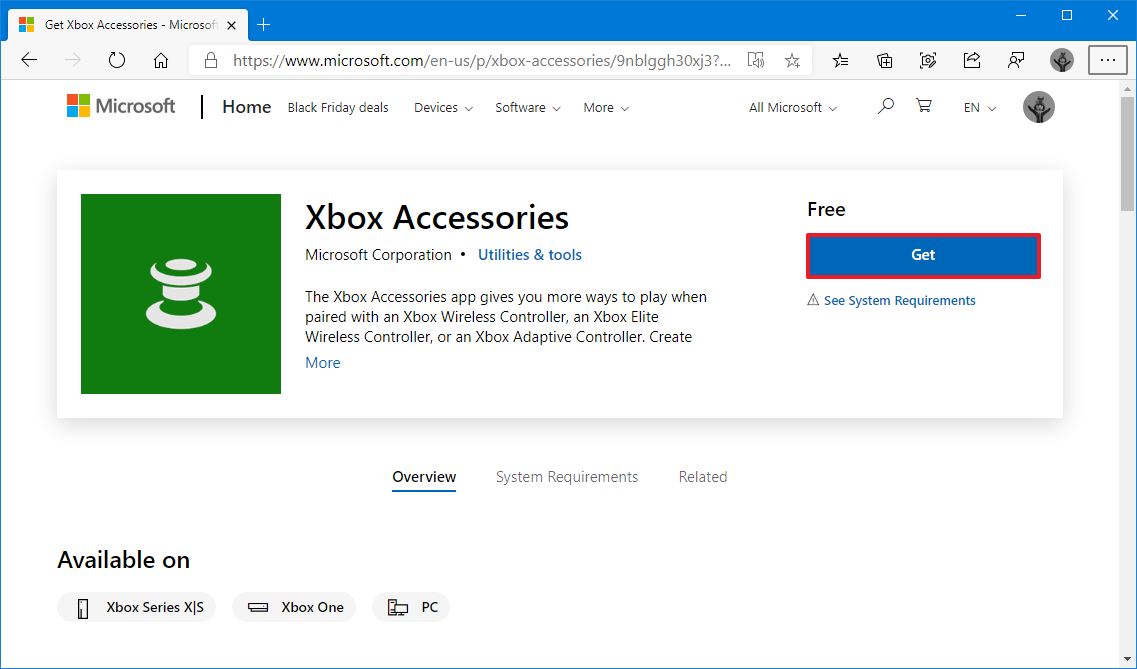
If you want to use a custom button layout when playing games with an Xbox controller, you'll first need to install the Xbox Accessories app from the Microsoft Store. (This is available on Windows 10, Xbox Series X and Series S, and Xbox One.)
Install Xbox Accessories app
To install the Xbox Accessories app to remap Xbox controllers, use these steps:
- Open Microsoft Store.
- Click the Get button.
- Click the Open button.
- Click the Get (or Install) button for the Xbox Accessories app.
Once you complete the steps, the app will be available from the Start menu to remap buttons on an Xbox Wireless Controller, Xbox Elite Wireless Controller, or Xbox Adaptive Controller.
Remap controller buttons
To remap the Xbox buttons, connect the controller to your device using the Xbox Wireless USB adapter, Bluetooth, or USB cable, and then use these steps:
All the latest news, reviews, and guides for Windows and Xbox diehards.
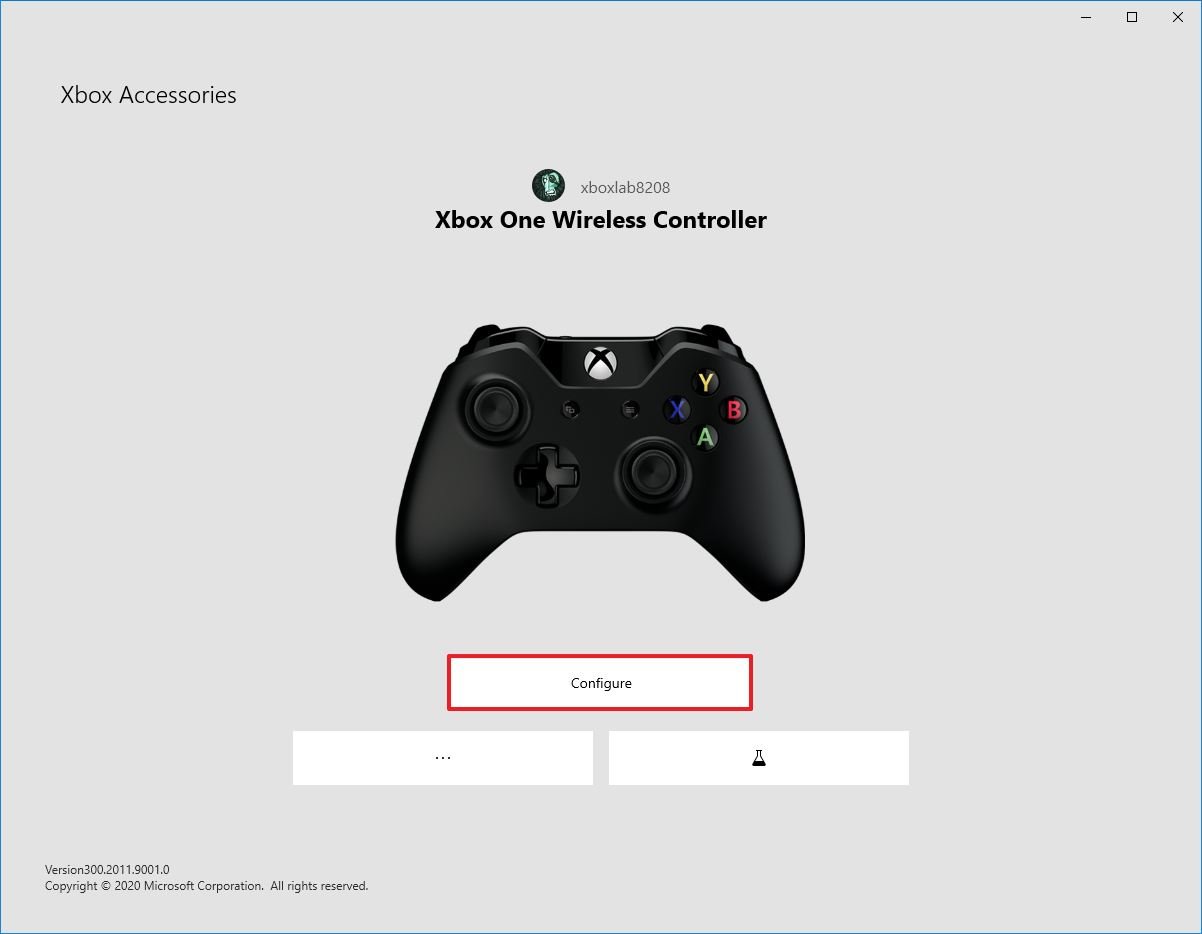
- Open Xbox Accessories app.
- Click the Configure button.
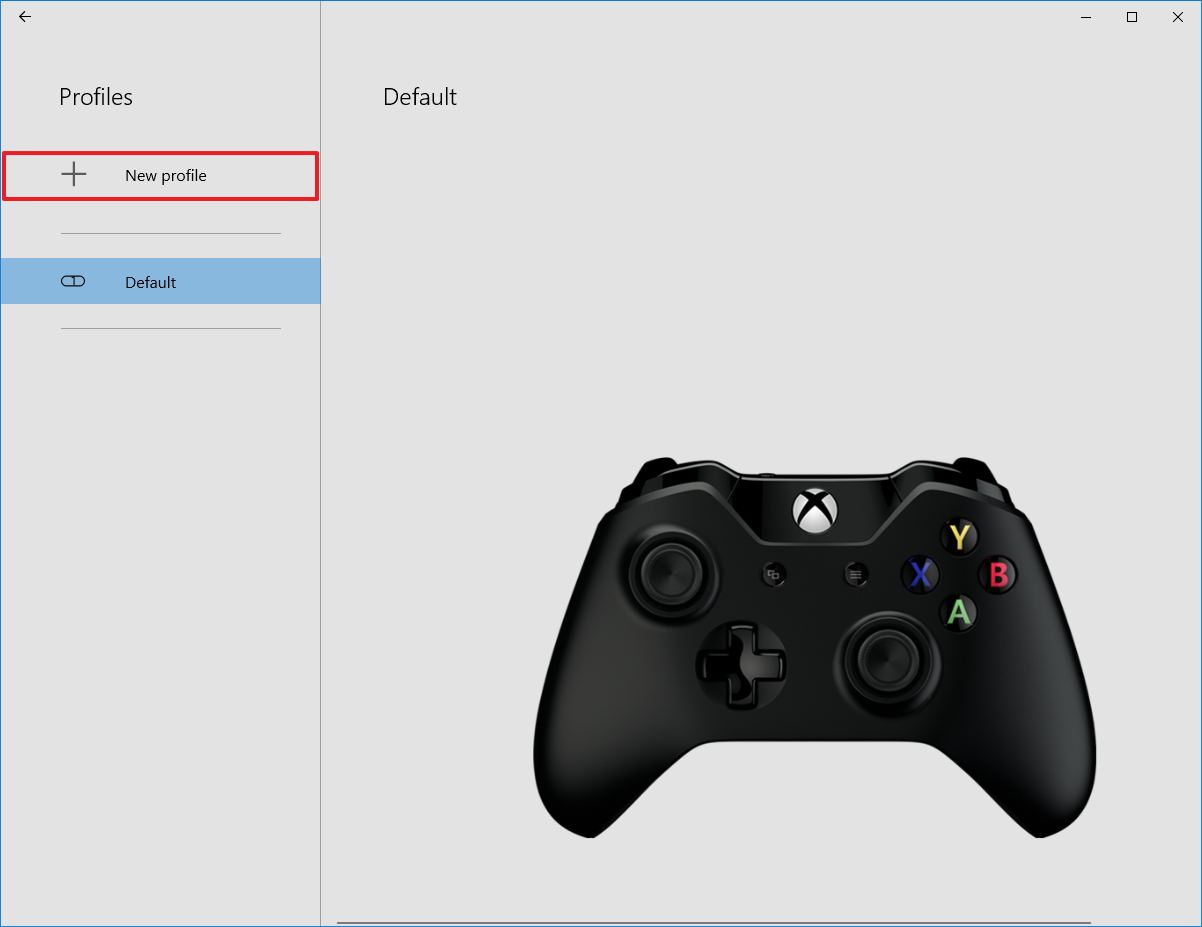
- Click the New profile option from the left navigation pane.
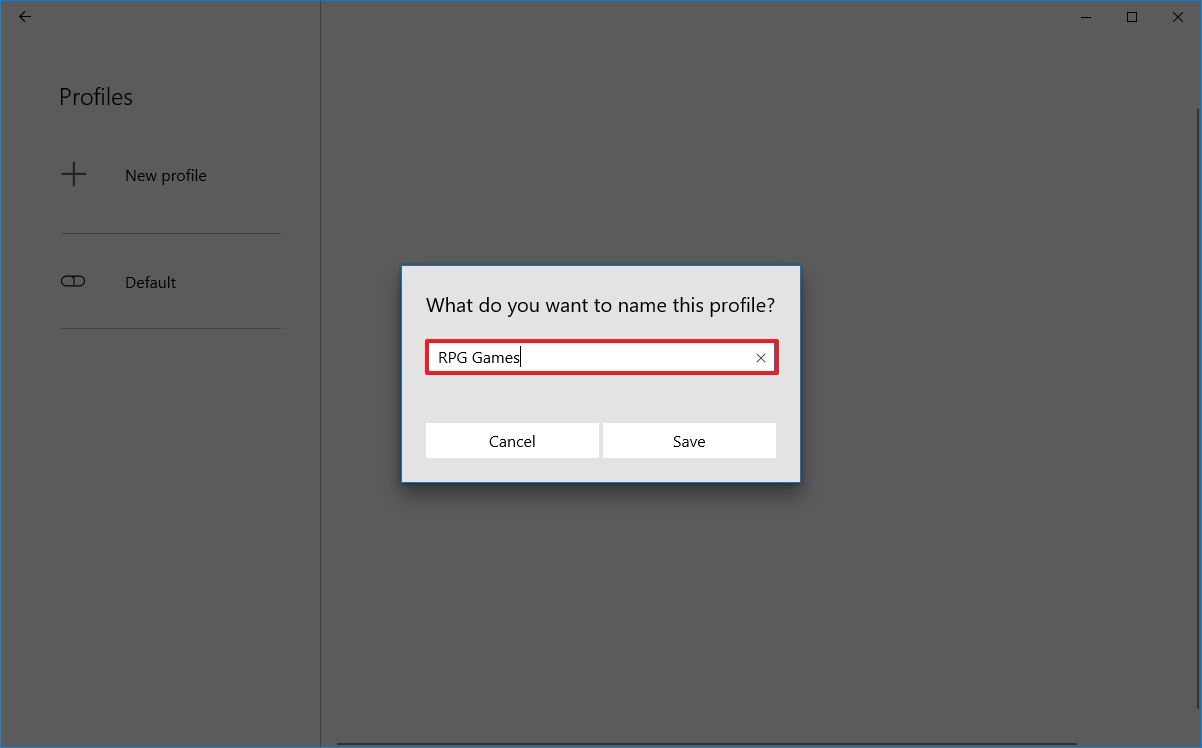
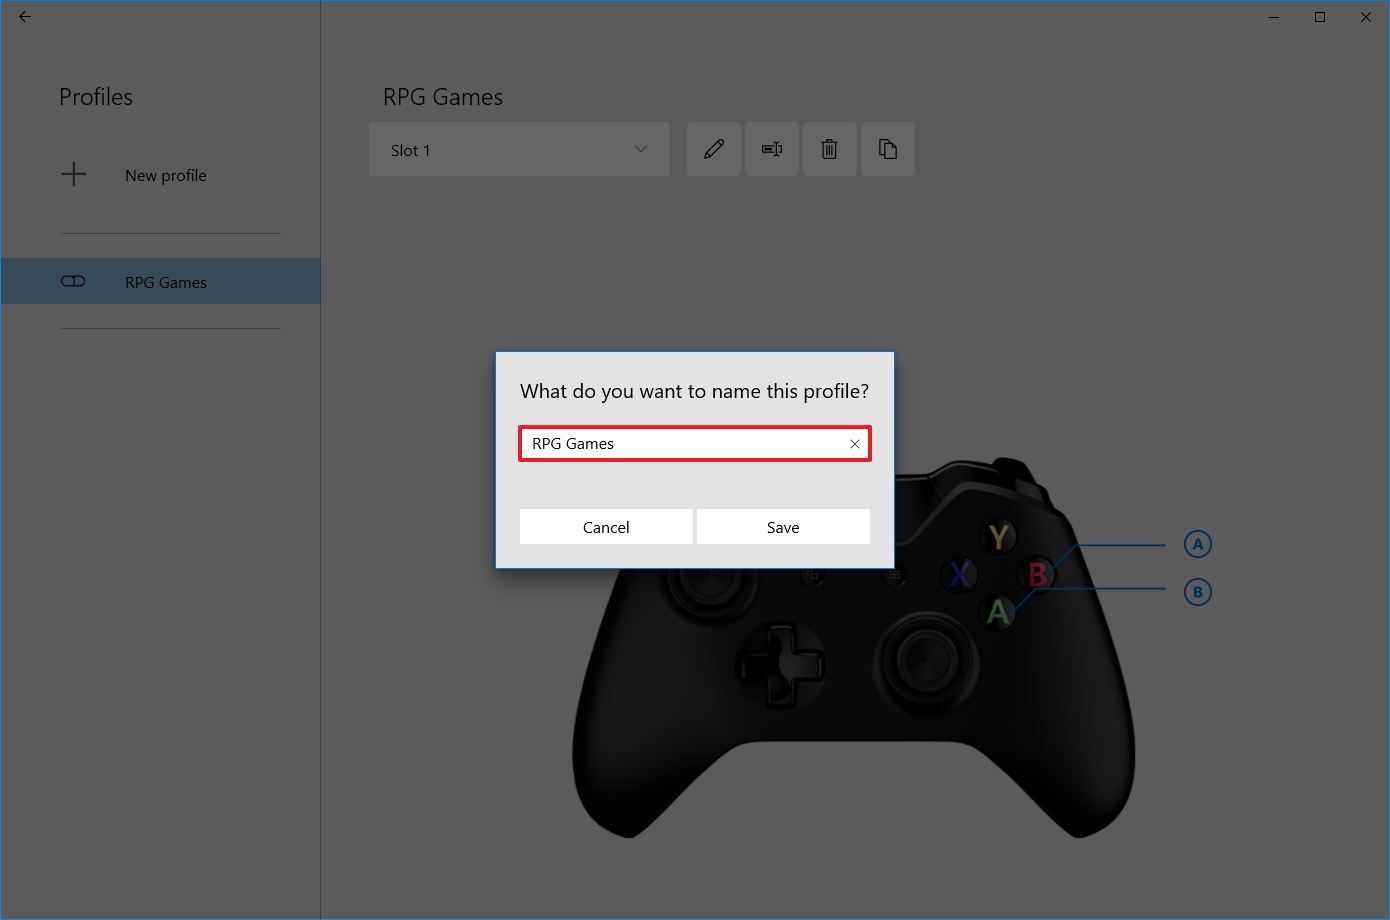
- Confirm a descriptive name for the profile. (You can use the name of the game or gaming category to describe the profile file name.)
- Click the Save button.
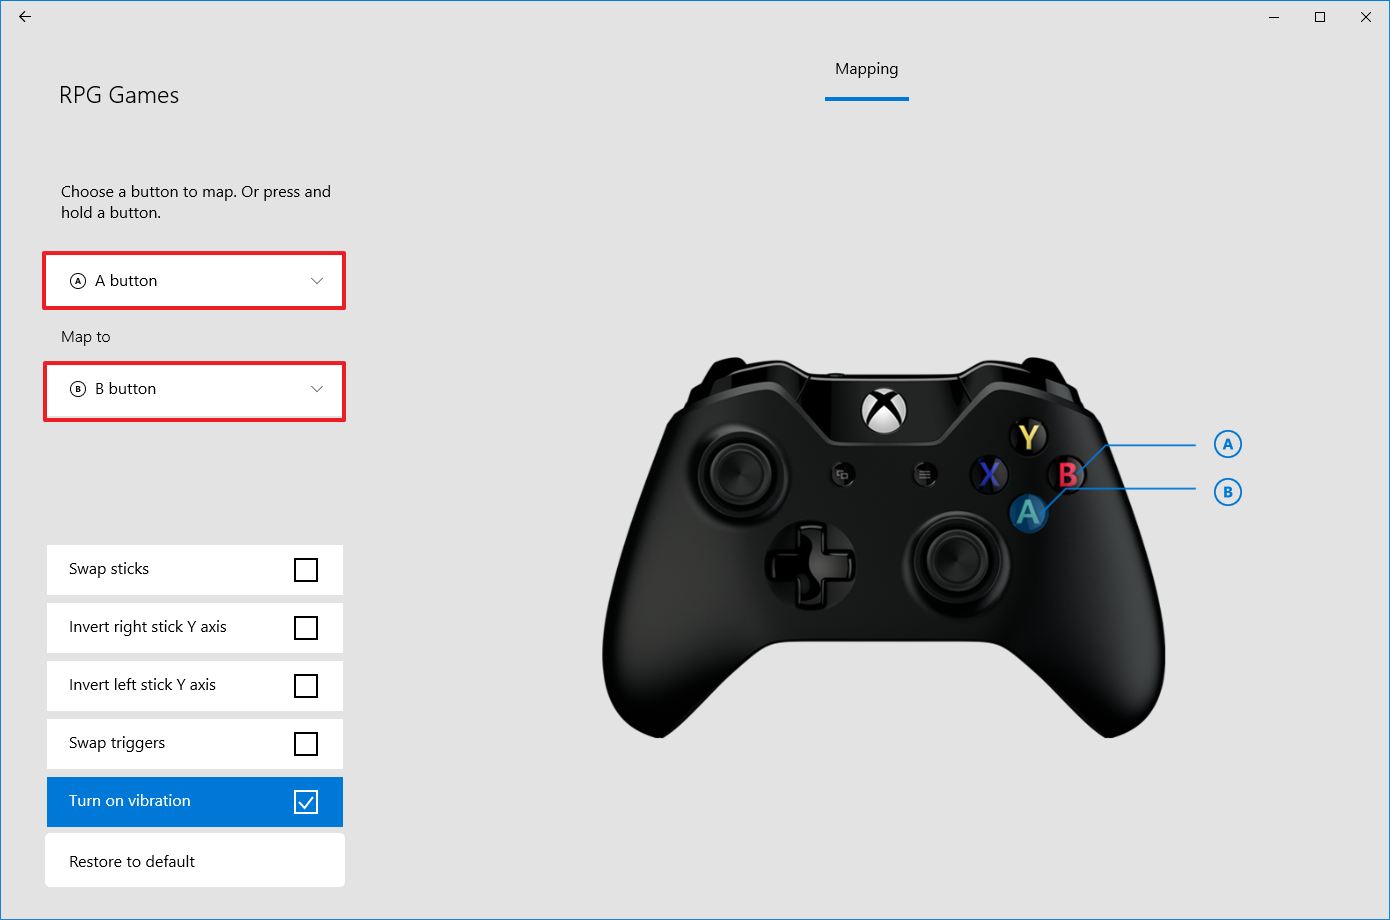
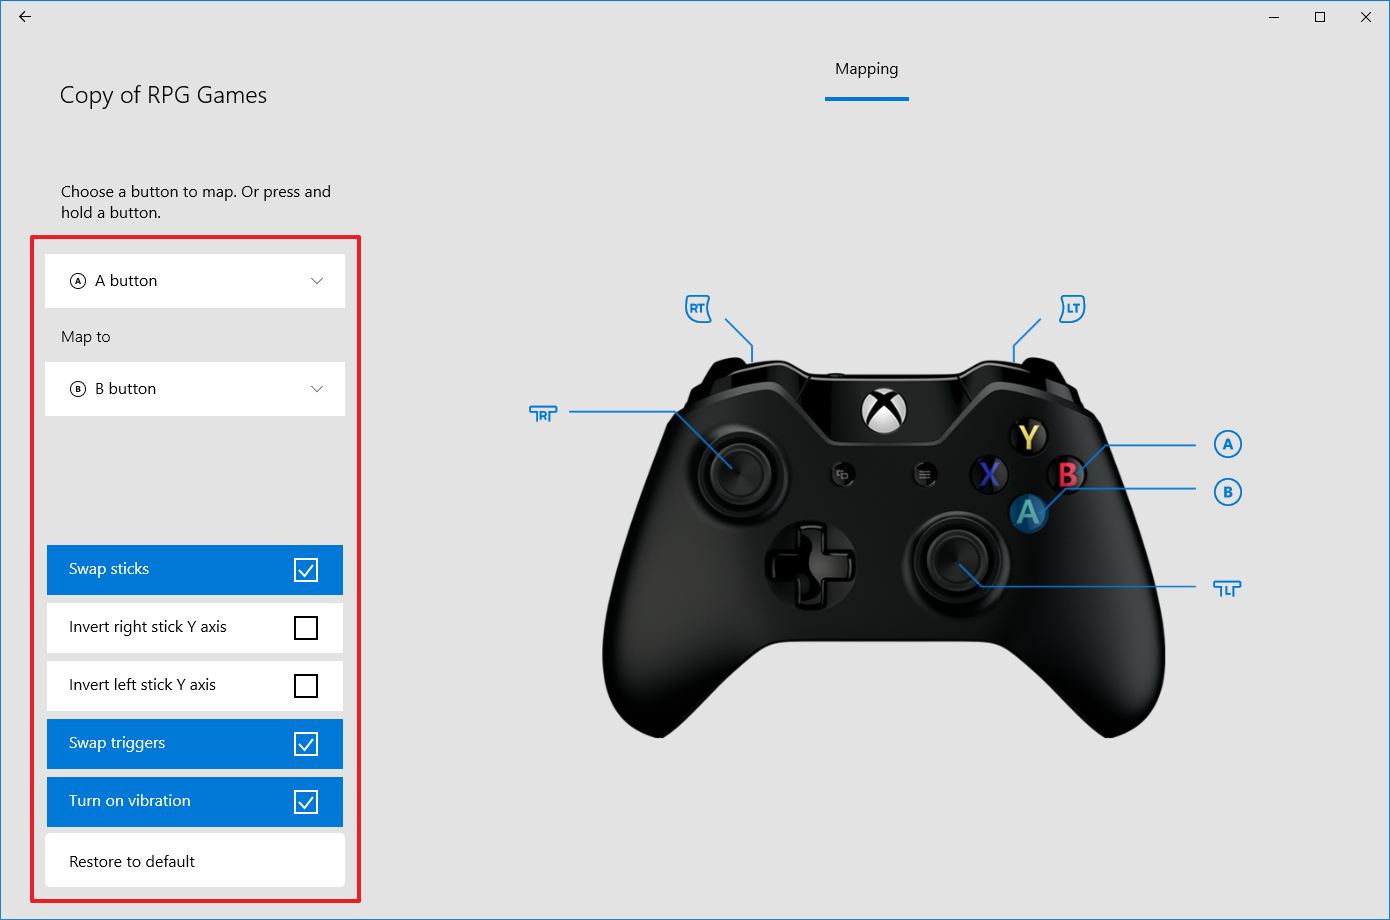
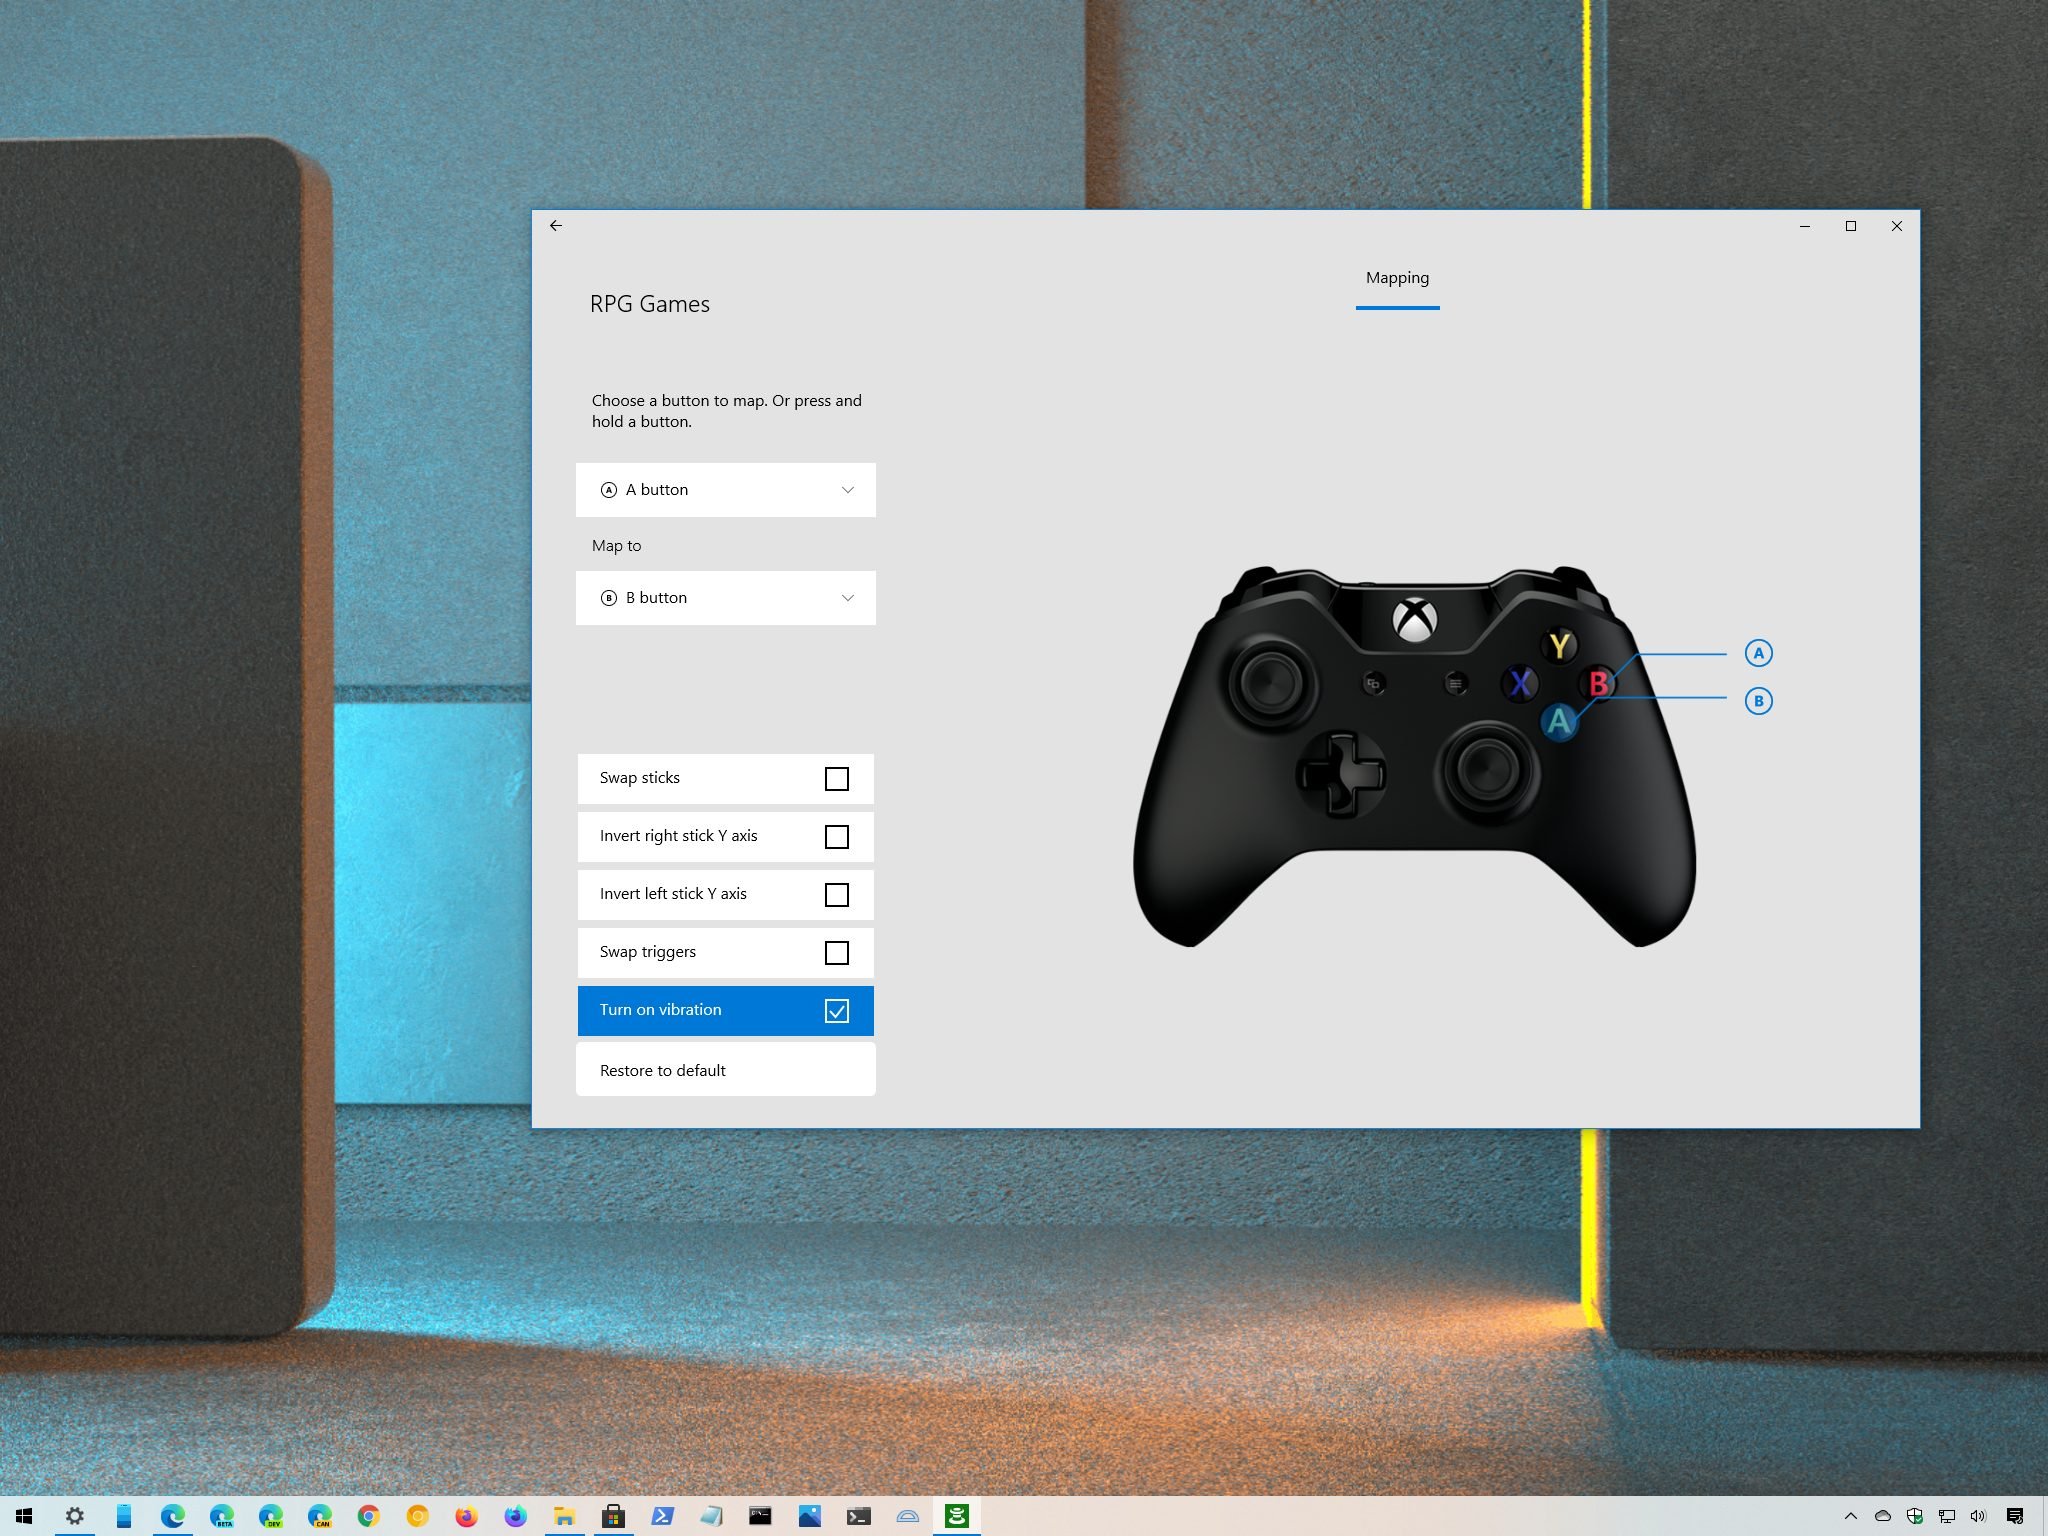
- Use the drop-down menu and select the button you want to change (for example, A, B, X, Y, bumpers, stick clicks, and D-pad).
- Use the "Map to" drop-down menu and select the button you want to remap to.
- Repeat steps No. 6 and 7 to remap other buttons.Quick note: As you remap the buttons, a preview will be displayed on the right side.
- (Optional) Check one or multiple predefined remapping options:
- Swap sticks.
- Invert right stick Y-axis.
- Invert left stick Y-axis.
- Swap triggers.
- (Optional) Clear the Turn on vibration to disable the vibration motors in the Xbox controller.
- Click the back button to save the changes.
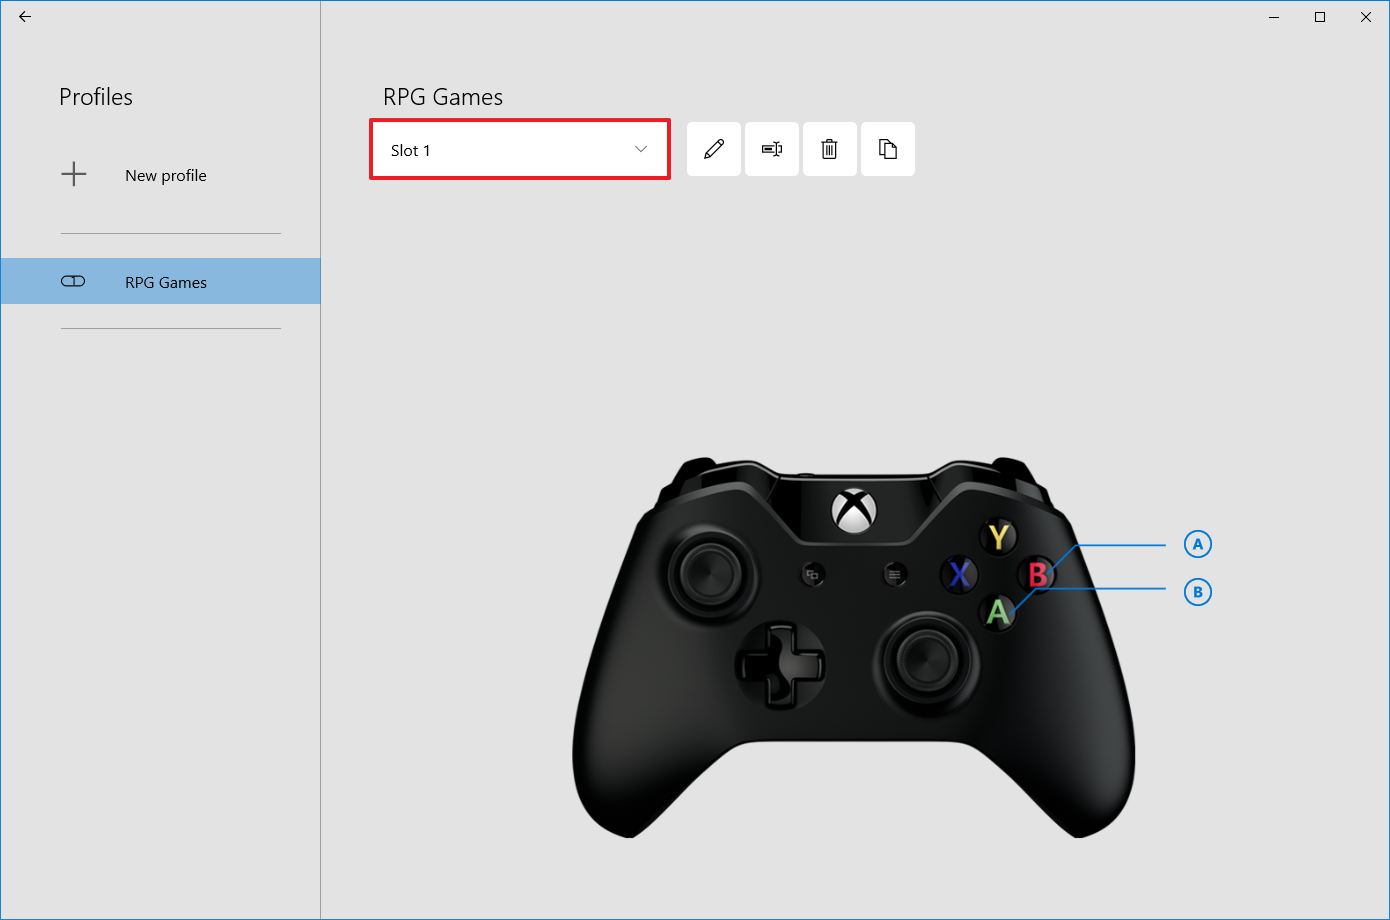
- Use the drop-down menu and select the Slot 1 to make the profile your new default.Quick tip: If you're using the Xbox Elite controller, you'll be able to set the default for each available slot.
After you complete the steps, the new remap for buttons will save automatically, and you can now start playing games with the new layout.
Alternatively, you can also remap buttons by pressing and holding the button, stick, or triggers and pressing the button you want to map.
If you're serious about gaming, but you are still using the standard controller, the Xbox Elite Controller Series 2 is a significant step up.
How to edit remap Xbox controller buttons profile
At any time, the app allows you to modify the button layout, rename, or delete the profiles.
To edit a remap button profile for an Xbox controller, use these steps:
- Open Xbox Accessories app.
- Click the Configure button.
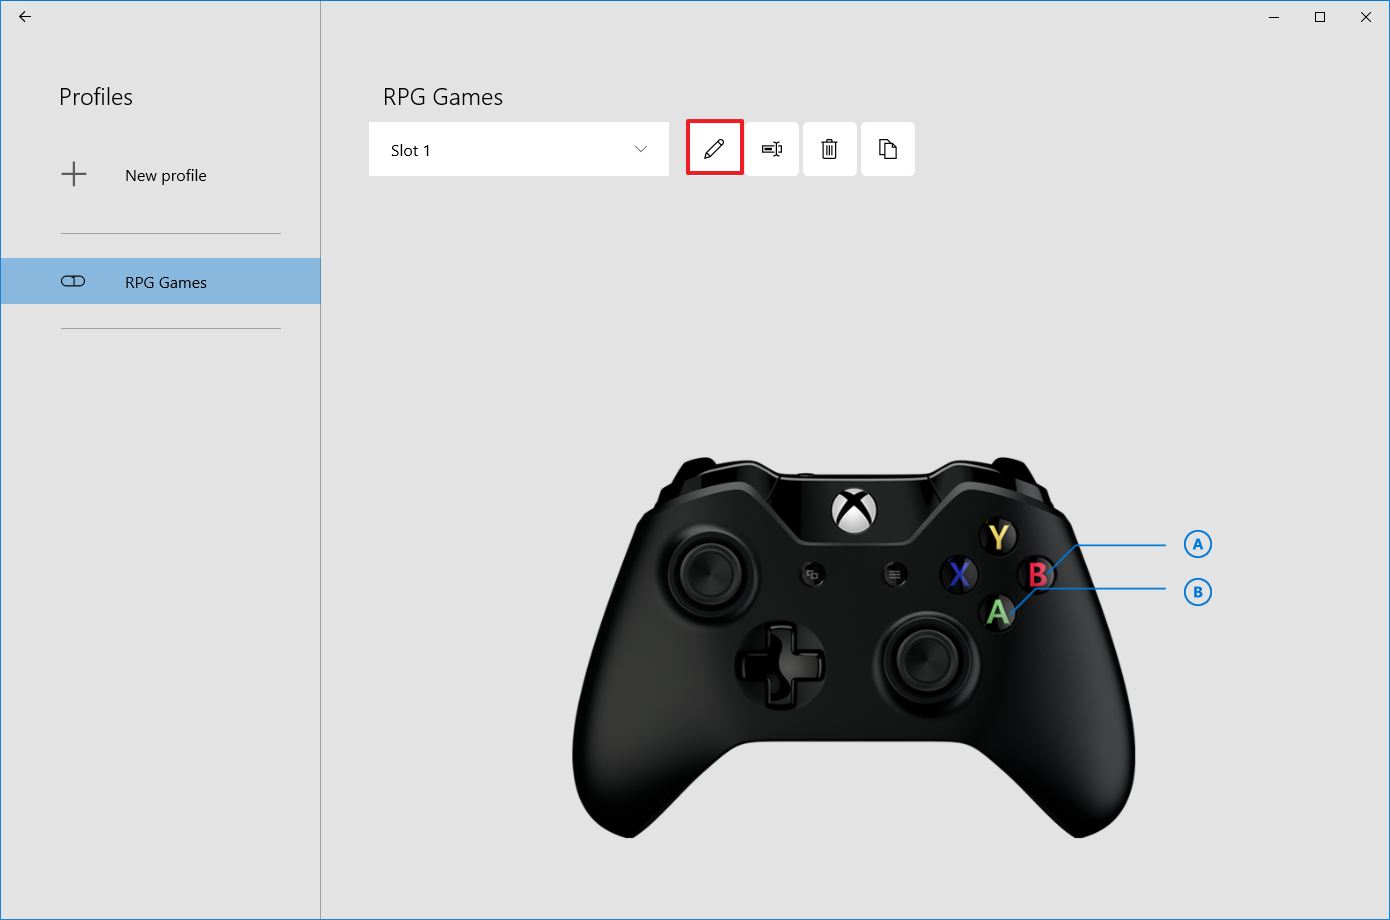
- Select the profile you want to edit.
- Click the Pen button to modify the remaps.
- Click the Rename button to change the name of the profile.
- Click the Trash can button to delete the profile.
Once you complete the steps, the profile will save the new changes or be removed from the app.
Create remap profile based on another profile
If you want to create multiple profiles with similar configurations, you don't need to start from scratch since the Xbox Accessories has an option to copy the settings into a new profile, which you can then modify to make it different.
To create a new profile based on an existing remap configuration, use these steps:
- Open Xbox Accessories app.
- Click the Configure button.
- Select the profile you want to duplicate.
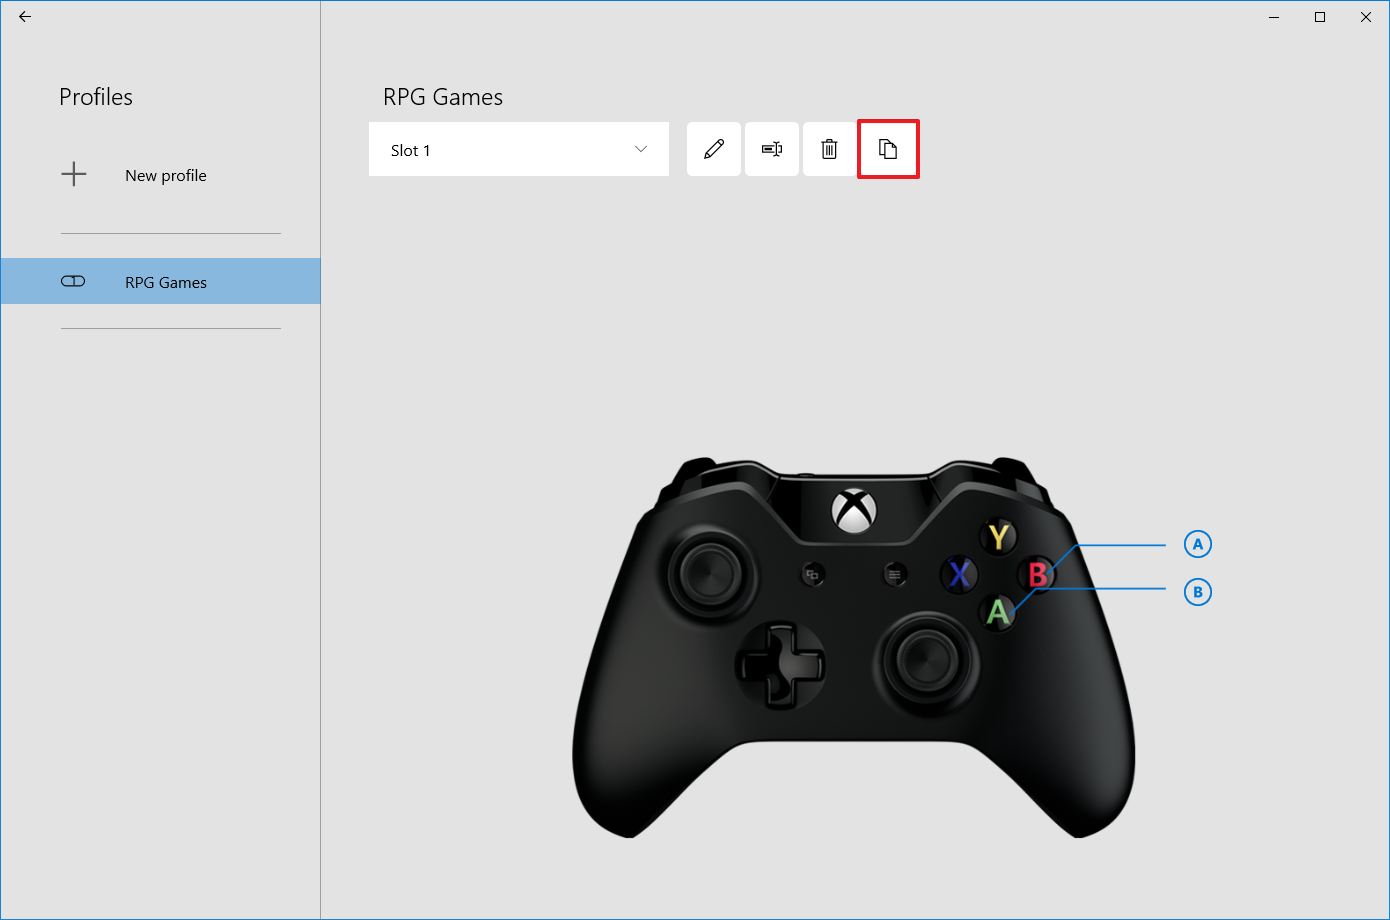
- Click the Copy button.
- Confirm the name of the new profile.
- Click the Save button.
- Click the Pen button.
- Remap the Xbox One controller buttons.
- Click the back button.
- Use the drop-down menu and select the slot that the profile should be available.Quick tip: If you're using the standard Xbox controller, select the "Slot 1" to make it your new default.
After you complete the steps, the new profile based on a previous configuration will be saved.
How to restore default button settings for Xbox controller
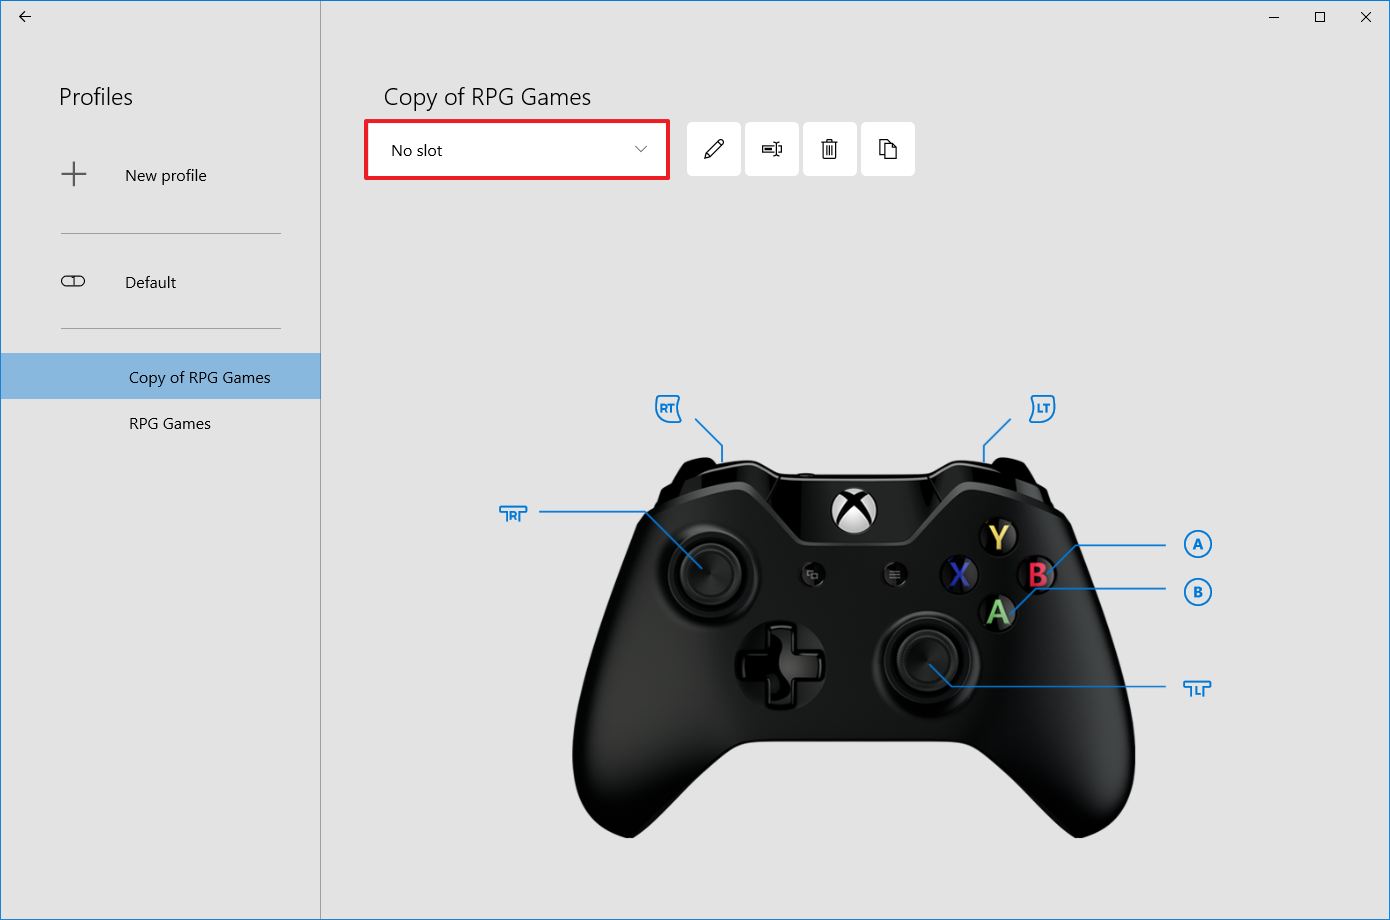
If you no longer want to use custom remaps on your Xbox controller, you'll need to remove it from the slot.
- Open Xbox Accessories app.
- Click the Configure button.
- Select the current button to remap the profile.
- Use the drop-down menu and select the No slot option.
- (Optional) Select the profile you no longer need.
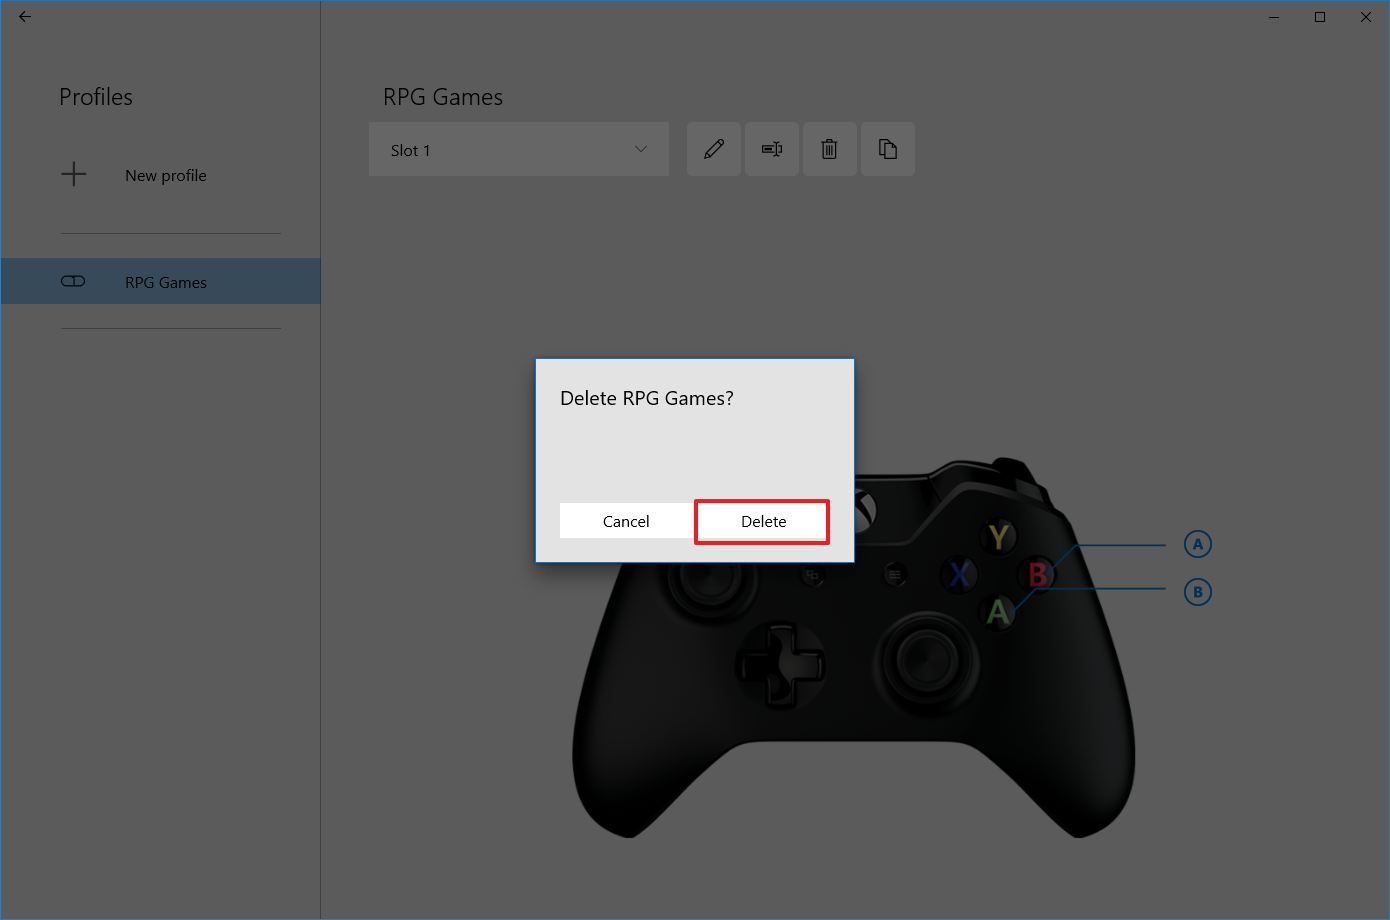
- Click the Delete button.
- Click the Delete button again.
Once you complete the steps, the controller will revert to the original button settings. Alternatively, if you want to reset the settings for a specific profile, while in the profile editing page, click the Restore to default option.
We're focusing this guide on the standard version of the Xbox Wireless Controller. If you're using the Xbox Elite Wireless Controller or Series 2, or the Adaptive Controller, you'll be able to access many other customization options. For example, you'll be able to adjust the brightness of the Xbox button, rename the controller, store up to 256 different configurations, swap thumbstick X and Y axes, specify Shift inputs, and a lot more.

Mauro Huculak has been a Windows How-To Expert contributor for WindowsCentral.com for nearly a decade and has over 22 years of combined experience in IT and technical writing. He holds various professional certifications from Microsoft, Cisco, VMware, and CompTIA and has been recognized as a Microsoft MVP for many years.
