How to record Xbox One Game DVR clips to an external drive
As a part of the Xbox One fall update, using an external drive allows you to capture, store and edit Game DVR clips with ease.

The latest Xbox One update brings a range of improvements to the platform, including a new user interface influenced by the "Fluent Design System," a reworked Home menu and various new features and changes head of the upcoming Xbox One X launch.
One of the biggest of these affects the console's inbuilt game capture application, Game DVR, with support introduced for external drives. Following the update, select external drives can be used to store game clips, while saving space internally on your console. We've broken down the steps required to record to external storage, alongside the benefits it offers.
How to enable 1080p Game DVR recording on Xbox One
How to record Game DVR clips to external storage

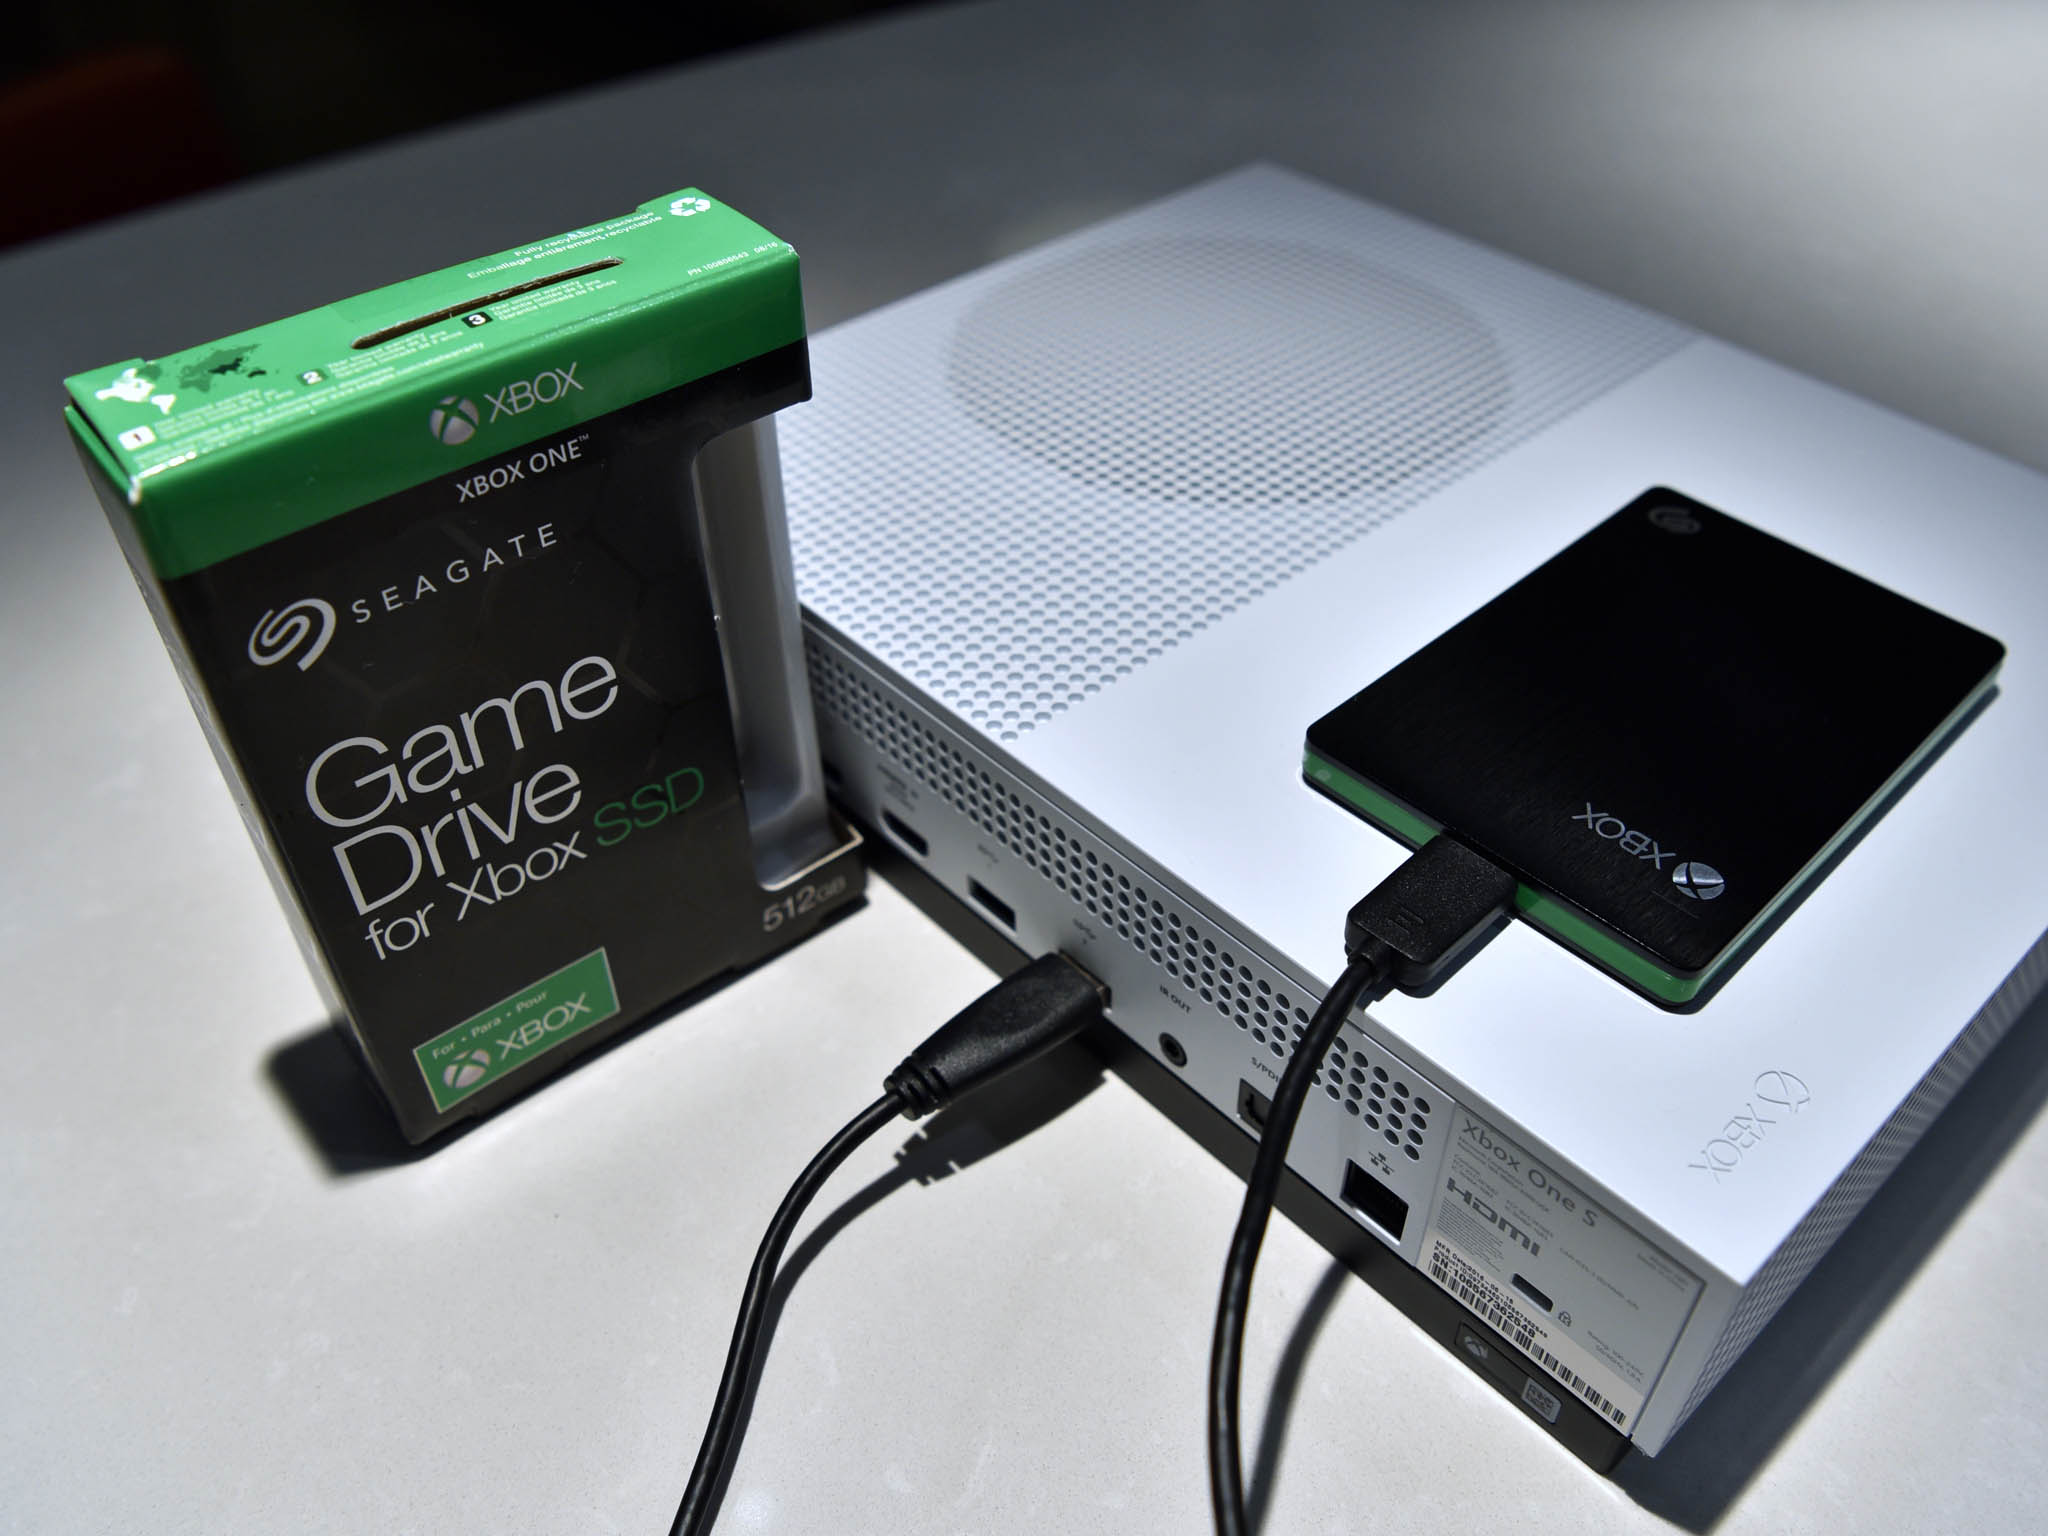
To start recording Game DVR footage to an external drive, you'll first need to find a suitable storage solution. While you may already have a drive formatted specifically for game and apps, Game DVR clips require storage designated for media, meaning you'll need a drive not associated with Xbox One game data. USB 3.0 is required, but it appears that Game DVR doesn't follow the exact same hardware restrictions as game installations, meaning those smaller than 256 GB can be used.
- Format your chosen external drive to NTFS.
- Connect an external drive to a vacant USB port on your Xbox One.
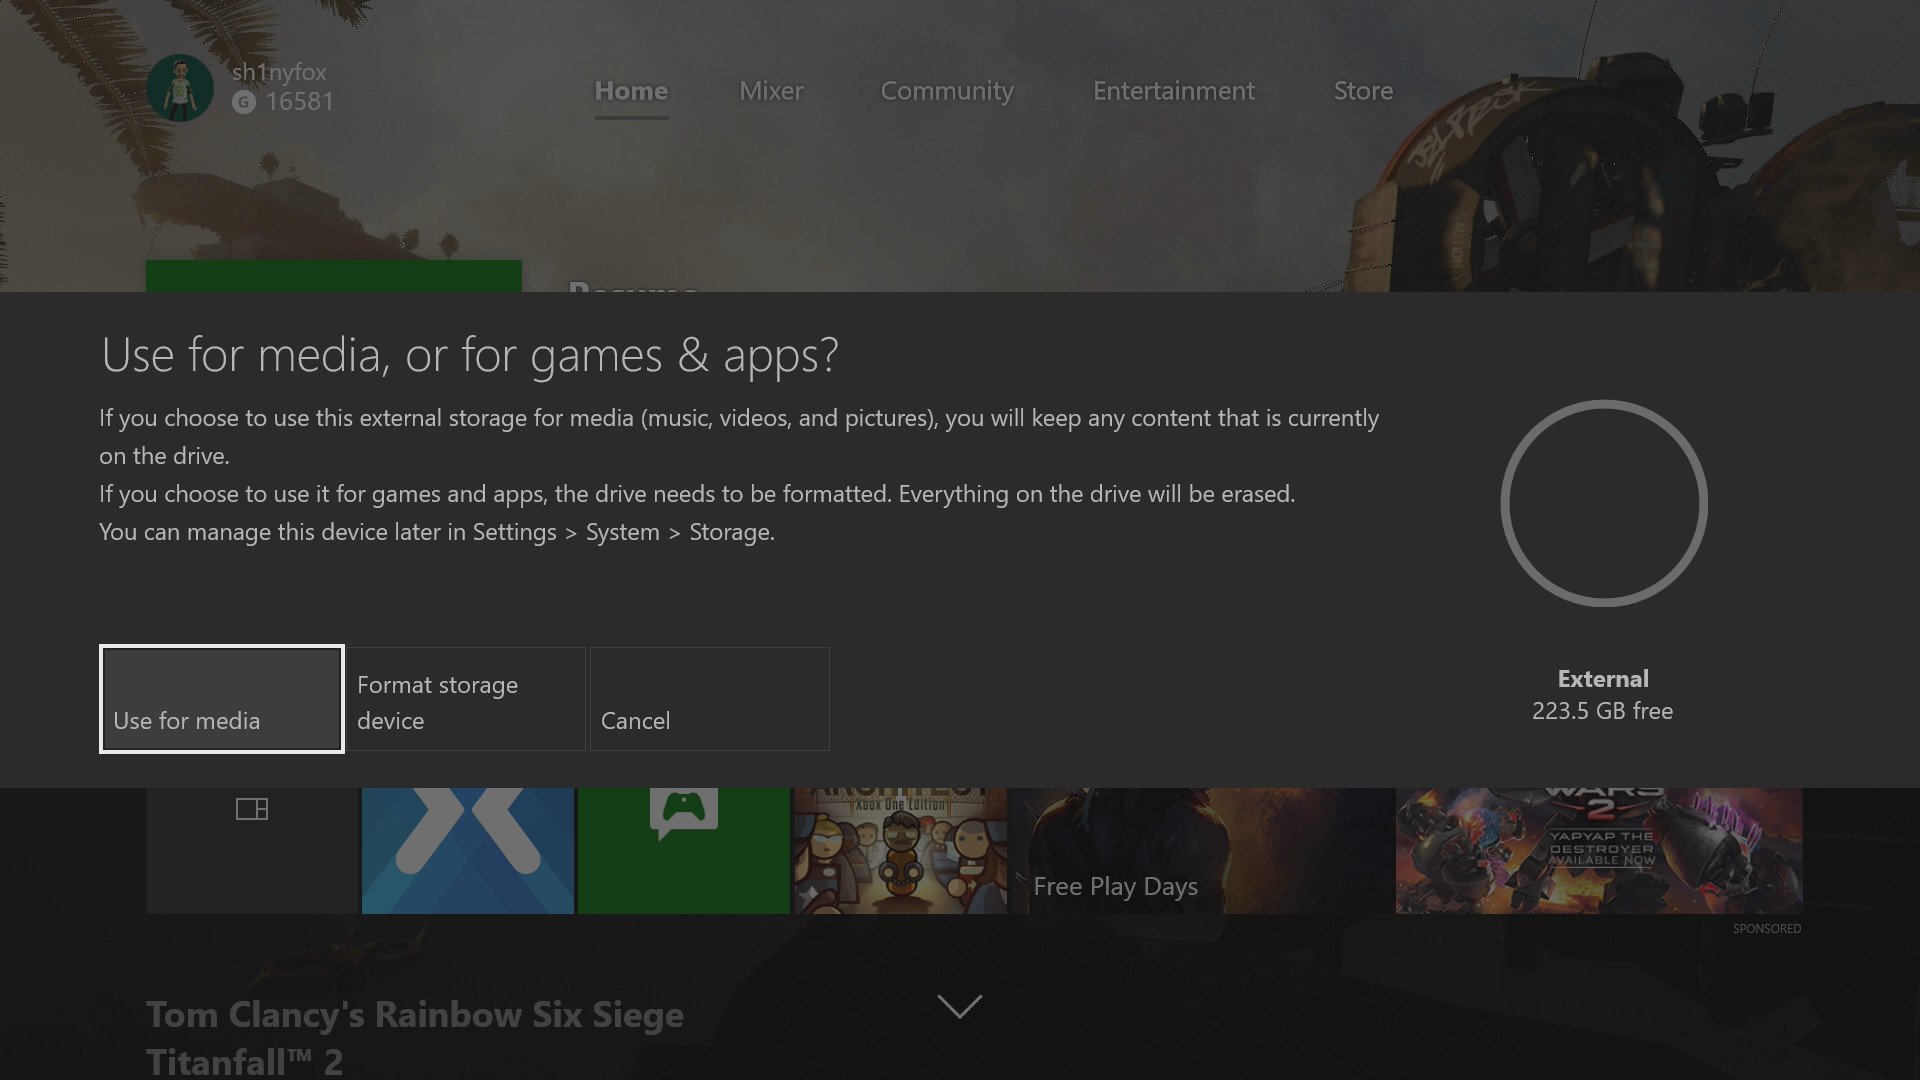
- Select Use for media if prompted with the choice.

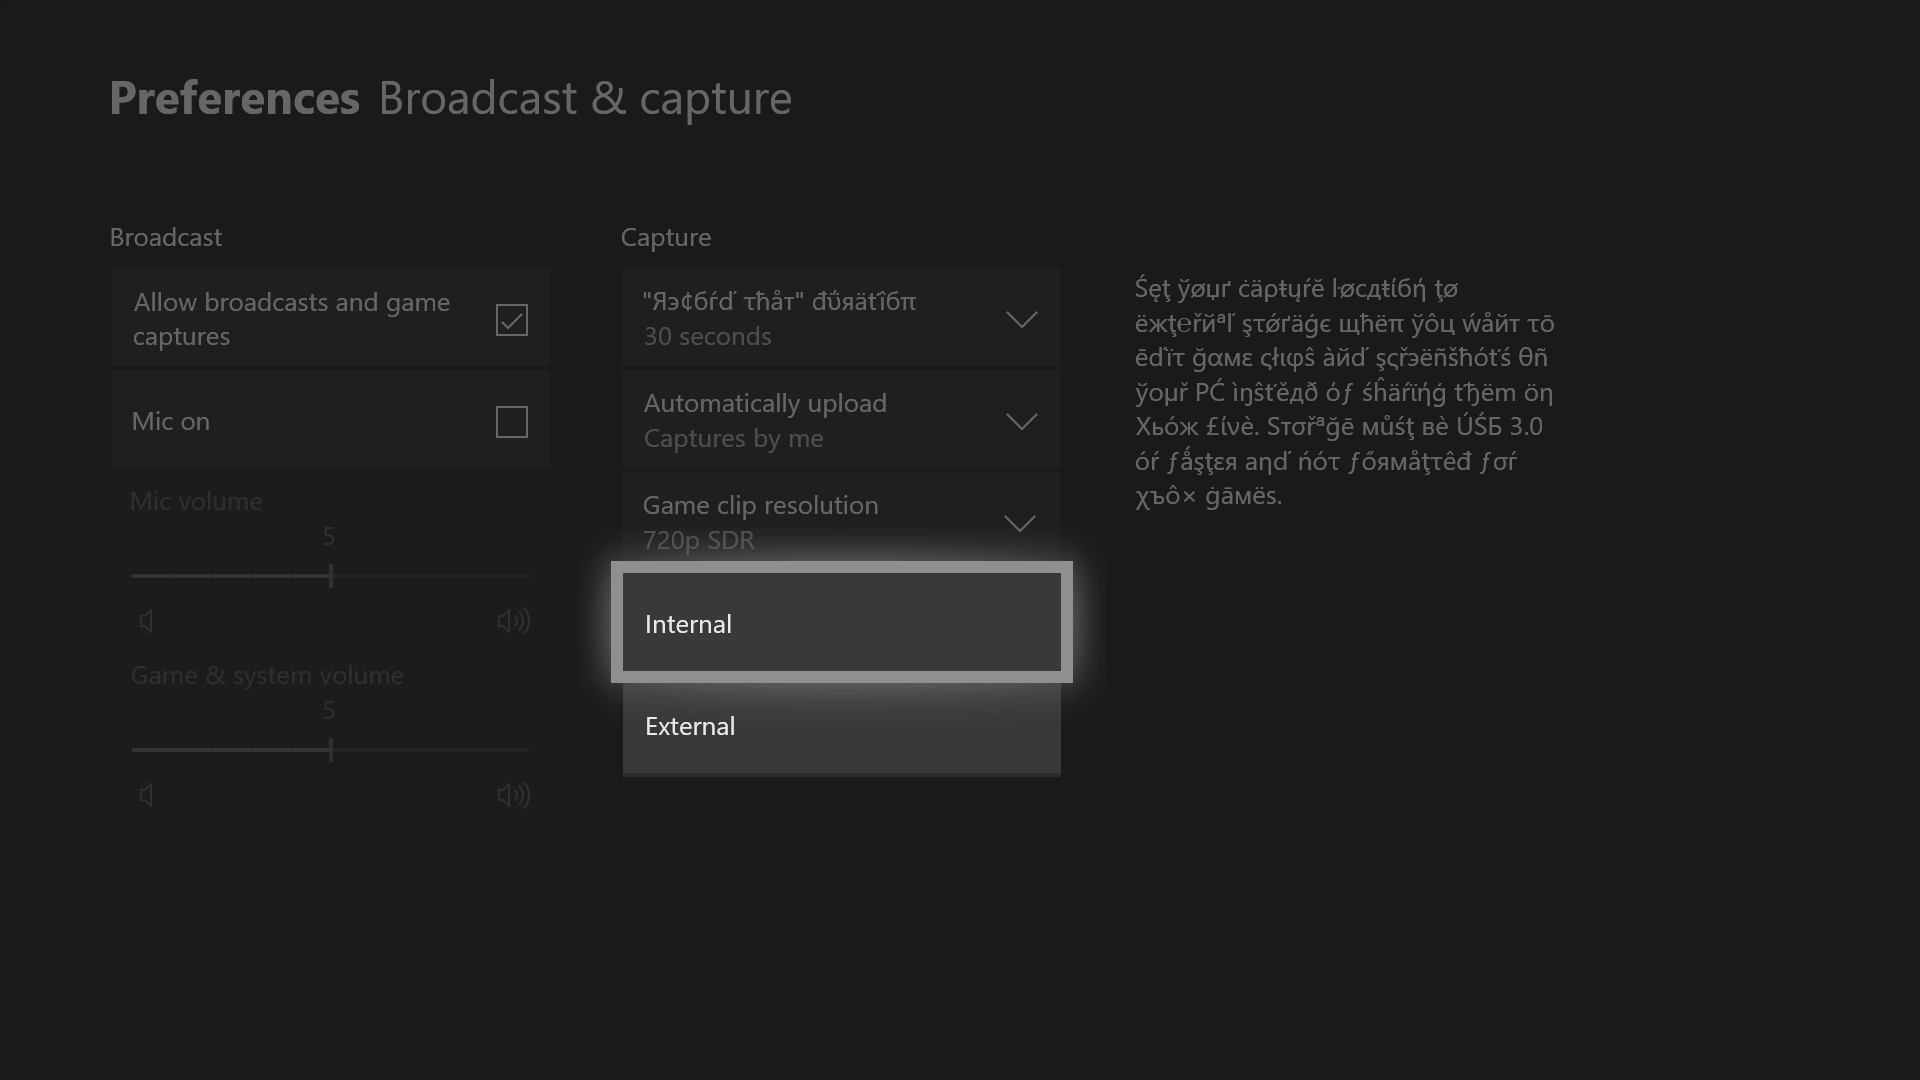
After inserting a drive and configuring it for media use on Xbox One, navigate to the console's Setting app, where a switch can be made from internal to external recording. Not only will this save space on your console's internal drive – doing so increases the maximum duration of a recording to one hour.
- Press the Xbox button to open the Guide.
- Scroll across to the System tab.
- Select All settings.
- Scroll down to the Preferences tab.
- Choose Broadcast & capture.
- Navigate to Capture location.
- Select External.
By switching to an external drive, this also opens up a new use for Game DVR, which was previously unachievable via internal storage. After recording clips, your external drive can now be plugged into a PC, where the traditional video files can be extracted. This essentially turns your console into a simple capture card, allowing recordings to be locally transferred for use in PC-based editing software. All files created by Game DVR can be found under the "Game DVR" folder automatically created on your drive.
Have you tried out Game DVR with an external drive yet? How does it compare to a traditional setup? Let us know your thoughts in the comments.
Get the Windows Central Newsletter
All the latest news, reviews, and guides for Windows and Xbox diehards.
- More: Xbox Help
- Xbox Fall 2017 update changelog
- How to customize your dashboard with new Xbox content blocks
- How to enable the Xbox light theme
- How to use Xbox network transfer
- How to enable 4K game downloads on your Xbox One
- How to enable 1080p game DVR recording
- How to record game footage to an external HDD
- How to use a USB webcam on Skype for Xbox
- How to use a USB webcam on Mixer for Xbox
Matt Brown was formerly a Windows Central's Senior Editor, Xbox & PC, at Future. Following over seven years of professional consumer technology and gaming coverage, he’s focused on the world of Microsoft's gaming efforts. You can follow him on Twitter @mattjbrown.

