How to reclaim space after upgrading to Windows 11
You need to follow these steps to delete the previous installation after upgrading to Windows 11.
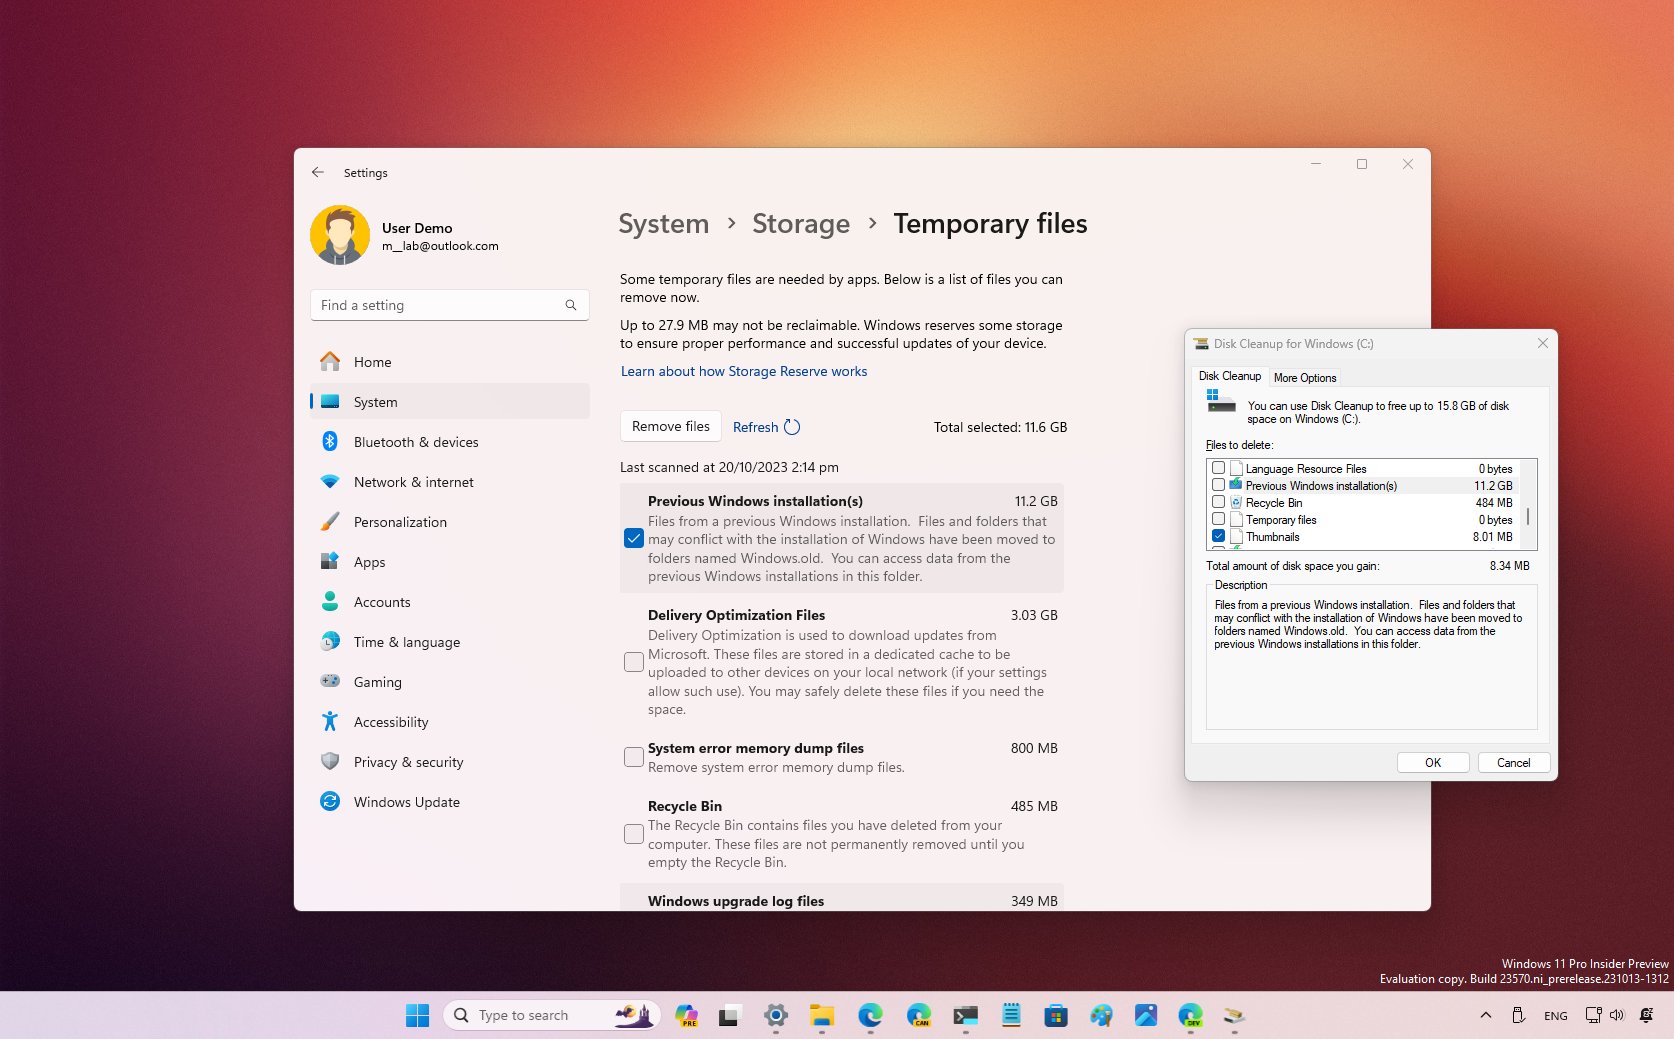
When you upgrade to Windows 11 from Windows 10 or another version, the setup makes a copy of the previous installation as part of the process in case something goes wrong during the setup and the system has to roll back to the original installation or Windows 11 is having compatibility issues, and you need to revert the device to a good working condition.
Although the safeguard feature provides a way to restore the original changes, the copy of the files will be kept even after the upgrade completes successfully, taking a lot of storage (inside the "Windows.old" folder) that can be an issue for devices with limited capacity.
If you notice that your computer is running out of space after the upgrade, Windows 11 includes a couple of options to delete the previous files that can reclaim 12GB or more, depending on the previous configuration.
In this how-to guide, I will walk you through the steps to delete the previous installation files, wasting space after upgrading to the new version of the operating system.
How to free up space after Windows 11 using Settings
To reclaim space after installing Windows 11, use these steps:
- Open Settings.
- Click on System.
- Click on Storage.
- Click the Temporary files page on the right-side.
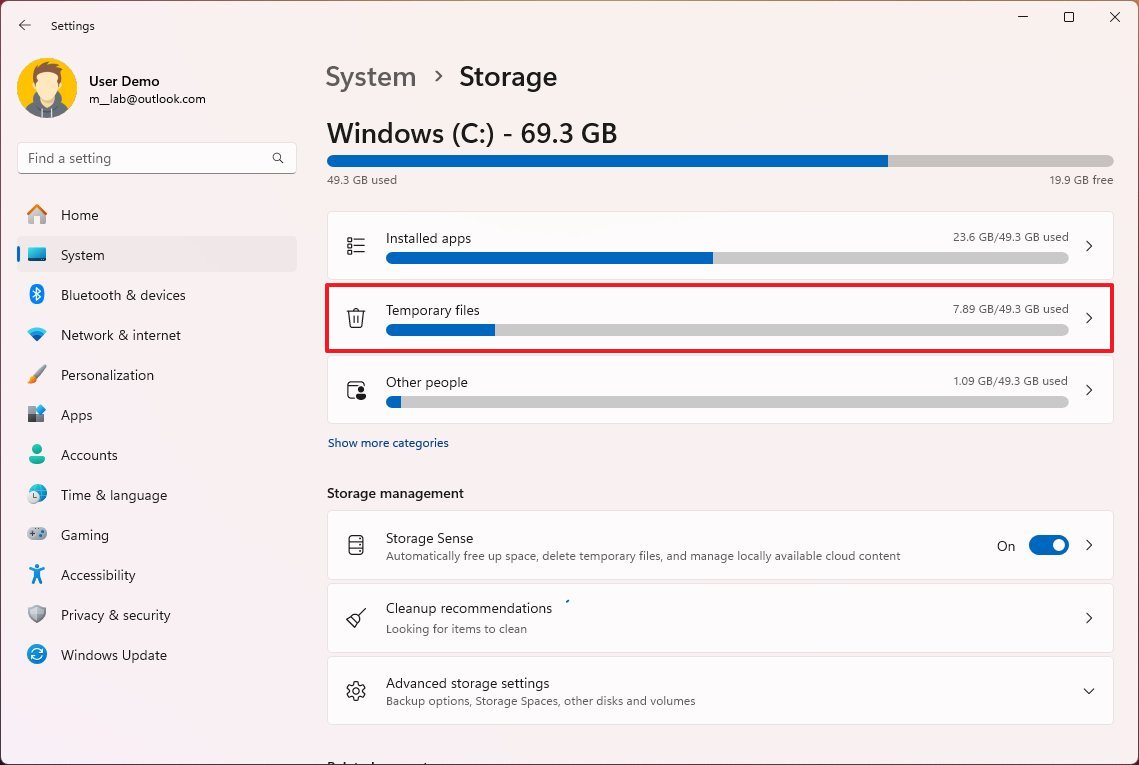
- Clear all the preselected items (if applicable).
- Check the "Previous Windows installation(s)" option.
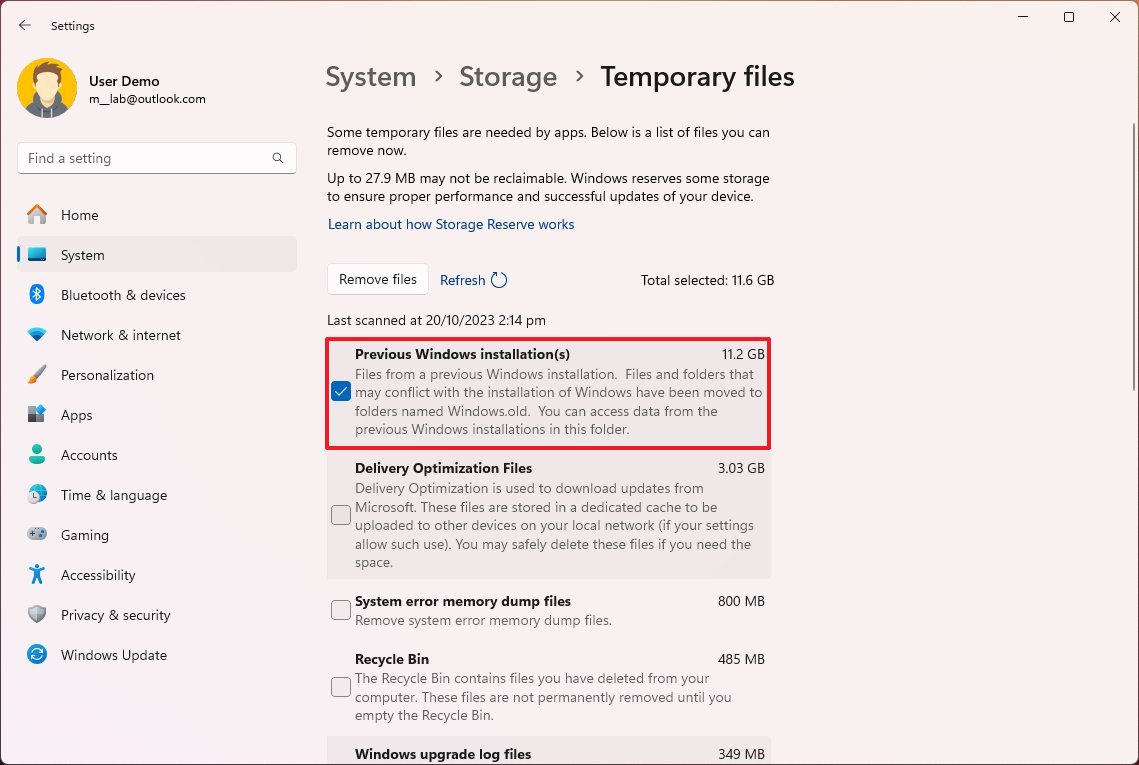
- Click the Remove files button.
Once you complete the steps, the previous installation files and any other temporary files you may have selected on the page will be removed.
How to free up space after Windows 11 using Disk Cleanup
In addition to using the Settings app, you can also use the legacy "Disk Cleanup" tool to delete the folder with the previous installation of Windows 11.
Get the Windows Central Newsletter
All the latest news, reviews, and guides for Windows and Xbox diehards.
To free up space after the installation of Windows 11, use these steps:
- Open Start.
- Search for Disk Cleanup, and click the top result to open the settings.
- Click the "Clean up system files" button.
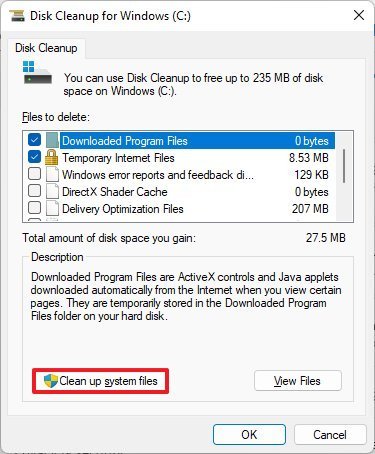
- Check the "Previous Windows installation(s)" option.
- Quick tip: You can also select other temporary files (such as "Delivery Optimization Files" and "Windows update log files") to recover even more space.
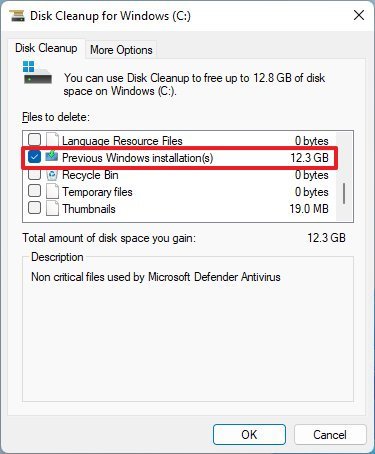
- Clear the Downloads option to avoid deleting downloaded files inside the "Downloads" folder.
- Click the OK button.
After you complete the steps, the folder with the previous installation files will be deleted from your computer, freeing up storage on the main drive.
The system will only keep a copy of the earlier setup for the first ten days after the upgrade. After this period, Windows 11 will automatically delete these files. Also, after removing the files, the option to roll back will no longer be available in the Settings app. In the future, if you want to downgrade, you will have to do a clean installation using the version of Windows you want to use.
More resources
For more helpful articles, coverage, and answers to common questions about Windows 10 and Windows 11, visit the following resources:
Mauro Huculak has been a Windows How-To Expert contributor for WindowsCentral.com for nearly a decade and has over 15 years of experience writing comprehensive guides. He also has an IT background and has achieved different professional certifications from Microsoft, Cisco, VMware, and CompTIA. He has been recognized as a Microsoft MVP for many years.

