How to delete the Windows.old folder on Windows 10
If you recently upgraded to a new version of Windows 10, you can use this guide to flush the Windows.old folder wasting space on your device.
All the latest news, reviews, and guides for Windows and Xbox diehards.
You are now subscribed
Your newsletter sign-up was successful
When you upgrade a device to a new version of Windows 10 or install an Insider Preview build, the setup process saves a copy of the previous version in the "Windows.old" folder.
This is part of the safety mechanism in case the upgrade process goes wrong. If the installation fails, the system can use the "Windows.old" folder to undo the changes. Also, if the upgrade completes successfully, the backup copy of the previous version will be kept to provide the option to roll back if the new installation starts causing issues.
Although this is a handy feature, if your device works correctly after the upgrade, you can safely delete the previous installation files to reclaim storage space.
In this how-to guide, we'll walk you through how to get rid of the "Windows.old" folder to free up several gigabytes of space to store more important files.
How to delete the Windows.old folder from Storage Sense settings
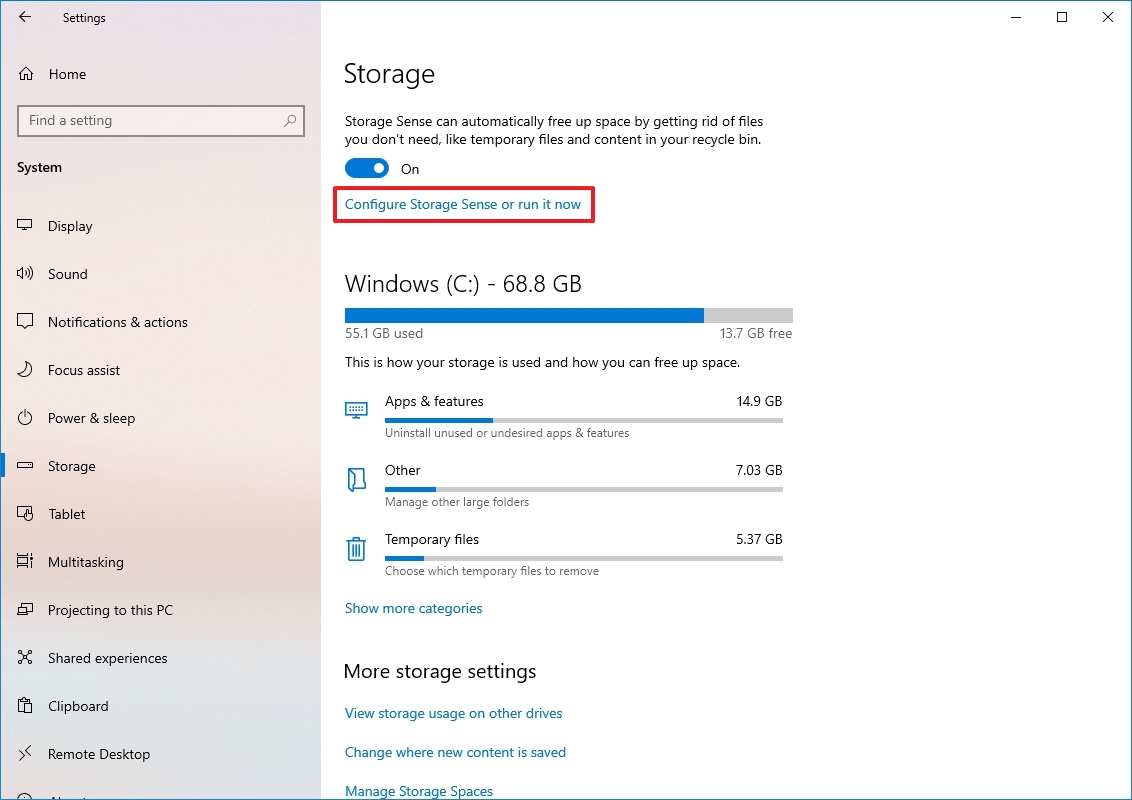
The easiest method to delete the Windows.old folder from your computer is to use the Storage Sense with these steps:
- Open Settings.
- Click on System.
- Click on Storage.
- Under the "Storage sense" section, click the "Change how we free up space automatically" option.
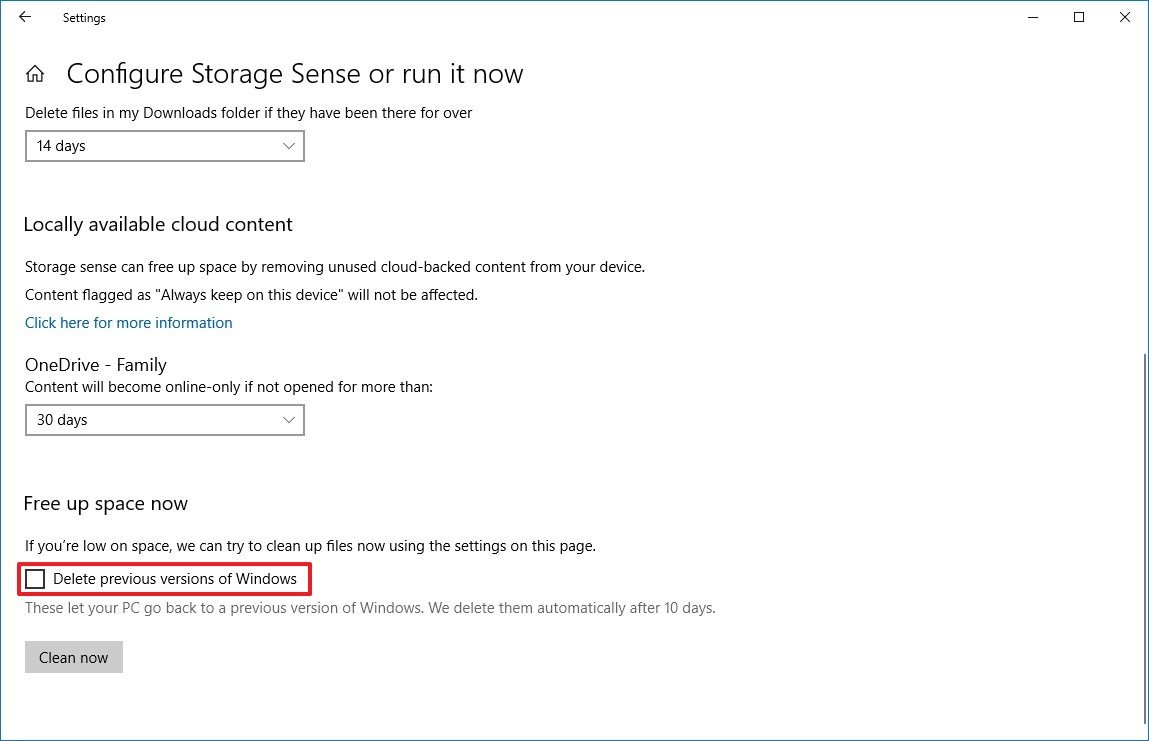
- Under the "Free up space now" section, check the "Delete previous version of Windows" option.
- Click the Clean now button.
Once you complete the steps, the folder with the previous installation of Windows 10 will no longer be available on your device.
How to delete the Windows.old folder from Temporary files settings
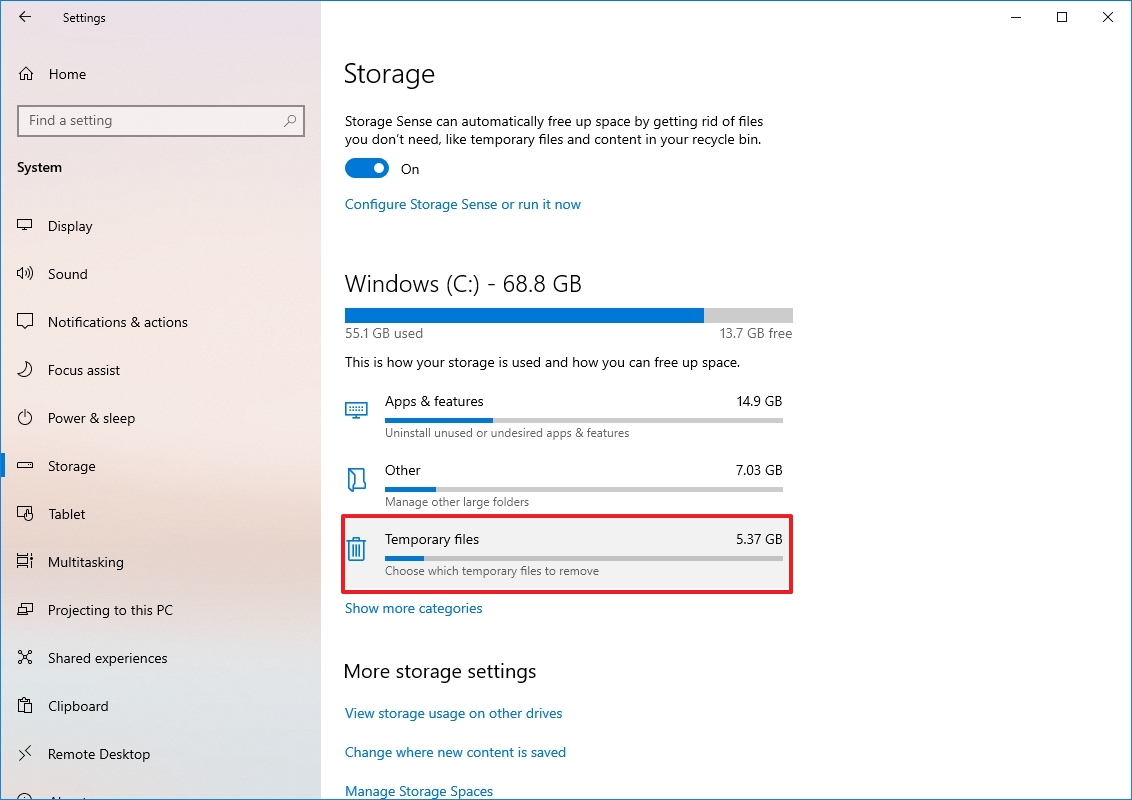
To remove the Windows.old folder from the Temporary files settings, use these steps:
All the latest news, reviews, and guides for Windows and Xbox diehards.
- Open Settings.
- Click on System.
- Click on Storage.
- Under the "Storage sense" section, click the "Temporary files" option.
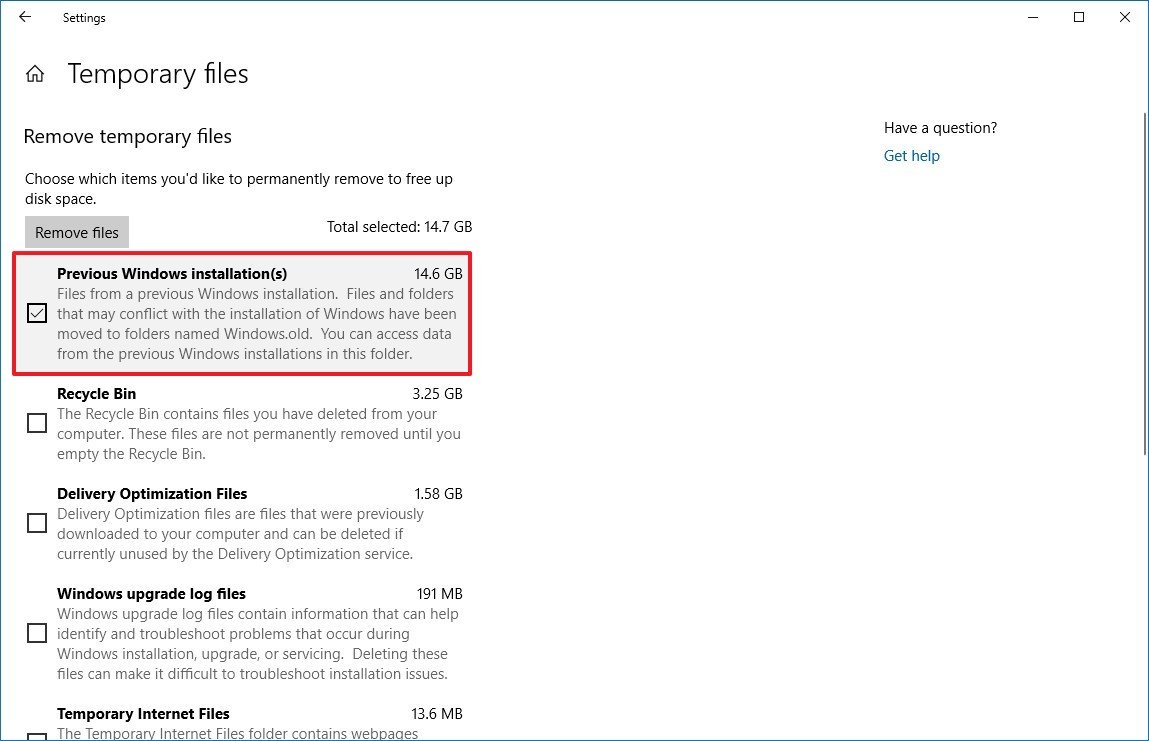
- Check the "Previous Windows installation(s)" option.
- (Optional) Clear the default selected options if you only want to remove the Windows.old folder.
- Click the Remove files button.
After completing the steps, the folder with the previous installation of Windows 10 will be removed, freeing up 14GB to 20GB of storage space on your primary hard drive.
How to delete the Windows.old folder from Disk Cleanup
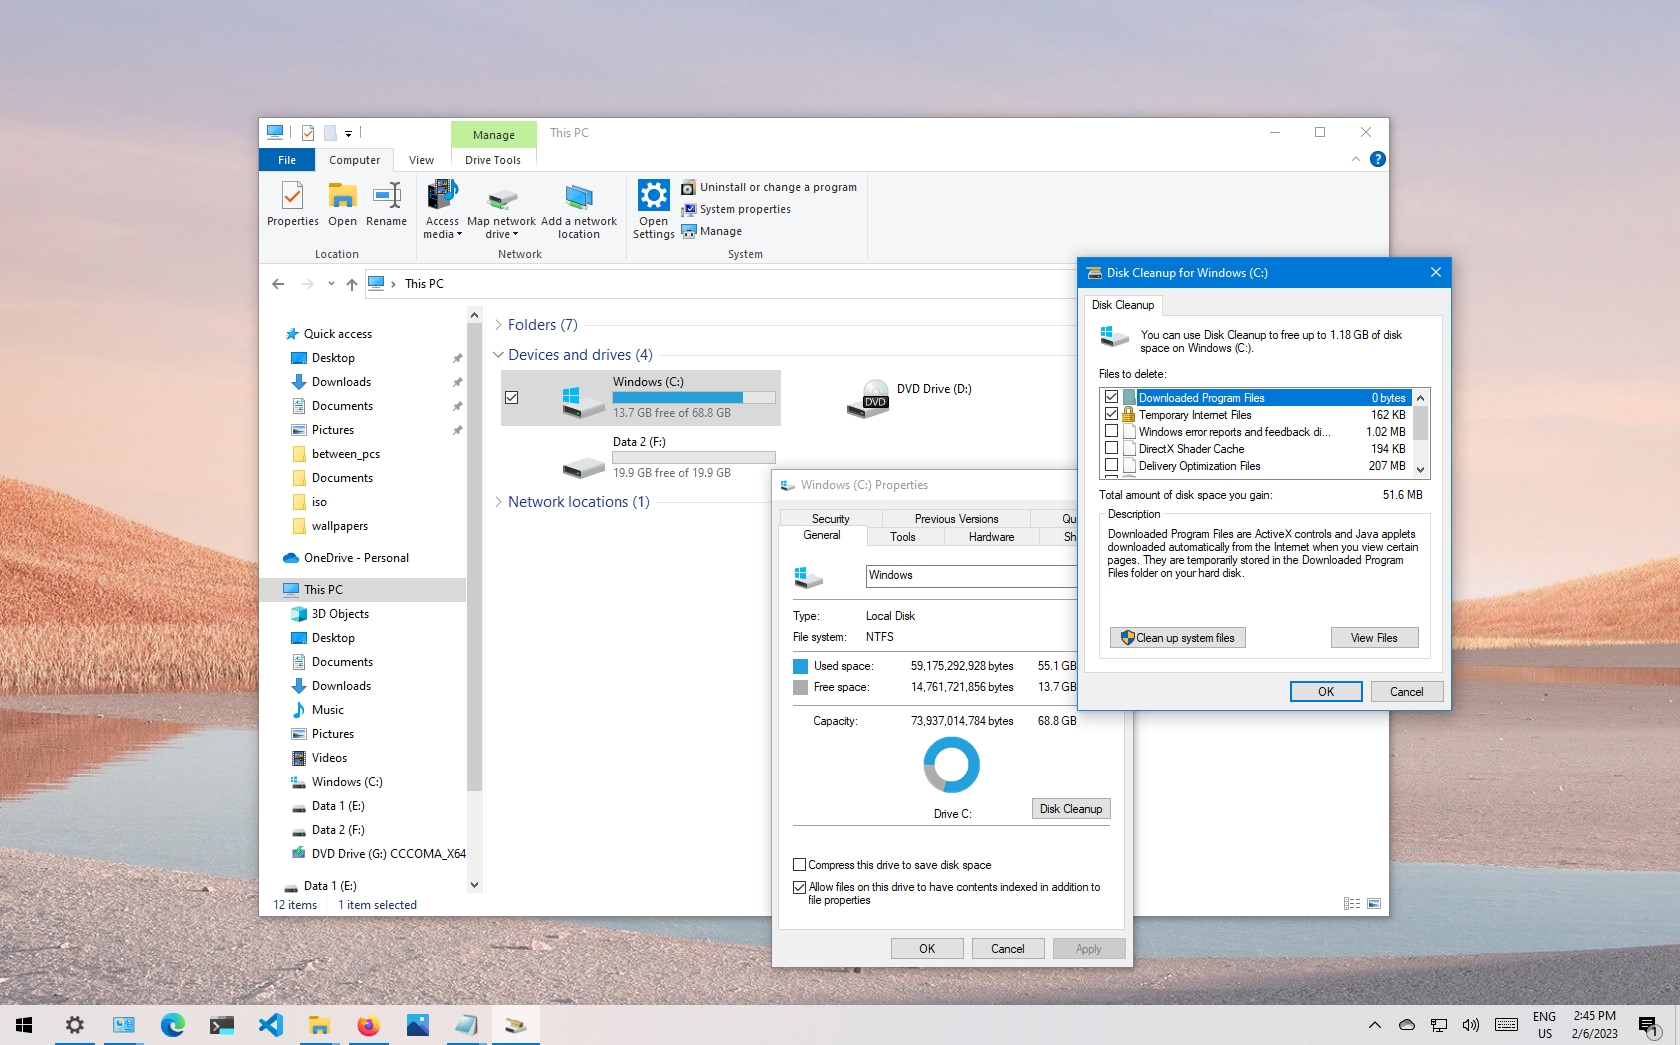
To remove the Windows.old folder with the legacy Disk Cleanup tool on Windows 10, use these steps:
- Open File Explorer.
- Click on This PC from the left pane.
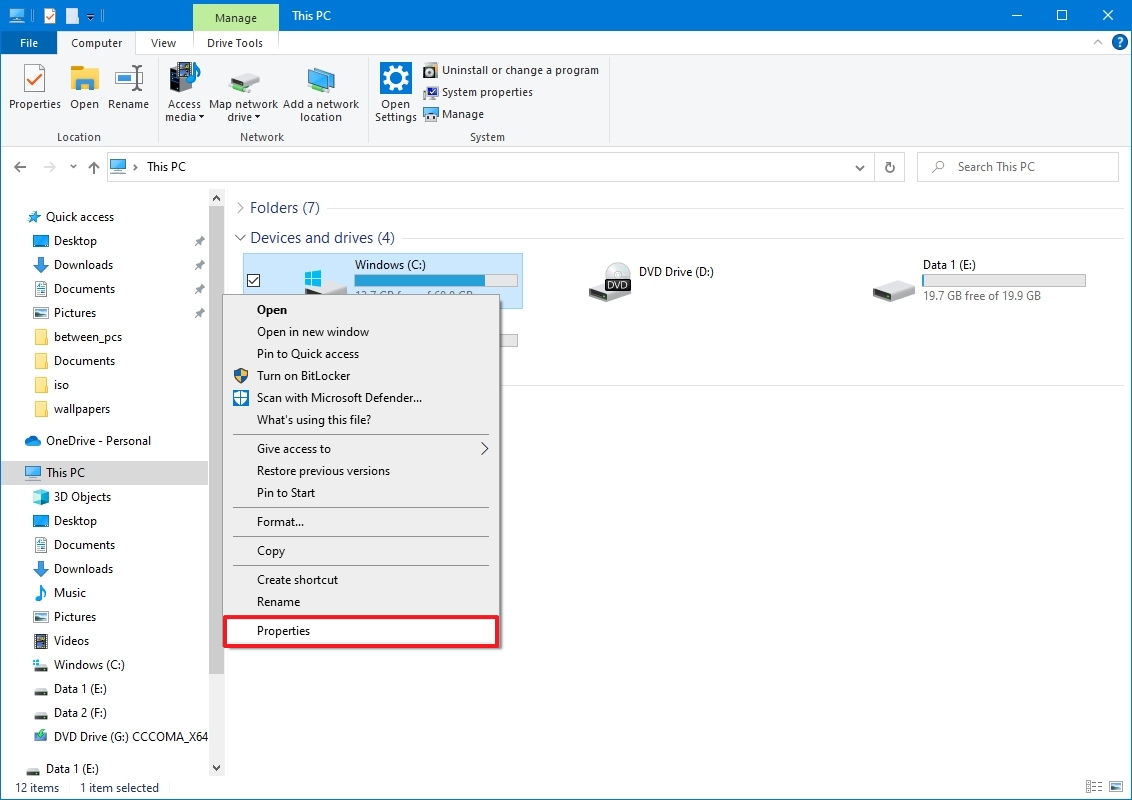
- Under the "Devices and drives" section, right-click the drive with the Windows 10 installation (usually the C drive) and select the Properties option.
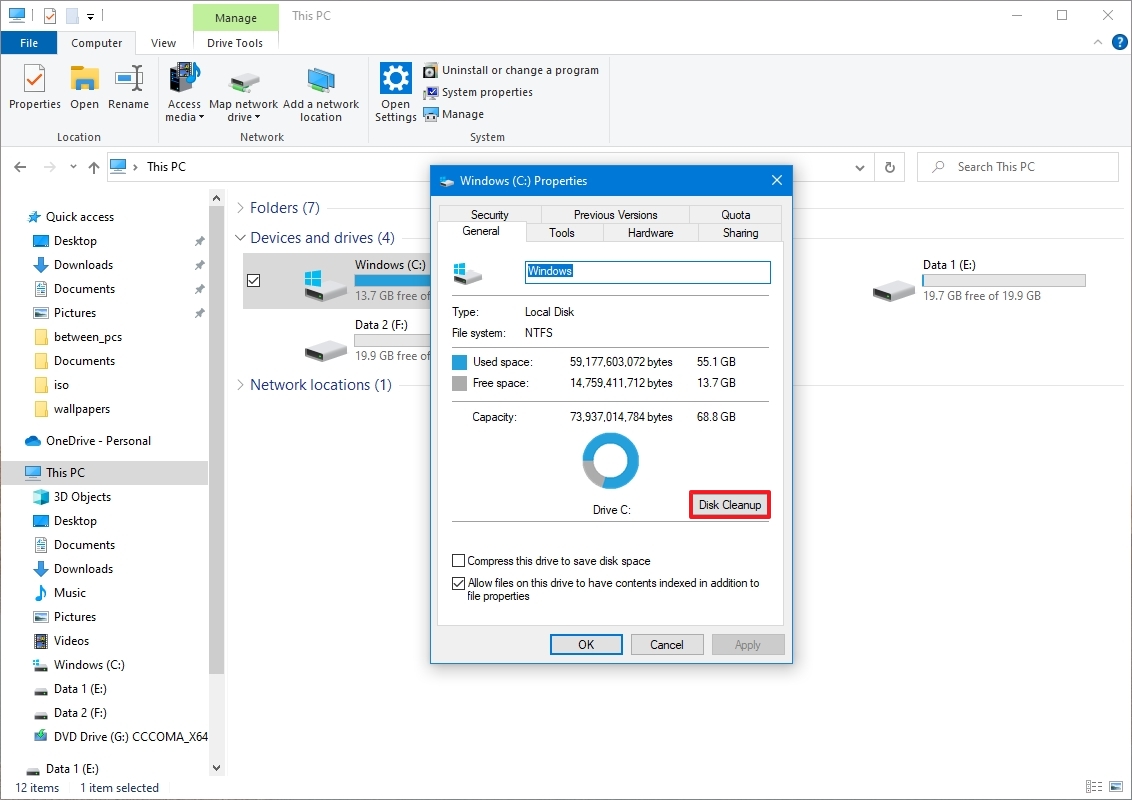
- In the "General" tab, click the Disk Cleanup button.
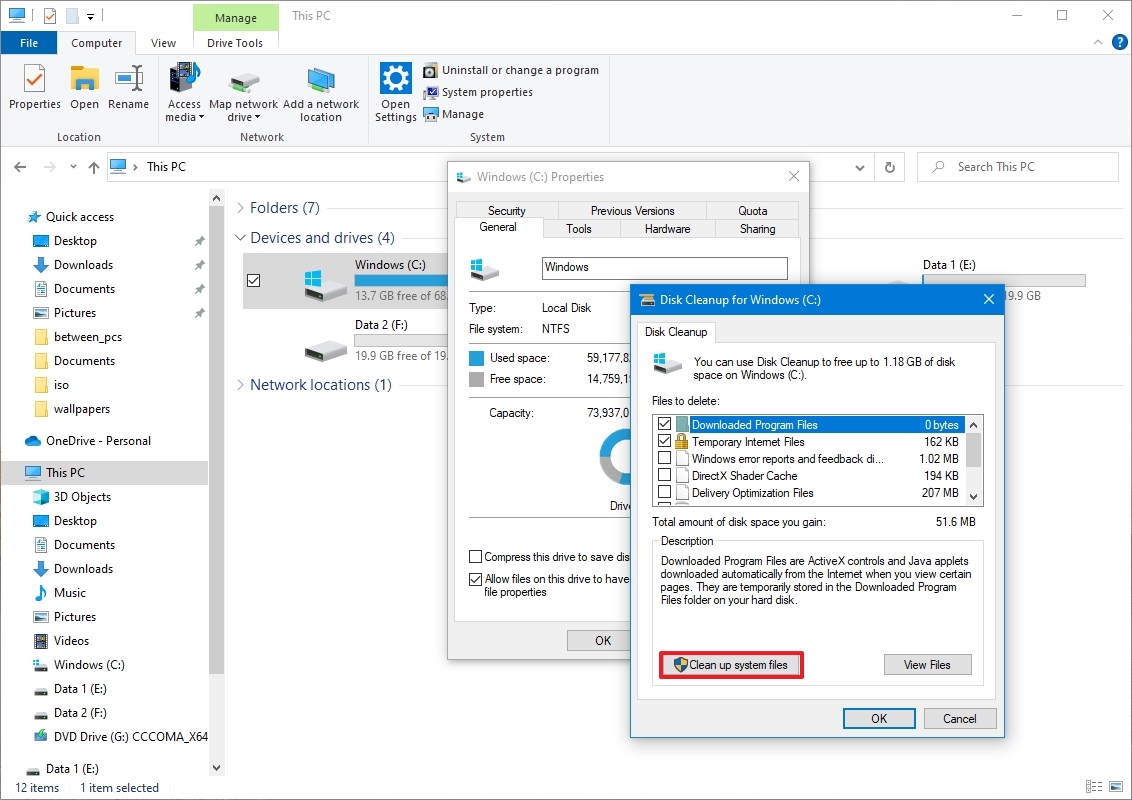
- Click the "Cleanup system files" button.
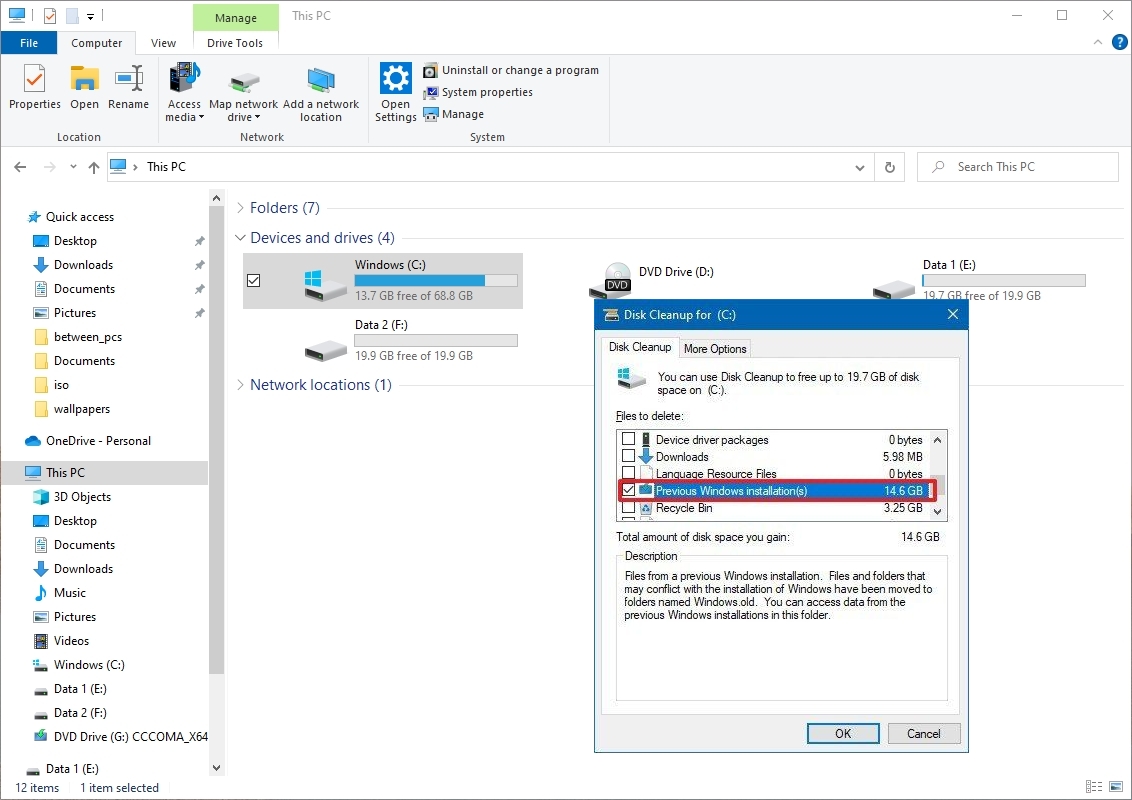
- Check the "Previous Windows installation(s)" option.
- (Optional) Clear the default selected options if you only want to remove the Windows.old folder.
- Click the OK button.
- Click the Delete Files button.
- Click the Yes button.
Once you complete the steps, the Windows.old folder will be removed from your device.
While it's safe to delete the Windows.old folder, if you remove its contents, you will no longer be able to use the recovery options to roll back to the previous version of Windows 10. If you delete the folder and then want to roll back to the previous version, you'll need to perform a clean installation with the desired version.
More resources
For more helpful articles, coverage, and answers to common questions about Windows 10 and Windows 11, visit the following resources:
- Windows 11 on Windows Central — All you need to know
- Windows 10 on Windows Central — All you need to know

Mauro Huculak has been a Windows How-To Expert contributor for WindowsCentral.com for nearly a decade and has over 22 years of combined experience in IT and technical writing. He holds various professional certifications from Microsoft, Cisco, VMware, and CompTIA and has been recognized as a Microsoft MVP for many years.
