How to stop Windows 10 from performing automatic restarts after installing updates
You can stop Windows 10 from automatically restarting after updates, and in this guide, we'll show you how to do it.

Windows 10 is an advanced OS that includes an extensive list of great features, but its tendency to reboot automatically to apply new updates is not one of them.
Although updates are necessary to ensure your device are in line with the latest improvements and security patches, if you don't restart soon enough, Windows 10 will eventually reboot automatically to finish applying updates. It simply isn't a good user experience.
In an attempt to mitigate this issue, in the Anniversary Update, Windows 10 introduced Active Hours to prevent installing updates while you're actively working on your computer. However, this won't stop Windows 10 from restarting during off hours, which can be a problem if you typically leave your computer in the middle of a task for an extended period.
Fortunately, there is a workaround that can be traced to Winaero, which allows you to take full control and prevent Windows 10 to reboot on its own everytime a new update installs.
In this Windows 10 guide, we'll walk you through the steps to prevent Windows 10 from rebooting after downloading and installing an update.
How to stop your PC from automatically restarting after installing updates
Important: Before proceeding note that this is a workaround not supported by Microsoft, and it can stop working at any time. You should use it at your own risk.
- Open Start.
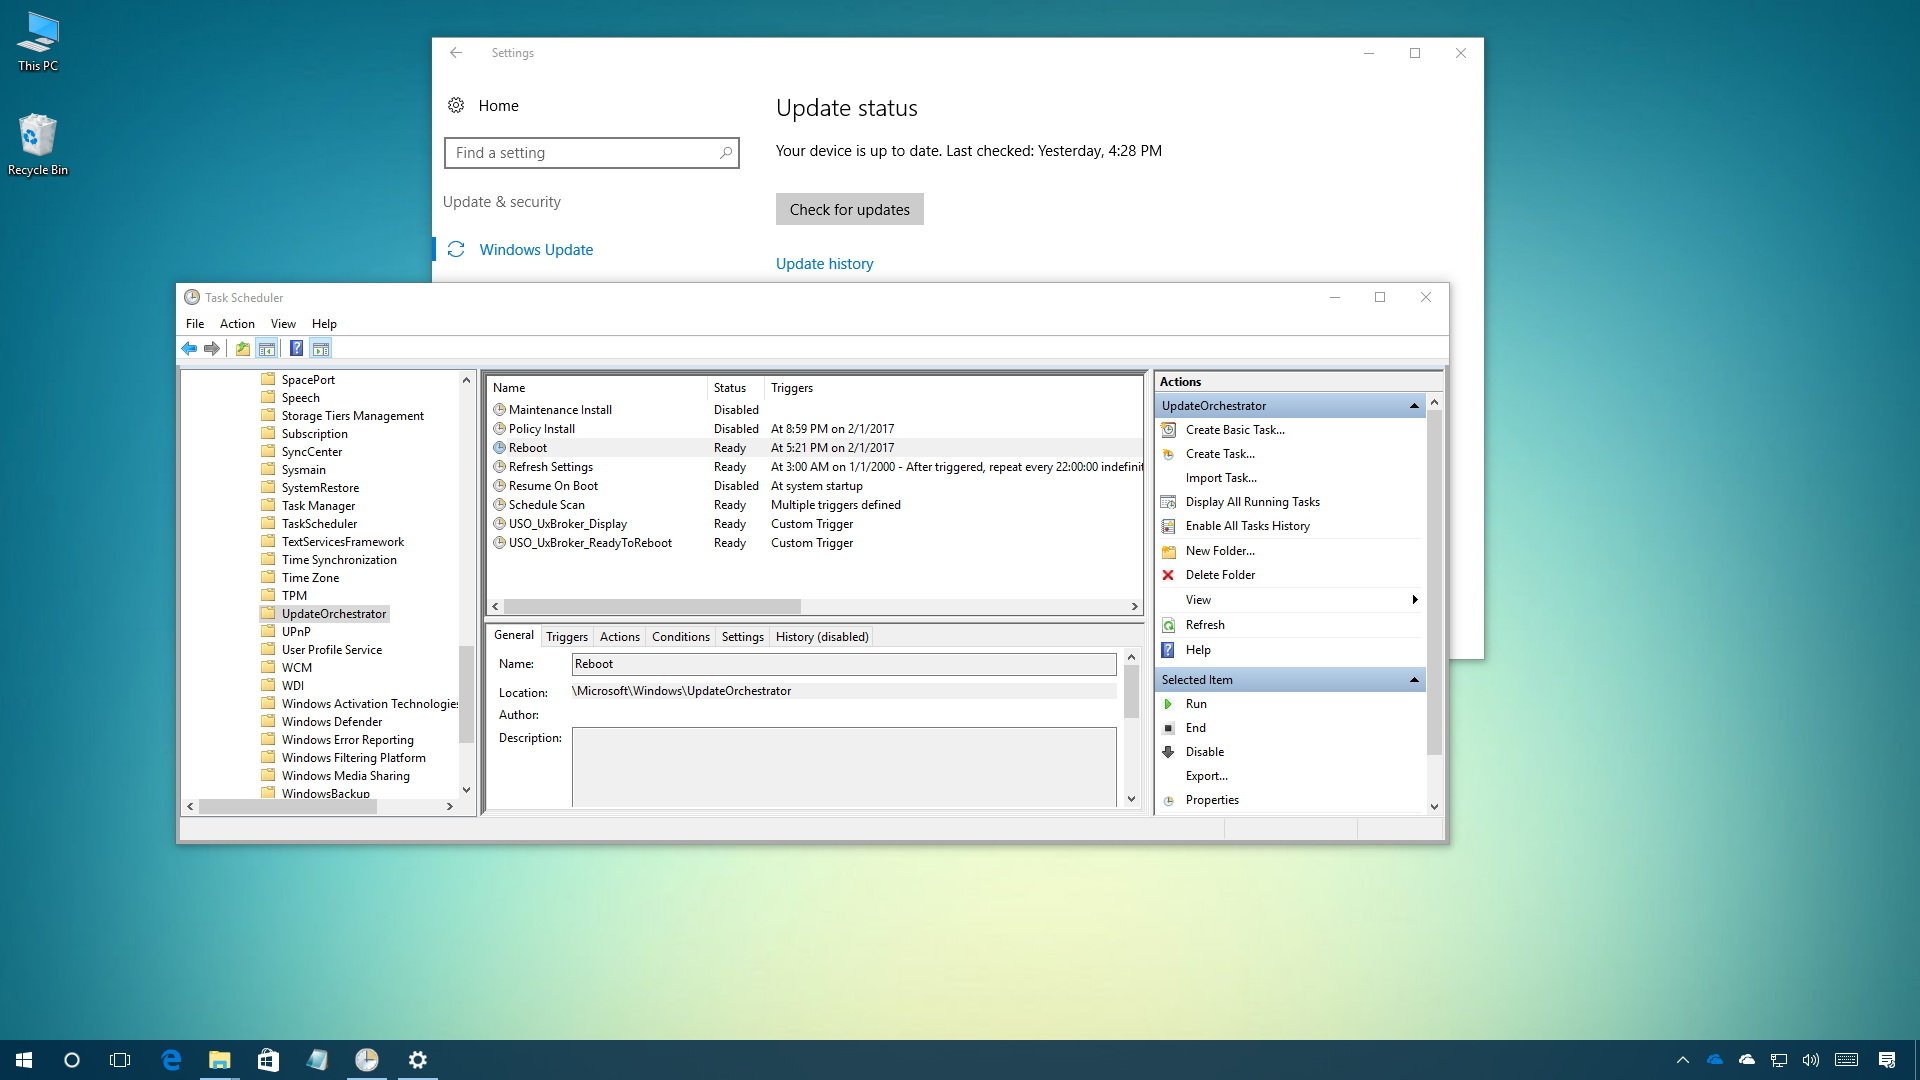
- Search for Task Scheduler and click the result to open the tool.
- Right-click the Reboot task and select Disable.

Once you completed the steps, your device will no longer restart after downloading and installing new updates. However, new updates won't apply, and future updates won't install until you manually reboot your computer.
Get the Windows Central Newsletter
All the latest news, reviews, and guides for Windows and Xbox diehards.
Additional steps (if needed)
In the case, Windows 10 automatically re-enables the Reboot task; you can stop this behavior by doing the following:
- Use the Windows key + R keyboard shortcut to open the Run command.
- Type the following path and click OK:
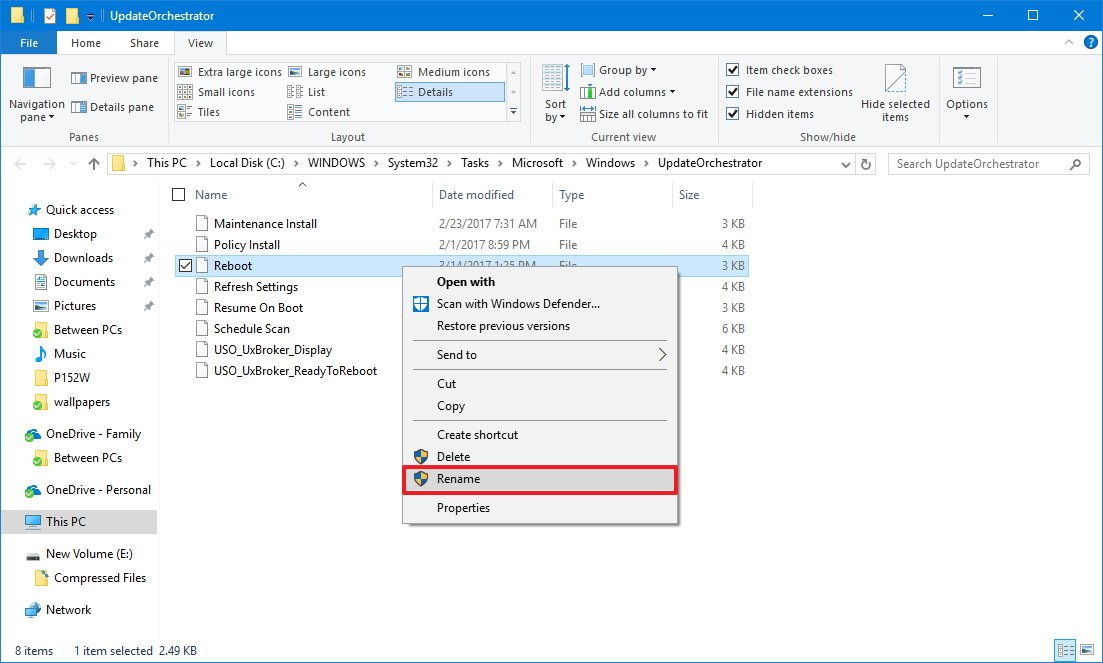
%windir%\System32\Tasks\Microsoft\Windows\UpdateOrchestrator - Select the Reboot file without an extension, right-click it, and select Rename.

- Rename the Reboot file to Reboot.old.
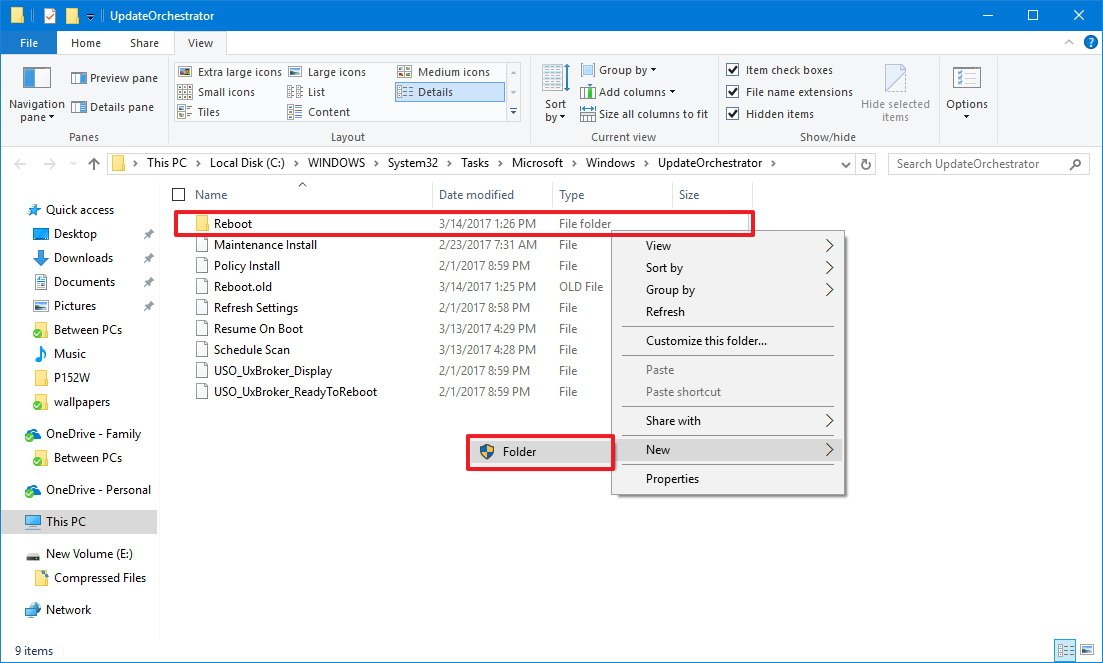
- Right-click inside the folder, select New, and click on Folder.

After you've completed the steps, Windows 10 will no longer be able to re-create the task to reboot your computer automatically.
If you want to revert the changes, go back to the UpdateOrchestrator folder and delete the Reboot folder and rename the Reboot.old file back to Reboot.
Then follow the Task Scheduler steps mentioned above but on Step 3 select Enable.
Note: We're not saying that you should skip installing updates, as they're important to keep your device secure and up to date. However, there are scenarios where you make want to take full control and decide exactly when to restart your computer to apply new updates, and this is when knowing how to stop automatic reboots comes in handy.
More Windows 10 resources
For more help articles, coverage, and answers to common questions about Windows 10, visit the following resources:
- Windows 10 on Windows Central – All you need to know
- Windows 10 help, tips, and tricks
- Windows 10 forums on Windows Central
Mauro Huculak has been a Windows How-To Expert contributor for WindowsCentral.com for nearly a decade and has over 15 years of experience writing comprehensive guides. He also has an IT background and has achieved different professional certifications from Microsoft, Cisco, VMware, and CompTIA. He has been recognized as a Microsoft MVP for many years.

