How to prevent laptop from connecting to Wi-Fi automatically on Windows 11
You can always stop Windows 11 from trying to connect to a wireless network automatically, and here are the different ways to do it.
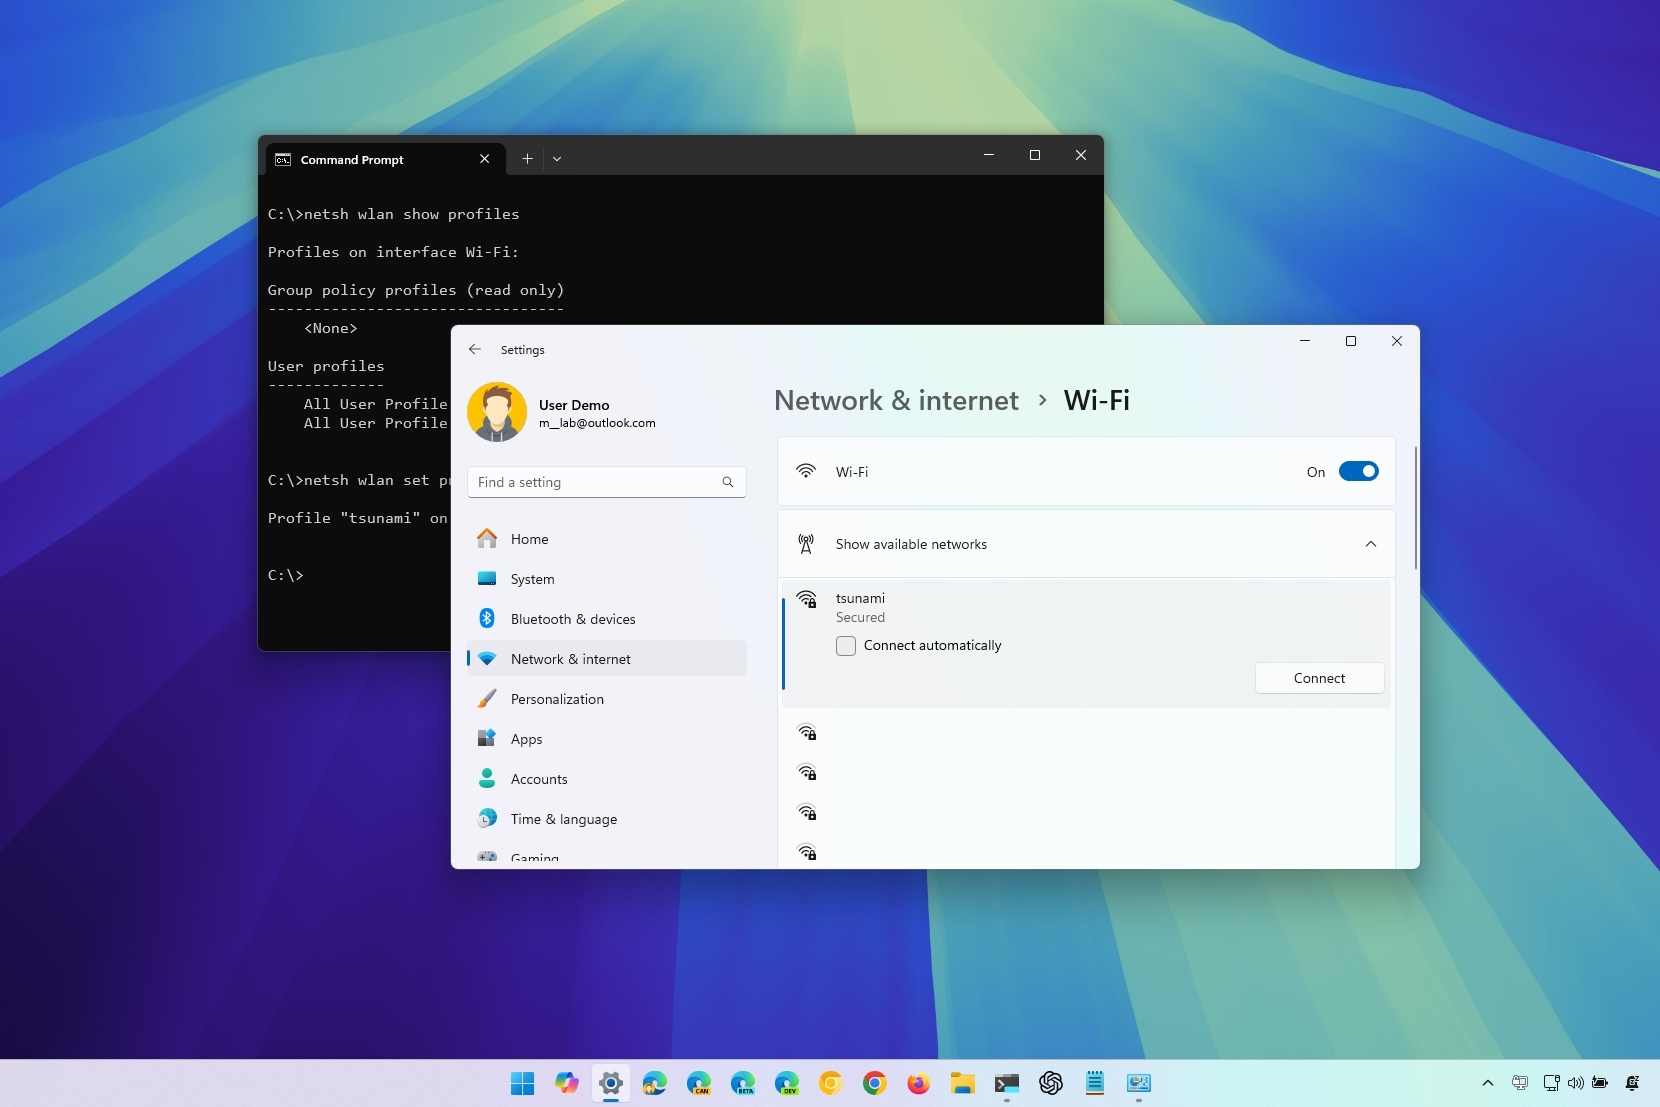
On Windows 11, whenever you configure a new Wi-Fi network profile by default, the system will enable the option to connect automatically when the network is in range. Although this convenient feature makes connecting to the internet faster, it's not one that you need on every wireless network.
If you don't need to connect to specific networks automatically, Windows 11 includes multiple ways to disable automatic connections to wireless access points.
In this how-to guide, we will automatically walk you through the steps to prevent your laptop from connecting to the wireless access points automatically.
These instructions has been updated to ensure accuracy and reflect changes to the process in the operating system.
How to stop automatic Wi-Fi connection from adapter configuration
Although you can change the settings after adding a wireless network profile, you can also disable automatic connections during the network configuration process.
Connect to a wireless network
To configure a Wi-Fi profile to never connect automatically, use these steps:
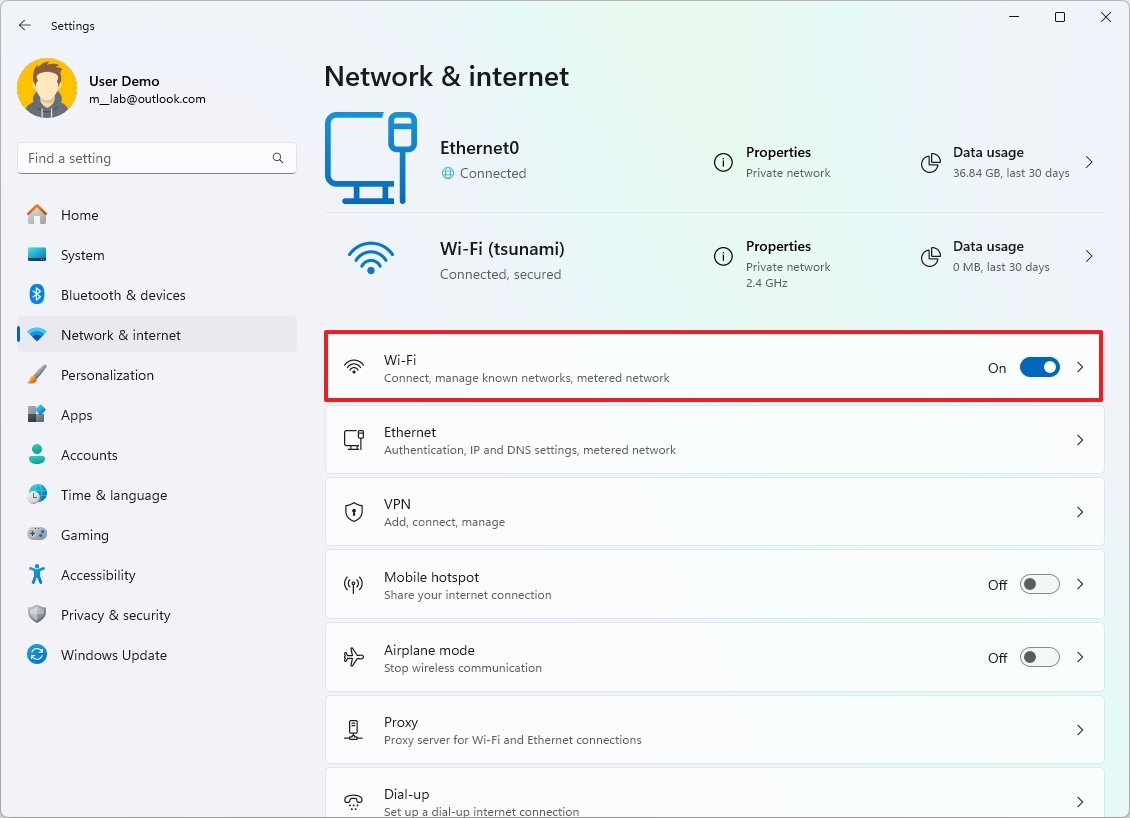
- Open Settings.
- Click on Network & internet.
- Click the Wi-Fi page on the right side.
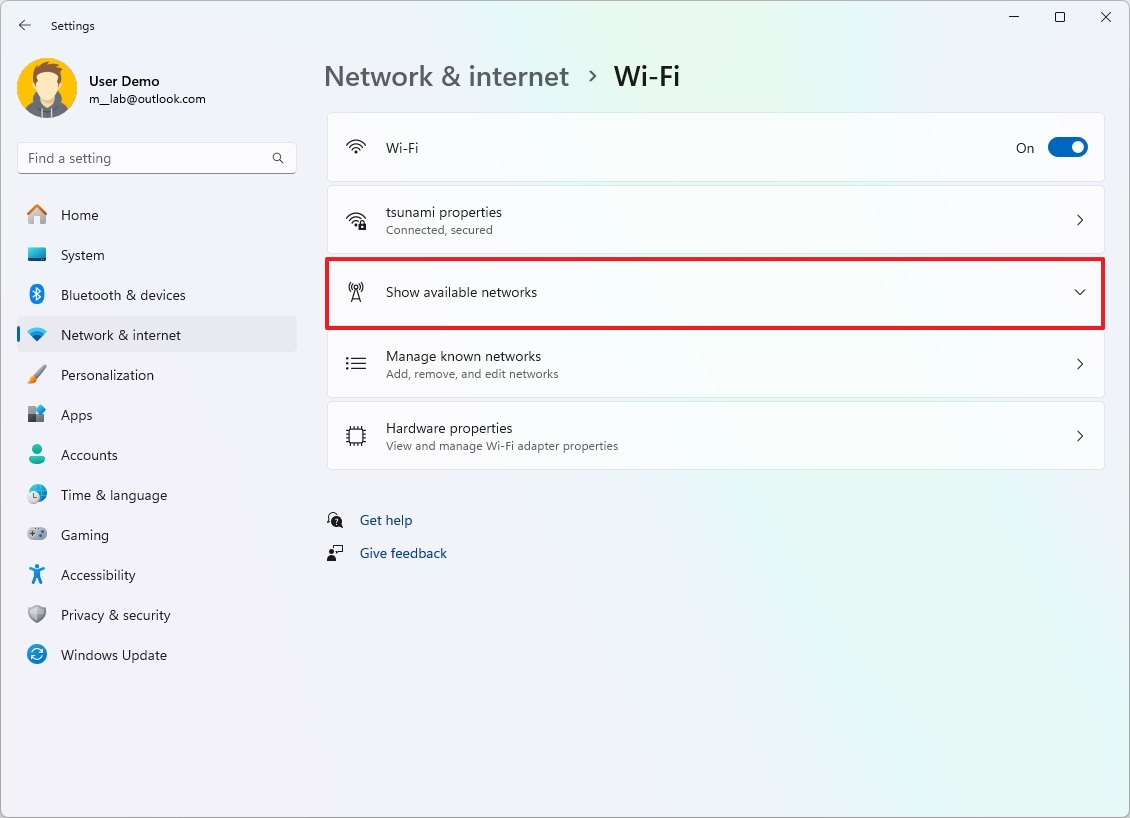
- Click the "Show available networks" option.
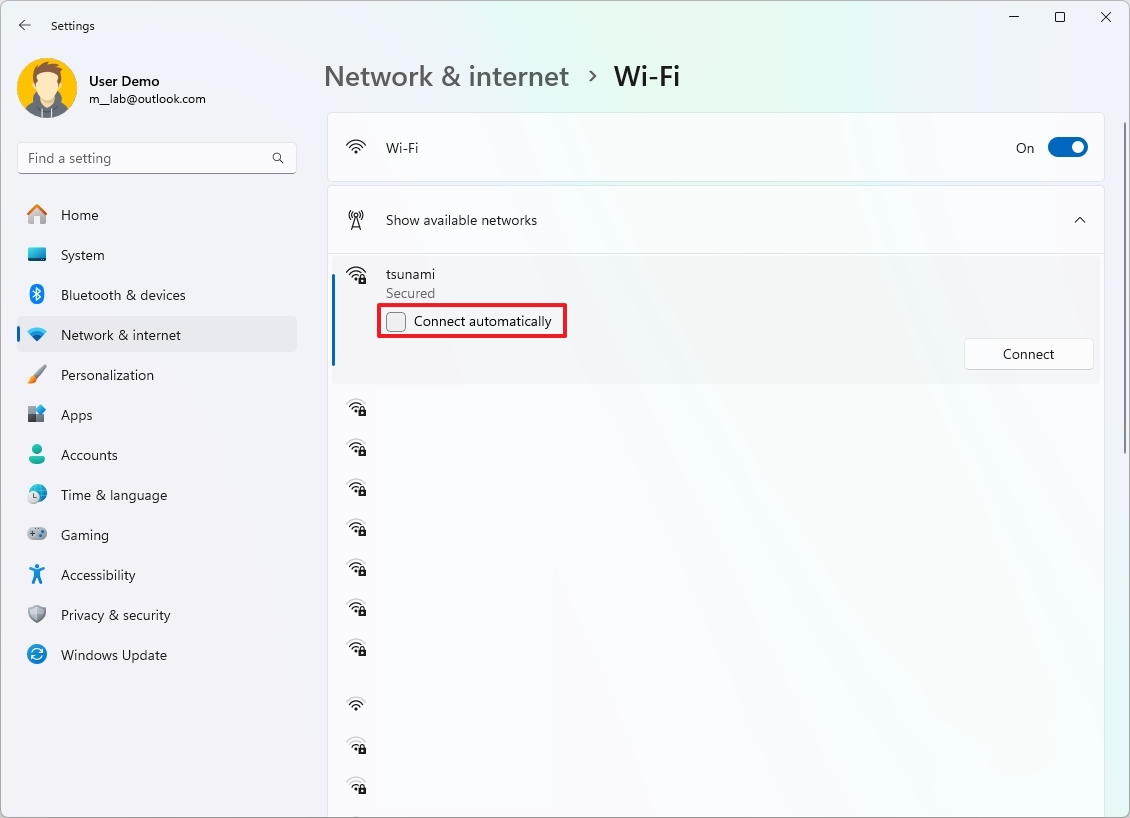
- Select the access point to connect.
- Clear the Connect automatically option.
- Click the Connect button.
- Confirm the wireless network password.
- Click the Next button.
Prevision wireless network
To prevent automatic network connections while adding a new Wi-Fi profile manually, use these steps:
- Open Settings.
- Click on Network & internet.
- Click the Wi-Fi page on the right side.
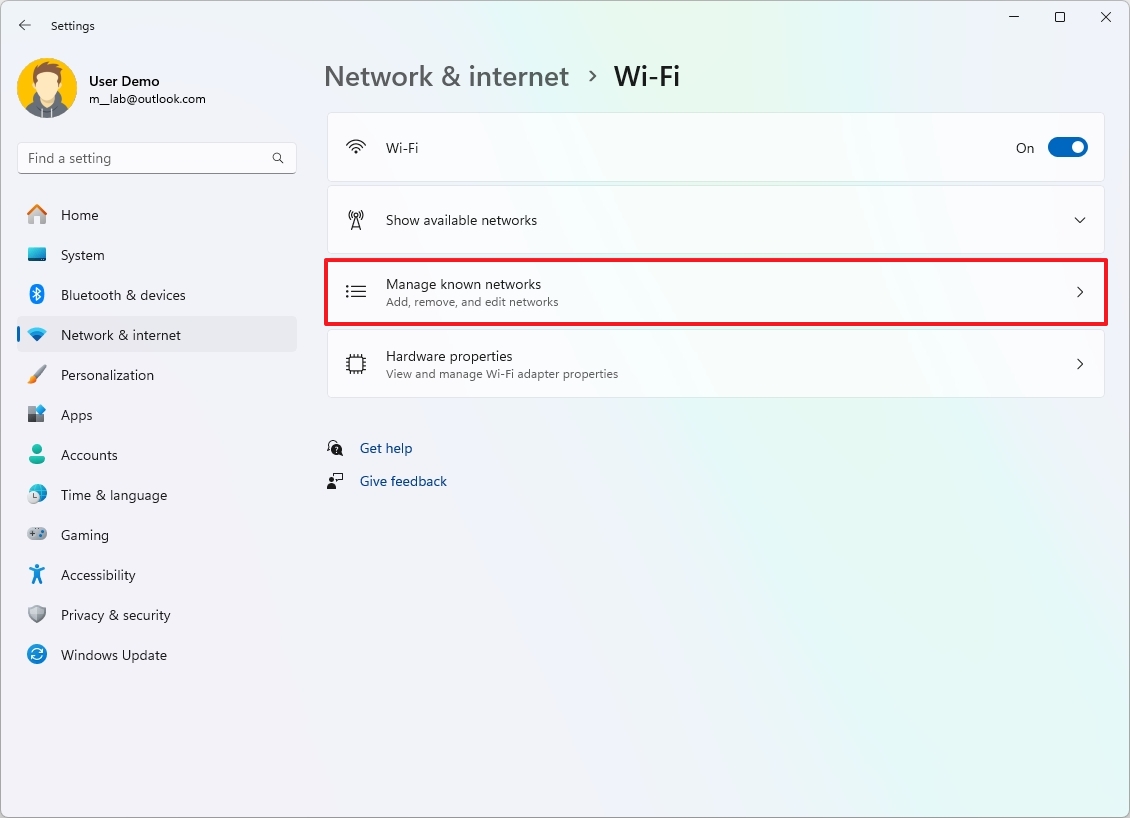
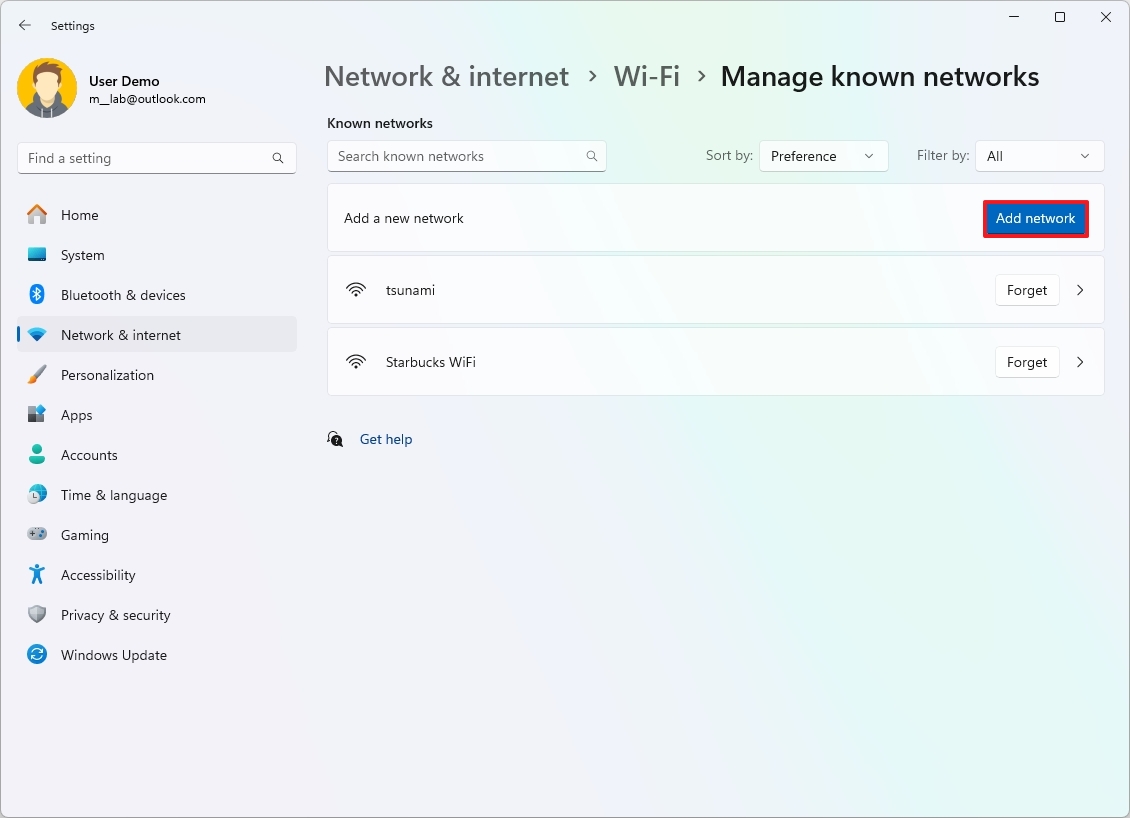
- Click the "Manage known networks" setting.
- Click the Add network button.
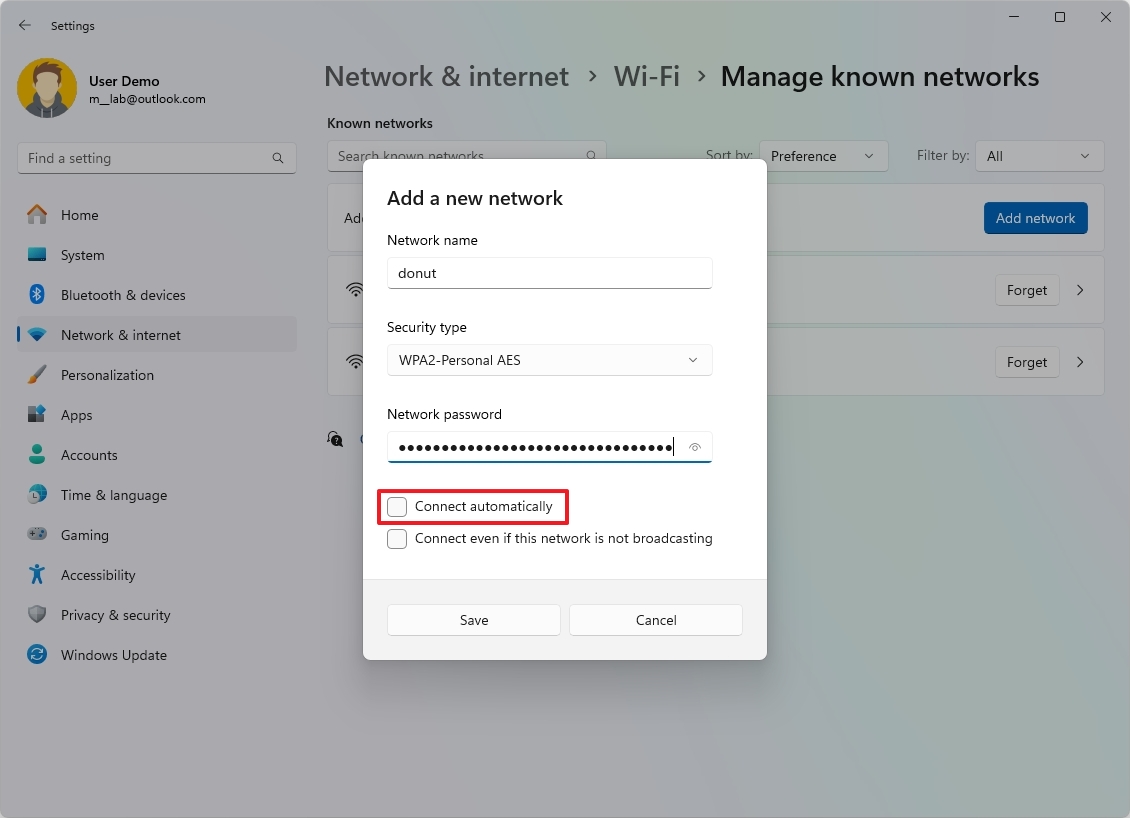
- Configure the Wi-Fi information, such as network name and security type.
- Clear the Connect automatically option.
- Click the Save button.
Once you complete these steps, Windows 11 won't connect to the wireless network when it's in range.
All the latest news, reviews, and guides for Windows and Xbox diehards.
How to stop automatic Wi-Fi connection from Settings
To stop Windows 11 from connecting to a Wi-Fi network automatically, use these steps:
- Open Settings.
- Click on Network & internet.
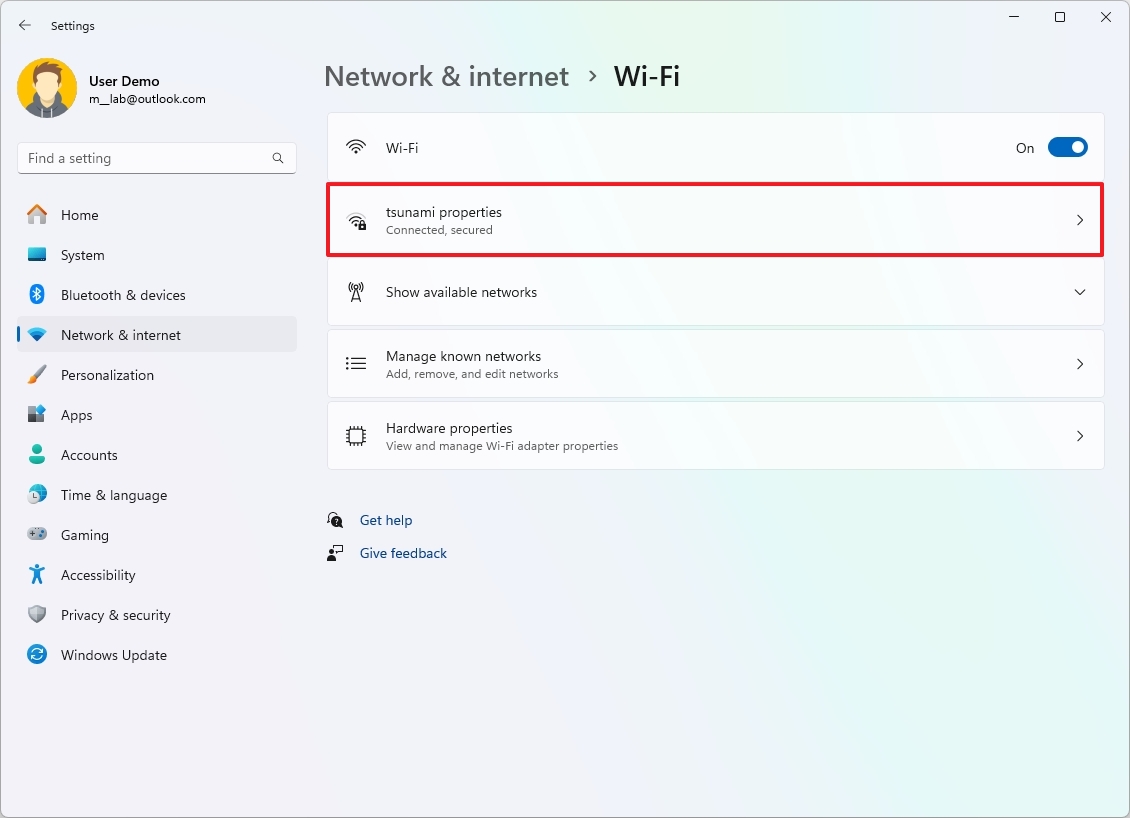
- Click the Wi-Fi page on the right side.
- Click the wireless properties setting.
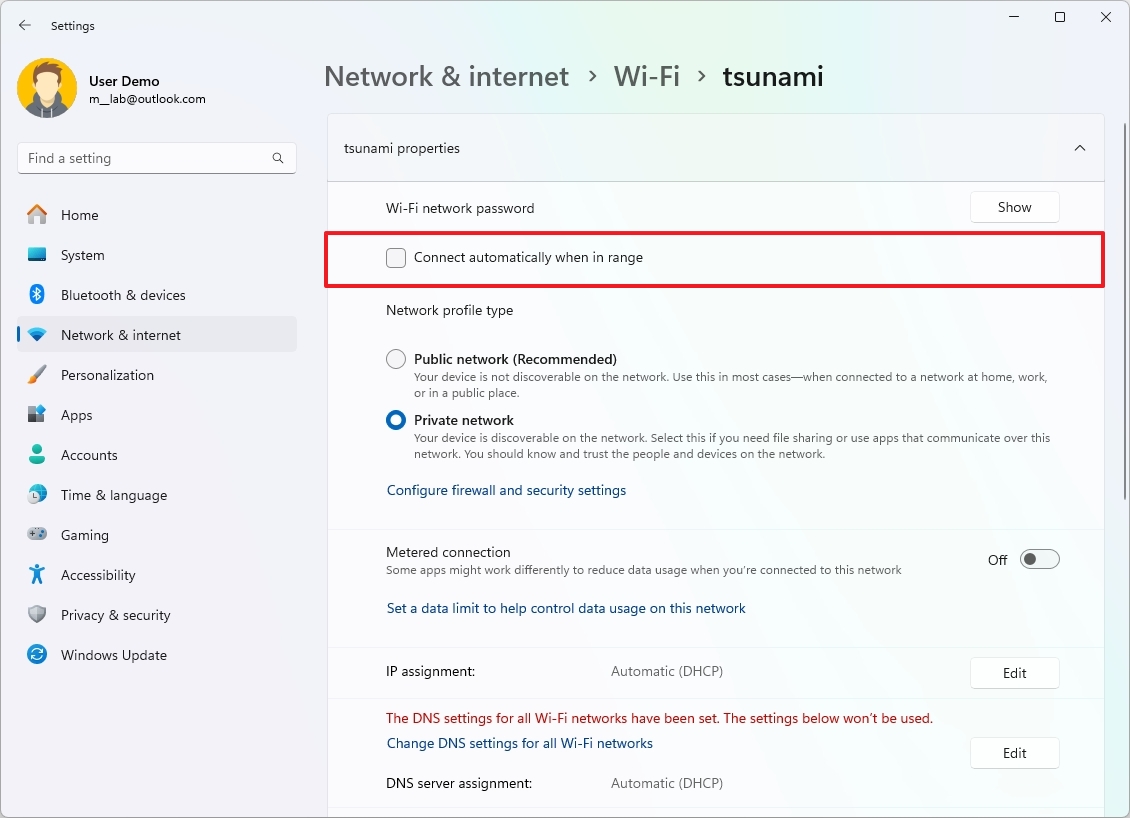
- Clear the "Connect automatically when in range" option under the "wireless properties" section.
Once you complete these steps, the laptop will no longer try to connect to the Wi-Fi network while it's in range.
How to stop automatic Wi-Fi connection from Control Panel
To prevent Windows 11 from connecting to the wireless access point through Control Panel, use these steps:
- Open Control Panel.
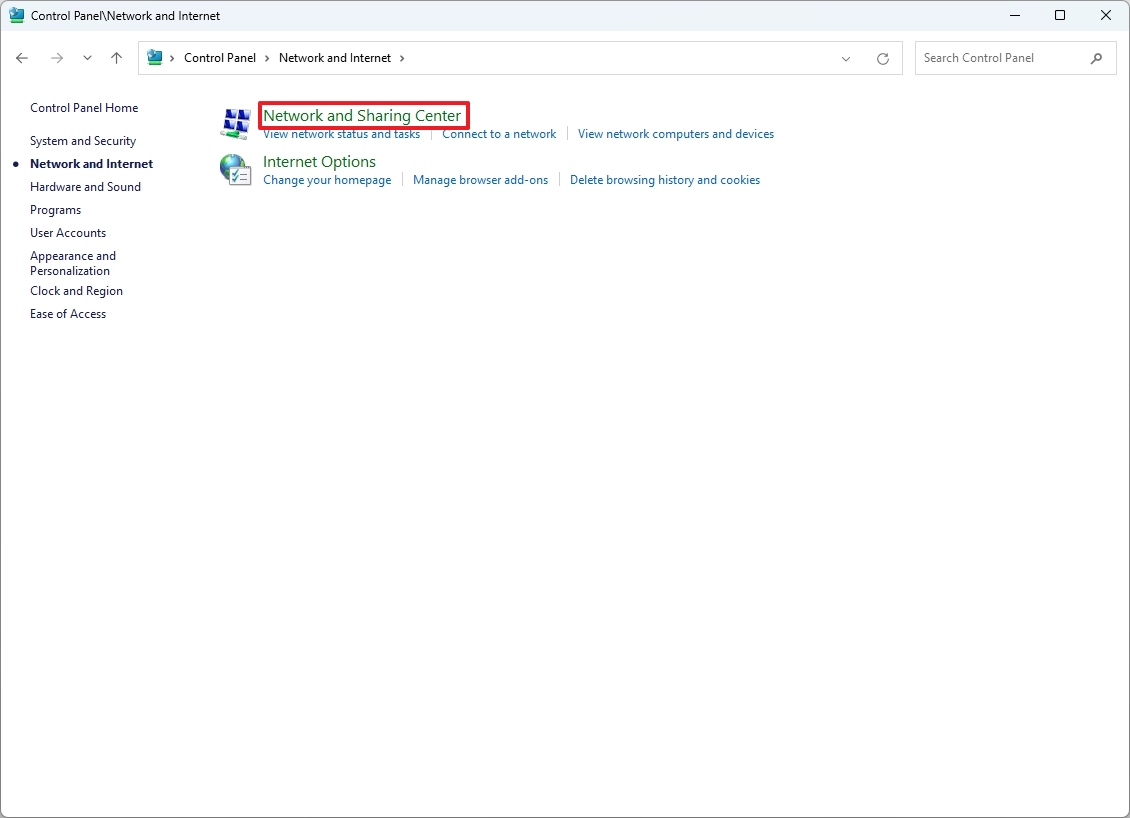
- Click on Network and Internet.
- Click the Network and Sharing Center on the right side.
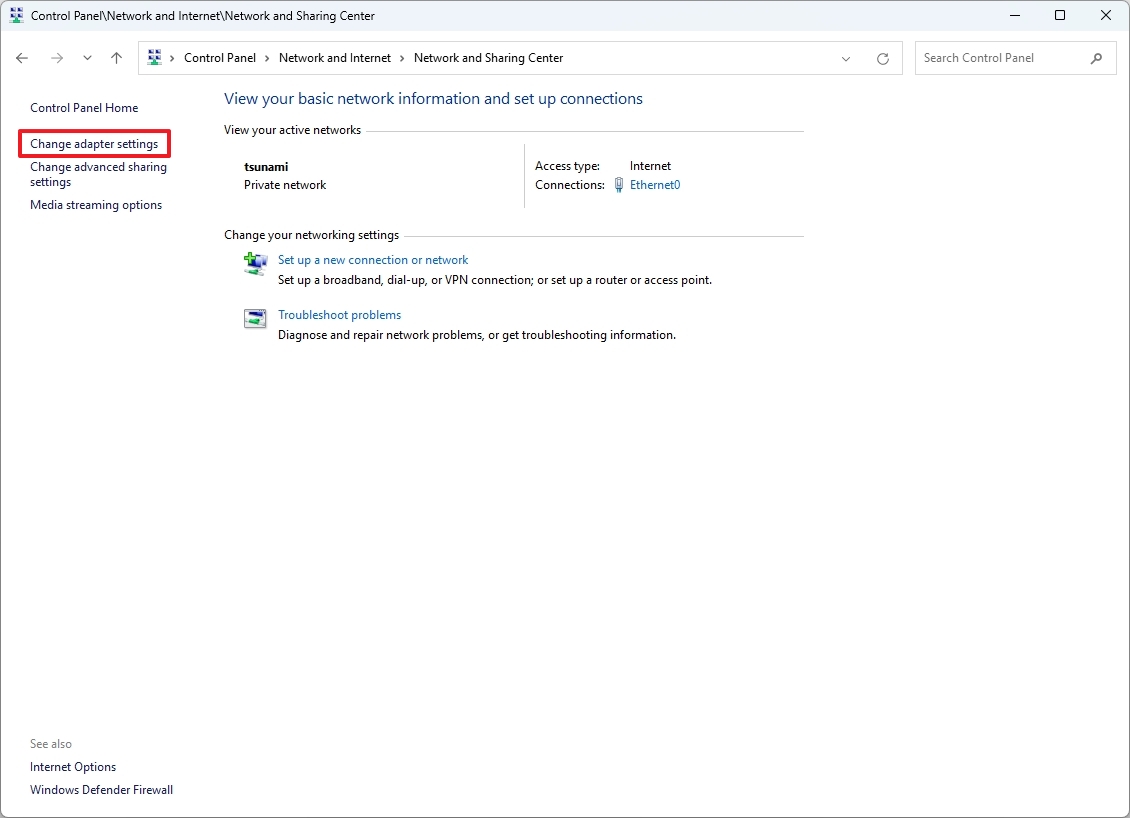
- Click the "Change adapter settings" option on the left pane.
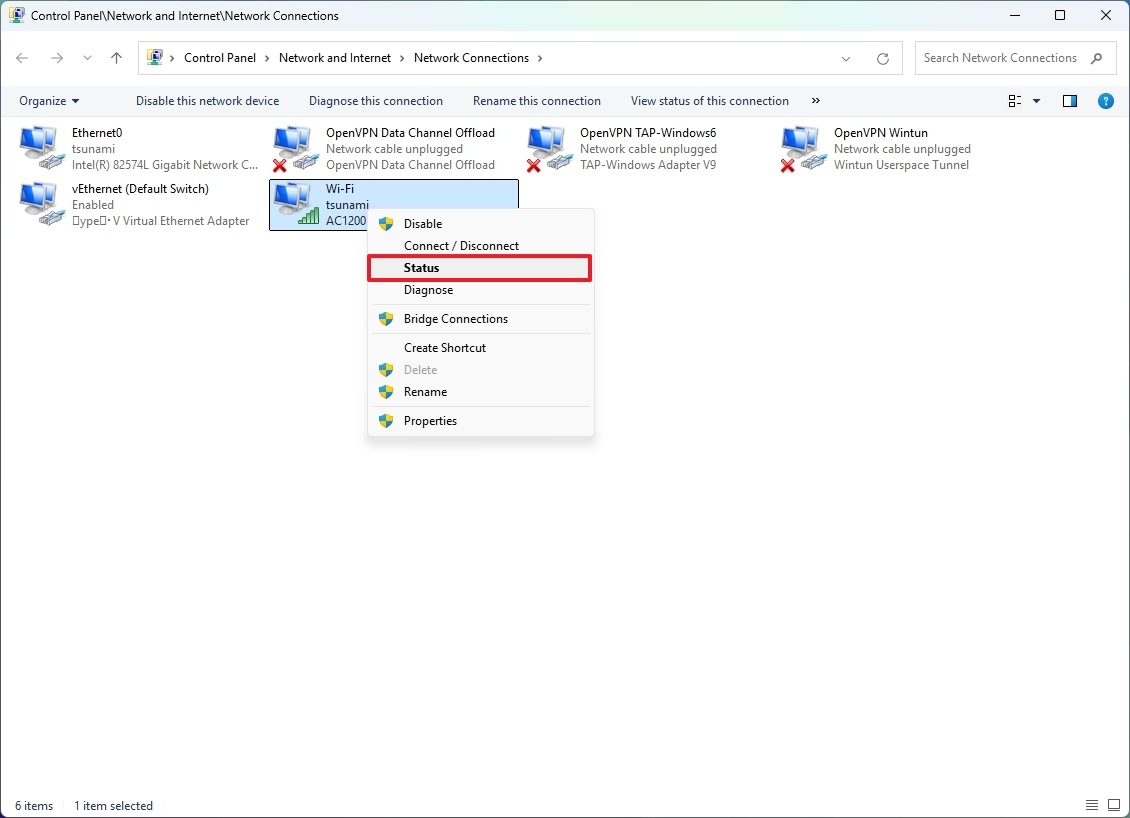
- Right-click the Wi-Fi adapter and select the Status option.
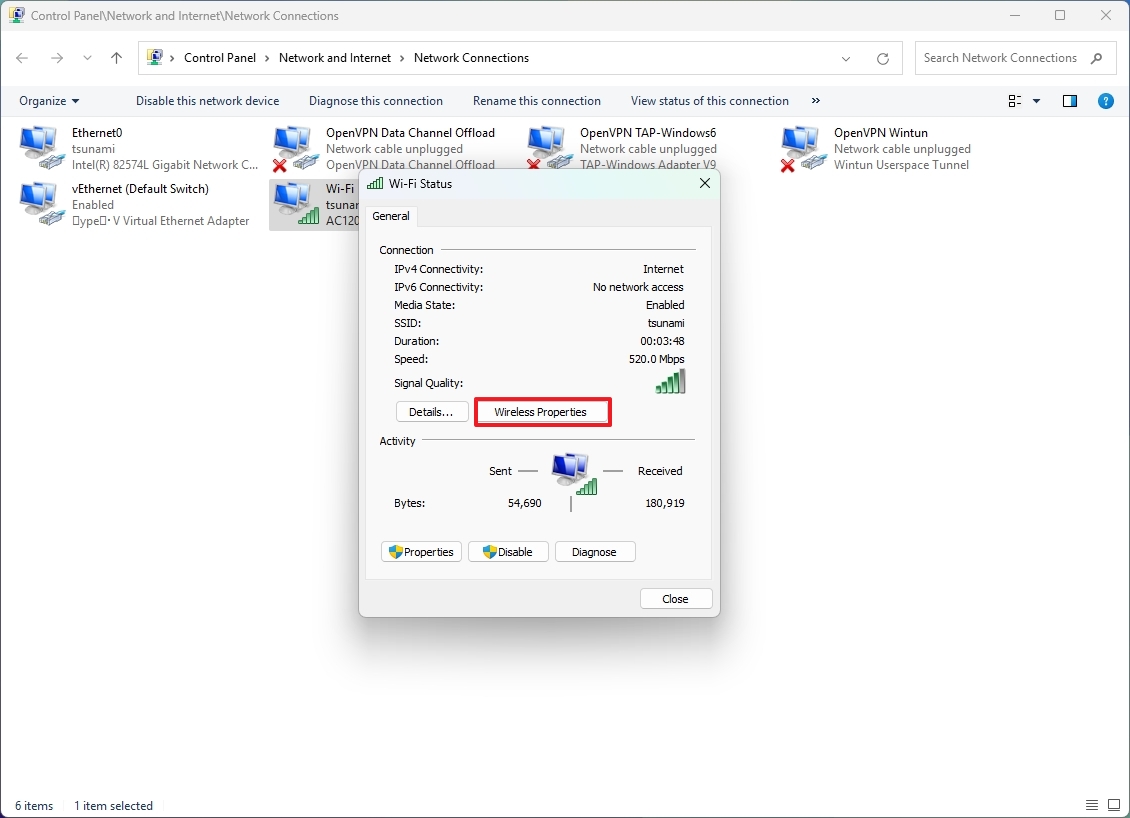
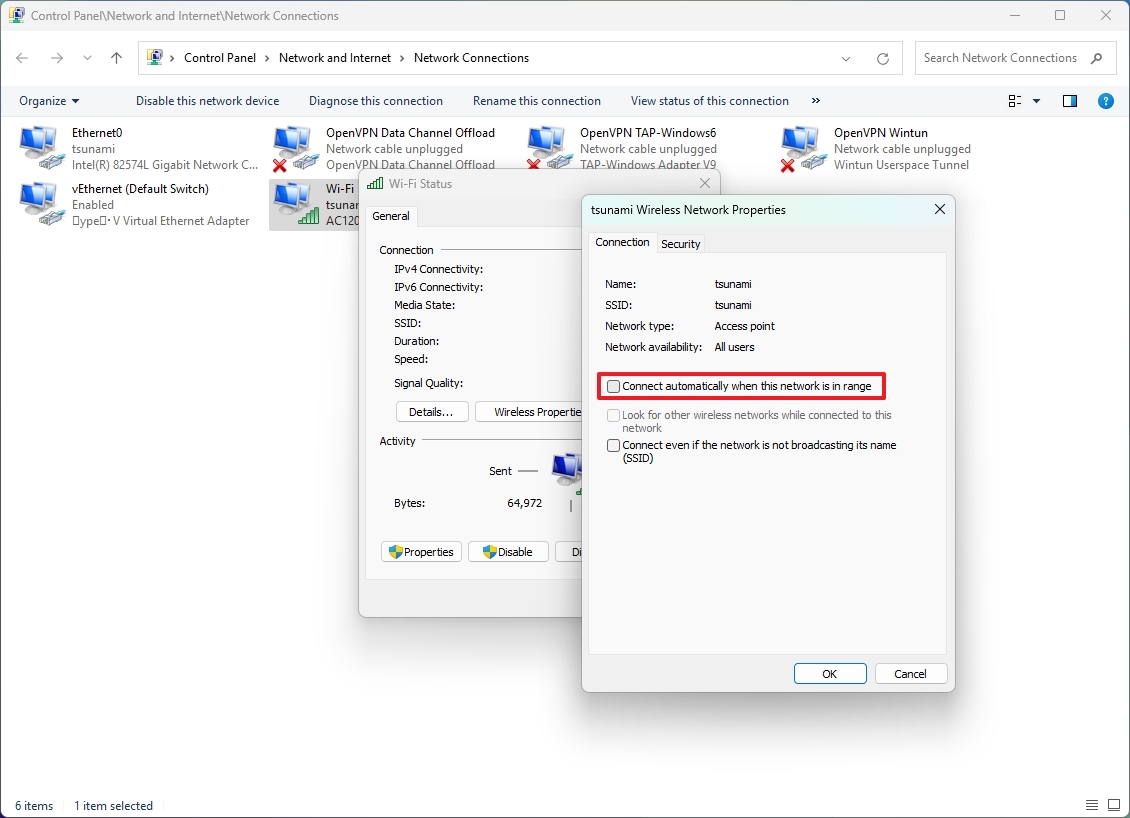
- Click the Wireless Properties button.
- Click the Connection tab.
- Clear the "Connect automatically when this network is in range" option.
- Click the OK button.
- Click the Close button.
After you complete these steps, like using the Settings app, Windows 11 won't connect to a wireless network.
How to stop automatic Wi-Fi connection from Command Prompt
To stop a wireless connection from accessing an access point while in range with Command Prompt, use these steps:
- Open Start.
- Search for Command Prompt, right-click the top result, and select the Run as administrator option.
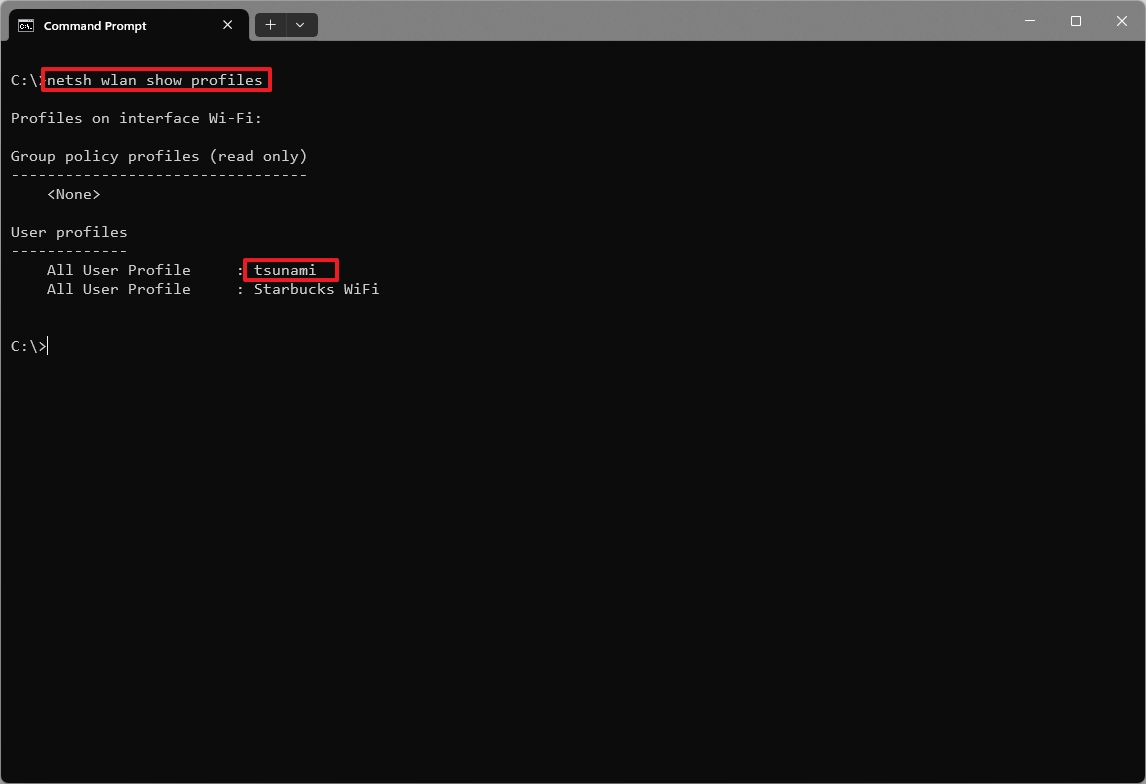
- Type the following command to determine the name of the wireless network to modify and press Enter: netsh wlan show profiles
- Confirm the name of the network profile.
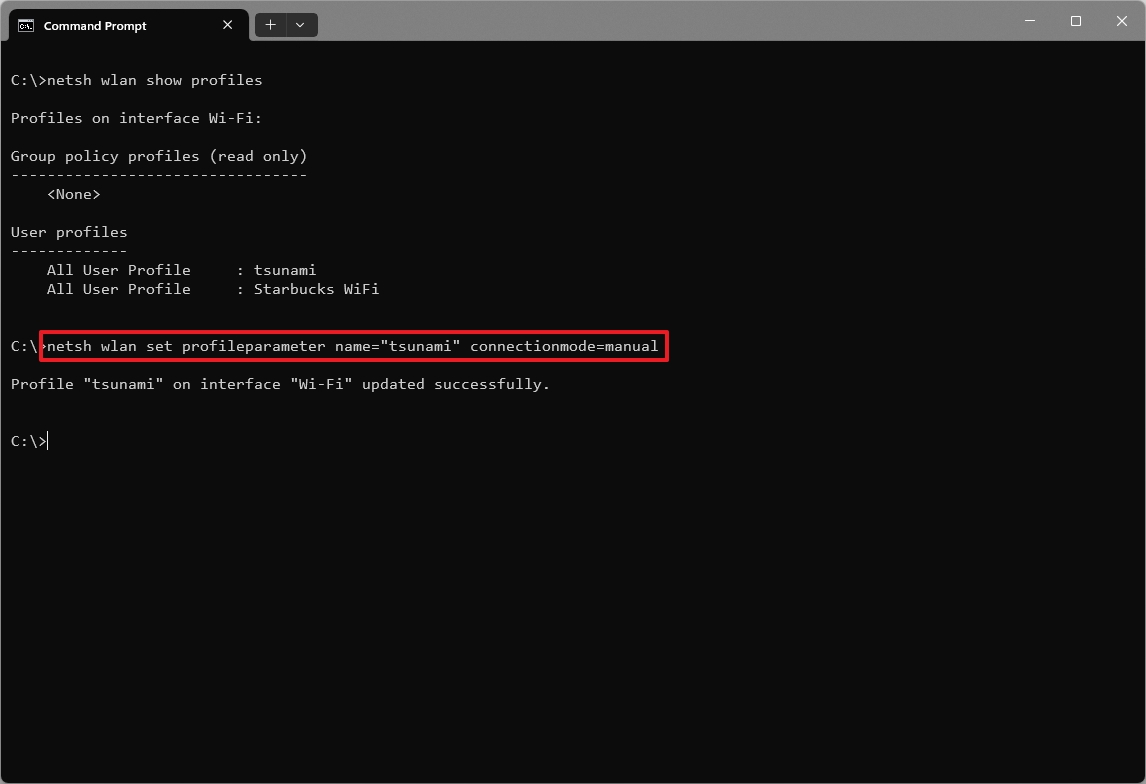
- Type the following command to disable automatic connection to the wireless network and press Enter: netsh wlan set profileparameter name="wireless_name" connectionmode=manual
In the command, change "wireless_name" for the actual name of your network as shown in step 3.
After you complete these steps, automatic connection to the wireless network you specified won't occur.
More resources
For more in-depth insights, troubleshooting tips, and the latest updates on Windows 11 and 10, be sure to explore these resources:
- Windows 11 on Windows Central — All you need to know
- Windows 10 on Windows Central — All you need to know

Mauro Huculak has been a Windows How-To Expert contributor for WindowsCentral.com for nearly a decade and has over 22 years of combined experience in IT and technical writing. He holds various professional certifications from Microsoft, Cisco, VMware, and CompTIA and has been recognized as a Microsoft MVP for many years.
