How to move virtual memory to a different drive on Windows 10
Yes, it's possible to move your device virtual memory to another drive, and here are the steps to perform this task on Windows 10.
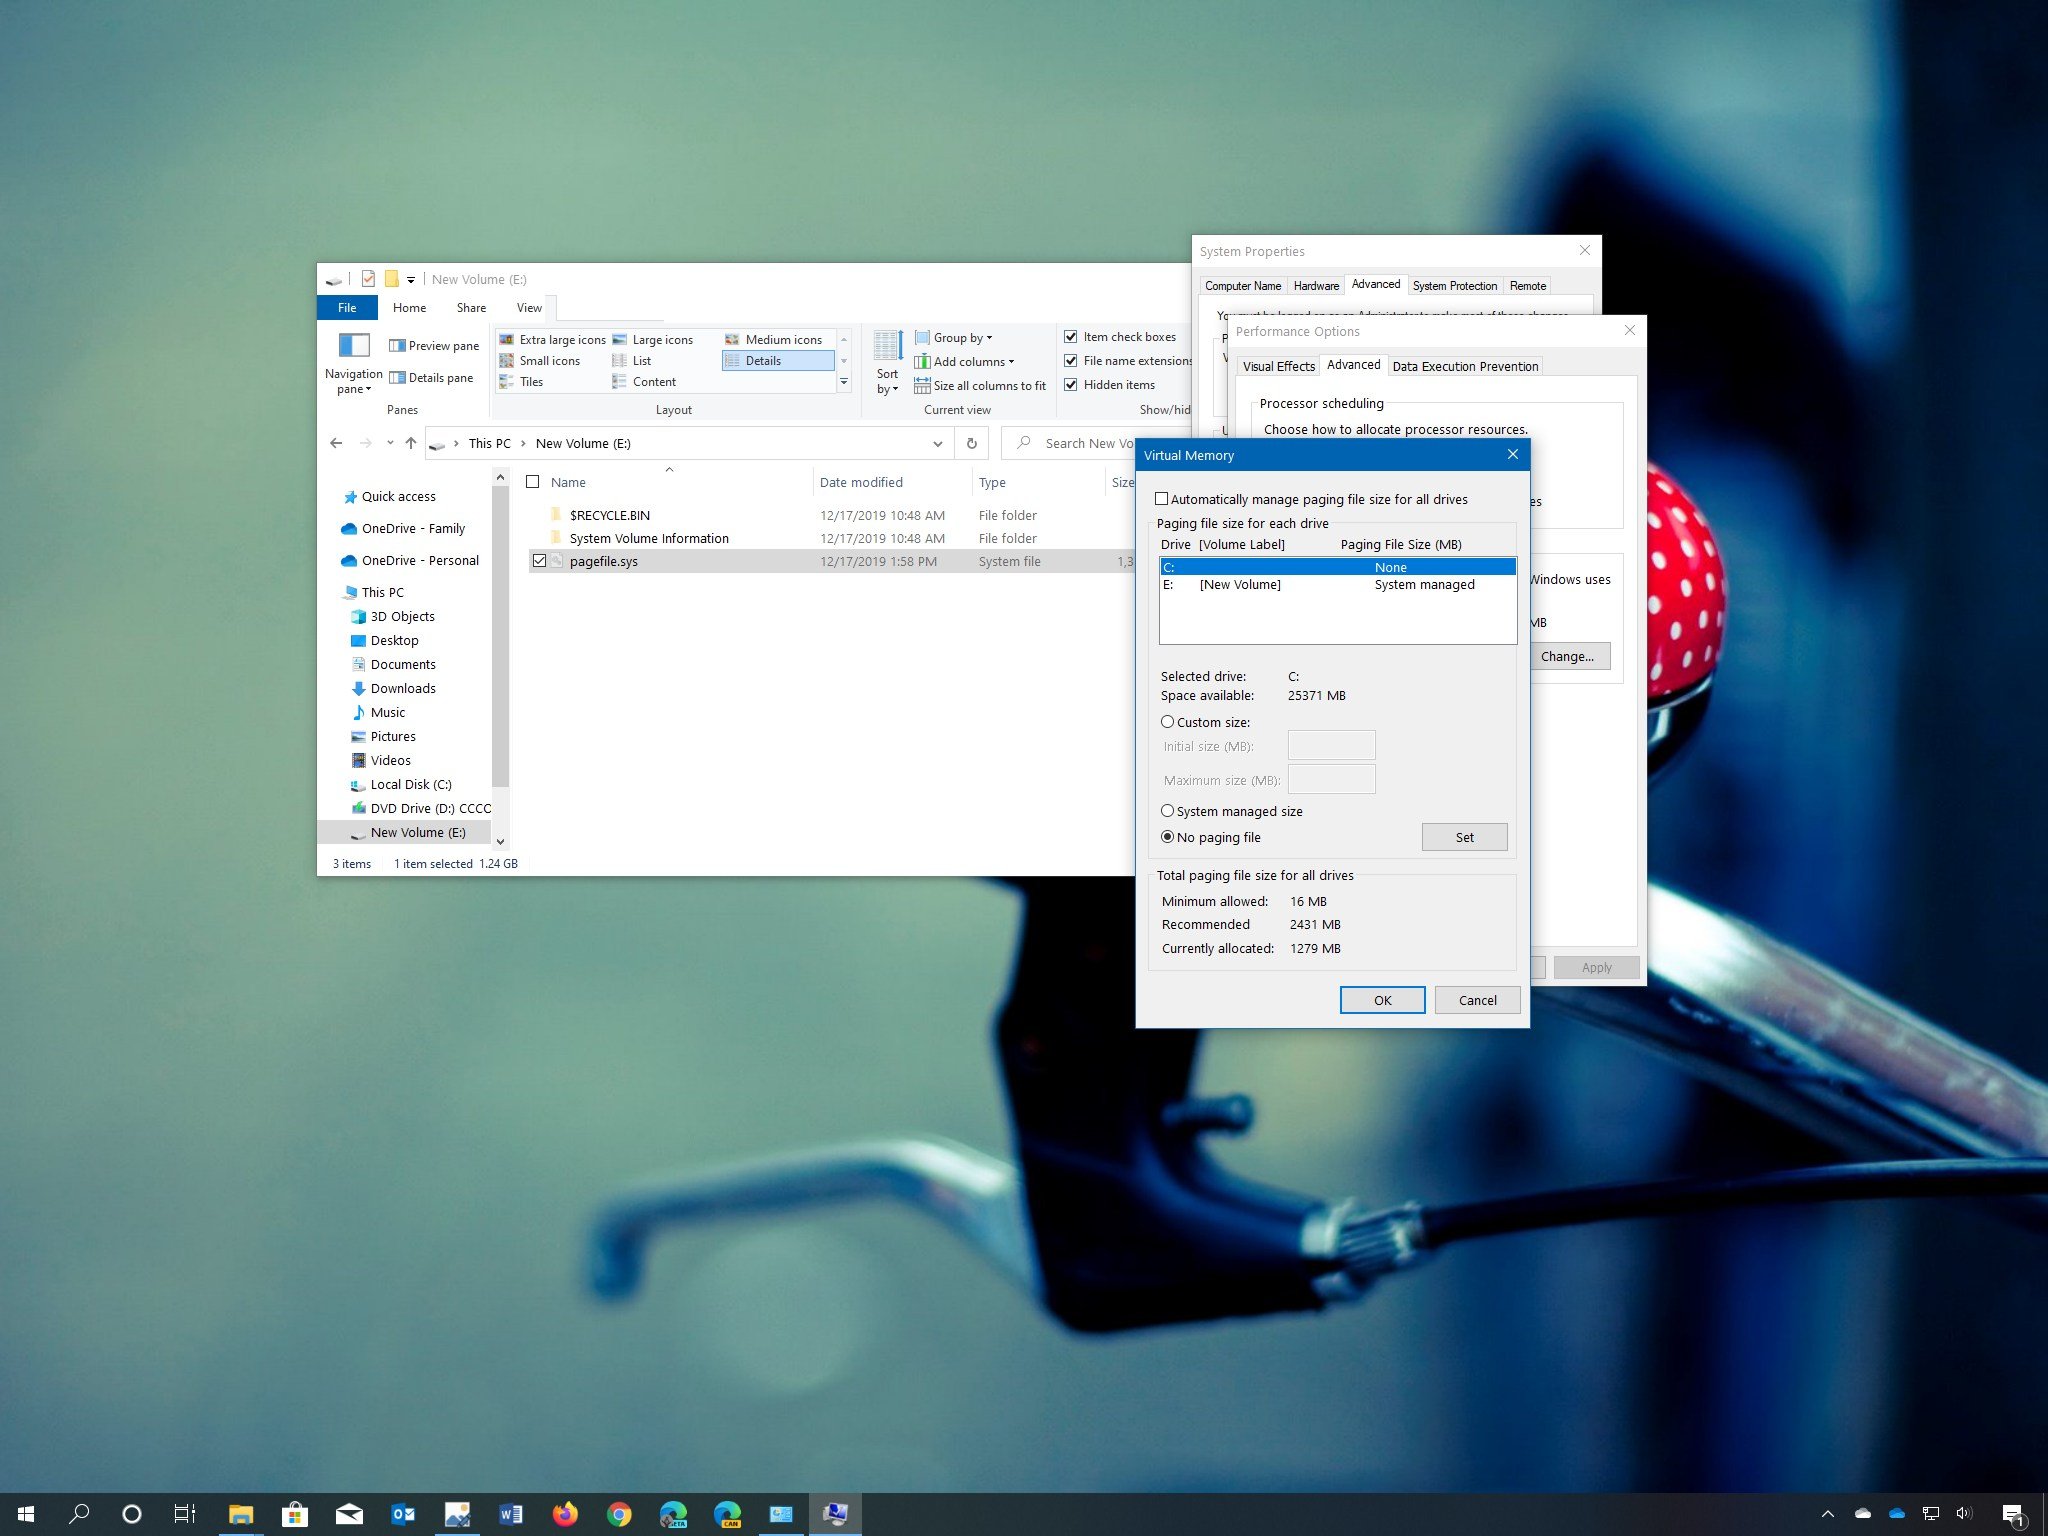
On Windows 10, virtual memory (paging file) is a feature that stores unused, modified pages in RAM (random-access memory) to the hard drive allowing to prioritize more physical memory for more frequent processes and apps. Using this process helps to improve performance and reduces the chances of the system, locking up if it runs out of memory.
Although for the most part, the feature works automatically, if needed, you can move the paging file (pagefile.sys) to another drive to increase the overall performance, or if you work with reads and writes intensive applications, then you want to reduce the number input/output (I/O) activity on the main drive.
Whatever the reason it might be, Windows 10 includes an option to move the page files to another drive using the Settings app.
In this Windows 10 guide, we'll walk you through the steps to move virtual memory to another drive.
How to move virtual memory to another drive
To move the Windows 10's virtual memory file to a different drive, use these steps:
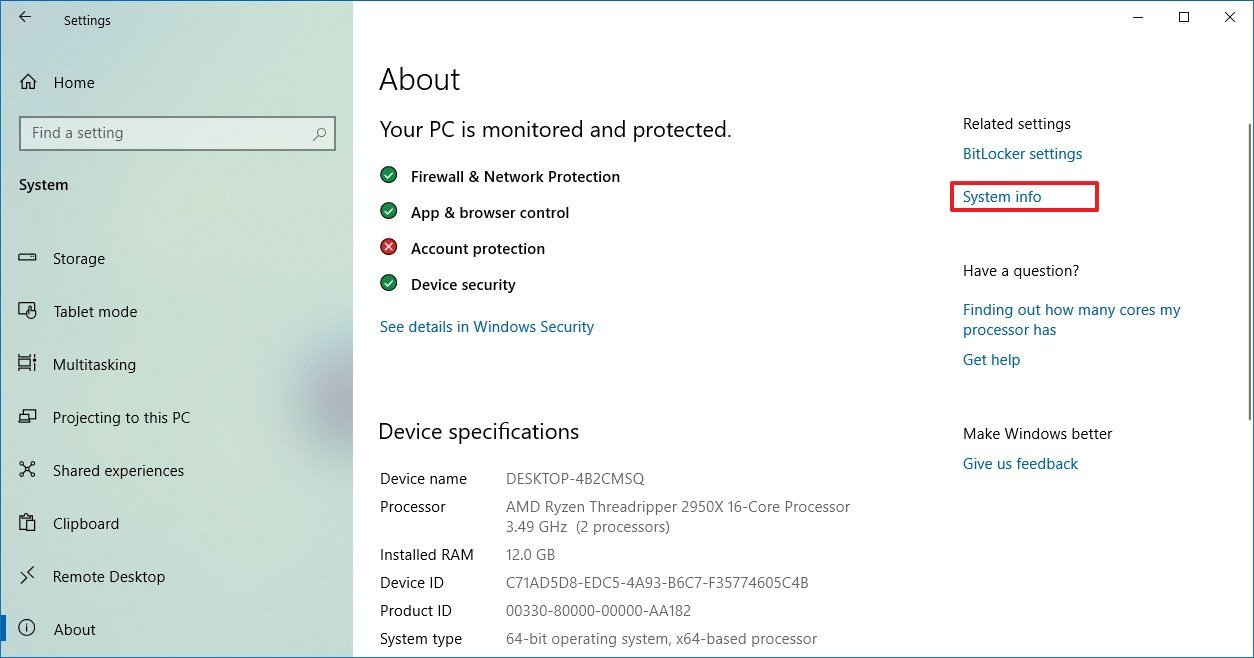
- Open Settings.
- Click on System.
- Click on About.
- Under the "Related settings" section, on the right side, click the System info option.
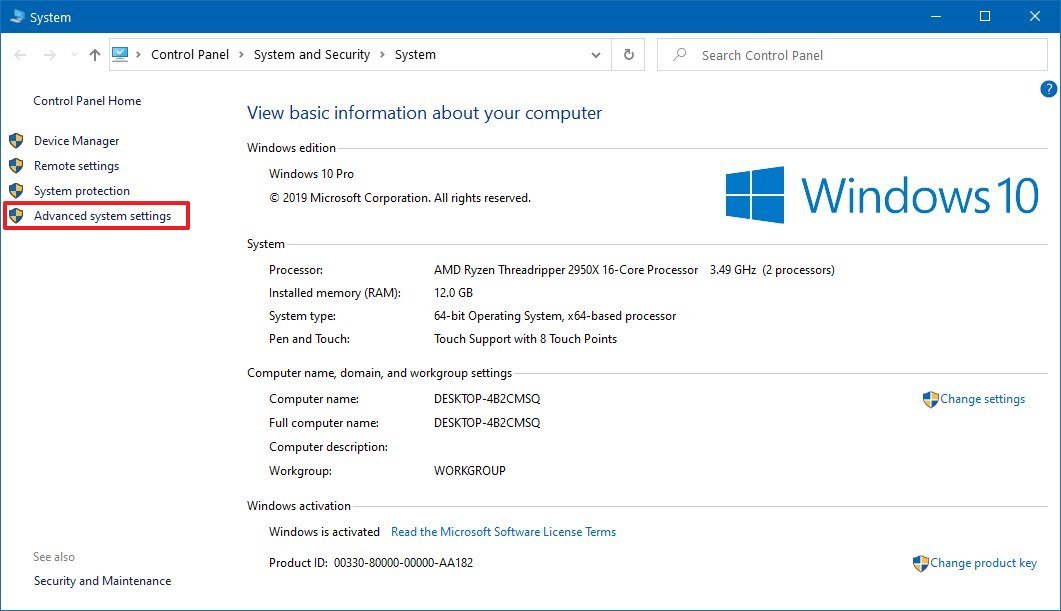
- Click the Advanced system settings option from the right side.
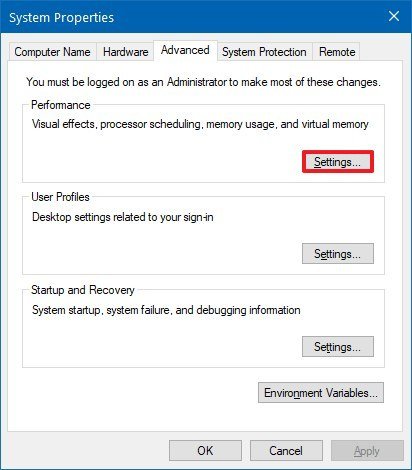
- Under the "Performance" section, click the Settings button.
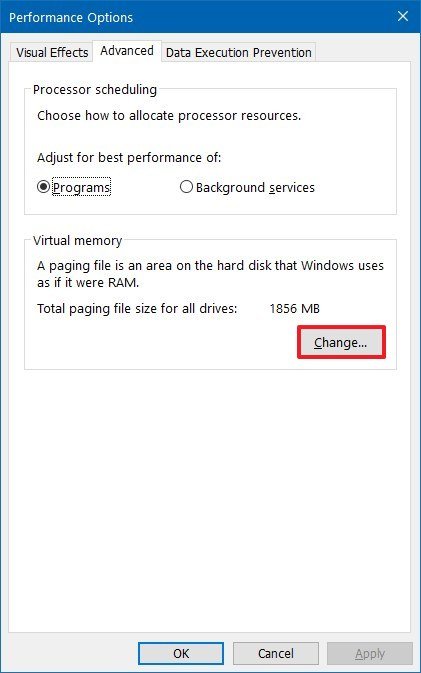
- Click the Advanced tab.
- Under the "Virtual memory" section, click the Change button.
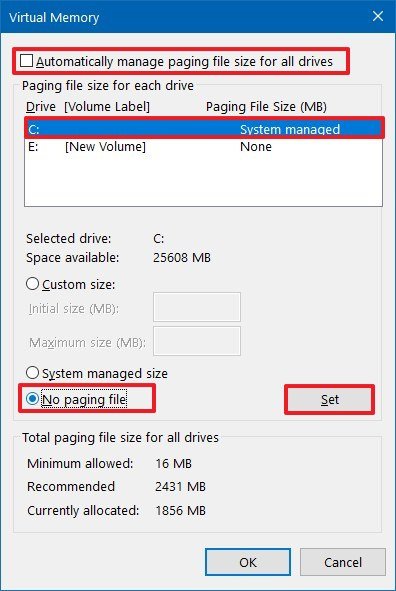
- Clear the Automatically manage paging file size for drivers option.
- Under the "Paging file size for each drive" section, select the C: drive.
- Select the No paging file option.Quick note: While it's possible to disable the paging file on the main drive when you're planning to use another drive to store the virtual memory file. It's often recommended to leave the paging file enabled on the main drive to allow the system to create crash dumps in the event of a system error. If you leave the paging file on the main drive, you can still configure virtual memory on the new drive, and Windows 10 will make sure to use the second drive paging files more frequently to temporarily store unused pages until they're no longer needed improving the overall system performance.
- Click the Set button.
- Click the Yes button.
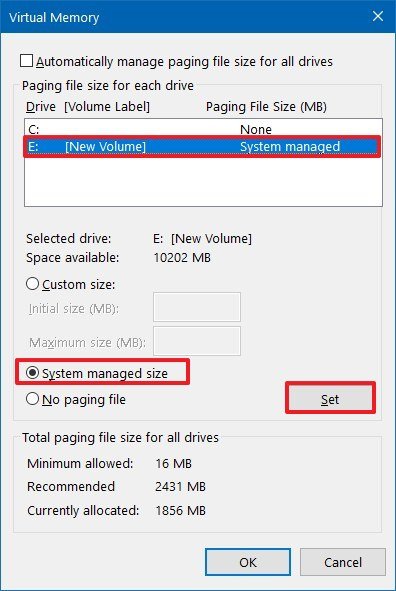
- Select the drive you want to use for the paging file.
- Select the System managed size option -- for example, E:.
- Click the Set button.
- Click the OK button.
- Click the Apply button.
- Click the OK button.
- Restart your computer.
Once you complete the steps, Windows 10 will automatically create a new pagefile.sys file containing the virtual memory content in the new location to improve performance.
As a rule of thumb, you should only move the pagefile.sys file to another drive that's equal or better in performance than the main drive with the Windows 10 installation. For example, if you're using a traditional rotating platters hard drive, you can use another Hard Disk Drive (HDD) or Solid-State Drive (SSD) to store the virtual memory. Still, if you're using an SSD, it wouldn't be very logical to move the paging file to a mechanical drive. If this is the case, it would be best to install Windows 10 on the SSD to improve performance, rather than moving the virtual memory.
All the latest news, reviews, and guides for Windows and Xbox diehards.
In the case that you no longer need this configuration, or it's not working as expected, you can revert the changes using the same instructions, but on step No. 9, make sure to check the Automatically manage paging file size for drivers option and continue with step No. 16 and the remaining steps.
The above instructions use the option that allows Windows 10 to automatically configure the size of virtual memory, but if you want to adjust this setting manually, you can refer to this guide.
Confirming virtual memory
If you want to confirm that virtual memory is working on the new drive, use these steps:
- Open File Explorer.
- Click on This PC from the left pane.
- Under the Devices and drives section, double-click to open the drive that is now storing the paging file.
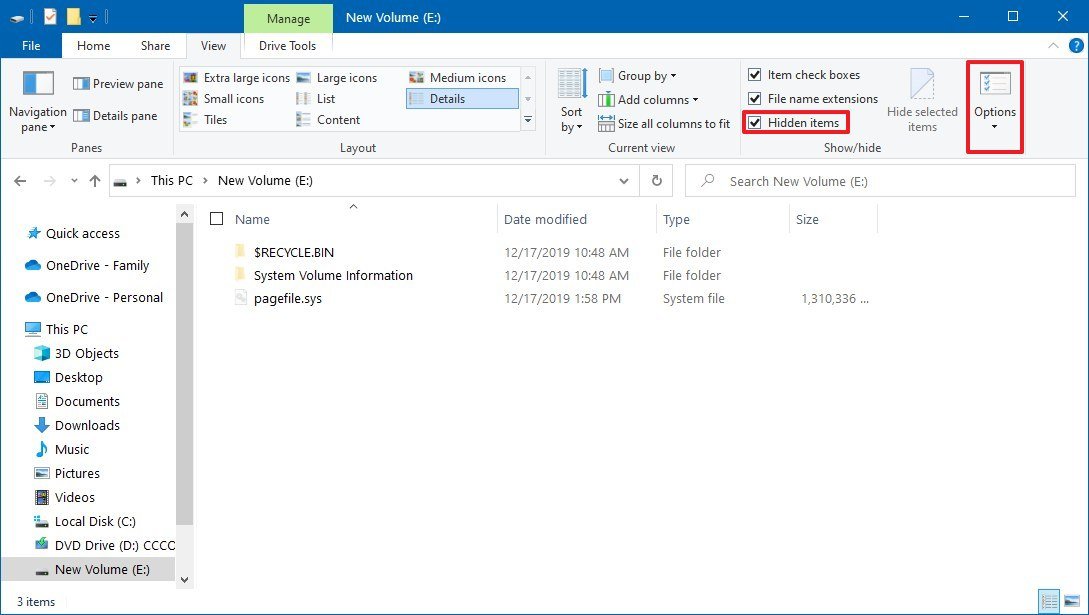
- Click the View tab.
- Check the Hidden items option.
- Click the Options button.
- Click the View tab.
- Under the "Advanced settings" section, clear the Hide protected operating system files option.
- Click the OK button.
- Click the Apply button.
- Click the OK button.
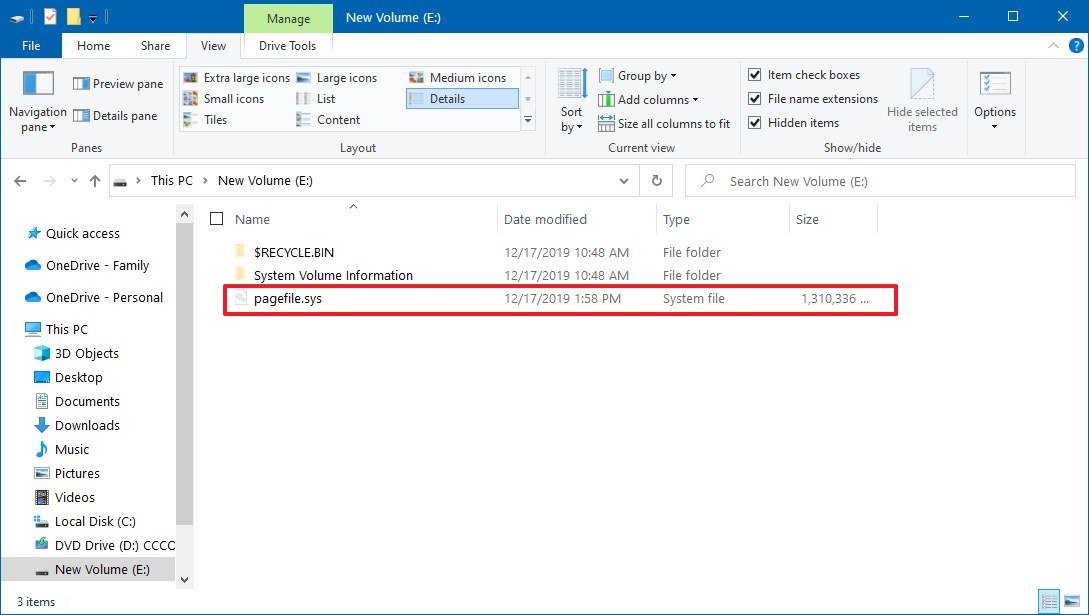
- Confirm the "pagefile.sys" is present.
After you complete the steps, you know if Windows 10 is using the new location for virtual memory.
If you want to hide the system files again (recommended), you can use the same instructions, but on step No. 5, check the Hidden items option, and on step No. 8, check the Hide protected operating system files option.

Mauro Huculak has been a Windows How-To Expert contributor for WindowsCentral.com for nearly a decade and has over 22 years of combined experience in IT and technical writing. He holds various professional certifications from Microsoft, Cisco, VMware, and CompTIA and has been recognized as a Microsoft MVP for many years.
